See how easy it is to make these two pair of necklace in this video tutorial
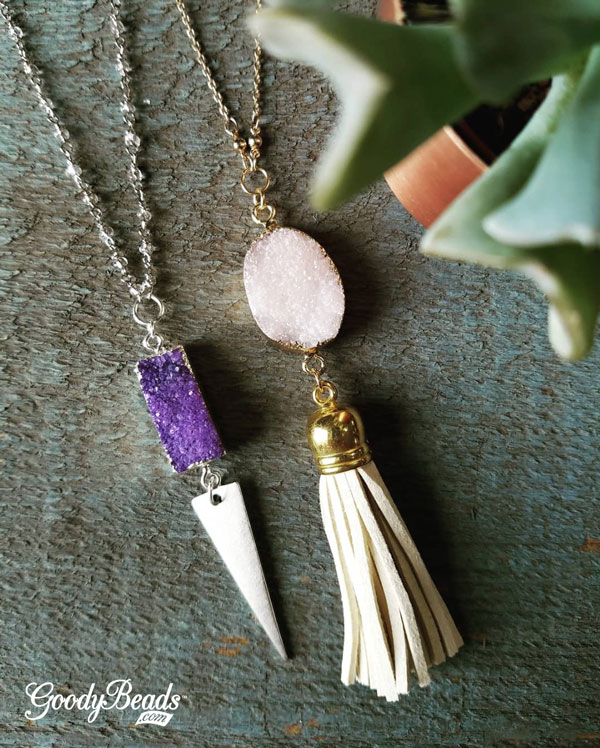
Open 5mm jump ring and slide on both ends of your chain link. (Chain can be to your length. We used a 2 feet link so that it can easily draped over your head.) Close jump ring.
Open 4mm jump ring and slide through one end of the Druzy connector and through jump ring from Step One. Close jump ring.
Open 5mm another jump ring, slide through tassel or charm and through other end of the Druzy connector. Close jump ring.
BeadSmith® Endless Loom with Downloadable Tutorials
The Endless Loom from BeadSmith, designed by Deb Moffett-Hall, is a versatile tool to help create elastic band bracelets and even leather wrap bracelets. Read through to download step-by-step instructions to help you get started!
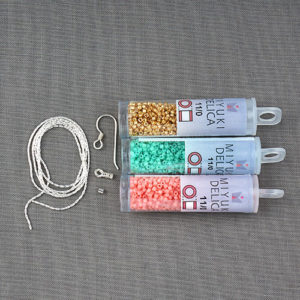
This first tutorial uses 0.5mm Elastic to wrap around the Endless Loom. You can also have the option to add a Tube Magnetic Clasp (Y004709/Y003008/Y004707) to your bracelet.
Even try out making a leather wrap bracelet using the Endless Loom. Coiling leather strands around the Endless Loom will help tame your cords and help you stitch even and straight rows. Check out the tutorial for easy tip and tricks to get your leather wrap bracelets started!
(Tutorial courtesy of BeadSmith and Deb Moffett-Hall)
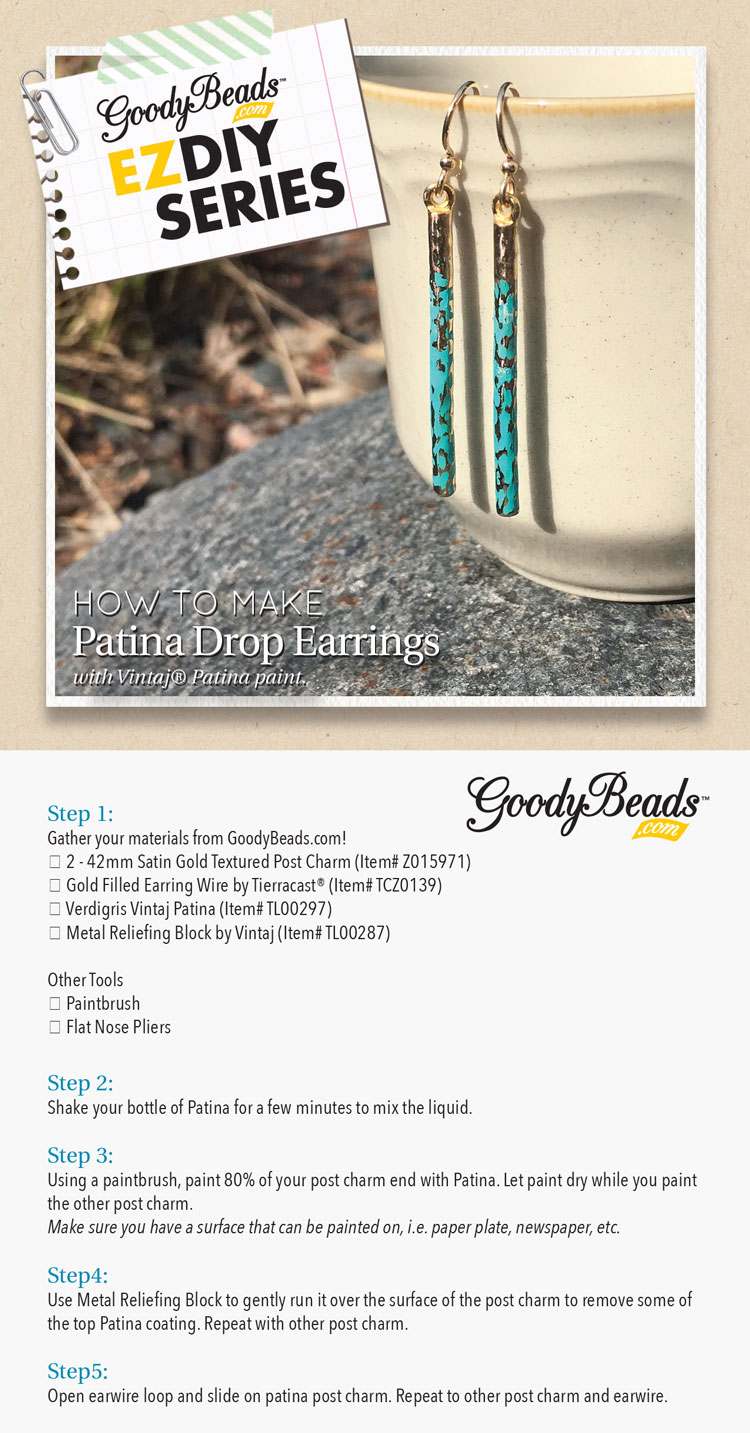
GoodyBeads EZ DIY Series: Patina Drop Earrings
You’ll want to wear these gorgeous earrings everyday after seeing how easy they can be made with Vintaj Patina.
Vintaj Patinas are opaque inks specially formulated by Ranger to adhere to metal. They can be used on a variety of surfaces like metal, leather, wood, etc. Check out our previous blogs on painting them on various metal components and Sizzix leather.
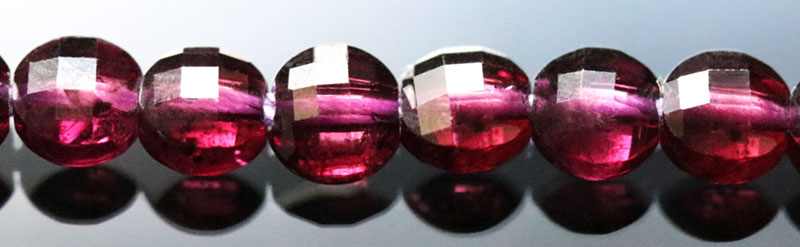
New to GoodyBeads are these luxurious 4mm Faceted Coin Gemstone Beads from DakotaStones. Get an up close look at the facets! Plus, two projects using these shimmering faceted gemstones!
Each bead is diamond cut with a “checkerboard” pattern. With an up close look, ‘the puffed edge leads to a checkerboard faceted face. That’s a lot of surface to catch and move light in a multitude of directions.’
Bracelets with 4mm Faceted Coin Gemstones
Who doesn’t love blue! Especially these Amazonite strand! We kept the simplicity of this bracelet by using Soft Flex Beading Wire and sliding on a gemstone and 11/0 Miyuki seed bead sequence. We made a sequence up to 7″ and used clamshell bead tips for the ends. Added a clasp and an inch of chain for an extender. (Adjust amount of beads to customize bracelet size.)
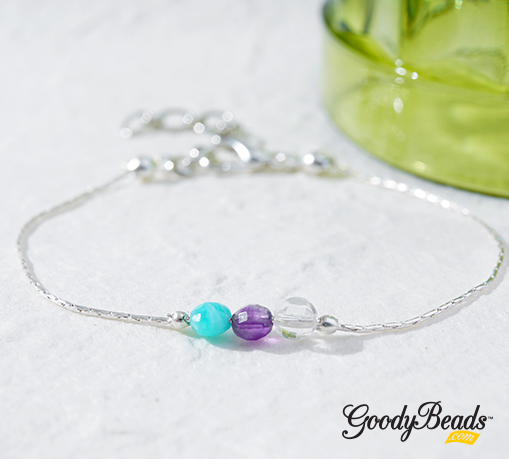
We kept this bracelet as simple as we can. We use three different gemstones: Amazonite, Amethyst, and Crystal Quartz all onto a .7mm beading chain. We first cut a 7″. At one end, we used a clamshell bead tip. Then we slid onto the beading chain a 2mm crimp tube, three gemstones and another crimp tube. Position the beads to the middle of the chain and using the Magical Crimping Pliers, crimp the crimp tubes on both sides of the gemstones. Cap the other end of the beading chain with another clamshell bead tip. Add your clasp and chain and you have a dainty gem bracelet!
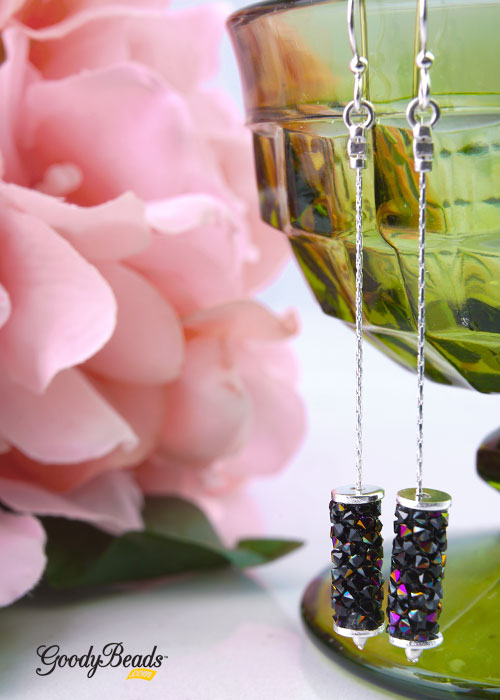
We are loving these Swarovski Fine Rocks tube beads. To make this pair:
Cut two piece of beading chain at about 2.5 inches.
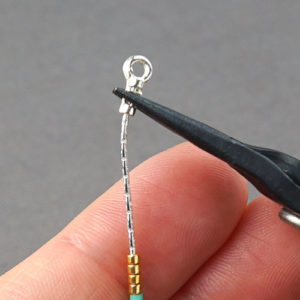
Use Magical Crimping Pliers, crimp one end of the beading chain with a 2mm crimp tube. (Make sure to leave a little beading chain sticking out of crimp tube so that when you crimp, the crimp tube will catch onto the beading chain.)
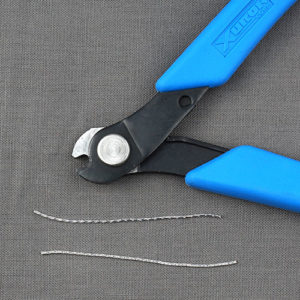
Use flush cutters to cut excess beading chain tip left from step two.
At this time, repeat steps 2 and 3 to other beading chain. After you’ve done this, make sure both beading chains are still the same length. Cut chain to adjust length if needed or for desired length.
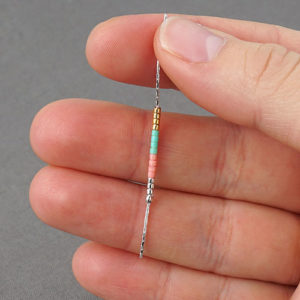
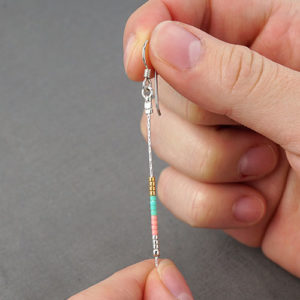
Slide onto the crimped beading chain a silver spacer, crystal tube beads and another silver spacer.
Slide top end of beading chain through end cap and flat crimp the middle of the end cap with flat nose pliers.
Open ear wire and slide on end cap loop. Close ear wire loop.
Repeat steps 6 and 7 on other crimped beading chain.
Here, we used the same instructions as above with a simple 8mm Swarovski Pearl bead. Use a piece of wire or headpin first, to slide through pearl bead, so that beading chain can run through it. We had also trimmed the beading chain to 1.5 inches after we crimped on the 2mm crimp tube.
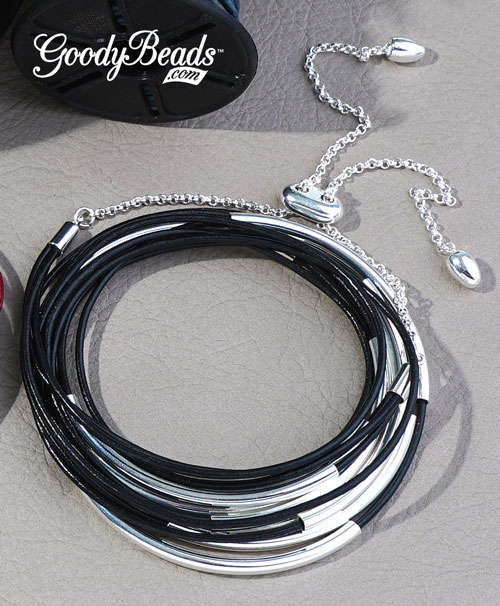
New from LeatherCordUSA is 1.5mm round leather cord. This popular size is a must-have for your leather projects. Here is a simple leather wrap bracelet project using 1.5mm leather cord, curved tubes and adjustable sliding clasp.
Here are components you will need to make the leather wrap bracelet:
Measure your wrist length and multiple that by 3 and subtract 2 inches.
Cut leather cord to 3 equal lengths to your measurement from step 1.
Take an end from each of your 3 leather cords and pinch them.
Add a drop of Super New Glue to your end cap and slide the cord ends into the end cap. Let it dry for a few minutes for it to set.
Slide curved tubes onto your leather cords. You can add as many tubes you want to each leather cord.
Add a drop of Super New Glue to the other end cap and slide the other three ends into the end cap. Let it dry for a few minutes.
Open the jump ring of your sliding clasp and slide on end cap loop. Close jump ring.
Repeat to other jump ring and end cap.
Complete!
As an option, you can add your own choice of clasp with a jump ring or split ring instead of the sliding clasp.
DIY Lava Bracelets and Essential Oils
Lava bead jewelry is all the rage, whilst combining them with essential oils. Learn about basic essential oil healing properties and create an easy DIY lava bracelets using lava beads from Dakota Stones.
Essential Oils Healing Properties
The aromatic scent of essential oils add extra healing and therapeutic property to calm your mind and your soul. While essential oils are used in aromatherapy, it’s even trending for medicinal uses.
Here are some healing properties of 5 basic essential oils.
Lavender
Healing Properties: calming and relaxing, stress reliever
Peppermint
Healing Properties: uplifting and invigorating, energy booster
One way to use essential oils is adding a drop or two to jewelry made with lava beads. Let lava beads absorb the essential oils for a few minutes before wearing your jewelry!
DIY Lava Bracelets
An easy DIY you can make are stretchy bracelets! Pair lava beads with wood beads for a natural look. And we couldn’t resist these dyed lava beads! What we did to make this bracelet was pre-stretching a 9″ piece of elastic. String on your beads and make a surgeon’s knot. (Check out previous Stretch Bracelet blog for surgeon’s knot).
We made this bracelet using wavy disc and the popular gray lava beads. Cut a 9″ soft flex wire. Slide on 9 lava beads. Slide on 10 wavy discs by sliding one bead concave out and slide another concave in so that the two discs cup together. Repeat for the rest. Then slide on 9 more lava beads. You can add more lava beads to either sides to customize your wrist size. Slide on a crimp tube to one end and loop of your clasp. Loop flex wire back through the crimp tube and crimp your tube. Cut flex wire with a 1/4″ tail. Repeat to other end but adding a jump ring.
Who doesn’t love a simple gemstone cuff? We made this Gemstone Coin Cuff using Dakota Stones’ coin-shaped gemstones and Nunn Design Thin Cuffs. Watch this short video and learn how easy it is to wire wrap gemstones onto a cuff.
Tory and Candie Cooper are back in this video to demonstrate how to make simple bracelets using memory wire, leather, end caps and beads!Making bracelets with memory wire is one of the easiest way to make jewelry! Make sure to stop over to our Memory Wire Hot Category page to shop for memory wire, end caps, tools and leather with an inner hole that can be used with memory wire. Don’t forget to get some of our favorite beads to accompany your leather memory wire bracelet like glass beads, gemstones, TierraCast beads, Swarovski crystals and more.
Because memory wire comes pre-coiled, it will sustain and keep its shape. We personally like the Beadalon® Heavy Duty Memory Wire (WR00120/WR00121), which Tory and Candie use in the video. And most importantly, having the correct tools will help create your bracelets: Memory Wire Shears and Memory Wire Finishing Pliers
These pliers will help with looping the memory wire because wire itself is a thick and sturdy wire.
Video Tutorial
https://www.youtube.com/embed/YmVVh5O5yLI
Bracelet Examples
Here are different variations of bracelets we’ve made using a combination of gemstones, metal beads, spacers, Czech beads, Swarovski crystals and more.
You can find other ways we’ve used memory wire in other blog posts:
A fun tip when making bracelet with beading chain, is for you not to be afraid to mix metals. Watch video for a step-by-step tutorial in making your own DIY adjustable bracelet!
Video
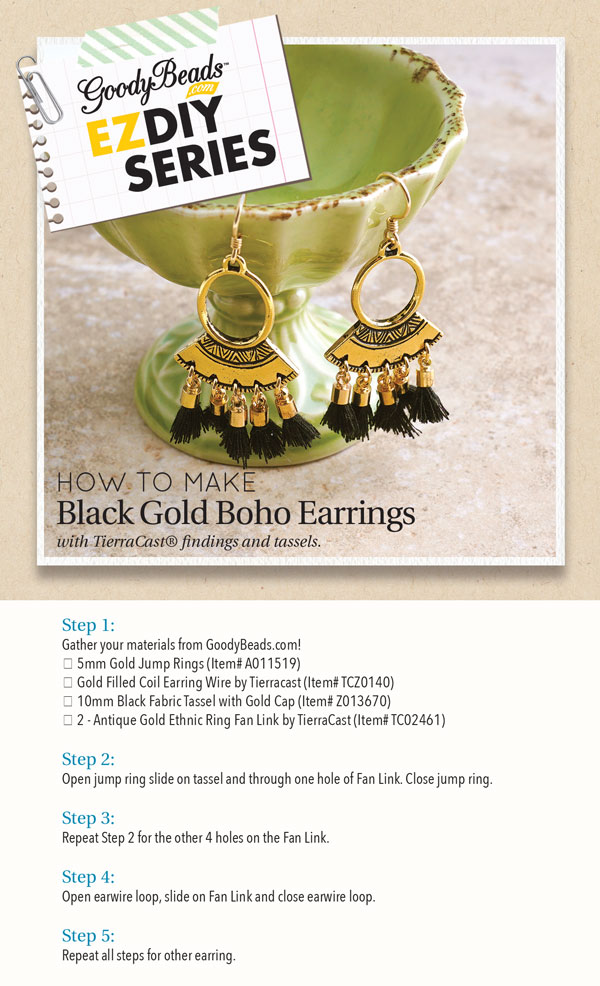
GoodyBeads EZ DIY Series: Black Gold Boho Earrings
Here at GoodyBeads, we love a good TierraCast® finding and tassels. So combined these favorites to make a fun and flirty pair of boho earrings.
This tutorial is as easy as opening and closing a jump ring, which is all there is to making this easy pair of DIY earrings.
Items you will need for a boho tassel earring:
Gold version –
2 – TierraCast Gold Ethnic Ring Fan Link (TC02461)
How to Use Vintaj Patinas on Leather – Video Tutorial
Candie Cooper is back with us again! Watch this informational video today and learn some tips and tricks to customize leather jewelry with Vintaj Patina paints.
Video Tutorial
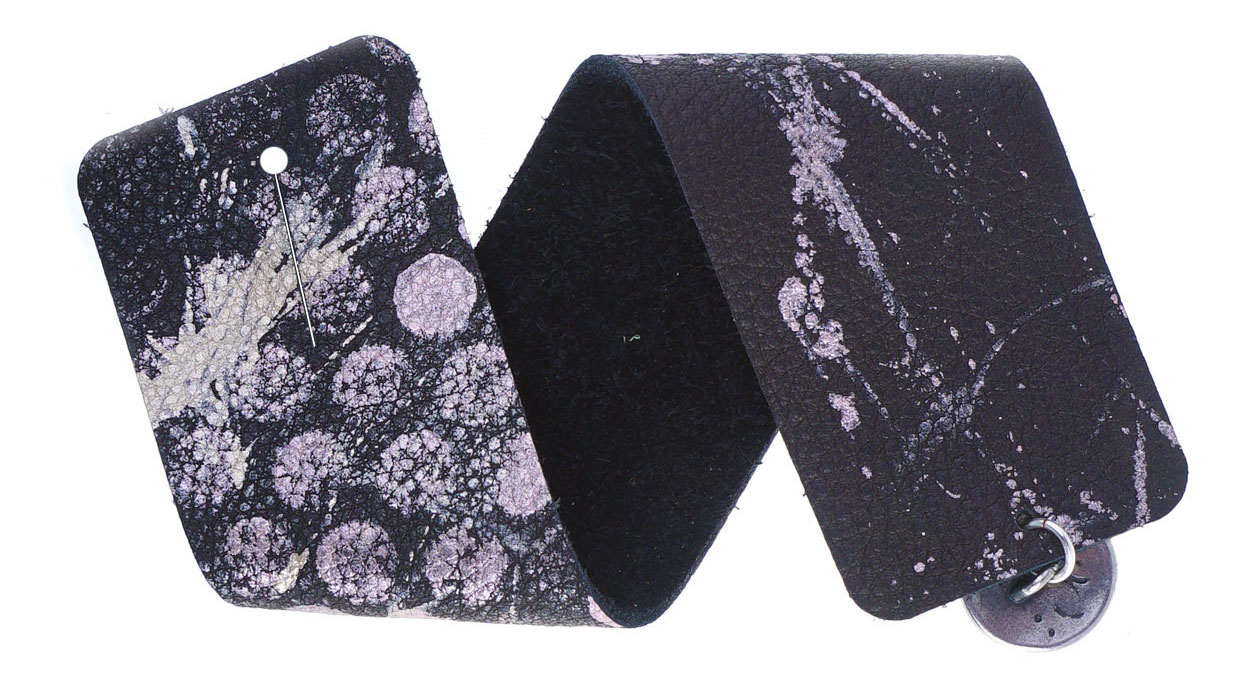
Vintaj Patina is versatile to use with metal, wood and even leather! With the help of Candie Cooper, she and Tory have a fun and innovative way of making leather jewelry with Vintaj Patina and the Sizzix Big Shot.
Here are some tips and tricks that were used in the video tutorial:
Use metallic patina paints over matte leather
Paint patina on bubble wrap and press leather on bubble wrap
Use a fan brush to lightly brush patina while creating hashing designs
Glide the tip of the patina paint bottle over leather in quick strokes and scribbles
Sizzix Die Cuts used in video: Leaf Die Set (SZ00062) & Wide Bracelet Die (SZ00028)
Beadalon® Instant Pendant Necklace – Tutorial
Make an easy necklace pendant when you have the Beadalon Instant Pendant.
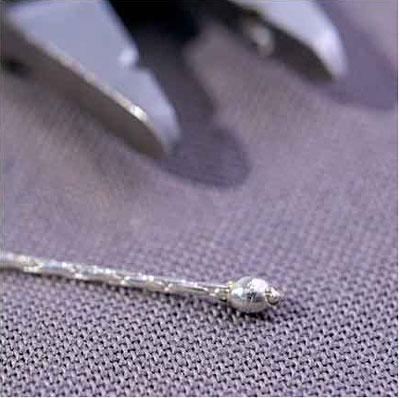
The Instant Pendant has a removable ball or point end that unscrews off. The mandrel is 1.5mm thick and 33mm long, so it is perfect for large-hole gemstones, large heavy beads, etc.
There are two styles; one with a ball tip and the other is a cone tip. They come in silver or gold finish. AND you get THREE with each package. So many combinations to think of!