DIY Miyuki Delica Colorblock Necklace with Griffin Cord
Let’s take out some Delica seed beads and make this fun colorblock necklace with Griffin silk cord.
What you’ll need for necklace:
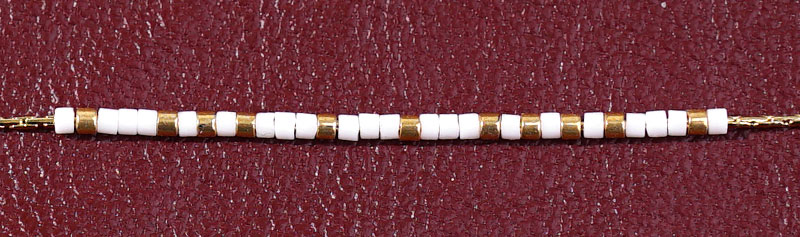
- 11/0 Delica Seed Beads – Use a variety of colors!
Items used in necklace: SB00141, SB02339, SB00229, SB00259 - Size 4 Silk Cord – Make sure it is a No. 4 size
Item used in necklace: A006574
Get all the components for this project here

Directions:
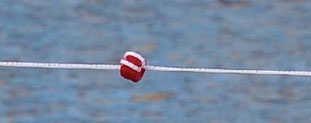
- Unravel silk cord from its card and straighten out the cord with water. (Check out Blog as an example HERE)
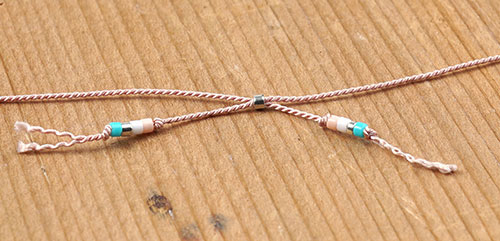
- Make a knot at the end of the silk cord.
- Slide on 4 delicas and make another knot, close to the last delica.
- Slide on a delica bead. (This will act as your slider piece at the end).
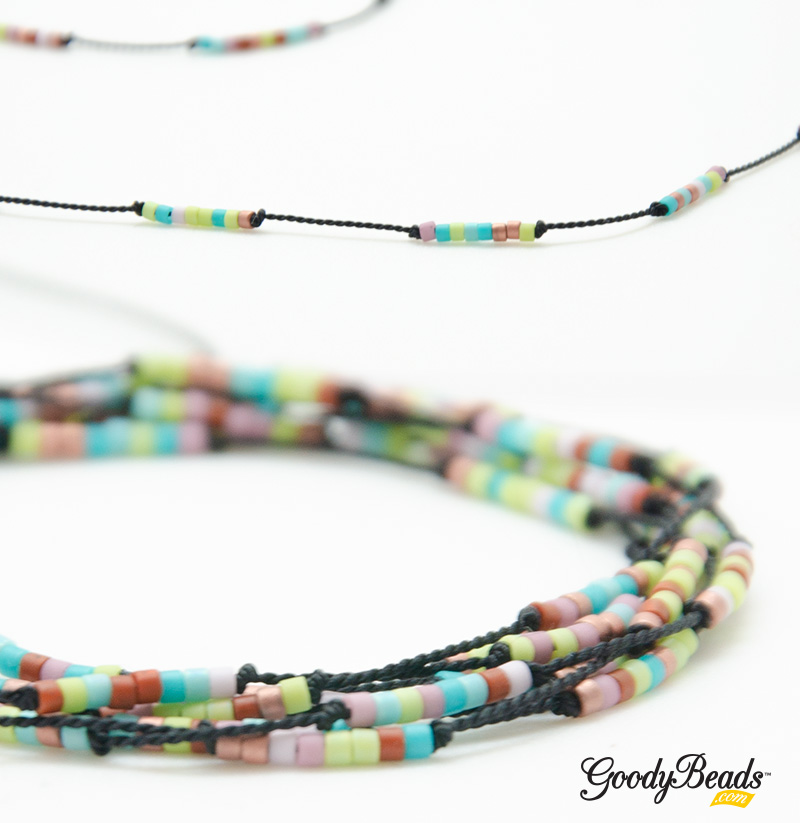
- Slide on 1.5 – 2 inches of 1st delica beads.
- Alternate the 1st and 2nd delicas 5-6 times.
- Slide on 1.5 – 2 inches of 2nd delica beads.
- Alternate the 2nd and 3rd delicas 5-6 times.
- Slide on 1.5 – 2 inches of 3rd delica beads.
- Alternate the 3rd and 4th delicas 5-6 times.
- Slide on 1.5 – 2 inches of 4th delica beads.
- Alternate the 3rd and 4th delicas 5-6 times.
- Slide on 1.5 – 2 inches of 3rd delica beads.
- Alternate the 2nd and 3rd delicas 5-6 times.
- Slide on 1.5 – 2 inches of 2nd delica beads.
- Alternate the 1st and 2nd delicas 5-6 times.
- Slide on 1.5 – 2 inches of 1st delica beads.
- slide needle through delica you added in step 4. You’re going to make a loop, so feed needle through the side that has the silk cord end.
- Put necklace on to determine the length you would like your necklace. Necklace in sample is 38″ long. It can be adjusted to be shorter too.
- Make a knot at the other cord end. Slide on 4 delicas and make another knot close to the last delica. Cut off excess silk cord.