DIY Seed Bead and Gemstones Pointed Earrings with FREE Pattern Tutorial
We’re combining seed bead and gemstones together in this FREE bead-stitch Pointed Earrings pattern tutorial.. It involves peyote stitching around a 10mm round gemstone bead and adding bursts of bead around the bezel. This earring pattern uses: 10mm round gemstones, 4mm round gemstones, wire guardians, 11/0 Delica seed beads and 15/0 round seed beads. And earwires, beading thread and needle.
Celebrate Summer with DIY Seed Bead Rainbow Earrings
Whether you’re celebrating summer or June’s Pride month, these rainbow earrings are what you need for summer fun! We have two rainbow earring designs, one using Delica seed beads with beadable components and another with round seed beads on a hoop! Check them out!
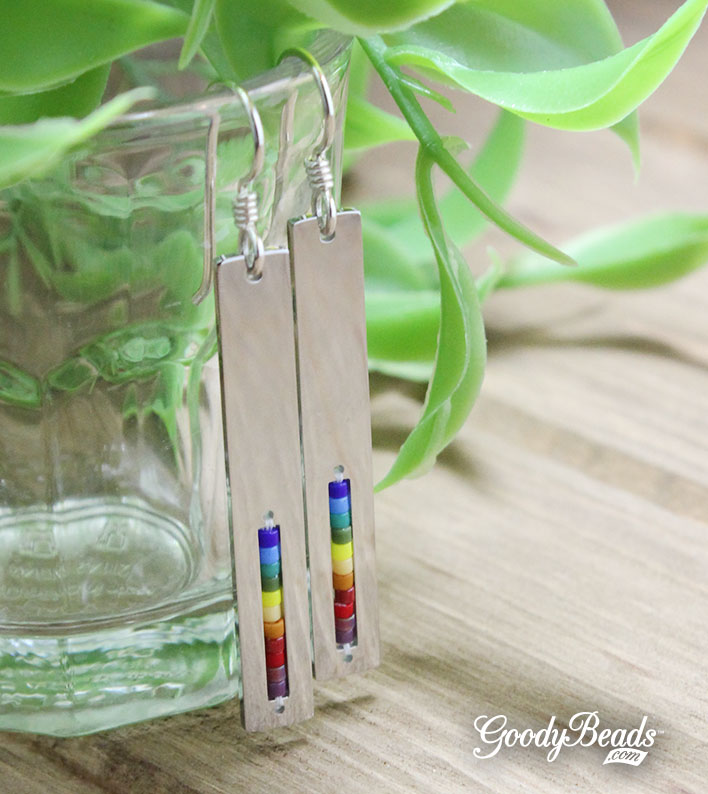
Rainbow Pendant Earrings Designed By So Vang
Be mesmerized with these pair of earrings using a using a rainbow of Delica seed beads! Items used in earrings:
Add a stopper bead to your thread, leaving a 5 inch tail.
Sew through top hole of the beadable channel. Pick up the 11 seed beads in the color sequence of the rainbow: SB00292, SB02337, SB02336, SB03777, SB00290, SB02311, SB00284, SB03545, SB00295, SB03388 & SB04034
Sew through bottom hole of channel. Sew back through all seed beads. Tie both ends together to secure pattern, tie two times. Sew through top hole and sew through a few beads before cutting off excess. Add need to thread tail you left in step 2, sew down through all the beads, sew through bottom hole, sew through a few beads and cut off excess thread.
Open ear wire and slide on beadable pendant.
Repeat steps 2-5 for other earring; you should have enough of the thread on your needle to do the second earring.
Rainbow Hoop Earrings Designed by Heidi
Fall in love with these hoop earrings using a rainbow of seed beads. Items used in earrings:
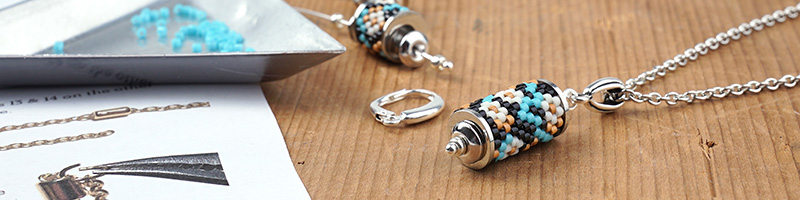
Our large selection of micro facet gemstones, from our friends at Dakota Stones, are small diamond cut gemstones expertly cut into rounds, rondelles, bicones, cubes and coins. Learn about how these gemstones are cut and get designing with micro facet gemstones in a Cellini Spiral and adding it to a fun memory wire wrap bracelet.
Micro Faceted Gemstones
Dakota Stones’ faceted gemstones ‘are machine cut with industrial-grade diamonds. With the use of new technology, geometry and an understanding of light, which is extremely important for precious stones with strong dispersion, [Dakota Stones] can now make the facets on each stone cleaner, sharper, and more consistent with minimal or no need for polishing. This means…manufacturing mathematically precise cuts on extremely small surfaces while getting the same luster and shine as we would see on large surfaces.’
Now let’s get to designing with small faceted gemstones!
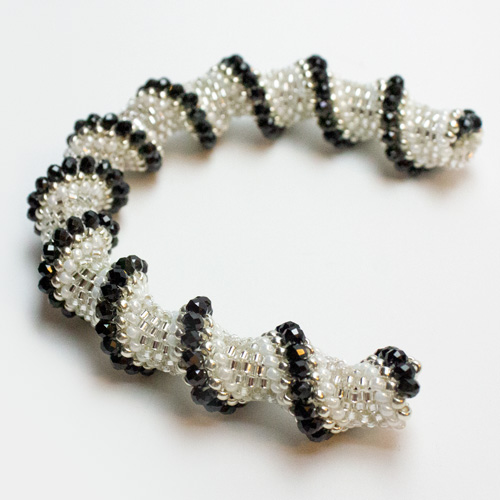
Black Spinel Cellini Spiral Memory Wire Bracelet
The basic design for the cellini spiral is using a 11/0 delica, 11/0 round Miyuki seed bead and 8/0 Miyuki seed bead. In this case, we’re subbing the 8/0 with some gorgeous 4mm rondelle Black Spinel gemstone bead.
Items used in Cellini Spiral pattern:
BSP4RL-F – 4mm Black Spinel Diamond Faceted Rondelle Beads
Start with 4-5 feet of beading thread. (This is a starting piece, you’ll need to add more to complete the spiral.) Sew on 6 delica beads, 2 pearl beads, 2 silver beads, 2 black spinel beads, 2 silver beads and 2 pearl beads.
2. Tie threads together to create a loop of beads. Tie two knots, making sure to leave a 5-6 inch tail end. Sew through loop once around.
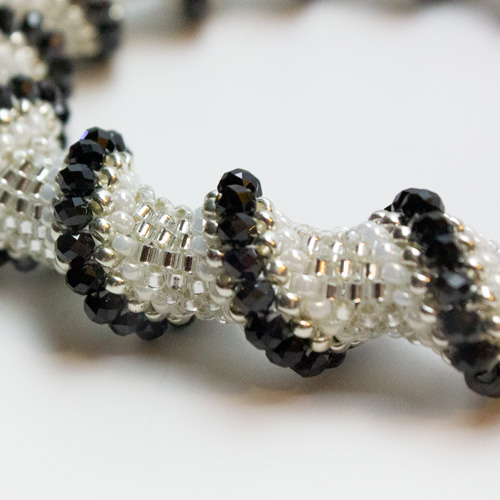
3. You are going to peyote stitch around the looped beads: – Pick up a delica bead skip a delica on the loop beads, sew through next delica. – Pick up another delica, skip a delica and sew through next delica. – Pick up a delica skip first pearl seed bead and sew through next pearl seed bead. – Pick up a pearl seed bead, skip silver bead and sew through next silver bead. – Pick up a silver bead, skip first black spinel and sew through next black spinel. – Pick up a black spinel, skip first silver bead and sew through next silver bead. – Pick up a silver bead skip first pearl seed bead and sew through next peal seed bead. – Pick up a pearl bead, skip first delica, sew through next delica and up through the next delica to start the next row.
NOTE: As a helpful tip while you sew around your spiral, when you are picking up a bead, you are picking up the bead corresponding to the bead you just sewn out of. So if you sewed out of a silver seed bead, you should pick up a silver seed bead in your pattern.
4. Repeat step 3 for the next row. By this time, your spiral will start to take shape. Use a 5mm wide dowel to help guide your bead in a spiral shape.
5. Repeat step 3 until you’ve used up all your Black Spinel beads.
NOTE: Between your spiral, you’ll run out of beading thread. To add more, sew your ends through your spiral, looping around a couple of beads before cutting off excess. Add another 4-5 feet of beading thread to your needle, loop around some beads of your spiral before guiding your needle back through the path of where you’ve left off to continue your spiral pattern.
6. Your Cellini spiral is done.
7. To make your memory wire bracelet, make a simple loop to one end of your memory wire with Memory Wire Finishing Pliers.
8. Slide on an onyx bead, spacer, 3 onyx beads, spacer and another onyx bead. Slide end cap and 3 inches of leather and end cap. Slide on Cellini spiral, onyx bead, spacer, 3 onyx beads, spacer and another onyx bead. Slide on another end cap, 3 inches of leather and end cap.
9. Cut excess memory wire with Memory Wire Cutters, leaving about 1/4 to 1/2 inches. Make a simple loop with this end.
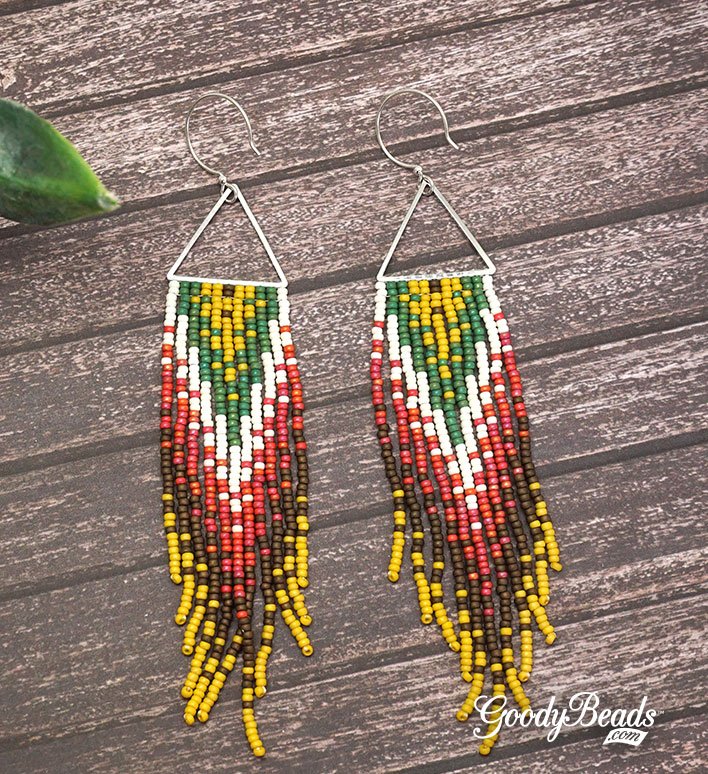
DIY Triangle Fringe Earrings with Miyuki Seed Beads
Make these COLORFUL Triangle Fringe Earrings, bead stitched with size 11 Miyuki Seed Bead. Get the FREE tutorial pattern and template!
Plus, with the pattern tutorial, comes with a template so that you can create your own color creations!
Earrings Designed by So Vang
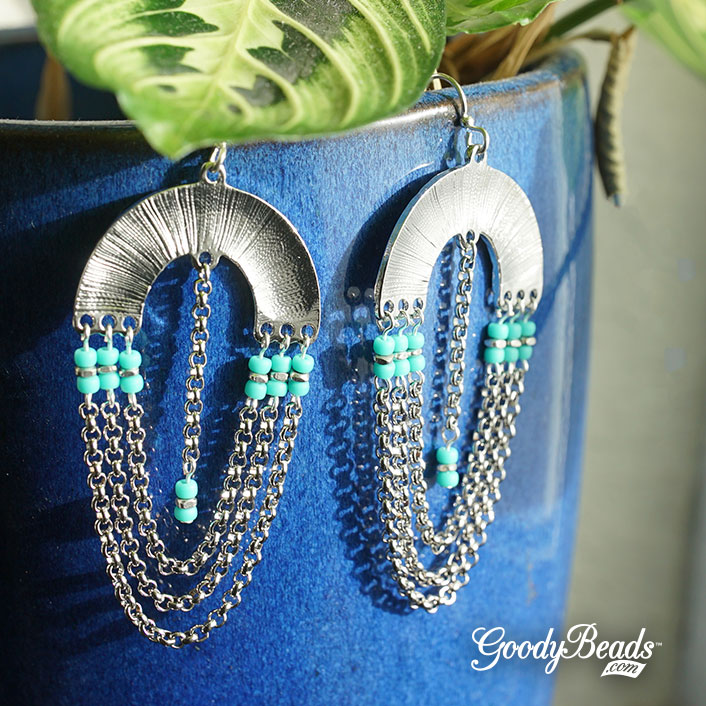
DIY Half Circle Chain Earrings with Turquoise Seed Beads
We love a good pair of earrings with movement and these Half Circle Chain Earrings do just that! With a simple POP of turquoise color amidst the silver chain and findings, you’ll especially love how light they are.
Items used in chain earrings:
Z021697 – 33mm Rhodium Plated Arch Connector
TCZ0077 – Sterling Silver Earring Wire by Tierracast®
Slide the following on an eyepin and make simple loop: seed bead, metal bead and seed bead. Make a total of 6 links.
Slide the following on a headpin and make a simple loop: seed bead, metal bead and seed bead.
Cut 3 chain pieces to 3 inches, 2.5 inches and 2 inches. Make sure the first and last ring of each piece are the same directions.
And 1 inch piece with rings opposite directions.
Open bead link loop from step 1, slide onto first outer hole of Arch Connector and close loop. Open other loop of bead link, slide on the 3 inch chain, close loop.
Open another bead link, slide onto next hole of connector and close loop. Open other loop of bead link, slide on the 2.5 inch chain and close loop.
Open another bead link, slide onto third hole of connector and close loop. Open other loop of bead link, slide on the 2 inch chain and close loop.
Attach the rest of the other bead links to the other end of the Arch Connector. Open other loop of each bead link and attach the mirrored chain to it.
Open jump ring, slide on the 1 inch piece of chain and through the middle loop of Arch Connector. Close jump ring. Open loop of bead dangle, attach to the other end of the inch chain and close loop.
Open ear wire loop, flip the Arch Connector so that the smooth backside it facing outwards, slide on connector and close loop.
Repeat all steps for other earring.
Earrings Designed by Tory
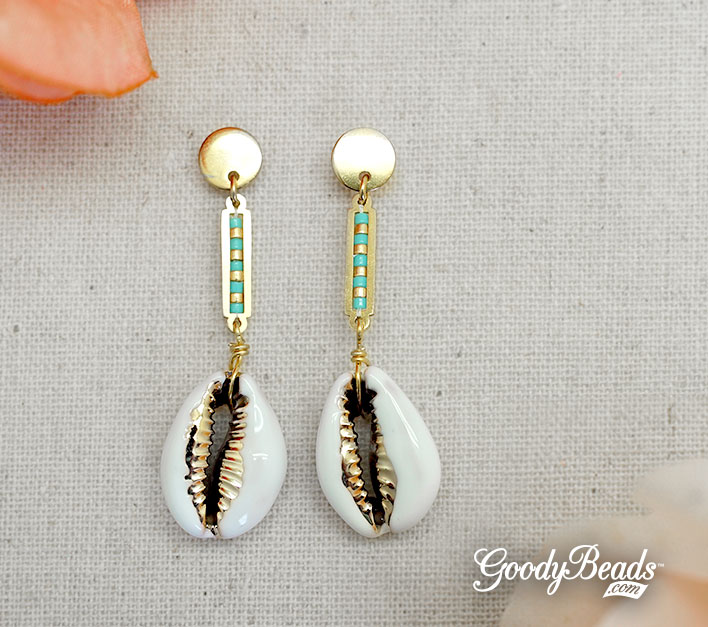
DIY White Cowrie Shell Earrings
Can you hear this DIY calling to you? This pair of cowrie shell earrings is designed with enamel cowrie shells and our fun beadable links. Get this free tutorial today and be summer-ready!
Add a foot of beading thread to your needle and add a bead stopper to your thread end, leaving about a 5 inch tail.
Sew through one hole of beadable link and pick up Sea Opal and Gold Delica seed beads, alternating between the colors. Pick up a total of 9 beads. Sew down through the other beadable link across the link channel. Sew back through all the beads. Pull off the bead stopper and tie both threads together, tie two times. Sew thread ends through a few beads before cutting off excess.
Cut a 3 inch piece of wire. Insert a third of the wire through the shell and fold wire. Wrap the longer piece of wire on top and around the shorter piece of wire.
Make a simple loop with the shorter wire.
Open loop, slide in beadable link and close loop.
Open earwire loop and slide on other end of beadable link.
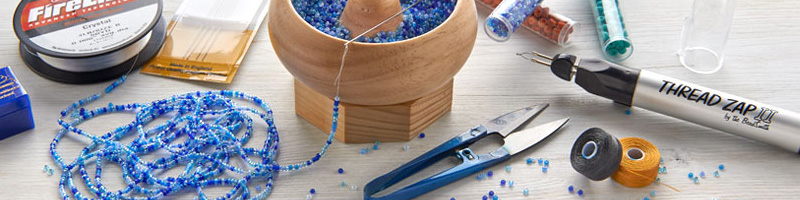
Want to get started on Bead Stitching? Here’s a simple starter guide to bead stitching with Stringing Tools, Stringing Materials and simple DIY tutorials ideas.
Needles
Needles are a must for getting started. They come in many shapes and sizes, depending on the size of your beads and its hole size. Since many of the beads you will use have small holes, needles for bead stitching are thin and can be used for all small beads. Shop needles in Stringing Tools.
String Thread
Beading Threads: You’ll need strings/thread to create your bead stitching designs.
For intricate patterns, using waxed beading thread like Fireline beading threads are a great material. They don’t stretch and keeps your pattern tight and secured with each stitching.
For loose stitching like fringe tassels, use some cotton beading threads They are also a less expensive option that can be used on for fringes but also for all your bead stitching projects.
If you don’t know where to get started, you can simply get the Seed Beader Beginner Kit. You’ll get the basic tools and stringing materials to get your project started. Kit includes beading needles and beading thread, along with some simple tools such as beading mats, thread clipper, bead scoop and bead stoppers. All you need are seed beads and some creativity to get you rolling! Check out the GoodyBeads blog for inspirational designs and tutorials. You will receive 1 of each of the following: A006767, A006587, TL00337, A006980, A021663, and A006770.
Easy Beading Projects
Get started on some simple bead stitching projects using seed beads:
Holiday Gift Guide for Seed Beaders and Bead Stitchers
Here is a simple gift guide for seed beaders during the holidays! Or need an easy DIY seed beading project to make for a holiday gift? We got some ideas for you.
Seed Beader Tools
Tools are the essential part of any jewelry-making adventure. Here are some ideas to gift a seed beader friend or yourself:
Stringing Tools – Get a selection of needles, cutters and looms. Here’s some of our favorites:
OR, simply gift the Seed Beader Beginner Kit, which includes beading needles and beading thread, along with some simple tools such as beading mats, thread clipper, bead scoop and bead stoppers.
Seed Beads and More Beads
Bead stitching uses a lot of Japanese seed beads, like Miyuki round beads, Delica, and Tilas. Try out some fun Mixes also, like Tila mixes, Delica mixes and more.
You can also use other shapes, especially some 2-hole Czech Beads like SuperDuos, DiamonDuos, Czech Bars, Ginkgos and more.
Not sure where to to start? Why not pick up a Seed Beading DIY kit. Each kit includes all the materials needed to make each jewelry item. Here are some of our recent favorites:
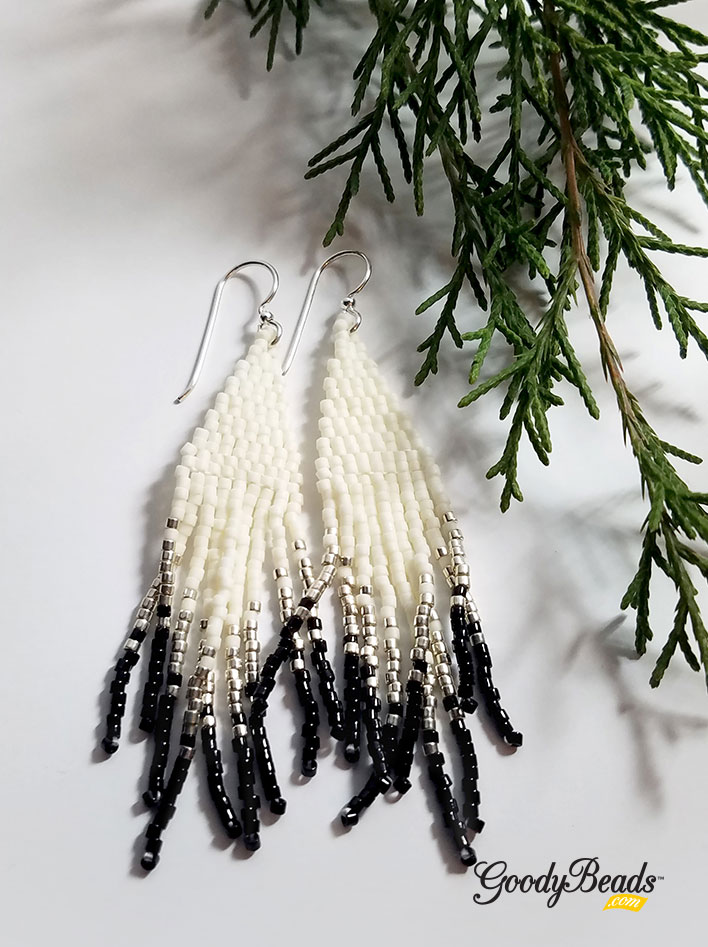
DIY Beaded Frilly Fringe Earrings with FREE Pattern Tutorial
Make today a pair of Beaded Frilly Fringe Earrings with size 11/0 seed beads or Delicas. Beaded earrings are everywhere! They are a fun piece for any occasion because of the many color combinations you can create with them. Our FREE DIY is this easy-to-follow pattern tutorial.
NOTE: in this pair of earrings (above), in Steps 3-5 where you are brick stitching each row, you’ll add a TWO delicas to create each row instead of one.
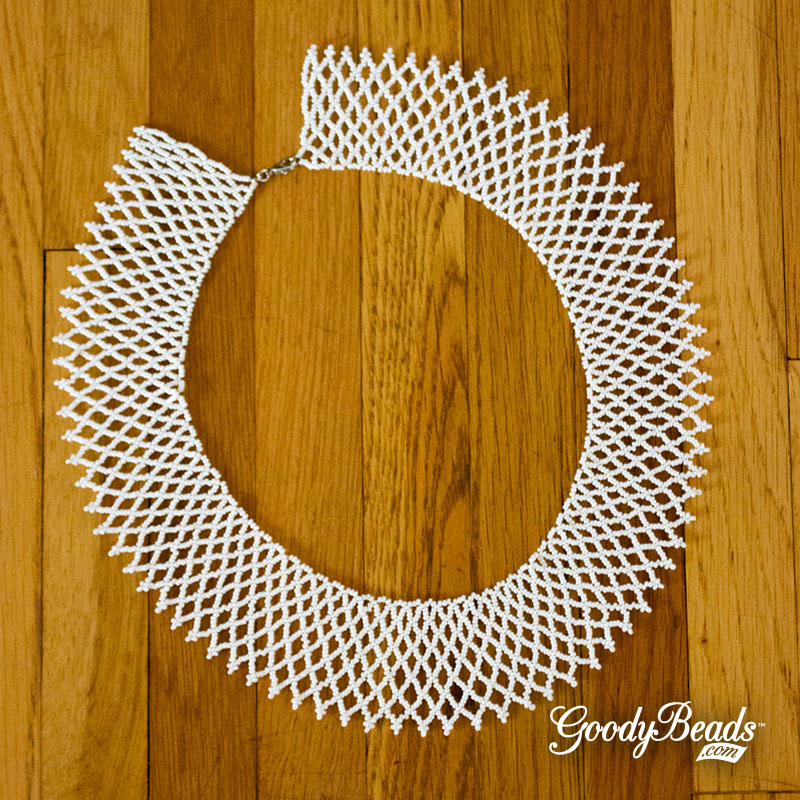
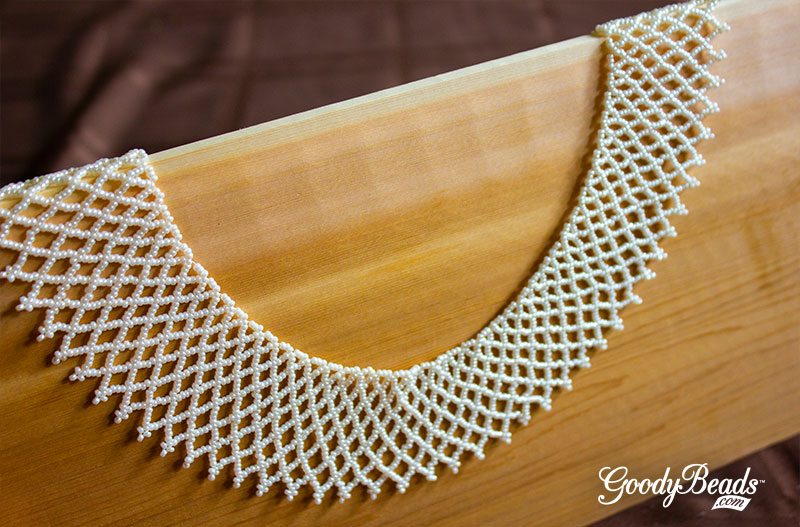
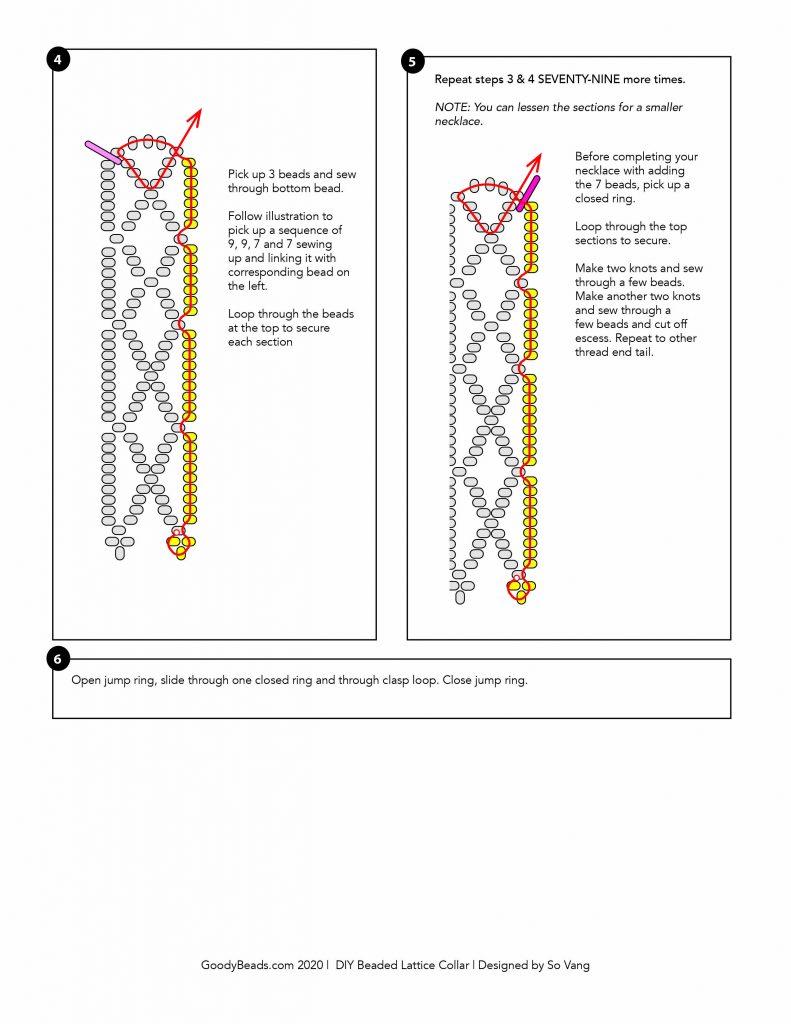
DIY Beaded Lattice Collar with FREE Pattern Tutorial
Our Beaded Lattice Collar necklace is certainly one all bead-stitchers would love to create! It’s also simple enough for any beginner who would like to create an iconic, show-stopping, statement necklace. Get your components andFREE Downloadable Tutorial HERE.
11/0 Miyuki Delica Mixes are some of our newer items here at GoodyBeads. And an interesting way of designing with them are some simple Memory Wire Bracelet. They are perfect for all ages and also the perfect bracelet to wear in warm summer months!
Memory Wire WR00126/WR00127 – Item used in bracelet WR00126 Note: do not use the Heavy or Extra Heavy Memory Wire. The thickness may not fit the Delicas.
Make a simple loop to one end of your memory wire.
Slide on Delica seed beads on memory wire. Make two wraps or more.
Cut excess memory wire leaving a 1/4″ end. Make a simple loop.
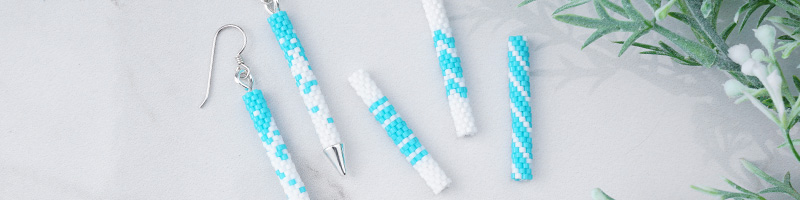
Tassel Earrings with TierraCast® Findings and Miyuki Seed Beads
Our tutorial today features some trendy tassel earrings made with seed beads. You may recall our previous blog post on Beaded Tassel Tutorial. Today’s project will use that tutorial along with multiple colors of seed beads and beautiful TierraCast pieces.
What you’ll need:
Size 11/0 seed beads. We used 3 different colors in our sample:
SB00423, which will pair with the gold TierraCast finding. You can also use SB00422 and silver TierraCast finding.
Skip the last bead and sew back up through all the beads you’ve sewn and through wire loop. Don’t pull to hard, you want your fringe to hang loose.
Repeat step 4 and 5 another 7 more times for a total of 8 tassel fringes.
Tie thread ends together, securing it with a small dot of Super New Glue.
Slide wire through cone and pick up 4mm round bead (pearl) and cream seed bead. Make a simple or wrapped loop.
Open earwire and add tassel dangle.
Repeat all steps for other earring.
How to Use Ricks Bead Loom, PLUS Two Ways to Clasp Loom Bracelets
From traditional Native American Indian-loomed wampum belts to popular and modern Julie Rofman wrap bracelets, bead looming has transcended through changes in time, culture and fashion. A bead loom can help you make elaborate, beautiful necklaces to simplistic bracelets.
If you are new to using the bead loom or have been wanting to use a bead loom, believe us when we say that using the Ricks Bead Loom is super easy and simple. Here are some tips and tricks to using Ricks Bead Loom, as well as some inspirational loom bracelets to get you started. We also provide two different ways to clasp loom bracelets.
Ricks Bead Loom
When you purchase a Ricks Bead Loom, you receive the bead loom and its components, as well as a detailed, visual instructions of how to set up and use the bead loom. You can also check out Ricks video tutorial on his webpage on how to use his bead loom.
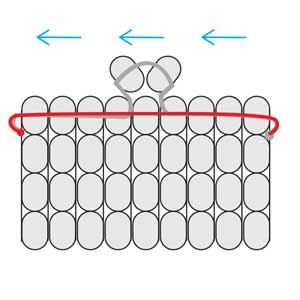
The basic method of bead looming is weaving a thread back and forth through rows of seed beads that are sandwiched in between vertical strands or “warp strands”. The difference between a traditional bead loom and Ricks Bead Loom is the amount of warp strands you are using. A traditional loom will have multiple warp strands going up and down along the loom, while a Ricks Bead Loom will have only one strand that wraps back and forth, up and around between the two rods. This continuous wrapping of the strands between rods will leave you with two threads at the end.
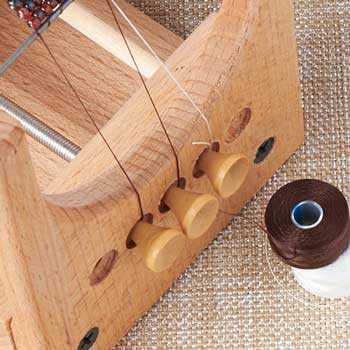
Like the instructions you will receive, first you insert your metals rods. These rods are where your vertical warp strands will lay. Adjust the wood piece/tailstock to your preferred bracelet length and start making your warp strands. The amount of warps you have is according to the amount of beads you have in a row, PLUS ONE. If you see the image below, you will see that we have eight seed beads per row and thus we need nine warp strands.
Next, lay your card separator in between the warp strands. It is optional to use the card separator. You can use the warp separator card that comes with the kit. Here, we cut a ½ inch piece of cardstock paper to get us started.
Hook your thread end to your peg and insert it into one of the holes in the front.
You are ready to start your rows. The basic motion of weaving each row is by weaving behind the warp strands with your beads and string. You will then weave back into the same row of beads, but when you feed your needle through, you are gracing the top side of the warp strands.
TIP: When bringing your needle back, use the backside of your needle. Using the backside of the needle will give you a smoother glide through the beads. Be careful not to prick yourself with the sharp end when using this method. Makes you wish you had a thimble on hand, huh? I did.
The first two rows will be tricky but after that you get those two on, it will be easier.
After your two rows are done, slide off the separator and pull your two rows down so it is flushed against the metal rod. Twist the peg that attaches to your thread to keep loose thread tight.
And you are ready to continue with your rows until you’ve reached the end.
TIP: When bringing your needle back through the row of beads, press up on the beads so that they protrude upward. Then, when you sew back through the beads, you will go over the vertical warp strands.
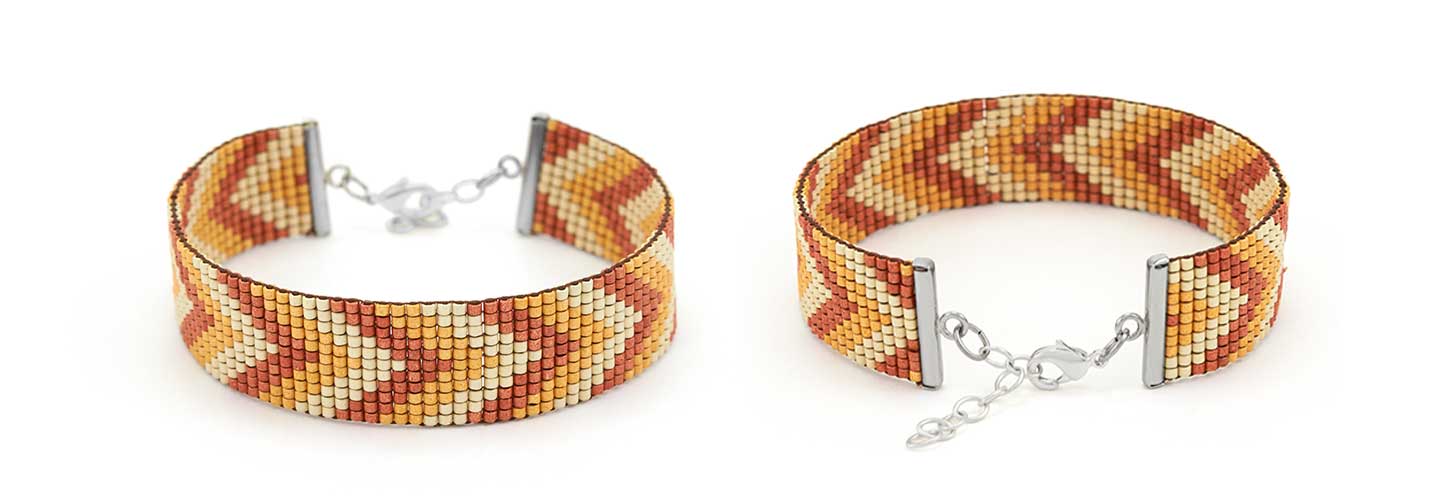
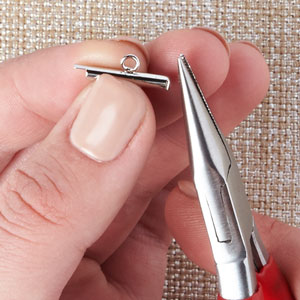
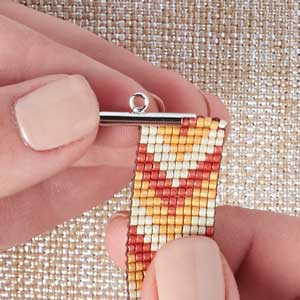
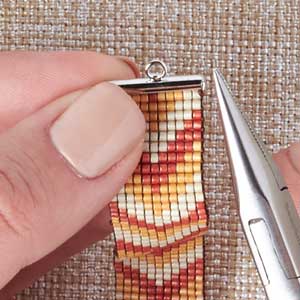
When you have finished your piece, unhook your threads from the pegs and sew the end threads through the rows and knot them. Cut excess thread. Slide your loomed piece off the metal bars and spread out your bead rows evenly outwards towards the ends to hide the loops of the warp strands. Then you are ready to add your clasp ends. Here are two types of loomed bracelets with instructions for adding a Miyuki Tube Finding and sewing on a bead loop to add your clasp.
For this bracelet, we used Miyuki Tube Findings, which are used particularly with Miyuki Delica Size 11 seed beads. GoodyBeads has four available sizes at 15mm, 20mm, 35mm, and 60mm, which will accommodate a certain amount of seed bead per row.
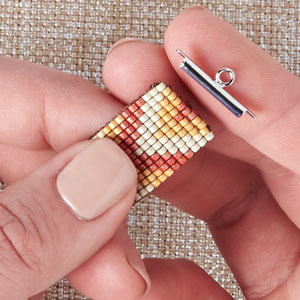
You can make a design like our Delica seed bead bracelet or you can use a Miyuki seed bead mix like our bracelet here. For our clasp for this bracelet, we made a loop using seed beads.
Step 1: Tie your thread end and insert your needle halfway through your row of beads.
Step 2: Add two seed beads. Skip one seed bead in your row and insert needle through the rest of your row. Make a knot.
3. After you make a knot, go back through the seed beads you threaded through. Make a knot on the other end.
Step 4: Then, feed your needle and run through your entire bead row and make a knot. Cut excess thread.
Step 5: Your end result.
Step 6: Insert jump ring in the loop you’ve made and add your choice of clasp. You are finished.