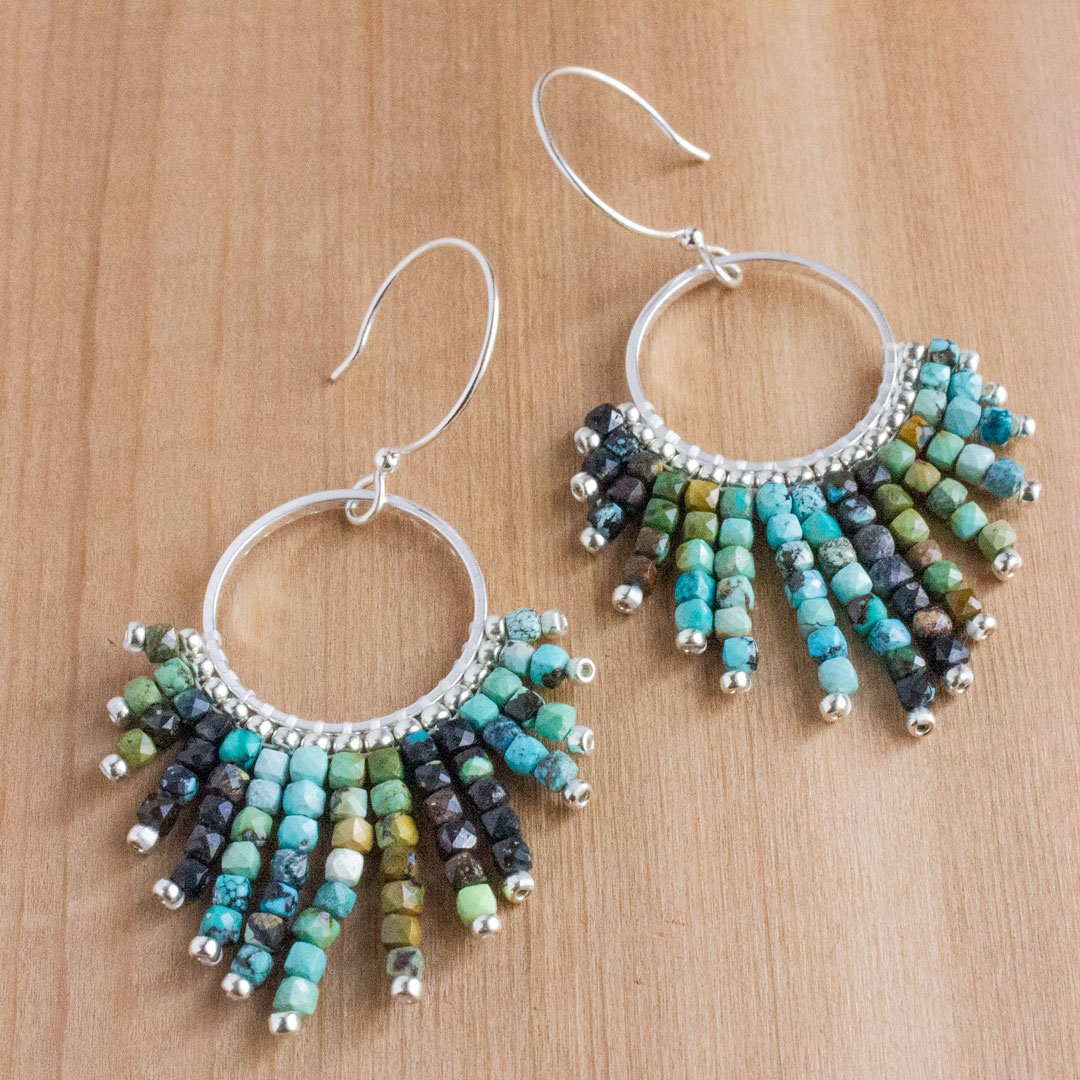
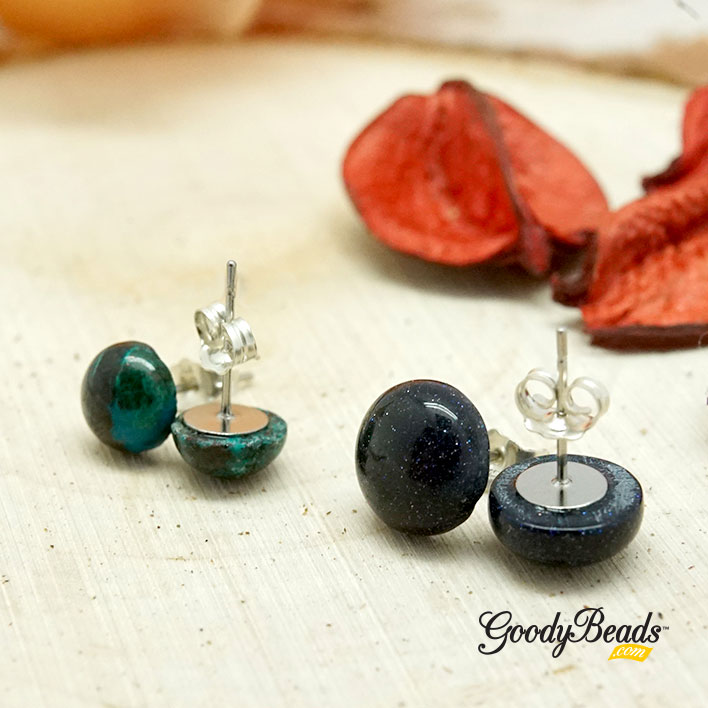
DIY Seed Bead and Gemstones Pointed Earrings with FREE Pattern Tutorial
We’re combining seed bead and gemstones together in this FREE bead-stitch Pointed Earrings pattern tutorial.. It involves peyote stitching around a 10mm round gemstone bead and adding bursts of bead around the bezel. This earring pattern uses: 10mm round gemstones, 4mm round gemstones, wire guardians, 11/0 Delica seed beads and 15/0 round seed beads. And earwires, beading thread and needle.
Fringe Earrings with Gemstone Cube Beads – FREE Pattern Tutorial
So Vang made this pair of earrings during one of our Facebook Lives and it has quickly become a favorite among jewelry makers! Dakota Stones 2mm gemstone cube beads were bead stitched onto a Beadalon® Quick Link, you’ll see on the PDF just how easy this pair of earrings are to make. Plus, check out the live episode where So demonstrates how to make them.
Check out the video tutorial on our Facebook Videos, to watch So demonstrate how to create these pair of earrings as well as a tip to using banded gemstone strands.
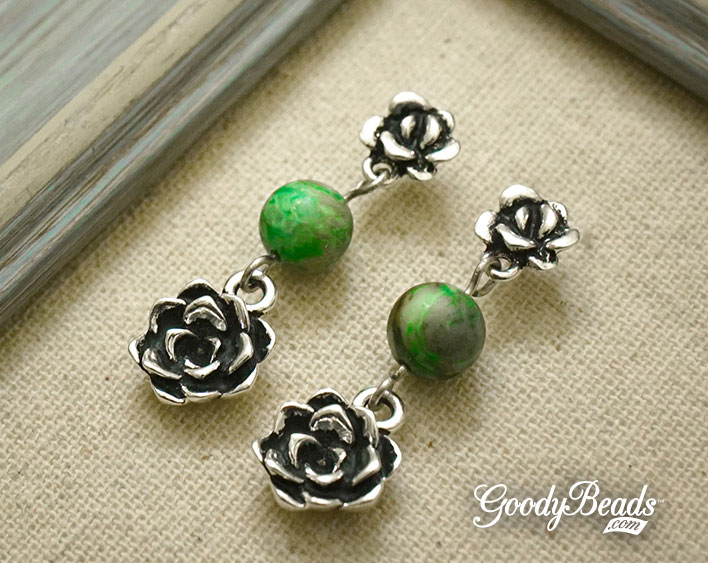
DIY Succulent Earrings with Crazy Lace Agate Gemstones
Make these cute succulent earrings using TierraCast succulent findings from their Renewal Collection and Crazy Lace Agate gemstones from Dakota Stones.
Items used in earrings:
TC02874 – 10mm Antique Silver Succulent Earring Post by TierraCast®
TC02877 (2) – 12mm Antique Silver Succulent Charm by TierraCast
GCL8RD-M-8 – MATTE Green Crazy Lace Agate 8mm Round 8-Inch
TC01253 (2) – 2 Inch Silver 21 Gauge Eyepin by TierraCast
TC01208 (2) – Clear Comfort Earring Back by Tierracast
Directions:
Open eyepin loop, slide on succulent charm and close loop.
Slide a gemstone onto the eyepin and make a simple loop.
Open loop and slide onto loop of post earring. Close loop. Make sure loops on eyepin are parallel and facing the same direction. This will help the succulent dangle to face forward.
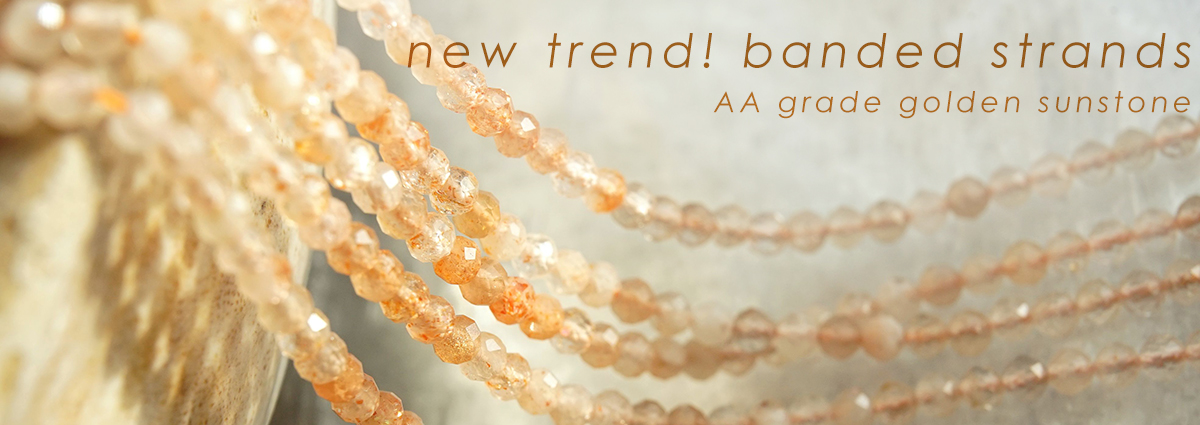
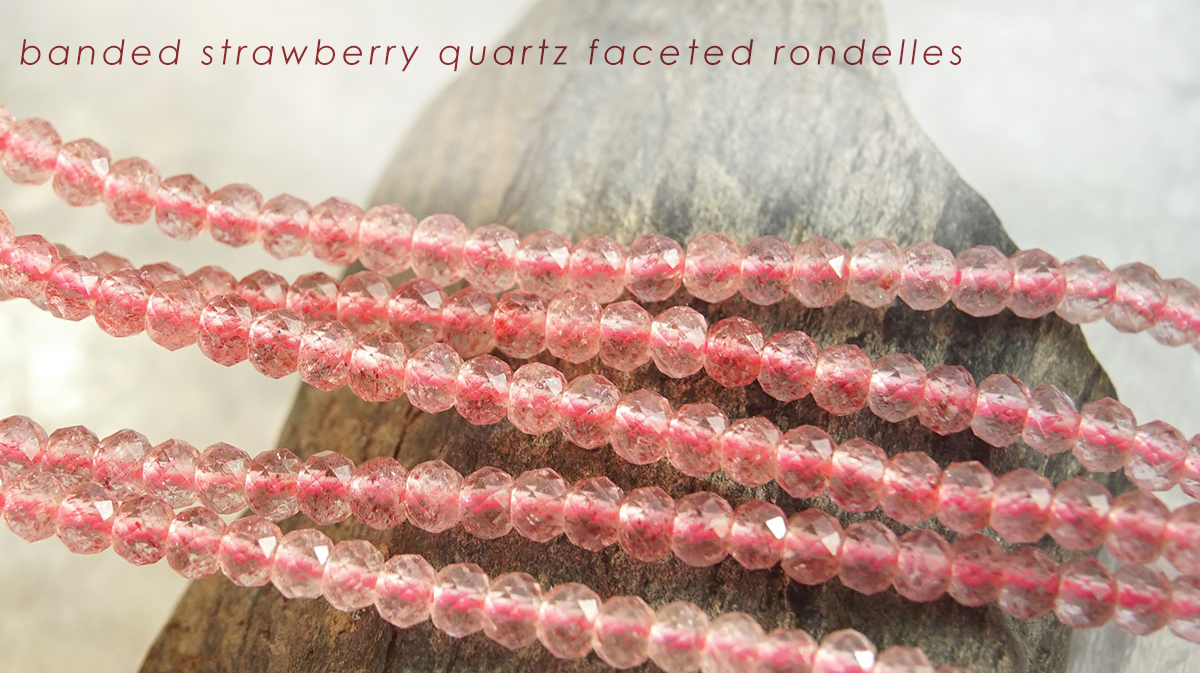
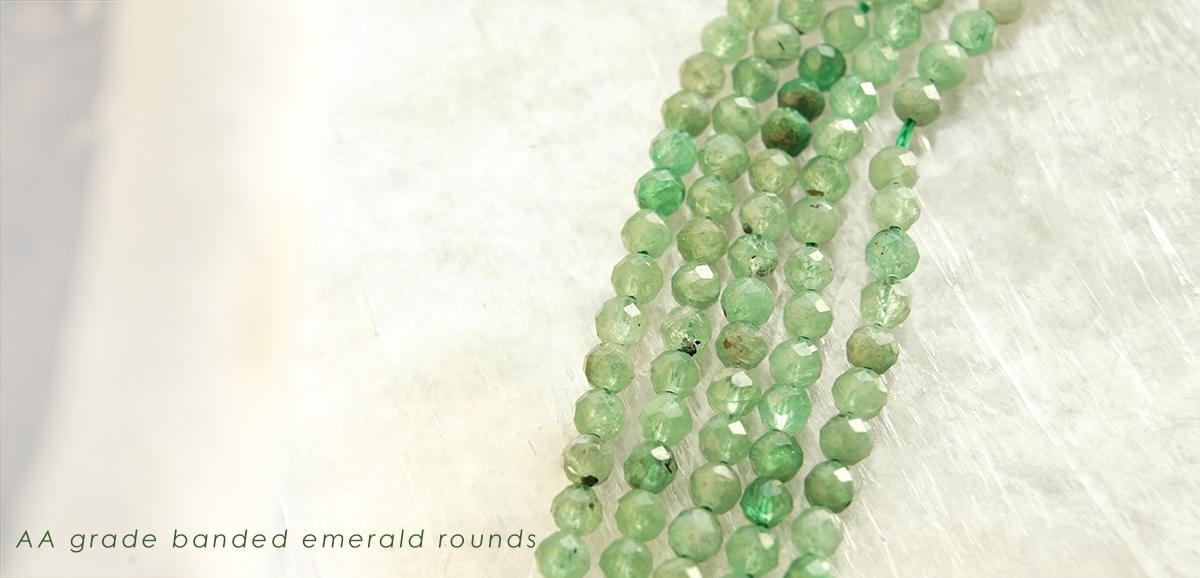
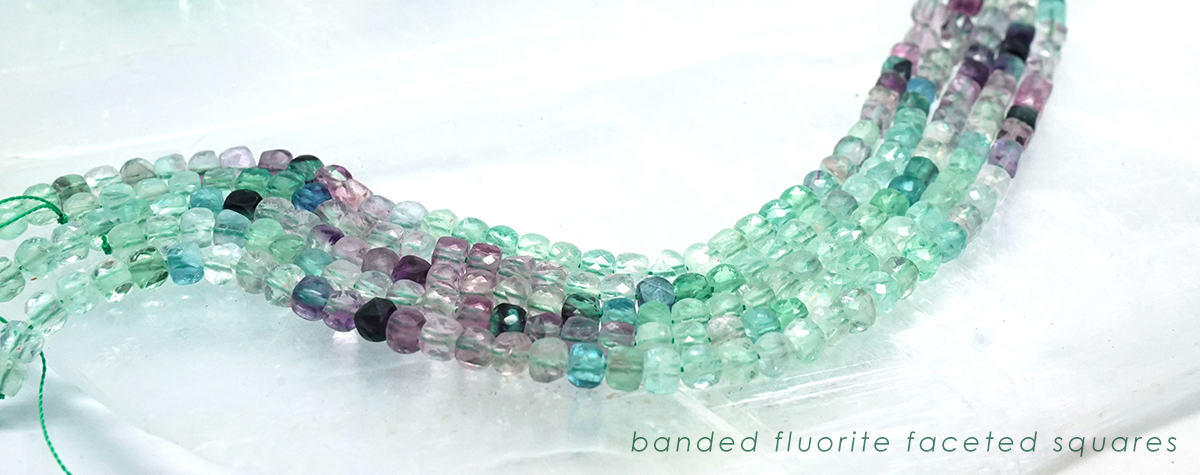
Goody Beads Exclusives this week featuring Banded Strands
Banded stones have seen a rise in popularity recently at Goody Beads, so we’ve recently expanded our line of banded stones.
Banded strands have two different meanings in the gem community. Banded gemstones, for example, occur when the beads themselves have different minerals laced throughout the stone in noticeably distinct colors. This is common especially in agate geodes, which are fairly common in the US.
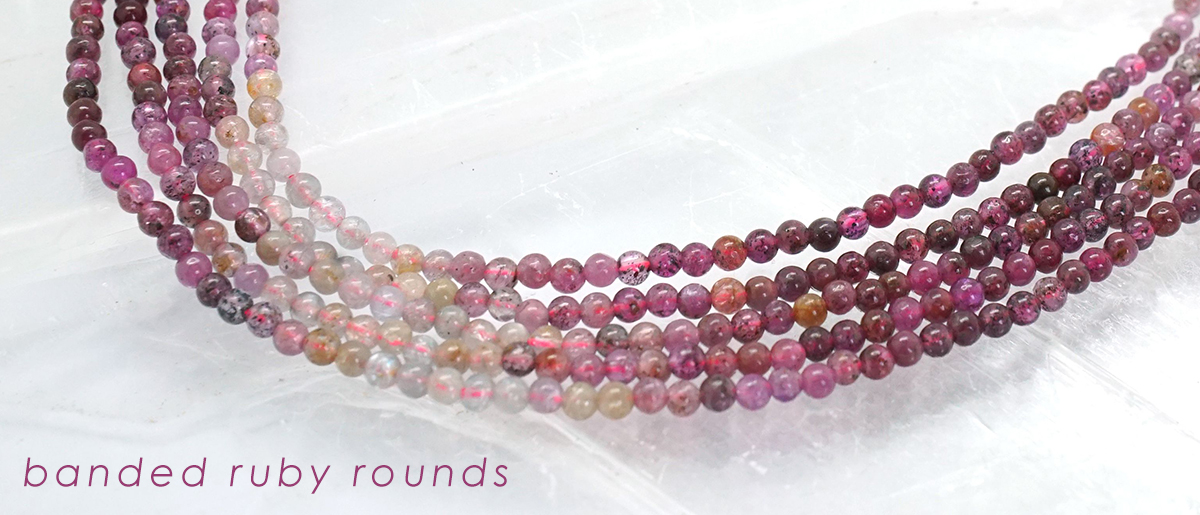
Banded strands have multiple colors of the same stone type in one strand. Most gemstones have different coloring depending on the minerals present in the stone, but have the same chemical formation and crystal structure to still be considered the same stone. In the case of turquoise, because of the oxidation process in chromium it is not uncommon to find traces of brown, different grades of blue and green in the stone. For some turquoise samples, especially those coming from famous mines, rough specimens with these color differences might be discarded or looked over for lacking uniformity. Banded strands allow these specimens to be used and appreciated by gemstone lovers and designers.
When designing with banded strands, arranging the beads by their shades is a classic staple. Ombre designs have gained popularity as more subtle jewelry has swung back into favor. However, all of the stones on each strand harmonize with each other, so feel free to pick and choose beads from the strand and pair them how you like!
Our large selection of micro facet gemstones, from our friends at Dakota Stones, are small diamond cut gemstones expertly cut into rounds, rondelles, bicones, cubes and coins. Learn about how these gemstones are cut and get designing with micro facet gemstones in a Cellini Spiral and adding it to a fun memory wire wrap bracelet.
Micro Faceted Gemstones
Dakota Stones’ faceted gemstones ‘are machine cut with industrial-grade diamonds. With the use of new technology, geometry and an understanding of light, which is extremely important for precious stones with strong dispersion, [Dakota Stones] can now make the facets on each stone cleaner, sharper, and more consistent with minimal or no need for polishing. This means…manufacturing mathematically precise cuts on extremely small surfaces while getting the same luster and shine as we would see on large surfaces.’
Now let’s get to designing with small faceted gemstones!
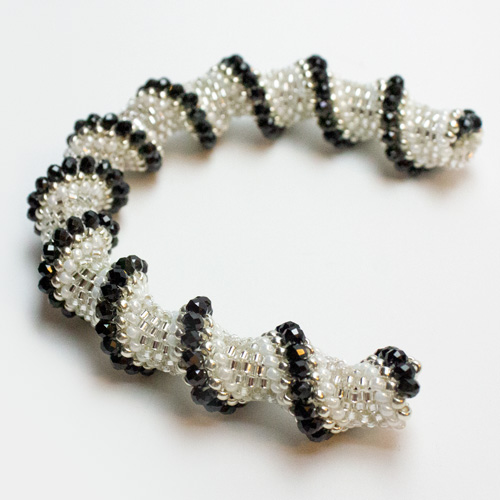
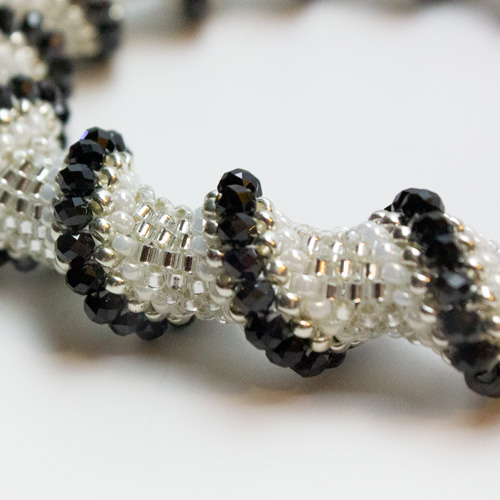
Black Spinel Cellini Spiral Memory Wire Bracelet
The basic design for the cellini spiral is using a 11/0 delica, 11/0 round Miyuki seed bead and 8/0 Miyuki seed bead. In this case, we’re subbing the 8/0 with some gorgeous 4mm rondelle Black Spinel gemstone bead.
Items used in Cellini Spiral pattern:
BSP4RL-F – 4mm Black Spinel Diamond Faceted Rondelle Beads
Start with 4-5 feet of beading thread. (This is a starting piece, you’ll need to add more to complete the spiral.) Sew on 6 delica beads, 2 pearl beads, 2 silver beads, 2 black spinel beads, 2 silver beads and 2 pearl beads.
2. Tie threads together to create a loop of beads. Tie two knots, making sure to leave a 5-6 inch tail end. Sew through loop once around.
3. You are going to peyote stitch around the looped beads: – Pick up a delica bead skip a delica on the loop beads, sew through next delica. – Pick up another delica, skip a delica and sew through next delica. – Pick up a delica skip first pearl seed bead and sew through next pearl seed bead. – Pick up a pearl seed bead, skip silver bead and sew through next silver bead. – Pick up a silver bead, skip first black spinel and sew through next black spinel. – Pick up a black spinel, skip first silver bead and sew through next silver bead. – Pick up a silver bead skip first pearl seed bead and sew through next peal seed bead. – Pick up a pearl bead, skip first delica, sew through next delica and up through the next delica to start the next row.
NOTE: As a helpful tip while you sew around your spiral, when you are picking up a bead, you are picking up the bead corresponding to the bead you just sewn out of. So if you sewed out of a silver seed bead, you should pick up a silver seed bead in your pattern.
4. Repeat step 3 for the next row. By this time, your spiral will start to take shape. Use a 5mm wide dowel to help guide your bead in a spiral shape.
5. Repeat step 3 until you’ve used up all your Black Spinel beads.
NOTE: Between your spiral, you’ll run out of beading thread. To add more, sew your ends through your spiral, looping around a couple of beads before cutting off excess. Add another 4-5 feet of beading thread to your needle, loop around some beads of your spiral before guiding your needle back through the path of where you’ve left off to continue your spiral pattern.
6. Your Cellini spiral is done.
7. To make your memory wire bracelet, make a simple loop to one end of your memory wire with Memory Wire Finishing Pliers.
8. Slide on an onyx bead, spacer, 3 onyx beads, spacer and another onyx bead. Slide end cap and 3 inches of leather and end cap. Slide on Cellini spiral, onyx bead, spacer, 3 onyx beads, spacer and another onyx bead. Slide on another end cap, 3 inches of leather and end cap.
9. Cut excess memory wire with Memory Wire Cutters, leaving about 1/4 to 1/2 inches. Make a simple loop with this end.
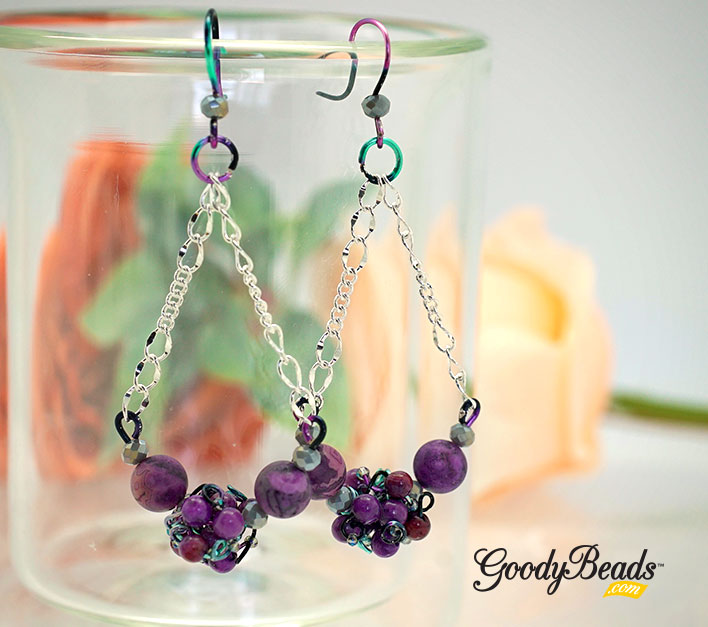
DIY Hanging Earrings with Purple Lace Agate Gemstones
This pair of earring is very unique because all the findings are handmade using multi-color Artistic Wire. Add the fine beauty of Purple Lace Agate to match the wires for a bold pop of color!
String TEN 4mm gemstone and TEN Chinese glass alternating them on the 22-gauge wire. (Do not cut wire off of spool.)
Make a loop an inch from the end then pull one of each bead next to the loop you’ve made and then make a loop on the other side, without cutting wire. Continue making loops, alternating in different directions, while pulling beads up until you have loops after all of the beads.
Cut loop of beads from the spool, leaving an inch of wire on either side. Gently wrap it around the pen/dowl working it to form a bead.
Slide bead off the pen and onto a 3.25 inch piece of 18-gauge wire. Slide on a 3mm Chinese glass next to the wire bead followed by an 8mm gemstone and another 3mm Chinese glass and make a simple loop. Repeat on the other side and curve thee wire slightly.
To make ear wires, cut two 3-inch pieces of 20-gauge wire. Make a loop to one end of both of the wires. Add a 3mm Chinese glass bead to each wire, then bend wires at a 45 degree angle on top of the bead. (Try to bend and make the ear wires both at the same time for consistency.) Wrap wire around pen to create an ear wire shape. Cut off excess wire if needed. Use a soft grit file to smooth out the ends or a Bur Cup tool.
Loop and coil 20-gauge wire with round nose pliers, making a 5-6mm loop. Cut loops to make 2 jump rings.
Trim chain link to have large loops on top and bottom. Cut 2 pieces.
Open one loop of your curved gemstone link, slide on a chain link end and close. Repeat to other end of link and chain.
Open jump rings you made, slide on both of your other chain ends and through loop of ear wires you made. Close jump rings.
Repeat all steps for other earring.
Earring Designed by Tia.
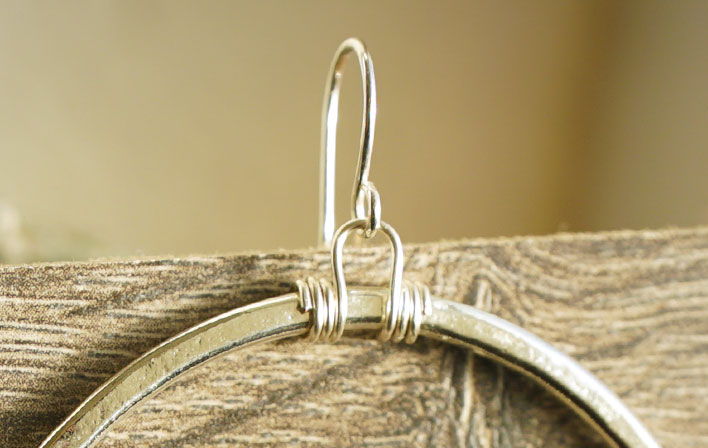
DIY Wire Wrapped Hoop Earrings with Microfacet Gemstones
Make a pair of Wire Wrapped Hoop Earrings using 26-gauge wire and 2mm faceted gemstones, all wrapped around a Nunn Design hoop. Though these may be dainty and minimalistic kind of earrings, they certainly don’t act like it. The large hoops and faceted sparkles from the gemstones will have everyone wanting one!
Items used in earrings:
Z008275 (2) – 50mm Bright .999 Fine Silver Plated Flat Grande Hoop
AW00215 – 26 Gauge Silver Plated Tarnish Resistant Silver Artistic Wire Or WR00035 – 26 Gauge German Bead Wire
TC02306 – Silver Filled Front Loop Earring Wire by Tierracast®
Wrap 4 coils around the hoop with the wire end. Pinch coils together to keep the coils tight. Slide on 31 beads or half of your gemstones onto the wire.
Pick up a gemstone and wrap around the hoop once, making sure to situate the bead on the outer rim of the hoop. Repeat to the rest of the gemstones. Make sure to pinch your coils together to keep your wires tight.
End your wire wrapping with 4 coils and cut off excess.
Cut a 5″ piece of wire or use the rest of your excess wire. Find the midpoint of your hoop, where you haven’t wire wrapped; this is where you will make your wire loop. Make 3 coils and pinch them together to keep the coils tight. Use your round nose pliers and clamp it next to your coil. How far you clamp in will determine the size of your loop. Wrap your wire around the round nose and downwards. While holding the plier in place, wrap the rest of the wire 3 more times the opposite direction of the first set of coils. Keep coils tight. Cut off excess wire.
Open earwire loop and slide on hoop dangle loop you made in step 5. Close loop.
Repeat all steps for other earring.
Designed by Kayla Braun-Waletzke
DIY Golden Goddess Earrings with Lapis Gemstones
Our February Daily DIY project is all about layering! The DIY Golden Goddess Earrings with Lapis Gemstones are designed by Jacque, who made the amazing Macrame Planter Hanger with Large-Hole Beads last summer. She is showing off her jewelry skills with these post earring made with Lapis gemstones, enamel connector and gold findings.
Slide a lapis gemstone onto a headpin and make a simple or wrapped loop.
Open 8mm jump ring, slide on one hole of enamel link and through hoop of Gold Etched Round Hoop. Close jump ring.
Open 9mm jump ring, slide through other hole of enamel link, lapis dangle and top loop of Gold Etched Round Hoop. You want to make sure the dangle is behind the enamel. Close jump ring.
Open oval jump ring, through top loop of Gold Etched Round Hoop and post earring loop. Close jump ring. Make sure the white enamel is facing outwards.
Repeat all steps for other earring.
Designed by Jacque
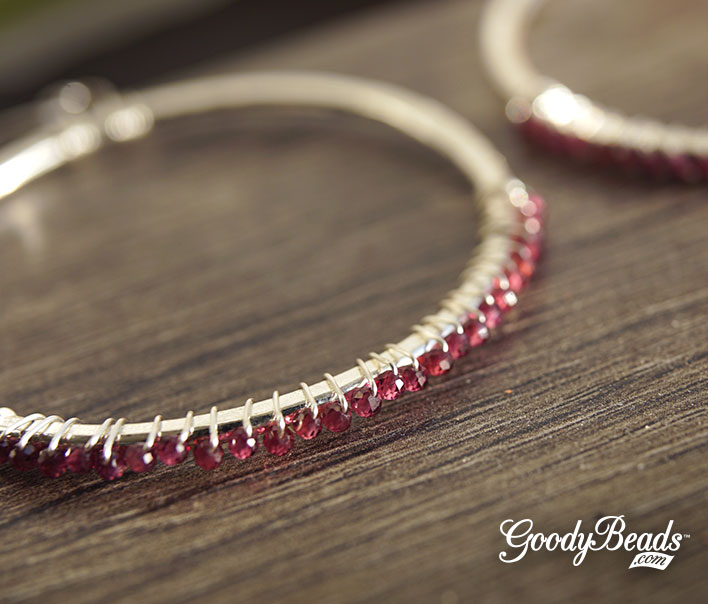
DIY Bracelet Cuff with Mircofacet Garnet Gemstones
Today’s February Daily DIY features the DIY Bracelet Cuff with Mircofacet Garnet Gemstones from Dakota Stones. Kayla, jewelry designer from Dakota Stones, created this dainty and gorgeous cuff using gemstones wrapped around a Nunn Design cuff with 24-gauge wire.
Starting a third of the way up the cuff, wrap your wire making 4-5 coils. Pinch the coils together to keep the coils close and tight.
Slide on a gemstone bead, lay and situate the gemstone on the flat cuff and wrap the wire around the cuff two times, while keeping the gemstone in place.
Repeat step 3 to the rest of your gemstones and coiling 2 times between each gemstone. Make sure to pinch your coils together to keep coils tight.
At the last coil, make 4-5 coils before cutting off excess.
Jewelry Design by Kayla Braun-Waletzke
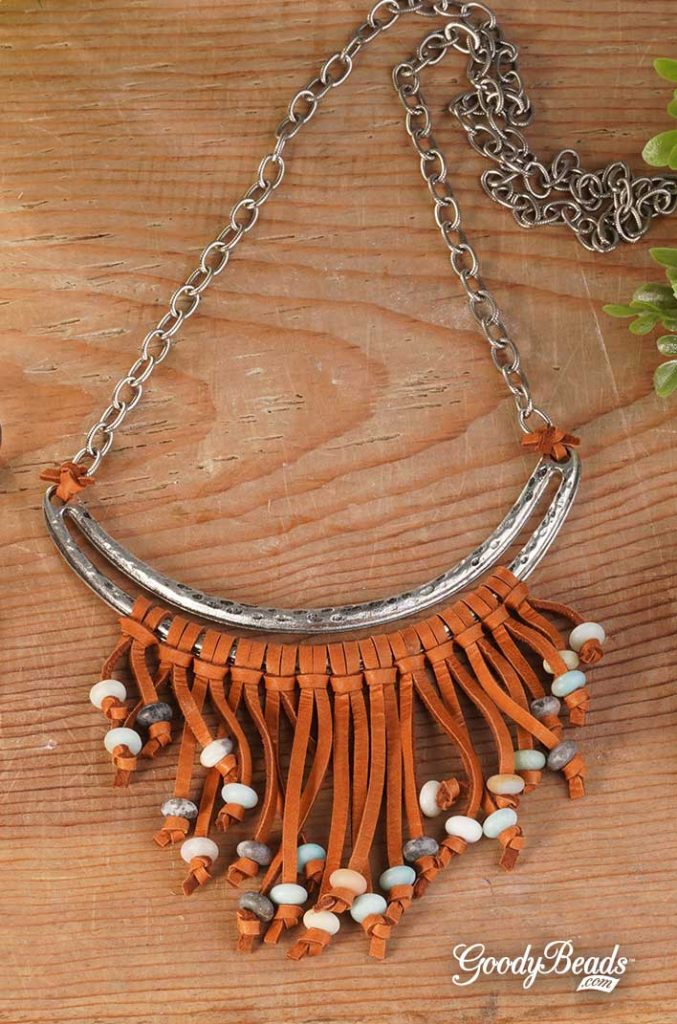
DIY Leather Fringe Bib Necklace with Deerskin Leather Lace
Try out this fun DIY bib necklace with deerskin lace fringe and Black Gold Amazonite large-hole gemstone beads from our Deerskin Lace March 2018 Trend.
Exceptionally strong, yet soft and supple, Deerskin Lace is expertly cut from only the finest North American deer hides. Great for all your jewelry and beading projects or for garment lacing. Deerskin Lace is the softest leather lace around.
Take a 7″ leather and make a lark’s head knot on the bottom bar of the bib necklace. Repeat 2 more times.
Make a lark’s head knot with the 10″ leather, 7 times.
Make a lark’s head knot with the 7″ leather, 3 times.
Slide a gemstone to the middle strand of your leather fringes and make a knot. Repeat outwards, staggering your knots so that your fringes get shorter and shorter. Make sure your knots are where you’d want them to be and then cut off excess leather.
Tie one end of the chain with the side hole of your bib connector with a 3″ piece of leather, twice. Repeat to other side.
Optional, you can cut chain in half to add a clasp. Or cut chain shorter for a shorter length.
Men’s Jewelry, Everything you need to know
Hello everyone, John here. I wanted to take some time and do a write up on men’s jewelry from a guys perspective. It’s something people are asking us about a fair amount. So here’s what I think about the world of guys and wearing jewelry!
Men’s Jewelry, what’s the deal?
Men’s clothing options are generally limited, especially if you’re dressing up you’re mostly confined to a suit, where the only opportunity for some personal style is with the accessories and details. This is where men’s jewelry gives a unique space for a guy to add some personal flair to their outfits. Jewelry can go a long way to get a look that stands out in the crowd of suits. Not as many men wear jewelry compared to women so when they do, it doesn’t go unnoticed.
What do men prefer in their jewelry?
Typically, men will gravitate toward simpler designs. Bands of leather, chains or a metallic cuff. The personalization comes with small details of items, colors or life events that are meaningful to them, or simply colors they like that go with lots of their wardrobe.
As far as colorways and material earth tones, leather and chain are the biggest winners here. Matte, natural colors and a minimal amount of bling and shine. Men will typically prefer subtle jewelry that accents what their wearing, but is far from being the feature of their outfit.
A watch has been a long-standing staple for men’s jewelry. If a guy wears a watch there is no reason to not also have a bracelet on that wrist, but lean toward something small that matches the watch and doesn’t take away from it being the party piece in too big of a way.
Stacking bracelets is common for women and also works great for men’s styles! Stacking 2-3 thinner or generally smaller bracelets is a popular look. The styles of these bracelets can either be a perfect match or just styles and colors that complement each other well.
Paracord is another material that is pretty popular in men’s designs. Designs incorporating it are especially great for a guy who frequents a tent, canoe or other adventure style activities, since the paracord itself could end up being very useful for some practical purposes in a bind.
Overall, make it look like you aren’t trying. Effortless appearance in style is what makes it work best. Just like everyone who wears jewelry, wear something that brings you confidence.
Design, what to look for
Some of this we covered in the section above, but there are a few things that you should keep in mind when designing jewelry for men. When you’re planning your design consider making something durable. Men tend to be less careful with their jewelry than women and will also frequently wear them while doing projects, yardwork or other things around the house that could potentially break something fragile. If you decide on using some type of glass bead, consider trying to protect it a bit with leather on both sides, like the projects in this blog about wrap bracelets bracelet kit we have on our site.
Don’t forget to consider designs you’ve used for yourself or friends in the past. Many of those designs work great for Men’s jewelry but, with a few small changes to the materials and/or color way. I personally think almost all of the designs done by Diakonos Designs could be worn by men or women.
Always keep in mind that everyone’s taste is different, and, these are a general rule of thumb. Some guys will like lots of color and shine, it just depends on their personal taste. Plus, 2021 men’s jewelry trends are saying a dash of bright color will be a popular look in this coming year, so be bold. If you know the person you’re making your jewelry for make what you think they’ll like. But, if you’re designing for men in general these are a good set of ideas to start from. Make sure you don’t forget, rules are made to be broken, let your creativity go wild and make something you love! At the end of the day, enjoying what you’ve made is far more important than following trends.
My Design
Metal Bracelet Cuff
This one is pretty easy. Just a simple cuff, all you have to do is put it on. It adds a nice metallic flair while still being understated.
Chain Bracelet
Overall these designs are pretty easy to put together. I’m going for an understated simple look that has just enough flair to be noticed but not be the feature of my look. First you want to get the right length of chain. I am using a matte black paperclip chain. If you’re able to measure for the person you’re making it for that’s the best option. But, if you’re not able to do that the average man’s wrist size is around 8 inches. That’s a good size to go with if you’re not making it for a specific person.
Anyway, on to the assembly of the chain bracelet. All you need to do is cut your length of chain to the appropriate length, then using pliers open the matte black jump rings and put them on the ends of the chain. Keeping the jump rings open add the magnetic clasp into the jump ring then close the jump ring. It’s as simple as that!
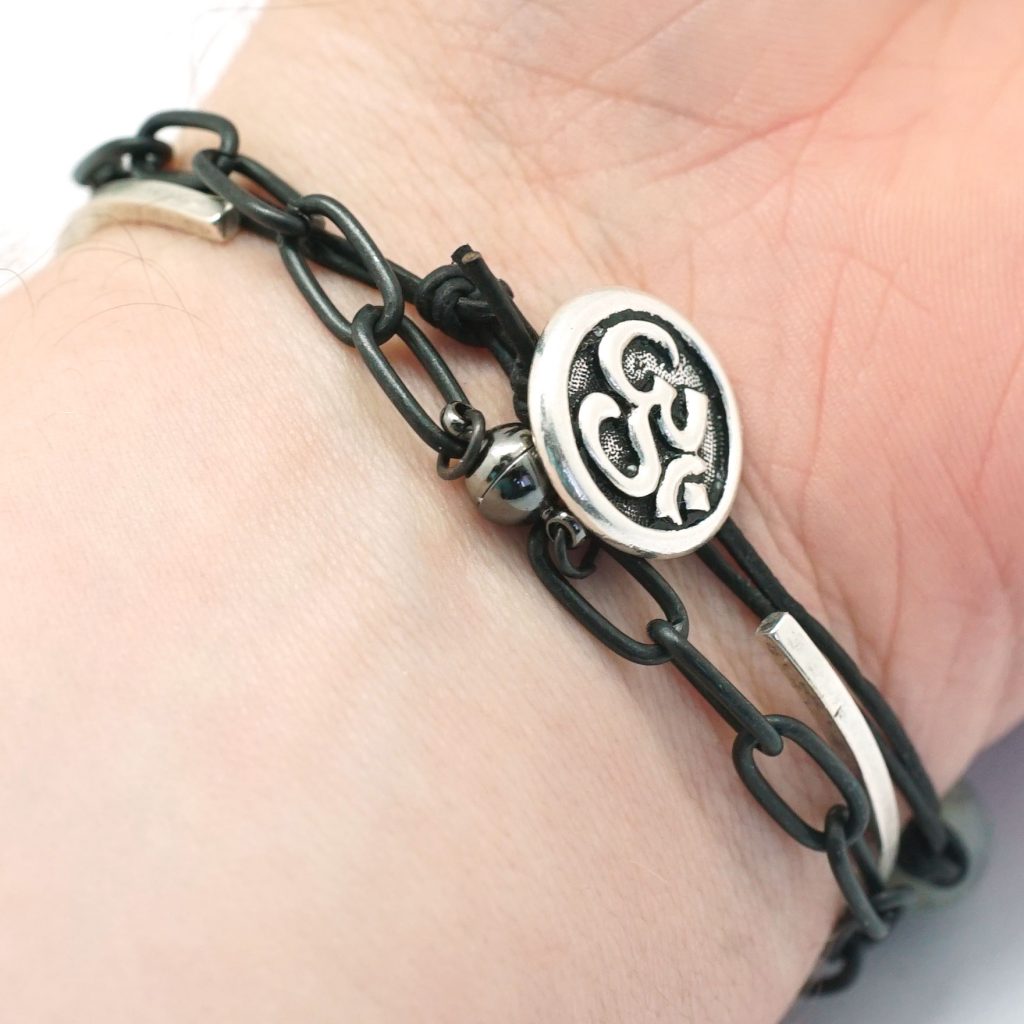
Leather with GemstoneBracelet
I’m looking for this piece to be a small touch of color from the flashing blues of the large hole labradorite, which will contrast well with the black and silver we have in the rest of the design. Then, a nice finish with a TierraCast button.
To make this final piece of our stack you will start by cutting a length of .5mm black round leather. Cut it to twice the length of your chain from the previous bracelet, but you’ll be doubling up the leather. Also, leave an inch or two extra for your knot to finish it. First, tie the button in the middle of your length of leather. I used a simple overhand knot. I then added another knot about an inch further up to provide a stop for the gemstones. Next slide on your large hole labradorite beads. I’m going to be using 7 stones simply because I prefer not feeling the beads wrapping around my wrist and 7 will keep it on top. Of course you can change this and add more beads if you’d like! Once the beads are on you just tie your knot like you did on the other side to hold the beads together. Finally, add a knot to close the leather at the end and give a place for your button to hold it all together, then trim any leftover leather!
Then put all of these pieces on one wrist and you’re ready to go!
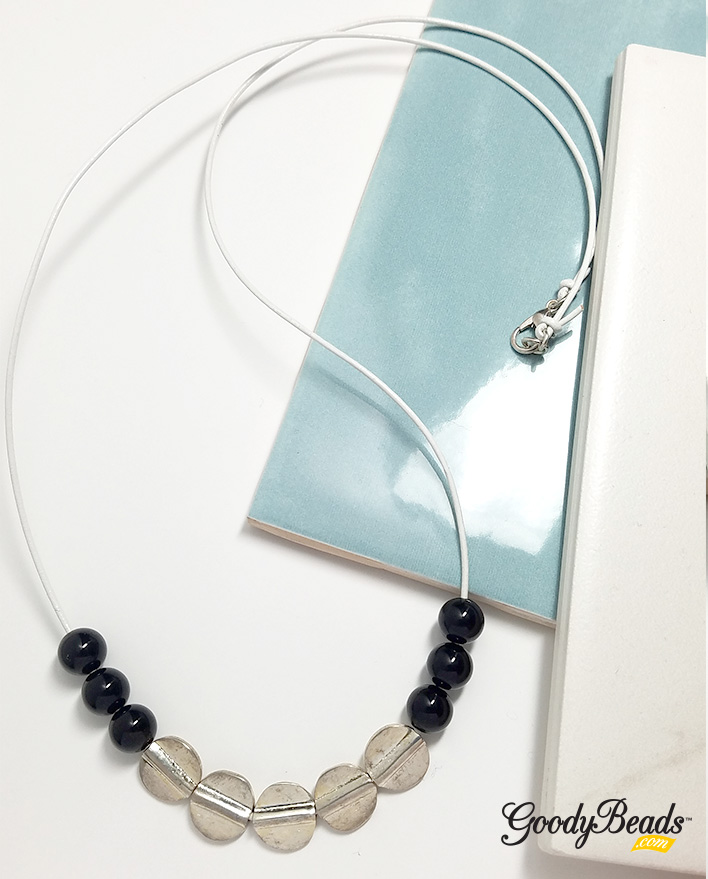
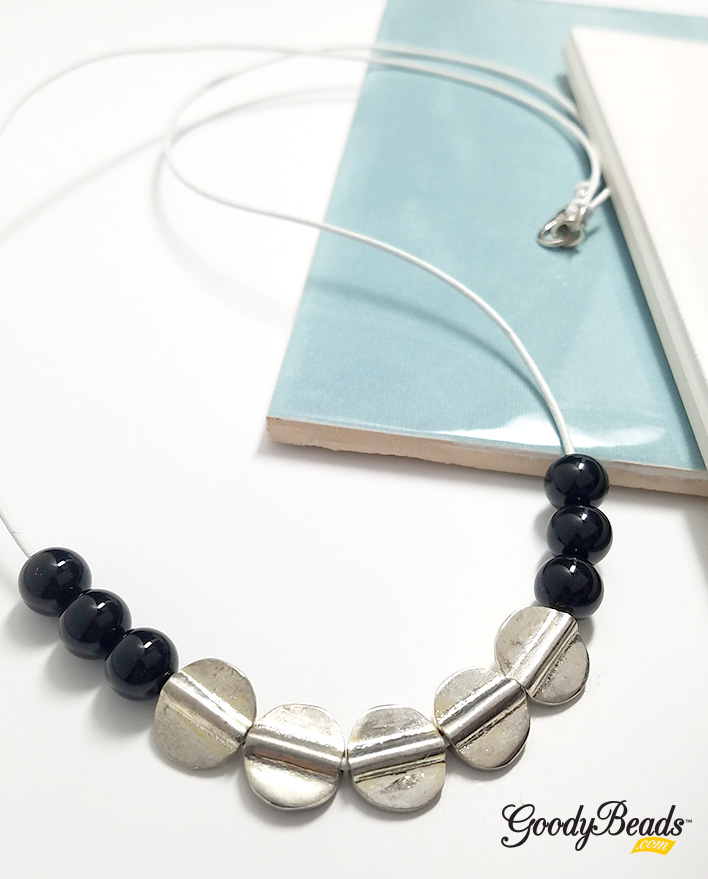
Black & White Gemstone Leather Necklace
This Gemstone Leather Necklace incorporates the classic black and white colors. It is a fun piece for a business pantsuit or a small dinner party. Made with large-hole gemstones and 1mm leather cord, you can make this in fun necklace in minutes!
Open 4mm jump ring, slide through loop of clasp and close jump ring. Open another 4mm jump ring, slide through closed ring and close jump ring. Open lobster clasp and clasp onto the closed ring.
Cut a piece of leather at 27 inches.
Slide one end of the leather through a 4mm jump ring in step 1, about 1.5 inch of the way. Make a slip knot. Use pliers to tighten the slip knot before cutting off excess leather end.
4. Slide on the following onto the leather: 3 onyx beads, 5 flat brass beads and 3 onyx beads. 5. Repeat step 3 to other leather end and through other 4mm jump ring from Step 1.
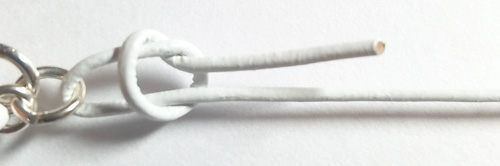
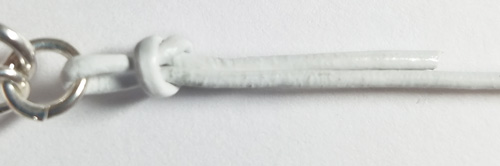
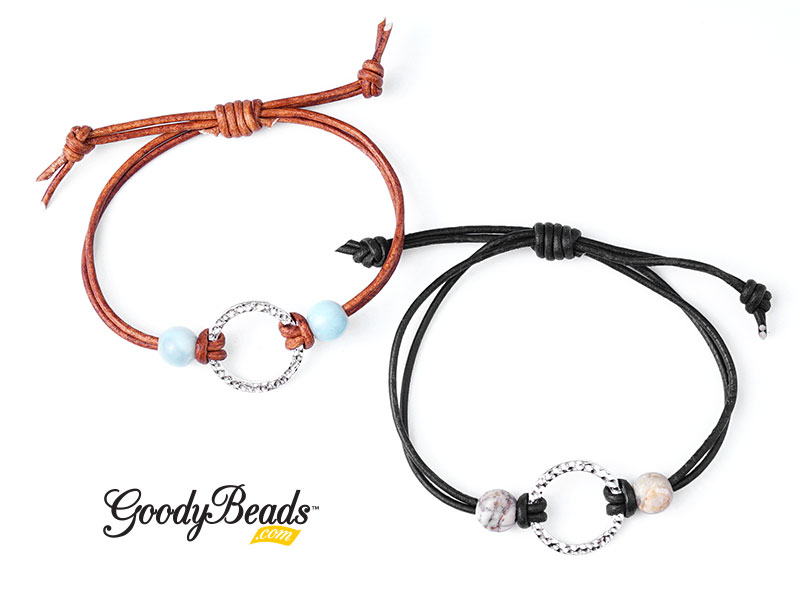
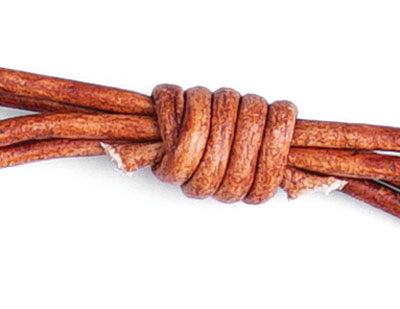
DIY Ring Link Adjustable Leather Bracelet
Today’s project is the DIY Ring Link Adjustable Leather Bracelet we demoed at the Pinners Conference. This project uses some of our favorite branded components like TierraCast ring component, Dakota Stones large-hole gemstones and Leather Cord USA 1.5mm leather! Combine them all and get a fun DIY you’ll need to make for all your friends.
What you’ll need for Ring Link Adjustable Leather Bracelet:
Take the filer and give the back of the cabs a few light scratches.
Wipe the back of the cab. Add a small dot of Super New Glue.
gently position the post earrings in the center of the cab back.
Repeat for other earring.
Leave earrings for a few hours to dry.
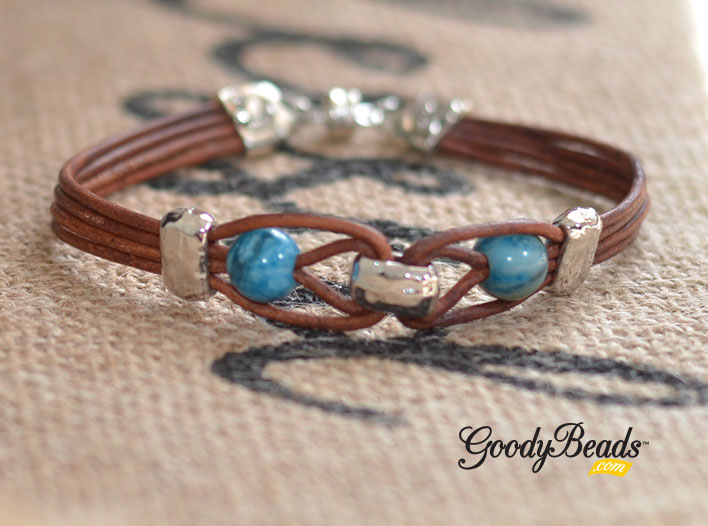
DIY Leather Band Bracelet with Large-Hole Gemstones
Let’s welcome fall with a this fun DIY using LeatherCord USA 1.5mm leather, Blue Crazy Lace large-hole gemstones from Dakota Stones and the perfect findings from TierraCast to pull it all together.
What you’ll need:
BCL8RDLH-8 – 8mm Blue Crazy Lace Large-Hole Gemstones
Slide all 4 pieces of leather through a barrel bead and center the bead in the middle of the leather pieces.
Divide 2 leather pieces to each side of the barrel bead.
On one side, fold the inner leather in half and slide a gemstone bead onto both leather ends.
Fold the outer leather strands in half, laying them on either side of the gemstone you added in Step 4 and slide all 4 ends through a barrel bead. Adjust leather strands to lay flat, and slide barrel up close to the gemstone you previously added.
Using nylon pliers or a flat nose pliers, gently crimp down on the barrel bead to keep the middle leather and gemstone in place.
Repeat steps 4 through 6 to other side of the bracelet.
Trim to wrist size and minus about ½ inch; making sure your barrel/gemstone design is centered and you’re making a straight flush cut.
Add an end cap to one end of your leather design, making sure all 4 leather strands fit inside and crimp down on your end cap using a flat nose or nylon pliers. Repeat on the other end of the bracelet.
Open 1 jump ring and slide on your end cap loop and clasp loop. Repeat on the other end cap loop and magnet end.