DIY Seed Bead and Gemstones Pointed Earrings with FREE Pattern Tutorial
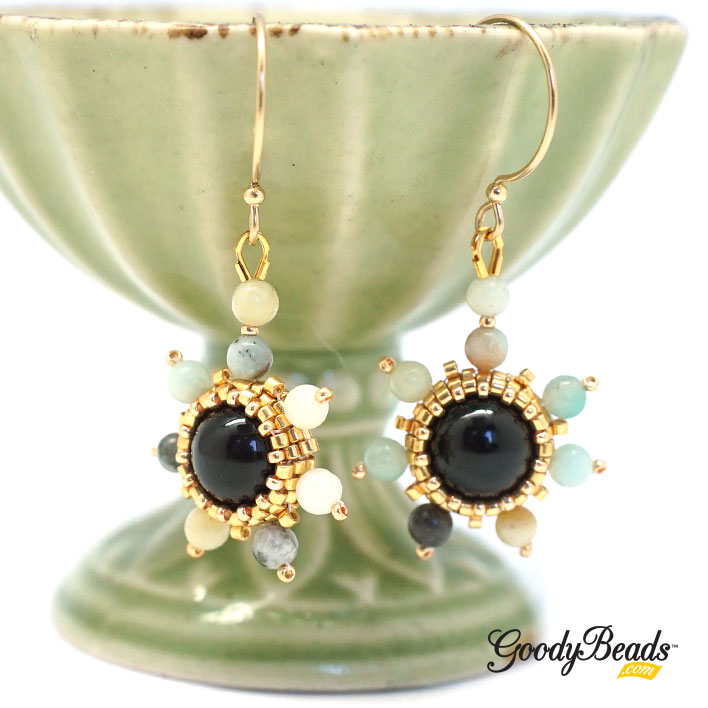
We’re combining seed bead and gemstones together in this FREE bead-stitch Pointed Earrings pattern tutorial.. It involves peyote stitching around a 10mm round gemstone bead and adding bursts of bead around the bezel. This earring pattern uses: 10mm round gemstones, 4mm round gemstones, wire guardians, 11/0 Delica seed beads and 15/0 round seed beads. And earwires, beading thread and needle.
TierraCast® Paw Print Bracelet by Tracy Proctor with Patten Tutorial
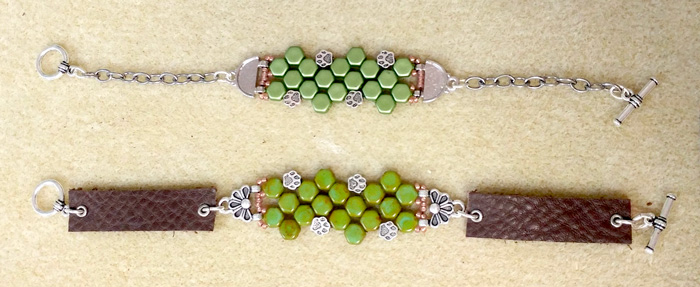
Get this free tutorial for the Paw Print Bracelet our friend Tracy from TierraCast provided. She accompanied Tory during one of our Facebook LIVE episodes and demonstrated this easy bead-stitching pattern. You can even check out the video or check out the instructions below to get you started!
Tracy was with us during our Facebook Live event and demoed how to stitch this pattern. Check out the episode HERE!
DIY Gemstone, Ribbon & Leather Bracelet with Video Tutorial
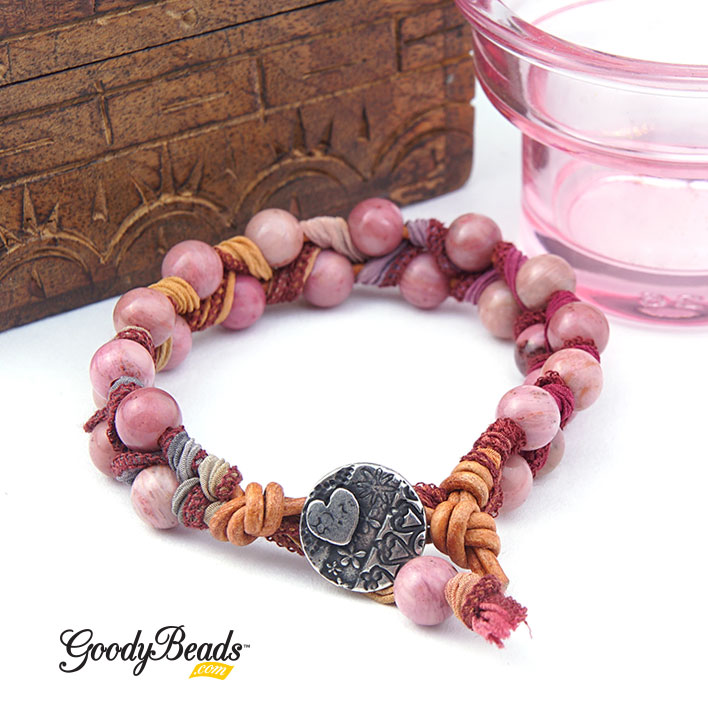
We’ve got a special DIY for your summer outfits! Create a leather bracelet with large-hole gemstones and braided with silk ribbon. This tutorial is a revamp of our previous blog post: Criss Cross Leather Bracelet by Dakota Stones. Check out this blog post for written directions on how to make these bracelets. Plus, below is a previous LIVE episode where Tory demonstrates how to braid and make this leather bracelet!
Items used in bracelets:
TC02349– 16.5mm Antique Pewter Amor Round Button by TierraCast®
A022076 – 2mm Natural Light Brown Round Leather Cord
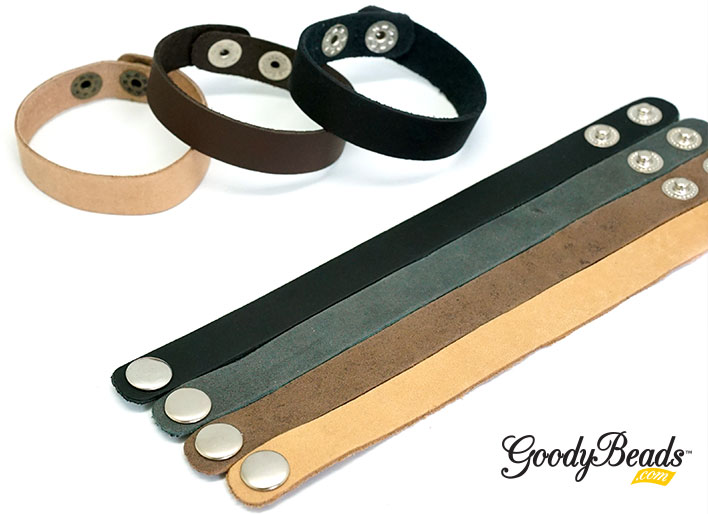
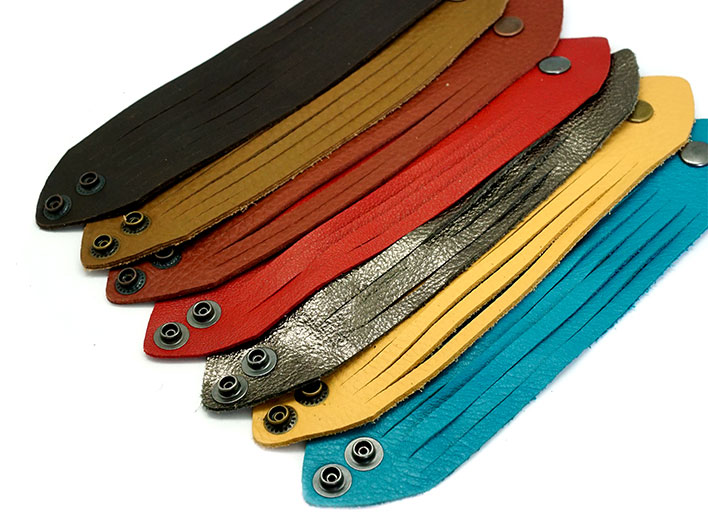
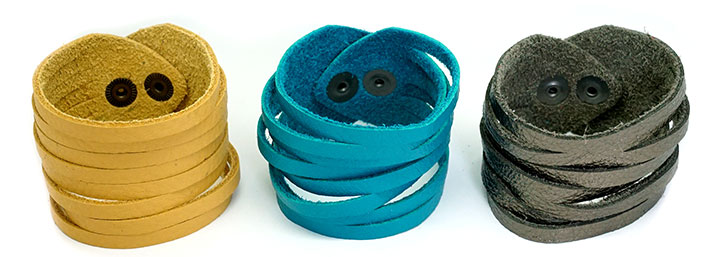
Design with NEW Leather Cuffs with snaps. Paint, rivet, or weave stringing materials between the strands. Or leave it as it since it’s a ready-to-wear cuffs that has two snaps to easily adjust between two size lengths.
Leather Cuffs
Our selection of leather cuffs comes in three different sizes. The similarities with all three sizes is their two snap option. You can adjust between the two snaps to lengthen or shorten the cuff.
20.5cmx1.5cm Leather Cuff: These cuffs are 20.5cm in length, while it’s 1.5cm wide. They are made with genuine leather from LeatherCord USA. Get them in 7 colors:
21.5cmx3.2cmm Leather Cuff: These cuffs are 12.5cm in length and 3.2cm in width. They have a wide band that you can easily punch holes in them and embellish. They are made with genuine leather from LeatherCord USA. Get them in 4 colors:
And lastly these Shredded Leather Cuffs looks really trendy! They are 9 inches long and 1.875 inches wide with 2 snap options for a 7 or 7.5 inches wrist length. Made from cow hide, they already have cuts in the leather to mimic a multi-strand look! Get them in 12 color ways:
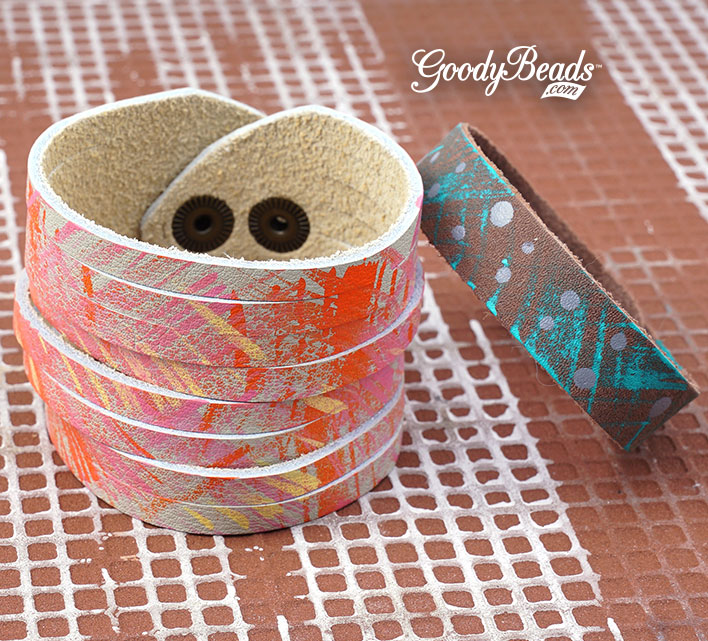
So with these bracelet cuffs, Tory was inspired to paint some Vintaj Patinas onto the cuff! She used different paints and made hash marks with brushes and also dots! How will you create with these leather cuffs? To paint with patinas, check out our video where our friend Candie Cooper joined us in painting leather with Patinas. CLICK HERE for video.
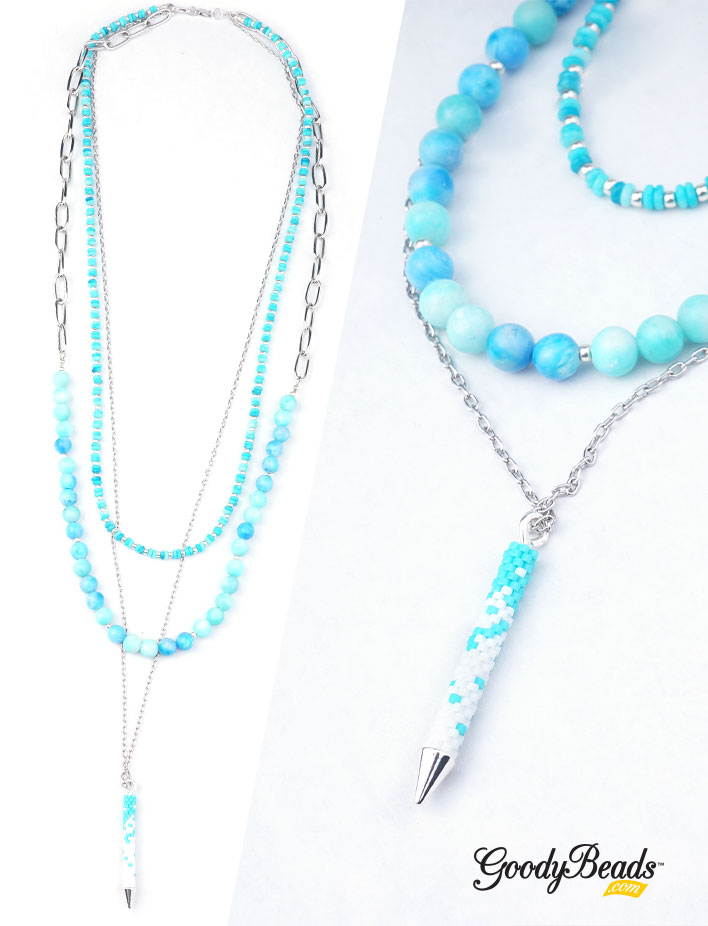
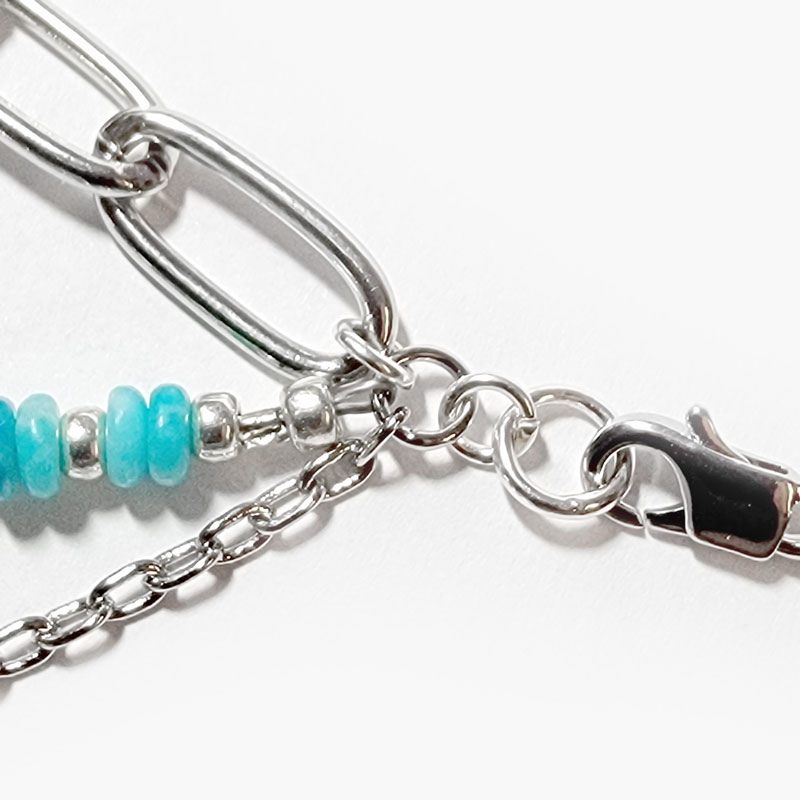
Summer is about hot weather and even hotter trends. Layered or Neck-Mess Necklaces are a must-have for summer because they are easy to pair with your casual to dressy outfit. We’ve got a fun DIY for you using many different components like Limited Edition gemstones mixes, seed beads, necklace chain and instant pendants; all layered together.
We love the different gemstone shapes in the Blue Skies gemstone mix, where we used the heishi and round beads in this mix for our layered necklace.
Items used in necklace:
Z001033 – 32 Inch Rhodium Plated Cable Chain Necklace
Cut paperclip chain in half to make two 6 inch pieces.
Cut a 20″ piece of soft flex wire.
String on the following:
Seed bead, crimp tube and seed bead.
5 round gemstones and seed bead. Repeat 6 more times.
Crimp tube and seed bead.
Loop one end of flex wire through a Wire Guardian, making sure to loop the wire guardian through a link of a 6″ paperclip chain. Slide flex wire through seed bead and crimp tube. And crimp the tube with crimping pliers. Cut end to leave about a 1/2 inch tail. Slide beads over to repeat and crimp on other end and other chain link.
Open a jump ring and slide on other end of paperclip chain and link it to the ends of the chain necklace. This is where all the layers will link on.
Cut a 30″ piece of soft flex wire.
String on the following bead sections:
Seed bead, crimp tube and seed bead
Two small heishi and seed bead. Repeat and string on 24inches of this sequence.
crimp tube and seed bead.
Feed one end of the flex wire through the Wire Guardian, making sure to loop the wire guardian through the end link of the chain necklace. (Same place you attached the paperclip chain in step 5) Slide flex wire through seed bead and crimp tube and make a crimp. Cut end to leave a 1/2 inch tail. Slide all the beads over to hide the tail end and repeat crimping on this this end.
9. Unclasp both of the clasp on the chain necklace. Open jump ring, slide on ring where all the layers are linked at and a closed ring. Do on both sides and add clasp back on.
10. Make peyote tube add to instant pendant. You can find pattern tutorial from the Peyote Tube with Beadalon Instant Pendants with components. Gently open the loop of the instant pendant just big enough to slide chain necklace on. And gently close it.
Celebrate Summer with DIY Seed Bead Rainbow Earrings
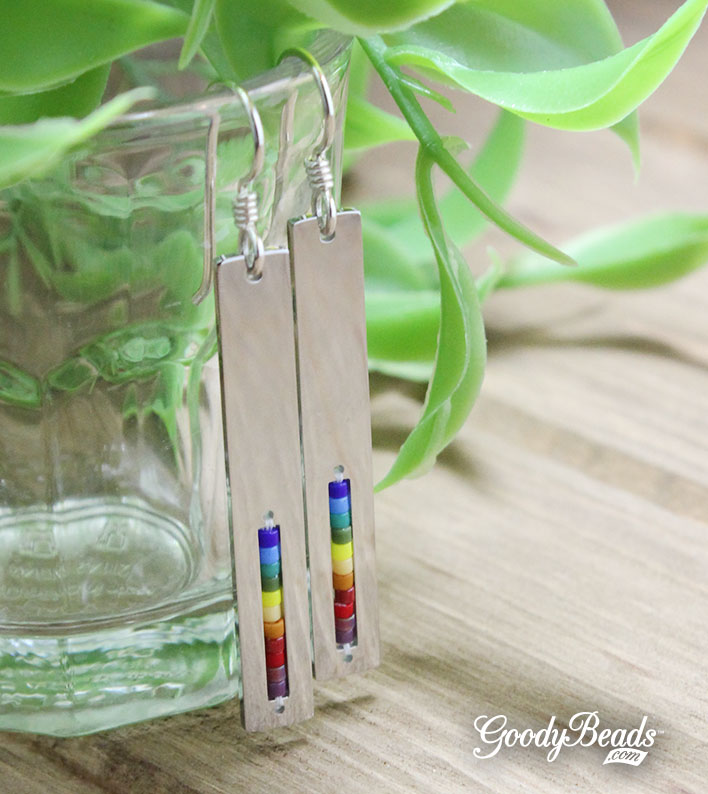
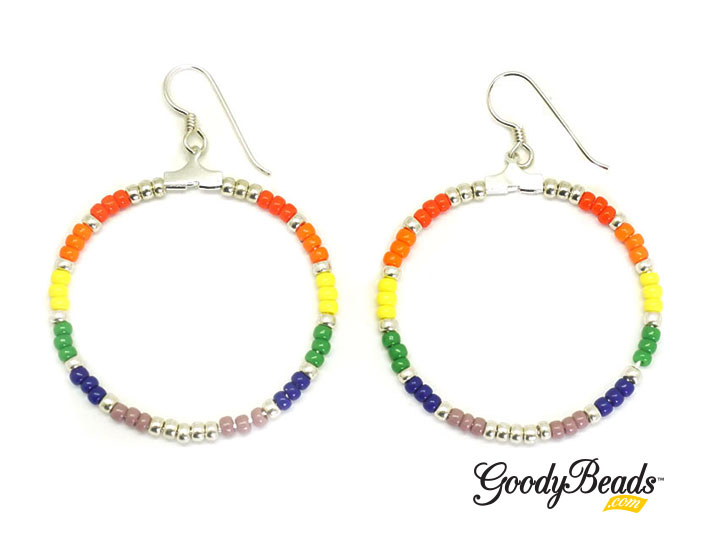
Whether you’re celebrating summer or June’s Pride month, these rainbow earrings are what you need for summer fun! We have two rainbow earring designs, one using Delica seed beads with beadable components and another with round seed beads on a hoop! Check them out!
Rainbow Pendant Earrings Designed By So Vang
Be mesmerized with these pair of earrings using a using a rainbow of Delica seed beads! Items used in earrings:
Add a stopper bead to your thread, leaving a 5 inch tail.
Sew through top hole of the beadable channel. Pick up the 11 seed beads in the color sequence of the rainbow: SB00292, SB02337, SB02336, SB03777, SB00290, SB02311, SB00284, SB03545, SB00295, SB03388 & SB04034
Sew through bottom hole of channel. Sew back through all seed beads. Tie both ends together to secure pattern, tie two times. Sew through top hole and sew through a few beads before cutting off excess. Add need to thread tail you left in step 2, sew down through all the beads, sew through bottom hole, sew through a few beads and cut off excess thread.
Open ear wire and slide on beadable pendant.
Repeat steps 2-5 for other earring; you should have enough of the thread on your needle to do the second earring.
Rainbow Hoop Earrings Designed by Heidi
Fall in love with these hoop earrings using a rainbow of seed beads. Items used in earrings:
Fringe Earrings with Gemstone Cube Beads – FREE Pattern Tutorial
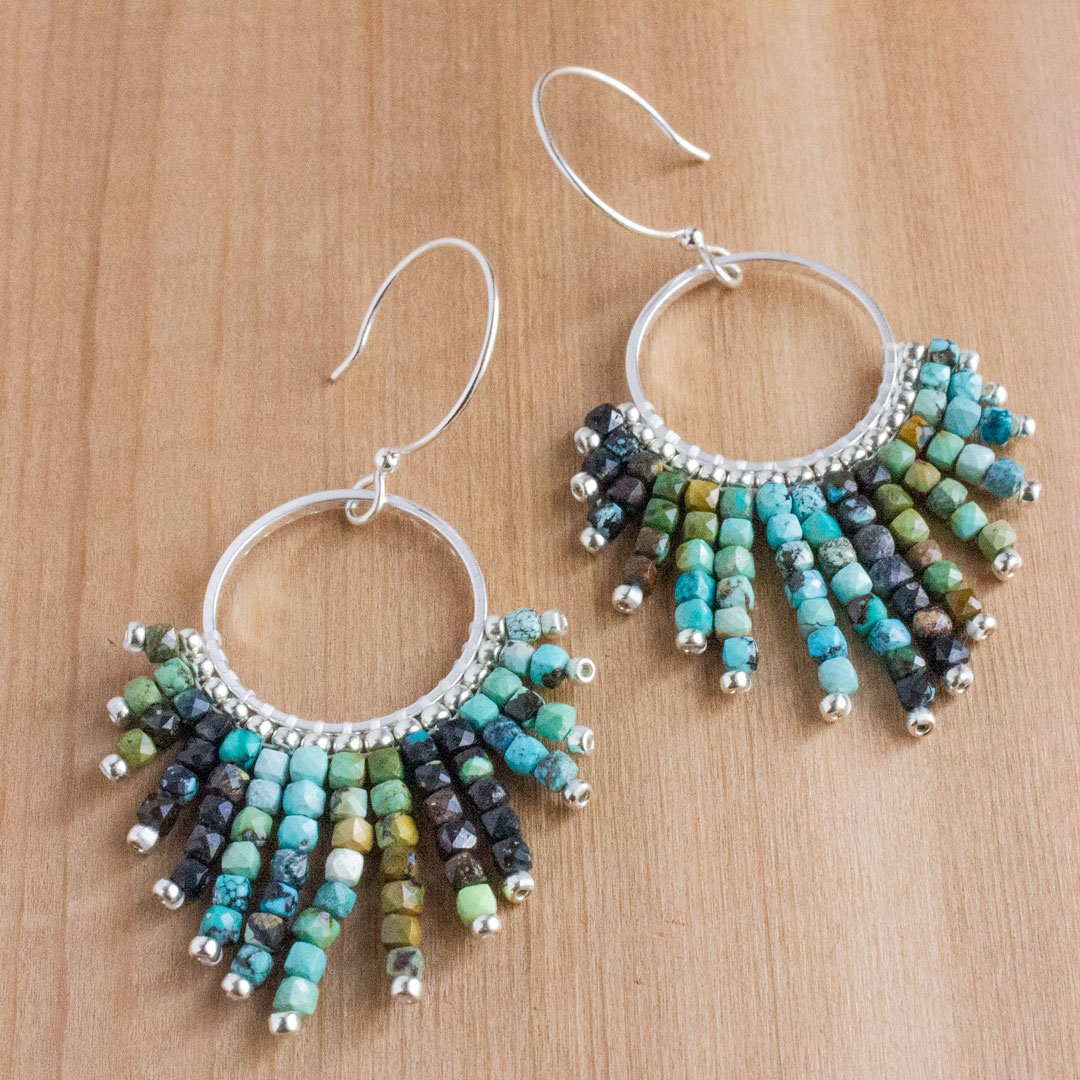
So Vang made this pair of earrings during one of our Facebook Lives and it has quickly become a favorite among jewelry makers! Dakota Stones 2mm gemstone cube beads were bead stitched onto a Beadalon® Quick Link, you’ll see on the PDF just how easy this pair of earrings are to make. Plus, check out the live episode where So demonstrates how to make them.
Check out the video tutorial on our Facebook Videos, to watch So demonstrate how to create these pair of earrings as well as a tip to using banded gemstone strands.
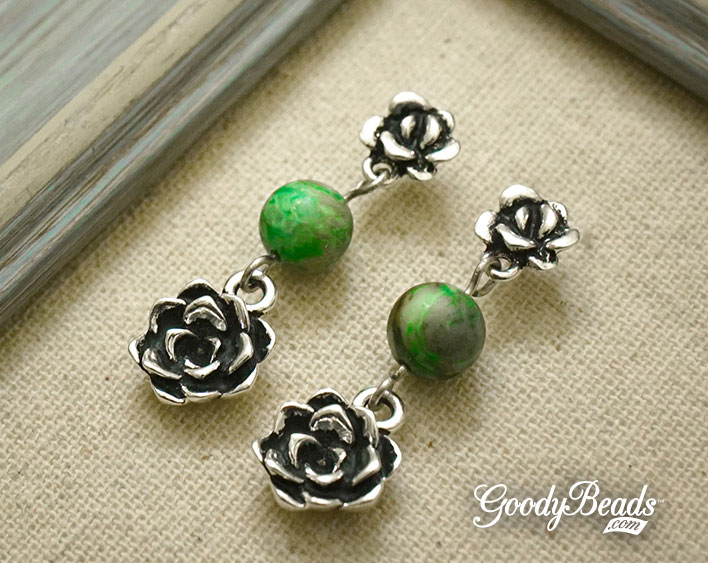
DIY Succulent Earrings with Crazy Lace Agate Gemstones
Make these cute succulent earrings using TierraCast succulent findings from their Renewal Collection and Crazy Lace Agate gemstones from Dakota Stones.
Items used in earrings:
TC02874 – 10mm Antique Silver Succulent Earring Post by TierraCast®
TC02877 (2) – 12mm Antique Silver Succulent Charm by TierraCast
GCL8RD-M-8 – MATTE Green Crazy Lace Agate 8mm Round 8-Inch
TC01253 (2) – 2 Inch Silver 21 Gauge Eyepin by TierraCast
TC01208 (2) – Clear Comfort Earring Back by Tierracast
Directions:
Open eyepin loop, slide on succulent charm and close loop.
Slide a gemstone onto the eyepin and make a simple loop.
Open loop and slide onto loop of post earring. Close loop. Make sure loops on eyepin are parallel and facing the same direction. This will help the succulent dangle to face forward.
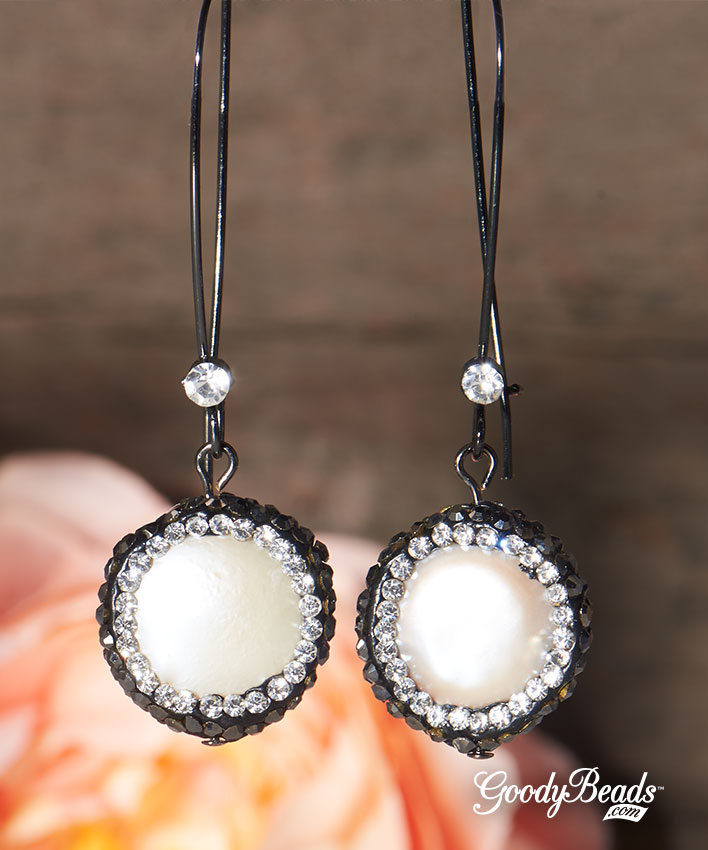
DIY Pearl Pavé Earrings with Rhinestone Pavé Beads
When I think about Mother’s Day, I think about pearls. They are what encompasses a mom; they’re precious, glowing and a treasure to have. Plus, these earrings are great to wear for any occasion! The rhinestones are laid around to frame the pearl. You can check out our other Rhinestone Pavé beads for more options!
Z009730 – 35mm Gunmetal Kidney with Clear Rhinestone Ear Wire
A019645 – 1.5 Inch Gunmetal Plated 22 Gauge Headpins
Directions:
Slide a bead onto a headpin and make a simple loop.
Open dangle loop and slide on the loop part of earring. Close dangle loop.
The loop on the earring will need to be pinched to that the dangle doesn’t (run away) slide off of the earwire. Use round nose pliers to gently pinch it to make the opening smaller.
Repeat all steps for other earring.
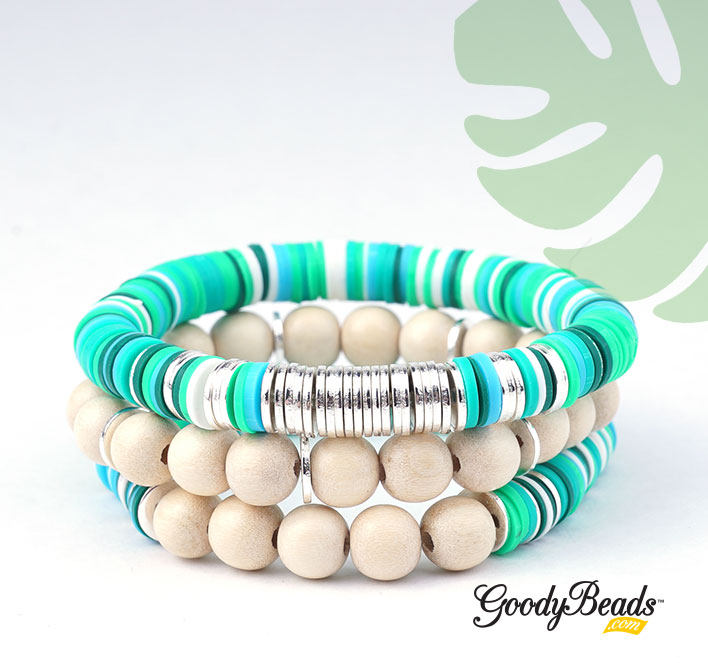
Summer Stretch Bracelets with Vinyl Beads
Catch this summer vibe with trendy summer stretch bracelets with Vinyl Beads. We’re pairing the fun array of colors with heishi silver beads and wood beads; all strung together on Beadalon Elasticity to make three different bracelets!
Items used in bracelet set:
X001271 – 8mm Green Mixed Vinyl Also, try out other 8mm Vinyl Beads colors!
Z017110 – 8mm Silver Plated Heishi You can also try the Gold Heishi – Z017112
Y004712 – 8mm Natural Wood Beads Also, try out other 8mm Round Wood Beads
Cut a piece of elastic cord to about 14 inches. Stretch the elastic to loosen its elasticity.
Cut one tip of the Big Eye Needle to open up the needle into a V-shape.
Fold elastic in half and slide needle on at that midpoint.
Slide on your beads; you will string on a length of your wrist size + .5″ more. Version A: 1 heishi, 4 vinyl beads, 2 heishi, 3 vinyl beads, 3 heishi, 2 vinyl beads, 20 heishi, 2 vinyl, 3 heishi, 3 vinyl, 3 heshi, 4 vinyl, 1 heishi and the rest will be vinyl beads to length advised above. Version B: 1 heishi, 3 vinyl, 1 heishi, 3 vinyl, 1 heishi, 5 wood beads, 1 heishi, 3 vinyl, 1 heishi, 3 vinyl, 1 heishi and the rest is vinyl beads. Version C: 3 wood beads, 1 heishi and repeat 7 more times. You don’t need to follow our versions but make your own fun sequence and designs.
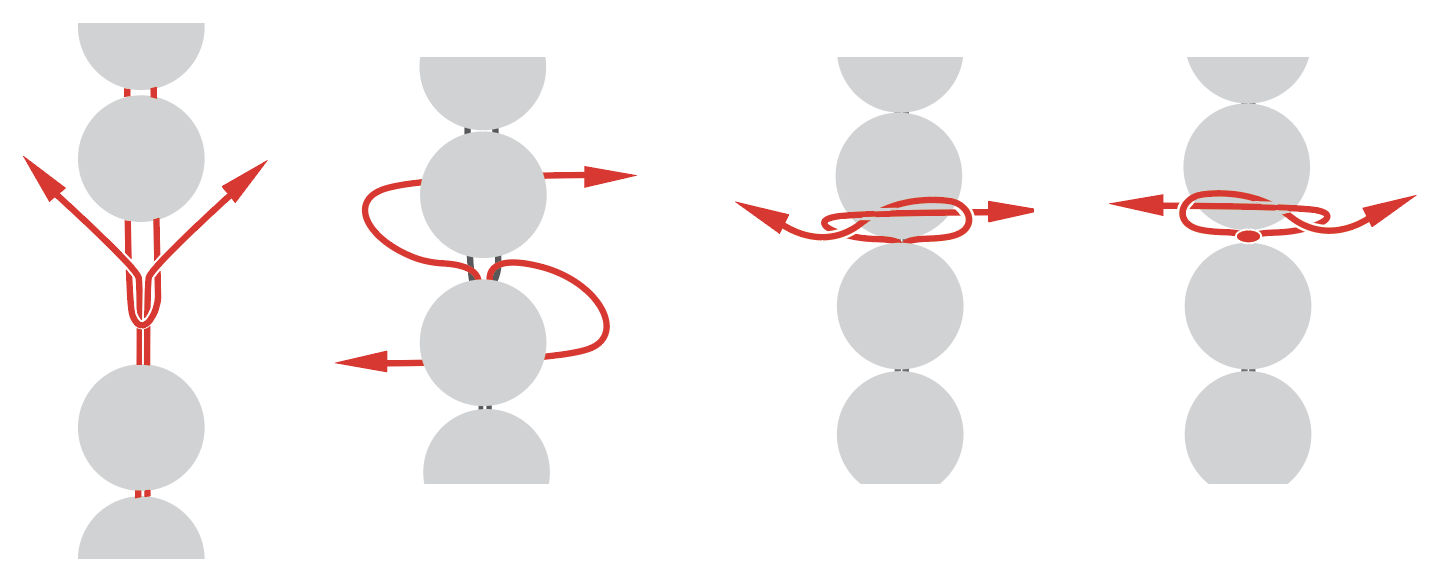
Take your strung on beads and make the Tricky Ricky Knot. Cut off excess elastic, leaving a 1/4″ tail. Gently stretch the bracelet so that the tail tucks and hides inside the holes of the beads.
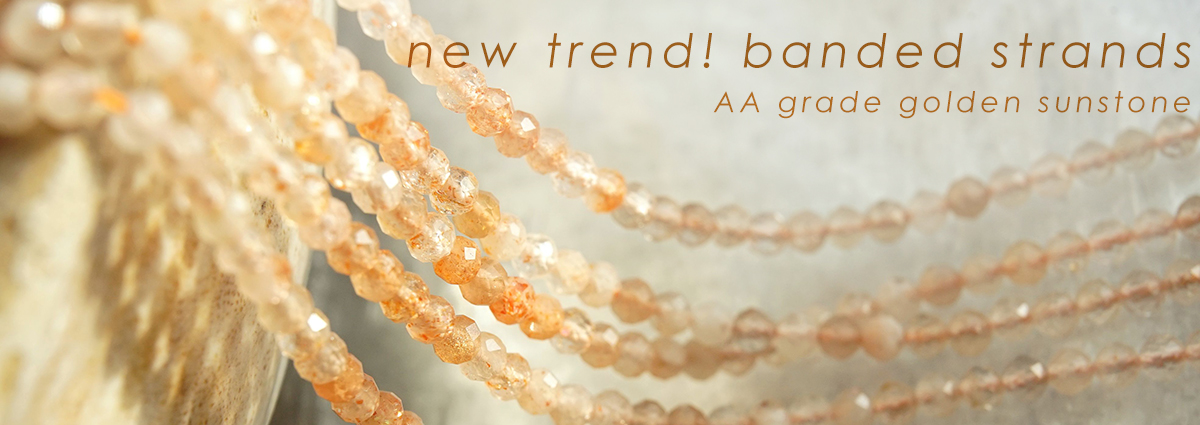
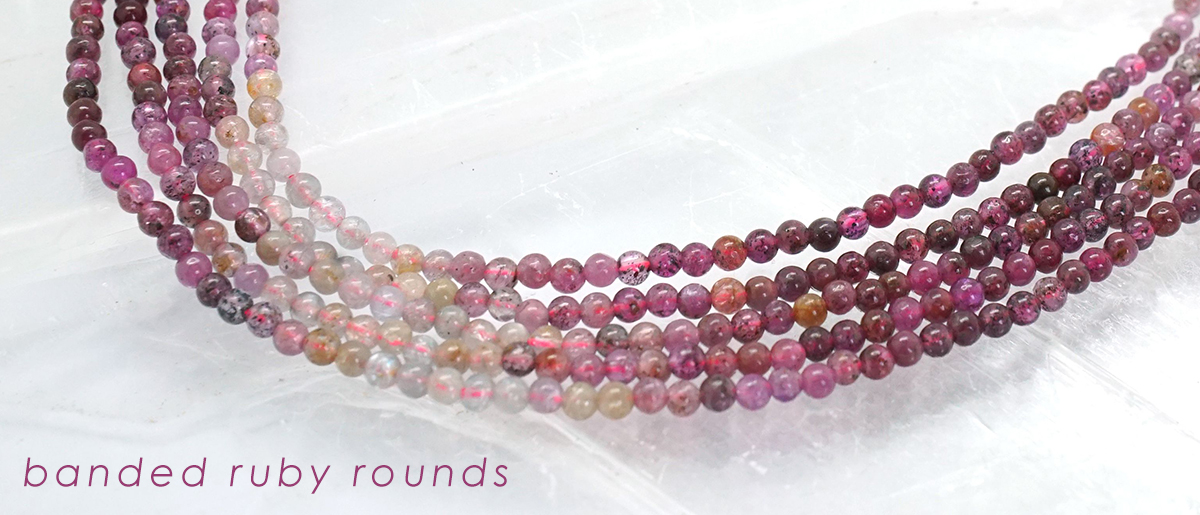
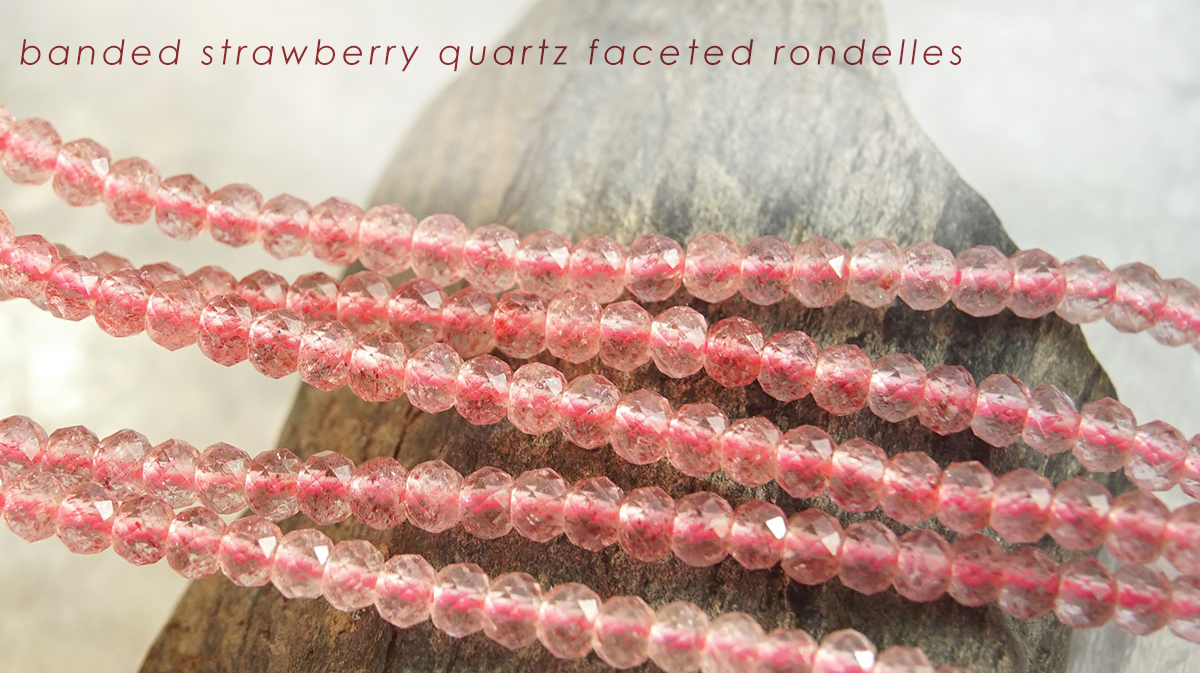
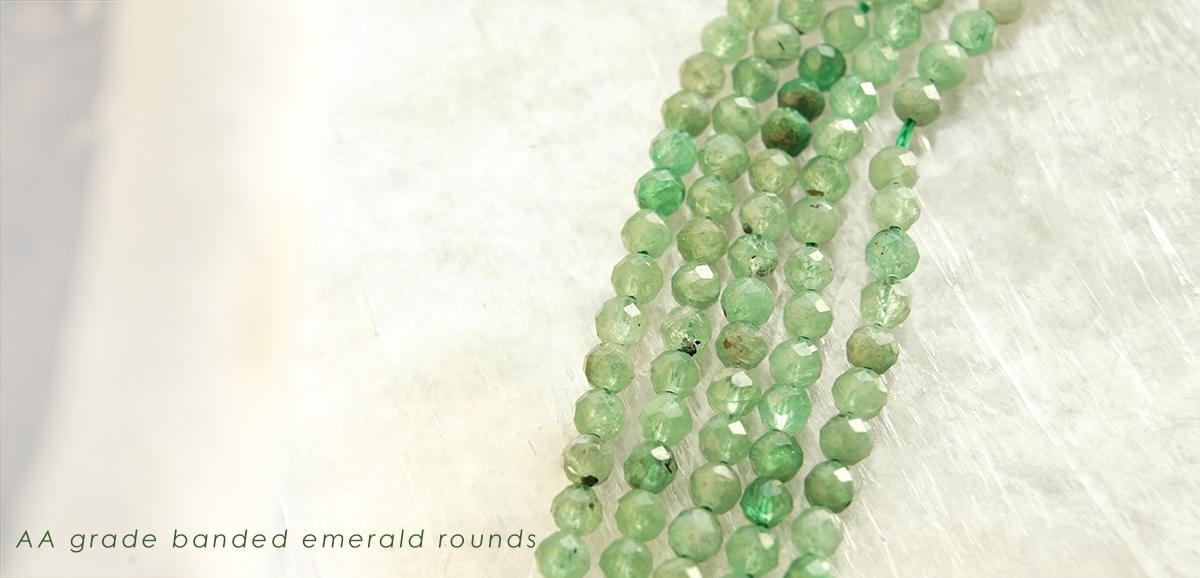
Goody Beads Exclusives this week featuring Banded Strands
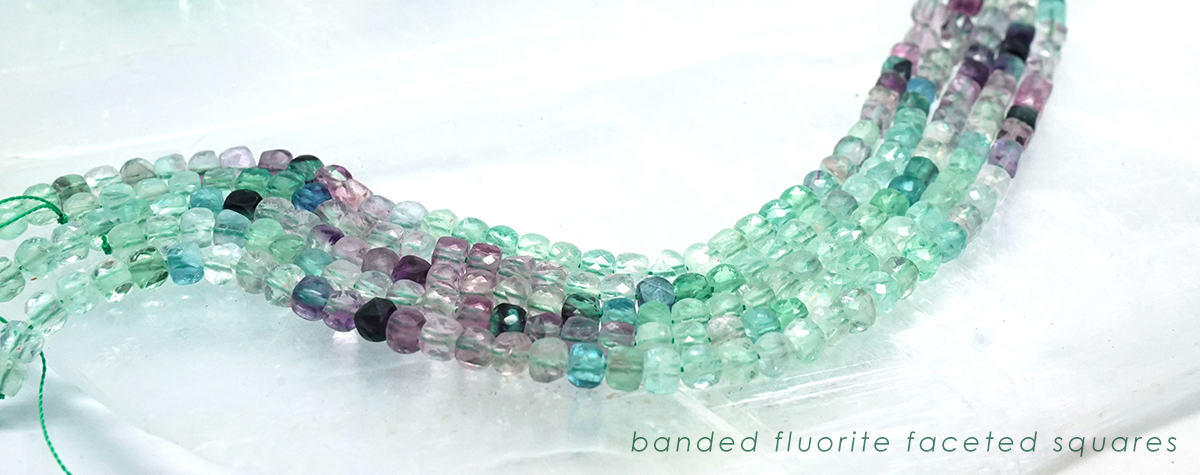
Banded stones have seen a rise in popularity recently at Goody Beads, so we’ve recently expanded our line of banded stones.
Banded strands have two different meanings in the gem community. Banded gemstones, for example, occur when the beads themselves have different minerals laced throughout the stone in noticeably distinct colors. This is common especially in agate geodes, which are fairly common in the US.
Banded strands have multiple colors of the same stone type in one strand. Most gemstones have different coloring depending on the minerals present in the stone, but have the same chemical formation and crystal structure to still be considered the same stone. In the case of turquoise, because of the oxidation process in chromium it is not uncommon to find traces of brown, different grades of blue and green in the stone. For some turquoise samples, especially those coming from famous mines, rough specimens with these color differences might be discarded or looked over for lacking uniformity. Banded strands allow these specimens to be used and appreciated by gemstone lovers and designers.
When designing with banded strands, arranging the beads by their shades is a classic staple. Ombre designs have gained popularity as more subtle jewelry has swung back into favor. However, all of the stones on each strand harmonize with each other, so feel free to pick and choose beads from the strand and pair them how you like!
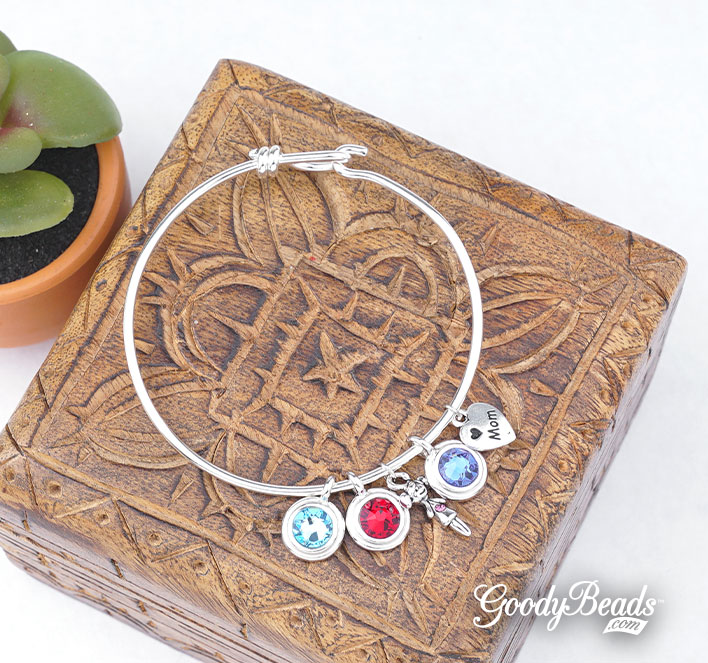
Happy Mother’s Day with an Easy DIY Bracelet with TierraCast Charms & More!
Mother’s Day is coming up and we have this sweet and east bracelet idea using TierraCast Wire Bracelet, TierraCast® Birthstone Crystal charms & more! Let your mom feel loved this year.
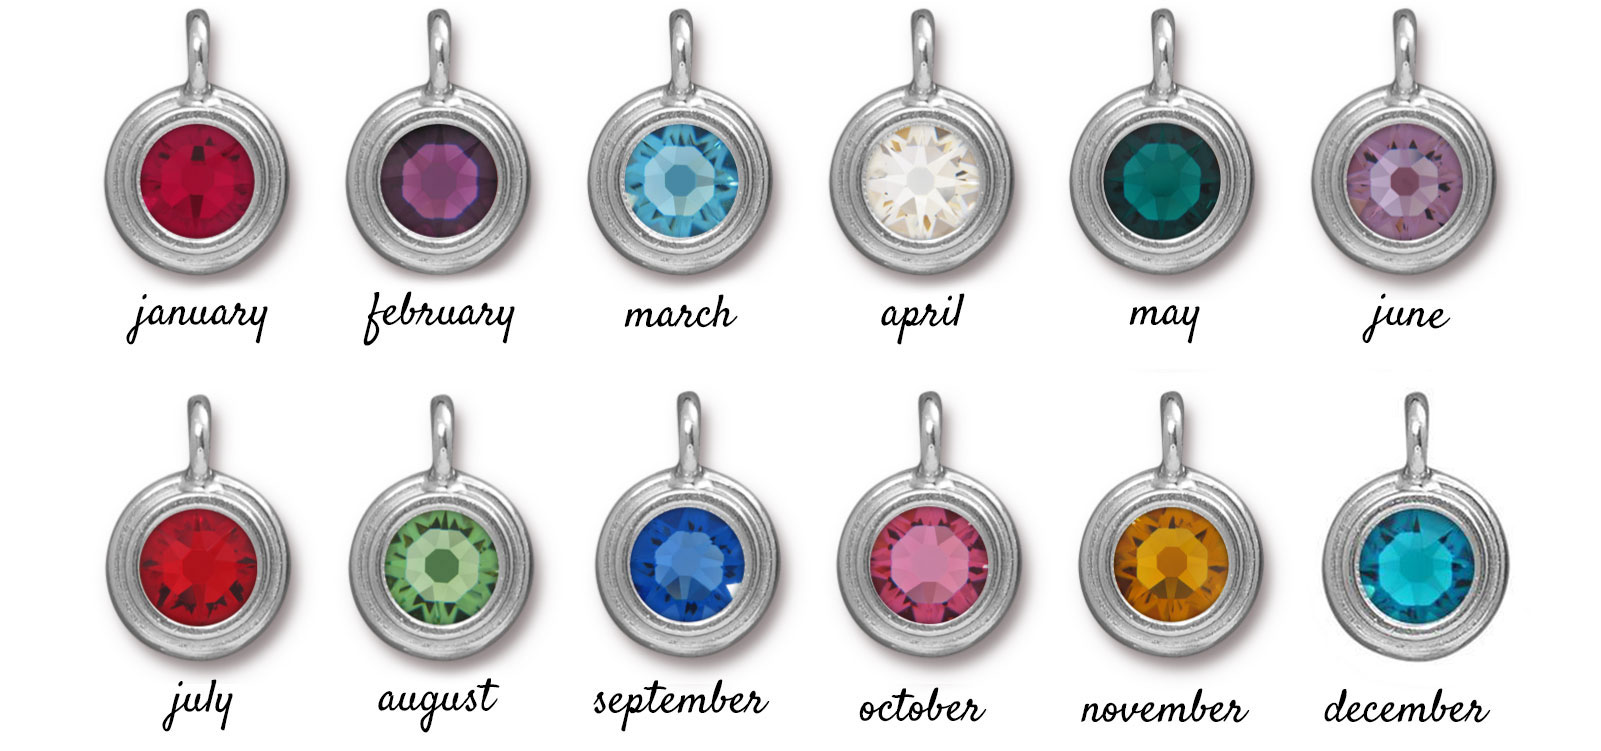
Dress up a TierraCast Wire Bracelet with birthstone crystal charms that represents each meaningful child or grandchild in their lives. Each month has it’s own birthstone and below is a list of each TierraCast birthstone crystal charm to add to your mom’s bracelet:
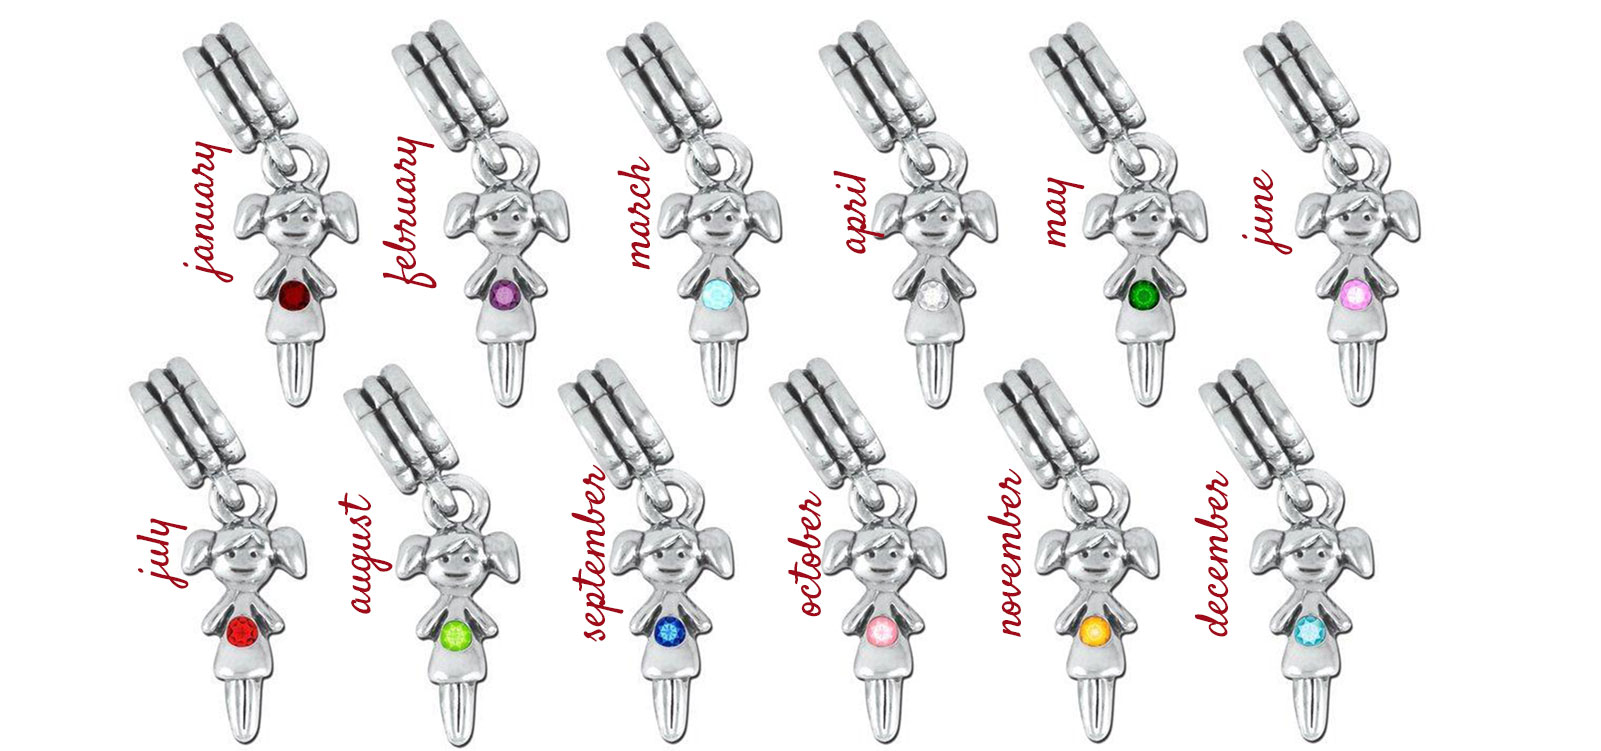
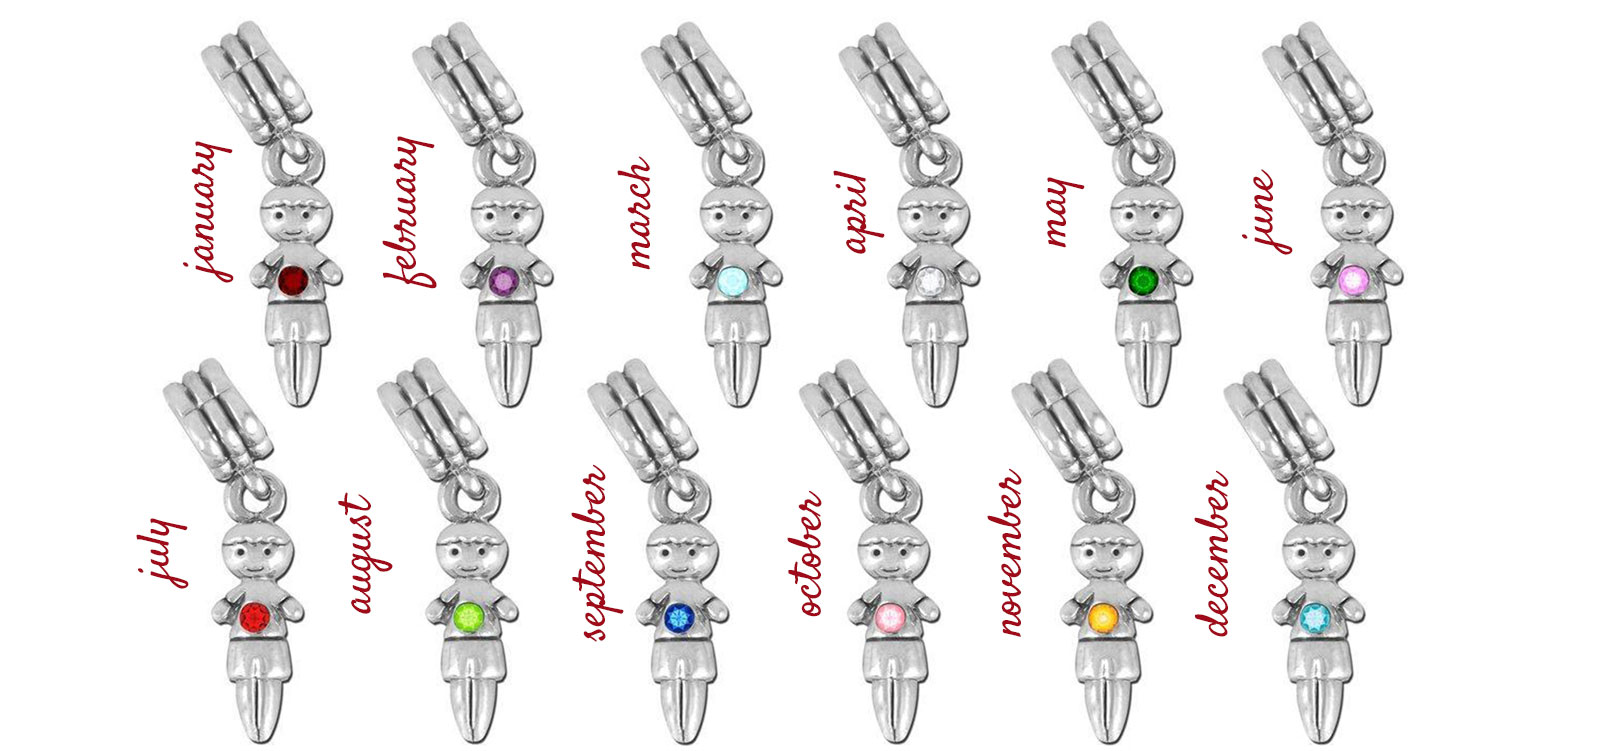
Need more charms to add to your bracelet, we’ve got a fun collection of Large-Hole Girl and Boy charms with birthstone crystals! Get these to add to the bracelet too:
Cut bail off of large hole girl charm. Open jump ring and slide on girl charm.
Open another jump ring and slide on Mom charm
Open wire bracelet, slide on charms through looped end.
Wrap and gift it to Mom!
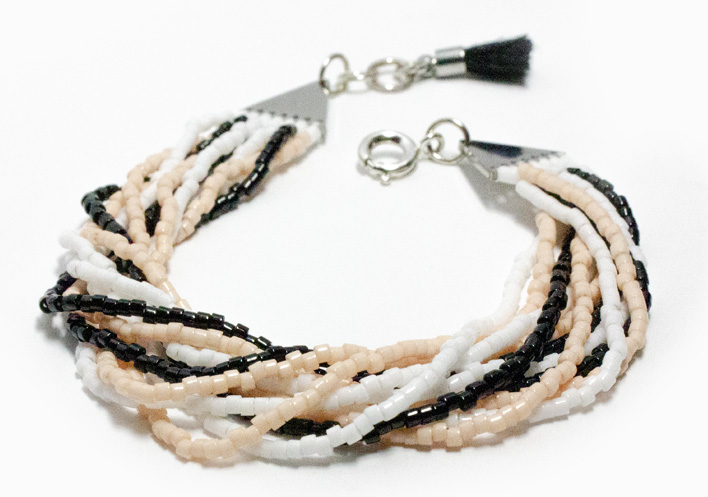
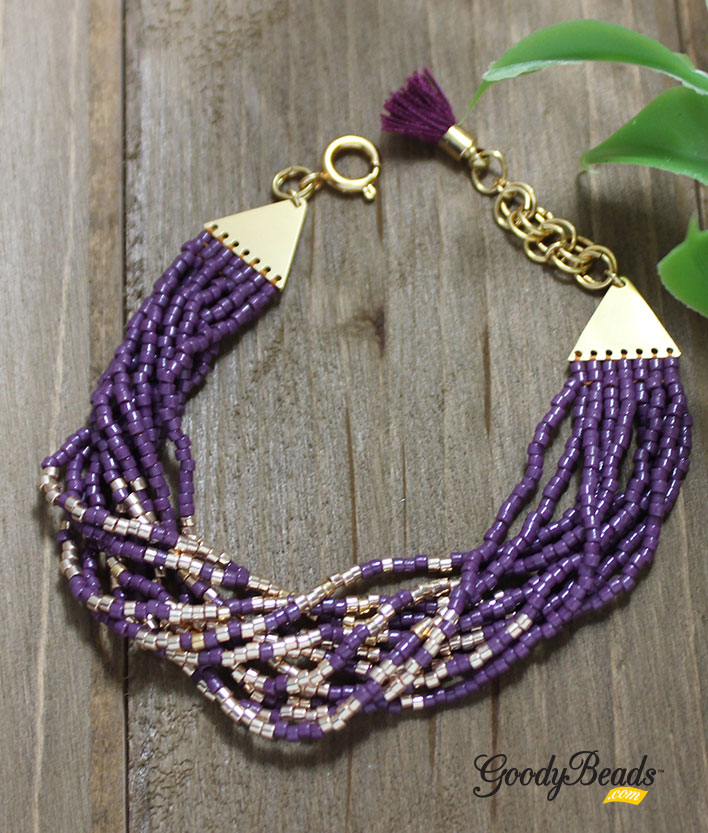
Beaded Multi-Strand Bracelet with Beadable Components and Delica Seed Beads
We have a fun DIY bracelet project today using Beadable Triangular Links and Miyuki Delica seed beads. With this FREE pattern, you’ll see how easy it is to make this multi-strand bracelet!
The Art of Czech Beads with Lenka Bindzar from Raven’s Journey
Our special guest today is our friend Lenka Bindzar, the owner and creator of Raven’s Journey, a superb supplier of Czech beads. Her intricate designs of pressed and cut glass beads are highly regarded due to the attention and artistry in the creation of each bead.
Lenka Bindzar
Lenka, give us a little back story about how you were able to create Raven’s Journey.
“The story of Raven’s Journey is really the story of our owner Lenka Bindzar. The fall of communism changed things for everyone in the Czech Republic. For Lenka it opened the door to travel and the wind blew her wayward seed all the way from Czech to a tiny island a short ferry ride from Seattle, WA., where she made beeswax candles for sale locally.
Out of supplies for her small beeswax candle business Lenka wandered into a craft store. After picking up what she needed for candle making she browsed the bead section looking for some interesting decoration for her new puppy’s collar. She was delighted to find a vast selection of beautiful glass beads that were all from Czech! She talked with the store owner for a while and learned that it was becoming increasingly difficult to find unique high-quality Czech glass beads and if she could find some he would happily take them off her hands. A customer was earned, and an idea was born.
On her next trip home to visit family Lenka traveled to the mountains north of Prague to the center of the Czech glass industry. It was in the Fall of 1998. She managed to pick up some leftover beads and sample cards but couldn’t locate anyone who was willing to supply a new business. Not to be discouraged she decided to drive through the region one last time.
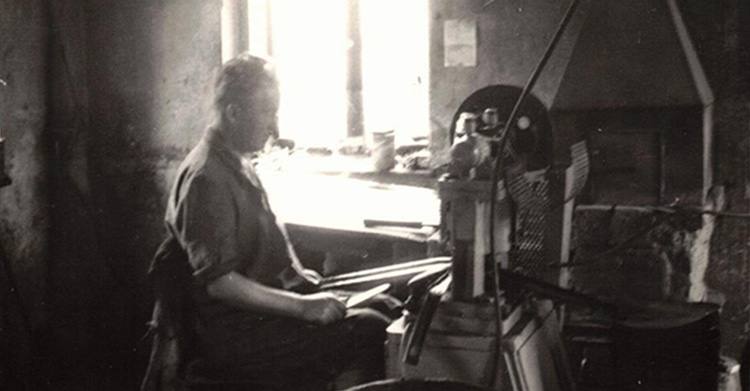
When they say that Czech glass beads are a cottage industry they mean it literally. Czech bead pressers have a unique feature to their homes, two chimneys. One for heating the house and one for melting raw glass to be pressed into beads. Lenka spotted one such house on the very outskirts of Jablonec overlooking a peaceful mountain valley filled with grass and sheep. The gravel driveway sparkled with the color of countless tiny pieces of discarded glass. An endearing older couple answered the door and invited her in. They were the second generation to run a small family-owned bead pressing company out of that house. They supplied Raven’s Journey with our first custom inventory and we still work with them all these years later. We hope to work with the next generation to come!
The first few years Lenka bought what was offered to her as a direct importer. The glass was beautiful, and her customers were happy, but she was always a little dissatisfied with the beads that were readily available. She dreamt of a time when she could combine the raw glass colors and available finishes in a more modern and elegant way. She wanted a unique style of Czech glass beads.
After 20 years and many trips back to those same Czech mountains we have developed relationships with industry artisans that allow us to affect every detail of the production of our glass beads and buttons. Recently this has extended to the design of custom contemporary molds for pressing beads. In this way we hope to offer our own humble addition to the history of Czech glass bead making.
Working with artisans in Czech to make the highest quality glass beads and buttons possible is a passion for us here at Raven’s Journey. Our 20-year commitment to working with small suppliers gives us the flexibility to innovate and bring unique and beautiful products to market
Where are your products made?
All our beads are made in the Czech Republic. I am from Czech, I love Czech glass beads and its makers. I really have never had the intention to import from any other country.
All our Czech glass beads are made in the North region of Czech, in the hills and mountains around the town of Jablonec.
Our beads are made by small family-owned businesses that survived the changes to the industry after communism in Czech. They press, tumble, and facet the beads in home workshops. The beadmakers will then take beads, after pressing and polishing, to another artisan to apply the special finishes like “Picasso” (an oxide of silver) or “Aurora Borealis” (called AB), two very traditional and popular finishes. There are many different finishes and washes requiring different techniques and equipment to apply.
Each step in the bead making process requires special training and years of knowledge so we understand why the work is split up between these specialized artisans.
Artisan pressing glass.
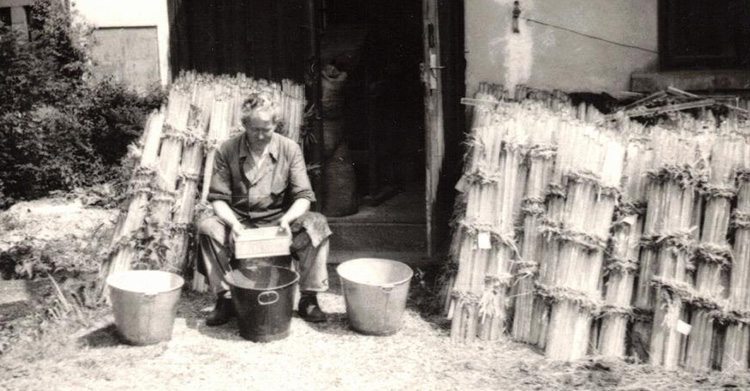
Artisan sorting the pressed glass.
What makes Raven’s Journey Czech beads special?
I consider Raven’s Journey Czech glass beads special because of our attention to detail. We are intimately involved in every aspect of the production of the beads and I know personally all the people involved in their making from the very start to finish. Some of our vendors have been working for us since the 1990’s. Most of the ideas are born in my mind, but it’s the collaborative hard work, dedication, family tradition, and love for the trade from all involved that bring all of those ideas to life.
I love the full rainbow of colors and shades, including expensive fuchsia pinks or always popular turquoise or deep red opal glass. I really try to create beads using unique or unusual glass colors that are available in limited supply from the main glass factory that produces all the raw glass we buy and use to press our beads. Some colors are made only once or twice a year and we must wait for them if not available when I create my orders. Some are made only once ever. I work hard to never design new beads with price or time in mind, just quality.
Just like a seed in my garden grows and turns into plants bearing blooms or fruit at the end of the season I will let the seeds of ideas grow in my mind. Then, when it is almost unbearable, I hurry to my desk, gather all my notes, hope for no distractions, and get into the brave mindset of translating my jumbled ideas into directives for the beadmakers.
It can be a challenge to translate those ideas into glass color and finish codes in my computer spreadsheets. All glass colors and shades and variations have number codes. The same is true for finishes which also vary from company to company in color shades and identification numbers.
Once my spreadsheet is full of my ideas in written codes, and I feel like my color pallet for each shape is satisfying, I get together with the bead makers and we spend hours in refining the order. I always try to make sure they fully understand what my desires are. Sometimes I may try new combinations and those ideas will break down when we get to the actual making of the bead so constant communication is vital. When production starts, challenges arise and just like with my garden I apply the knowledge I have gathered over the years and together with the bead makers we find the best solutions.
In the bead garden if all the factors come together just right, and we get a little lucky, I will see the outcome of my bead dreams about six to twelve months later. We ship in big containers across the Atlantic Ocean and then the USA. All the way to us on the West Coast where more work awaits in the form of unpacking, organizing, sorting, pricing, photography, storage, marketing and finally sales and shipping.
Of course, this is only one stage of the bead’s life, the beginnings. They go on to customers’ hands where they get reorganized and resold again until they reach the final place in someone’s bead studio, dining table, or a craft nook. They turn into amazing art that gets to be admired and loved. How these beads do travel!
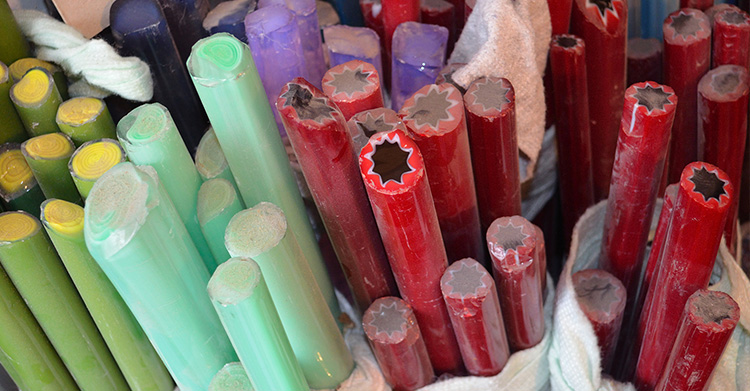
Glass Canes
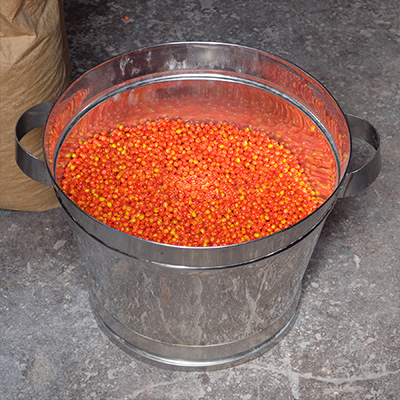
Melting Pots
Pressed Glass
Your Czech beads come in many intricate designs, like your leaf beads, Hibiscus flowers, goddess, etc, where do you find your inspiration for each design?
In a broad sense I tend to find design inspiration in my daily life. I have always lived near wild nature; it is easy to do in the Pacific Northwest. I am never far from a forest, mountains. or a lake and beach. I have found nature to be the best teacher for me and find much inspiration there.
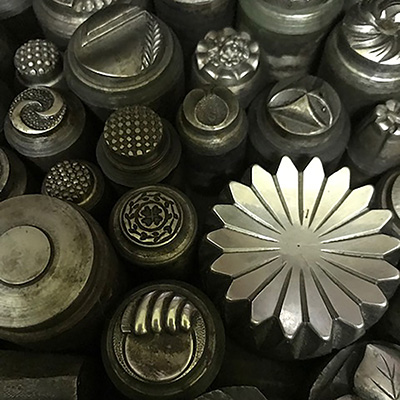
The history of Czech glass is long and there are thousands of molds available in the town that has been making these beads since the 1400’s. We are fortunate enough to have access to these “mold banks” and we choose beads that I think stand apart from the rest. For example flowers, leaves, and many faceted shapes were found that way.
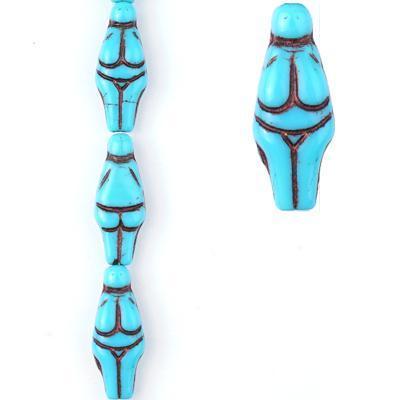
A good story regards one of our specialized shapes you asked about. The Goddess bead, we call it “Venus Bead” in Czech. The mold for the bead was created by my oldest bead makers that are in their mid 70’s and retired now.
The bead is a celebration of a historical find in the Czech Republic in 1925 near the small village of Vestonice. A tiny 4-inch-tall fertility goddess statue. Vestonicka Venuse is her name, she is the oldest known ceramic statue to ever be found. Its dated all the way to 29 000- 25000 BCE, surprising lots of historians which did not think ceramics were made then just yet. But she was proof of that, and Czech was proud of the find. Our bead makers made the bead in the image of the statue as their own way to celebrate the find.
Another way we find bead shapes is in our imagination! For a few years now we have used computer software and master mold carvers in the Czech Republic to realize some of our contemporary ideas for bead shapes. The process is slow for now, but we are working hard to streamline the process. Raven’s Journey so far has created 6 original shape designs such as the Lotus Coins and Horned Owl. We are always working on what is next and trying to be as innovative as we can.
Besides deciding the bead shapes, I spend a lot of time with color combos and finish choices. I like good quality beads and always seek quality colors and try to only use time tested finishes while still seeking new and unusual of course.
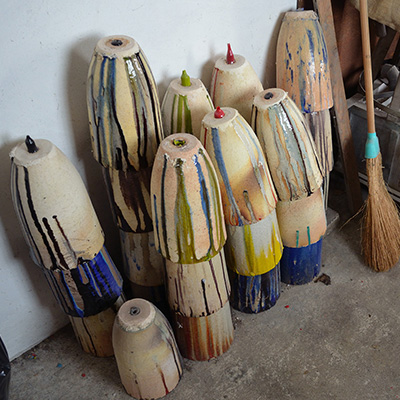
Molds
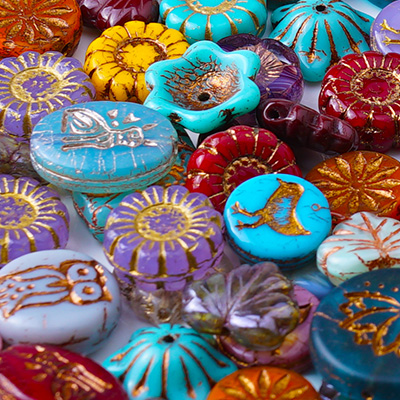
Glass Czech Beads by Raven’s Journey
What are your favorite ways to design with Czech beads?
I do not have as much time to make things as I would like but I am lucky to spend so much time with our beads in the warehouse helping customers, and my office dreaming up what comes next.
When it comes to my own jewelry designing, I go for simple techniques that do not take days to complete. Perhaps one day I will have more time to play and learn new techniques. I’m always amazed at the creativity of our customers!
My most favorite time playing with beads is when my younger sister comes to visit from Czech and we spend our quality time together pouring over new beads. We are always in such a hurry to create new jewelry we can wear right away. We like to make jewelry that we can wear every day, on any occasion. My sister loves glass beads as much as I do. She pays attention to all the beads, not just the new ones, she has learned they all have their time to shine in her designs. Many beads we produce are forgotten forever in the never-ending desire for new products. Czech glass beads are so unique sometimes we can’t make the same thing twice even if we try! Some due to lost or broken molds, sometimes we just can’t get back to the same color of raw glass material. We try to stay focused on what is new and exciting.
Photos by Lenka Bindzar.
If you’d like to purchase some of these artistic Czech Beads by Raven’s Journey, make sure to get them at GoodyBeads.com today!
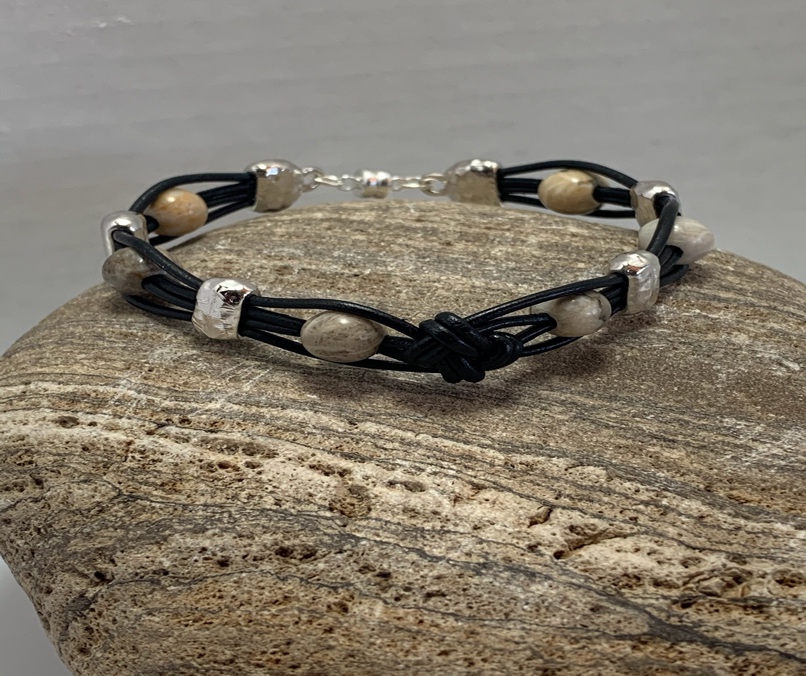
DIY Box Knot Leather Bracelet by Pat Netz
Pat Netz, one of our participating members from our Facebook Group, Goody Beaders posted a leather bracelet with a box knot. And we love it so much that we had to have her on our Facebook Live to show us how to do it. Make sure you check out the video HERE!
Pat has graciously given us a tutorial and images on how to make the box knot bracelet!
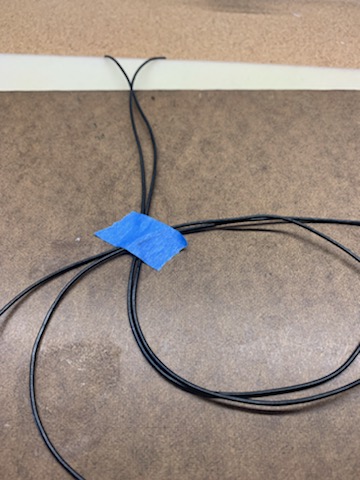
1.Place 2 pieces of leather vertically and 2 pieces horizontally and place a piece of tape over the center.
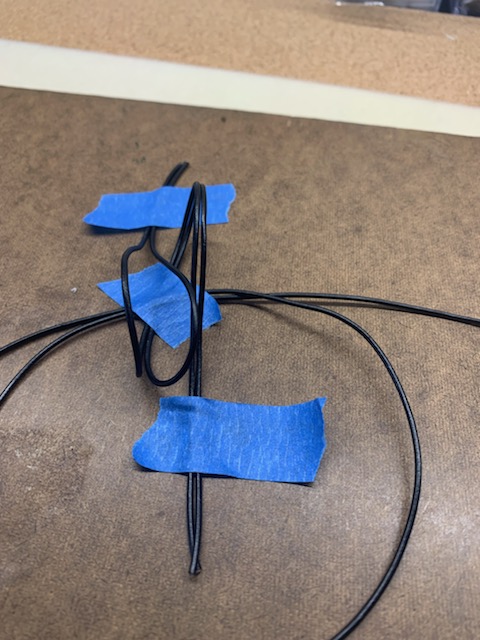
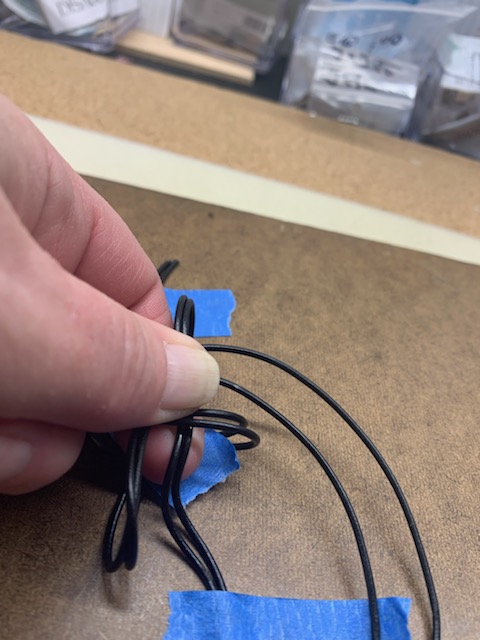
2. Take the top 2 pieces and loop down. Tape to hold.
3. Take the bottom 2 pieces and loop up. Tape to hold.
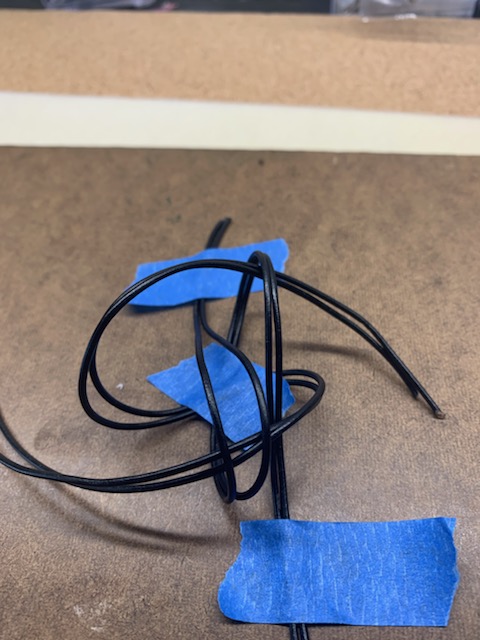
4. Now take the 2 right pieces over the 1st loop and under the 2nd loop.(working from right to left)
5. Take the 2 left pieces over the 1st loop and under the 2nd loop(working left to right).
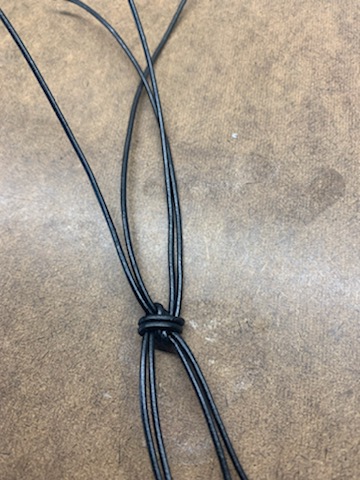
6. Now hold all 8 pieces in center and remove tape. Start pulling cords to cinch in knot. To tighten pull opposite corners at same time.
7. With the 2 center pieces of leather, add 1 large hole bead. You may want to cut one end of the leather at an angle to help put the bead on. Now slide on a crimp bead, repeat 2 more times.
8. Repeat this pattern for the other side.
9. Crimp the crimp beads. I measured from the center of the knot to the center of a crimp bead approximately 1”. This will make a 7” bracelet.
10. Trim excess leather to put on your crimp ends. Cut one piece of leather on an angle to fit into end.
11. With a toothpick, add the E6000 glue into the cap. Push in your 4 pieces of leather and crimp. Repeat for other side.