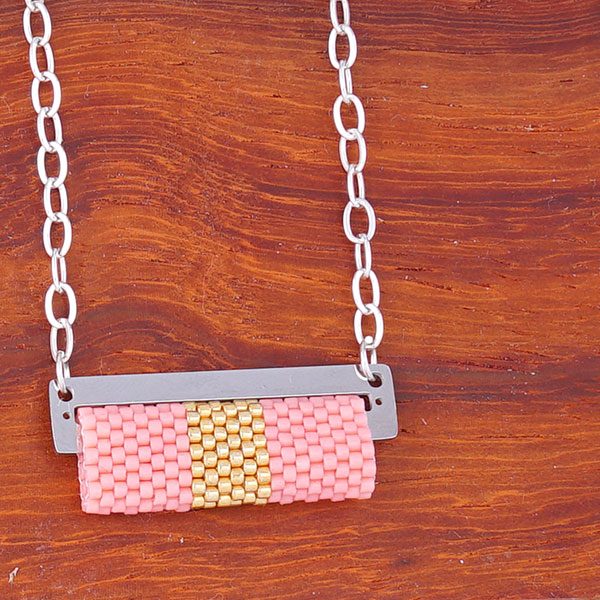
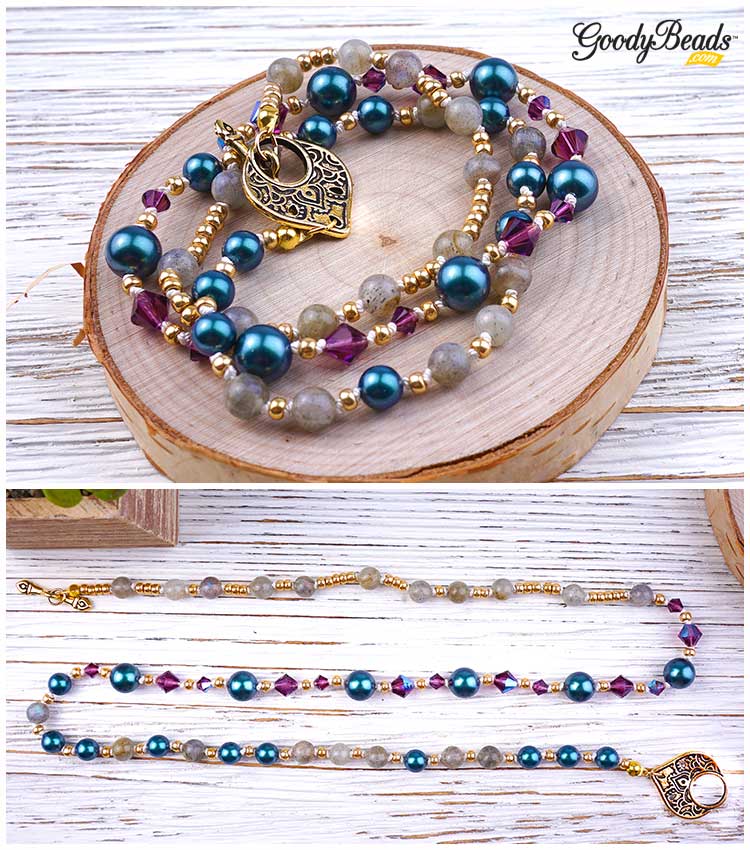
Swarovski® Tangerine Jewelry Tutorials

We have three exciting projects using June’s Swarovski Psychology of Color: Tangerine. See how to freshen up your jewelry with these DIY projects!
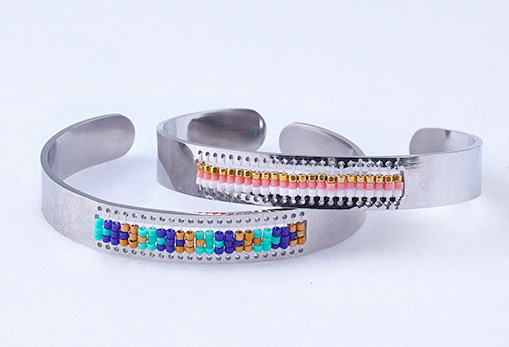
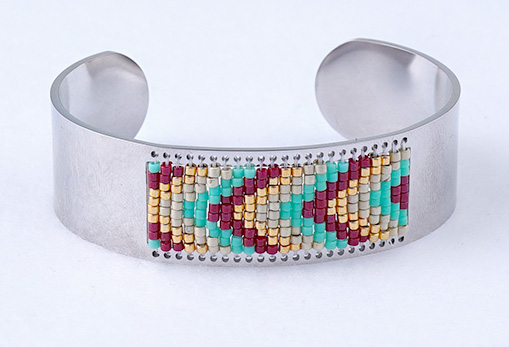
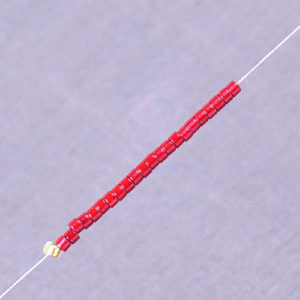
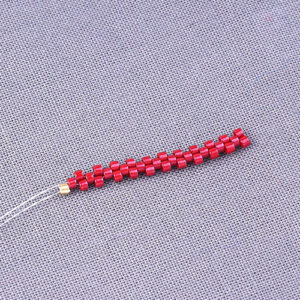
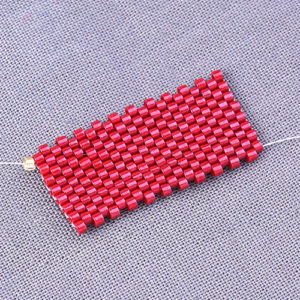
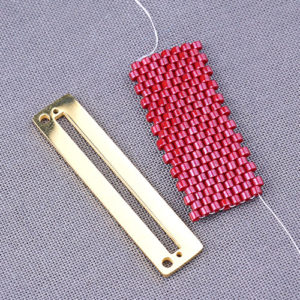
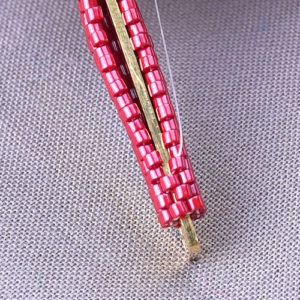
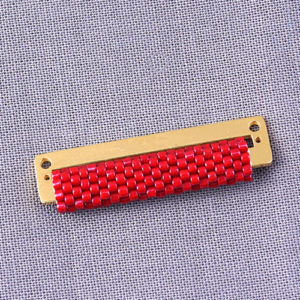
 

Tangerine Cuff

GoodyBeads Blog | Free Tutorial - Beadable Cuff with 4mm Tangerine Bicone Swarovski Crystals and 8/0 round Miyuki seed beads.

See how easy it is to making your own sparkling bracelet with a beadable cuff and Swarovski bicone crystals.
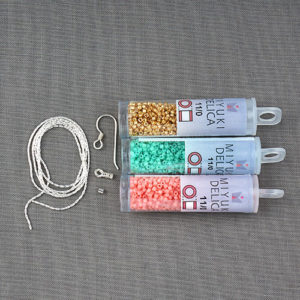
What you’ll need:

SW_POC_TangerineProjects_CuffTut

Directions:

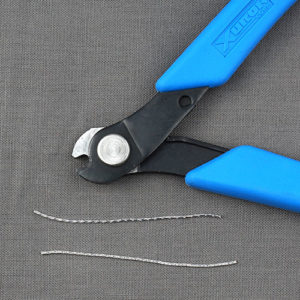
  1. Cut a 4 foot piece of beading thread.
  2. Add a Bead Stopper or sew through a small seed bead twice, leaving a 5 inch tail.
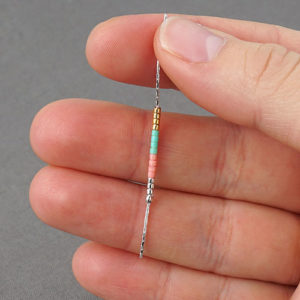
  3. Sew up through the the first hole and pick up a bicone crystal and seed bead.
  4. Sew across the channel to the hole opposite.
  5. Skip a hole and sew up through then next hole. Pick up a bicone crystal and seed bead.
  6. Sew across the channel to the hole opposite.
  7. Keep repeating these step sequence to add a total of 12 bicone crystals to cuff.
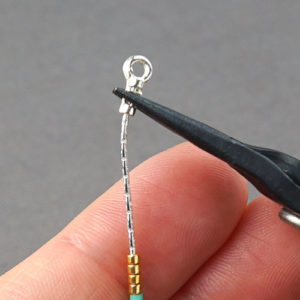
  8. Sew through the whole pattern again to secure the pattern.
  9. Tie off ends and cut off excess.


Tangerine Drop Earrings

GoodyBeads Blog | FREE Tutorial Earrings with Tangerine Swarovski crystals and silver findings.

Make this sweet tiered earrings with dangling crystals inside a Teardrop Hoop.

What you’ll need:


Directions:

  1. Slide a 8mm crystal on ball headpin and make a simple loop.
  2. Open eyepin loop, slide on loop from step 1 and close eyepin loop.
  3. Slide 6mm crystal on eyepin and make a simple loop.
  4. Open loop you just made and slide loop on inside loop of hoop component. Close loop.
  5. Open another eyepin loop and slide on top loop of hoop components. Close loop.
  6. Slide a 4mm crystal on eyepin and make a simple loop.
  7. Open loop you made from Step 6 and slide on earwire. Close loop.
  8. Repeat all steps for other earring.


Swarovski: Satsuma Suprise

GoodyBeads Blog| Swarovski Psychology of Color Tangerine

Our friends at Swarovski Create your Style, designed this colorful multi-strand bracelet.

What you’ll need:

Directions:

  1. Use alcohol wipes to clean all findings and set aside to dry.
  2. Using one jump ring attach to one ss39 chaton setting. Repeat five more times and set aside.
  3. Using one 1088 ss39 chaton stone glue into one ss39 chaton setting and set aside for 24 hours to dry. Repeat five more times and set aside.
  4. Using two and a half coils of memory wire, make a double loop at one end with Memory Wire Finishing Pliers.
  5. Slide on the following FOUR sections:
    1. TWO 4mm bicones, 6mm bicone, TWO 4mm bicones, Botanical bead, 4mm bicone, Tangerine chaton charm, Botanical bead, TWO 4mm bicones, 6mm bicone, TWO 4mm bicones , THREE metal seed beads,
    2. TWO 4mm bicones, 6mm bicone, TWO 4mm bicones, Botanical bead, 4mm bicone, Tangerine chaton charm, Botanical bead, TWO 4mm bicones, 6mm bicone, TWO 4mm bicones, THREE metal seed beads, Peach Delite chaton charm, THREE metal seed beads,
    3. TWO 4mm bicones, 6mm bicone, TWO 4mm bicones, Botanical bead, 4mm bicone, Botanical bead, TWO 4mm bicones, 6mm bicone, TWO 4mm bicones, THREE metal seed beads, Peach Delite chaton charm, THREE metal seed beads,
    4. TWO 4mm bicones, 6mm bicone, TWO 4mm bicones, Botanical bead, 4mm bicone, Botanical bead, TWO 4mm bicones, 6mm bicone, TWO 4mm bicones, THREE metal seed beads, TWO 4mm bicones, 6mm bicone, and TWO 4mm bicones.
  6. Trim the end of the wire and make a double loop at the end.
  7. Add one chaton setting at each end of the bracelet.


Leather Wrap Bracelet with Matubo Beads – Video Tutorial

We’ll show you how to make a leather wrap bracelet by fishtail braiding leather with new 2/0 Czech Matubo Beads.


For this bracelet tutorial, you’ll need:


Determine Length of 1.5mm Leather needed for a wrap bracelet

Use this method to determine the leather cord length you may need for a multi-wrap bracelet.

Take your wrist length and double the length. Multiply that by the number of wraps you want and then add 12”. That will give you an approximate cord length you will need to start your bracelet. (The extra 12” factors in the beads and leather you’ll be adding along with loop end.)

Example:

2 wraps for an 8.5” bracelet: (8.5” x2) x 2 wraps = 34 + 12 = 46” needed.

Or

4 wraps for a 7.5” bracelet: (7.5” x2) x 4 wraps = 60 + 12 = 72” needed.

Keep in mind, these total numbers are approximate. You will want to test the wrap length while you’re making your bracelet. Having extra length is better than being short on your wrapped length goal.


Video Tutorial

Leather bracelet tutorial begins at 15:00 mark.


Peacock Eden Green Pearl Earrings – Pattern Tutorial

We are back with a new pattern tutorial using the new Eden Green Pearl from Swarovski®. Make yourself a pair of these earrings to your next spring outing!


Shown on our previous Facebook LIVE video, So Vang and Tory Vezina took on the challenge of designing with the new pearl from Swarovski. As the pearl itself is a vibrant hue and luster of green, So Vang had designed it with black and gold, to highlight and frame the pearl, creating what almost resembles a peacock feather. Get this FREE Pattern today here!


Items you’ll need to complete earring:


GoodyBeads Blog - Eden Green Swarovski Pearl Earrings FREE tutorial

Items used in earring above: SW02125 (2), SW02121 (2), SB00269, SB00423, SB00066, SB01406, A019596, A006588, TCZ0139, A015211


Easy SuperDuo Bracelet – Tutorial

Czech SuperDuos are a versatile two-hole bead that can be easily made into a simple stitched bracelet. Check out this super simple tutorial using only Czech SuperDuos, size 11/0 Miyuki seed beads and beading thread.

If you know So Vang, you know that SuperDuos are her favorite two-hole bead to use when bead stitching. It creates fun angles and combines easily with her other favorites like Czech Honeycomb beads and DiamonDuos. But a simple basic way to make a bracelet using SuperDuos is combining it with size 11/0 and warping the strands around for this easy DIY bracelet.

Things you will need for this bracelet:

— Download Multi-Wrap Golden Bracelet Pattern —

Multi-Wrap Golden Bracelet

GoodyBeads | Blog - Czech Easy SuperDuo Bracelet FREE tutorial

Items used in this bracelet: SB01406, SB02087, SB01367, SB01390, SB00423, SB00332, Y001366, A011536, A006587, A015211)

You can make a one wrap bracelet with this tutorial or make a multi-wrap. To make this bracelet, start out with your bracelet length (in this case we did 7 inches), multiply that by the amount of  wraps we wanted and add another foot. This length will be the amount of beading thread you will need. In this case, we used about 4 feet. We strung 4 sections of 4 different color ways to make this bracelet. Each section measures 7 inches in length.

A quick tip, when you are finished sewing all the necessary beads, lay your piece straight and smooth out the piece so that everything lays flat before you tie off your ends.

GoodyBeads | Blog - Easy Czech SuperDuo Bracelet FREE Tutorial

Sample Color ways

GoodyBeads \ Blog - Czech SuperDuo Bracelet FREE Tutorial

Test out different colors to play with. Here we have four samples of various color ways you can make your bracelet.

Items used in these sample color ways:(SB01787 & SB0367), (SB02140 & SB02402), (SB01782 & SB00387), (SB01439SB00423)

— Download Multi-Wrap Golden Bracelet Pattern —


Czech Ginko Two-Hole Scale Bracelet Tutorial

New from the 2019 Tucson show are these lovely Czech Ginko beads from BeadSmith. Check out today’s free tutorial using Ginko beads.


GoodyBeads | Blog Czech Ginko Two Hole Beads with Free Bracelet tutorial

Czech Ginko beads are a two-hole bead in the shape of Ginkgo leaves.


Scale Bracelet

GoodyBeads | Blog - Czech Ginko Scale Bracelet with Free Tutorial

This bracelet tutorial was inspired by Nela Kábelová’s (www.gianelle.beadforum.cz) pattern called Snake Skin Bracelet. We used her pattern and tweaked it slightly to add 4mm Swarovski® bicone crystals instead of 4mm round beads. And used 8/0 Miyuki seed beads in place of the seed beads she used. Don’t they look like fish scales? Dragon scales? Mermaid scales? They are a beautiful shape with lots of option for bead stitching.


What you’ll need for this bracelet:


GoodyBeads | Blog - Ginko Scale Bracaelet clasp ends - FREE tutorial

Items used in bracelet above: SB03708, SW02072 (36), A008804, A019945, A006587, A015211, SB00117 or SB00063


Beading Chain Drop Earrings Tutorial

Beading chain is a hot hot item at GoodyBeads. Check out this alternative to using beading chain for drop earrings!

We previously used beading chain for making adjustable bracelets. Now here’s an easy DIY using beading chain for making modern drop earrings. For this tutorial, it is helpful to learn about the Magical Crimping Pliers from a previous blog post.

What you’ll need for this DIY tutorial:

  • 0.7mm Silver Beading Chain (CH00724)
  • 8mm End Cap (X001505)
  • 2mm Crimp Tubes (TC01897)
  • And your favorite beads!

Tools:

  • Magical Crimping Pliers (TL00288)
  • Flush Cutters
  • Flat Nose Pliers

Tutorial

For this tutorial, we are using dainty Miyuki Delica beads for a cute pair of minimalistic earrings!

Items used in Miyuki Delica drop earrings:CH00724, , X001505, TC01897(2), TCZ0078, SB00269, SB02322, SB00141, SB02334

Drop Earrings with Beading Chain

GoodyBeads Beading Chain Drop Earrings with Swarovski Crystals - Tutorial

We are loving these Swarovski Fine Rocks tube beads. To make this pair:

  1. Cut two piece of beading chain at about 2.5 inches.
  2. Use Magical Crimping Pliers, crimp one end of the beading chain with a 2mm crimp tube. (Make sure to leave a little beading chain sticking out of crimp tube so that when you crimp, the crimp tube will catch onto the beading chain.)
  3. Use flush cutters to cut excess beading chain tip left from step two.
    BeadingChain_SWend
  4. At this time, repeat steps 2 and 3 to other beading chain. After you’ve done this, make sure both beading chains are still the same length. Cut chain to adjust length if needed or for desired length.
  5. Slide onto the crimped beading chain a silver spacer, crystal tube beads and another silver spacer.
  6. Slide top end of beading chain through end cap and flat crimp the middle of the end cap with flat nose pliers.
  7. Open ear wire and slide on end cap loop. Close ear wire loop.
  8. Repeat steps 6 and 7 on other crimped beading chain.

Items used in crystal fine rocks earrings:CH00724, X001505,TC01897(2), Z002570, SW01965 (2), TCZ0077

GoodyBeads Blog: Beading Chain Drop Earrings with Swarovski Pearls - Tutorial

Here, we used the same instructions as above with a simple 8mm Swarovski Pearl bead. Use a piece of wire or headpin first, to slide through pearl bead, so that beading chain can run through it. We had also trimmed the beading chain to 1.5 inches after we crimped on the 2mm crimp tube.

Items used in pearl drop earrings:CH00724, X001505,TC01897(2), SWZ0878 (2), Z012031


Beadable Cuffs with Miyuki Delicas

Beadable cuffs are an easy DIY bracelet to wear or gift. Here is an easy tutorial for making your very own beadable cuff with Miyuki Delicas.


This simple tutorial is easy for all beading levels. Plus, it’s a trendy piece of jewelry you can layer with all of your bracelets!

Items you will need to make a beadable cuff:


Ladder Stitch

One basic technique when bead stitching your beadable cuff is the ladder stitch, also known as the invisible stitch. For sewers or quilters, this technique is used to cleanly close fabric openings. But in our case, we are using the same technique to loop through the holes of the beadable cuff while adding Delica beads in between the channel of the cuff.

BeadableCuff_LadderStitch_Tutorial

Add a stopper bead to the end of your beading thread. To do this, loop your thread TWICE through a seed bead, leaving a 6 inch tail end. Sew up through one hole and pick up three Delicas. Sew down through the hole across the channel. Sew up through the next hole, add three Delicas and sew down through the hole across the channel. Repeat until you’ve reach the end of your Cuff.

NOTE: to strengthen your beading thread, sew back up through the beads and holes using the same ladder stitch technique.

Tie both ends off and use a tiny dab of glue to secure the knots. Cut off excess thread.


Beadable Cuff

GoodyBeads | Blog Beadable Cuffs Beadable Findings Miyuki Delica Beads

Items used in cuff:

TOP – Z001859A006587, SB00269, SB00229, SB00223

BOTTOM – Z001859A006587, SB03546, SB01824, SB02334


Wide Beadable Cuff

On our website, we also have a Wide Cuff (Silver Z001451/Gold Z001542) that requires 10 Delicas in between ladder stitched. Make fun designs like our chevron design we have here.

GoodyBeads | Blog Beadable Wide Cuffs Beadable Findings Miyuki Delica Beads

Items used in cuff: Z001451A006587SB03545SB01822SB02334SB00269


Beadable Ring

Don’t forget to complete your cuff with a Beadable Ring (Z001454/Z001455). This beadable and adjustable ring can easily be designed with the same ladder stitch technique.

GoodyBeads | Blog Beadable Ring Beadable Findings Miyuki Delica Beads

Items used in ring: Z001455A006587SB03546SB01824SB02334


GoodyBeads EZ DIY Series: Seed Bead Snowflake Ornament

Ready yourself for the festive holidays making seed bead snowflake ornaments with snowflake ornament forms.

Nov18_Snowflake_image


Items you will need for the seed bead snowflake ornament:


Tutorial

Snowflake_Tut

Items used in tutorial: SB00106, SB00093, SB00114, SB00109, A006240


Beaded Bead with 2mm Swarovski® Pearl – Pattern Tutorial

New to GoodyBeads are 2mm Swarovski Pearls! Their glossy shine is sure to add fanciness to your designs. Here is a simple beaded bead using 2mm Swarovski pearls, 4mm Swarovski bicone crystals and 8/0 seed beads.


What you will need for this pattern tutorial:

GoodyBeads | Blog: Beaded Bead with 2mm Swarovski pearls, bicone crystals and 8/0 seed beads.


Leather Bracelet

Use these beaded beads on 3mm leather cord!

  1. Cut leather cord to wrist length. Glue end caps to each ends of the leather with Super New Glue.
  2. Slide leather through beaded bead.
  3. Add clasps to your choosing to complete your bracelet.

GoodyBeads Blog" Beaded Bead with 2mm Swarovski Pearls and FREE tutorial

Right White Bracelet Components:
SB00106, A006587, A015211, SW01935, SW01049, A002413, A010432, CH00324, A001530, Z006500

Right White Bracelet Components:
SB00106A006587, A015211, SW01911, SWZ0582, A002413, A010432, CH00329, Z001256


Beadable Findings: Peyote Tube Bar Pendant

We are in love with our beadable findings! And with a simple knowledge of peyote-stitching Miyuki 11/0 Delicas, create a tube, attached through the Beadable Bar Pendant, to make a minimalistic neckalce.


Products you will need:


Tutorial

Make sure to check out our previous blog post on how to do an Even Count Peyote Stitch as you will use the even count stitch for this tutorial.

Items used in this beadable finding: Z001466, SB03545, Z006587, A015211


BarTut_image

You don’t have to stick to the 14 rows of peyote rows. You can make the tube longer and with different pattern designs for a longer and unique pendant.

Items used in this beadable finding necklace: Z001465, SB02322, SB00269


GoodyBeads EZ DIY Series: Boho Feather Earrings

Learn to bead stitch this easy pair of Boho Feather Earrings with Miyuki delica beads and beadable feather findings.


Items used in feather earrings:


Swarovski: New Shimmer Crystals and Pearl

We’ve launched a beautiful selection of new Swarovski from their new Fall/Winter 2019/2020 Innovation: Be Yourself. Our first selection consists of new Crystal Shimmer and Amethyst Shimmer bicone crystals, and Crystal Iridescent Tahitian Look Pearl. Plus, we have two lovely jewelry pieces to compliment the hues of these new Swarovski.


Passion Pearl Wrap Bracelet

GoodyBeads Blog | New Swarovski wrap bracelet with knotted Griffin silk cord.

In this three -wrap bracelet, we used Griffin Silk Cord knotted with Tahitian Look Pearls, Amethyst Shimmer bicone crystals and 6mm Labradorite round beads with size 8/0 gold seed beads. Plus, we finished up this piece with gold findings.

Items used in 6.5″ bracelet: SB00107, LBT6RD-8, SW01915 (10), SW01916 (6), SW01908 (6), SW01906 (7), Z008768, A006581, TC02395, A008801

  1. Make a knot at the end of the silk cord and cut excess end. Slide over knot with a clamshell bead tip (Check previous blog on examples). Optional, add a small dab of Super New Glue to the knot before sliding the clamshell over.
  2. Slide on a seed bead and make another knot flushed to the seed bead.
  3. Slide on a 6mm Tahitian Pearl and make a knot.
  4. Side on a seed bead and make another knot.
  5. Repeat with alternating with pearl beads or 6mm Labradorite beads until you reach your desired wrist length. This will be your first row.
  6. Next row, alternate a knot between an 8mm Amethyst Shimmer bicone crystal, seed bead, 4mm Amythest Shimmer bicone crystal, seed bead, 8mm Tahitian Pearl and seed bead. Repeat until your desired wrist length.
  7. For your third row, alternate seed beads and Labradorite beads in no particular order to wrist length.
  8. End with a knot, add a small dab of glue and cap off with a clamshell bead tip.
  9. Open jump ring and attach either clamshell bead tip end to a toggle clasp. Repeat to other bead tip end.


Passion Flower Necklace

Sep18_NewSwarovski_image2

We used the Griffin Silk cord to complete the bracelet with a necklace with similar beads as in the bracelet with TierraCast Findings.

Items used in necklace: TC02387, A019617, SW01908 (2), Z018414, Z018257, TC02397, A008801Z008768A006581, SW01912 (6), SW01905 (6), SB00107

  1. Open loop of eyepin and slide on TierraCast Mehndi charm. Close loop.
  2. Slide on the following beads onto the eyepin and make a simple loop or wrap loop: 8mm Ameythst Shimmer bicone crystal, wavy disc (concave down), Czech Hibiscus, wavy disc (concave up) and 8mm Amythest Shimmer bicone crystal. (If making a wrapped loop, make sure to slide on TierraCast magnetic clasp end before finishing loop off.)
  3. Make a knot at the end of the silk cord. Slide on a seed bead, 3mm bicone, a seed bead, a pearl, 2 seed bead, 3mm bicone, 2 seed bead, a pearl, 3 seed bead, a 3mm bicone, 3 seed bead and a pearl.
  4. Slide on seed beads to accomodate a length large enough to slide over your head.
  5. End silk cord with pearl, 3 seed bead, 3mm bicone, 3 seed bead, a pearl, 2 seed bead, 3mm bicone, 2 seed bead, pearl, a seed bead, 3mm bicone and seed bead.
  6. Take both ends of your silk cord and make a knot to tied the ends together.
  7. Slide a clamshell bead tip over the knot.
  8. Open jump ring and slide on loop of bead tip and other end of the TierraCast magnetic clasp. Close loop.


Even Peyote Stitch on Czech Carrier Beads with FREE Patterns

New to GoodyBeads are the oh-so popular Czech Carrier Beads. We have an easy even count peyote stitch pattern to get you started.

Czech Carrier beads are making waves in the DIY jewelry making world. They have two holes and can be used for a stretch bracelet or intricate necklaces! Because they have two holes, they can be easily used in your favorite bead-stitching projects! The typical way to style carrier beads is bead stitching a tube of beads or seed beads to encase the carrier beads. We are using the classic peyote stitch tubes to slide over the carrier beads. Check out this tutorial and pattern ideas below!


Even Count Peyote Stitch

For these patterns, we used an even count peyote stitch pattern and created tubes to side over Czech Carrier beads. Check out this simple illustration below to understand how to do an even count peyote stitch pattern. Don’t forget to PIN this for later!

Even Count Peyote Bead Stitch Delica Seed Beads
Even Count Peyote Stitch Tutorial


Peyote Stitch Patterns

CarrierBEads02

We adore these colors! We used four colors to design these 15 different patterns. Make sure to DOWNLOAD PDF of these patterns and a quick tutorial of how to create tubes to add to your Czech carrier beads.

Plus, you can download this Carrier Bead Pattern Template, where you can create your own designs!


Glue/Adhesive

This step is important because this avoids the tubes from sliding off the carrier beads. We would recommend using GS Hypo Cement (A007224). It has a precision applicator, which helps get into small openings and a cap that stops overflowing glue from escaping and drying up. You have two options of when to add your glue.

First option is before you zip up your tube pattern. Apply glue to both sides of the carrier bead and lay it in the middle of your pattern. Fold your pattern around the carrier bead and sew the ends to zip up the tube patter.

Second option is after making your peyote stitch tubes. Complete your tubes and slide carrier bead half way through, still exposing the bead. Run your glue around the exposed area of the bead, let it sit for a second or two and slide the tube over the rest of the carrier bead.

Let it the beads dry completely before using. Make sure to read instructions for more information.


Pearly Pastel Necklace

Here’s a simple necklace we created with the beads we made above. It’s strung on using Fine Soft Flex Beading Wire (FTBW0001) and ivory miracle beads.

First we cut a 4 feet piece of wire. Fed one end of the wire through a 2′ piece of chain (this will be the extender chain for the necklace) and centered the chain at the middle of the beading wire. Slide on a 2mm crimp tube and using the Magic Crimper (TL00288) crimped the tube into a bead. You can check out our previous blog post HERE about the tool. Next, with both ends, slide on (25) size 4mm ivory miracle bead, (3) size 6mm miracle bead and (3) size 8mm miracle bead. Slide a 6mm miracle bead on each wire thread and slide on first carrier bead. As you can see we added a miracle bead in between each carrier bead. from the top strand, we used size 6mm miracle bead and the bottom used size 8mm miracle bead. This helps the necklace take shape. Reverse the pattern of strung beads to the end and crimp off the end with a lobster claw clasp.


Items used for necklace: SB02334, SB00269, SB01822, SB02346, A006587, A015211, Z016460, A007224, A011534, FTBW0001, TC01897 (2), A010140 (2 pks), A010141, A010142 (2 pks) and CHZ0101


Beadable Findings: Fancy Fanned Earrings

One of our popular project request is our beadable fan earrings with 11/0 Miyuki Delicas and long tassels. Check our video to see how easy they are made.


Components used:

  1. Beadable Fan: Z001471 (2)
  2. Delicas: SB03543, SB02334, SB00269
  3. Pearl: SW00736 (2)
  4. Tassel: Z013818
  5. Findings: A002413, TCZ0078
  6. Beading Tools: A006587, A015211


Tutorial:

  1. Starting with 2.5′ to 3′ of beading thread, attach a stopper bead leaving a 6″ tail end.
  2. Start from one end of the fan, come up through the bottom hole.
  3. Add your three delicas and go across the beadable opening and down the hole.
  4. Sew up the next hole, add your three delicas, go across the beadable opening and down the hole.
  5. Repeat this until you’ve gone across the beadable fan pendant.
  6. You will now add your pearl bead by sewing up the hole closest to the round opening, add your pearl bead and go across the circle opening and down the hole.
  7. Sew through the pearl bead again and up the hole, through the pearl again and down the hole.
  8. Tie off your ends and cut excess off.
  9. Open small jump ring and slide on tassel and through the middle hole of your fan pendant. Close jump ring.
  10. Open earwire loop and attached top fan pendant loop to earwire. Close loop.
  11. Repeat all steps for other earring.


Beadalon® Ring Jig – Video Tutorial

Watch as Wyatt White from Beadalon shows how easy it is to create customized adjustable rings using the Ring Jig Tool.


Who doesn’t love adjustable rings? Especially when you can make them yourself and add small beads or charms!

What you will first need are the following for this video tutorial: