DIY Seed Bead and Gemstones Pointed Earrings with FREE Pattern Tutorial

We’re combining seed bead and gemstones together in this FREE bead-stitch Pointed Earrings pattern tutorial.. It involves peyote stitching around a 10mm round gemstone bead and adding bursts of bead around the bezel. This earring pattern uses: 10mm round gemstones, 4mm round gemstones, wire guardians, 11/0 Delica seed beads and 15/0 round seed beads. And earwires, beading thread and needle.

Items used in this example:

  • ONX10RD-8 – 10mm Round Onyx Gemstone
  • BGA4RD-8 – 4mm Round Black-Gold Amazonite Gemstone
  • SB00269 – 11/0 Galvanized Gold Delica Seed Beads
  • SB01136 – 15/0 Galvanized Yellow Gold Seed Beads
  • A006599 – White Superlon Beading Thread Bobbin
  • Z010382 – Gold Plated Wire Guardian
  • TCZ0148 – Gold Filled Hoop Earring Wires by Tierracast®
  • A006767 – #10 Long English Beading Needles

— CLICK for FREE Downloadable Pattern Tutorial —

–Click HERE for more DIY projects from Goody Beads–


DIY Layered Necklace with Gemstones

Summer is about hot weather and even hotter trends. Layered or Neck-Mess Necklaces are a must-have for summer because they are easy to pair with your casual to dressy outfit. We’ve got a fun DIY for you using many different components like Limited Edition gemstones mixes, seed beads, necklace chain and instant pendants; all layered together.

We love the different gemstone shapes in the Blue Skies gemstone mix, where we used the heishi and round beads in this mix for our layered necklace.

Items used in necklace:

  • Z001033 – 32 Inch Rhodium Plated Cable Chain Necklace
  • X003062 – 5.5mm Jump Ring
  • Y005033 – 6mm Closed Ring
  • FTBW0001 – Fine SoftFlex Wire
  • X009683 – Limited Edition Clear Blue Skies Candy Jade Mix from Dakota Stones
  • SB00106 – 8/0 Galvanized Silver Seed Beads
  • A004830 – 2mm Silver Plated Crimp Tubes
  • Z010379/Z010376 – Wire Guardians
  • CH01180 (1 foot)- 11.6mm Silver Finish Steel Thin Paperclip Cable Chain

Instant Pendant:
Z016436 – Silver Instant Pendant with Cone
Get the components and pattern tutorial for the instant pendant in the Peyote Tube with Beadalon Instant Pendants blog post.

GoodyBeads.com blog | DIY Layered Necklace with Gemstones

Directions:

  1. Cut paperclip chain in half to make two 6 inch pieces.
  2. Cut a 20″ piece of soft flex wire.
  3. String on the following:
    1. Seed bead, crimp tube and seed bead.
    2. 5 round gemstones and seed bead. Repeat 6 more times.
    3. Crimp tube and seed bead.
  4. Loop one end of flex wire through a Wire Guardian, making sure to loop the wire guardian through a link of a 6″ paperclip chain. Slide flex wire through seed bead and crimp tube. And crimp the tube with crimping pliers. Cut end to leave about a 1/2 inch tail. Slide beads over to repeat and crimp on other end and other chain link.
  5. Open a jump ring and slide on other end of paperclip chain and link it to the ends of the chain necklace. This is where all the layers will link on.
  6. Cut a 30″ piece of soft flex wire.
  7. String on the following bead sections:
    1. Seed bead, crimp tube and seed bead
    2. Two small heishi and seed bead. Repeat and string on 24inches of this sequence.
    3. crimp tube and seed bead.
  8. Feed one end of the flex wire through the Wire Guardian, making sure to loop the wire guardian through the end link of the chain necklace. (Same place you attached the paperclip chain in step 5) Slide flex wire through seed bead and crimp tube and make a crimp. Cut end to leave a 1/2 inch tail. Slide all the beads over to hide the tail end and repeat crimping on this this end.

9. Unclasp both of the clasp on the chain necklace. Open jump ring, slide on ring where all the layers are linked at and a closed ring. Do on both sides and add clasp back on.

10. Make peyote tube add to instant pendant. You can find pattern tutorial from the Peyote Tube with Beadalon Instant Pendants with components. Gently open the loop of the instant pendant just big enough to slide chain necklace on. And gently close it.

–Click HERE for more DIY projects from Goodybeads–


Celebrate Summer with DIY Seed Bead Rainbow Earrings

Whether you’re celebrating summer or June’s Pride month, these rainbow earrings are what you need for summer fun! We have two rainbow earring designs, one using Delica seed beads with beadable components and another with round seed beads on a hoop! Check them out!

Rainbow Pendant Earrings Designed By So Vang

Be mesmerized with these pair of earrings using a using a rainbow of Delica seed beads! Items used in earrings:

GoodyBeads.com Blog | Celebrate Summer with DIY Seed Bead Rainbow Earrings

Directions:

  1. Add a 3 feet piece of thread to your needle.
  2. Add a stopper bead to your thread, leaving a 5 inch tail.
  3. Sew through top hole of the beadable channel. Pick up the 11 seed beads in the color sequence of the rainbow: SB00292, SB02337, SB02336, SB03777, SB00290, SB02311, SB00284, SB03545, SB00295, SB03388 & SB04034
  4. Sew through bottom hole of channel. Sew back through all seed beads. Tie both ends together to secure pattern, tie two times. Sew through top hole and sew through a few beads before cutting off excess. Add need to thread tail you left in step 2, sew down through all the beads, sew through bottom hole, sew through a few beads and cut off excess thread.
  5. Open ear wire and slide on beadable pendant.
  6. Repeat steps 2-5 for other earring; you should have enough of the thread on your needle to do the second earring.

Rainbow Hoop Earrings Designed by Heidi

Fall in love with these hoop earrings using a rainbow of seed beads. Items used in earrings:

GoodyBeads.com Blog | Celebrate Summer with DIY Seed Bead Rainbow Earrings

Directions:

  1. Open the hoop and slide on the following seed beads:
    1. 3 silver, 3 red, silver, 3 orange, silver, 3 yellow, silver, 3 green, silver, 3 blue, silver, 3 purple, 5 silver, 3 purple, silver, 3 blue, silver, 3 green, silver, 3 yellow, silver, 3 orange, silver, 3 red & 3 silver.
  2. Slide hoop end back into place and use pliers to gently crimp down the hoop end.
  3. Open earwire loop and slide on beaded hoop and close loop.
  4. Repeat all steps for other earring.

–Click Here for more DIY Projects from GoodyBeads–


DIY Succulent Earrings with Crazy Lace Agate Gemstones

Make these cute succulent earrings using TierraCast succulent findings from their Renewal Collection and Crazy Lace Agate gemstones from Dakota Stones.

Items used in earrings:

  • TC02874 – 10mm Antique Silver Succulent Earring Post by TierraCast®
  • TC02877 (2) – 12mm Antique Silver Succulent Charm by TierraCast
  • GCL8RD-M-8 – MATTE Green Crazy Lace Agate 8mm Round 8-Inch
  • TC01253 (2) – 2 Inch Silver 21 Gauge Eyepin by TierraCast
  • TC01208 (2) – Clear Comfort Earring Back by Tierracast

GoodyBeads.com Blog | DIY Succulent Earrings with Crazy Lace Agate Gemstones FREE Tutorial

Directions:

  1. Open eyepin loop, slide on succulent charm and close loop.
  2. Slide a gemstone onto the eyepin and make a simple loop.
  3. Open loop and slide onto loop of post earring. Close loop. Make sure loops on eyepin are parallel and facing the same direction. This will help the succulent dangle to face forward.
  4. Repeat all steps for other earring.

— Click HERE for more DIY Projects from GoodyBeads–


Beaded Multi-Strand Bracelet with Beadable Components and Delica Seed Beads

We have a fun DIY bracelet project today using Beadable Triangular Links and Miyuki Delica seed beads. With this FREE pattern, you’ll see how easy it is to make this multi-strand bracelet!

What you’ll need for project:

— CLICK for FREE Downloadable Pattern Tutorial —

GoodyBeads.com Blog | FREE Pattern Tutorial on Beaded Multi-Strand Bracelet with Beadable Components and Delica Seed Beads

Items used in bracelet above: SB00128, SB00223, SB00229, Z005132 (2), A006599, X003062, A006767, Z001442 & Z013680.

GoodyBeads.com Blog | FREE Pattern Tutorial on Beaded Multi-Strand Bracelet with Beadable Components and Delica Seed Beads

Items used in bracelet above: A006597, Z005132 (2), SB02349, SB00269, A007665, A008801, A006767, Z013678.

— CLICK for FREE Downloadable Pattern Tutorial —


Design DIY Jewelry with Bali-Style Beads

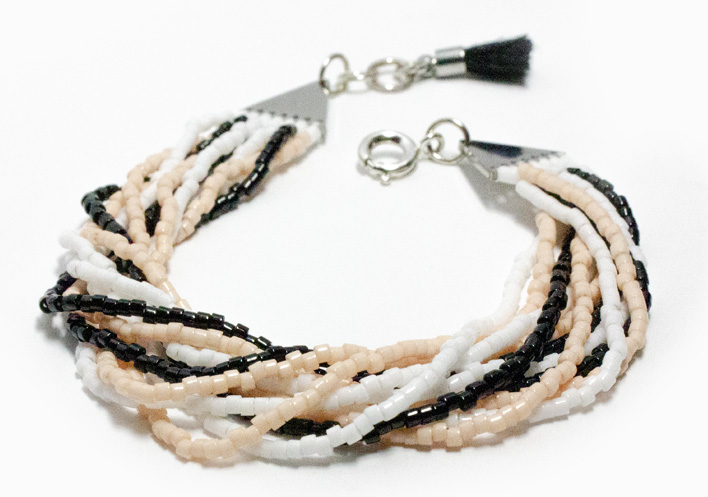
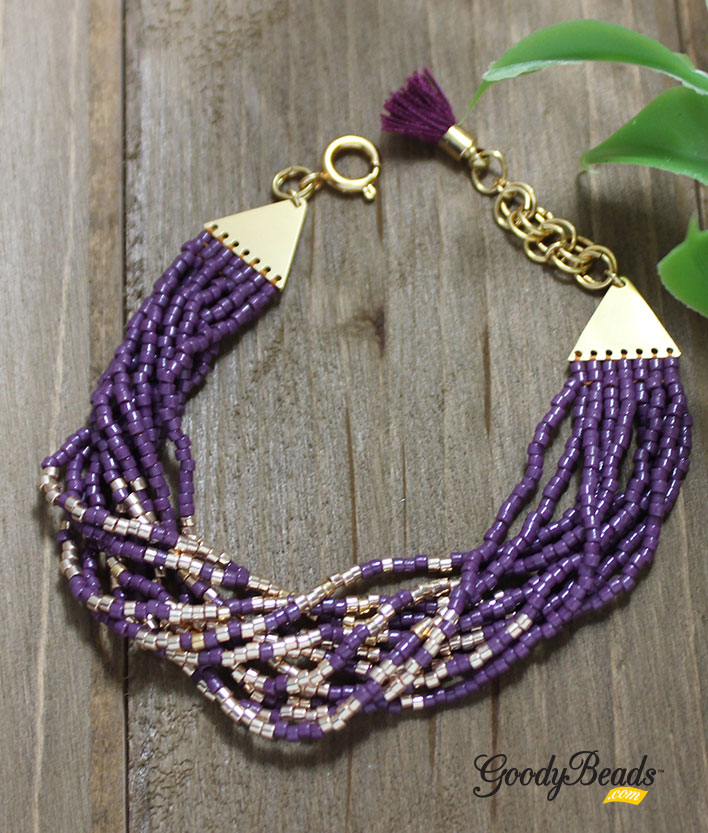
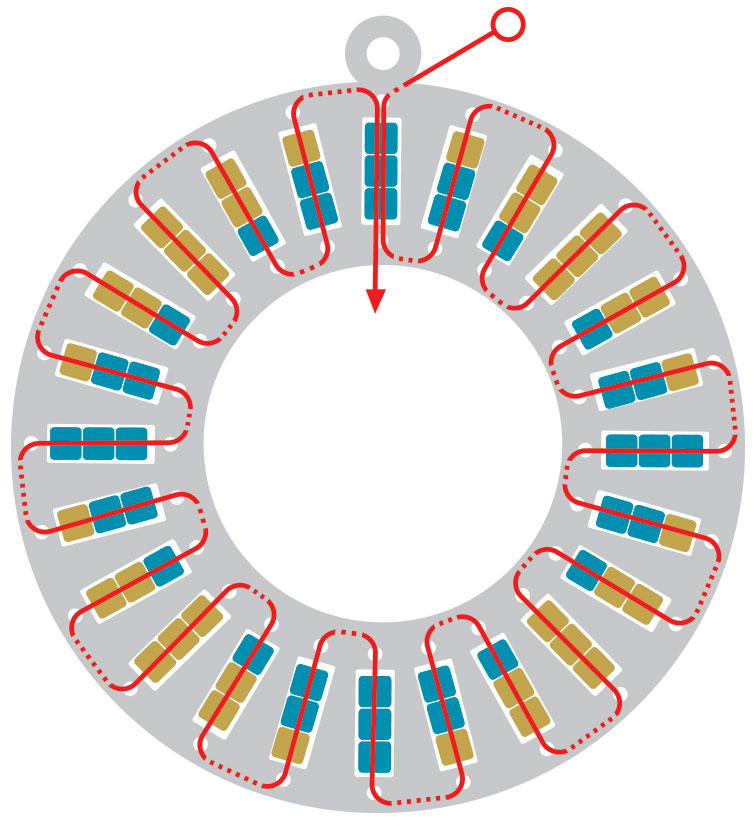
Bali-style beads are intricate works with filigree patterns and granulation techniques that metalsmith crafters from Bali has a been creating for centuries. The process of making Bali beads is about precision and symmetry. And it is said that Bali beads are an art form a designer will take pride in.

The process first starts with a base, whether it’s a circle disc or cone. Then the filigree patterns are laid on the base and granulation or small silver beads are arranged on the base in symmetrical dotted designs. Once the design is made, it’s then casted into a mold. The mold will make the beads and findings which are copper filled with real sterling silver or gold plating. Our selection of bali-style beads and findings are affordable without losing its handmade beauty and quality. Each bead or finding is also painted with a dye that will fill the concave areas of the design, while the the raised portions are brushed and polished away, really bringing out the details.

Take time to look at Bali beads and know that they’re an old and beautiful art form. Here are some DIY ideas to get you excited about bali-style beads.

GoodyBeads.com Blog | Design DIY Jewelry with Bali-Style Beads

DIY Bali-Style Wrap Bangle

GoodyBeads.com Blog | Design DIY Jewelry with Bali-Style Beads - DIY Bali-Style Wrap Bangle FREE Tutorial

Items used in bracelet: WR00127, Z008001 (2), Z007999 (2), Z008253 (2) (Tools: Memory Wire Cutters and Memory Wire Finishing Pliers)

Directions:

  1. Make a simple loop to one end of the memory wire with memory wire finishing pliers.
  2. Slide on bali-style curve beads, alternating between the three styles. Note: tubes will have a more curves shape then the memory wire, so carefully push and slide the memory wire through the tube.
  3. When you’re done, cut excess wire, leaving 1/4″ and make a simple loop. Tighten both ends to keep tubes in place.

Golden Circle Earrings with Miracle Teardrop Bead

Pulling our inspiration from our favorite Miracle Drop Earrings, we’re using 30mm Miracle Teardrop beads.

GoodyBeads.com Blog | Design DIY Jewelry with Bali-Style Beads - Golden Circle Earrings with Miracle Teardrop Bead FREE Tutorial

Items used in earrings: A014928, Z010749 (2), Z010753 & TCZ0148.

Directions:

  1. Slide on headpin the teardrop bead and cone. Make a simple loop.
  2. Open earwire loop and slide on dangle. Close loop.
  3. Repeat for other earring.


February: DIY Project A Day

We’re kicking off the new year with another month of DIY Project a day. For the entire month of February, every day we will give you a DIY project. We will have everything from simple hoop earrings to fun bead-stitching designs. We’ll incorporate a lot of our favorites like gemstones, crystals, tassels, leather and more! Plus, as a bonus for this month, we have special guest designers to help inspire your month!

Each blog post and project will include a high quality image with a full components list and a simple, easy-to-follow directions.

Here is a calendar and list of our daily DIY projects to get you inspired!

List of Daily Projects:

  1. Garnet Gemstone Wire Wrapped Cuff
  2. Golden Goddess Earrings with Lapis Gemstones
  3. Boho Babe Earrings
  4. White Heart-Day Leather Bracelet
  5. FLASHBACK Friday: Skipping Heartbeat Earrings
  6. Easy Threader Earrings with Pearls
  7. Leaf Drop and Straw Necklace with Beadable Accessories
  8. Fan Tassel Hoop Earrings
  9. Purple Garnet Hoop Earrings with Mircofacet Gemstones
  10. Paradise Beading Necklace with Swarovski Crystals
  11. Chunky Paperclip Chain Bracelet
  12. FLASHBACK Friday: Statement Bib Necklace with Chinese Crystals
  13. Cowrie Shell Earrings
  14. Carabiner Wrap Bracelet or Necklace
  15. Baroque Pearl Tiered Earrings
  16. Hanging Earrings with Purple Lace Agates
  17. Beadable Fan Earrings with Diamond Drop
  18. Large Snowflake Earrings (Winter’s not over yet…)
  19. FLASHBACK Friday: Easy Leather Hook Bracelet
  20. Half Circle Chain Earrings with Turquoise Seed Beads
  21. Hook Wrap Bracelet with Vegan Bolo Leather Cord
  22. Starburst Post Earrings with Beadable Pendant
  23. Arrow Leather Bracelet
  24. Macrame Wheel Earrings
  25. Tropical Statement Earrings
  26. FLASHBACK Friday: Stone Ripple Leather Bracelet
  27. Jacque Tassel Earrings
  28. Fringe Earrings with Triangle Link


DIY Starburst Post Earrings with Beadable Pendant

Today’s DIY features a Beadable Pendant sewn with Miyuki Delica beads and hung on a hoop post earring. Think of all different color ways you can design with this earring.

Items used in post earrings:

GoodyBeads.com Blog | DIY Starburst Post Earrings with Beadable Pendant FREE Pattern Tutorial

Directions:

1.Start with 3 feet of beading thread. Add a bead stopper to your end, leaving a 5-6 inch tail.

2. Sew through the top hole/channel, pick up three beads and sew across the channel and down the hole. Ladder stitch around the pendant, following the illustrated pattern:

3. Repeat and sew through the pattern again. At the end, tie both your end together, sew through a bead or two and cut off excess.

4. Open jump ring, slide on beadable pendant and through hoop of earrings. Close jump ring.

5. Repeat all steps for other earring.

— CLICK for FREE Downloadable Pattern Tutorial —

Earring Designed by So Vang


DIY Golden Snowflake Earrings

Winter isn’t over yet. Let’s make these golden snowflake earrings with snowflake acetate pendants with gold findings.

Items used in snowflake earrings:

  • Z006136 – 35mm Pearl Acetate Cutout Snowflake Pendant
  • CH00998 – 15mm Matte Gold Donut Chain
  • A008801 – 5mm Oval Jump Rings
  • TC02298 – Gold Filled Front Loop Earring Wire by Tierracast®

GoodyBeads.com Blog | DIY Golden Snowflake Earrings FREE tutorial.

Directions:

  1. Take two donut links from the chain link.
  2. Open jump ring, slide through one hole of donut link and loop of snowflake pendant. Close jump ring
  3. Open earwire loop, slide on other hole of donut link and close loop.
  4. Repeat all steps for other earring.

Earrings Designed by Tory


DIY Carabiner Starburst Necklace or Wrap Bracelet

Fall in love with this versatile piece of jewelry that acts as a necklace and a wrap bracelet. Designed with paperclip chain and a bold carabiner clasp, it’s a showstopper piece with a large Starburst Charm.

Items used in jewelry:

  • Z006008 – 20.5mm Stainless Steel Round Starburst Charm
  • Z004793 – 20mm Silver Plated Jewelry Carabiner Rhinestone Lock Clasp
  • CH01172 (2) – 10.9mm Silver Finish Steel Paperclip Cable Chain
  • X003062 – 5.5mm Silver Plated 18 Gauge Round Jump Rings

Get all the components for this project here

GoodyBeads.com Blog | DIY Carabiner Starburst Necklace or Wrap Bracelet

Directions:

  1. Cut chain to 15 inches.
  2. Open jump ring and slide on one end of chain. Close jump ring.
  3. Open another jump ring, slide through jump ring from step 2 and through charm loop. Close jump ring.
  4. Unscrew carabiner clasp and slide through other end of chain.
  5. Wear it wrapped around twice for a wrap bracelet or as a necklace.

Designed by Heidi


DIY Chunky Paperclip Chain Bracelet with Large Mindful Pendant Charm

Paperclip chain and chunky jewelry is the new statement accessory for this new year. It’s simplistic and draws your attention because of its bold presence. Top it off with a large TierraCast 8 Fold Path Pendant and you’re set for your own runway!

Items used in Paperclip Chain Bracelet:

  • TC02496 – 32mm Antique Silver 8 Fold Path Pendant by TierraCast
  • CH01170 – 26.5mm Imitation Rhodium Finish Jumbo Paperclip Cable Chain
  • A008807 – 7mm Silver Plated 16 Gauge Round Jump Rings
  • Z008325/Z008360 – 33mm Large Swivel Lobster Clasp

Get all the components for this project here

GoodyBeads.com Blog | DIY Chunky Paperclip Chain Bracelet with Large Mindful Pendant Charm FREE Tutorial

Directions:

  1. Cut a piece of chain consisting of 9 links.
  2. Open jump ring, slide on one end of the chain and through clasp loop. Close jump ring.
  3. Open another jump ring, slide in charm and close jump ring.
  4. Open another jump ring, slide through chain end again, through jump ring of the pendant charm and close jump ring.

Designed by Heidi


DIY Playful Tassel Earrings

Spring will be here before we know, so why not include these DIY playful tassel earrings to your mix of colorful, spring jewelry. Made with our favorite fan tassels and gold findings, they’re so easy you’ll probably want to make more for all your girlfriends too!

Items used in tassel earrings:

  • Z017109 – 40mm Gold Plated Brass Hoop Frame
  • Z007737 – Turquoise Blue Flat Half Circle Fan Tassel with Gold
  • A011517 – 4mm Gold Plated 20 Gauge Round Jump Ring
  • TCZ0139 – Gold Filled Earring Wire by Tierracast®

GoodyBeads.com Blog | DIY Playful Tassel Earrings FREE Tutorial

Directions:

  1. One end of the hoops can slide out. Don’t slide it out but crimp down by using a needle nose pliers.
  2. Open jump ring, slide on tassel loop and through hoop. Close jump ring.
  3. Open earwire loop, slide on hoop dangle and close loop.
  4. Repeat all steps for other earrings.


DIY Leaf Drop & Straw Necklace with Beadable Accessories

For today’s February Daily Project, our DIY Leaf Drop & Straw Necklace may look elaborate and hard to make, but don’t fret because it’s quite easy. With the help of beadable accessories, we’re pulling it together with a straw connector and chain for a stylish necklace! Plus a get the FREE pattern tutorial for this necklace and its beadable accessories.

Items used in necklace:

  • SB02336 – 11/0 Spruce Duracoat Opaque Dyed Delica Seed Beads
  • SB00269 – 11/0 Galvanized Gold Miyuki Delica Seed Beads
    OR try other 11/0 Delica Colors
  • Z001659 – Handmade Woven Rattan Straw Oval Ring Pendant/Connector
  • Z005131 (3) – Gold-Plated Stainless Steel Beadable Rectangular Link
  • Z018107 – 40mm Gold-Plated Stainless Steel Beadable Oval Pendant
  • CH00532 (2) – 2.2mm Gold Plated Soldered Cable Chain
  • A008801 – 5mm Gold Plated 21 Gauge Oval Jump Rings
  • A011523 – 8mm Gold Plated 20 Gauge Round Jump Ring
  • A011517 – 4mm Gold Plated 20 Gauge Round Jump Ring
  • A006587 – 6lb Crystal Fireline Thread
  • A006767 – Beading Needles

——- CLICK for FREE Downloadable Pattern Tutorial ——-

GoodyBeads.com Blog | DIY Leaf Drop & Straw Necklace with Beadable Accessories with FREE Pattern Tutorial

Designed by So Vang


Heidi’s Boho Babe Earrings

Heidi is a fan of silver jewelry and her Boho Babe Earrings definitely hits the mark! Made with silver findings, charms and beads, this easy-to-make pair of earrings will be a staple to your spring style!

Items used in earrings:

  • Z017106 – 40mm Silver Plated Brass Hoop Frame
  • A010966 – Silver Plated Earring Wire with Bali Style Design
  • Y006450 – 12mm Silver Plated Round Disc Drop
  • A022190 – 4.5mm Cornerless Cube Silver-Plated Brass Beads
  • A008799 – 5mm Oval Silver Plated 21 Gauge Jump Rings
  • Z011500 – 4mm Silver Plated 20 Gauge Round Jump Ring
  • A015821 – Super New Glue

Get all the components for this project here

GoodyBeads.com Blog | Heidi's Boho Babe Earrings FREE Tutorial

Directions:

  1. Open a round jump ring, slide on a silver charm and close jump ring.
  2. Open an oval jump ring, slide round jump ring from step 1 and close jump ring. Open another oval jump ring, slide through previous oval jump ring and close jump ring.
  3. Repeat steps 1 and 2 to make a total of 10 dangles.
  4. Gently open the hoop by taking out one of its ends. (Only one side is crimped in, so make sure you pull out the other.)
  5. Slide on the the following:
    silver bead, oval ring of silver charm dangle, two silver bead, silver charm, two silver bead, silver charm, two silver bead, silver charm, two silver bead, silver charm, and a silver bead.
  6. Add a small dot of glue on the hoop end and slide hoop end back in the slot you took it out of. Use thin flat nose pliers to crimp down this end to secure it.
  7. Open earwire loop and slide on hoop dangle. Close loop.
  8. Repeat steps 4 -7 for other earring.

Designed by Heidi.


DIY Leather Fringe Bib Necklace with Deerskin Leather Lace

Try out this fun DIY bib necklace with deerskin lace fringe and Black Gold Amazonite large-hole gemstone beads from our Deerskin Lace March 2018 Trend.

Exceptionally strong, yet soft and supple, Deerskin Lace is expertly cut from only the finest North American deer hides. Great for all your jewelry and beading projects or for garment lacing. Deerskin Lace is the softest leather lace around. 

Items used in necklace:

GoodyBeads.com Blog | DIY Leather Bib Necklace with Deerskin Leather Lace FREE Tutorial

Directions:

  1. Cut 7 pieces of leather lace at 10 inches.
  2. Cut 6 pieces of leather lace at 7 inches.
  3. Take a 7″ leather and make a lark’s head knot on the bottom bar of the bib necklace. Repeat 2 more times.
  4. Make a lark’s head knot with the 10″ leather, 7 times.
  5. Make a lark’s head knot with the 7″ leather, 3 times.
  6. Slide a gemstone to the middle strand of your leather fringes and make a knot. Repeat outwards, staggering your knots so that your fringes get shorter and shorter. Make sure your knots are where you’d want them to be and then cut off excess leather.
  7. Tie one end of the chain with the side hole of your bib connector with a 3″ piece of leather, twice. Repeat to other side.
  8. Optional, you can cut chain in half to add a clasp. Or cut chain shorter for a shorter length.