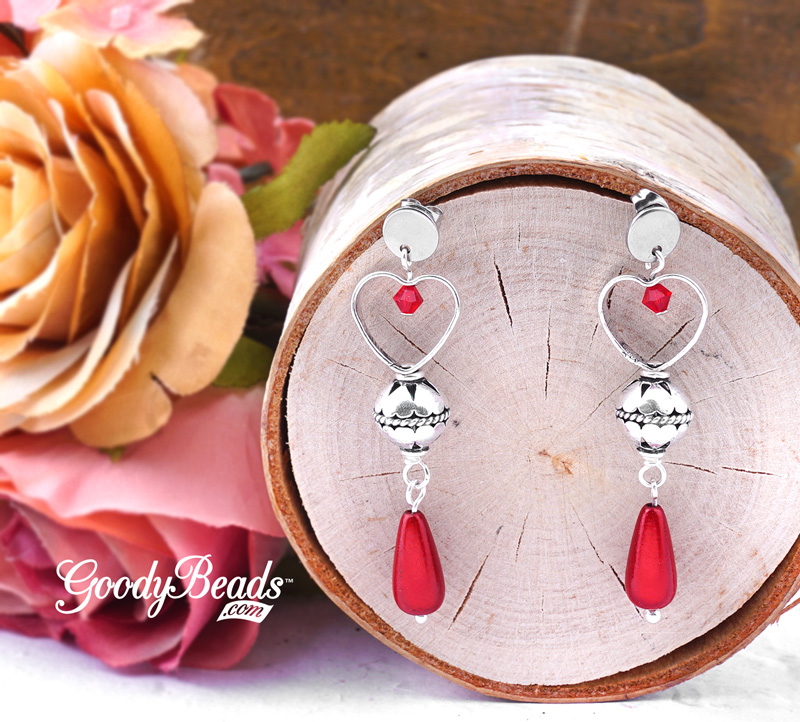
Slide end cap to one end of the chain and crimp end cap. Repeat to other end of chain and end cap.
Open eyepin loop, slide on loop of one end cap and close loop. On eyepin, slide on a 4mm crystal and make a simple loop. Open loop and slide on quick link and close loop.
Open another eyepin loop and slide on other end cap and close loop. One eyepin, slide on 4mm crystal, metal bead and 4mm crystal. Make a simple loop.
On a headpin, slide on a 6mm crystal and 4mm crystal. Make a simple loop. Open loop and slide on loop you made in step 3. Close loop.
DIY Statement Earrings with Swarovski Scarlet Crystals
Design a pair of DIY Statement Earrings with one our newest color addition in our Swarovski crystals: Scarlet. Scarlet is a cross between a Siam and Ruby color. It has a hint of a deep purple and the vibrance of red. Pair the hue with gold findings for a rich pair of earrings!
On a headpin, slide on a 4mm crystal and make a simple loop. Open loop and slide on one hole of brush gold disc. Close loop.
Open an eyepin loop and other hole of brush gold disn. Close loop.
On the eyepin, slide on 6mm crystal and through teardrop hoop from the inside and up. Make a simple loop. Open loop and slide on hole of half circle connector (curved side). Close loop.
Open another eyepin loop and slide through other hole of half circle connector. Close loop.
On eyepin, slide on 8mm crystal and make a simple loop.
Open earwire loop, slide on loop you make in step 5 and close loop.
Repeat all steps for other earring.
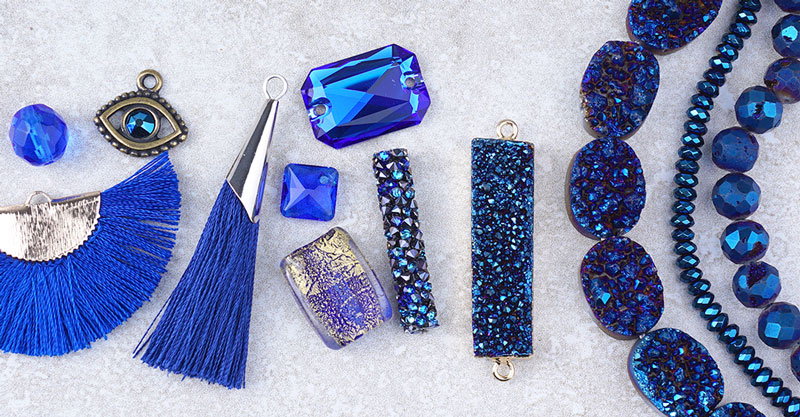
Pantone 2020 Color of the Year: Classic Blue
Pantone has chosen the spotlight color for 2020. Classic Blue. It is a ‘solid and dependable blue hue we can always rely on.’ Here is how Classic Blue is characterized:
Because Pantone has continuously given us variations of blue hues in the past, it can be safe to say that blue is a reliable and dependable color that we all find ourselves designing with and wearing through the years. And it is definitely a bold color. Here are some items to get you inspired with the classic blue:
Here are some easy DIY earrings to get your 2020 started.
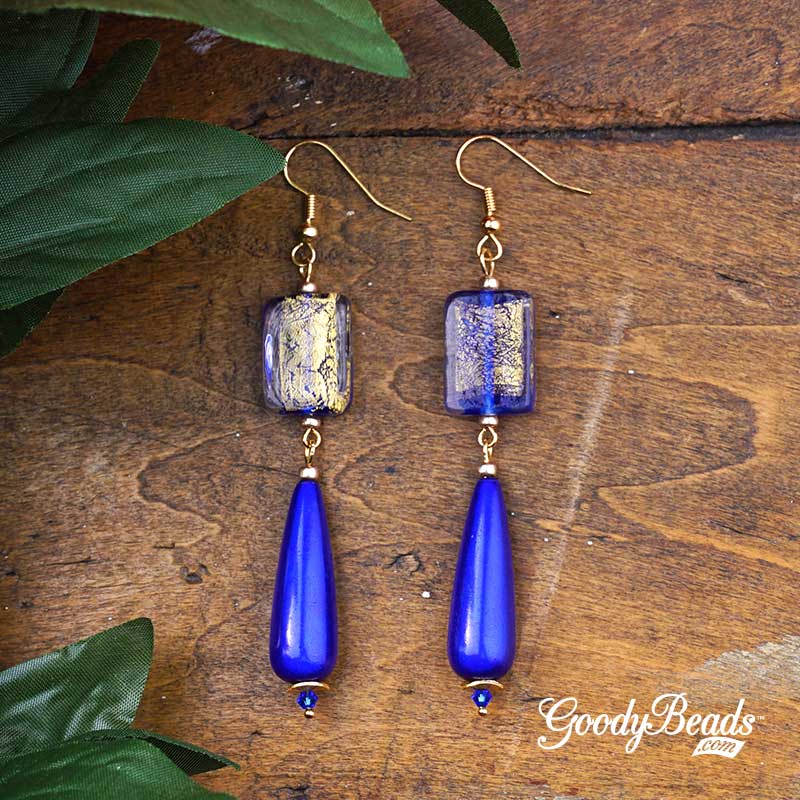
Blue Glass Glowing Earrings
We combined some of favorite beads like glass, miracle and Swarovski, tied together with some gold findings! Plus, we just love the gold flakes in the glass bead.
On a headpin, slide the following beads and make a simple loop: 3mm Swarovski bicone bead, wavy disc, miracle bead and seed bead.
Open eyepin loop and slide on bead dangle from step 1. Close loop.
On the eyepin slide on the following and make a simple loop: Seed bead, glass bead and seed bead.
Open earwire, and slide on your dangle and close loop.
Repeat all steps for other earring.
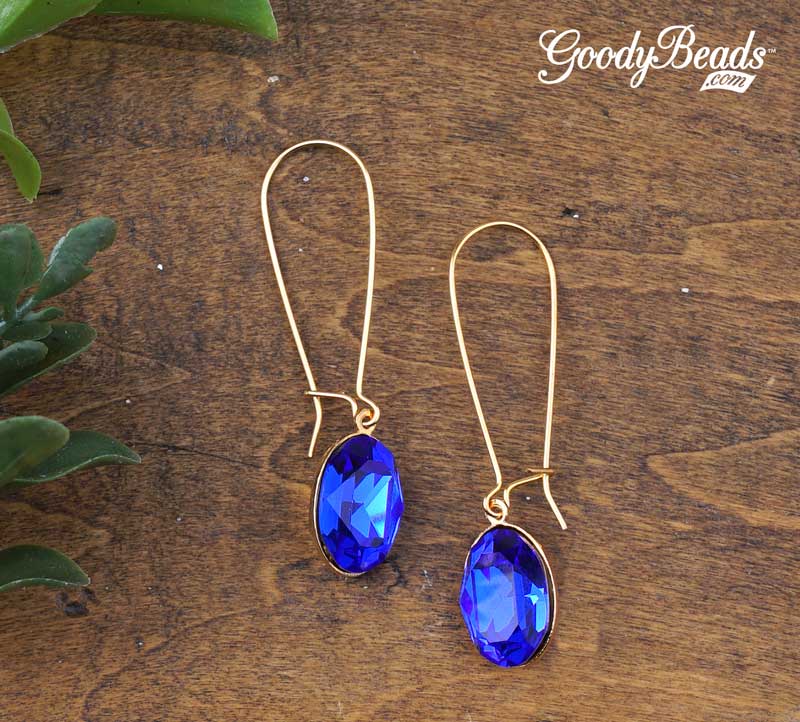
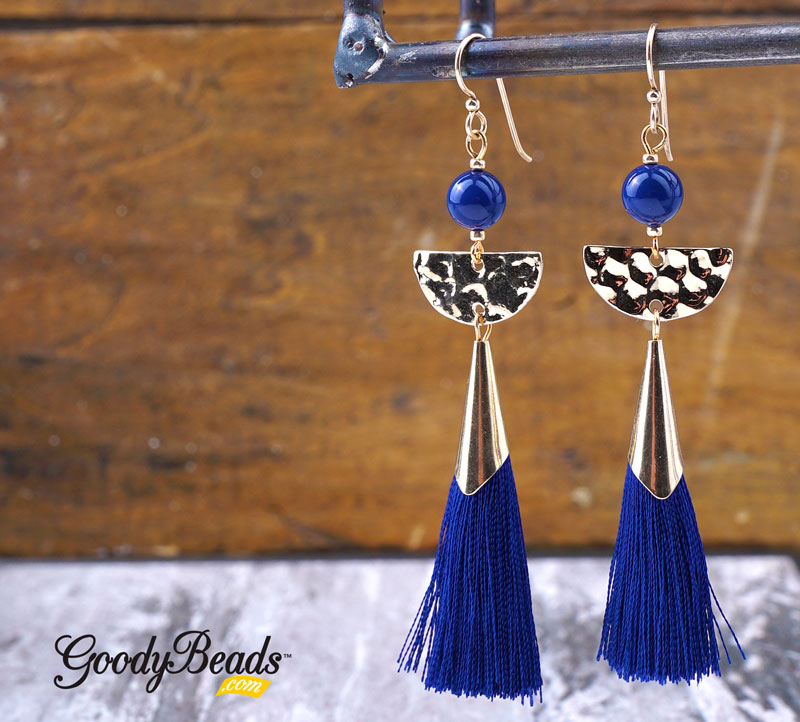
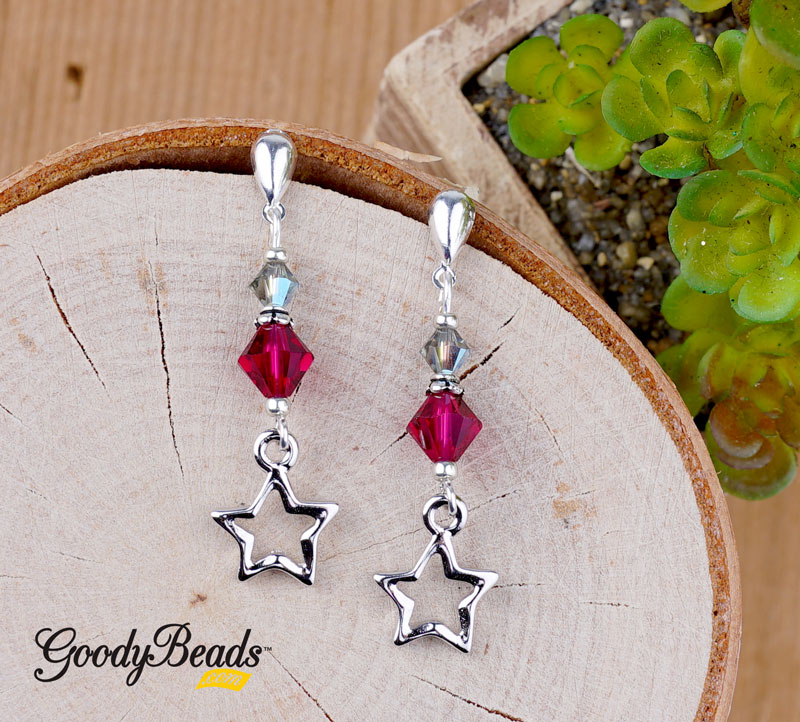
Majestic Blue Drop Earrings
We don’t use much of the kidney earrings, but love them all the same. They work great with a simple drop crystal or charm, as the kidney drapes and elongates the earring itself.
Open eyepin loop, slide on star charm and close eyepin.
On the eyepin, slide a seed bead, Ruby crystal, bead cap, 4mm black diamond crystal, and seed bead. Make simple loop.
Open dangle loop and slide on post earring loop. Close loop.
Repeat all steps for other earring.
Holiday Gift Ideas: DIY Crafts
Here are some fun DIY Crafts for the holidays. Turning from our traditional DIY jewelry, we want to offer some fun DIY Craft options for your friend who loves to accessorize with bookmarks, ornaments and more!
Know someone who needs a fun holiday gift that brings sparkle, glam and bling to their outfit? These gift ideas uses the sparkle of Swarovski® crystals and pearls. Gift some exciting DIY jewelry that’ll make her shine! Here are some ideas to get you started:
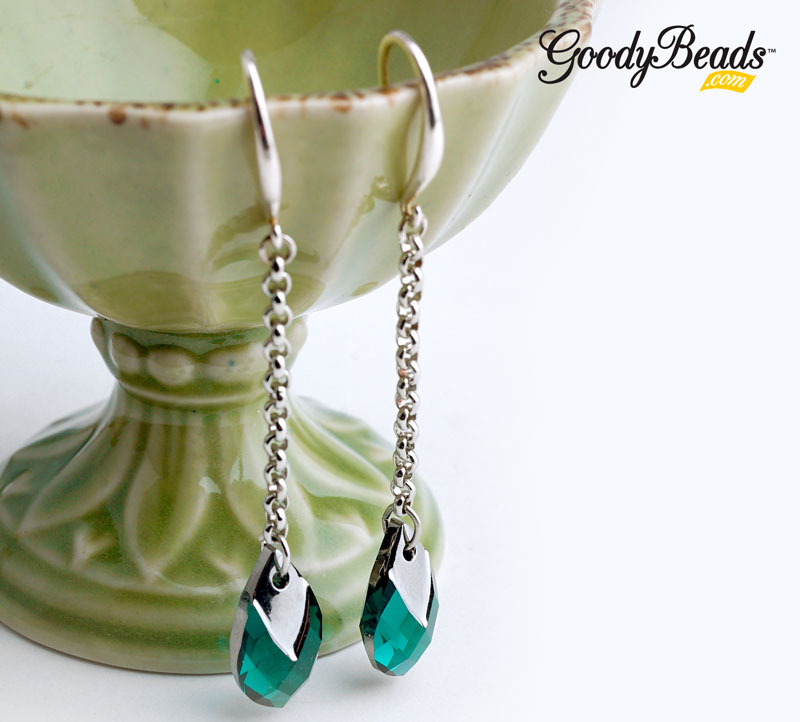
Embrace your own life balance with this month’s color, Emerald. When you design with Emerald, its elegant hue is refreshing. Emerald is a color loved by many through the ages. Here are some Swarovski colors to match this statement hue:
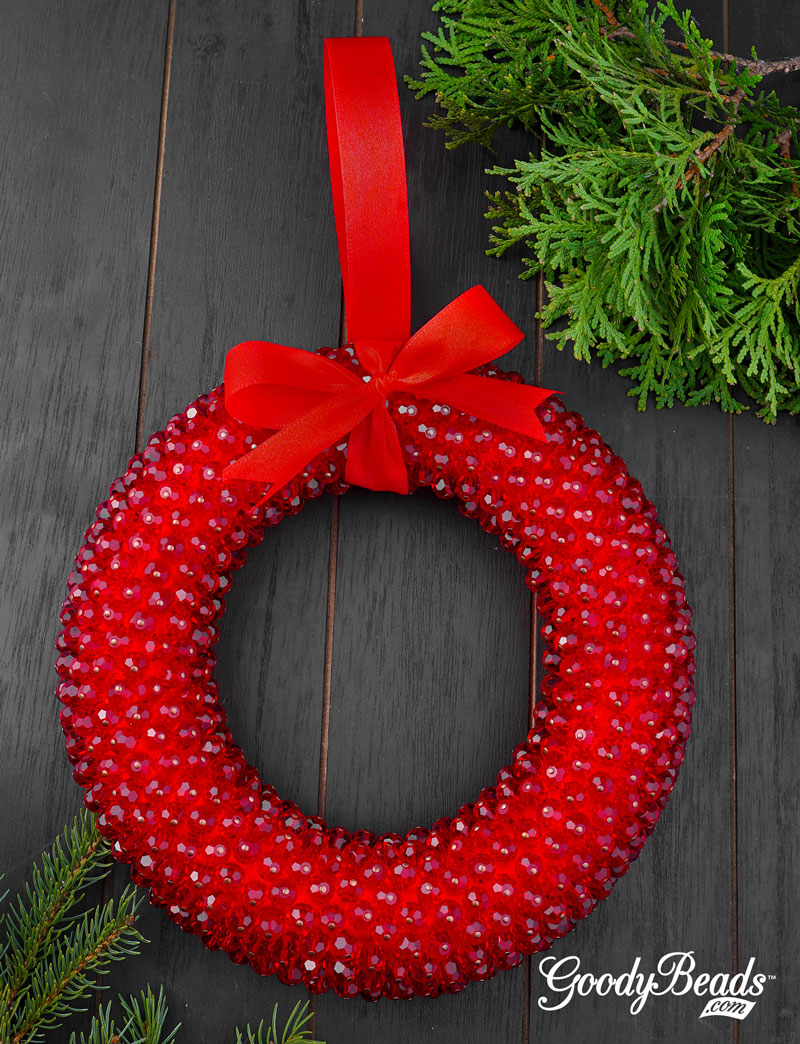
Sparkling Beaded Holiday Wreath with Chinese Glass Beads
We have a show stopping DIY craft for you this holiday season. Make a stunning, sparkly beaded holiday wreath with beads!
Inspired by Martha Stewart, because she is the Queen of DIY, we followed the video instructions to her Holiday Druk Bead Wreath to create our own! For our version, we’re using different beads and findings, but using the same process.
What you’ll need for wreath:
8 Inch foam wreath from your local craft store. (We got ours from Joann Fabric.)
Red Wide Satin Ribbon (Also got this from Joann Fabric)
As a note, you can use different color and size Chinese Crystals. You can also use other kinds of beads, such as Satin or Miracle beads, Swarovski Crystals or Pearls, Gemstone Beads or even some wood beads. The ideas are limitless. One thing to keep in mind is to make sure to have a similar ribbon color to match the beads you will be using. If you have a variation of colors, testing on white or black ribbon would work. You can also use a variation of sizes from 4mm to 12mm beads in your wreath.
Directions:
Wrap your wreath with ribbon all the way around. Secure the end with a pin. (You can use crafting glue to help secure your ribbon in place.)
Cut all your headpin tips at an angle. This will help you push through the ribbon and foam. (Martha Stewart colored her pin tips with red nail polish or paint. You can if you want, we opted out of this option.)
Slide a bead onto a headpin, dip the tip into your glue and push headpin into your wreath. You may need to twist the headpin sometime to punch through the ribbon.
Repeat and stagger your beads throughout. (You only need to fill the front side of your wreath and not the back. However, you can if you would like to.)
Finish it off with a ribbon bow and a loop of ribbon (pinned and glued to the back).
Have a Happy DIY Holiday!
DIY Satin Wrap Bracelet with Memory Wire
Talk about arm candy with this festive Satin Wrap Bracelet with memory wire, satin beads, miracle beads, Chinese crystals and gold split rings. Make it in time for the winter holidays because its got the fancy red, ivory and gold look!
Here is what you’ll need to make this wrap bracelet:
Create a simple loop at one end of the memory wire using the Memory Wire Finishing Pliers.
Slide on the following sequence of beads onto the memory wire:
3 miracle bead, two split rings, three clear Chinese crystal and two split rings. Repeat two more times. Add three miracle beads, two split rings and three clear Chinese crystal.
Three red satin beads and brass bead. Repeat 4 more times.
Three red satin beads, two split rings, three clear Chinese crystal and two split ring. Repeat 4 more times. Omit last two split rings.
Miracle bead, two split rings, miracle bead, two split rings, miracle bead, two split rings, red satin, two split rings, red satin, two split rings, red satin and two split rings. Repeat 2 more times.
End with miracle bead, two split rings, miracle bead, two split rings, miracle bead.
Trim memory wire with Memory Wire Cutter so there is a 3/8” to 1/2” tail. Create a simple loop using Memory Wire Finishing Pliers.
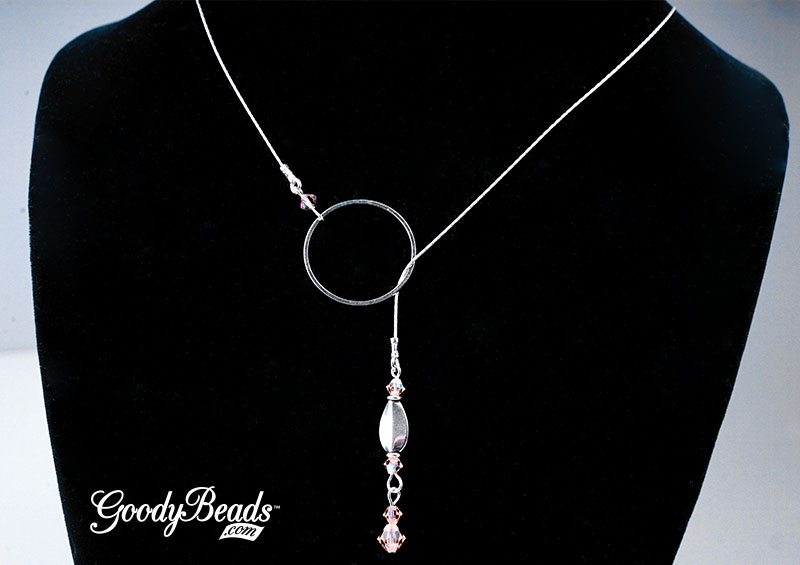
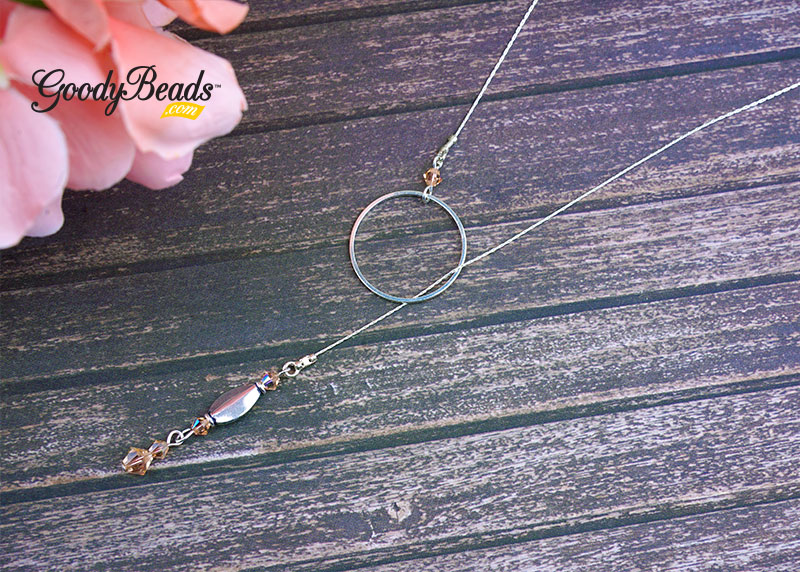
Illusion Necklace with Swarovski® Crystals
Our illusion necklace is made with gorgeous Swarovski Aquamarine Shimmer crystal beads and using the simple technique of flat crimping.
Your choice of clasp (Clasp used in example: A021129)
Swarovski Aquamarine Shimmer Round Crystal – 4mm SW02034 (12), 6mm SW02035 (8), 8mm SW02036 (6)
Add more crystals for more sparkle!
Directions:
Cut beading wire at 18″, 20″, 22″ and 24″ long
Flush all pieces of wire at one end and slide all ends in the end cap. Crimp the end cap.
On each wire, slide on sequences of crimp tube, crystal and crimp tube. Crimp the crimp tubes on both sides of the crystal. Space out the sequences of beads throughout your strands.
Once you have all your crystals crimp down, flush the other ends of your beading thread, slide another end cap over it and crimp the end cap.
Attach your clasp to the end of your end caps with jump ring.
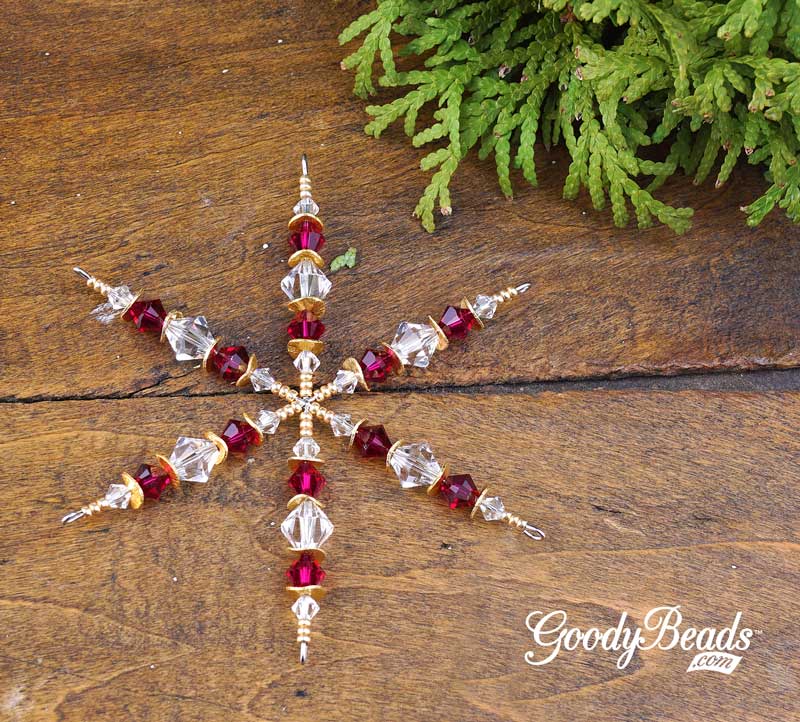
Holiday Lightbulb Snowflake Ornament with Swarovski® Crystals
We LOVE the holidays because of the bright and beautiful decorations. Are you busting out your lights and tree soon? Why not make some festive holiday snowflake ornaments to elevate your holiday design! These are designed with glass lightbulb beads and Swarovski crystals.
On a spoke, slide on a seed bead, an emerald bicone, red lightbulb, seed bead, crystal rondelle, seed bead & white lightbulb bead. Make a simple loop with memory finishing pliers.
Skip a spoke and on the third spoke, slide on a seed bead, clear bicone, green lightbulb, seed bead, crystal rondelle, seed bead & red lightbulb bead. Make a simple loop.
Skip a spoke and on the fifth spoke, slide on a seed bead, red bicone, white lightbulb, seed bead, crystal rondelle, seed bead & green lightbulb bead. Make a simple loop.
On the next spoke, slide on a seed bead, clear bicone, green lightbulb, seed bead, crystal rondelle, seed bead & red lightbulb bead. Make a simple loop. (This sequence should mimic the spoke across.)
On the next open spoke, slide on a seed bead, red bicone, white lightbulb, seed bead, crystal rondelle, seed bead & green lightbulb bead. Make a simple loop. (This sequence should mimic the spoke across.)
On the last open spoke, an emerald bicone, red lightbulb, seed bead, crystal rondelle, seed bead & white lightbulb bead. Make a simple loop with memory finishing pliers. (This sequence should mimic the spoke across.)
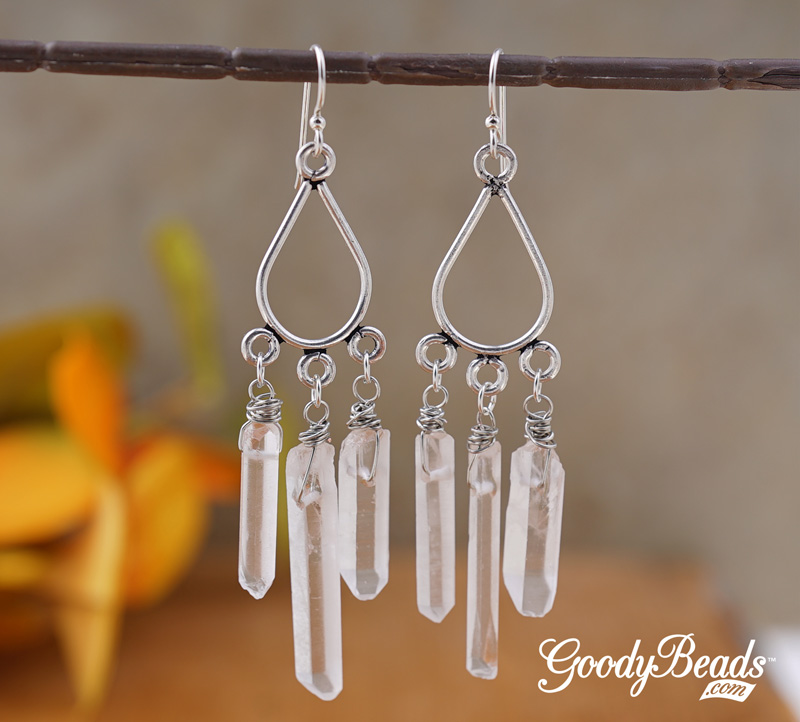
Crystal Quartz Drop Earrings with Tutorial
Today’s FREE tutorial is wire wrapping Crystal Quartz points and making simple pair of earrings with them! All you need are a few tools and wire to get your started!
Tools: Round Nose Pliers, Chain Nose Pliers and Side Cutter
Crystal Point Tutorial
Step One: Gather your materials and tools.
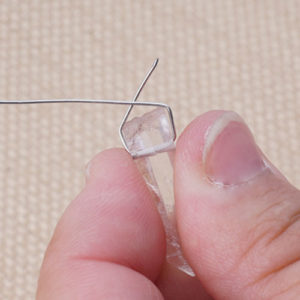
Step Two: Cut a 5 Inch piece of wire and slide wire through crystal an inch of the way.
Step Three: Wrap both wire ends to the top of the crystal and criss cross them.
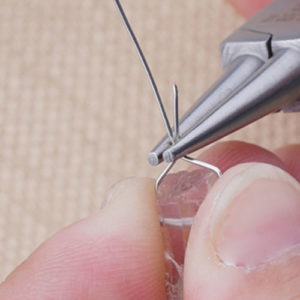
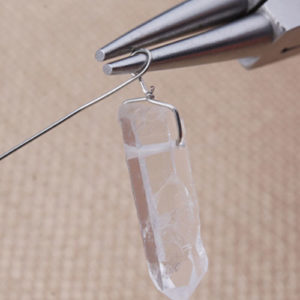
Step Four: Using a round nose, grasp the wires where they cross.
Step Five: Without moving your pliers, twist the crystal a few times to create a tight twist at the cross.
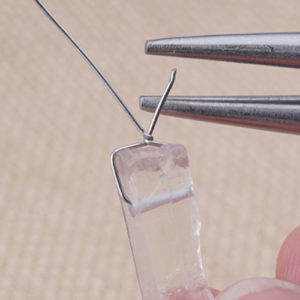
Step Six: Cut off smaller wire end.
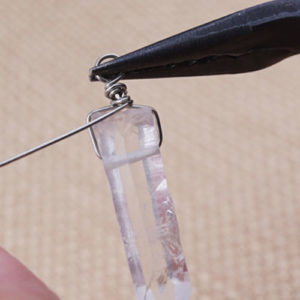
Step Seven: With the round nose pliers, make a full loop.
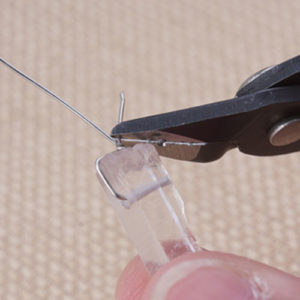
Step Eight: Grasp the loop with flat nose pliers and wrap the wire around the base of the loop a few times. Don’t worry about making them perfect coils.
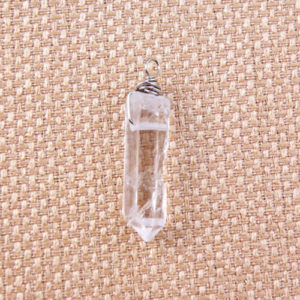
Step Nine: Cut off excess wire, tuck in the wire end and you are ready to make more!
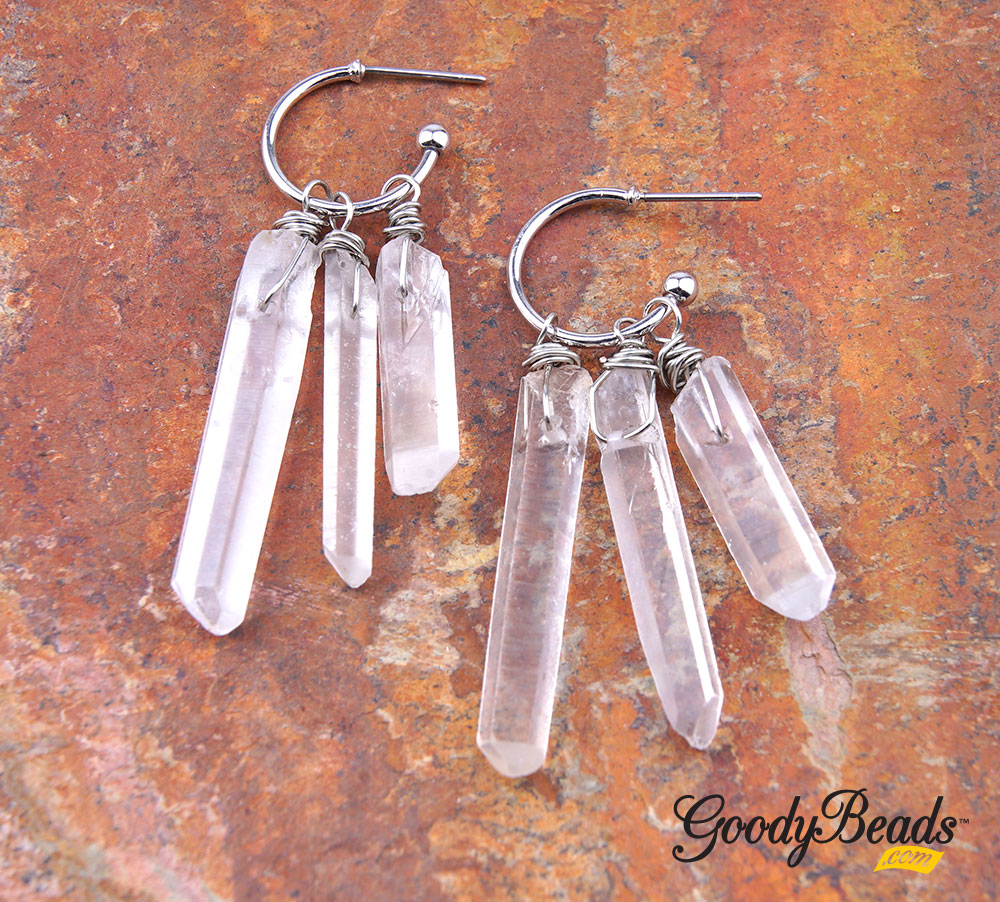
Here are some earring examples to using your crystal points!
Crystal Hoop Earrings
We took three different graduated points and slid them over the hoop earrings for an easy pair of earrings!
In this example, we chose two points of the same length and dangled one point on either sides of the drop link. And a third point at a longer length at the middle.