Wire Form Cuffs with Gemstone Cabochons

This DIY tutorial will give you a new style statement bracelets with wire form cuffs and gemstones cabochons.


What you’ll need for bracelets:


Directions

  1. Take a small piece of sanding sponger, filer or sand paper and brush over the flat area/base on the cuff that you will adhere the cabochon to. Brush or scrape the surface to get some scratches in.
  2. File the backside of your Cabochon.
  3. Wipe off excess dust from cuff and Cabochon.
  4. Add coating of Super New Glue or thin layer of E-6000 to area you filed.
  5. Sit the back of your cabochon on the are you just added glue to.
  6. Hold in place for a few seconds. Let piece dry completely for 24 hours before wearing.


Cuff Samples

WireFormCabochonCuff_01

Items use in this cuff design: Z004398CAB-IZJ40X30OV

WireFormCabochonCuff_02

Items use in this cuff design: Z004446CAB-ATQ25DC


Cymbal Vourkoti SuperDuo Bracelet

We’re continuing our LOVE for the new Cymbal Components with a simple bracelet pattern using the Cymbal Vourkoti bead ending and Czech SuperDuo beads.


cymbalVourkotiCymbal Vourkoti bead endings are used with Czech SuperDuo beads. The bead ending caps your bracelet and finishes it off beautifully and professionally. Find the easy pattern tutorial below along with SuperDuo pattern options to play with.


What you’ll need for bracelet:


Purple Blush SuperDuo Bracelet

GoodyBeads Blog | FREE Pattern Tutorial with Cymbal Vourkoti components and Czech SuperDuos.

Items used in this bracelet: Z004582, SB01782, SB00423, A006587, Z011514, A008658, A015211


Color & Pattern Samples

This pattern is certainly a versatile basic pattern to mixing up SuperDuo colors of your own choosing. Here are 4 different color ways and patterns you can use with this pattern using Cymbal Vourkoti components.

GoodyBeads Blog | Cymbal Vourkoti Czech SuperDuo Pattern and Colorways

  • This first example uses SuperDuo beads with a Capri finish. The Capri finish has splotching of colors all around the SuperDuo bead, so when you bead stitch the, you get some lovely splotch of color without a….
    Items used in this example:SB02114, SB00422, Z004581
  • Second example uses two colors of SuperDuo with an outer color a Picasso finish and the middle beads are an opaque color.
    Items used in this example: SB01440, SB01441SB00424Z004582
  • Third example uses two different SuperDuo beads consisting of SuperDuo Duets and an opaque color to compliment the inner color. This creates a track pattern in the middle.
    Items used in this example: SB01406, SB03491SB00422Z004581
  • Lastly, try pattern out with three colors, while creating a chevron pattern.
    Items used in this example: SB01406SB01441, SB03093, SB00424Z004582


Swarovski® Tangerine Jewelry Tutorials

We have three exciting projects using June’s Swarovski Psychology of Color: Tangerine. See how to freshen up your jewelry with these DIY projects!


Tangerine Cuff

GoodyBeads Blog | Free Tutorial - Beadable Cuff with 4mm Tangerine Bicone Swarovski Crystals and 8/0 round Miyuki seed beads.

See how easy it is to making your own sparkling bracelet with a beadable cuff and Swarovski bicone crystals.

What you’ll need:

SW_POC_TangerineProjects_CuffTut

Directions:

  1. Cut a 4 foot piece of beading thread.
  2. Add a Bead Stopper or sew through a small seed bead twice, leaving a 5 inch tail.
  3. Sew up through the the first hole and pick up a bicone crystal and seed bead.
  4. Sew across the channel to the hole opposite.
  5. Skip a hole and sew up through then next hole. Pick up a bicone crystal and seed bead.
  6. Sew across the channel to the hole opposite.
  7. Keep repeating these step sequence to add a total of 12 bicone crystals to cuff.
  8. Sew through the whole pattern again to secure the pattern.
  9. Tie off ends and cut off excess.


Tangerine Drop Earrings

GoodyBeads Blog | FREE Tutorial Earrings with Tangerine Swarovski crystals and silver findings.

Make this sweet tiered earrings with dangling crystals inside a Teardrop Hoop.

What you’ll need:


Directions:

  1. Slide a 8mm crystal on ball headpin and make a simple loop.
  2. Open eyepin loop, slide on loop from step 1 and close eyepin loop.
  3. Slide 6mm crystal on eyepin and make a simple loop.
  4. Open loop you just made and slide loop on inside loop of hoop component. Close loop.
  5. Open another eyepin loop and slide on top loop of hoop components. Close loop.
  6. Slide a 4mm crystal on eyepin and make a simple loop.
  7. Open loop you made from Step 6 and slide on earwire. Close loop.
  8. Repeat all steps for other earring.


Swarovski: Satsuma Suprise

GoodyBeads Blog| Swarovski Psychology of Color Tangerine

Our friends at Swarovski Create your Style, designed this colorful multi-strand bracelet.

What you’ll need:

Directions:

  1. Use alcohol wipes to clean all findings and set aside to dry.
  2. Using one jump ring attach to one ss39 chaton setting. Repeat five more times and set aside.
  3. Using one 1088 ss39 chaton stone glue into one ss39 chaton setting and set aside for 24 hours to dry. Repeat five more times and set aside.
  4. Using two and a half coils of memory wire, make a double loop at one end with Memory Wire Finishing Pliers.
  5. Slide on the following FOUR sections:
    1. TWO 4mm bicones, 6mm bicone, TWO 4mm bicones, Botanical bead, 4mm bicone, Tangerine chaton charm, Botanical bead, TWO 4mm bicones, 6mm bicone, TWO 4mm bicones , THREE metal seed beads,
    2. TWO 4mm bicones, 6mm bicone, TWO 4mm bicones, Botanical bead, 4mm bicone, Tangerine chaton charm, Botanical bead, TWO 4mm bicones, 6mm bicone, TWO 4mm bicones, THREE metal seed beads, Peach Delite chaton charm, THREE metal seed beads,
    3. TWO 4mm bicones, 6mm bicone, TWO 4mm bicones, Botanical bead, 4mm bicone, Botanical bead, TWO 4mm bicones, 6mm bicone, TWO 4mm bicones, THREE metal seed beads, Peach Delite chaton charm, THREE metal seed beads,
    4. TWO 4mm bicones, 6mm bicone, TWO 4mm bicones, Botanical bead, 4mm bicone, Botanical bead, TWO 4mm bicones, 6mm bicone, TWO 4mm bicones, THREE metal seed beads, TWO 4mm bicones, 6mm bicone, and TWO 4mm bicones.
  6. Trim the end of the wire and make a double loop at the end.
  7. Add one chaton setting at each end of the bracelet.


Flat Memory Wire and Gemstone Bracelet – Video Tutorial

Candie Cooper came by the GoodyBeads Mezzanine to show us how to make an easy DIY wrap bracelet with flat memory wire and gemstone beads. Watch the video today!


GoodyBeads Blog: Flat Memory Wire and Gemstone Bracelet Video Tutorial

After the Spring Twin Cities Bead Bazaar, Candie stopped by to demonstrate how to make a classy and chic bracelet using 4mm faceted coin gemstone beads, wire wrapped around flat memory wire.


What you’ll need:


Video Tutorial


Bead Stitched Bracelets with Cymbal Soros – Pattern Tutorial

One the newest additions to GoodyBeads is the Cymbal Components. Here are three projects, with patterns; using the Cymbal Soros.


Z012249_1Z012250_1

Cymbal Components are bead endings, bead substitutes and side beads that give your bead stitched patterns a cleaner, finished ending. The Cymbal Soros Bead Ending, in Silver and Gold, is noted to use with Miyuki Tilas and 1/2 Tilas. But the wonderful thing about using the Soros is how versatile this bead ending is. In these three bracelets, you will notice how similar the bead stitching patterns/sequence. One pattern will show how to incorporate Tilas and 1/2 Tilas, while the other two mixes up different beads like SuperDuos, Tilas, seed beads and even two-hole Swarovski Spike Beads.


Playful Tila Bracelet

GoodyBeads Blog: Playful Tila Bracelet with Cymbal Components and Miyuki Tila Beads, Pattern Tutorial

What you’ll need for this bracelet:

Items used in bracelet below: SB00870, SB01934, Z012249, A006588, A015211, A011535, Z011500, X003062


Tila Stripe Bracelet

GoodyBeads Blog: Tila Stripe Bracelet with Cymbal Components and Miyuki Tila. FREE Tutorial

What you’ll need for this bracelet:

Items used in bracelet:SB00870, SB01406, SB00107, SB00402, Z012250A006588, Z007861, Z011522A015211


Elegant Spike Bracelet

GoodyBeads Blog: Elegant Spike Bracelet with Cymbal Components and Swarovski two-hole Spike Crystal Beads, Pattern tutorial

What you’ll need for this bracelet:

Items used in bracelet: SB01406SB00107SB00423A006588Z012250A015211, SW01715 (23), Z007861, Z001925


Leather Wrap Bracelet with Matubo Beads – Video Tutorial

We’ll show you how to make a leather wrap bracelet by fishtail braiding leather with new 2/0 Czech Matubo Beads.


For this bracelet tutorial, you’ll need:


Determine Length of 1.5mm Leather needed for a wrap bracelet

Use this method to determine the leather cord length you may need for a multi-wrap bracelet.

Take your wrist length and double the length. Multiply that by the number of wraps you want and then add 12”. That will give you an approximate cord length you will need to start your bracelet. (The extra 12” factors in the beads and leather you’ll be adding along with loop end.)

Example:

2 wraps for an 8.5” bracelet: (8.5” x2) x 2 wraps = 34 + 12 = 46” needed.

Or

4 wraps for a 7.5” bracelet: (7.5” x2) x 4 wraps = 60 + 12 = 72” needed.

Keep in mind, these total numbers are approximate. You will want to test the wrap length while you’re making your bracelet. Having extra length is better than being short on your wrapped length goal.


Video Tutorial

Leather bracelet tutorial begins at 15:00 mark.


Swarovski® Light Topaz Jewelry Tutorials

We have three exciting projects using May’s Swarovski Psychology of Color: Light Topaz. See how we transform this brilliant hue!

Golden Rays Bracelet

GoodyBeads Swarovski Light Topaz Stretch Bracelet - FREE Tutorial

This lightweight and easy stretch bracelet is sure to make heads turn. Each Cushion Setting has two holes running along the back for an easy stretch bracelet you’ll love to wear all the time!

What you’ll need:

Twinkling Star Necklace

GoodyBeads Swarovski Light Topaz Necklace - FREE Tutorial

Be dazzled with this simplistic and minimalistic design!

What you’ll need:

Little Drops of Sunshine

GoodyBeads Swarovski Light Topaz Earrings - FREE tutorial

Our friends at Swarovski Create your Style, designed this bright earring tutorial.

What you’ll need:

Directions:

  1. Using alcohol wipes, clean all the findings and set aside to dry.
  2. Using 10mm fancy stone, blue into cushion setting and set aside. Repeat 3 more times for a total of 2 Light Topaz and 2 Sunshine Delite. Let dry for 24 hours.
  3. Repeat steps 2 for 12mm cushion crystal and setting.
  4. Slide on an eyepin, a 4mm crystal bead. Make a simple loop. Repeat 7 more times.
  5. Slide on an eyepin, a 6mm crystal bead. Make a simple loop. Repeat for 3 more times.
  6. Using three jump rings, attach one to 16mm crystal pendant, and then add the other two jump ring to create a chain.
  7. Using five jump rings, attach one to 16mm crystal pendant, and then add the other four jump ring to create a chain.
  8. Using one bead component from Step 4, attach to Sunshine Delite dangle from Step 2. Repeat once more and set aside.
  9. Using one bead component from Step 4 and one made in Step 5, link together and attache the 6mm ends to Light Topaz Dangle in Step 2. Repeat once more and set aside.
  10. Using two bead components made in Step 4 and one made in Step 5, link together and attached 4mm end to one 12mm Light Topaz dangle in Step 3. Repeat once more and set aside.
  11. Using the Charm Keep Hoop, open the hoop at the top and begin to slide on the components in this order, then close loop:
    1. Component in Step 9
    2. Component in Step 6
    3. Component in Step 10
    4. Component in Step 7
    5. Component in Step 8
  12. Repeat Step 11 in the reverse order to make second dangle.
  13. Open earwire loop and slide on hoop dangle. Close loop. Repeat for other earring.


Wood & Gemstone Stretch Bracelet – Pinners Tutorial

Make and Take project at MN Pinners Conference for you to try out, featuring wood and gemstone beads tied into an easy stretch bracelet!


We are at the Pinners Conference this weekend and could not be happier that it’s in Minneapolis, our own backyard. We have loads of Make & Take projects taught by GoodyBeads, TierraCast and LeatherCord USA. AND classes being taught by our own Tory Vezina and our friend Ricky and Kayla from Dakota Stones. If you’re unable to make it out to us and participate in our DIY Jewelry Make & Take, no worries! We have this super simple stretch bracelet we are offering at the booth, but featuring them here for all to make!


This stretch bracelet is made with 8mm round gemstones from Dakota Stones, Stretchy cord from Beadalon and lightweight wood beads.  Plus, make sure you check out many videos featuring the famous Tricky Ricky Knot by Ricky from Dakota Stones.


What you’ll need for bracelet:


GB_MakeTake_Bracelet02


Instructions:

  1. Pull and pre-stretch elastic to loosen the elasticity.
  2. Find the middle point of the elastic and slide needle to that point. Cut one side of the needle to open the needle.
  3. Slide the following beads onto the elastic: 20 wood beads, spacer, 5 gemstones and spacer.
  4. Slide off needle and follow Ricky’s Knot Instructions to tie elastic.
    a. Take elastic ends and feed it through the loop of the elastic.
    b. Take elastic ends and wrap behind elastic loop going in opposite directions.
    c. Bring both elastic ends foward and tie an overhand knot going right over left.
    d. Tie a second knot going left over right.
  5. Cut off excess elastic leaving an 1/8” or 1/4” end.


Items used in bracelet: A021633, (2) TC00342WD-BYG8RD, TL00281, DMT8RD-8


Using Spacer Beads with New Czech Lentil Coins

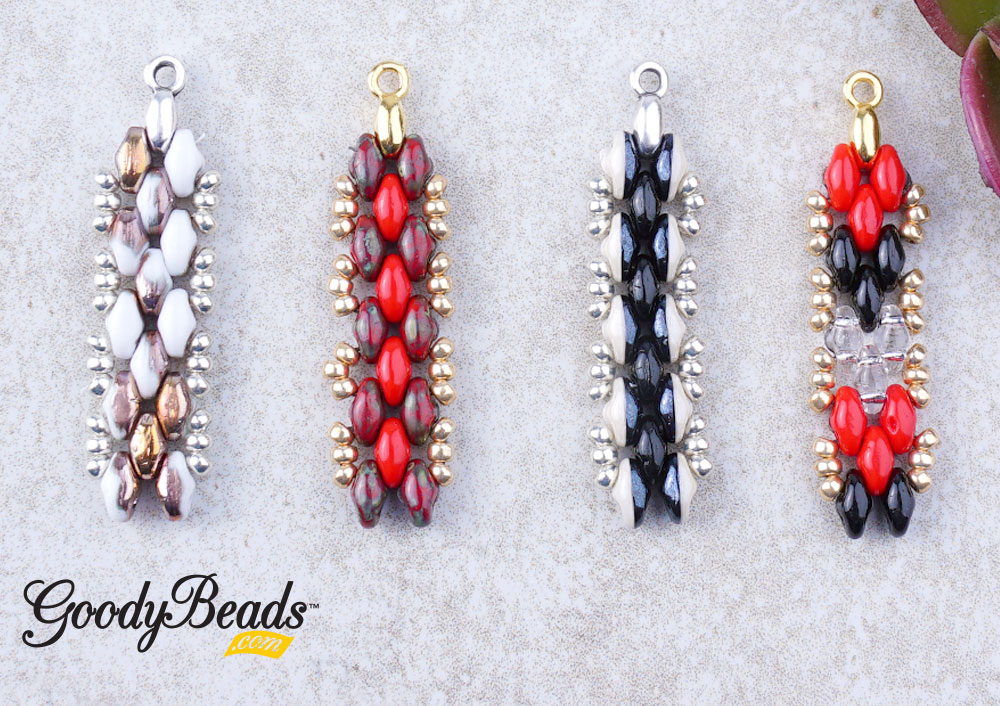
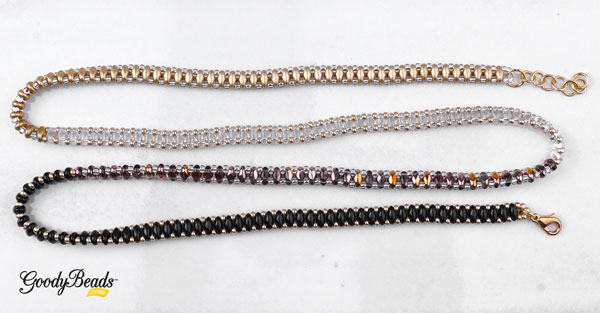
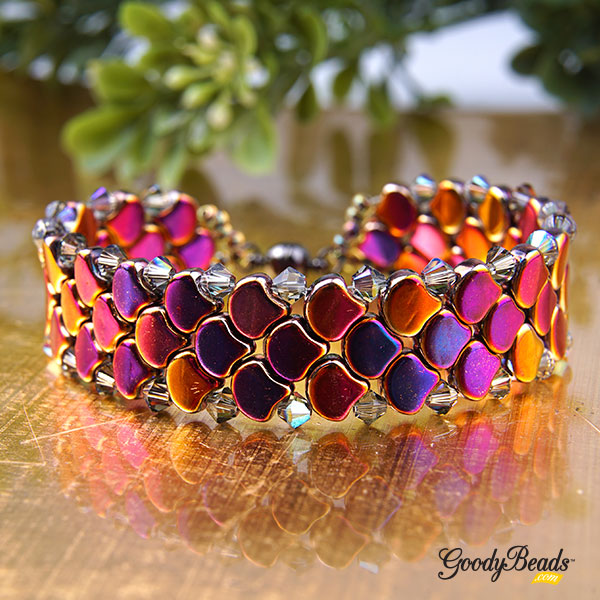
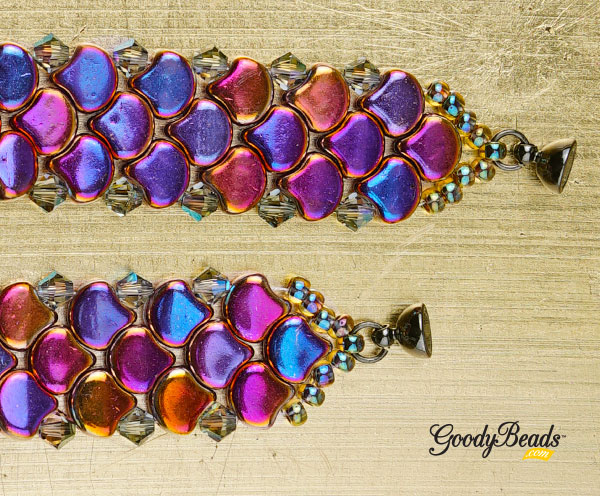
Accentuate your designs and beads with spacer beads. Here was different ways to use spacer beads with our NEW Czech Lentil Coin beads.

One of the many reasons to using spacer beads in a design, is to create space between larger or more pronoun beads, hence the name. What it also does when space is added, is to alleviate the rubbing between beads. For larger beads or crystals, sometime when you lay then next to each other, the movement you put into wearing your design will eventually shift and rub. This may in time, chip or crack the beads. So adding spacer beads or smaller beads will lessen the rubbing.

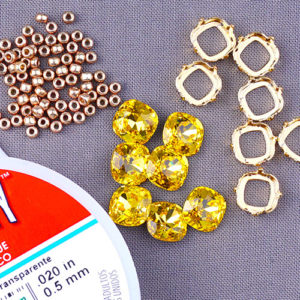
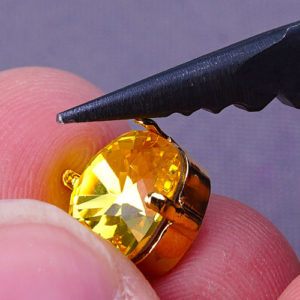
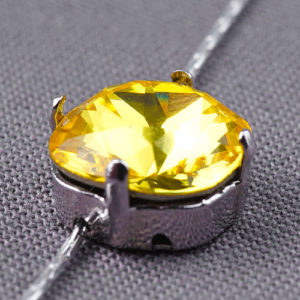
Plus, it adds a pop of color, style and overall look with spacers. For this example, we’ll use these New Czech Lentil Coins.

GoodyBeads NEW Czech Lentil Coin Beads

Lentil Coin Beads: Z014437, A014438, Z014441, Z014443, Z014445, Z014447

Using Spacer Beads

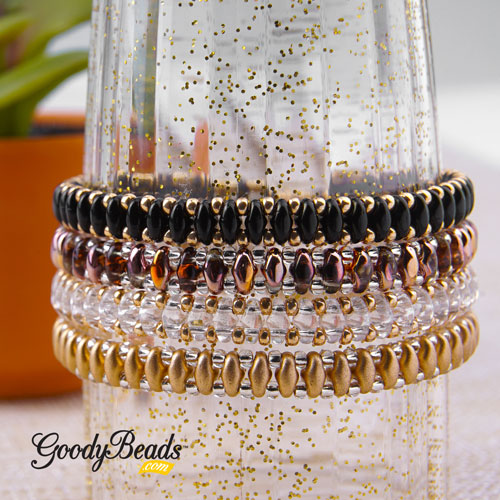
here are different beads and spacers you can add in between beads to bring out a fun look to your beaded strand!

SpacerBead_01

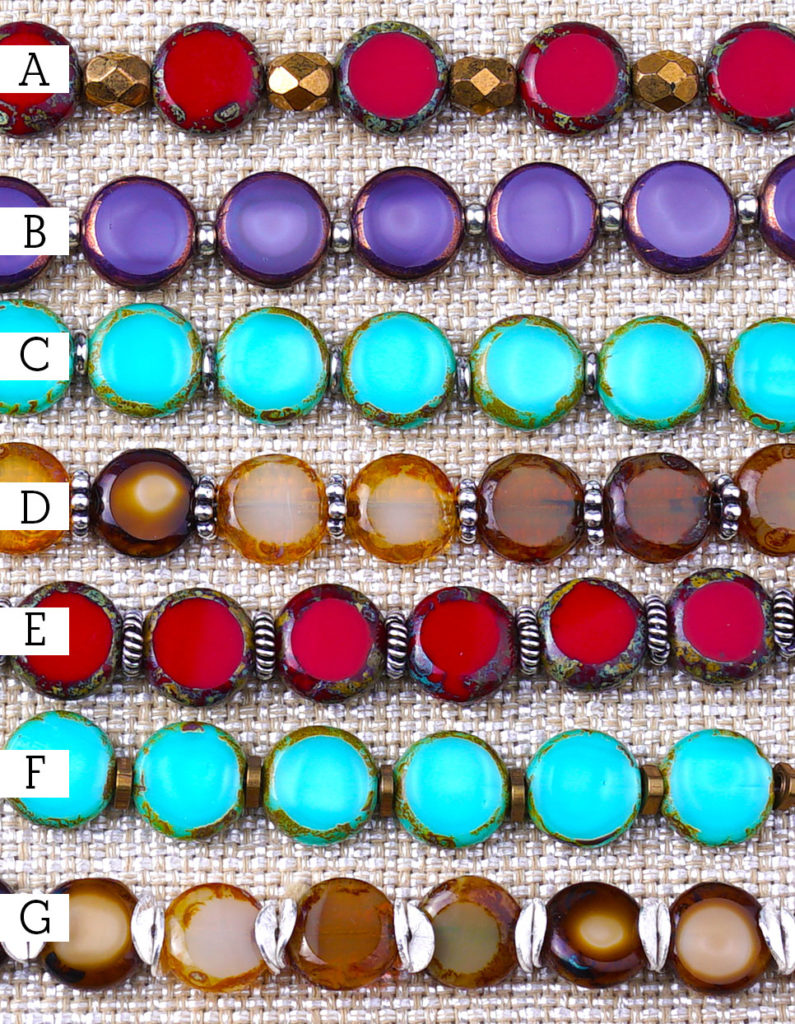
A. Use a bead as a spacer bead. Here, we used Czech Fire-polish beads. (A011558)
B. Size 8/0 Miyuki Seed Beads (SB00106)
C. Czech O-Beads (SB01893)
D. Daisy Bali Spacer Beads (Silver A003563/Gold A004238/Copper A004216)
E. Bali Spacer Bead (Silver A003564/Gold A004239/Copper A004218)
F. Triangle Brass Bead (Silver A022195/Brass A022196/Gold A022197/ Copper A022198)
G. 6mm Wavy Disc Beads (Silver Z018411/ Gold Z018412)

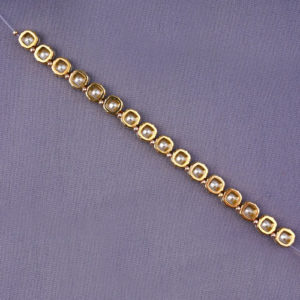
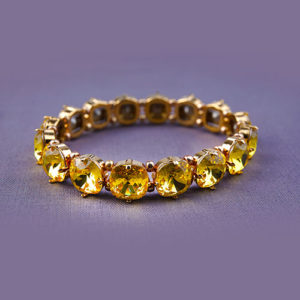
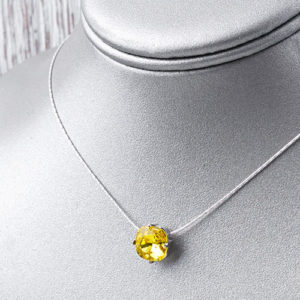
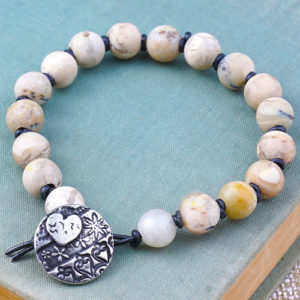
Purple Passion Bracelet

Here’s a bracelet we made using spacer beads and Czech Lentil coin beads. It makes for a flat design, simple yet fun. Can you imagine the possibilities!

GoodyBeads Blog | Czech Lentil Coins

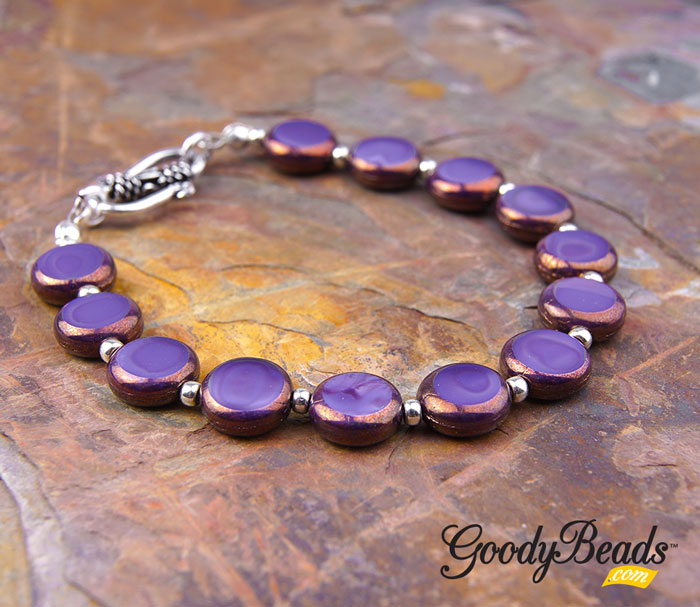
Items used in bracelet: FTBW0001, Z014445, SB00106, (2) TC01897, Z010740, A003577

Bracelet Instructions:

  1. Cut a 9 inch piece of Soft Flex Wire.
  2. Slide on a crimp tube and make a flat crimp to one end of flex wire.
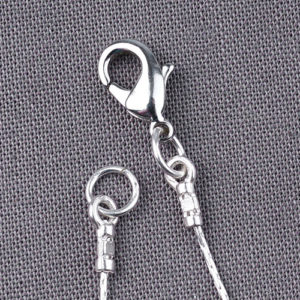
  3. Slide on clamshell and cover crimped tube. (Check out Clamshell Blog for more information)
  4. Slide on a seed bead and Lentil Coin. Repeat sequence until you’ve used a full strand of Lentil Coins. You can add more until you’ve reached your desired length.
  5. Add a seed bead to the end. Slide on a clamshell and another crimp tube.
  6. Make a flat crimp to the crimp tube, close inside the clamshell.
  7. Cut excess flex wire and close clamshell over the crimped tube.
  8. Slide jump ring from Hook Clasp through loop of clamshell. Close clamshell loop.
  9. Repeat step 8 to other end.
    (Optional: you can substitute hook clasp for a clasp of your choice.)


Eden Green Pearl Beadable Bracelet & Cuff – Tutorial

Wrap yourself in this magnificent new pearl color from Swarovski®: Eden Green. Design with this pearl along with an easy bracelet and cuff tutorial.


Eden Green is a gorgeous hue surely to stand out in a sea of spring colors. Tory Vezina has paired the pearl with gold and an array of blues.


What you will need for tutorial:


Tutorial

Tutorial starts at 5:30 minutes.


Make sure to check out Eden Green Pearl Earring tutorial HERE.


Painted Leather Wrap Bracelet

Check out this bracelet Tory and Candie taught at the Spring 2019 Twin Cities Bead Bazaar, using Vintaj Patinas painted on leather.


If you were able to join us at the Twin Cities Bead Bazaar on March 2 & 3, you’ll know how much fun it was! We are sharing this super easy bracelet Candie Cooper and Tory taught at one of the hourly Make & Takes. It’s made with leather cord and TierraCast end caps on NEW Extra Heavy Duty Memory Wire. And then painted with Vintaj Patinas.


GoodyBeads | Blog - Memory Wire Leather with Vintaj Patinas

Instructions:

  1. Using Finishing Pliers, make a loop at one end of the memory wire.
  2. Slide on memory wire a bead cap, leather and a bead cap.
  3. Cut excess memory wire leaving about 1/2 inche to 3/4 inch end.
  4. Create a loop on other end of the memory wire.
  5. Paint Leather with Vintaj Patinas. Let it dry.


Components to Make Bracelet: TC01854 (2), CH00793 (10″), WR00132, Vintaj Patinas

Tools Used: TL00206, TLZ0207


Easy SuperDuo Bracelet – Tutorial

Czech SuperDuos are a versatile two-hole bead that can be easily made into a simple stitched bracelet. Check out this super simple tutorial using only Czech SuperDuos, size 11/0 Miyuki seed beads and beading thread.

If you know So Vang, you know that SuperDuos are her favorite two-hole bead to use when bead stitching. It creates fun angles and combines easily with her other favorites like Czech Honeycomb beads and DiamonDuos. But a simple basic way to make a bracelet using SuperDuos is combining it with size 11/0 and warping the strands around for this easy DIY bracelet.

Things you will need for this bracelet:

— Download Multi-Wrap Golden Bracelet Pattern —

Multi-Wrap Golden Bracelet

GoodyBeads | Blog - Czech Easy SuperDuo Bracelet FREE tutorial

Items used in this bracelet: SB01406, SB02087, SB01367, SB01390, SB00423, SB00332, Y001366, A011536, A006587, A015211)

You can make a one wrap bracelet with this tutorial or make a multi-wrap. To make this bracelet, start out with your bracelet length (in this case we did 7 inches), multiply that by the amount of  wraps we wanted and add another foot. This length will be the amount of beading thread you will need. In this case, we used about 4 feet. We strung 4 sections of 4 different color ways to make this bracelet. Each section measures 7 inches in length.

A quick tip, when you are finished sewing all the necessary beads, lay your piece straight and smooth out the piece so that everything lays flat before you tie off your ends.

GoodyBeads | Blog - Easy Czech SuperDuo Bracelet FREE Tutorial

Sample Color ways

GoodyBeads \ Blog - Czech SuperDuo Bracelet FREE Tutorial

Test out different colors to play with. Here we have four samples of various color ways you can make your bracelet.

Items used in these sample color ways:(SB01787 & SB0367), (SB02140 & SB02402), (SB01782 & SB00387), (SB01439SB00423)

— Download Multi-Wrap Golden Bracelet Pattern —


Czech Ginko Two-Hole Scale Bracelet Tutorial

New from the 2019 Tucson show are these lovely Czech Ginko beads from BeadSmith. Check out today’s free tutorial using Ginko beads.


GoodyBeads | Blog Czech Ginko Two Hole Beads with Free Bracelet tutorial

Czech Ginko beads are a two-hole bead in the shape of Ginkgo leaves.


Scale Bracelet

GoodyBeads | Blog - Czech Ginko Scale Bracelet with Free Tutorial

This bracelet tutorial was inspired by Nela Kábelová’s (www.gianelle.beadforum.cz) pattern called Snake Skin Bracelet. We used her pattern and tweaked it slightly to add 4mm Swarovski® bicone crystals instead of 4mm round beads. And used 8/0 Miyuki seed beads in place of the seed beads she used. Don’t they look like fish scales? Dragon scales? Mermaid scales? They are a beautiful shape with lots of option for bead stitching.


What you’ll need for this bracelet:


GoodyBeads | Blog - Ginko Scale Bracaelet clasp ends - FREE tutorial

Items used in bracelet above: SB03708, SW02072 (36), A008804, A019945, A006587, A015211, SB00117 or SB00063


EZ DIY Series: Druzy Adjustable Bracelet

Jump on this fashionable jewelry trend of adjustable jewelry with the versatile finding of Bracelet Sliding Clasps.


Bracelet sliding clasps is a versatile clasp with two chain pieces fed through a stopper clasp where you can easily slide the chains back and forth to adjust the length of the bracelet. Sliding clasps also has a jump ring attached to the chain to make it easy to add your favorite connector or link. Here is an easy DIY tutorial using the sliding clasps and druzy connector with the help of a chain nose plier tool.


Tutorial

GoodyBeads | Blog - Druzy Adjustable Bracelet Tutorial

Items used in bracelet tutorial: Z012176 & Z020673


Large Hole Gemstone Leather Knot Bracelet – Tutorial

Make this easy leather knotted bracelet with large hole gemstones from Dakota Stones.

Happy Friday. We’re having a fun time today since we’re all looking forward to the weekend. Why not try your hand at this easy leather bracelet tutorial with 1mm leather cord from LeatherCordUSA, large-hole gemstones from DakotaStones and a TierraCast button. You’ll make a simple overhand knot in between each large-hole gemstones. Don’t worry, you got it!

GoodyBeads | Blog Knotted Leather bracelet with large hole gemstones - Free Tutorial

Components you’ll need to make bracelet:

Tutorial

Items in bracelet tutorial: A022063, TC02349WAF8RDLH-M-8/APL8RDLH-8