Pantone 2021 Color of the Year: Ultimate Gray & Illuminating

Pantone has produced their color pick for 2021. Or should we say picks! With 2020 being a rough year for everyone around the world, Pantone’s color picks Ultimate Gray and Illuminating challenges a ‘forward’ thinking for the future. We will dive into Pantone’s meaning for their color picks for 2021 and we’ll give you a fun DIY jewelry to embrace this color combination!

2016 was the year Pantone debuted a first-time, duo-color that blurs the line of femininity and masculinity; Rose Quartz and Serenity. With the current event of 2020, it is no wonder their pick for 2021 doesn’t blur the line of colors but complement two opposite colors that works “together to support one another.” While Ultimate Gray is justly a neutral gray color, Illuminating is a bright yellow, it is “a marriage of color conveying a message of strength and hopefulness that is both enduring and uplifting.

Pantone states, ” Emboldening the spirit, the pairing of PANTONE 17-5104 Ultimate Gray + PANTONE 13-0647 [Illuminating] highlights our innate need to be seen, to be visible, to be recognized, to have our voices heard. A combination of color whose ties to insight, innovation and intuition, and respect for wisdom, experience, and intelligence inspires regeneration, pressing us forward toward new ways of thinking and concepts.”

How do you feel about Pantone’s picks for 2021?

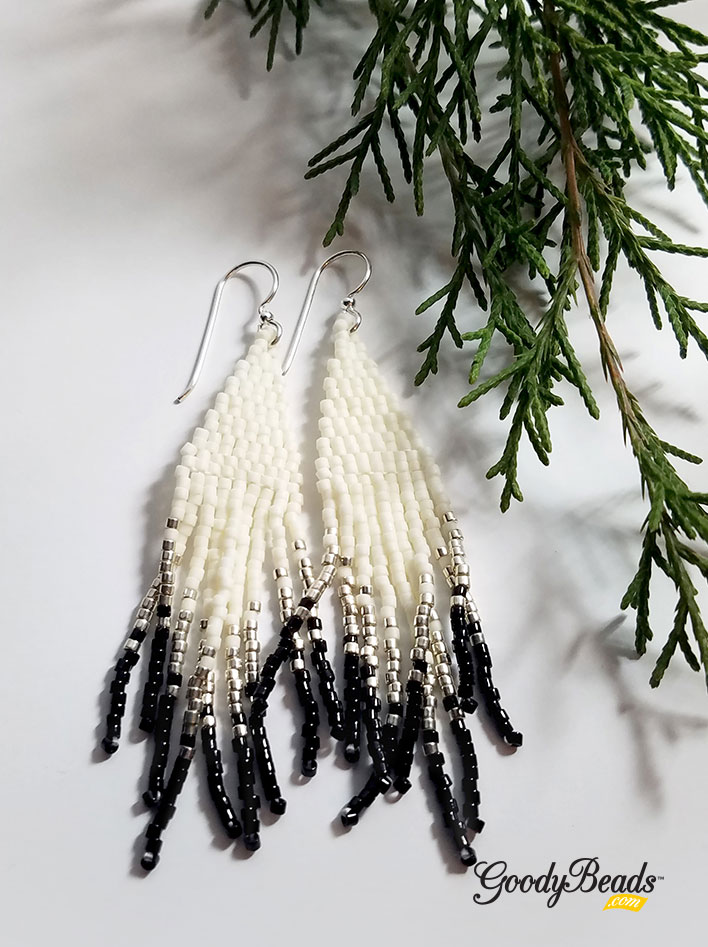
DIY Beaded Silvery Yellow Diamond Color Block Earrings

We love the color combination and the emboldening message it represents. Here is a fun design using the two colors in our pair of DIY earrings. We’ve made a simple colorblock diamond earrings using Delica beads in a brick stitch.

FOLLOW the FREE Pattern Tutorial for these earrings HERE!

Items used in earrings: SB00290, SB00141, TCZ0078, A006585, A002413 & A006767


Spend the Holidays with Swarovski® – New Year

We’re celebrating the festive spirit with our friends at Swarovski: Create Your Style and celebrating with New Years Eve colors! Plus, we have a fun DIY project to get you hyped up for the new year.

Here are our selection of Swarovski crystals to embrace the festive and classic colors of New Years:

  • White/Clear – Crystal Clear, Crystal AB, Crystal 2XAB & Iridescent Dove Grey Pearl.
  • Gold/Bronze – Metallic Sunshine, Golden Shadow, Light Gold, Bright Gold, Crystal Light Silk, Metallic Light Gold, Light Topaz & Light Colorado Topaz
  • Silver/Grey – Light Grey, Dark Grey, Silver Night, Silver Shade, Greige, Light Grey Opal

Captivating Crystal Cuff

GoodyBeads.com Blog | Spend the Holidays with Swarovski® – New Year with FREE DIY and tutorial

GoodyBeads.com Blog | Spend the Holidays with Swarovski® – New Year with FREE DIY and tutorial

Items used in cuff: WR00127, SW02445, SW02444 (2), SW002442 (2), SW02437, SW02436 (2), SW02435 (2), Z008287 & SB00106.

Directions:

  1. Set the crystal in its setting and gently bend the prongs down to secure the crystal. (Check out Light Topaz blog post on how to press down the prongs.) Repeat to all 5 crystals and settings.
  2. Cut two pieces of memory wire at a coil and a quarter.
  3. Roll and make a simple loop to each end of the memory wire with memory wire finishing pliers.
  4. Slide on a seed bead on each memory wire. Slide each square bead hole through each memory wire. Repeat this process 7 more times. End this portion with a seed bead to each memory wire.
  5. Slide on small setting you made in Step 1, slide each memory wire through the two-hole setting. Slide on a seed bead to each memory. Repeat adding a medium setting, seed bead, large setting, seed bead, medium setting, seed bead and small setting.
  6. Repeat Step 4.
  7. Cut excess wire with memory wire cutters, leaving about a 3/4 inch end and make a simple loop.


DIY Snowflake Ornament with Lightbulb Glass Beads

The holidays are a fun time for decorating around the house. Why not make some snowflake ornaments using these snowflake forms and various beads you may have around the house. This project is also perfect for kids to design and adults finishing it off.

Wire Snowflake Ornament Forms

The Wire Snowflake forms comes in FOUR different sizes. Depending on the amount of beads you want on each peg will determine which ornament form to buy.

Ornament with Lampwork Beads

GoodyBeads.comg Blog | DIY Snowflake Ornament with Lightbulb Lampwork Glass Beads FREE tutorial

Items used in ornament: A006240, A022201, Z004872, Z004845, Z004885, SB00423 & Z013345.

Directions:

  1. On one spoke, slide on two seed beads, Czech bead, spacer bead, lightbulb bead, spacer bead, Czech bead and seed bead.
  2. Make a simple loop with a memory wire finishing plier. Then use a crimping plier or flat nose pliers to close the loop. (Check out previous blog post on a visual step-by-step look on making the loop.)
  3. Skip a spoke and repeat step 2 & 3 with a different lightbulb color bead.
  4. Skip another spoke repeat step 2 & 3 with a different lightbulb color bead.
  5. Then with the other spokes, repeat steps 2 & 3 with a lightbulb color bead that is different from the spoke on either sides of it.

You can also see Tory making this during a Facebook LIVE episode HERE.

Need more inspiration on making Snowflake Ornaments? Check out these designs on our Blog!


DIY Beaded Frilly Fringe Earrings with FREE Pattern Tutorial

Make today a pair of Beaded Frilly Fringe Earrings with size 11/0 seed beads or Delicas. Beaded earrings are everywhere! They are a fun piece for any occasion because of the many color combinations you can create with them. Our FREE DIY is this easy-to-follow pattern tutorial.

What you’ll need:

——- CLICK for FREE Downloadable Pattern Tutorial ——-

Beaded Frilly Fringe Earrings

Items used in earring sample: SB00444, SB00423, SB00447, TCZ0148, A006599 & A006767.

Items used in earrings: SB00260, SB00128, SB00141, TCZ0077, A006599 & A006767.

NOTE: in this pair of earrings (above), in Steps 3-5 where you are brick stitching each row, you’ll add a TWO delicas to create each row instead of one.

Need more Fringe? Check out these other ideas:


Black & White Gemstone Leather Necklace

This Gemstone Leather Necklace incorporates the classic black and white colors. It is a fun piece for a business pantsuit or a small dinner party. Made with large-hole gemstones and 1mm leather cord, you can make this in fun necklace in minutes!

What you’ll need for Gemstone Leather Necklace:

GoodyBeads.com Blog | Black & White Gemstone Leather Necklace with large-hole Gemstones.

GoodyBeads.com Blog | Black & White Gemstone Leather Necklace with large-hole Gemstones.

Directions:

  1. Open 4mm jump ring, slide through loop of clasp and close jump ring. Open another 4mm jump ring, slide through closed ring and close jump ring. Open lobster clasp and clasp onto the closed ring.
  2. Cut a piece of leather at 27 inches.
  3. Slide one end of the leather through a 4mm jump ring in step 1, about 1.5 inch of the way. Make a slip knot. Use pliers to tighten the slip knot before cutting off excess leather end.

4. Slide on the following onto the leather:
3 onyx beads, 5 flat brass beads and 3 onyx beads.
5. Repeat step 3 to other leather end and through other 4mm jump ring from Step 1.


Spend the Holidays with Swarovski® – Christmas Holiday

We’re celebrating festive spirit with our friends at Swarovski: Create Your Style and celebrating with Christmas Holiday colors. Plus, we have a fun DIY project to get hype up the holidays.

Here are our selection of Swarovski crystals to embrace the festive and classic colors of Christmas Holiday:

  • Reds – Siam, Light Siam, Scarlet, Rouge Pearl & Red Coral Pearl.
  • Green – Emerald, Luminous Green Mystic, Vitrail Medium, Olivine, Iridescent Tahitian Look and Eden Green Pearl.
  • Yellow/Gold/Bronze: Topaz, Light Topaz, Golden Shadow, Metallic Sunshine, Yellow Opal, Sunflower, Citrine, Copper & Metallic Light Gold,

Red Currant Road Bracelet

Items used in Bracelet: SW02559 (24), SW02635 (5), TC02648 (5), TC01870, TL00265, A011531, Z012973 & Z001065.

Directions:

  1. Using alcohol wipes clean all off the links and set aside to dry.
  2. Using one 10mm Scarlet fancy stone glue into matching finding. Repeat four more times and set aside to dry for 24 hours.
  3. Using one head pin slide on one 6mm Rouge Pearl and make a simple loop. Repeat 23 more times and set aside.
  4. Using two 5mm jump rings attach each jump ring separately to the same side of one frame made in Step 2 (double jump ringing). Use two more 5mm jump rings to attach to the opposite side. Repeat this step four more times and set aside.
  5. Using two 9mm jump rings, connect together two links made in Step 4 so that it is double jump ringed. Continue this process until all five stone set links are connected.
  6. Using three pearl drops, attach to one side of the double medium jump ring connection between stone set links. Repeat for opposite side of the two 9mm jump ring connection. Repeat this step until you have 4 complete sets of 6 pearls between all 5 stone set links.
  7. Using one end of the Maker’s toggle attach two small jump rings by attaching each jump ring separately to the same side of the toggle (double jump ringing). Repeat for other side of the toggle piece.
  8. To attach the toggles to the ends of the bracelet use two medium jump rings to attach the double jump rings from the bracelet to the toggle. Repeat for the other side.

Bracelet and tutorial courtesy of Swarovski: Create Your Style.


DIY Beadable Gifts for the Holiday Table

How will you dress your holiday table this year? Why not add some fun utensils like our selection of Beadable Gifts? Last year we visited a local lunch/catering business to show how to use these beadable gifts. We’re sad to say that the business is no longer there but we still dream about their delicious soups. Here are some ideas to reel in the festivities for the holidays.

Items you’ll need:

Toss and serve some fresh salads with a pair of Salad Serving Set. (A003251)

Get the Beadable Tongs (Z005787) for the mixed salads, fried chicken or as an extra pair of hands!

Help carve your turkey or ham with the Serving Fork (Z005605).

Cake Server Z007097 to serve up your favorite desserts!

Make it a memorable evening with a popping a bottle of bubbly and capping it off with a sweet Wine Stopper (A003264)

Check out our other beadable ideas to get you inspired:

Beadable Gifts Video

Check out our video HERE from 2019 on how to utilize these fun ideas!


5 DIY Jewelry Designs with Carabiner Lock Clasp

One of our newest products for 2020 is the Carabiner Lock Clasp. We have 5 examples for designing DIY jewelry with this clasp.

Chunky and Cool Bracelets

Items used in bracelets:

In our bracelet examples above, we’ve only used 2 components: chain and carabiner lock clasps. Because it opens by unscrewing its side, you can easily cut your chain to your bracelet length and slide your chain ends through the clasp. No jump rings required, just fun bracelets to pair with your arm candy collection. Plus, these bracelets are the perfect starter to add your charms or tassels to personalize it!

Neck Mess Love

Items used in necklace:

In our 3 necklaces, we’re making the clasp the focal/statement piece. Create a fun pendant drop with tassels, charms or baubles. Or design a modern, minimalistic lariat chain necklace.


DIY Mixed Moons Leather Bracelet with Adjustable Sliding Clasp

Our Mixed Moons Leather Bracelet with adjustable sliding clasp tutorial today is dedicated to the celestial phenomenon of two Full moons this October. The first was on Oct 1st and the second is on an ominous Halloween night! Make this fun bracelet for a spooky holiday or for the next full moon on Halloween, which wont be for another 19 years.

What you’ll need for the Mixed Moon Leather Bracelet with adjustable sliding clasp:

  • Z019103 – 1.5mm Leather cord
  • Z019982 (2) – Antique Silver Coin Slider
  • Z019983 – Satin Gold Coin Slider
  • Z019986 (2) – Rectangular End
  • Z012153 – Adjustable Wheat Chain Bracelet Sliding Clasp
  • A015821 – Super New Glue

GoodyBeads.com Blog | DIY Mixed Moons Leather Bracelet with Adjustable Sliding Clasp FREE Tutorial

GoodyBeads.com Blog | DIY Mixed Moons Leather Bracelet with Adjustable Sliding Clasp FREE Tutorial

GoodyBeads.com Blog | DIY Mixed Moons Leather Bracelet with Adjustable Sliding Clasp FREE Tutorial

Directions:

  1. Cut 4 pieces of leather at 4 inches each.
  2. Add a small drop of glue inside the rectangular end. Insert all four ends of leather inside the end. Let it dry for a minute before going to step 3.
  3. Slide on the 3 Coin Sliders, Silver, Gold and Silver. Now, make sure other ends of the leather are straight, cut if necessary. Add a small drop of glue to the other rectangular end, insert leather ends inside the rectangular end. Let it dry for a minute before going to step 4.
  4. Remove both jump rings from adjustable slider clasp. Set jump rings aside. Trim 1-2 inches off both chains, depending on your wrist size.
  5. Slide jump ring back onto the slider chain end and loop of a rectangular end, close jump ring. Repeat on other side.


October: A Month of DIYs

For the whole month of October, we’re offering you even MORE inspiration with a DIY jewelry project every single day! GoodyBeads.com brings you easy DIYs from simple earrings and necklaces to something challenging you’d want to sink your teeth in! We’ve incorporated many of our favorite products like gemstones, acetate, seed beads, findings, charms and so much more.

Each blog post will include a high quality image with a full components list to create the daily project and a simple, easy-to-follow directions.

Here is a calendar and list of our daily DIY projects to get you inspired!

October DIY Jewelry Projects


DIY Flora Link Criss Cross Leather Bracelet with Macrame Knots

We love the contrasting colors in this Flora Link Cross Cross Leather Bracelet. This DIY uses a braided and macramé technique using round leather cord and TierraCast Flora Links. It’s also a revamp version of the Criss Cross Leather Bracelet we did back in May.

What you’ll need for Leather Bracelet:

  • Z015514 – 1mm Natural Light Brown Leather
  • A022077 – 2mm Natural Blue Leather
  • TC02377 (2) – Small Flora Link
  • TC02379 (3) – Medium Flora Link
  • TC02349 – Button

Get all the components for this project here

GoodyBeads.com Blog | DIY Flora Link Criss Cross Leather Bracelet with Macrame Knots

GoodyBeads.com Blog | DIY Flora Link Criss Cross Leather Bracelet with Macrame Knots

Directions:

  1. Cut 30 inches of the 2mm leather cord.
  2. Cut 60 inches of the 1mm leather cord.
  3. Slide 2mm leather through button and center it. Take both leather ends and make a knot an inch away from the button.
  4. You can use a macrame board to anchor your 2mm leathers down or pin it down to anchor it also.
  5. Slide the middle part of your 1mm leather behind both of the 2mm leather cord, near the knot you made in Step 3. Make 7 full square macramé knots.
  6. Slide on a small flora link. In front of the link cross the left piece of the 1mm over the 2 strands of 2mm cord and then cross the right piece over the left peice.
  7. Take the both ends of 2mm leather and bend them back over the crisscrossed strands and go back thru the ring. Tighten, adjust and straighten your strands.
  8. Repeat steps 6 and 7 with a sequence of 3 medium flora link and 1 small flora link.
  9. After last ring do 7 FULL macramé square knots.
  10. With all 4 pieces of cord make an overhand knot where the macramé ends. Trim ends of the 1mm cord.
  11. Make another overhand knot with both leather ends about one inch from the first to create your button hole clasp. Make another for an optional length.

Video Tutorial

Check out our previous Facebook LIVE episode where Tory makes this bracelet HERE!


DIY Beaded Lattice Collar with FREE Pattern Tutorial

Our Beaded Lattice Collar necklace is certainly one all bead-stitchers would love to create! It’s also simple enough for any beginner who would like to create an iconic, show-stopping, statement necklace. Get your components and FREE Downloadable Tutorial HERE.

What you’ll need for Beaded Lattice Collar:

——- CLICK for FREE Downloadable Pattern Tutorial ——-

GoodyBeads.com Blog | DIY Beaded Lattice Collar with FREE Pattern Tutorial

GoodyBeads.com Blog | DIY Beaded Lattice Collar with FREE Pattern Tutorial

Beaded Lattice Collar Pattern Tutorial

——- CLICK for FREE Downloadable Pattern Tutorial ——-

GoodyBeads.com Blog | DIY Beaded Lattice Collar with FREE Pattern Tutorial


TierraCast® DIY Lavender Garden Loomed Bracelet

The DIY Lavendar Garden Loomed Bracelet comes from our friends at TierraCast. This bracelet uses a bead loom and one of their newest products, The Stitch-In Link Connector.

Items you’ll need for Loomed Bracelet:

GoodyBeads.com Blog | TierraCast® DIY Lavender Garden Loomed Bracelet FREE Tutorial

GoodyBeads.com Blog | TierraCast® DIY Lavender Garden Loomed Bracelet FREE Tutorial

Directions courtesy of TierraCast.com:

  1. Loom Set-up: String 10 warp threads onto your loom, per loom manual instructions.
  2. Row 1: Begin your weft thread with plenty of length, at least 36” to 40”, and anchor per your loom instructions, then string nine color C beads and complete Row 1. Most looms complete rows by bringing all nine beads, strung along the thread, under the warp threads, aligning them between each of the warps, and then bringing the needle back through the beads in the opposite direction, making sure to keep the needle above the warp threads.
  3. Row 2: string one Color B, seven Color C, and one Color B. Stitch back through the beads in the opposite direction, making sure to keep the needle above the warp threads.
  4. Row 3: String two B, two C, then string one stitch-in through the first hole, ensuring the top loop is facing up, so that it will sit on top of the work when loomed in. (Fig 1) Bring the beads and button stitch in under the warps and align them between the warp threads. (Fig 2) Then string two C and two B and align the beads between the warp threads. Stitch back through all beads and the stitch-in above the warps in the same way you would complete a regular loomed row.
  5. Row 4: String three B, one C, then bring your thread under the warp threads and pass the needle through the stitch-in’s middle hole (Fig 3). String one C and three B. Align the beads between the warps and complete the row with the thread passing back through all beads and the stitch in above the warp threads.
  6. Row 5: Repeat Step 5, but with four B, then stitch through the top hole of the button stitch-in (Fig 4). String four B and complete the row. (Fig 5)
  7. The rest of the pattern is loomed normally, following the Loom Pattern. Download a pdf of the bead chart and pattern here.
  8. When you reach row 50, string one B, three C, the first hole of the second stitch-in connector, three C, and one B. Complete the row with the thread passing back above the warp threads through all beads and the stitch-in.
  9. Row 51. String two B, two C then bring your thread under the warps and pass through the center hole of the stitch-in, string two C and two B. Complete the row with the thread passing back above the warp threads through all beads and the stitch-in.
  10. Row 52. String three B, one C, then bring your thread under the warps and pass through the last hole of the stitch-in, then string one C and three B. Complete the row with the thread passing back above the warp threads through all beads and the stitch-in.
  11. Finish the remaining rows 53-55 as normal, then remove from the loom and weave in warp threads per your loom manual’s instructions.
  12. Using chain nose pliers, open a jump ring and attach the apple blossom button to the stitch-in loop over row 4. Close jump ring.
  13. Cut a 10” length of 2mm leather cord. String the cord through the loop of the button stitch-in over row 52. Center cord in loop.
  14. Tie an overhand knot with both strands of the leather. *Measure from the knot along the cord approx. 17mm (a little over half an inch) and then tie another overhand knot with both strands. Tighten. * Repeat from * to create a second button loop for an adjustable closure. Trim leather and use a small amount of glue to secure the knots.
  15. Optional: Open one jump ring and attach to cord at the loop of the stitch-in connector. Before closing string on charm. Close jump ring.

(Check out TierraCast page for image reference.)


John’s DIY Bottle Opener with Large-Hole Gemstones

Need a gift for the holidays? This easy gift-giving beadable DIY bottle opener is what you’ll want. It’s easy to make and great for a quick gift you can wrap right up. Pair it with some cool looking large-hole gemstones for a masculine vibe.

What you’ll need for DIY Bottle Opener:

GoodyBeads.com Blog | John's DIY Bottle Opener with Large-Hole Gemstones FREE Tutorial

Directions:

  1. Twist of the end of the bottle opener and slide on 4 gemstones.
  2. Twist the end back onto the bottle opener end.

Need more easy DIY gift-giving ideas? Check out these Beadable ideas!


DIY Carabiner Lariat Necklace with Swarovski® Baroque Pearl

Our lariat necklace tutorial today features the popular carabiner clasps, along with our newer Swarovski baroque pearls. Make this necklace long or short, it will be the start of some fun layering neck mess pieces.

Items you’ll need for Lariat Necklace:

GoodyBeads.com Blog | DIY Carabiner Lariat Necklace with Swarovski® Baroque Pearl FREE Tutorial

GoodyBeads.com Blog | DIY Carabiner Lariat Necklace with Swarovski® Baroque Pearl FREE Tutorial

Directions:

  1. Slide pearl onto the headpin and make a larger simple or wrapped loop. Make sure loop can slide on through clasp.
  2. Open jump ring, slide on charm and close jump ring.
  3. Cut chain to 16 inches. Or cut to your preferred length.
  4. Open carabiner clasp by unscrewing clasp, slide on jump ring with charm and pearl drop. Then slide on both ends of your paper clip chain. Close clasp.