Flat Memory Wire and Gemstone Bracelet – Video Tutorial

Candie Cooper came by the GoodyBeads Mezzanine to show us how to make an easy DIY wrap bracelet with flat memory wire and gemstone beads. Watch the video today!


GoodyBeads Blog: Flat Memory Wire and Gemstone Bracelet Video Tutorial

After the Spring Twin Cities Bead Bazaar, Candie stopped by to demonstrate how to make a classy and chic bracelet using 4mm faceted coin gemstone beads, wire wrapped around flat memory wire.


What you’ll need:


Video Tutorial


Bead Stitched Bracelets with Cymbal Soros – Pattern Tutorial

One the newest additions to GoodyBeads is the Cymbal Components. Here are three projects, with patterns; using the Cymbal Soros.


Z012249_1Z012250_1

Cymbal Components are bead endings, bead substitutes and side beads that give your bead stitched patterns a cleaner, finished ending. The Cymbal Soros Bead Ending, in Silver and Gold, is noted to use with Miyuki Tilas and 1/2 Tilas. But the wonderful thing about using the Soros is how versatile this bead ending is. In these three bracelets, you will notice how similar the bead stitching patterns/sequence. One pattern will show how to incorporate Tilas and 1/2 Tilas, while the other two mixes up different beads like SuperDuos, Tilas, seed beads and even two-hole Swarovski Spike Beads.


Playful Tila Bracelet

GoodyBeads Blog: Playful Tila Bracelet with Cymbal Components and Miyuki Tila Beads, Pattern Tutorial

What you’ll need for this bracelet:

Items used in bracelet below: SB00870, SB01934, Z012249, A006588, A015211, A011535, Z011500, X003062


Tila Stripe Bracelet

GoodyBeads Blog: Tila Stripe Bracelet with Cymbal Components and Miyuki Tila. FREE Tutorial

What you’ll need for this bracelet:

Items used in bracelet:SB00870, SB01406, SB00107, SB00402, Z012250A006588, Z007861, Z011522A015211


Elegant Spike Bracelet

GoodyBeads Blog: Elegant Spike Bracelet with Cymbal Components and Swarovski two-hole Spike Crystal Beads, Pattern tutorial

What you’ll need for this bracelet:

Items used in bracelet: SB01406SB00107SB00423A006588Z012250A015211, SW01715 (23), Z007861, Z001925


Deertan Lace and Gemstone Necklace – Tutorial

Create and design this urban necklace using one of our newest products: Deertan Lace leather.


Softer than Calf Craft, yet incredibly strong, Deertan Lace is expertly cut from only the finest hides. Deertan lace is full grain leather cut from the top 5 percent of hand selected Italian calf hides. Each hide is specially treated to be water resistant. Great for all your jewelry and beading projects or for garment lacing. Deertan Lace is the softest leather lace around. This product comes from our friends at Leather Cord USA, always producing high-quality leather for DIY jewelry and crafts.


Deertan Lace and Gemstone Necklace

An easy jewelry project using Deertan lace is this simple DIY necklace. We’ve paired this necklace using 3mm Deertan Lace with Dakota Stones large-hole gemstones, Beadalon Quick Links and TierraCast beads and components.

GoodyBeads Blog: DIY Necklace tutorial with Deertan Leather Lace and Large-hole gemstones.


Directions:

  1. Cut a 3 feet piece of deertan lace.
  2. Fold lace in half and make a lark’s head to both the 20mm and 25mm ring.
  3. Slide on flat barrel bead through both lace pieces from Step 2.
  4. Make an overhand knot at the ends of the deertan lace. Adjust knot to get desired length.
  5. Cut two piece of lace at 10 inches. And one piece at 12 inches.
  6. With a 10″ lace, fold in half and make a lark’s head knot on the 25mm ring link. Repeat with the 12″ next and then the 10″. Bunch them together.
  7. On a lace fringe end, slide on a nugget bead, large-hole gemstone and another nugget bead. Make an overhand knot. Repeat to the other 5 lace fringe ends.
    Note: To assist in sliding on beads and gemstones, make an angled cut to leather ends.

Items used in necklace: Z015547, ATQ8RDLH-8, TC01492 (12), Z010360, Z010362TC01750


Tourmaline Mining Adventure

Our Designer So Vang went Tourmaline mining in southern California. Check out her rocky finds and simple wire tutorial to wrapping raw gemstones.

Written by So Vang-

My husband and I visited the Himalaya Tourmaline Mine in Santa Ysabel, California, known for their pink and green Tourmaline. You can also fine crystal quartz and black tourmaline. The added bonus about going to this mine is that you don’t have to bring any tools. With the day fee, you get buckets to use, mesh sifters and shovel. Wear comfortable shoes, a hat and clothes you don’t mind getting dirt on, because you will get dirty. I suggest bringing a toothbrush to help brush the dirt and long gloves because yours nails will get chipped if you have brittle nails like me. And lastly a container to put all your fabulous finds in!


Keep in mind that at their mining site, larger gems has been sorted out and what you sift through is a sifted pile. Granted, be open minded because you can still get a large piece of gem and gorgeous tourmaline chips! They also have a higher-quality bag that you can sift through for an extra $100. But enjoy what you find because the small gems you find and discover is all in the adventure itself.


Below is a pile of small pink, green and black Tourmaline we found. They certainly look gorgeous in their raw state.

GoodyBeads Blog: Mining for Pink Green and Black Tourmaline


The way Tourmaline is created it by the natural minerals and chemicals within the pockets of crystal quartz. You can see in the images below the raw forms of quartz with pieces of pink, green and black tourmaline jutting out of them.

GoodyBeads Blog: Mining for Pink, Green and Black Tourmaline

GoodyBeads Blog: Mining for Pink, Green and Black Tourmaline


Pendant with Raw Tourmaline – Tutorial

GoodyBeads Blog: DIY wire wrapping raw gemstones

Now that you have your Tourmaline, what do you make with them? I love this easy trick to making rock pendants by wrapping and encasing them with wire. You can easily use some Dakota Stones gemstones in this tutorial. Especially the faceted Botswana Agate stones.

What you’ll need for this tutorial is:

Watch our previous Facebook LIVE where I talked about these amazing rocks and do a quick tutorial to create your very own pendant!


If you are in the San Diego area and need an adventure to go gemstone mining, I recommend trying out the Himalaya Tourmaline Mine!


Leather Wrap Bracelet with Matubo Beads – Video Tutorial

We’ll show you how to make a leather wrap bracelet by fishtail braiding leather with new 2/0 Czech Matubo Beads.


For this bracelet tutorial, you’ll need:


Determine Length of 1.5mm Leather needed for a wrap bracelet

Use this method to determine the leather cord length you may need for a multi-wrap bracelet.

Take your wrist length and double the length. Multiply that by the number of wraps you want and then add 12”. That will give you an approximate cord length you will need to start your bracelet. (The extra 12” factors in the beads and leather you’ll be adding along with loop end.)

Example:

2 wraps for an 8.5” bracelet: (8.5” x2) x 2 wraps = 34 + 12 = 46” needed.

Or

4 wraps for a 7.5” bracelet: (7.5” x2) x 4 wraps = 60 + 12 = 72” needed.

Keep in mind, these total numbers are approximate. You will want to test the wrap length while you’re making your bracelet. Having extra length is better than being short on your wrapped length goal.


Video Tutorial

Leather bracelet tutorial begins at 15:00 mark.


Using TierraCast Buttons in DIY Jewelry – Tutorial

Launch yourself into this cute trend of button DIY jewelry with TierraCast buttons. We have three projects using TierraCast buttons; two pair of earrings and a lariat necklace.

TierraCast has a large assortment of button components. Of course when it comes to button components, you easily gravitate your DIY mind to making bracelets. Which is the perfect use for them. But we’ve expand our thinking into using buttons as earrings and necklace components. Here are three examples using TierraCast buttons designed by Heidi!

Golden Rosette Button Earrings

GoodyBeads Blog: TierraCast Button Earrings FREE Tutorial

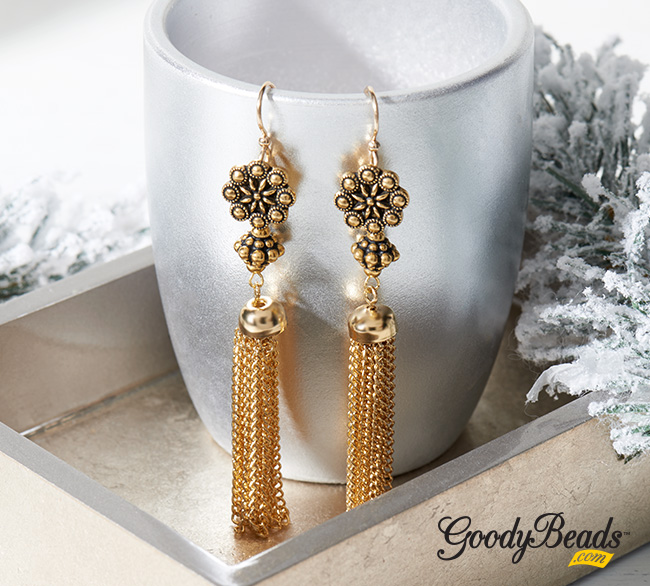
There is always room for a pair of tassel earrings in your jewelry stash. Why not make it shine like gold in this pair of Golden Rosette Button Earrings, using TierraCast’s Czech Rosette Button. The shank button makes it easy to hang your golden components. Unlike a typical button with two or four holes in the center, a shank has a protrusion in the back of the button with a hole so that when sewn on fabric, there is space allowed for the fabric to sit behind.

Directions:

  1. Open eyepin loop, slide on chain tassel and close loop.
  2. Slide on a TierraCast Pamada bead and make a simple loop.
  3. Open a jump ring, slide on loop from bead dangle from Step 2 and through shank hole of button. Close jump ring.
  4. Open another jump ring and slide through loop of ear wire and through shank hold of button. Close jump ring.
  5. Repeat all steps for other earring.

Items used in earrings: TCZ0139, Z011522, TC02267 (2), TC02679 (2), Z010982, A013211 (2)

Copper Cluster Button Earrings

GoodyBeads Blog: TierraCast Button Earrings FREE Tutorial

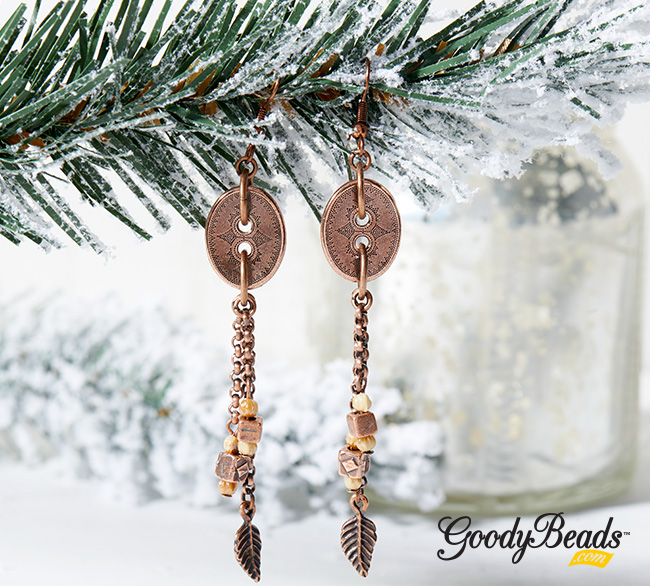
In this pair of earrings, the button acts as a focal link piece. It’s designed with fringe chain tassels with embellished ends.

Directions:

  1. Cut three rollo chain with 8 links, 13 links and 22 links.
  2. Open small jump ring, slide on leaf charm and the 22 link chain. Close jump ring. Open another small loop and attach to other end of chain.
  3. On a head pin slide on melon bead, cube bead and another melon bead. Make a simple loop. Make another for a total of two.
  4. Open loop of cube dangle from Step 3 and slide on an 8 link chain. Close loop. Open another small loop and attach to other end of chain.
  5. Open loop of cube dangle from Step 3 and slide on an 13 link chain. Close loop. Open another small loop and attach to other end of chain.
  6. Open large jump ring and slide through button. Also slide jump ring from Step 2, then Step 5 and then Step 4. Close jump ring.
  7. Open small jump ring, slide on large jump ring from Step 6 and through loop of ear wire. Close jump ring.
  8. Repeat all steps for other earring.

Items used in earrings: A009401, Z012870, A011518, CH00496 (1′), TC01191 (2), A021855, TC01114 (4), A019622, TC02278 (2)

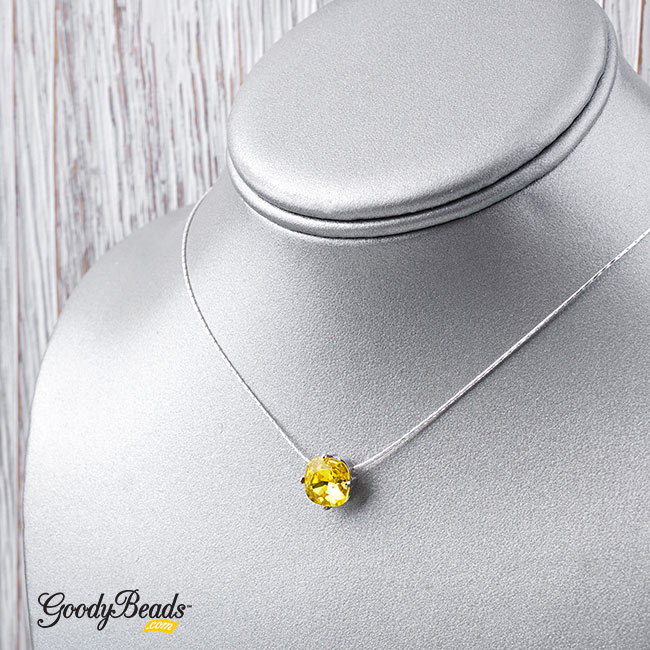
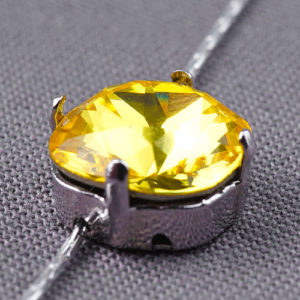
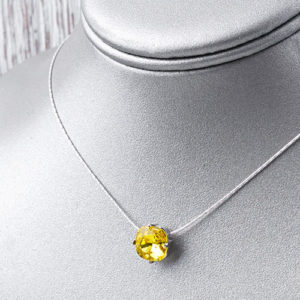
Charming Lariat Button Necklace

GoodyBeads Blog: TierraCast Button Earrings FREE Tutorial

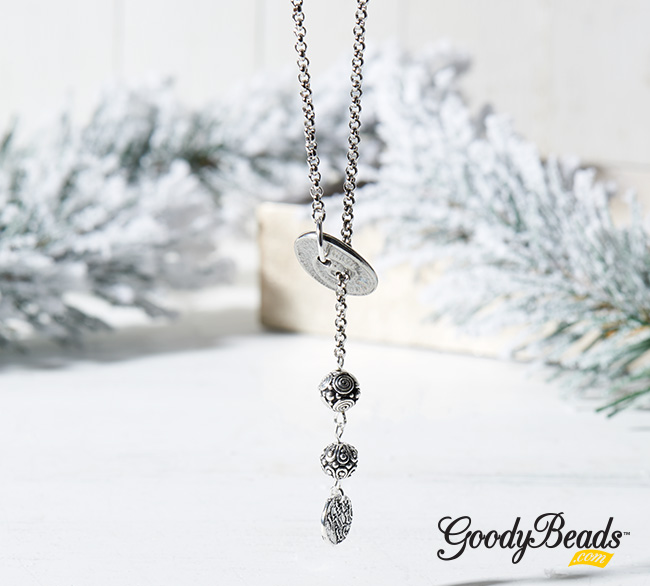
Design this lariat necklace with a button connecting your chain around. Dangle your ends with a sequence of TierraCast bead links and/or charm.

Directions:

  1. Open small jump ring and slide on charm and loop of eyepin. Close jump ring.
  2. On eyepin, slide on a silver bead and make a simple loop.
  3. Open loop made from step 2 and slide on an eyepin loop.
  4. On this eyepin, slide on another silver bead and make a simple loop.
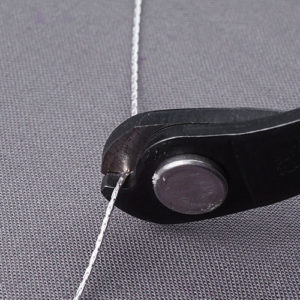
  5. Open loop made from step 4 and slide on one end of your chain. Close loop.
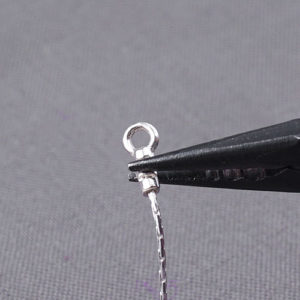
  6. Feed chain through one hole of your TierraCast button.
  7. Open large jump ring, slide on other end of chain and through other hole of the TierraCast button. Close jump ring.

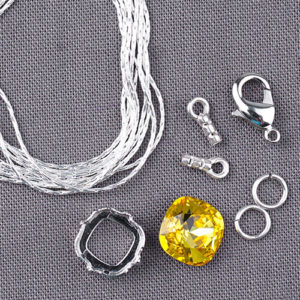
Items used in necklace: CH01095 (24″-36″), TC02279, A002814, TC00298 (2), Z004093, TC00454, A001495


DIY Locket with Swarovski® Crystals – Tutorial

Check out this easy DIY Locket project using 4mm Swarovski crystals and glass locket.


We here at GoodyBeads LOVE a good simple DIY jewelry piece. We believe DIY jewelry can be fun and easy for an advance jeweler and one who aspires to learn. This DIY locket is an easy DIY that anyone can do in mere seconds or minutes.


What you’ll need to make a DIY locket:


For our projects, we are using GoodyBeads Master Mixes which are predesigned by our Designers with an assortment of colors. You can surely make your own assortment of choose one color of your choice.


DIY Tutorial

Items used in tutorial: MX00008, A019583, Z001033


Other Locket SamplesGoodyBeads Blog: DIY Glass Locket with Swarovski Crystals

Items used in image: Z006045, Y003724, MX00026, Z006175, MX00016


Glass Bead Sun Catcher Tutorial

To celebrate Spring, we have a cute Sun Catcher tutorial you can make with glass beads, crystals, metal beads or all your leftover beads.


A fun way to using leftover beads is by making a Sun Catcher. A Sun Catchers is a mobile that you hang by a window. It is said that sun catchers are a good way to deter birds flying into your windows. For our project, we used our glass bead mix: Z010800 but you can feel free to use metal beads, Chinese crystals, Swarovski crystals or other various products you have. I am guilty of stashing beads and having leftover beads, so using them in this project is great!


What you’ll need:


GoodyBeads SunCatcher Tutorial with Glass Beads

GoodyBeads SunCatcher Tutorial with Glass Beads


Directions

  1. Take a coil of your Bracelet Memory Wire and make a Loop. You can find tutorial here to make a Memory Wire Hoop.
    1. For a larger Sun Catcher, use the Necklace Memory Wire.
  2. Before completing your second loop, slide on 6 glass beads. You can use any color beads you want.
  3. Cut 2 feet of S-long Bead Cord. Cut 5 pieces. (You can cut more for a fuller or larger Sun Catcher)
  4. Make an overhand knot with the bead cord in between each bead on your hoop.
  5. Slide a glass bead and small seed bead onto a bead cord. Slide it close to the hoop and make an overhand knot below the seed bead.
  6. Repeat Step 5 spacing out your sections of glass beads. Make sure to add heavier beads to the bottom to help weight your bead cord straight.
  7. Repeat Steps to other bead cord and be organic with your spacing.

(Items used in tutorial: Z010800, WR00135, A012987, GBIB0002, various 8/0 Seed Beads)

Make your Sun Catcher long or short, you have free range to your Sun Catcher. You can even add charms to your bead cord!

May19_Suncatcher_03


Video Tutorial

Make sure to check out our previous Facebook LIVE with So demonstrating how to making your own Sun Catcher.


Swarovski® Light Topaz Jewelry Tutorials

We have three exciting projects using May’s Swarovski Psychology of Color: Light Topaz. See how we transform this brilliant hue!

Golden Rays Bracelet

GoodyBeads Swarovski Light Topaz Stretch Bracelet - FREE Tutorial

This lightweight and easy stretch bracelet is sure to make heads turn. Each Cushion Setting has two holes running along the back for an easy stretch bracelet you’ll love to wear all the time!

What you’ll need:

Twinkling Star Necklace

GoodyBeads Swarovski Light Topaz Necklace - FREE Tutorial

Be dazzled with this simplistic and minimalistic design!

What you’ll need:

Little Drops of Sunshine

GoodyBeads Swarovski Light Topaz Earrings - FREE tutorial

Our friends at Swarovski Create your Style, designed this bright earring tutorial.

What you’ll need:

Directions:

  1. Using alcohol wipes, clean all the findings and set aside to dry.
  2. Using 10mm fancy stone, blue into cushion setting and set aside. Repeat 3 more times for a total of 2 Light Topaz and 2 Sunshine Delite. Let dry for 24 hours.
  3. Repeat steps 2 for 12mm cushion crystal and setting.
  4. Slide on an eyepin, a 4mm crystal bead. Make a simple loop. Repeat 7 more times.
  5. Slide on an eyepin, a 6mm crystal bead. Make a simple loop. Repeat for 3 more times.
  6. Using three jump rings, attach one to 16mm crystal pendant, and then add the other two jump ring to create a chain.
  7. Using five jump rings, attach one to 16mm crystal pendant, and then add the other four jump ring to create a chain.
  8. Using one bead component from Step 4, attach to Sunshine Delite dangle from Step 2. Repeat once more and set aside.
  9. Using one bead component from Step 4 and one made in Step 5, link together and attache the 6mm ends to Light Topaz Dangle in Step 2. Repeat once more and set aside.
  10. Using two bead components made in Step 4 and one made in Step 5, link together and attached 4mm end to one 12mm Light Topaz dangle in Step 3. Repeat once more and set aside.
  11. Using the Charm Keep Hoop, open the hoop at the top and begin to slide on the components in this order, then close loop:
    1. Component in Step 9
    2. Component in Step 6
    3. Component in Step 10
    4. Component in Step 7
    5. Component in Step 8
  12. Repeat Step 11 in the reverse order to make second dangle.
  13. Open earwire loop and slide on hoop dangle. Close loop. Repeat for other earring.


Swarovski Psychology of Colors: Light Topaz

This May, Swarovski’s Psychology of Colors pick is Light Topaz. Check out how this vibrant color is characterized!


GoodyBeads Swarovski Psychology of Color: Light Topaz

Light Topaz is the ideal color for May. It’s a bright color that helps signify spring, bright sunshine and budding growth after a long winter. Here are some Swarovski colors to match this brilliant hue:


Light Topaz Jewelry

GoodyBeads Swarovski Light Topaz FREE jewelry tutorials.

Make sure you stop over to our other blog post for jewelry designed with Swarovski Light Topaz.


Wood & Gemstone Stretch Bracelet – Pinners Tutorial

Make and Take project at MN Pinners Conference for you to try out, featuring wood and gemstone beads tied into an easy stretch bracelet!


We are at the Pinners Conference this weekend and could not be happier that it’s in Minneapolis, our own backyard. We have loads of Make & Take projects taught by GoodyBeads, TierraCast and LeatherCord USA. AND classes being taught by our own Tory Vezina and our friend Ricky and Kayla from Dakota Stones. If you’re unable to make it out to us and participate in our DIY Jewelry Make & Take, no worries! We have this super simple stretch bracelet we are offering at the booth, but featuring them here for all to make!


This stretch bracelet is made with 8mm round gemstones from Dakota Stones, Stretchy cord from Beadalon and lightweight wood beads.  Plus, make sure you check out many videos featuring the famous Tricky Ricky Knot by Ricky from Dakota Stones.


What you’ll need for bracelet:


GB_MakeTake_Bracelet02


Instructions:

  1. Pull and pre-stretch elastic to loosen the elasticity.
  2. Find the middle point of the elastic and slide needle to that point. Cut one side of the needle to open the needle.
  3. Slide the following beads onto the elastic: 20 wood beads, spacer, 5 gemstones and spacer.
  4. Slide off needle and follow Ricky’s Knot Instructions to tie elastic.
    a. Take elastic ends and feed it through the loop of the elastic.
    b. Take elastic ends and wrap behind elastic loop going in opposite directions.
    c. Bring both elastic ends foward and tie an overhand knot going right over left.
    d. Tie a second knot going left over right.
  5. Cut off excess elastic leaving an 1/8” or 1/4” end.


Items used in bracelet: A021633, (2) TC00342WD-BYG8RD, TL00281, DMT8RD-8