Beadalon® Artistic Wire® 3D Bracelet Jig and Tutorial
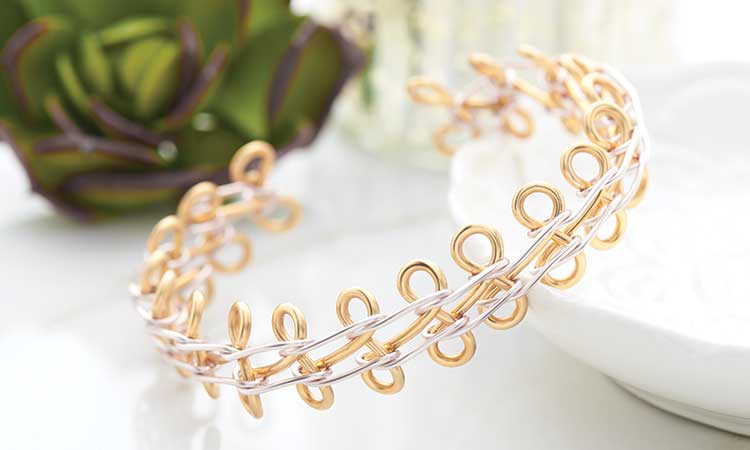
From Beadalon® Artistic Wire® is the 3D Bracelet Jig. You can create bangle bracelets, cuff bracelets, and curved components. We have a great informational video from Artistic Wire to get you started on creating your own custom-made bracelet.
Video Tutorial
This video, provided by Beadalon/Artistic Wire, gives you a tutorial on how to use the 3D Bracelet Jig and creating a simple wire bangle bracelet.
Bangle with Czech Beads Tutorial
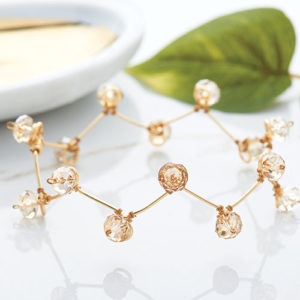
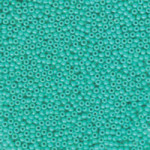
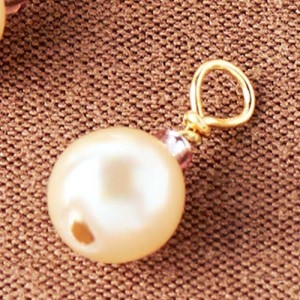
Now that you have learned how to create a 3D bangle from the video above, it is a great base to add beads to. Here is a tutorial on how to create the bracelet above using 8mm rondelle beads. You can choose from Czech, Millefiori, Gemstones, Chinese crystals or Swarovski®.
What you will need:
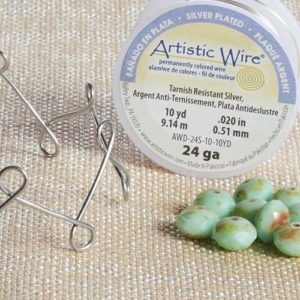
3D Bangle made with 3D Bracelet Jig and 18 Gauge Wire (from video above)
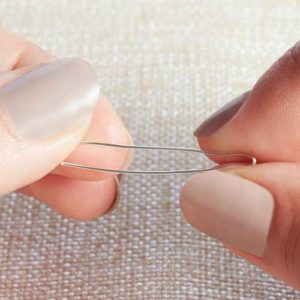
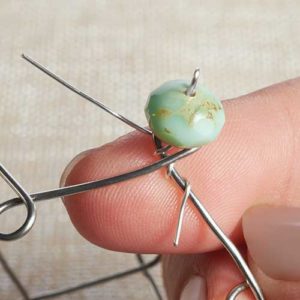
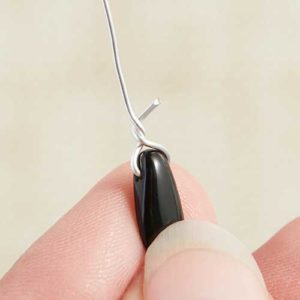
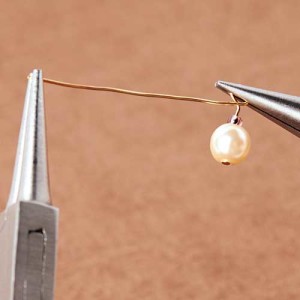
Step 2. Cut 3” of 24-Gauge Artistic Wire and bend in half. Pinch the fold.
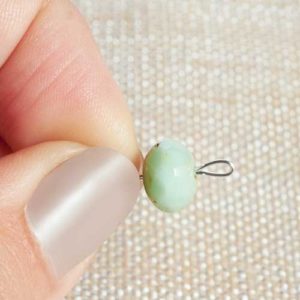
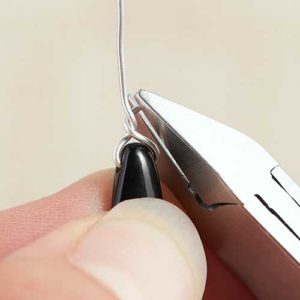
Step 3. Slide on rondelle bead. Tip: If loop is too long, clamp loop with flat nose pliers to create a smaller loop.
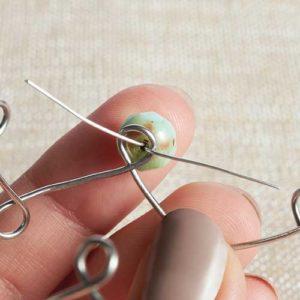
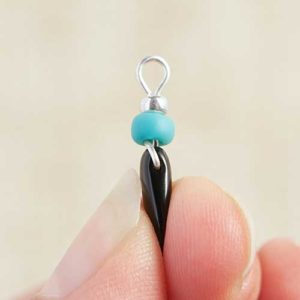
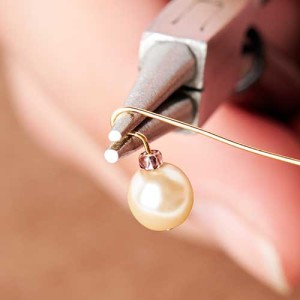
Step 4. Insert wire ends through one loop of the bangle bracelet. Separate the wire ends and spread them apart.
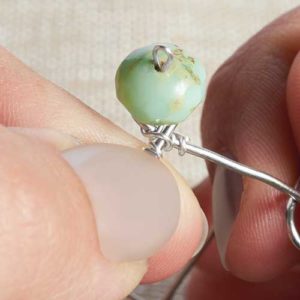
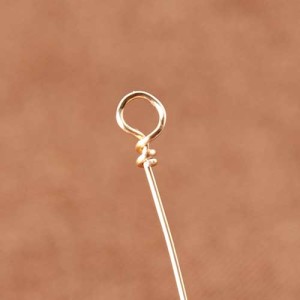
Step 5. Turn bracelet around and wrap wire end around three times on the bangle wire.
Step 6. Repeat to other wire end.
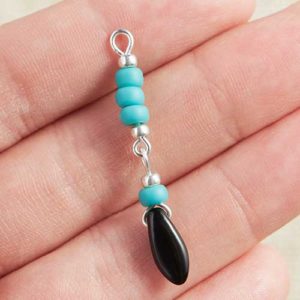
Step 7. With your fingers or finger nails, push the wrapped coils towards the middle.
Step 8. Cut excess wire and repeat all steps for remaining bangle loops.
3D Bracelet Examples
Here are other examples of what you can make with the 3D Bracelet Jig.
Swarovski® Fall/Winter 2017/2018 NEW Collection: NEW Jewelry
Our selection of Swarovski® 2017/2018 Collection: Nature of Us, is here. Our fingers were itching to create with them! Here are three jewelry pieces featuring some of the new items GoodyBeads received!
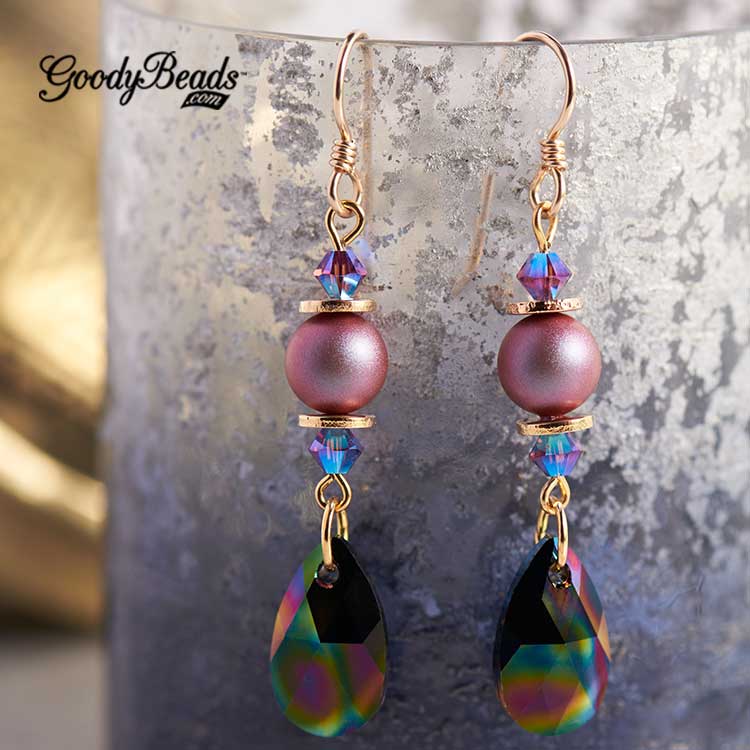
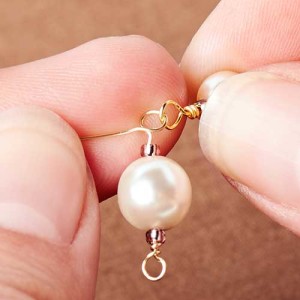
Rainbow Pearl Earrings
Designed by So Vang
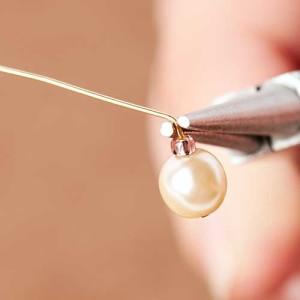
We just love the matte vibrancy of the pearls and the gleaming dark rainbow effect from the crystal drop. Paired with disc spacers, amethyst 2x AB bicone crystals and gold-plated finding, it’s certainly the pair of earrings worth waiting for.
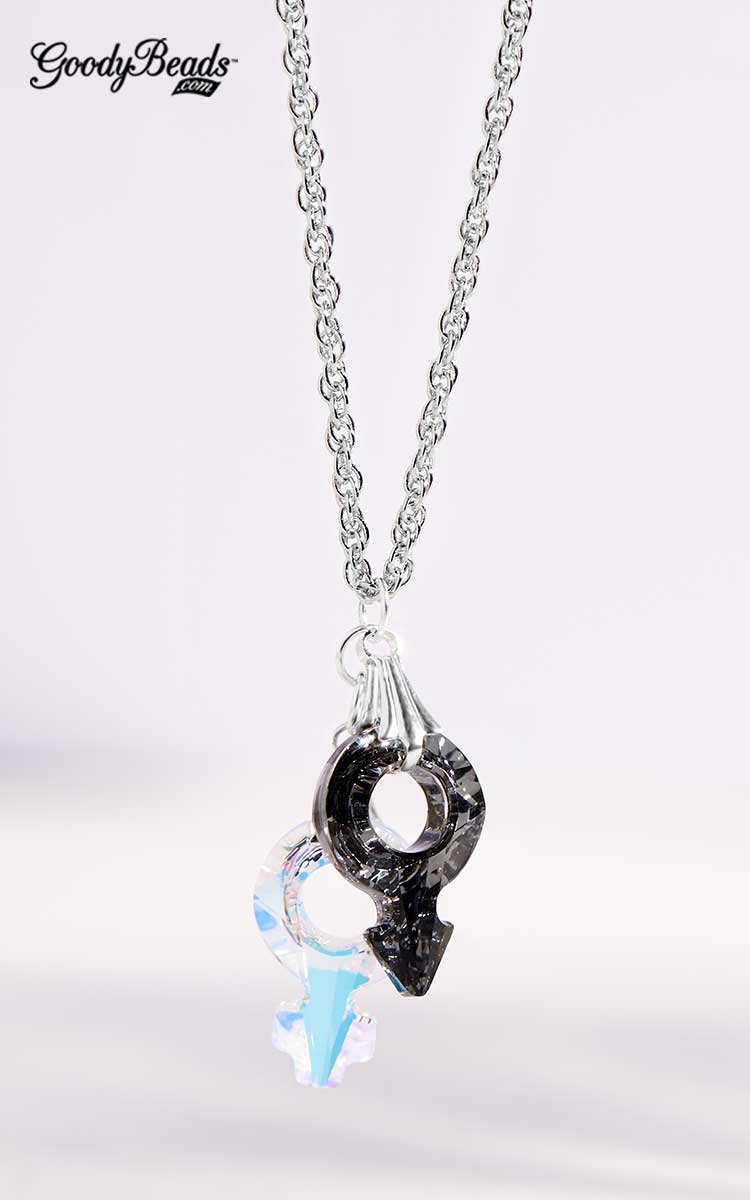
Slide a bicone crystal on a headpin and make a simple loop. Make a total of two.
Open loop of crystal dangle and slide on side loop of link. Close loop. Repeat to other end.
Open oval jump ring and slide on cross pendant and middle loop of link. Close jump ring.
Cut two 1/2” of chain.
Open small jump ring and slide on one chain link end and top side loop of link. Close jump ring. Repeat to other chain link.
Open oval jump ring and slide on both ends of chain link and loop of earwire. Close loop.
Repeat all steps for other earring.
Save
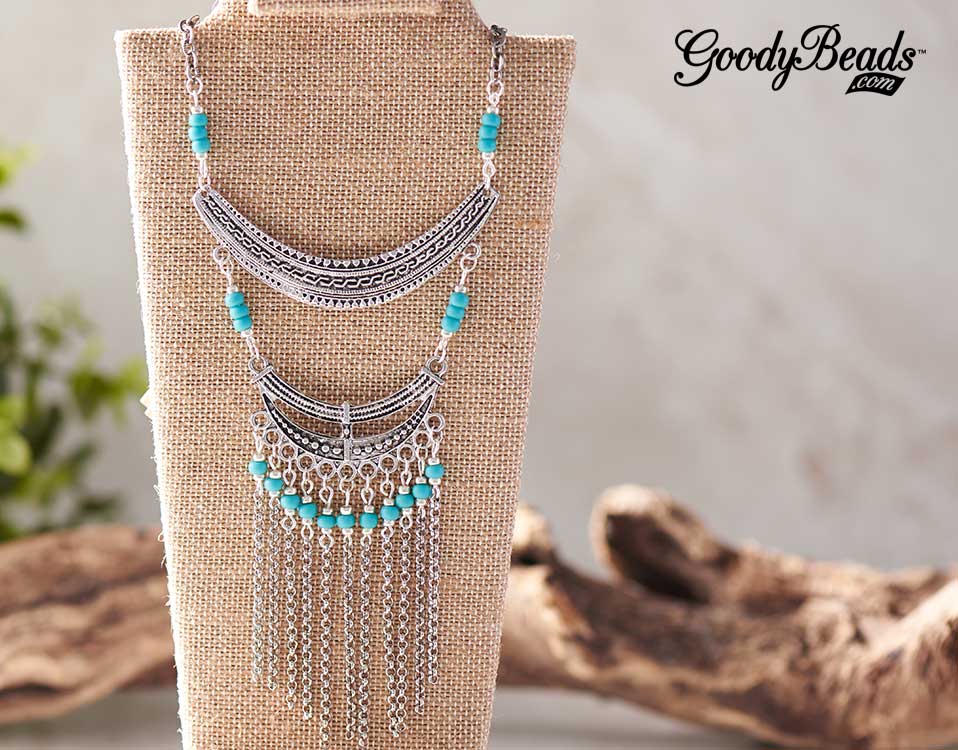
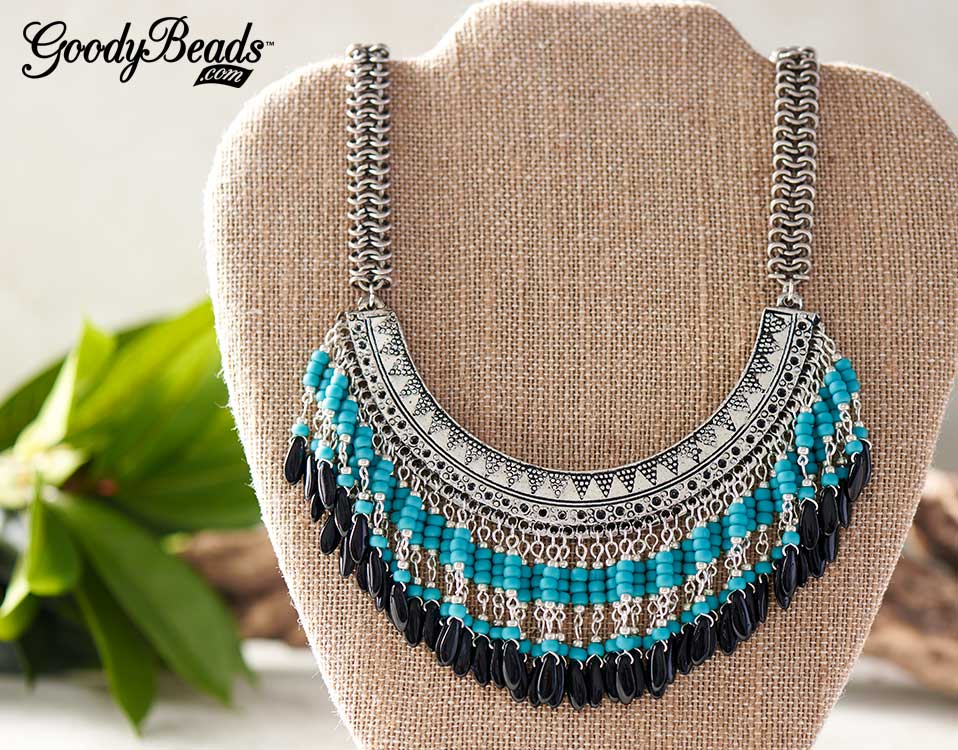
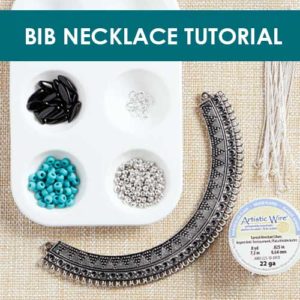
Boho-Inspired Bib Necklaces with FREE Tutorial
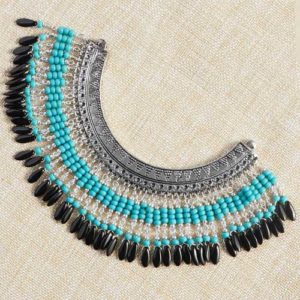
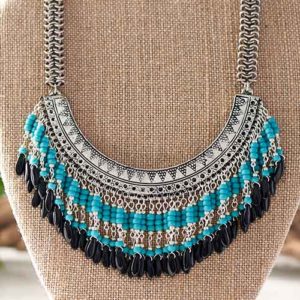
It’s on Pinterest, Tumblr and other social media image viewing boards; boho-inspired bib necklaces. Now with these Bib Connectors at GoodyBeads, you can customize your own statement necklaces with seed beads, Czech beads and daggers, and chain links.
What gives these necklaces a boho flare are the bib connectors. The intricate Bali designs and geometric patterns embellishes the overall look of creating a bib statement necklace.
Malin Fringe
Designed by So Vang
A fun simplistic way to use these Bib Connectors is linking two different connectors together. Show off your customized style with this easy-to-make bib chain necklace.
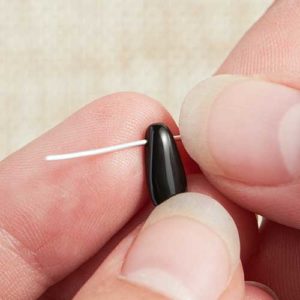
Step Three: Fold wires up and twist at the top of the dagger bead.
Step Four: Cut excess wire of shorter end.
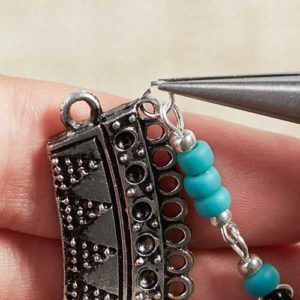
Step Five: Slide one 6/0 seed bead and one 8/0 seed bead. Make a simple loop with loop facing the side of your dagger bead. (Refer to image.)
Step Six: Open eyepin loop and slide on dagger dangle.
Step Seven: slide on eyepin one 8/0 seed bead, three 6/00 seed beads and one 6/0 seed bead. Make a simple loop. Make sure to have loop facing in the same direction as your eyepin loop. (Refer to image.)
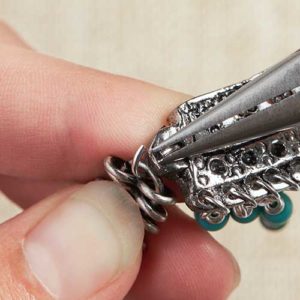
Step Eight: Open a 4mm jump ring, slide through dagger dangle and then slide through loop on bib connector.
Step Nine: Repeat steps 1-8 for every loop on bib connector. A total of 50.
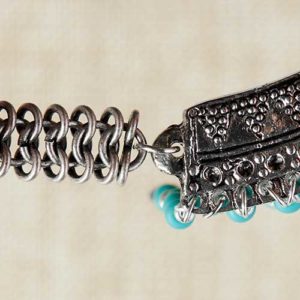
Step Ten: Cut two 6″ chain maille link. Open a 7mm jump ring and slide on one end of your chain link and side hole of bib connector. Close jump ring.
Step Eleven: Repeat to other bib end and second chain link.
Step Twelve: Open another 7mm jump ring and slide on one end of the chain link and lobster clasp. Close jump ring. Open another 7mm jump ring and slide on other chain link end and close jump ring.
Completed Bib Necklace.
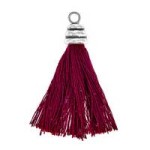
Folding Silk Ribbon to Make Fiber Earrings and Necklace
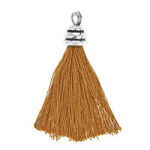
Check out our tutorial on how to fold silk fairy ribbon onto eyepins (or headpins) for a trendy fiber jewelry look!
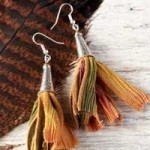
Fiber jewelry adds a natural and organic look to any outfit. As we made tassel earrings and bangle bracelet in our previous fiber blog post, we have a brand new way to use these silky ribbons. Here is our tutorial on how to fold your silk ribbon into eyepin dangles for earrings or a necklace link piece.
Shades of Blue and Purple Chain Dangle Earrings
Designed by So Vang
Make these earrings to show off your sassy and fun side.
Cut ribbon in half. Cut chain into four, 1 inch lengths. Open eyepin loop and slide on the four chain pieces. Close loop. Slide on a small bead. Follow tutorial above to feed ribbon onto your eyepin. Add a small bead on top and make a simple loop. Open ear wire loop and slide on ribbon dangle. Repeat again for second earring.
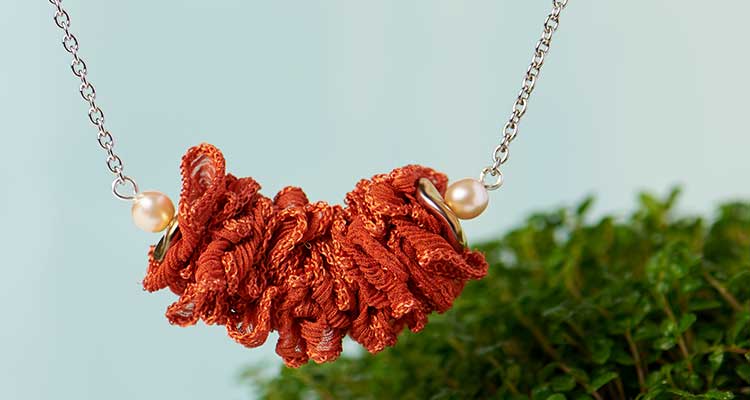
Orange and Pearl Necklace
Designed by So Vang
This necklace is easy and simple enough to make that you might want to buy different color silk ribbon to customize with your outfit!
Slide on pearl bead and Czech ripple bead. Fold a full strand of silk ribbon. Slide on another ripple bead and pearl bead. Make a simple loop at a 2 ½ Inch length. Open one of the loops and slide on the end of a30” chain. Close loop. Open other loop and slide on other end of your chain. Close loop.
Shades of Blue and Purple Chain Dangle Earrings
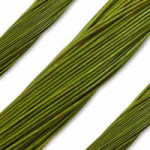
(1) A017789 – Botanical Gardens Hand Dyed Silk Ribbon
Owls are a hoot – I mean a hot motif trend. With their symbolism of knowledge and power, we’ve created two pieces of jewelry to show our love of owls.
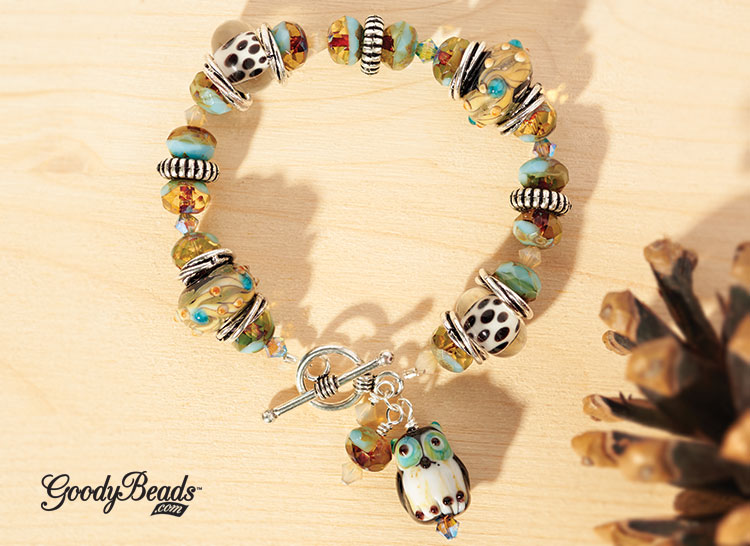
It’s a Hoot Beaded Bracelet
Designed by So Vang
Selecting high-quality lampwork glass beads, fiery Czech beads and Swarovski® crystals, we pulled out hues of opaque turquoise, chalky browns and silver accents. Strung on elastic, this bracelet is easy to wear and perfect for an evening hike or bird watching.
Step 6. Loop one elastic end through toggle bar loop and back through crimp tube. Crimp tube with crimping pliers.
Step 7. Loop other elastic end through toggle round loop and back through crimp tube. Crimp tube with crimping pliers.
Step 8. Open jump ring and slide on the three bead dangles and loop of round toggle clasp.
Step 9. Close jump ring.
Owl Be It Necklace
Designed by Tory Vezina
You can just feel autumn with this owl necklace. The gradation of colors in the fairy necklace to the dangling leaf charm entices your senses of seeing the changing colors of treetops to hearing leaves crackling as they brush across the sidewalk.
Step 9. Line your ribbon ends together and make a knot.
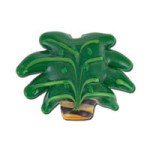
DiamonDuo™ Pineapple Paradise with FREE Pattern Tutorial
Nothing says summer like some sweet pineapple. Stitched with DiamonDuo, SuperDuo and Pip beads, these pineapples are the ultimate way to showcase how excited we are about summer! Check out our FREE tutorial on how to make these pineapple beads and use them as earring dangles or as the focal point on a tassel necklace.
We are loving this galactic red and white pineapple necklace. Donned with a red tassel and Swarovski® crystals, get ready to fall in love with summer all over again!
Make your next jewelry POP with some lampwork beads. Our selection of these glass beads are quality handmade, which makes each bead uniquely one-of-a-kind. Check out our three simple designs that utilizes these stunning, focal beads.
Glass Menagerie Bracelet
Designed by Tory Vezina
Mix up different glass lampwork and Bali style beads for this sandy and colorful bracelet.
What you will need:
(1) A013548 – 20mm Spiral with Spots Glass Disc Beads
Slide on your crimp tube and beads. Refer to image to slide on the bead sequence. End with a crimp tube. (Click on image for a larger view)
Crimp both sides to the toggle clasp loops. Cut excess wire with flex wire cutters.
Place a crimp cover over the crimped tube. Use a flat-nose plier or serrated pliers to gently close the cover over the crimped tube. And you are done.
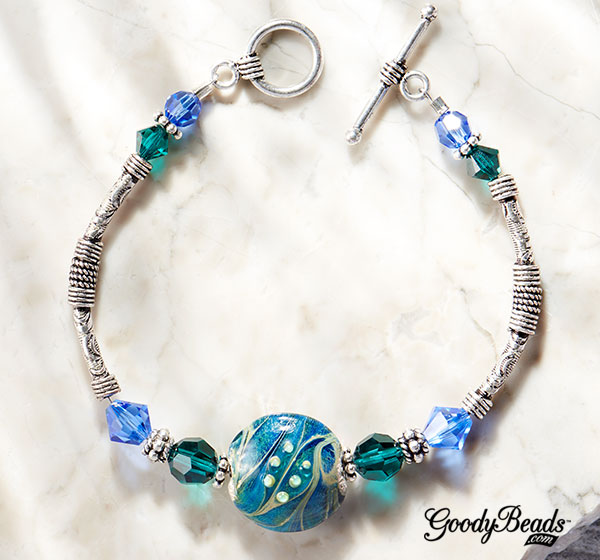
Coastal Ripples Bracelet
Designed by Tory Vezina
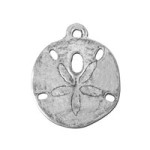
Sail away with beautiful thoughts of the ocean wearing our Coastal Ripples Bracelet. Our ocean waves disc bead is dressed with sparkling Swarovski® crystals and elongated with Bali style tube beads.
Compile your beads and tools. (List of components below.)
Slide a blue bicone crystal on headpin and make a simple loop. Make 4 bead dangles.
Slide a darker blue bicone crystal on headpin and make a simple loop. Make 4 bead dangles.
Slide a pearl on headpin and make a simple loop. Make 4 bead dangles.
Cut chain link to have 5 links.
Open eyepin and slip on chain link.
Attach two different bead dangles to each link and eyepin loop.
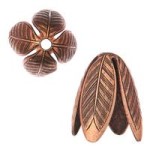
Slide these beads onto the eyepin and make a wrapped loop: pearl, bead cap, lampwork bead, bead cap, pearl.
Open earring loop and slide on eyepin dangle.
Repeat to other earring.
Make Easy Knots with the EasyKnotter® Tool
Invented by Maureen “Reenie” Oliveto, the EasyKnotter® tool was created to help beaders make perfect knots in their beaded jewelry designs. Whether you plan to stagger knotted sections throughout your jewelry piece or want knots to sit closely next to beads, this easy-to-use tool allows you to make evenly-spaced, clean knots wherever you want. Learning how to use this fantastic tool is easy too and we’re here to show you how. Let’s get started!
Beading Thread
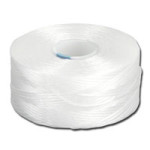
We will be using Griffin bead cord in our tutorial. We love the Griffin cord because of its 100% silk quality, the flexibility of the cord and it comes twisted with an attached needle. Silk cords come in many different sizes to accommodate the bead’s hole size. Size is very important when making knots. You want beads to fit snugly on the cord so that they don’t glide over the knot.
As the cord comes spooled around a card, you will need to prepare the silk for use by stretching and smoothing out dents and kinks. Check out this blog post we did on how to smooth out silk cords.
EasyKnotter® Tutorial
Now that you know how to use The EasyKnotter®, see this cool technique in action. Check out this previous blog post featuring knotted jewelry designs.
Every EasyKnotter® tool comes with complete instructions for reference.
When making knots, pull the silk cord upwards after you’ve looped the knot on the peg of the tool. When you pull the cord in a perpendicular angle, it will create a closer knot when you lift it off the peg.
When you lift the knot up, use flat nose pliers to pull the knot closer to your bead clusters. Open your pliers slightly and wedge the cord closest to the knot. Do not clamp on the cord. Pull the knot towards you slowly to tighten the knot and help it sit close to your bead clusters.
Maureen Oliveto has a neat way to create a tighter and closer knot. Check out her video on how to.
To make evenly-spaced knots between your bead clusters, use the measurement lines on the tool. Proceed with making your loop knot and placing it on the metal peg. Hold the last knot you’ve made at your preferred measurement line. Pull on the cord end until tight and lift off. Pull on the cord to tighten and secure the knot. Proceed with adding beads and making your closed off knot.
Expandable Bracelets and Rings
What kind of summer will you have? Whether it’s on the beach, surfing, roaming an outdoor mall or lounging on your back patio, be ready with our easy project using expandable wire bracelets and adjustable rings.
Stack multiple adjustable bracelets together. Or make a cluster of rings and wear them scattered around the base of your fingers or as knuckle rings. However you style it, remember to make it about you by personalizing and customizing them with simple charms and dangles with a quick open of a jump ring.
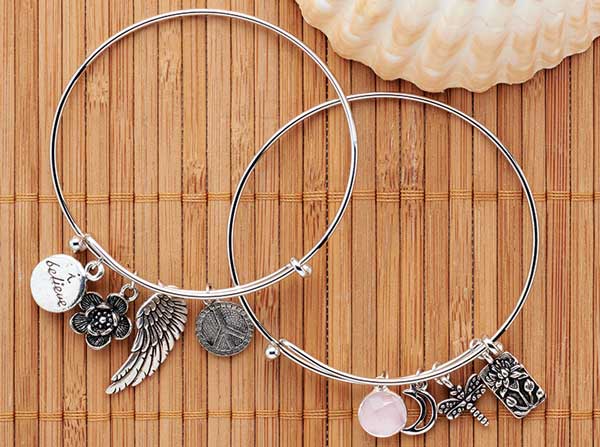
Expandable Bracelets
Designed by So Vang
What makes these bracelets expandable is the way you can slip them on and off any wrist size without altering the shape. You can get an antique silver finish or gold finish bracelet and complement them with gold or antique silver charms. Or mix up the colors. Create a theme or select your favorite charms. Attach charms with a jump ring and you are ready for summer fun!
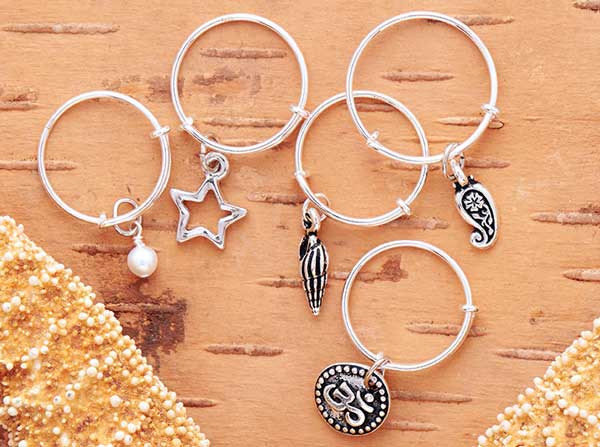
Adjustable Rings
Designed by So Vang
We are loving the versatility of these rings. They come in three different sizes to give you options to place them on your knuckles, thumbs or simply at the base of your fingers. We’ve added simple charms to our rings, as well as a cute pearl dangle to tie in a beachside look.
(2) Z003520 – Sterling Silver Adjustable Ring – Size 5-7
(2) Z003521 – Sterling Silver Adjustable Ring – Size 6-8
(1) Z003522 – Sterling Silver Adjustable Ring – Size 8-10
Boho Ring-Chain Bracelet
Designed by So Vang
Of course you can use these rings to help achieve a popular ring-chain bracelet. First, we made a simple chain bracelet with a lobster clasp. Then we put the ring on and measured a loose length of our chevron chain across the back of the hand. To finish, we connected the chevron chain to the ring and to the middle of the chain bracelet with two linked jump rings. It’s perfect for wearing with other selections of expandable bracelets and adjustable rings for a groovy summer!
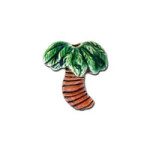
Are you ready to head bang to the beat of “Boys of Summer,” while cruising along the beach? We have three bracelets that feature trending flamingo and palm tree motifs. Easy to make and slip on, you can make these simple stretch or leather bracelets while catching rays on the beach.
Beach Party Stretch Bracelet
Designed by So Vang
Wear your oversized floppy hat, romper, flip flops and this cool bracelet to your next beach party! You can whip up this bracelet and still have time to figure out if you want to change your outfit again.
What you will need for this bracelet is the following:
Step 3 – Cut with your memory wire cutters 1/2″ away from the last palm tree.
Step 4 – Round the wire end to make a simple loop.
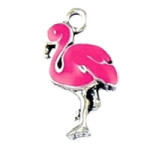
Blushing Flamingo Leather Bracelet
Designed by Tory Vezina
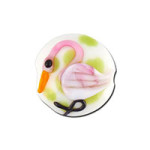
Can you imagine yourself wearing this bracelet, while humming and sipping on a fruity drink? We love the handmade flamingo glass bead surrounded with hues of pink.
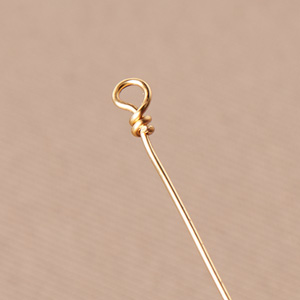
Step One: Cut 22-gauge wire and make a wire wrapped loop. Make sure to make a loop small enough so seed beads can not pass through.
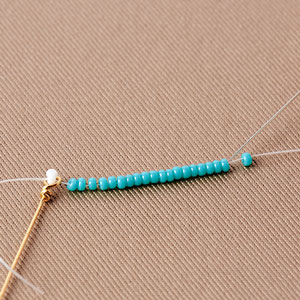
Step Two: Knot a bead to the end of the thread. Feed the thread through wire loop.
Step Three: String on your preferred amount of seed beads. (Here we are using size 11 Miyuki seed beads.)
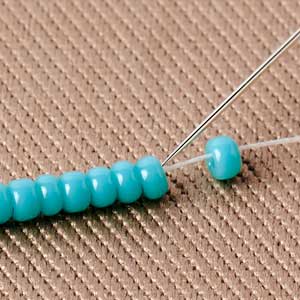
Step Four: Skip the last bead and thread the needle back though the beads.
Step Five: Thread through the wire loop.
Step Six: String on beads and thread back through the beads while skipping the last bead. Then go back through the wire loop.
Step Seven: Repeat until you’ve reached a desired thickness. This thickness is according to how full you want your tassel to look within the bead cap or end that is being used. Tie off the ends and cut excess. You can add fast-drying glue to secure the knots.
Step Eight: Add your bead cap or bead end and make a wire wrapped loop. You’ve completed your beaded tassel.
Guinevere Beaded Tassel Lariat Necklace
Designed by Tory Vezina
If Queen Guinevere wore a tassel necklace, this would be the necklace. With pearl seed beads and spiral rope chain, this necklace is perfect for common folk to feel like a queen!
The tassel was made with size 11 pearl seed beads and gold end caps. Make two beaded tassels. Cut some rope chain at 3-4 feet and attach each end with a brass jump ring and beaded tassel. Wear this lariat necklace loose while wrapped around once or twice. Or tie a knot 2-4 inches away from your beaded tassel.
A simple embellishment you can add to your head pins and wire, is making a wire wrap loop. A wrapped loop adds a decorative and elegant look to your jewelry piece. Here, we’ll explain how to make a wrapped loop, how to connect two wrapped loops together and show you previous projects using wrapped loops.
While we covered the basic of a simple loop in a previous blog post, you can take that knowledge of simple loops and amp it up a notch with wire-wrapped loops. Like, our previous advice; practice, practice, practice.
First, let’s talk about wire gauge. While we recommend your head pins, eyepins or wire to be a 21 – 24 gauge, you can surely use other thickness. Do keep in mind that when wire wrapping a thick gauge, like 20 or lower; it will be more difficult to create a tighter coil. While a thinner gauge above 26 will be more delicate. But when it comes down to beading and jewelry, it’s personal preference.
Wire Wrap Loop Tutorial
Tools you will need:
Round Nose Pliers
Flat Nose Pliers
Serrated Pliers
Side Cutter
Step One: Add bead(s) to head pin or eyepin. Grasp the tip of the round nose pliers on the wire close to the top bead.
Step Two. Bend wire to a 45-degree angle over the pliers’ round nose with fingers.
Step Three: Slide the round nose pliers in 1/4” and grasp the bent 45-degree angle tail. Bring wire over the pliers’ round nose to make a backwards question mark. Note: You can slide the pliers in more for a larger loop.
Step Four: Switch the pliers’ nose so that the bottom nose is in the loop that’s been made. Wrap the wire end under the round nose and over the bead(s). The wire should cross over the bent 45-degree angle section leaving a gap below the loop.
Step Five: Clamp the loop with a flat nose plier and grasp the wire tail with the tip of the round nose pliers.
Step Six: In a clockwise rotation, coil the wire with your round nose pliers around the gap and down. You should get 2-3 coils.
Step Seven: Clip the excess wire with a side cutter. Use a serrated or flat nose pliers to catch the end of the wire tail and tuck it under the coils.
Step Eight: Straighten loop as needed. You are done!
Linking Wire Wrapped Loops
Unlike simple loops, with wire wrap loops you are unable to open the loops up and link them. You will need to add the two parts in the middle of the wrapping process, while using Artistic Wire to make a double wrapped, loop links.
Step One: Make a wrapped loop on 22 Gauge Artistic Wire.
Step Two: Make a 45-degree bent angle and full loop. After the full loop, link finished wire wrapped piece into loop.
Step Three: Finish the rest of the wire wrapping process and you should have a wire-wrap linked piece.
There are many variations of how to form a wrapped loop. Many jewelry-makers create coils while holding the wire end with their fingers. Or others wire wrap an irregular coil. Whichever the look you are achieving, one way to make a wrapped loop.
Sample Jewelry with Wire-Wrapped Loops
Here, we will explore inspirational jewelry from past trends and blog postings that have used wrapped loops.
We linked up wire-wrapped loops to make this waterfall-inspired pearl necklace.
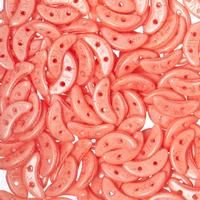
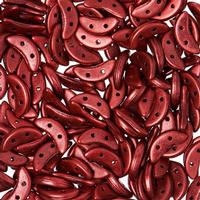
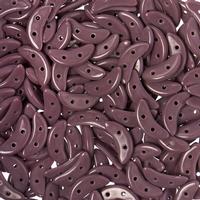
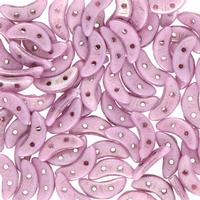
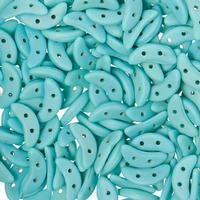
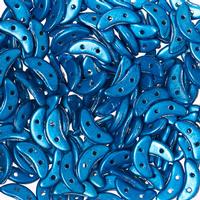
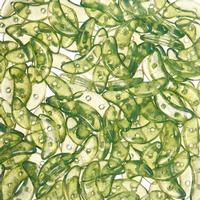
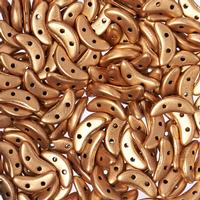
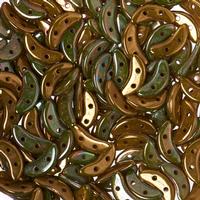
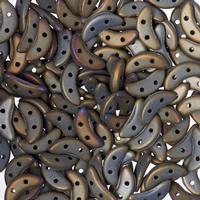
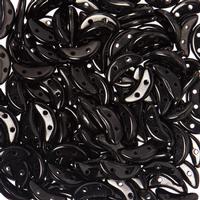
Czech Crescent Bracelet and Earrings with FREE Illustrated Tutorial
Czech Crescent beads are NEW at GoodyBeads. The Czech crescent beads are wedge-shaped beads with two holes. We have two easy and free tutorials using these Czech crescent beads.
Midnight Gold Czech Crescent Bracelet
Design by So Vang
For this bracelet, we used a combination of black and gold crescent beads with Swarovski® crystals in Graphite AB2X. The midnight glow of the AB2X is hauntingly beautiful in this piece.
We love this bracelet because it is simple to make. First, start by threading on 4 seed beads. Keep the ends of your thread untied. Then, you will thread on a top layer with a sequence of 3 Czech crescent, a seed bead and a 4mm bicone crystal. Repeat this sequence until you’ve reached your preferred bracelet length. End this top layer with 3 crescent beads and 4 seed beads. Now, bring the thread down to the bottom 3 crescent beads you’ve ended with. You will now be threading the bottom layer by adding a seed bead and bicone crystal in between each crescent bead grouping until you’ve reached the end. Tie both of your thread ends together. Feed your threads back through a few beads before you cut off excess thread. Add your clasp and chain link to the seed bead loop ends you’ve made with jump rings.
First thread on your top layer with, crescent bead, seed bead, bicone crystal (4 times). Tie both thread ends together to create a cylinder shape. Feed your thread through one crescent bead and loop down through the second hole of the crescent bead. Thread in reverse of your cylinder shape with adding a seed bead and bicone crystal inbetween the crescent bead. Once you’ve reached the end. Tie off thread ends and thread through a few beads before cutting off excess and you’ve completed your crescent bead design.
Slide these beads onto the headpin and make a simple loop:
Seed bead, bicone crystal, 8mm round crystal, 6mm round crystal, crescent bead design, bicone crystal and seed bead.
Open your Ear-wire loop and slide on your crescent bead design headpin loop. Repeat for other earring.
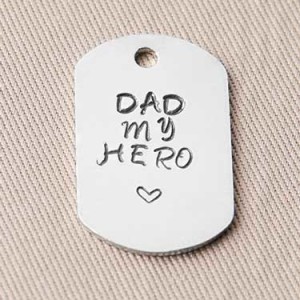
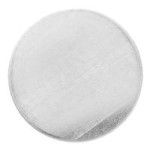
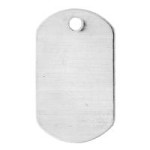
Make a personalized gift with special, customized words for Dad. A new alternative to sterling silver, Alkemé™ stamping blanks make personalizing gifts easy and fun.
Made with a newly formulated, non-corrosive metal alloy, these metal discs allow for intricate, detailed stamping at just a light tap of a hammer. Plus, Alkemé™ stamping blanks are lead-, nickel and cadmium-free. Just buff with a soft cloth, like you do with silver. It’s a great, affordable option to using sterling silver, and looks fantastic.
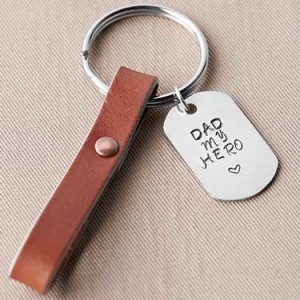
Leather KeyChain with Alkemé Blank
Designed by So Vang
Dads are heroes, don’t you agree? They fix the sink when clogged, change out the burned-out light bulb, chase away monsters under your bed and even drive you to the mall. We have this easy leather keychain to remind him of his superhero qualities. Refer to our How to Rivetblog post for a tutorial on how to rivet leather and our metal stamping blog post on how to stamp metal blanks.
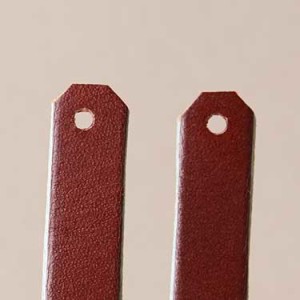
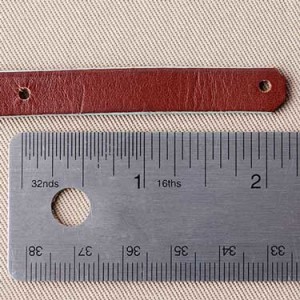
Step Two: Cut 6” of 10mm flat leather. Punch a hole at the ends. Optional: Cut the corners of your leather ends.
Step Three: Punch a hole 2” away from one end of your leather.
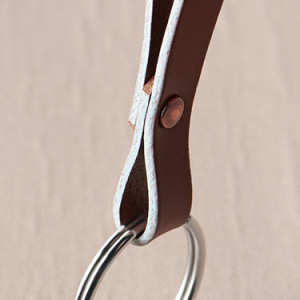
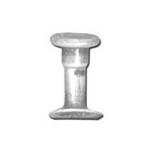
Step Four: Loop your 2” gap hole over your key ring. Loop the other end to sit on top of your other leather end and rivet the three hole layers together with a 6mm rivet.
Step Five: Attach your Alkemé stamping blank with a jump ring to key ring. Done.
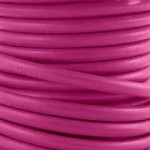
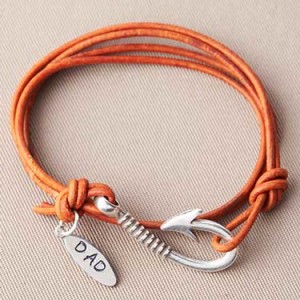
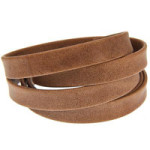
Leather Cord Wrap Bracelet
Designed by So Vang
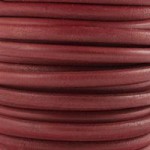
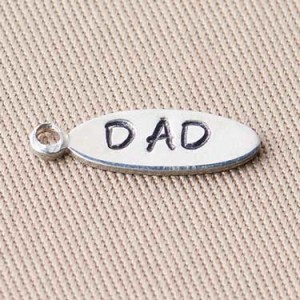
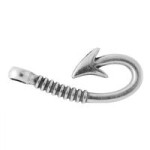
This simple bracelet is for the fishing enthusiast Dad. Using this stylish fish hook clasp, 2mm leather cord and an Alkemé dangle blank, he is sure to wear this bracelet all day, every day, fishing, or non-fishing.
Step One: Stamp your Alkemé stamping dangle blank.
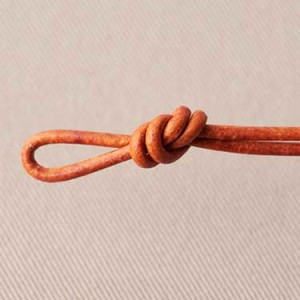
Step Two: Fold your 2mm leather cord in half and tie a loop.
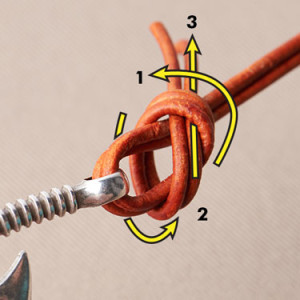
Step Three: Cut to accommodate two wraps around wrist, plus an extra 5” for the knot. Loop the end through the fish hook clasp loop and make a slip knot. Follow arrows. Pull ends to tighten knot. Cut excess leather end.
Step Four: Attach your Alkemé stamp blank with a jump ring. Done.
Letter Stamps: TL00191 – 3mm Bridgette Metal Letters Stamping Set
Memorial Day DIY Jewelry
Memorial Day is a special day to honor those who have died while serving in the United States of America armed forces. We have a few DIY jewelry projects to commemorate this day and all American holidays.
Red, White and Blue Flat Leather Bracelet
Designed by So Vang
Here’s a clean and sleek bracelet made from 5mm flat leather and rivets. First, measure four strands of leather at your wrist size plus two more inches for the loops. You can learn how to rivet leather loops by reading our previous blog. Make sure to loop your ends through the bar end before you hammer your rivets. Add a clasp and you are ready to rock to the beat of an American song.
We made this bracelet easy to wear, make, and adjust. Take a strand of red, white and blue 2mm leather cord and line them up at one end. Take a silver clamp and clamp the three ends with serrated chain nose pliers. Hold your strands together and evenly straighten your strands. Make a flush cut at the other end and use another silver clamp to clamp those ends. Add your clasp and a simple USA charm. What’s versatile about this bracelet is that you can add knots in between your leather cords if you find the bracelet to be a bit loose. Plus, we think the added knots are a neat feature to the bracelet. Wrap 4 or 5 times around your wrist for a fire cracking weekend.
To make the pin, you will make Czech dagger rings by threading on Czech daggers and making a knot with the thread ends. Cut off excess thread. You will need to make three rings with 10 red Czech dagger beads, 9 red Czech dagger beads and 7 black Czech dagger beads.
Next, slide on your headpin the 8mm black round crystal, black dagger ring, red dagger smaller ring, red dagger larger ring and 8mm red bicone crystal. Make a simple loop. Open the headpin dangle loop and attach to the loop on the bow pin.
For this ring, you will need to make two rings with 10 red dagger beads and 7 red dagger beads. Use a fast-drying glue, like Super New Glue to add to the base of your ring. Lay the larger red ring on top and press down with your finger. This will help the ring to lay flat. This should only take a few seconds to dry. Add some glue on the inner part of the red dagger ring and add your smaller red dagger ring. Hold it in place with your finger for a few seconds. Add some glue to that layer and place the jet round crystal on top.