DIY Wire Wrapped Hoop Earrings with Microfacet Gemstones

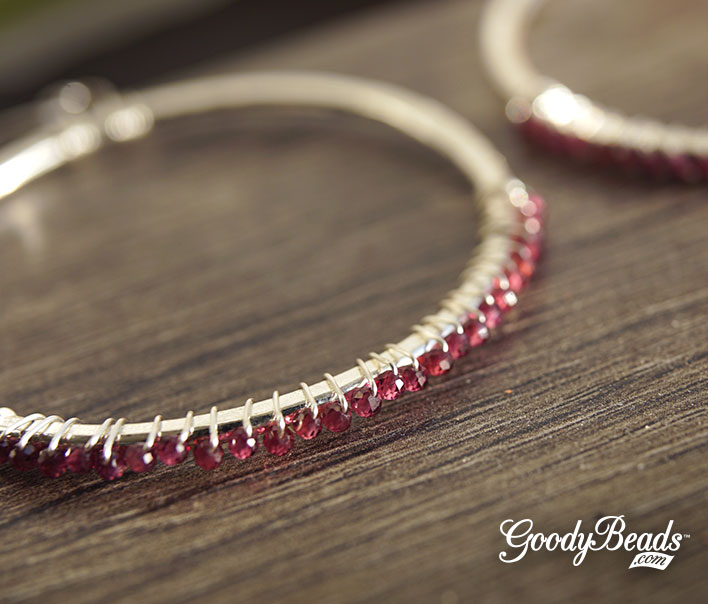
Make a pair of Wire Wrapped Hoop Earrings using 26-gauge wire and 2mm faceted gemstones, all wrapped around a Nunn Design hoop. Though these may be dainty and minimalistic kind of earrings, they certainly don’t act like it. The large hoops and faceted sparkles from the gemstones will have everyone wanting one!

Items used in earrings:

  • Z008275 (2) – 50mm Bright .999 Fine Silver Plated Flat Grande Hoop
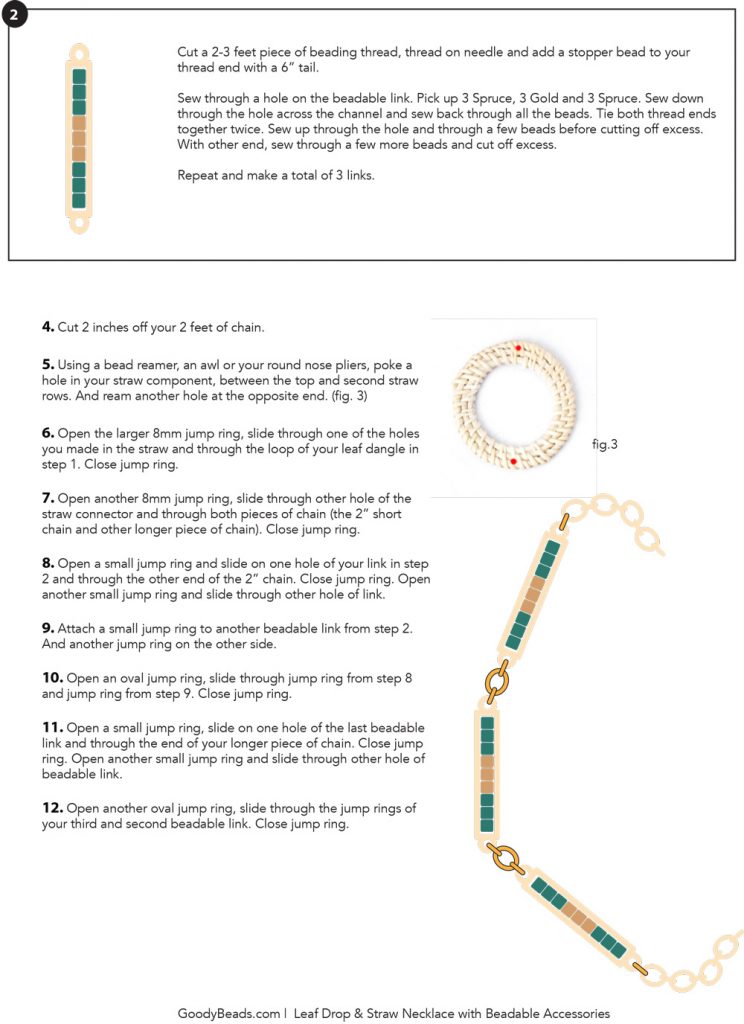
  • AW00215 – 26 Gauge Silver Plated Tarnish Resistant Silver Artistic Wire
    Or WR00035 – 26 Gauge German Bead Wire
  • TC02306 – Silver Filled Front Loop Earring Wire by Tierracast®
  • PGT2RD-F – 2mm Purple Garnet Diamond Cut Gemstone Faceted Round

Get all the components for this project here

GoodyBeads.com Blog | DIY Wire Wrapped Hoop Earrings with Microfacet Gemstones FREE Tutorial

GoodyBeads.com Blog | DIY Wire Wrapped Hoop Earrings with Microfacet Gemstones FREE Tutorial

Directions:

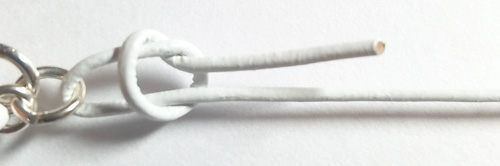
  1. Cut a 2 feet piece of wire.
  2. Wrap 4 coils around the hoop with the wire end. Pinch coils together to keep the coils tight. Slide on 31 beads or half of your gemstones onto the wire.
  3. Pick up a gemstone and wrap around the hoop once, making sure to situate the bead on the outer rim of the hoop. Repeat to the rest of the gemstones. Make sure to pinch your coils together to keep your wires tight.
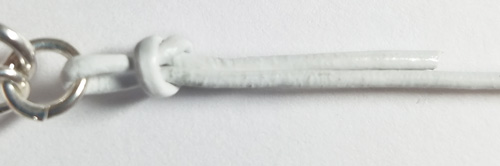
  4. End your wire wrapping with 4 coils and cut off excess.
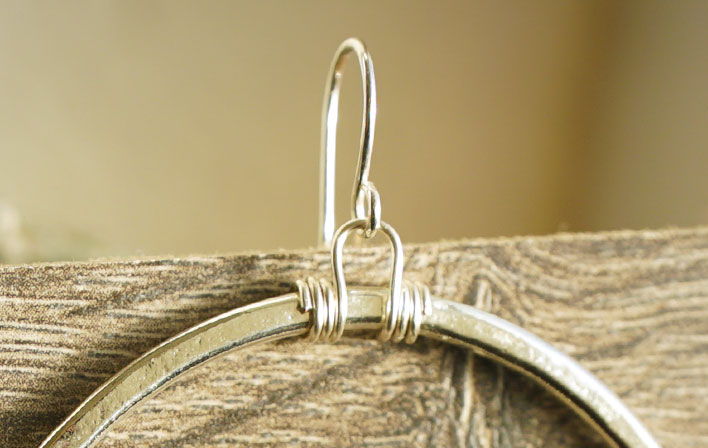
  5. Cut a 5″ piece of wire or use the rest of your excess wire. Find the midpoint of your hoop, where you haven’t wire wrapped; this is where you will make your wire loop. Make 3 coils and pinch them together to keep the coils tight. Use your round nose pliers and clamp it next to your coil. How far you clamp in will determine the size of your loop. Wrap your wire around the round nose and downwards. While holding the plier in place, wrap the rest of the wire 3 more times the opposite direction of the first set of coils. Keep coils tight. Cut off excess wire.
  6. Open earwire loop and slide on hoop dangle loop you made in step 5. Close loop.
  7. Repeat all steps for other earring.

GoodyBeads.com Blog | DIY Wire Wrapped Hoop Earrings with Microfacet Gemstones FREE Tutorial

Designed by Kayla Braun-Waletzke


DIY Playful Tassel Earrings

Spring will be here before we know, so why not include these DIY playful tassel earrings to your mix of colorful, spring jewelry. Made with our favorite fan tassels and gold findings, they’re so easy you’ll probably want to make more for all your girlfriends too!

Items used in tassel earrings:

  • Z017109 – 40mm Gold Plated Brass Hoop Frame
  • Z007737 – Turquoise Blue Flat Half Circle Fan Tassel with Gold
  • A011517 – 4mm Gold Plated 20 Gauge Round Jump Ring
  • TCZ0139 – Gold Filled Earring Wire by Tierracast®

GoodyBeads.com Blog | DIY Playful Tassel Earrings FREE Tutorial

Directions:

  1. One end of the hoops can slide out. Don’t slide it out but crimp down by using a needle nose pliers.
  2. Open jump ring, slide on tassel loop and through hoop. Close jump ring.
  3. Open earwire loop, slide on hoop dangle and close loop.
  4. Repeat all steps for other earrings.


DIY Leaf Drop & Straw Necklace with Beadable Accessories

For today’s February Daily Project, our DIY Leaf Drop & Straw Necklace may look elaborate and hard to make, but don’t fret because it’s quite easy. With the help of beadable accessories, we’re pulling it together with a straw connector and chain for a stylish necklace! Plus a get the FREE pattern tutorial for this necklace and its beadable accessories.

Items used in necklace:

  • SB02336 – 11/0 Spruce Duracoat Opaque Dyed Delica Seed Beads
  • SB00269 – 11/0 Galvanized Gold Miyuki Delica Seed Beads
    OR try other 11/0 Delica Colors
  • Z001659 – Handmade Woven Rattan Straw Oval Ring Pendant/Connector
  • Z005131 (3) – Gold-Plated Stainless Steel Beadable Rectangular Link
  • Z018107 – 40mm Gold-Plated Stainless Steel Beadable Oval Pendant
  • CH00532 (2) – 2.2mm Gold Plated Soldered Cable Chain
  • A008801 – 5mm Gold Plated 21 Gauge Oval Jump Rings
  • A011523 – 8mm Gold Plated 20 Gauge Round Jump Ring
  • A011517 – 4mm Gold Plated 20 Gauge Round Jump Ring
  • A006587 – 6lb Crystal Fireline Thread
  • A006767 – Beading Needles

——- CLICK for FREE Downloadable Pattern Tutorial ——-

GoodyBeads.com Blog | DIY Leaf Drop & Straw Necklace with Beadable Accessories with FREE Pattern Tutorial

Designed by So Vang


DIY Threader Earrings with Pearl Dangle

Threader earrings are very popular among minimalistic jewelry wearers. You can wear it threaded through one pierced hole and have a long dangle earring or if you have two next to each other, you can thread and loop through both. They are easy to wear and even easier to make! Try out this DIY threader earrings with pearl dangle.

Items used threader earrings:

  • Z019929 – Sterling Silver Box Chain Ear Threads
  • SW02567 (2) – Swarovski® 8mm White Crystal Baroque Round Pearl
  • A001494 – 1 Inch Silver Plated 24 Gauge Headpins

GoodyBeads.com Blog | DIY Threader Earrings with Pearl Dangle FREE Tutorial

Directions:

  1. Slide pearl on a headpin and make a simple loop.
  2. Open pearl dangle loop and slide on loop of earrings. Close loop.
  3. Repeat for other earrings.


Heidi’s Boho Babe Earrings

Heidi is a fan of silver jewelry and her Boho Babe Earrings definitely hits the mark! Made with silver findings, charms and beads, this easy-to-make pair of earrings will be a staple to your spring style!

Items used in earrings:

  • Z017106 – 40mm Silver Plated Brass Hoop Frame
  • A010966 – Silver Plated Earring Wire with Bali Style Design
  • Y006450 – 12mm Silver Plated Round Disc Drop
  • A022190 – 4.5mm Cornerless Cube Silver-Plated Brass Beads
  • A008799 – 5mm Oval Silver Plated 21 Gauge Jump Rings
  • Z011500 – 4mm Silver Plated 20 Gauge Round Jump Ring
  • A015821 – Super New Glue

Get all the components for this project here

GoodyBeads.com Blog | Heidi's Boho Babe Earrings FREE Tutorial

Directions:

  1. Open a round jump ring, slide on a silver charm and close jump ring.
  2. Open an oval jump ring, slide round jump ring from step 1 and close jump ring. Open another oval jump ring, slide through previous oval jump ring and close jump ring.
  3. Repeat steps 1 and 2 to make a total of 10 dangles.
  4. Gently open the hoop by taking out one of its ends. (Only one side is crimped in, so make sure you pull out the other.)
  5. Slide on the the following:
    silver bead, oval ring of silver charm dangle, two silver bead, silver charm, two silver bead, silver charm, two silver bead, silver charm, two silver bead, silver charm, and a silver bead.
  6. Add a small dot of glue on the hoop end and slide hoop end back in the slot you took it out of. Use thin flat nose pliers to crimp down this end to secure it.
  7. Open earwire loop and slide on hoop dangle. Close loop.
  8. Repeat steps 4 -7 for other earring.

Designed by Heidi.


DIY Golden Goddess Earrings with Lapis Gemstones

Our February Daily DIY project is all about layering! The DIY Golden Goddess Earrings with Lapis Gemstones are designed by Jacque, who made the amazing Macrame Planter Hanger with Large-Hole Beads last summer. She is showing off her jewelry skills with these post earring made with Lapis gemstones, enamel connector and gold findings.

Items used in Post Earrings:

  • Z016675 (2) – 43mm Satin Gold Etched Round Hoop
  • Z016258 (2) – 27mm White Enamel Gold Plated Ring Connector Pendant
  • Z006000 – 12mm Gold Plated Stainless Steel Sun Burst Post Earrings with Loop
  • LAP12DC-8 – 12mm Lapis Coin Gemstone Beads
  • A011525 – 9mm Gold Plated 20 Gauge Round Jump Ring
  • A011523 – 8mm Gold Plated 20 Gauge Round Jump Ring
  • A008801 – 5mm Gold Plated 21 Gauge Oval Jump Rings
  • A019662 – 1 Inch Gold Plated 22 Gauge Headpins

Directions:

  1. Slide a lapis gemstone onto a headpin and make a simple or wrapped loop.
  2. Open 8mm jump ring, slide on one hole of enamel link and through hoop of Gold Etched Round Hoop. Close jump ring.
  3. Open 9mm jump ring, slide through other hole of enamel link, lapis dangle and top loop of Gold Etched Round Hoop. You want to make sure the dangle is behind the enamel. Close jump ring.
  4. Open oval jump ring, through top loop of Gold Etched Round Hoop and post earring loop. Close jump ring. Make sure the white enamel is facing outwards.
  5. Repeat all steps for other earring.

Designed by Jacque


DIY Bracelet Cuff with Mircofacet Garnet Gemstones

Today’s February Daily DIY features the DIY Bracelet Cuff with Mircofacet Garnet Gemstones from Dakota Stones. Kayla, jewelry designer from Dakota Stones, created this dainty and gorgeous cuff using gemstones wrapped around a Nunn Design cuff with 24-gauge wire.

Items used in this DIY Bracelet:

  • WR00044 – 24 Gauge Copper Wire
  • Z016187 – Copper Flat Nunn Design Cuff
  • CHA4DC-F – Garnet beads from the Chakra Strand

Get all the components for this project here

Directions:

  1. Cut a 4′ piece of wire.
  2. Starting a third of the way up the cuff, wrap your wire making 4-5 coils. Pinch the coils together to keep the coils close and tight.
  3. Slide on a gemstone bead, lay and situate the gemstone on the flat cuff and wrap the wire around the cuff two times, while keeping the gemstone in place.
  4. Repeat step 3 to the rest of your gemstones and coiling 2 times between each gemstone. Make sure to pinch your coils together to keep coils tight.
  5. At the last coil, make 4-5 coils before cutting off excess.

Jewelry Design by Kayla Braun-Waletzke


DIY Leather Fringe Bib Necklace with Deerskin Leather Lace

Try out this fun DIY bib necklace with deerskin lace fringe and Black Gold Amazonite large-hole gemstone beads from our Deerskin Lace March 2018 Trend.

Exceptionally strong, yet soft and supple, Deerskin Lace is expertly cut from only the finest North American deer hides. Great for all your jewelry and beading projects or for garment lacing. Deerskin Lace is the softest leather lace around. 

Items used in necklace:

GoodyBeads.com Blog | DIY Leather Bib Necklace with Deerskin Leather Lace FREE Tutorial

Directions:

  1. Cut 7 pieces of leather lace at 10 inches.
  2. Cut 6 pieces of leather lace at 7 inches.
  3. Take a 7″ leather and make a lark’s head knot on the bottom bar of the bib necklace. Repeat 2 more times.
  4. Make a lark’s head knot with the 10″ leather, 7 times.
  5. Make a lark’s head knot with the 7″ leather, 3 times.
  6. Slide a gemstone to the middle strand of your leather fringes and make a knot. Repeat outwards, staggering your knots so that your fringes get shorter and shorter. Make sure your knots are where you’d want them to be and then cut off excess leather.
  7. Tie one end of the chain with the side hole of your bib connector with a 3″ piece of leather, twice. Repeat to other side.
  8. Optional, you can cut chain in half to add a clasp. Or cut chain shorter for a shorter length.


Criss Cross Thread Beadable Cuff

We like to think outside the box with this Criss Cross Thread Cuff. With using a beadable cuff, we aren’t adding beads to it but colored thread in a criss cross pattern.

What you’ll need for projects:

  • Gold Beadable Cuff – Z001860
  • TOHO One-G Nylon Thread OR Size AA White Superlon Beading Thread
    Item used in example – Z017742
  • Super New Glue – A015821
  • Needle – A006767

Get all the components for this project here

GoodyBeads.com Blog | Criss Cross Thread Beadable Cuff FREE Pattern Tutorial

Love arm candy? We layered this Criss Cross Thread Cuff with our Bronze Legend Bracelet and Golden Rays Bracelet. How will you layer this cuff?

Designed by So Vang


DIY Blue-Blue Straw Earrings with Deerskin Leather Lace

We’re ending the year with one of our favorites from 2020, straw earrings. We’ve paired our colored straw components with LeatherCord USA deerskin leather lace, a soft leather that can easily bend and shape.

Items used in earrings:

  • Z010962 – 3mm Saddle Deerskin Leather Lace
  • Z016790 – Turquoise Handmade Woven Rattan Straw
  • TC02360 – 11mm Brass Oxide Jardin Crimp End Cap by TierraCast®
  • Z002858 – Antique Brass Fishhook with 2mm Ball Earwires

GoodyBeads.com Blog | DIY Blue-Blue Straw Earrings with Deerskin Leather Lace FREE Tutorial

Directions:

  1. Cut two pieces of leather at 5 inches.
  2. Fold one piece of leather and make a lark’s head knot through the straw component. Make sure the leather is laid next to each other and the front of the leather is faced the same way. (Refer to our earrings tutorial to see step 1 and 2 on making a lark’s head knot with leather lace.)
  3. Repeat step 2 for other leather piece and straw.
  4. Determine the length you want your leather to be. You can cut a 1/4″ off the end of your leather. Make sure it is a flush cut.
  5. Cap your leather ends with the TierraCast end cap. Using nylon pliers, crimp the end cap to secure the leather ends. Repeat for other leather and end cap. (As an option, you can add a small dot of E-6000 inside the end cap. Use a toothpick to spread it around. Do not use Super New Glue, it may discolor the leather where it is inserted.)
  6. Open earwire loop, slide on end cap loop and close earwire loop. Repeat for other earring.


Pantone 2021 Color of the Year: Ultimate Gray & Illuminating

Pantone has produced their color pick for 2021. Or should we say picks! With 2020 being a rough year for everyone around the world, Pantone’s color picks Ultimate Gray and Illuminating challenges a ‘forward’ thinking for the future. We will dive into Pantone’s meaning for their color picks for 2021 and we’ll give you a fun DIY jewelry to embrace this color combination!

2016 was the year Pantone debuted a first-time, duo-color that blurs the line of femininity and masculinity; Rose Quartz and Serenity. With the current event of 2020, it is no wonder their pick for 2021 doesn’t blur the line of colors but complement two opposite colors that works “together to support one another.” While Ultimate Gray is justly a neutral gray color, Illuminating is a bright yellow, it is “a marriage of color conveying a message of strength and hopefulness that is both enduring and uplifting.

Pantone states, ” Emboldening the spirit, the pairing of PANTONE 17-5104 Ultimate Gray + PANTONE 13-0647 [Illuminating] highlights our innate need to be seen, to be visible, to be recognized, to have our voices heard. A combination of color whose ties to insight, innovation and intuition, and respect for wisdom, experience, and intelligence inspires regeneration, pressing us forward toward new ways of thinking and concepts.”

How do you feel about Pantone’s picks for 2021?

DIY Beaded Silvery Yellow Diamond Color Block Earrings

We love the color combination and the emboldening message it represents. Here is a fun design using the two colors in our pair of DIY earrings. We’ve made a simple colorblock diamond earrings using Delica beads in a brick stitch.

FOLLOW the FREE Pattern Tutorial for these earrings HERE!

Items used in earrings: SB00290, SB00141, TCZ0078, A006585, A002413 & A006767


Holiday Gift Guide for Last-Minute Easy DIYs

Christmas is fast approaching, so here are some last-minute easy DIYs you can whip up in no time and with just a few components. Our ideas consists of Easy Bracelets, Easy Hoop Earrings, DIYs for the Table and DIY Kits.

Easy DIY Bracelets

Here are some easy DIYs for simple bracelets!

DIY Hook Earrings

Here are some easy DIYs to make trendy hoop earrings:

DIYs for the Table

Here are some easy DIYs to make for the dinner table, beading table or even your work table:

DIY Kits

Need more ideas? Get some DIY kits so you can get started!


Spend the Holidays with Swarovski® – New Year

We’re celebrating the festive spirit with our friends at Swarovski: Create Your Style and celebrating with New Years Eve colors! Plus, we have a fun DIY project to get you hyped up for the new year.

Here are our selection of Swarovski crystals to embrace the festive and classic colors of New Years:

  • White/Clear – Crystal Clear, Crystal AB, Crystal 2XAB & Iridescent Dove Grey Pearl.
  • Gold/Bronze – Metallic Sunshine, Golden Shadow, Light Gold, Bright Gold, Crystal Light Silk, Metallic Light Gold, Light Topaz & Light Colorado Topaz
  • Silver/Grey – Light Grey, Dark Grey, Silver Night, Silver Shade, Greige, Light Grey Opal

Captivating Crystal Cuff

GoodyBeads.com Blog | Spend the Holidays with Swarovski® – New Year with FREE DIY and tutorial

GoodyBeads.com Blog | Spend the Holidays with Swarovski® – New Year with FREE DIY and tutorial

Items used in cuff: WR00127, SW02445, SW02444 (2), SW002442 (2), SW02437, SW02436 (2), SW02435 (2), Z008287 & SB00106.

Directions:

  1. Set the crystal in its setting and gently bend the prongs down to secure the crystal. (Check out Light Topaz blog post on how to press down the prongs.) Repeat to all 5 crystals and settings.
  2. Cut two pieces of memory wire at a coil and a quarter.
  3. Roll and make a simple loop to each end of the memory wire with memory wire finishing pliers.
  4. Slide on a seed bead on each memory wire. Slide each square bead hole through each memory wire. Repeat this process 7 more times. End this portion with a seed bead to each memory wire.
  5. Slide on small setting you made in Step 1, slide each memory wire through the two-hole setting. Slide on a seed bead to each memory. Repeat adding a medium setting, seed bead, large setting, seed bead, medium setting, seed bead and small setting.
  6. Repeat Step 4.
  7. Cut excess wire with memory wire cutters, leaving about a 3/4 inch end and make a simple loop.


DIY Snowflake Ornament with Lightbulb Glass Beads

The holidays are a fun time for decorating around the house. Why not make some snowflake ornaments using these snowflake forms and various beads you may have around the house. This project is also perfect for kids to design and adults finishing it off.

Wire Snowflake Ornament Forms

The Wire Snowflake forms comes in FOUR different sizes. Depending on the amount of beads you want on each peg will determine which ornament form to buy.

Ornament with Lampwork Beads

GoodyBeads.comg Blog | DIY Snowflake Ornament with Lightbulb Lampwork Glass Beads FREE tutorial

Items used in ornament: A006240, A022201, Z004872, Z004845, Z004885, SB00423 & Z013345.

Directions:

  1. On one spoke, slide on two seed beads, Czech bead, spacer bead, lightbulb bead, spacer bead, Czech bead and seed bead.
  2. Make a simple loop with a memory wire finishing plier. Then use a crimping plier or flat nose pliers to close the loop. (Check out previous blog post on a visual step-by-step look on making the loop.)
  3. Skip a spoke and repeat step 2 & 3 with a different lightbulb color bead.
  4. Skip another spoke repeat step 2 & 3 with a different lightbulb color bead.
  5. Then with the other spokes, repeat steps 2 & 3 with a lightbulb color bead that is different from the spoke on either sides of it.

You can also see Tory making this during a Facebook LIVE episode HERE.

Need more inspiration on making Snowflake Ornaments? Check out these designs on our Blog!


Black & White Gemstone Leather Necklace

This Gemstone Leather Necklace incorporates the classic black and white colors. It is a fun piece for a business pantsuit or a small dinner party. Made with large-hole gemstones and 1mm leather cord, you can make this in fun necklace in minutes!

What you’ll need for Gemstone Leather Necklace:

GoodyBeads.com Blog | Black & White Gemstone Leather Necklace with large-hole Gemstones.

GoodyBeads.com Blog | Black & White Gemstone Leather Necklace with large-hole Gemstones.

Directions:

  1. Open 4mm jump ring, slide through loop of clasp and close jump ring. Open another 4mm jump ring, slide through closed ring and close jump ring. Open lobster clasp and clasp onto the closed ring.
  2. Cut a piece of leather at 27 inches.
  3. Slide one end of the leather through a 4mm jump ring in step 1, about 1.5 inch of the way. Make a slip knot. Use pliers to tighten the slip knot before cutting off excess leather end.

4. Slide on the following onto the leather:
3 onyx beads, 5 flat brass beads and 3 onyx beads.
5. Repeat step 3 to other leather end and through other 4mm jump ring from Step 1.