Vendor Video: Artistic Wire 3D Jig Expandable Bangle Bracelets
Wyatt White, from Beadalon, demonstrates how easy it is to make an expandable bangle using the Artistic Wire 3D Jig! Check out this video and learn to customize one for yourself!
We are still in love with our Groovy Bead Frames and could not wait to share this easy tutorial with you. Shown in our January 2017 Color of the Year, are these easy-to-make seed bead teardrop earrings with the pewter drop groovy bead frames. Follow our easy illustrated instructions and a tutorial video.
You can pick up this pdf file tutorial with illustrated instructions. OR watch our tutorial video to see how simple it is to create.
A Quick Note: The holes of the Groovy Bead Frames might not have a clear opening. I suggest using a bead reamer (A002370) or something sharp and pointy to poke the holes first to ensure a clear opening before stitching.
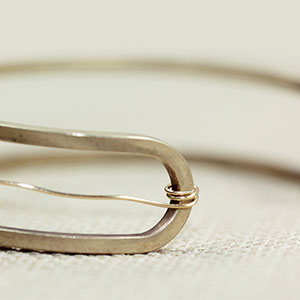
We are loving gemstones and especially making them into bracelets. We have this super simple bracelet tutorial that uses 8mm round gemstones, cuff bracelet and 24-Gauge Artistic Wire.
We have chosen these glossy 8mm Apple Jasper (APL8RD-8) to lay inside our favorite open cuff bracelets (Z002579) and wrapped with 24-Gauge Artistic Wire (AW00049). We love this tutorial because you can use any 8mm gemstones and different hues of artistic wire to create your own.
Tutorial
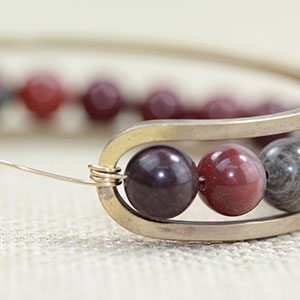
Step One: Cut a 10″ wire piece. Coil one end of your wire three times at the side of your cuff.
Step Two: Slide on 17 round gemstones and coil the wire to the other end of your cuff bracelet. Cut off excess.
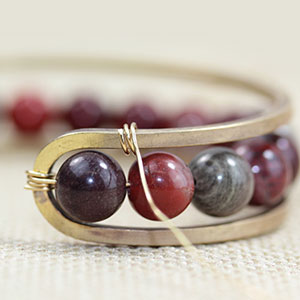
Step Three: Cut a 5′ wire piece and coil at the top of your cuff, shown in the image.
Step Four: Coil three times around the cuff and between gemstones.
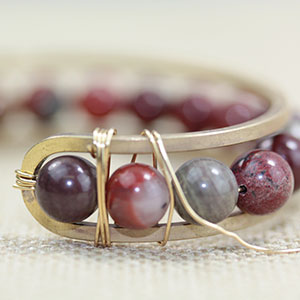
Step Five: Repeat your coils until you’ve reached the end. Cuff off excess. Make sure to tuck your wire ends to avoid scratching when being worn.
We have this Criss Cross Leather Bracelet tutorial from our friends at Dakota Stones, whom provides high-quality gemstones since 2001. We love this bracelet because it uses leather cord, fairy ribbon and large-hole gemstones.
Thread the button on the leather and find the center. Tie the cords together in an overhand knot. Before you tighten the knot all the way, insert the end of the Fairy ribbon and tighten.
Start by threading the large hole beads onto both ends of the leather and securing each end with a bead stopper or a loosely tied knot.
Weave the ribbon in a figure 8 (fishtail weave) around the left outside leather and in between the two leather cords. Repeat on the right- around the cord and through the middle.
Slide a bead up on your left strand of leather and repeat the figure 8 with the suede on the left side, below the bead. Repeat with the right, slide a bead up and figure 8 with the ribbon on the right.
Continue with Step 4 to use about 32 beads total, or until you reach your desired length. Taper the end by weaving the cord 3-4 times in between the leather without the beads.
Finish by tying an overhand knot to join the ribbon and two leather cords. Tie an additional overhand knot with just the leather cords, leaving enough space in between the two knots for your button or bead to fit tightly. Glue the knots and cut excess. You can always leave the ribbon tails or add beads to the ends of the leather for accents.
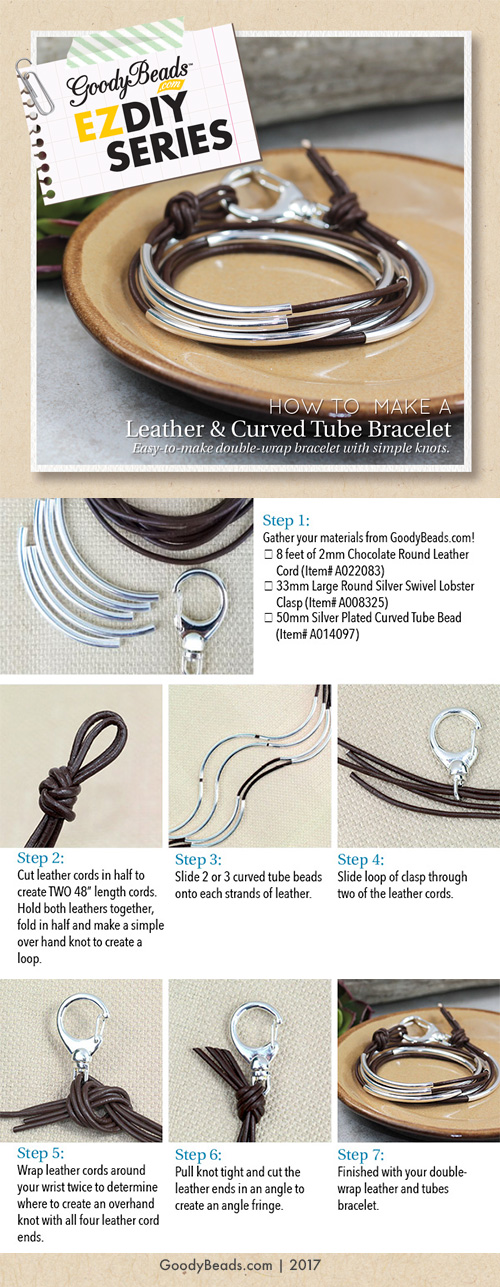
EZDIY Leather and Curved Tube Bracelet
Learn to create this popular DIY bracelet with 2mm leather and curved tube beads. This easy-to-make, double-wrap leather and curved tube bracelet made with simple overhand knots is a versatile tutorial for a single-wrap, double-wrap, triple-wrap or more.
As seen in our Trends we Love: Leather and Tube Beads, create a longer length to double as a necklace or bracelet. Or simply be inspired to add spacers and metal beads.
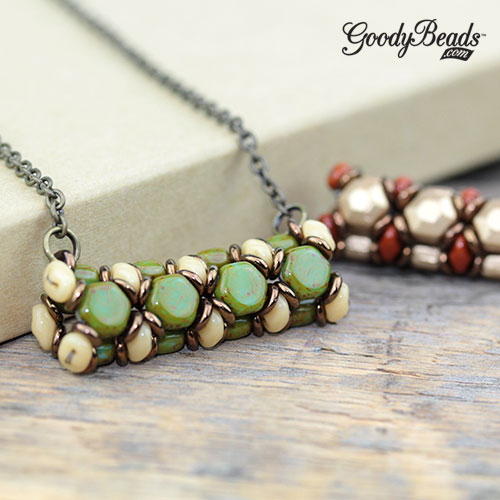
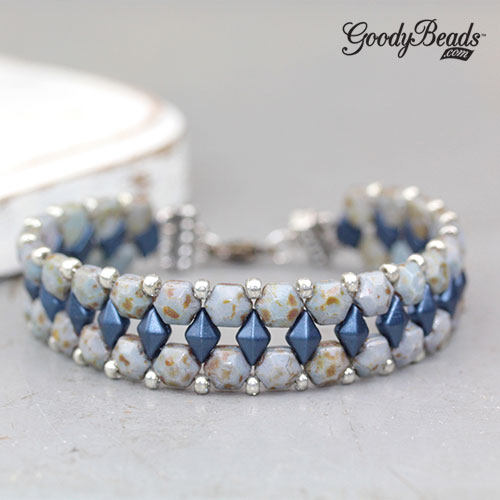
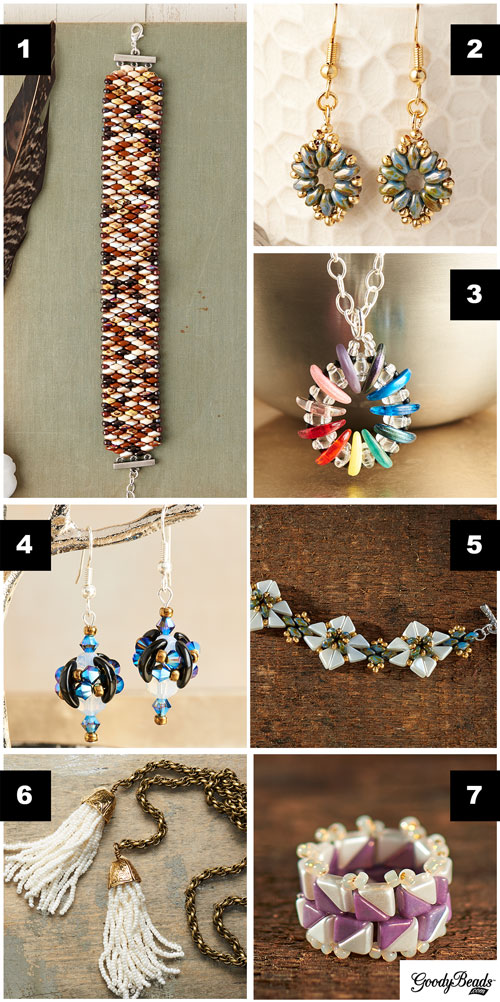
One of our October 2017 Trend is all about two-hole beads and we love the versatility it brings to bead stitching. Check out what we made with SuperDuos, DiamonDuos, Honeycomb beads, and Tango. Plus, two BRAND NEW patterns for you to try out, created from our designer So Vang.
SuperDuo Fan Earrings
SuperDuos are certainly a must-have when square stitching. These SuperDuo Fan Earrings takes minutes to make and think of all the different color combinations you can use. Get your downloadable Pattern Tutorial here.
Honeycomb Beaded Tube Necklace
You’ve seen So use Czech Honeycomb in many of her designs. Here is an easy downloadable pattern you can follow. Use this pattern to make a focal necklace piece, add this tube on a bead pen or make earring by sliding it on a headpin, sandwiched between bicone crystals. What will you make?
Honeycomb Jewel and DiamonDuo Bracelet
You’ve seen this popular bracelet before in our Czech Honeycomb Jewel Bead blog post. Check this blog post and learn how to make this bracelet with our other two-hole favorites: Honeycomb and DiamonDuo.
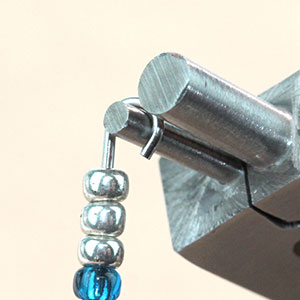
Wire Snowflake Ornament Forms and Tutorial
The holidays are coming up and we’ve got a fun tutorial with tips and tricks to creating snowflake ornaments with wire snowflake ornament forms.
Wire Snowflake Ornament Forms
The Wire Snowflake forms comes in FOUR different sizes. Depending on the amount of beads you want on each peg will determine which ornament form to buy.
Tools are important when completing your ornament. Because the snowflake form has thicker gauge wire, it is best to cut the wire with a Memory Wire Cutter (FTTL0005). You will create a simple loop at the tip of your pegs, for this you can use round nose pliers and roll a loop. However, we love to use the Memory Wire Finishing Pliers (TLZ0207), which creates less stress on looping the pegs. And Serrated Pliers (A001682) to close your loops because it helps grip the peg wires without slipping.
Tutorial
Step One: Slide beads onto a peg. Keep a 1/4″ peg end. Cut with memory wire cutters, if neccessary.
Step Two: Use your round nose pliers or memory wire finishing pliers to roll a simple loop as close as you can.
Step Three: Use a serrated nose pliers and squeeze the loop together.
Step Four: Squeezed loop.
Step Five: Fill the rest of your ornament by skipping one peg and repeat steps 1-3. Skip another peg and repeat until you’ve completed your ornament.
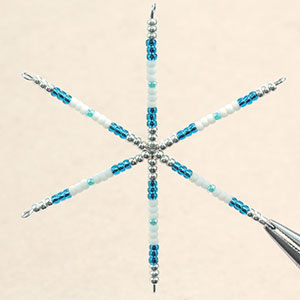
Inspirational Ornaments
Here are some inspiring ornaments you can create with lampwork beads, Swarovski® crystals, Chinese crystals, bead caps and more!
Each peg consists of: seed bead, bicone crystal, bead cap, lampwork, bead cap, bicone crystal and seed bead. Open jump ring, slide through one peg loop, through loop of tassel and close jump ring. Open another jump ring, slide on peg loop opposite of previous peg loop, through an ornament hook and close loop.
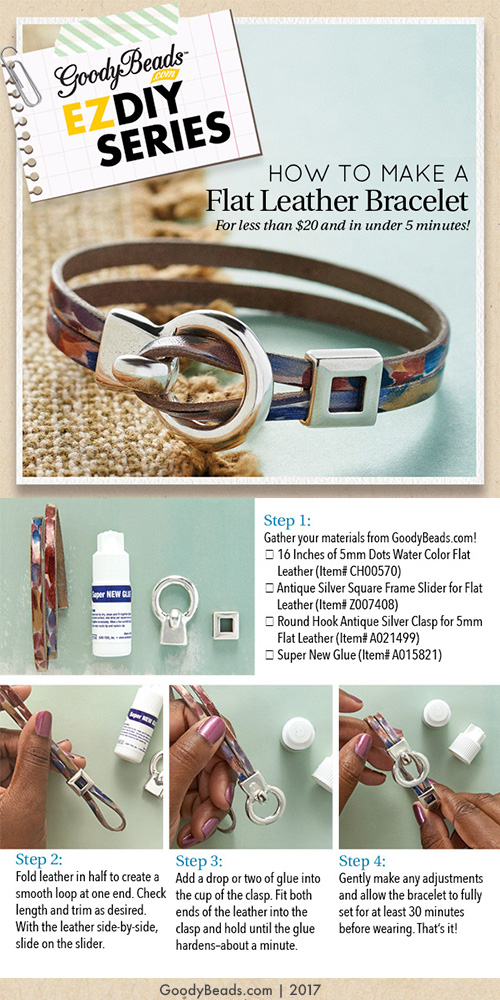
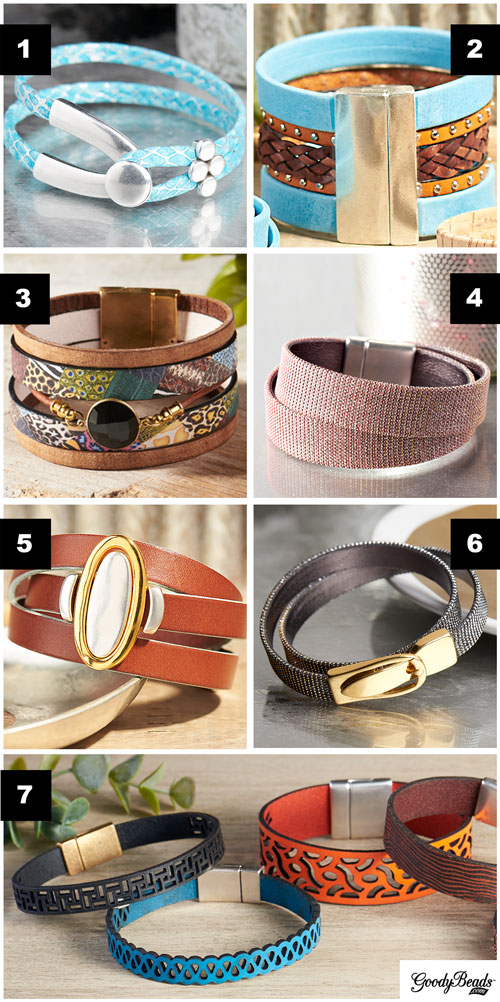
We are digging into our vault of fun tutorials! Come try out this popular flat leather bracelet. With supplies under $20 and less than 5 minutes to complete. Create this bracelet and wear it all in one day.
Flat leather is very trendy. Especially when with our popular Water Color Flat Leather, perfect colors for our fall weather, don’t you think?
Vendor Video: BeadSmith® Endless Loom
Looking to add a new tool and beading technique? BeadSmith introduces the Endless Loom by Deb Moffet-Hall. Learn what this purposeful tool can do and help with your bead-stitching skills.
The Endless Loom (TL00275) comes with components to customize your loom and colorful illustrated instructions on how to assemble your loom. It has sizing rods to customize the bracelet let you desire, end bars, tension rods and elastic bands. Watch the video to learn how to assemble the Endless Loom and what kinds of bracelets you can create!
Introduction to Kumihimo with BeadSmith® Instructional Video
Learn a new beading technique with Kumihimo. These instructional videos from BeadSmith gives an introduction to Kumihimo, how to braid fibers and how to incorporate seed beads. Get your Kumihimo supplies and learn how to braid one today!
Kumihimo Introduction by BeadSmith
Kumihimo Braiding with Beads by BeadSmith
Check out our previous GoodyBeads Kumihimo trends for inspiration.
Bead weaving and/or stitching can be a challenging, yet fun and fulfilling to create. Check out our selections of bead weaving ideas from hand-selected kits to easy and free beading tutorials.
Grab some 2mm leather cord and a couple findings to create this super simple, super inexpensive and super quick leather bracelet. Check out our easy DIY tutorial to create one today!
Flat leather bracelets are a modern and trendy fashion accessory. Take a look at some of our inspirational bracelets using flat leather. Create wide cuff or multiple wrap bracelets with different flat leather textures from smooth leather,