Vendor Video: Artistic Wire® Adjustable Necklace Jig

Make adjustable necklaces with Artistic Wire Findings Forms Necklace Jig. Accompanied with a video tutorial from Beadalon® and Artistic Wire.


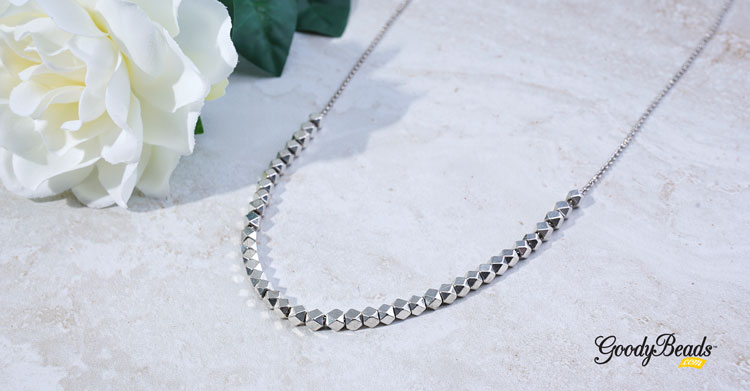
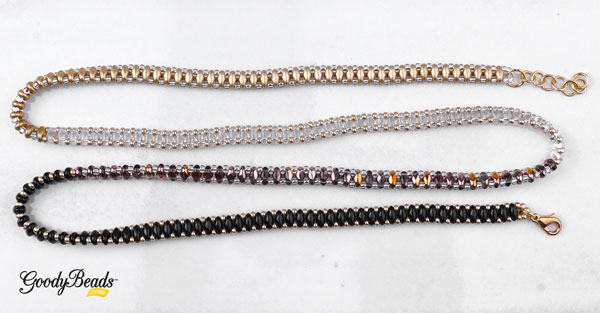
Make trendy choker necklaces with the Adjustable Necklace Jig, using Artistic Wire and basic tools.

Here are things you’ll need to make adjustable wire necklaces:


Tools:


Video Tutorial


  1. Straighten wire with Wire Straighter Tool.
  2. Bend the wire around the top of the jig.
  3. Bend one end of the wire around the top peg.
  4. Wrap the wire around the jig one and a half times. (Turn the jig to wrap the wire.)
  5. Wrap the wire around the other jig  peg.
  6. Remove the wire from the jig.
  7. Cut the tail end with flush cutters, leaving a small hook. Cut the other end leaving a small hook.
  8. Optional: If you’d like the necklace to be smaller, just a small cylinder to adjust wire.
  9. Use the Memory Wire Finishing Pliers to turn a loop. (Use larger peg of plier.)
  10. Use Bent Chain Nose Pliers to bend wire 90° down.
  11. Repeat Steps 9 and 10 to other wire end.
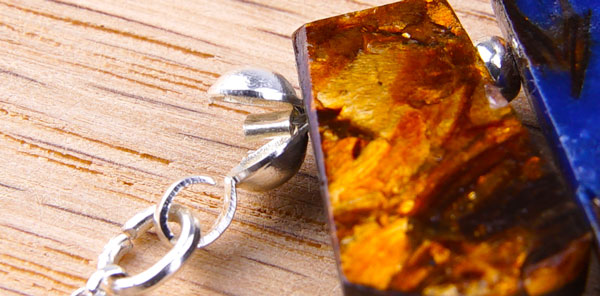
  12. Use pliers to open loop. Latch the loop onto the necklace and close it.
  13. Repeat step 12 to other end.


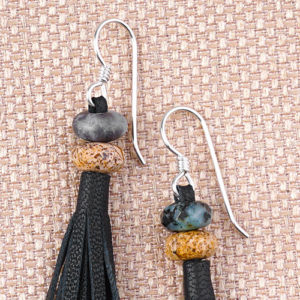
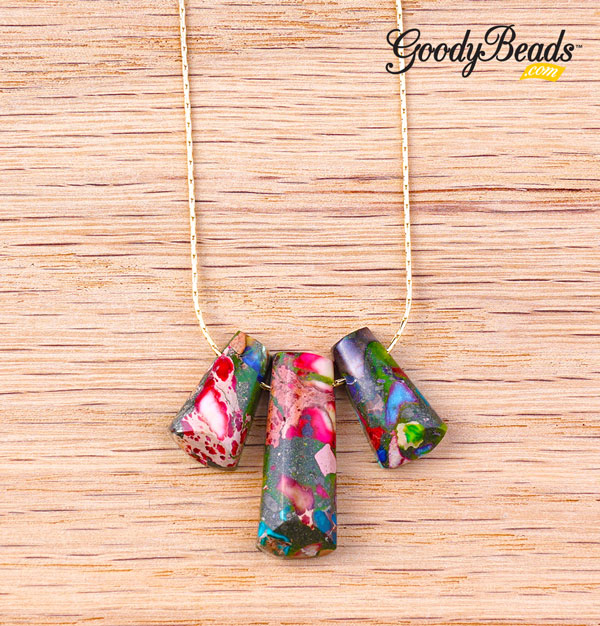
Finish off your necklace with a dangle charm. Or if you want to add beads to your necklace, string on beads before completing step 11.


Beadalon Knot-a-Bead Tool – Video Tutorial

Candie Cooper is back with Tory to show how easy it is to use the Beadalon Knot-A-Bead tool. Check out today’s video tutorial to knotting your own creating today!


GoodyBeads Blog | Beadalon Knot-a-Bead Tool Video Tutorial

Making knotted jewelry is a delicate skill that can be done with chain nose pliers, awl or tweezers. But with the Beadalon Knot-A-Bead tool, you can easily make quick and easy knots. Here is what you’ll need to get you started:


Video Tutorial


Instructions

  1. Make a loop with the end of your beading thread and make an over hand knot. This will create a loop for your necklace later.
  2. Slide on the silk cord, all the beads you’ll be knotting. It is helpful to layout your design ahead of time to determine your sequence.
  3. Slide a bead down to your first knot. Take thread and wrap it over the metal dowel/awl, and then under.
  4. Tie a knot and pull the silk cord upwards to cinch the knot together.
  5. Take the beaded portion and push it to the back to get it out of the way.
  6. Slide knot over to the right and hook thread under the yoke and pulling downwards and across to tighten the knot. There is a button lever on the left side. Push that to release the knot and thread.
  7. Slide over next bead and repeat.
  8. Once you’ve made a knot in between all your beads, repeat step 1 to other end of knotted beads to create a loop.
  9. Cut excess thread.
  10. Open a jump ring, slide through beading thread loop and a 6″-8″ chain end. Close jump ring.
  11. Repeat steps 10 to other end of knotted beads.
  12. Add your clasp to one end of your chain piece with a jump ring and your necklace is complete!


Along with the Beadalon Knot-a-Bead, you will get instructions on how to easily use the tool:

Beadalon Knot a Bead Tool Instructions


DIY Diffuser Necklace with Lava Beads – Tutorial

Check out this easy tutorial for making your own DIY Diffuser Necklace with lava beads.


Essential oils are a rapid trend that is used in aromatherapy. “Scientists think they work by sending chemical messages to parts of the brain that affect mood and emotion. Although these scents alone won’t take all your stress away, the aroma may help you relax.” (WebMD) Check out our previous post on some popular essential oil scents and its healing properties. 


Many users of essential oils just rub it on their skin, but you could design DIY jewelry with lava beads for a fashionable statement. Learn how to make your own diffuser pendant necklace with scented lava beads in this easy DIY tutorial.

GoodyBeads Blog - DIY Lava Diffuser Necklace


What you’ll need for DIY Diffuser Necklace:


Tutorial


Using Spacer Beads with New Czech Lentil Coins

Accentuate your designs and beads with spacer beads. Here was different ways to use spacer beads with our NEW Czech Lentil Coin beads.

One of the many reasons to using spacer beads in a design, is to create space between larger or more pronoun beads, hence the name. What it also does when space is added, is to alleviate the rubbing between beads. For larger beads or crystals, sometime when you lay then next to each other, the movement you put into wearing your design will eventually shift and rub. This may in time, chip or crack the beads. So adding spacer beads or smaller beads will lessen the rubbing.

Plus, it adds a pop of color, style and overall look with spacers. For this example, we’ll use these New Czech Lentil Coins.

GoodyBeads NEW Czech Lentil Coin Beads

Lentil Coin Beads: Z014437, A014438, Z014441, Z014443, Z014445, Z014447

Using Spacer Beads

here are different beads and spacers you can add in between beads to bring out a fun look to your beaded strand!

SpacerBead_01

A. Use a bead as a spacer bead. Here, we used Czech Fire-polish beads. (A011558)
B. Size 8/0 Miyuki Seed Beads (SB00106)
C. Czech O-Beads (SB01893)
D. Daisy Bali Spacer Beads (Silver A003563/Gold A004238/Copper A004216)
E. Bali Spacer Bead (Silver A003564/Gold A004239/Copper A004218)
F. Triangle Brass Bead (Silver A022195/Brass A022196/Gold A022197/ Copper A022198)
G. 6mm Wavy Disc Beads (Silver Z018411/ Gold Z018412)

Purple Passion Bracelet

Here’s a bracelet we made using spacer beads and Czech Lentil coin beads. It makes for a flat design, simple yet fun. Can you imagine the possibilities!

GoodyBeads Blog | Czech Lentil Coins

Items used in bracelet: FTBW0001, Z014445, SB00106, (2) TC01897, Z010740, A003577

Bracelet Instructions:

  1. Cut a 9 inch piece of Soft Flex Wire.
  2. Slide on a crimp tube and make a flat crimp to one end of flex wire.
  3. Slide on clamshell and cover crimped tube. (Check out Clamshell Blog for more information)
  4. Slide on a seed bead and Lentil Coin. Repeat sequence until you’ve used a full strand of Lentil Coins. You can add more until you’ve reached your desired length.
  5. Add a seed bead to the end. Slide on a clamshell and another crimp tube.
  6. Make a flat crimp to the crimp tube, close inside the clamshell.
  7. Cut excess flex wire and close clamshell over the crimped tube.
  8. Slide jump ring from Hook Clasp through loop of clamshell. Close clamshell loop.
  9. Repeat step 8 to other end.
    (Optional: you can substitute hook clasp for a clasp of your choice.)


Gemstone Tassel Earrings – Tutorial

We love a good tassel, and these leather tassels from LeatherCord USA are no exception! Here is a fun and easy DIY gemstone tassel earrings you can make in seconds!


GoodyBeads | Blog - Gemstone Tassel Earrings FREE tutorial

We adore these leather tassels from LeatherCord USA, because they have a long enough loop at the top, which will hold these large-hole gemstone bead from DakotaStones and then topped off with a TierraCast ear wire. With high-quality materials from well-known brands, you’re sure to make a fabulous pair of earrings!


What you’ll need for earrings:


Earring Tutorial


Sizzix Framelits And Embossing – Video Tutorial

Get your Sizzix Big Shot out and learn how to use Framelits Die and Embossing in this video segment with Candie Cooper and Tory Vezina!


GoodyBeads Blog | Sizzix How to Use Framelits and Embossing Folders Video Tutorial


Today’s blog post will feature Sizzix Framelits and Embossing Folders. Use Framelits to cut fun shapes to display your earrings or even use it for your scrapbooking needs. And use Embossing Folders to add a 3D texture to paper, fabric or even thin copper/metal pieces.


Embossing Folders

The first important rule when using Embossing Folders with the Sizzix Big Shot is the Extended Platform (SZ00053).

GoodyBeads Blog | Sizzix How to Use Framelits and Embossing Folders Video Tutorial

You will need the Extended Platform, which is included with Sizzix Big Shot Machine; to place your Embossing folder on to run it through the Sizzix Big Shot, instead of using the Movers and Shaper platform you would usually use to place your Dies on. There will be a visual on the Platform on how to use it with your Big Shot.


The Process to running the Embossing Folder through your Big Shot is to place the Extended Platform down, put your paper or thin piece of metal inside your Embossing Folder, put the Embossing folder on the Extended Platform and place the Cutting Pad on top. Run the whole thing through the machine and you will get a textured piece of paper or thin metal!


Make sure to check out these fun Embossing Folders to creating your own designs:

GoodyBeads Blog | Sizzix How to Use Framelits and Embossing Folders Video Tutorial

Embossing folders: SZ00075, SZ00074, SZ00073, SZ00072, SZ00070, SZ00071


Sizzix Framelits

The next important rule to cutting shapes using Framelits is the Extended Thin Die Adapter you will need to accompany the Extended Platform in using Framelit Dies (SZ00046 & SZ00048).

GoodyBeads Blog | Sizzix How to Use Framelits and Embossing Folders Video Tutorial


Framelits are dies with intricate and detailed designs best used with paper, fabric or thin pieces of metal or copper. Do not use Framelits with thick pieces of leather.


The process in running the Framelit Dies through the Big Shot is to place the Extended Platform down, then place the Extended Thin Die Adapter on top, followed by a Cutting Pad, Framelit with the form side facing up, your piece of paper and another Cutting Pad. Run all parts through the Big Shot for an intricate cut out piece of paper!


Video Tutorial

Candie and Tory will show you how easy it is using the Framelits Dies and Embossing Folders in this video tutorial!


Lariat Beading Chain Necklace – Tutorial

Tory and Heidi popped onto Facebook LIVE this week to create this stunning piece, inspired by window shopping at Nordstroms. Check out how easy it is to make this necklace using our popular rollo chain and adjustable sliding clasp.

A fun pastime we love doing is shopping! Who doesn’t like shopping? Tory came across a lariat necklace window shopping on Nordstrom.com and figured she can make her own! See how easy it is to make and how versatile it is.

LariatChainNecklace_2

Items you’ll need for necklace:

Tutorial

  1. Slide on 42 cube beads on chain.
  2. Slide both chain ends through 2-hole slider.
  3. Slide a cube bead on one end of your chain. Open jump ring and slide on chain end and charm dangle. Close jump ring.
  4. Repeat step 3 to other chain end.

LariatChainNecklace_3

Wear it as a lariat necklace, adjust your ends and make it a choker. Or flip it around for a simple modern beaded chain necklace.


Miracle Drop Earrings – Tutorial

Designing spring jewelry with these cute Miracle drop beads and donut bead cone.


Items you’ll need for earrings:


Tutorial

  1. Slide on head pin a miracle bead and bead cone.
  2. Make a simple or wrapped loop.
  3. Open earwire loop, slide on the drop dangle and close loop.
  4. Repeat all steps for other earring.


GoodyBeads Miracle Drop Earrings - Tutorial

Items used in earrings: A019696, Z010749, A014923, TCZ0139


GoodyBeads Miracle Drop Earrings - Tutorial

Items used in earrings: A014927, Z010741, A019697, A008998


Eden Green Pearl Beadable Bracelet & Cuff – Tutorial

Wrap yourself in this magnificent new pearl color from Swarovski®: Eden Green. Design with this pearl along with an easy bracelet and cuff tutorial.


Eden Green is a gorgeous hue surely to stand out in a sea of spring colors. Tory Vezina has paired the pearl with gold and an array of blues.


What you will need for tutorial:


Tutorial

Tutorial starts at 5:30 minutes.


Make sure to check out Eden Green Pearl Earring tutorial HERE.


Lattice Beaded Bead with 6mm Round Gemstone

We’ve got a fun lattice beaded bead pattern tutorial for you using 6mm round gemstones. Can’t you image the possibilities!


GoodyBeads | Blog Lattice Beaded Bead 6mm Round Gemstone - FREE Tutorial

As a request from our viewers, So Vang is sharing her pattern to making a lattice beaded bead using 6mm round gemstones. You don’t have to use 6mm gemstones. You can use 6mm bicone beads or 6mm round Chinese Crystals or Pearls. You can decide on the colors, that’s the fun of taking a tutorial and making it your own!

This pattern is also an altered version to the 2mm Pearl blog.


For this tutorial you’ll need:

And of course…

Adjusting Your Pattern

Sometimes, when designing your lattice beaded bead, you will find that the tutorial pattern won’t work as well and you’ll need to adjust the pattern. In this example, we have the 6mm Labradorite round beads. These beads are a slight smaller than the white Howlite, so in Step 6 I had adjusted to using THREE 11/0 seed beads instead of FOUR. This way, the lacing of the seed beads will hug the round gemstones.

GoodyBeads | blog - Lattice Beaded Bead with 6mm Round Gemstone FREE tutorial

Items used in image above:

What will you design today! We would love to see them. Make sure to tag us on Social Media so we can see your lovely creations!


Painted Leather Wrap Bracelet

Check out this bracelet Tory and Candie taught at the Spring 2019 Twin Cities Bead Bazaar, using Vintaj Patinas painted on leather.


If you were able to join us at the Twin Cities Bead Bazaar on March 2 & 3, you’ll know how much fun it was! We are sharing this super easy bracelet Candie Cooper and Tory taught at one of the hourly Make & Takes. It’s made with leather cord and TierraCast end caps on NEW Extra Heavy Duty Memory Wire. And then painted with Vintaj Patinas.


GoodyBeads | Blog - Memory Wire Leather with Vintaj Patinas

Instructions:

  1. Using Finishing Pliers, make a loop at one end of the memory wire.
  2. Slide on memory wire a bead cap, leather and a bead cap.
  3. Cut excess memory wire leaving about 1/2 inche to 3/4 inch end.
  4. Create a loop on other end of the memory wire.
  5. Paint Leather with Vintaj Patinas. Let it dry.


Components to Make Bracelet: TC01854 (2), CH00793 (10″), WR00132, Vintaj Patinas

Tools Used: TL00206, TLZ0207


3 Ways to Use Gemstone Pendant Sets

Design necklaces with these 11 Piece Gemstone Ladder Pendant Sets. We have 3 ways to make your own DIY necklaces.


GoodyBeads | Blog - 3 Ways to making DIY necklaces with Gemstone Pendant Sets

Pendant Set Item Numbers: LAPLGIM15-38-LAD-PEN, PPLBRZ15-38-LAD-PEN, RCJ15-38-LAD-PEN, ORIM15-38-LAD-PEN, LAPBRZ15-38-LAD-PEN, TQSBRZ15-38-LAD-PEN, MLTPYR15-38-LAD-PEN, PKBL15-38-LAD-PEN, MGI-FAN-PEN-11

These pendant sets are a composite made by fusing stone fragments using heat, pressure and a stabilizing agent or resin. The stone fragments remain clearly visible, creating fascinating patterns. Composite beads may also be called “mosaic beads” because of the visible fragments. The stone used to create composite beads is usually the remnants from cutting, making them a great way to incorporate upcycled elements in designs with a vibrant pop of color!


These 11 piece gemstone ladder pendant sets are versatile for your jewelry designs! They make a great statement piece when using all 11 pieces or just use a few pendants in multiple designs. The size ranges from 15mm-38mm. Here are 3 ways to using these gemstone pendant sets.


Gemstone Collar Necklace

GoodyBeads | Blog - 3 Ways to making DIY necklaces with Gemstone Pendant Sets

Items used in necklace: LAPBRZ15-38-LAD-PEN, FTBW0001, A004831, SB00106, Z010754, Z010740

The most basic way to using these pendant set is making a collar necklace. We used the entire set and strung the pendants on Soft Flex wire with a seed bead in between each pendant. At each end we slid on a clamshell bead tip and crimped a 1.5mm crimp tube to sit inside the clamshell tip. Because we LOVE our adjustable necklace slide clasp, we slid on its jump ring end to the loop of the clamshell bead tip and closed the loop. Instant necklace to wear!

GemstoneCollar_05
Crimp a 1.5mm crimp tube on Soft Flex wire, inside the clamshell bead tip.


Pendant Drop Necklace

GoodyBeads | Blog - 3 Ways to making DIY necklaces with Gemstone Pendant Sets

Items used in necklace: MGI-FAN-PEN-11, SB00106, Z011944,  A019633 or WR00033.

Make a pendant drop with one or a few pendants from your set. One way is to simple slide a pendant on an eyepin for an easy drop. Or slide on three pendants with a seed bead on either side (optional) on an eyepin or wrapped wire loop. Then add your adjustable necklace chain to each loop of your drop pendant for a super easy necklace.


Beading Chain Pendant Necklace

GoodyBeads | Blog - 3 Ways to making DIY necklaces with Gemstone Pendant Sets

Items used in necklace: MGI-FAN-PEN-11Z012743, CH00725

A fun third option is to slide your pendants on a beading chain. Cut your beading chain to your preferred necklace length. Slide pendants onto the beading chain. End your beading chain using the Loop Crimp Lobster Clasp Set (Z012741/Z012743). Slide end cap on beading chain and crimp the end to your beading chain. Repeat to other beading chain end. Open jump ring and slide on lobster clasp and through end cap loop. Repeat to other end cap without a clasp.


Easy SuperDuo Bracelet – Tutorial

Czech SuperDuos are a versatile two-hole bead that can be easily made into a simple stitched bracelet. Check out this super simple tutorial using only Czech SuperDuos, size 11/0 Miyuki seed beads and beading thread.

If you know So Vang, you know that SuperDuos are her favorite two-hole bead to use when bead stitching. It creates fun angles and combines easily with her other favorites like Czech Honeycomb beads and DiamonDuos. But a simple basic way to make a bracelet using SuperDuos is combining it with size 11/0 and warping the strands around for this easy DIY bracelet.

Things you will need for this bracelet:

— Download Multi-Wrap Golden Bracelet Pattern —

Multi-Wrap Golden Bracelet

GoodyBeads | Blog - Czech Easy SuperDuo Bracelet FREE tutorial

Items used in this bracelet: SB01406, SB02087, SB01367, SB01390, SB00423, SB00332, Y001366, A011536, A006587, A015211)

You can make a one wrap bracelet with this tutorial or make a multi-wrap. To make this bracelet, start out with your bracelet length (in this case we did 7 inches), multiply that by the amount of  wraps we wanted and add another foot. This length will be the amount of beading thread you will need. In this case, we used about 4 feet. We strung 4 sections of 4 different color ways to make this bracelet. Each section measures 7 inches in length.

A quick tip, when you are finished sewing all the necessary beads, lay your piece straight and smooth out the piece so that everything lays flat before you tie off your ends.

GoodyBeads | Blog - Easy Czech SuperDuo Bracelet FREE Tutorial

Sample Color ways

GoodyBeads \ Blog - Czech SuperDuo Bracelet FREE Tutorial

Test out different colors to play with. Here we have four samples of various color ways you can make your bracelet.

Items used in these sample color ways:(SB01787 & SB0367), (SB02140 & SB02402), (SB01782 & SB00387), (SB01439SB00423)

— Download Multi-Wrap Golden Bracelet Pattern —


Czech Ginko Two-Hole Scale Bracelet Tutorial

New from the 2019 Tucson show are these lovely Czech Ginko beads from BeadSmith. Check out today’s free tutorial using Ginko beads.


GoodyBeads | Blog Czech Ginko Two Hole Beads with Free Bracelet tutorial

Czech Ginko beads are a two-hole bead in the shape of Ginkgo leaves.


Scale Bracelet

GoodyBeads | Blog - Czech Ginko Scale Bracelet with Free Tutorial

This bracelet tutorial was inspired by Nela Kábelová’s (www.gianelle.beadforum.cz) pattern called Snake Skin Bracelet. We used her pattern and tweaked it slightly to add 4mm Swarovski® bicone crystals instead of 4mm round beads. And used 8/0 Miyuki seed beads in place of the seed beads she used. Don’t they look like fish scales? Dragon scales? Mermaid scales? They are a beautiful shape with lots of option for bead stitching.


What you’ll need for this bracelet:


GoodyBeads | Blog - Ginko Scale Bracaelet clasp ends - FREE tutorial

Items used in bracelet above: SB03708, SW02072 (36), A008804, A019945, A006587, A015211, SB00117 or SB00063


EZ DIY Series: Druzy Adjustable Bracelet

Jump on this fashionable jewelry trend of adjustable jewelry with the versatile finding of Bracelet Sliding Clasps.


Bracelet sliding clasps is a versatile clasp with two chain pieces fed through a stopper clasp where you can easily slide the chains back and forth to adjust the length of the bracelet. Sliding clasps also has a jump ring attached to the chain to make it easy to add your favorite connector or link. Here is an easy DIY tutorial using the sliding clasps and druzy connector with the help of a chain nose plier tool.


Tutorial

GoodyBeads | Blog - Druzy Adjustable Bracelet Tutorial

Items used in bracelet tutorial: Z012176 & Z020673