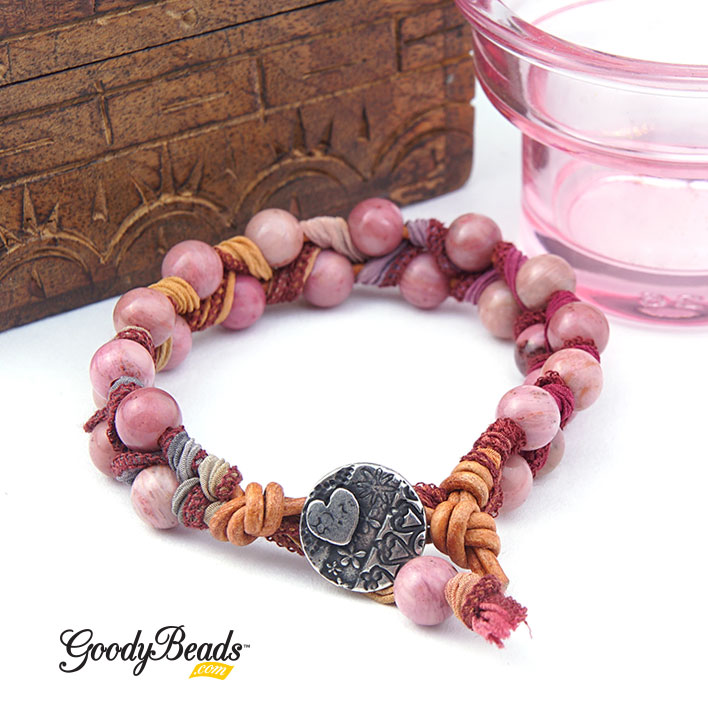
DIY Gemstone, Ribbon & Leather Bracelet with Video Tutorial
We’ve got a special DIY for your summer outfits! Create a leather bracelet with large-hole gemstones and braided with silk ribbon. This tutorial is a revamp of our previous blog post: Criss Cross Leather Bracelet by Dakota Stones. Check out this blog post for written directions on how to make these bracelets. Plus, below is a previous LIVE episode where Tory demonstrates how to braid and make this leather bracelet!
Items used in bracelets:
TC02349– 16.5mm Antique Pewter Amor Round Button by TierraCast®
A022076 – 2mm Natural Light Brown Round Leather Cord
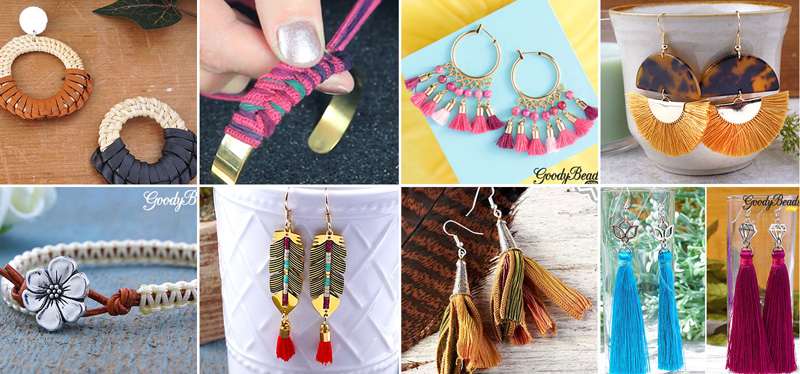
These Holiday DIY gift ideas are for the Boho Beauty in your life.She seeks a relaxing vibe and a moment of zen. She loves natural and earthy tone, so make sure you design with fibers like Ribbon, Tassels, Leather and Straw, as well as some Gemstone. Here are some great DIY projects for the Boho Beauty!
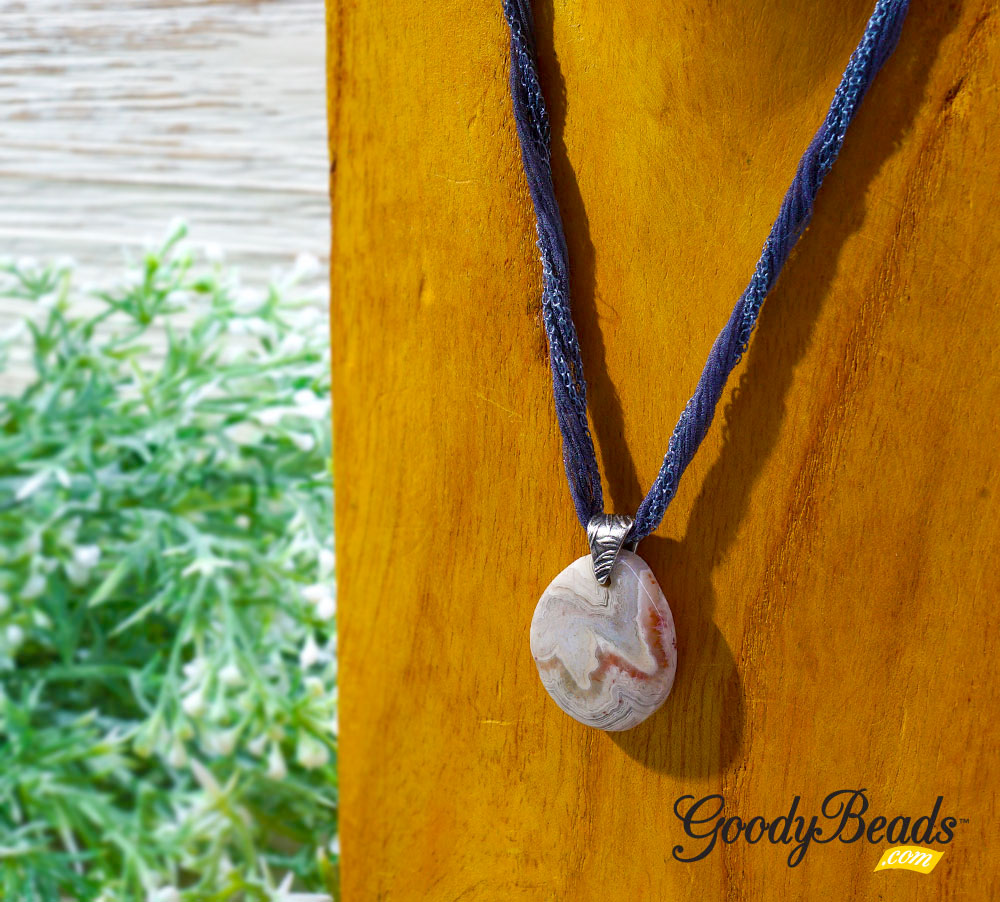
Design a DIY gemstone ribbon necklace with a gemstone pendant and pinch bail on soft, silk ribbon.
Each gemstone pendant is beautifully cut, polished, top-drilled and ready to be the focal to any necklace design. With the help of a pinch bail, all you have left for a your necklace are the natural fibers of fairy, silk ribbon.
What you’ll need to make a DIY Gemstone Ribbon Necklace:
Check out these 5 ways to use hand-dyed silk ribbon. If you haven’t picked up on these Hand-Dyed Silk Ribbon, you’re missing out! Grab some today and make your favorites!
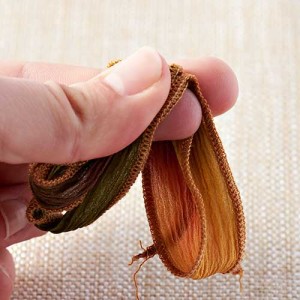
These quality hand-dyed silk ribbon are 34″ long and hemmed around the edges for a finished look without the fraying. They come in many different color combinations that gradients across the ribbon. No two will look the same because they are hand-dyed and handmade. Here are five ways to use hand-dyed silk ribbon in your jewelry-making or be inspired!
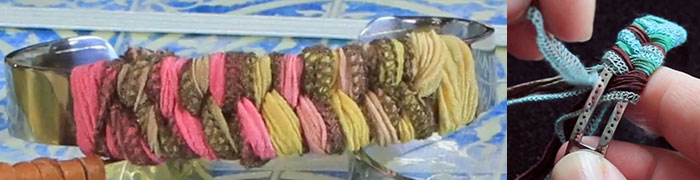
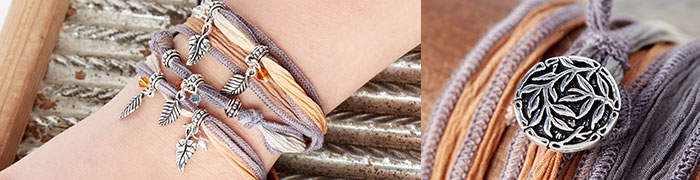
1 Braided Cuff
In our previous blog post, Fishtail Braided Cuff Video Tutorial with Candie Cooper, Tory and Candie demonstrate how easy it is to braid your very own cuff bracelet. Watch the video HERE and pick up some ribbon and cuffs today!
2 Charm Wrapped Bracelet
Another easy way to make a bracelet is by adding charms and dangles. Slide on metal charms and beads, staggering through the ribbon. At one end, make a double knot to secure a button. Wrap the bracelet around your wrist and loop the other ribbon end around the button. This will help determine where you will tie a loop to slide over the button.
3 Links and Connectors with Ribbon
Use TierraCast Links from our TieraCast Components Trend! Bend the link slightly with Nylon Jaw Bracelet Bending Pliers (Z005839). Feed one end of the silk ribbon down one hole of the link and up the other hole. After you center the link, wrap the ribbon around your wrist and tie the ends for a simple bracelet OR add a favorite clasp.
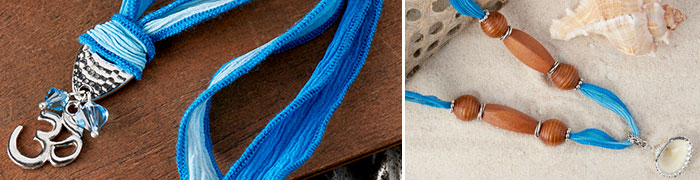
One easy way to use hand-dyed ribbon is to add a pendant and make it a necklace. In this necklace, we made a pendant with Swarovski® crystals, a flowery lampwork bead and silver findings. We attached the dangle to a bail and fed the ribbon through the bail. Tie ends together to your preferred length.
Here’s another way to make a necklace from our TieraCast Components Trend. We took the hammered toggle clasp and used the ring part of the toggle. You will take your ribbon and make a lark’s head knot by folding your ribbon in half, slide the folded end through the larger hold of the ring toggle about an inch or two, take the other ribbon ends and slip it through the loop of your ribbon fold. Pull your ribbon ends all the way to latch the ring toggle to the middle of your ribbon. Tie your ends together to a preferred length and then add dangles and charms to the small hole of your ring toggle.
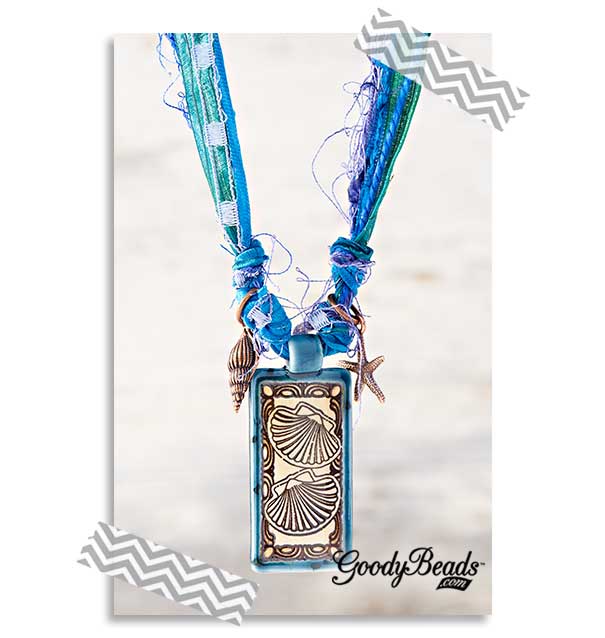
The second image is also a ribbon necklace with wood beads and silver findings with a seashell pendant. Be inspired from our Coastal Charm Trend.
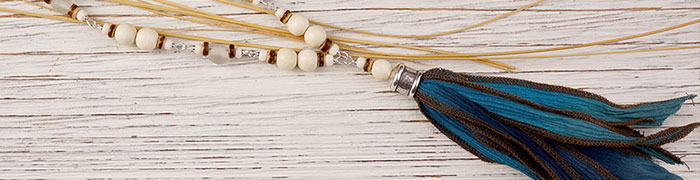
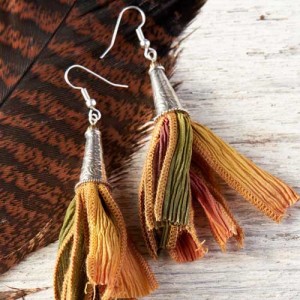
5 Ribbon Tassel
Tassels are everywhere! What a neat way to create a tassel with ribbon! From our Silk Ribbon in Jewelry blog post, you will see an easy tutorial in creating these tassel earrings.
We used the same concept from above for this necklace from our Naturally Coastal Trend. Instead of a straight blunt cut at the end, we cut each section individually at a diagonal. This will help create a fun wispy tassel.
What is your favorite ways to use Hand-Dyed Ribbon? We would love know how you use ribbon in your jewelry making!
Fishtail Braided Cuff Video Tutorial with Candie Cooper
Learn today how fun and easy it is to make this fishtail braided cuff, using hand-dyed silk ribbon. With special guest, Candie Cooper, watch this video tutorial as Tory and Candie walk you through how to make this bracelet cuff.
While this beadable cuff is usually used for bead-stitching projects, as seen in our Delica Trend, we’ve utilized the open middle space to create a criss-cross braid. Plus, we love the ombré coloration in these ribbons and they are the perfect stringing material to create these braids.
Candie Cooper was able to grace us with her special appearance in this video to assist Tory as she gives a step-by-step tutorial on how to braid hand-dyed ribbon on a beadable cuff.
Other stringing materials you can use to braid are fairy ribbon, 1mm – 2mm leather cord and deerskin leather because they are pliable. Create with us today!
Criss Cross Leather Bracelet by Dakota Stones
We have this Criss Cross Leather Bracelet tutorial from our friends at Dakota Stones, whom provides high-quality gemstones since 2001. We love this bracelet because it uses leather cord, fairy ribbon and large-hole gemstones.
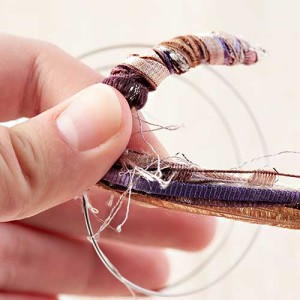
Thread the button on the leather and find the center. Tie the cords together in an overhand knot. Before you tighten the knot all the way, insert the end of the Fairy ribbon and tighten.
Start by threading the large hole beads onto both ends of the leather and securing each end with a bead stopper or a loosely tied knot.
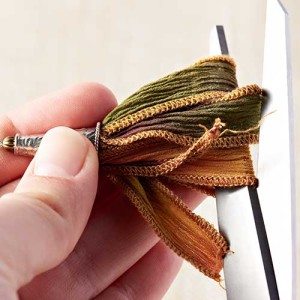
Weave the ribbon in a figure 8 (fishtail weave) around the left outside leather and in between the two leather cords. Repeat on the right- around the cord and through the middle.
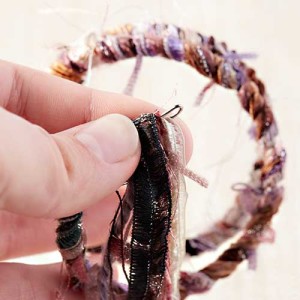
Slide a bead up on your left strand of leather and repeat the figure 8 with the suede on the left side, below the bead. Repeat with the right, slide a bead up and figure 8 with the ribbon on the right.
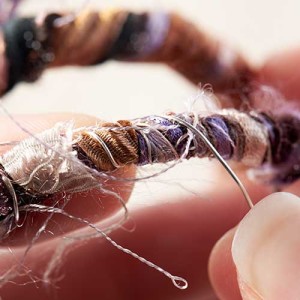
Continue with Step 4 to use about 32 beads total, or until you reach your desired length. Taper the end by weaving the cord 3-4 times in between the leather without the beads.
Finish by tying an overhand knot to join the ribbon and two leather cords. Tie an additional overhand knot with just the leather cords, leaving enough space in between the two knots for your button or bead to fit tightly. Glue the knots and cut excess. You can always leave the ribbon tails or add beads to the ends of the leather for accents.
Folding Silk Ribbon to Make Fiber Earrings and Necklace
Check out our tutorial on how to fold silk fairy ribbon onto eyepins (or headpins) for a trendy fiber jewelry look!
Fiber jewelry adds a natural and organic look to any outfit. As we made tassel earrings and bangle bracelet in our previous fiber blog post, we have a brand new way to use these silky ribbons. Here is our tutorial on how to fold your silk ribbon into eyepin dangles for earrings or a necklace link piece.
Shades of Blue and Purple Chain Dangle Earrings
Designed by So Vang
Make these earrings to show off your sassy and fun side.
Cut ribbon in half. Cut chain into four, 1 inch lengths. Open eyepin loop and slide on the four chain pieces. Close loop. Slide on a small bead. Follow tutorial above to feed ribbon onto your eyepin. Add a small bead on top and make a simple loop. Open ear wire loop and slide on ribbon dangle. Repeat again for second earring.
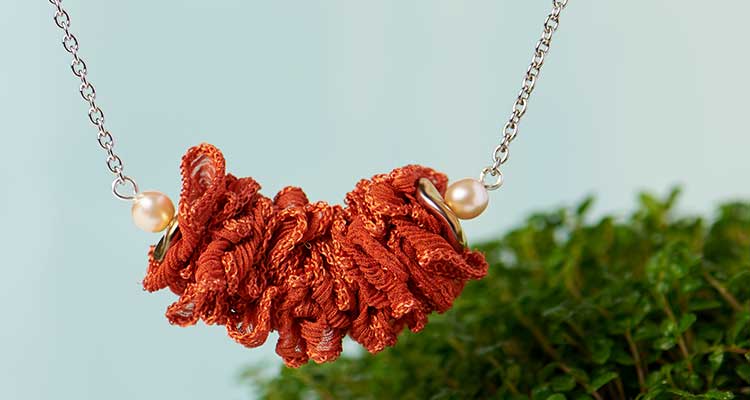
Orange and Pearl Necklace
Designed by So Vang
This necklace is easy and simple enough to make that you might want to buy different color silk ribbon to customize with your outfit!
Slide on pearl bead and Czech ripple bead. Fold a full strand of silk ribbon. Slide on another ripple bead and pearl bead. Make a simple loop at a 2 ½ Inch length. Open one of the loops and slide on the end of a30” chain. Close loop. Open other loop and slide on other end of your chain. Close loop.
Shades of Blue and Purple Chain Dangle Earrings
(1) A017789 – Botanical Gardens Hand Dyed Silk Ribbon
Owls are a hoot – I mean a hot motif trend. With their symbolism of knowledge and power, we’ve created two pieces of jewelry to show our love of owls.
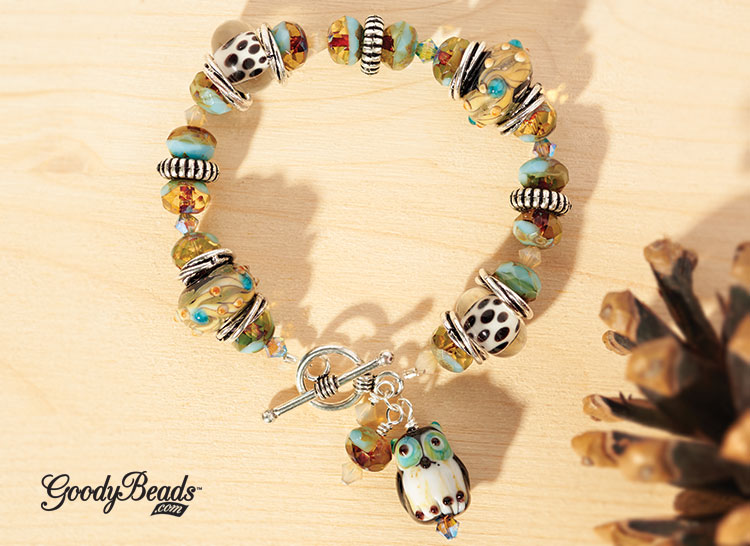
It’s a Hoot Beaded Bracelet
Designed by So Vang
Selecting high-quality lampwork glass beads, fiery Czech beads and Swarovski® crystals, we pulled out hues of opaque turquoise, chalky browns and silver accents. Strung on elastic, this bracelet is easy to wear and perfect for an evening hike or bird watching.
Step 6. Loop one elastic end through toggle bar loop and back through crimp tube. Crimp tube with crimping pliers.
Step 7. Loop other elastic end through toggle round loop and back through crimp tube. Crimp tube with crimping pliers.
Step 8. Open jump ring and slide on the three bead dangles and loop of round toggle clasp.
Step 9. Close jump ring.
Owl Be It Necklace
Designed by Tory Vezina
You can just feel autumn with this owl necklace. The gradation of colors in the fairy necklace to the dangling leaf charm entices your senses of seeing the changing colors of treetops to hearing leaves crackling as they brush across the sidewalk.
Step 9. Line your ribbon ends together and make a knot.
How to Use Silk Ribbon in Jewelry
To encompass the trend of boho, we have pulled our wonderful stock of silk ribbon and ribbon mixes to show you how to use silk ribbon in jewelry. We will show you how to make an easy wrap memory wire bracelet with silk ribbon and silk ribbon tassel earrings.
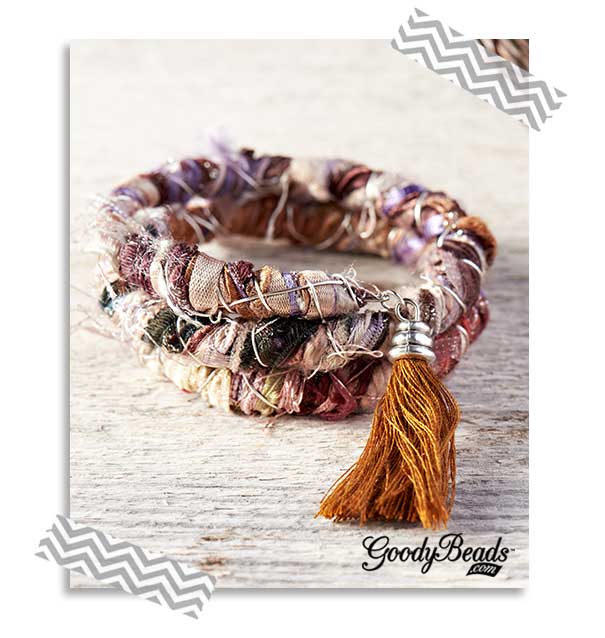
Boho Silk Memory Wire Bracelet
Designed by So Vang
This bracelet is perfect to wear on a beautiful summer day. We used the Hand Dyed Ribbon Mix, which has eight 2 yards of ribbon, yarn and fabric mix. When wrapped around memory wire, the colors and various fibers has a boho charm. You can finish off your bracelet with a tassel attached at the memory wire loop end or add charms scattered around the bracelet with jump rings. This memory wire ribbon wrap bracelet is easy to make and to pair with your everyday outfit. Just follow our easy instructions or DOWNLOAD our pdf tutorial.
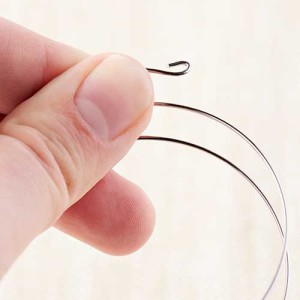
Step 1: Cut memory wire for 2-3 wraps. Make a simple loop at each end.
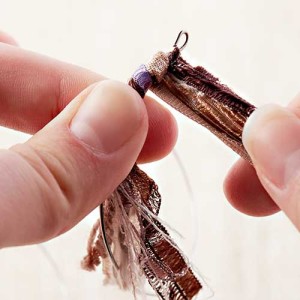
Step 2: Gather your strands of ribbon mix to one end. Hold about 3 inches of the ribbon strands with the memory wire. Start wrapping your ribbon around a few times close to the loop.
Step 3: Tightly coil the ribbon strands around the memory wire. Make sure to keep your strands flat and not twisted when coiling the strands. Take your time.
Step 4: At the end, glue to secure. Wrap strands back towards the beginning of memory wire to create a fuller looking bracelet. Once you run out of strands, dab a small amount of glue to hold ends down.
Step 5: Wrap 26 Gauge wire around ribbon strands to secure the strands.
Step 6: Embellish with charms, bead dangles, tassel, or wear as is. Your boho fiber bracelet is complete!
Use silk ribbon to make a trendy pair of tassel earrings. Make some fun pair of earrings like what we have made here. OR create a longer tassel to use in a statement necklace.
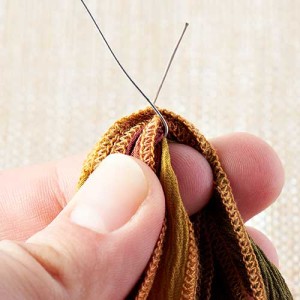
Step 1: Cut silk ribbon in half. Take one half and fold in half. Fold again and again for a total of three half folds.
Step 2: Cut 4 inches of 22 Gauge wire. Insert under last ribbon fold a third of the way and cross the wire strands.
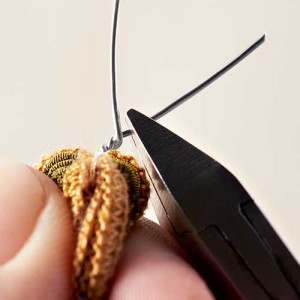
Step 3: Twist the two wire strands. Cut excess length of the shorter wire strand.
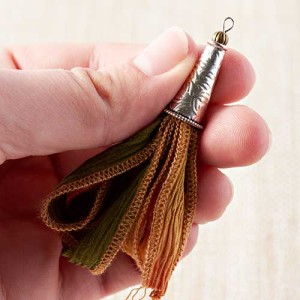
Step 4: Insert cone on wire and use flat nose pliers to pull tassel snuggly inside cone.
Step 5: Add a small bead and make a simple loop.
Step 6: Cut the ribbon loops.
Step 7: Attach ear wire and repeat for the other tassel earring.
Center a porcelain pendant to these mix ribbon and make knots on both sides. Then make another knot next to those knots and added seashell and starfish charms with copper jump rings in between each knots. This necklace takes you to the beach without even being there!