Dakota Stones® – Muonionalusta Meteorite & Care Guide
Blog Post and Information courtesy of Dakota Stones and DakotaStones.com
All gemstones are fascinating and special. They come from far-away, remote parts of the globe. These Muonionalusta Meteorite beads, however, are more special than most, and originally came from much farther away. The meteorite was first discovered in Sweden, nearly 100 miles north of the Arctic Circle, in 1906 by two children who stumbled over a metal object stuck in the ground. Later determined to be an iron meteorite, it was thought to have fallen approximately 800,000 years ago. Other, smaller pieces of the meteorite have been found in the area, spread by the impact with the earth or moved through glacial changes.
Muonionalusta Meteorite requires routine care in both specimen and jewelry form. Once you receive your pieces, it’s important to properly and regularly care for them. This article applies only to the care and keeping of Muonionalusta Meteorite in bead or other “finished” form. Different types of meteorite and meteorite specimens may require different care.
DOs
– Immediately remove from any sealed plastic packaging and put in a dry place with a controlled temperature. – Clean your meteorite thoroughly in anhydrous (water-free) alcohol. Anhydrous alcohols include 95% ethyl alcohol which can be found at hardware or home improvement stores or 99% isopropyl alcohol found in drug stores. – Seal it. Appropriate sealants can be found in hardware stores and include brands like WD-40 or RustGuardIt. You can also use microcrystalline wax, but this process involves prolonged exposure to high heat. – Store in a dry, temperature controlled area. – Store with a desiccant (silica gel packs) and recharge or change them out. – Re-clean and re-seal as needed. The amount, type of wear, or individual wearer can all impact how frequently the stone will need to be cleaned and sealed. – Clean and re-seal after exposure to sweat or heavy or prolonged handling. – Remove rust with anhydrous alcohol and a steel brush.
DO NOTs
– Clean with water. – Store long-term in anything sealed without controlling the moisture in the container. – Submerge in water or use any product including water for cleaning. – Wear while exercising or in environments where the piece will be in contact with a high amount of sweat and moisture. At Your Own Risk: Seal with lacquer or acrylic agents. They can alter the appearance of the piece and be difficult to remove. They are also NOT a permanent solution or impervious to moisture.
Dakota Stones® Carbon-Based Minerals: Shungite
Blog Post and Information courtesy of Dakota Stones and DakotaStones.com
Shungite is a modern material, the first instance of the name being coined only dating back to 1879. Then, the material could refer to any mineral with shungite inclusions– and at the time, this meant just about any stone with carbon inclusions. Over time, we’ve been able to identify what makes shungite special– which comes from the biological material it comes from. The name is derived from where it was discovered, like many other minerals — Shunga, Russia, has the largest deposits of shungite. Shungite is also almost exclusively sourced from Russia, and the mineral has been illusive in most other places in the world.
What we do know now is that shungite is almost entirely carbon. Carbon is an organic compound, and an excessively abundant element found in the earth’s crust. Carbon is also found abundantly within our bodies! We do know that because of this, shungite was likely a prehistoric plant or animal of some kind, that remained buried in the earth’s crust for thousands of years, the pressure and age transforming it into a close relative to carbon. We have yet to discover exactly what these organisms were, but they likely came from prehistoric swamps and volcanic ash.
Shungite has a non-crystalline formation, making it brittle in its raw form and very desirable for pigments in paints. Carbon-based black paint has been a new scientific and artistic achievement in the last decade. These paints create a depthless, abyssal black that absorbs all light. Looking at these extremely dark paints have created scientific opportunities, such as hiding satellites from view in the night sky. For artists and goths, this new black is an exciting opportunity, but these paints have yet to hit the mass market for regular consumption. You may need to wait a little while longer to obtain a piece of clothing that will finally let you become one with the void– but the possibility is definitely within our lifetime.
Because these shungite beads are highly carbon-based, they are very light in comparison to other black alternatives. Compared with onyx, a dense, chalcedony-based mineral, does provide a rich black. However, shungite has a unique, metallic appearance. One could compare it with graphite, which is made primarily from carbon, since it does have a lusty appearance. These beads could look sleek when paired with crystal quartz for a monotone design. Their dark color could be a nice spacer bead to provide breathing room in more colorful designs. If you’re designing something with our meteorite beads, they could make a light alternative, as meteorite is mostly iron, and tends to be somewhat heavy.
The metaphysical properties of shungite tend to be very attractive to customers who desire to protect themselves from EMFs. Carbon is an especially conductive material, so it is said that wearing these beads can help direct the flow of unwanted energies through the stones, rather than the wearer. These stones can also aid in pulling negative energy from the wearer in general, which may help you to keep a more positive, focused attitude.
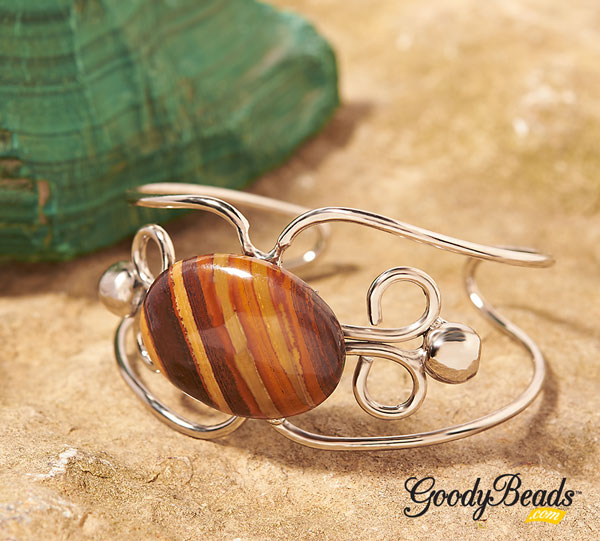
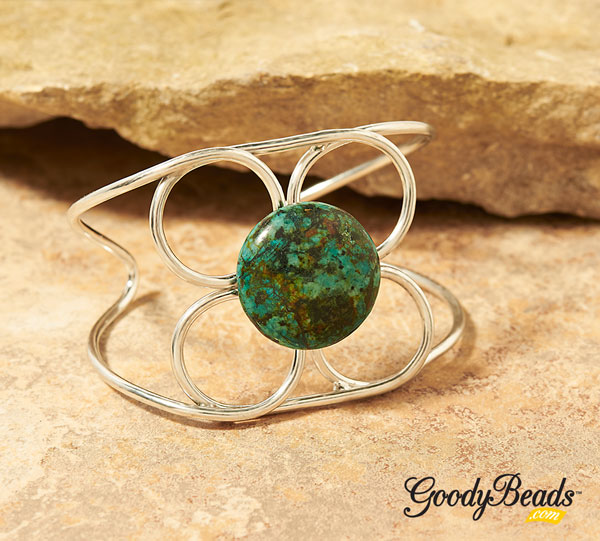
Wire Form Cuffs with Gemstone Cabochons
This DIY tutorial will give you a new style statement bracelets with wire form cuffs and gemstones cabochons.
Take a small piece of sanding sponger, filer or sand paper and brush over the flat area/base on the cuff that you will adhere the cabochon to. Brush or scrape the surface to get some scratches in.
File the backside of your Cabochon.
Wipe off excess dust from cuff and Cabochon.
Add coating of Super New Glue or thin layer of E-6000 to area you filed.
Sit the back of your cabochon on the are you just added glue to.
Hold in place for a few seconds. Let piece dry completely for 24 hours before wearing.
Channel your free spirited soul with these DIY Boho Pip Earrings with Gemstone beads.
Our focal piece to our DIY earrings are these magnificent chandelier earring findings! We went bold and added a pop blue Pip beads and an earthy brightness of Howlite Gemstones.
Open a jump ring and slide on a pip bead. Close jump ring. Repeat for a total of 12 ‘pip dangles.’
On an eye pin, slide on a gemstone bead and make a simple loop. Repeat for a total of 12 ‘gemstone links.’
Open a loop on one of the ‘gemstone links’ and slide on a ‘pip dangle’. Close loop. Repeat for a total of 10 ‘gemstone pip dangles.
Open a jump ring, slide a pip dangle on and through the inner middle loop of chandelier finding. Close jump ring. Repeat to other chandelier finding.
Open loop of a ‘gemstone pip dangle’ (from step 3). Slide loop through the third loop from the right of your chandelier bottom loops. Skip a loop and add another ‘gemstone pip dangle’. Repeat 3 more times. Repeat this step with other chandelier finding.
Open a ‘gemstone link’ (from step 2) loop and slide onto the top loop of the chandelier. Close loop. Repeat this step with other chandelier finding.
Open ear wire loop. and slide on top loop of gemstone link from Step 6. Close loop. Repeat this step with other chandelier finding.
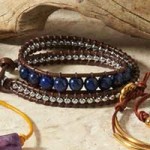
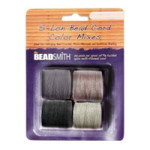
In this three -wrap bracelet, we used Griffin Silk Cord knotted with Tahitian Look Pearls, Amethyst Shimmer bicone crystals and 6mm Labradorite round beads with size 8/0 gold seed beads. Plus, we finished up this piece with gold findings.
Make a knot at the end of the silk cord and cut excess end. Slide over knot with a clamshell bead tip (Check previous blog on examples). Optional, add a small dab of Super New Glue to the knot before sliding the clamshell over.
Slide on a seed bead and make another knot flushed to the seed bead.
Slide on a 6mm Tahitian Pearl and make a knot.
Side on a seed bead and make another knot.
Repeat with alternating with pearl beads or 6mm Labradorite beads until you reach your desired wrist length. This will be your first row.
Next row, alternate a knot between an 8mm Amethyst Shimmer bicone crystal, seed bead, 4mm Amythest Shimmer bicone crystal, seed bead, 8mm Tahitian Pearl and seed bead. Repeat until your desired wrist length.
For your third row, alternate seed beads and Labradorite beads in no particular order to wrist length.
End with a knot, add a small dab of glue and cap off with a clamshell bead tip.
Open jump ring and attach either clamshell bead tip end to a toggle clasp. Repeat to other bead tip end.
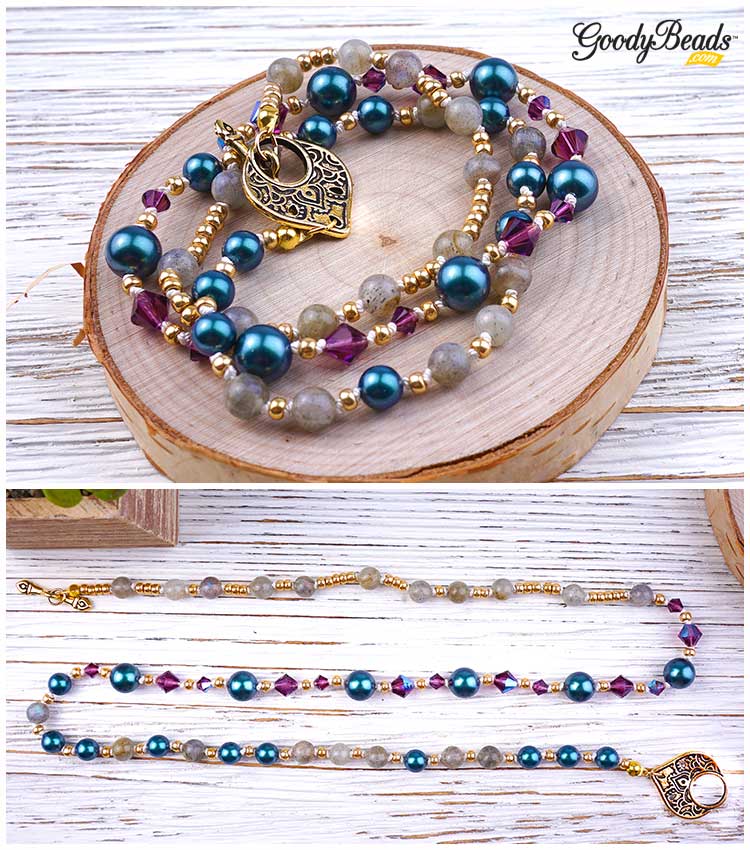
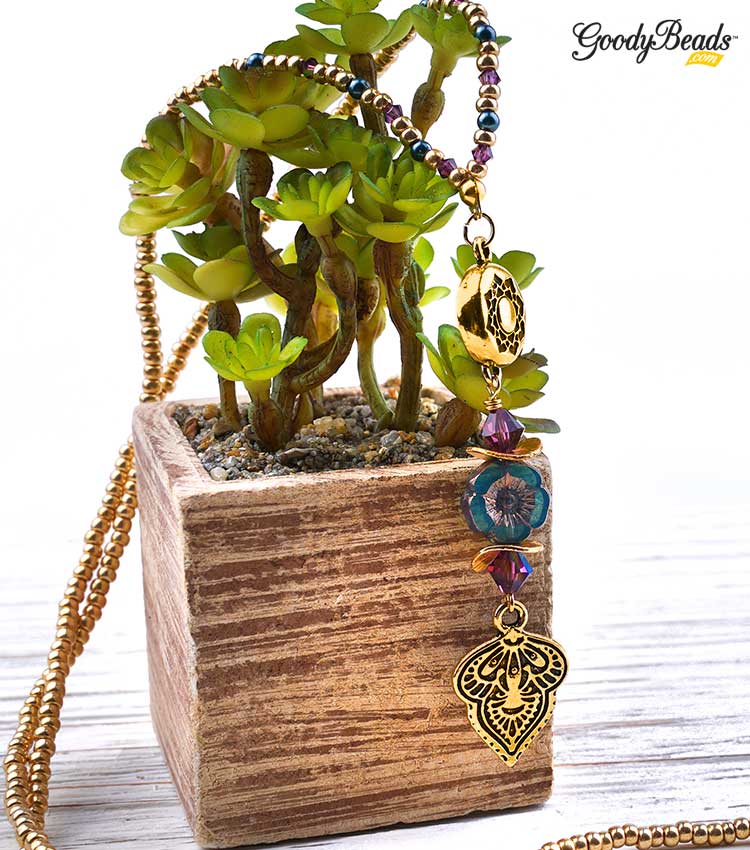
Passion Flower Necklace
We used the Griffin Silk cord to complete the bracelet with a necklace with similar beads as in the bracelet with TierraCast Findings.
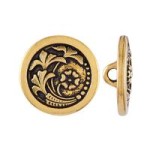
Open loop of eyepin and slide on TierraCast Mehndi charm. Close loop.
Slide on the following beads onto the eyepin and make a simple loop or wrap loop: 8mm Ameythst Shimmer bicone crystal, wavy disc (concave down), Czech Hibiscus, wavy disc (concave up) and 8mm Amythest Shimmer bicone crystal. (If making a wrapped loop, make sure to slide on TierraCast magnetic clasp end before finishing loop off.)
Make a knot at the end of the silk cord. Slide on a seed bead, 3mm bicone, a seed bead, a pearl, 2 seed bead, 3mm bicone, 2 seed bead, a pearl, 3 seed bead, a 3mm bicone, 3 seed bead and a pearl.
Slide on seed beads to accomodate a length large enough to slide over your head.
End silk cord with pearl, 3 seed bead, 3mm bicone, 3 seed bead, a pearl, 2 seed bead, 3mm bicone, 2 seed bead, pearl, a seed bead, 3mm bicone and seed bead.
Take both ends of your silk cord and make a knot to tied the ends together.
Slide a clamshell bead tip over the knot.
Open jump ring and slide on loop of bead tip and other end of the TierraCast magnetic clasp. Close loop.
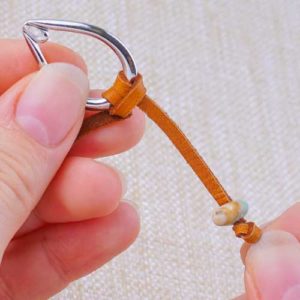
We were able to sponsor this make & take class along with Dakota Stones during the 2018 Bead & Button Show with Candie Cooper. See how easy it is to create this Seaside Flora Leather Bracelet.
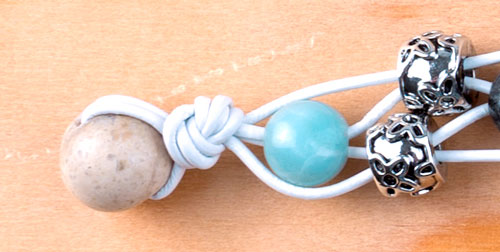
Perfect for a beachside getaway and catching some rays, this bracelet is made with black gold Amazonite and White African Opal gemstones from Dakota Stones, 1mm leather cord and silver beads.
Slide both strands of leather through large gemstone bead (WAF10RDLH-8) and make an overhand knot with all 4 strands.
Separate and fan out the four strands.
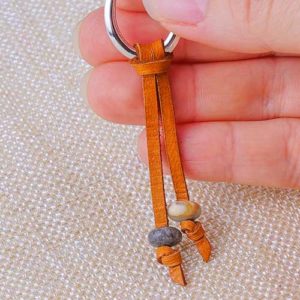
With the middle two strands, slide on a small black gold Amazonite gemstone. Next, with the bottom two strands, slide on a metal bead. And with the top two strands, slide on a metal bead.
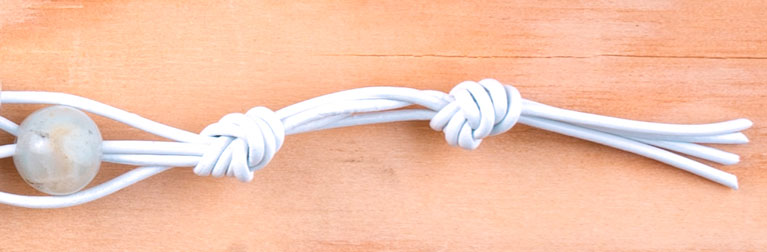
Repeat Step 4 sequence, five more times. End with a small gemstone to the middle two strands.
Evenly space out the beads to fit your wrist size. Make and overhand knot with all four strands. Make another knot about 3/4″ from previous knot.
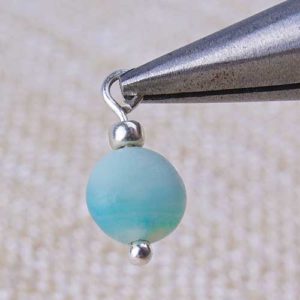
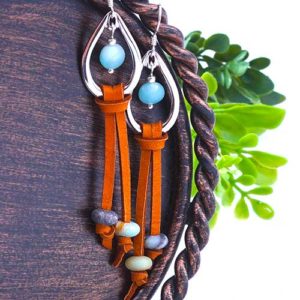
One of our favorite Make & Take project we offered during the 2018 Bead & Button Show was the Lasso Drop Earrings. Check out how easy it is to make these pair of leather and gemstone earrings!
It features soft deerskin leather lace and matte black gold Amazonite gemstones. Inspired by the trend of leather and adventurous western style, here’s an easy earring tutorial!
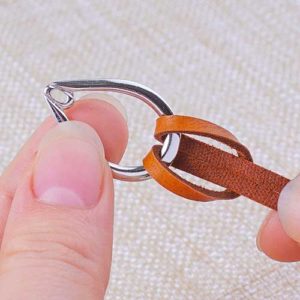
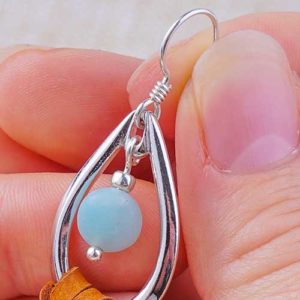
Step One: Start with 9” of leather. Make a Lark’s Head Knot by folding leather in half, slide loop through TierraCast drop halfway and feed both leather ends through leather loop.
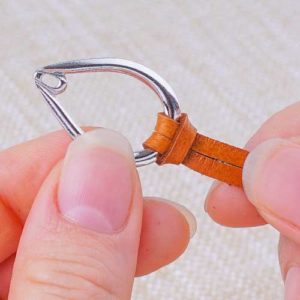
Step Two: Turn around and tighten loop. Make sure to keep leather ends flat and side by side.
Step Three: Cut the tips of the leather ends at an angle to create a pointed tip. Slide a bead through leather end and make a knot 1.5” – 1.75” inches away from the base of the TierraCast drop.
Step Four: Repeat Step 3 with other leather end, while making a knot slightly shorter. Cut leather ends at an angle, 1/4” away from knot.
Step Five: Slide a gemstone coin bead and seed bead onto a headpin and make a simple loop. Make sure your loop is slightly bigger to slide onto TierraCast drop.
Step Six: Open loop of dangle and slide onto the underside of TierraCast drop hole. Close loop. Open loop of earwire and slide on hole of TierraCast drop. Close loop.
We’re in love with bib connectors at GoodyBeads. So is Candie Cooper! Watch our product video where Tory and Candie will show you bib connectors available at GoodyBeads and how easy it is to add beads, charms, tassels and more for a fun and easy necklace.
Our bib connectors are lightweight with detailed designs. They have holes to easily add charms or tassels to with a jump ring. Watch the video below where Candie and Tory will show you the many kinds of bib connectors you can find on GoodyBeads, sample necklaces using bib connectors and they demonstrate how easy it is to add embellishments to them.
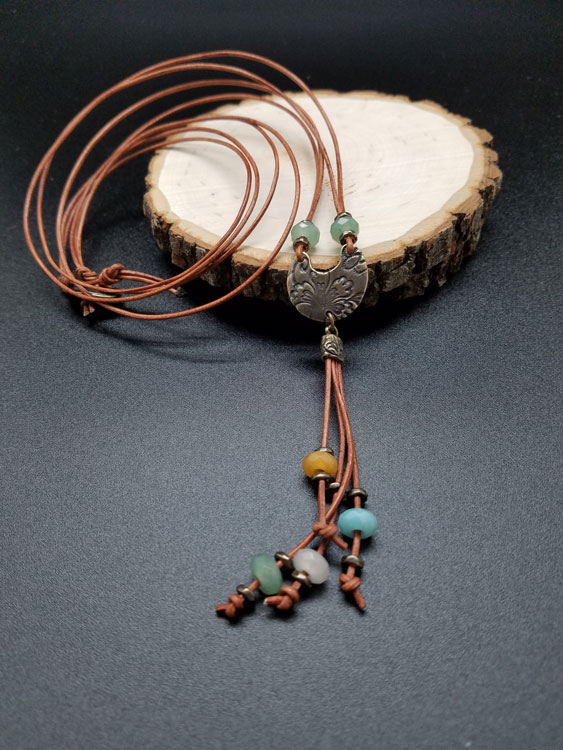
Tory’s Make and Take class was a HIT at the Twin Cities Bead Bazaar! It consists of Dakota Stones® faceted large-hole gemstones and TierraCast® new collection: Vida Más Dulce. We are happy to share with you this necklace and a tutorial you can make!
Start by cutting the leather for your tassel. For a long tassel cut 4 pcs of leather at 5”, 4.5”, 4” and 3.5”. For a short Tassel start with 3.5” and cut the others at 3.25”, 3 and 2.75”.
Put the 4 ends of your cut leather into the cord end and crimp the cord end on both sides with a non-serrated or nylon Pliers. Make sure to squeeze both sides or you may loose a piece of leather on either end.
Add a spacer bead, gemstone and spacer bead to each piece of leather cord in your tassel and tie a overhand knot at the end. Pull tight so they do not come undone. Make any adjusts you need to the tassel length at this time.
Measure how long you want your necklace to be around your neck. Take this length and double it and cut. Then cut a second piece the same length.
String your leather thru the top holes of the TierraCast connector piece. Then trim the ends of your leather to a point, to make it easier to slide on your beads. On each side string both pieces of leather thru the spacer bead, gemstone bead and another spacer bead.
Pick one side to add your button to and put one piece of leather cord from that side thru each of your button holes and do an overhand knot with both cords. Then do a second over hand knot under the button and pull it up so it is flush with the button.
On the other side do an overhand knot at the top and then about a half an inch down, add a second overhand knot and this will become your button hole to act as a clasp for your necklace.
Open your jump ring and add your tassel and the bottom hole of the TierraCast Connector. Close your jump ring.
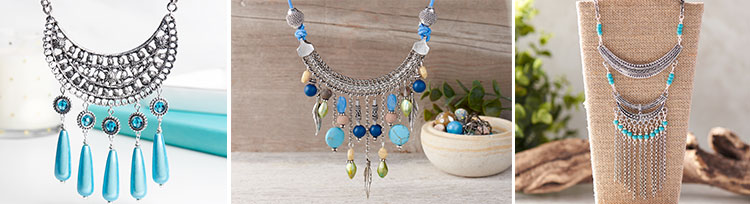
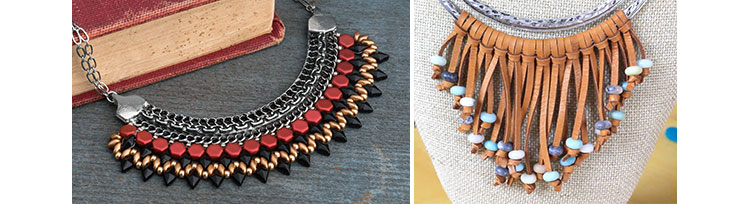
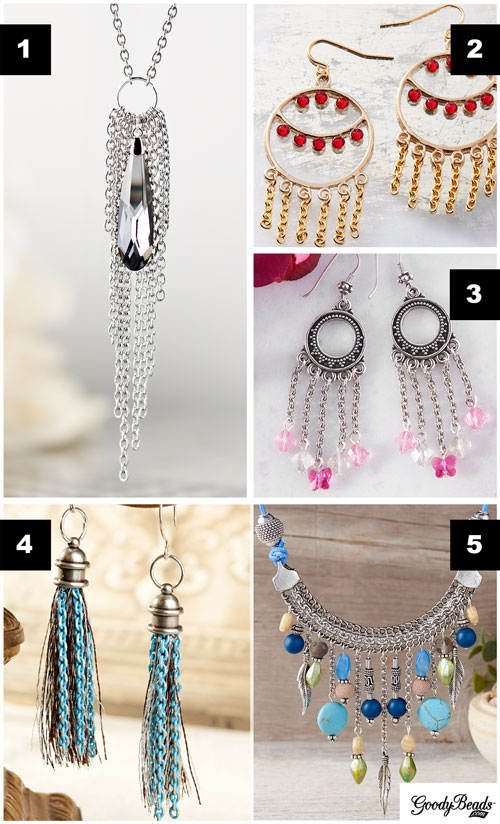
GoodyBeads Inspiration: Chain Fringe
Chain link is not only great to add length to necklaces or as chain extenders for bracelets, but they are fun to create fringe with. With its popularity in fashion jewelry and accessories, we have some examples of how we’ve created fringed jewelry with chain.
Dangle chain for some crazy, fun fringe. Keep fringes simple or trail it with beaded dangles. Let these examples inspire the next time you create with chain links.
Rose Quartz and Serenity are Pantone’s color of the year winners. And for the first time they debuted a duo-color that blurs the line of femininity and masculinity.
We will show how we used these colors to inspire our Color of the Year Jewelry.
Link Earrings
Designed by So Vang
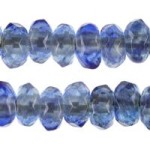
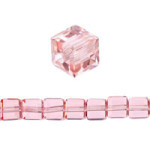
Made with blue foil tint beads and a hint of pink, these earrings pairs the two colors harmoniously.
Necklace
Pink Quartz Necklace Designed by Heidi Urlaub. Blue Serenity Neckalce Designed by Tory Vezina.
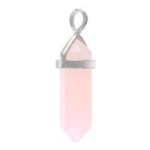
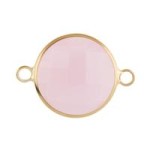
Rose Quartz Draped with a shiny tassel and beaded chain, this Rose Quartz necklace is the perfect statement piece to wear this spring. Can you imagine wearing it with your sweet summer dress and suede floppy hat?
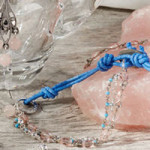
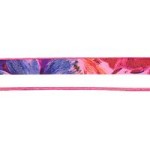
Serenity This dream catcher necklace has the right Serenity hues for 2016. Made with handmade silk ribbon, Czech glass chip beads and feather charms, you can pair this with your trending flannel outfit and skinny jeans.
Bracelets
Designed by So Vang
Wire Wrap This wire wrap bracelet combines a darker shade of Serenity and square pink crystals. Accented with silver bali beads, string these colors onto memory wire for a three-loop bracelet with a simple loop on each end. This fun and easy Color of the Year-inspired memory wire bracelet is ready to flaunt.
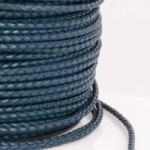
Leather cord When it comes to transcending gender barriers, leather is best to use to create an accessory that both men and women can casually wear. Using the same darker Serenity color as in the bracelet above, we used red aventurine beads on 1mm leather cords. We cut the 1mm cords into three equal strands. Taking the three strands, crimp one end with a revolving crimp tubes. Insert a bead on your top two strands and then the next bead will be on your bottom two strands. Repeat until desired length. Cut the three strand ends straight and crimp them with another revolving crimp tube. Add your choice of clasp and it is ready to wear.
How will you wear this year’s colors of the year?
Link Earrings
(2) Z007149 – 30mm Antique Silver Hammered Round Pewter Link
(1) A008998 – Silver Base Metal French Wire Earrings
How to Make Leather Wrap Bracelets with Illustrated Tutorial
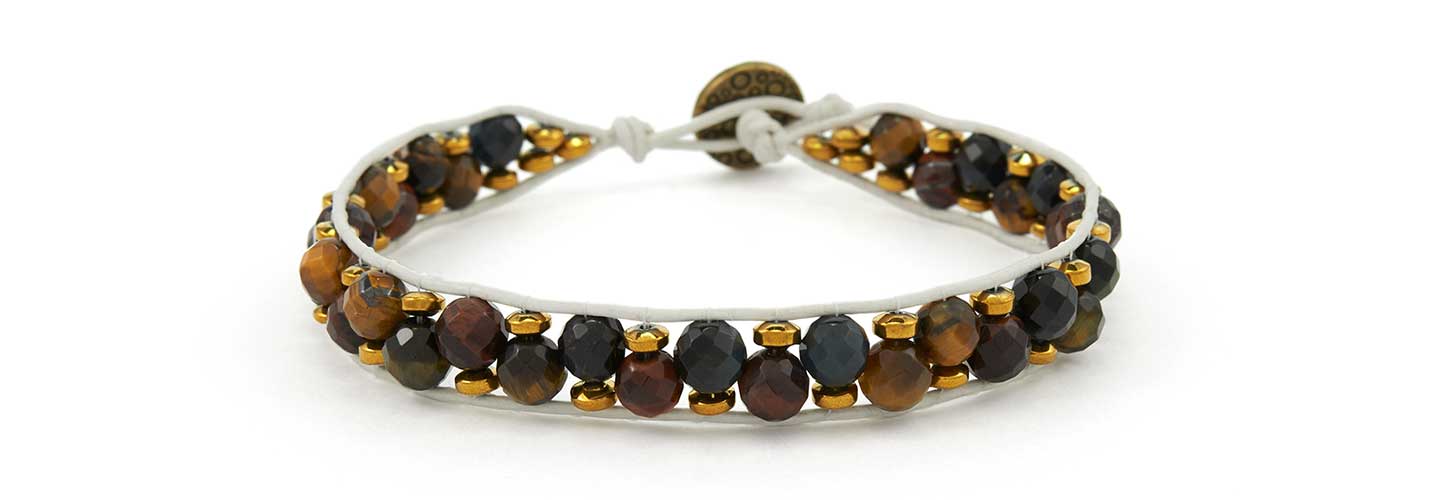
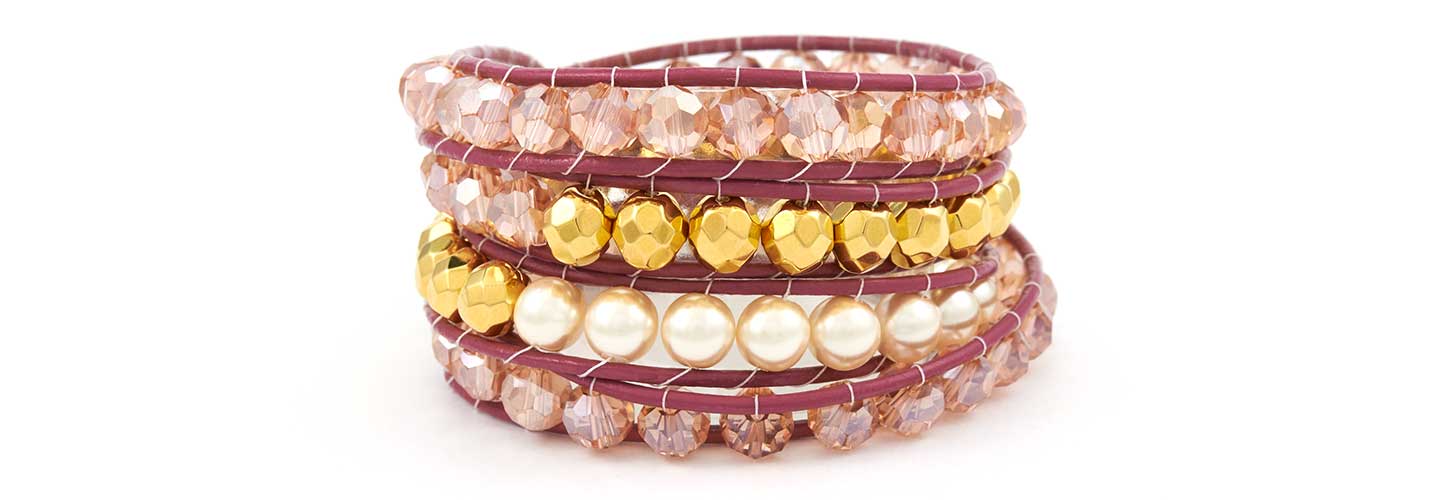
Leather wrap bracelets is a trending favorite to spice up a boho outfit or rock out to a head-banging concert or add to a casual outing with your girlfriends. Wrap bracelets are a must-have for 2016. We will show you how to make wrap bracelets with illustrated tutorial that you can download.
They may look difficult to make, but after a few attempts, they are honestly easy to make. We will show you a tutorial on how to make these bracelets using one-hole beads and super duo beads, as well as a few tips and tricks to help you make these wrap bracelets.
The basic components you need for these bracelets are:
Button findings: which will act as your clasp. Button Ends will work well, also.
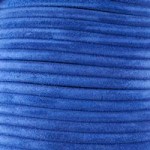
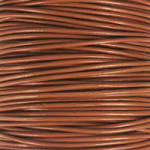
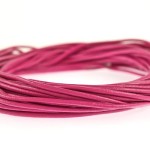
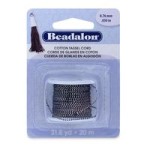
Leather or cotton round cord: these could range from 1mm to 2mm or larger, depending your preference and on the size of beads you are going to use. The length of cord needed for your bracelet will be determined below.
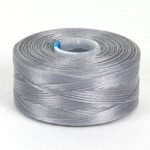
Thread: you can match the thread to your leather cord to hide the look or to add color. Check out some Beading Thread options but keep in mind that you will need a thin enough thread to go through the hole of your beads twice.
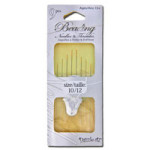
Beading Needle: size will be according to your thread and bead’s hole size.
Adhesive: Hypo-Cement with precision tip, is a good choice to glue thread ends or any fast-drying glue will do.
Beads: use your preference of beads or seed beads. Have enough if you plan to have a multi-wrap bracelet.
Determine leather length needed for a wrap bracelet
Use this method to determine the leather cord length you may need for a multi-wrap bracelet.
Take your wrist length and double the length. Multiply that by the number of wraps you want and then add 12”. That will give you an approximate cord length you will need to start your bracelet. (The extra 12” factors in the button knot, end knot(s) and bead size.)
Example:
2 wraps for an 8.5” bracelet: (8.5” x2) x 2 wraps = 34 + 12 = 46” needed.
Or
4 wraps for a 7.5” bracelet: (7.5” x2) x 4 wraps = 60 + 12 = 72” needed.
Keep in mind, these total numbers are approximate. You will want to test the wrap length while you’re making your bracelet. Having extra length is better than being short on your wrapped length goal.
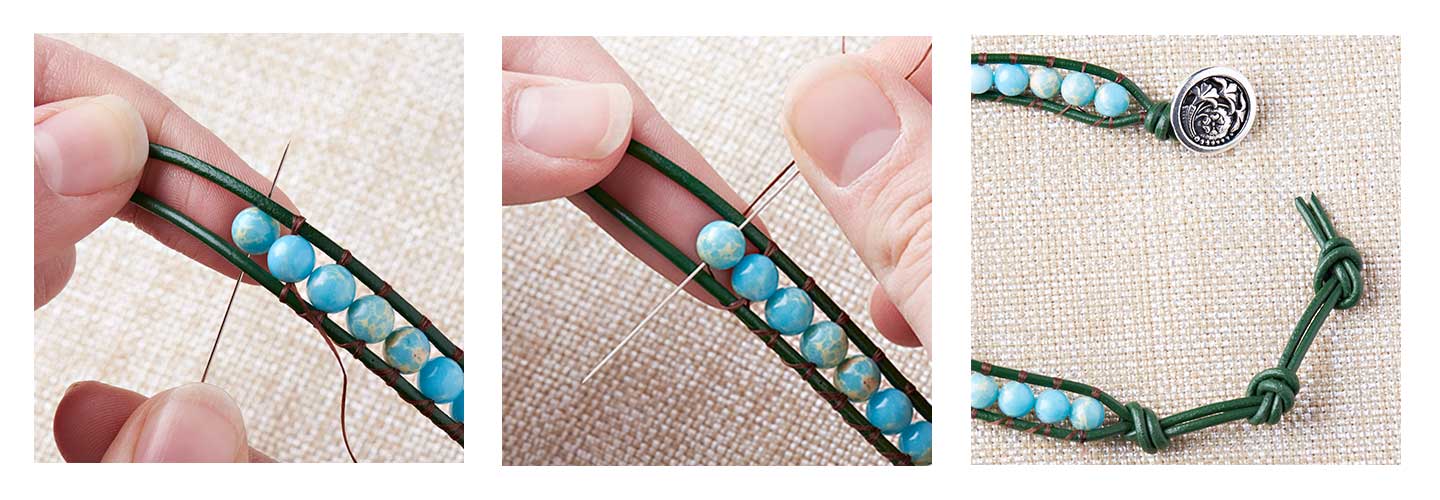
Basic Leather Wrap Bracelet Tutorial
The basic weaving of the thread will be going under the leather cords and then coming over leather cords.
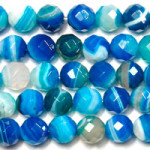
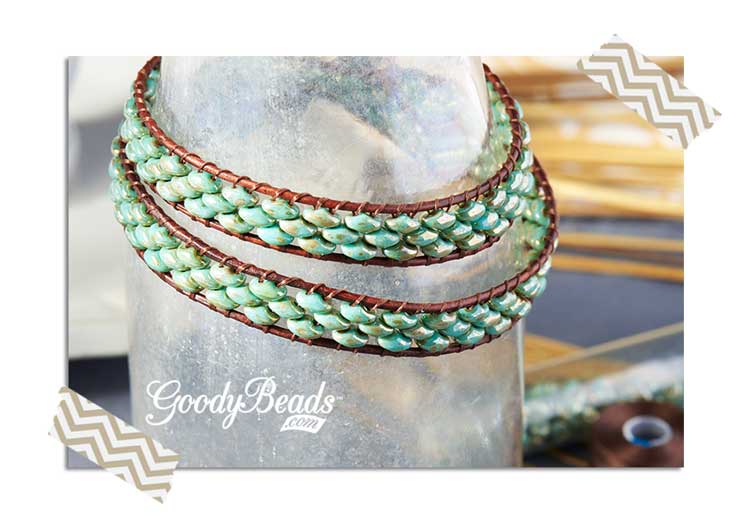
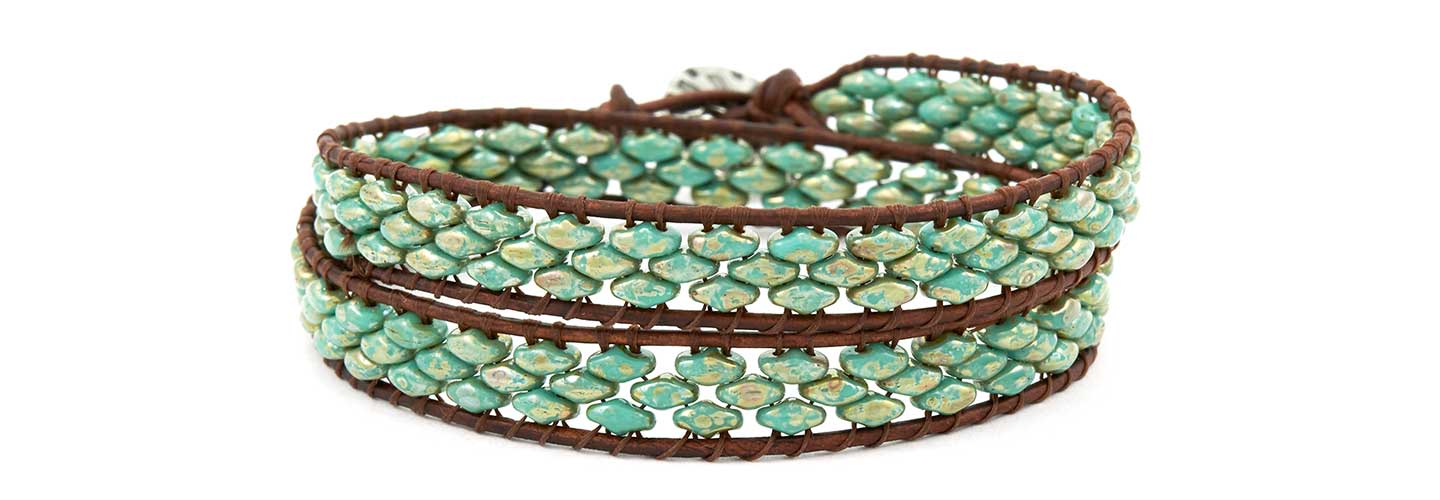
With Czech SuperDuo seed beads, you will be layering the bead holes to create a layer sequence. Below is a tutorial on how to make this SuperDuo wrap around bracelet.
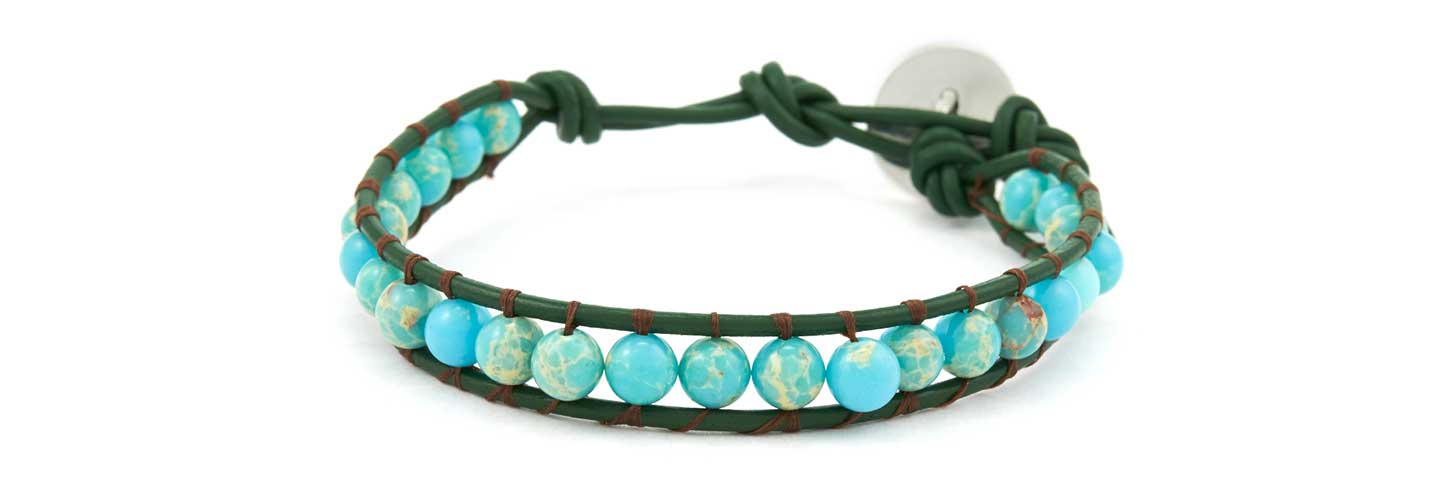
This is a simple one-wrap bracelet. Think about using a different thread color than your leather cord color for a mix of colors.
Use more than one bead on each layer for more embellishment options.
Make a bracelet with multiple combinations of beads to create a fun layered look.
These SuperDuo beads look like tiny stone pebbles, don’t you think? Try a SuperDuo mix set for a colorful bracelet or create a zigzag pattern. What will you try?
Other Tips
How to add on additional thread: Tie thread to closest leather cord and glue with Hypo Cement or fast-drying glue. Cut off excess. Tie new thread to leather cord, glue knot and continue.
How to hold leather strands: An alternative to holding the leather strands, for stability when adding beads, is to clamp the button to a clipboard.
How to straighten leather cords: While you are stringing on beads, adjust previous beads with fingers to straighten out leather cords. Or when you have reached your desired bracelet length, lay the bracelet down and run your hand across your bracelet. This will help to smoothen and straighten your leather cords.
How to tighten threads/bead layers: If you find that your thread does not keep your bead(s) sandwiched in place or the bead sits loosely, sew up and under the cords and through the bead again. Over and down through the bead. Sewing through the bead twice on the leather cords will give your beads a tighter hold.
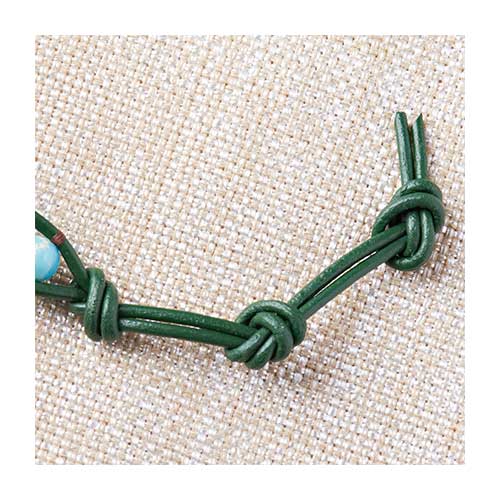
Tighten leather knots: If your leather cord knots are loosening, add a small dab of fast-drying glue or Hypo-Cement to knot(s) for tighter holds.
How to make an adjustable bracelet: Make additional knotted ends for an adjustable bracelet.
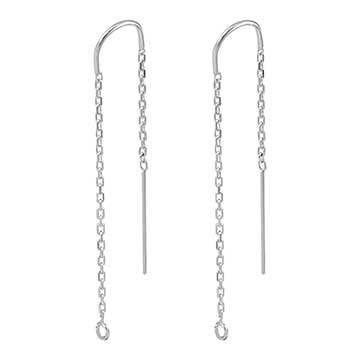
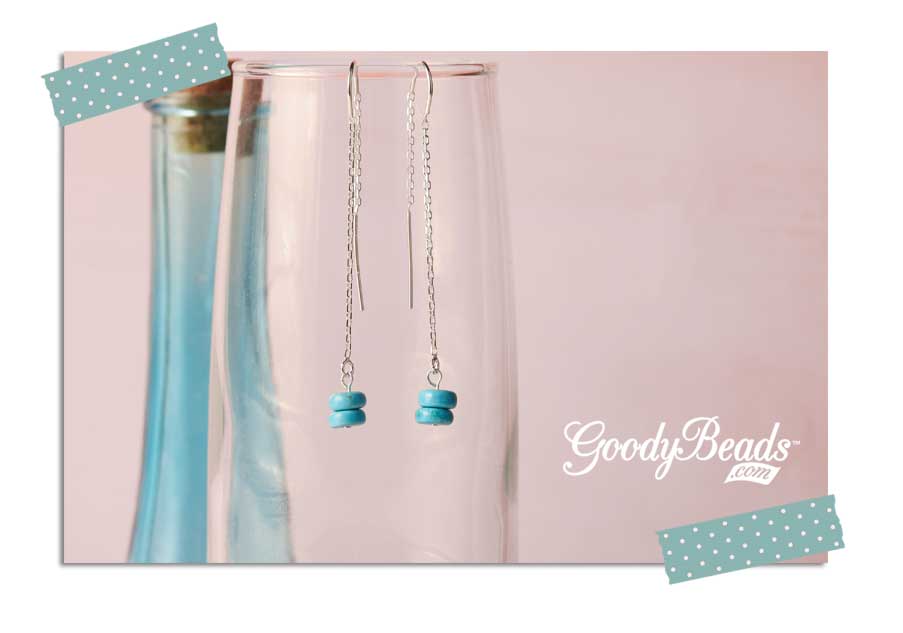
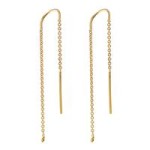
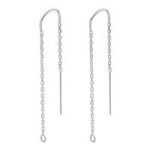
Threader Earrings are a chic, modern jewelry that’s dainty and subtle, yet offers a simple to sophisticated look. These threader earrings are easy to make and wear. At one end you have a jump ring, where it is best to add a charm or wire-looped dangle of beads or crystals. Simple enough.
Below we have some simple and easy threader earrings that we’ve made. What will you add to your threader earring?
Golden Star Earrings
Get ready to rock out to your favorite head-banging song with these pair of star charm earrings. We used 4mm gold-plated jump rings to attach these cut-out gold-plated stars to the threader earrings. Let’s get jamming!
Golden Gear Earrings
For your secret love of steampunk fashion and jewelry, gear charms offers a modern, Victorian, and mechanical edge. Also attached with 4mm gold-plated jump rings to the threader earrings, these earrings bring an awareness to all types of fashion jewelry we are yet to explore.
Sparkly Ball Earrings
Using 1” headpins, we made rhinestone ball dangles to attach to our threader earrings. They add a pop of sparkle and shimmer!
Turquoise Drop Earrings
Still using the 1” headpins, we used turquoise beads to give these threader earrings a dab of color.
Golden Star Earrings:
(1) Y001135 – U-Threader Gold Filled Chain Drop Earrings
A hot trend this summer are tassels. We have three fun inspirational tassel jewelry projects for you to enjoy at your next music festival or relaxing under the shade by the beach.
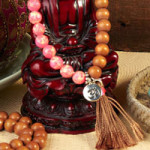
Mala Meditate Necklace
Mala is a strand of counting beads used in Hindu or Buddhist practice for praying or reciting a mantra to aid concentration during meditation. A typical mala is made with 108 beads that are strung with a knot tied in between each bead. Depending on the type of chant, counts of strung beads may vary. It is said that with each knot, people recite a mantra to bless the beads. The strand is also accompanied with a larger bead named the “Guru” bead and a tassel.
For our Mala necklace, we used 8mm round gemstone beads for a 42” necklace. Using a sturdy Super-Lon bead cord, cut a piece of cord about 150″ and make a knot 6″ in. This will help stop the end bead from falling off. String on your first bead and make a knot (using a pliers or tweezers if needed) flush to the bead to keep it in place. Repeat until you’ve strung and knotted all 108 beads.
Now take both cord ends and tie together. At these two ends, you will string on your Guru bead and tassel.
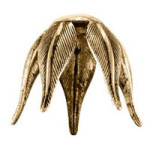
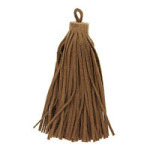
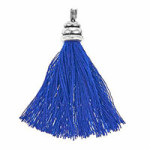
We made our tassel portion by using a large rust suede leather tassel. Insert a 3” eyepin from the middle-bottom of the tassel up. Slip on a 10mm tulip end cap to cover the top of the tassel. Wrap the headpin and your tassel is ready. (see images below)
Now take the two tied ends, string on the 12mm wood bead and place the tired ends through the tassel wire loop. Bring the strings back through the bottom of the wood bead and make a knot or two. Secure it with some clear adhesive like GS Hypo Cement. Cut the ends and you are ready to meditate or wear your Mala as a fashion accessory.
Beaded Tassel Earrings
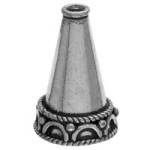
For these Beaded Tassel Earrings, we used our brand new Tassel Maker from Beadalon®. You can find a tutorial of how to make tassels HERE. We took Super-Lon bead cord and made 25 loops to make the tassel. Attach an eyepin to the top of the tassel and slip on a cone bead cap and a 4mm round bead. Make a simple wire loop and attach to earring hooks.
If you find that some of your tassel ends have kinks, twists or curls, dampen with water, twist and pull them straight. After a few seconds when dried, you will find them straightened out. Taking about a third or half of the tassel ends, string 10 beads to each strand and knot the end. We recommend using an already-mixed, size 8 seed bead for a fun colorful look. Cut the remaining, unstrung tassel ends at a variety of shorter lengths to blend into the rest of the beaded tassels. Now you are ready to rock these earrings at your next music festival!
Wood Tassel Bracelets
One of our easier projects is our Wood Tassel Bracelets. Make these quick and easy bracelets to show your love of tassels. For each bracelets, we used different round wood beads in a sequential design along with a tassel, strung on elastic. Make sure to stretch the elastic string lightly to loosen the elasticity before stringing on beads. Also, after knotting the elastic, use GS Hypo Cement to secure your knot.
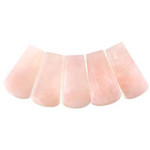
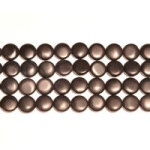
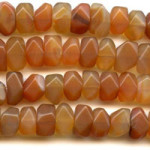
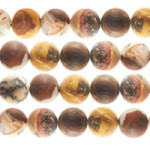
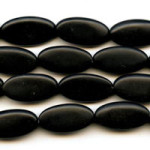
Feature: Dakota Stones and the Process of Matte Finish Gemstones
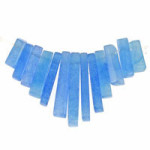
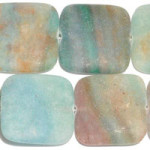
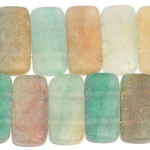
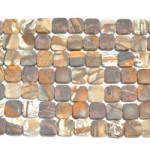
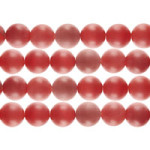
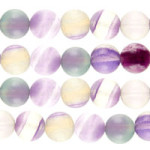
Our friends at Dakota Stones have been generous to supply us with semi-precious and gemstones beads in a variety of natural stones, shapes, sizes, and finishes. We’re especially fond of the matte-finished gemstones. They are stunning with unique, nature-made cracks, lines, and spots.
Dakota Stones shares with us more about matte finishes and their matte-finish production process:
“Matte-finished or frosted gemstones have become a popular design choice in jewelry. They complement many of the newer design materials such as ribbon, leather, chain, rusted auto parts or whatever designers dream up. Matte finished beads work with many of the alternative metals and the variety of finishes now available such as gun metal, copper, antiqued, etc. Matte-finish offers a subtle accent or an understated elegance to designs and is a great choice when designing men’s jewelry.
The process to matte-finish a bead is counter intuitive and actually requires more steps than the traditional polished stone. The stone bead is put through all the normal steps of a polished bead; cut, drilled polished, then it goes back into the tumbler with a fine grit powder, water and additional tiny stones and tumbled to the desired look. Each stone type requires a different amount of time in the tumbler depending on the material’s hardness and characteristics. Harder materials can require up to 2 hours in the tumbler and occasionally it takes multiple tumbles with different various-sized grit powder.”
So, the next time you pick up some matte-finish gemstones and awe over their texture and smoothness, take a second to appreciate the time and care that went into creating these natural-looking gemstones. These types of stones will make a great addition to your next design project.
(image source Dakota Stones and original Post HERE.)