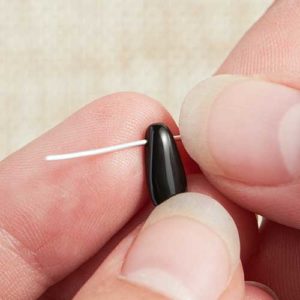
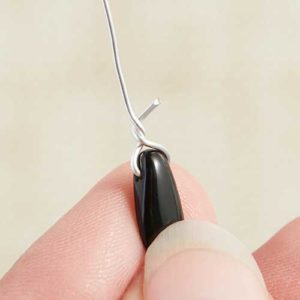
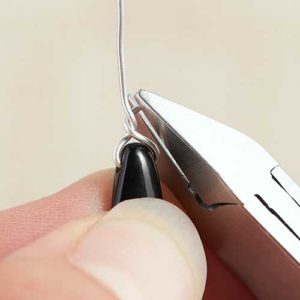
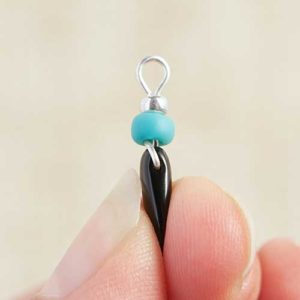
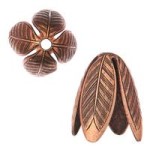
Artistic Wire® Finding Forms – Beaded Holiday Ornament Charms
Make some fun beaded holiday ornament charms with Artistic Wire® Finding Forms. Watch Artistic Wire demonstrate how to create a star, snowman or tree. Hang one from a holiday tree, dangle one from a window or attach one to a neatly wrapped present! Get your finding forms, artistic wire, and seed beads today at GoodyBeads to make some beaded holiday ornaments of your own!
What you will need to create a finding form ornament charm:
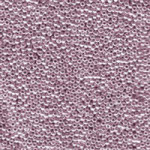
Here we created a holiday tree (TL00250) with 22 Gauge Antique Brass Wire (AW00026) and included a Swarovski® star bead to the top. We took 26 Gauge Artistic Wire and wrapped back and forth on the inside of the tree while adding random seed beads. This project is perfect if you have leftover seed beads from previous projects. You can also use our Miyuki Seed Bead Grab Bag (A011619) for a nice variation of color and sizes.
Holiday Star Ornament Charm
Designed By Tory Vezina
Our star (TL00251) is made with Antique Brass Wire (AW00026) with bronze, white, clear and cream hued seed beads crisscrossed in the middle on 26 gauge wire.
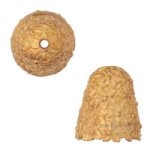
Holiday Snowman Ornament Charm
Designed By Tory Vezina
We thinkthis snowman (TL00253) is just darling! We added an 8mm squaredelle (A011435) and 6mm Swarovski cube (SW00309) to depict a top hat for our snowman. We ran some 26 Gauge artistic wire side to side, and layered with seed beads and Czech melon beads for the scarf.
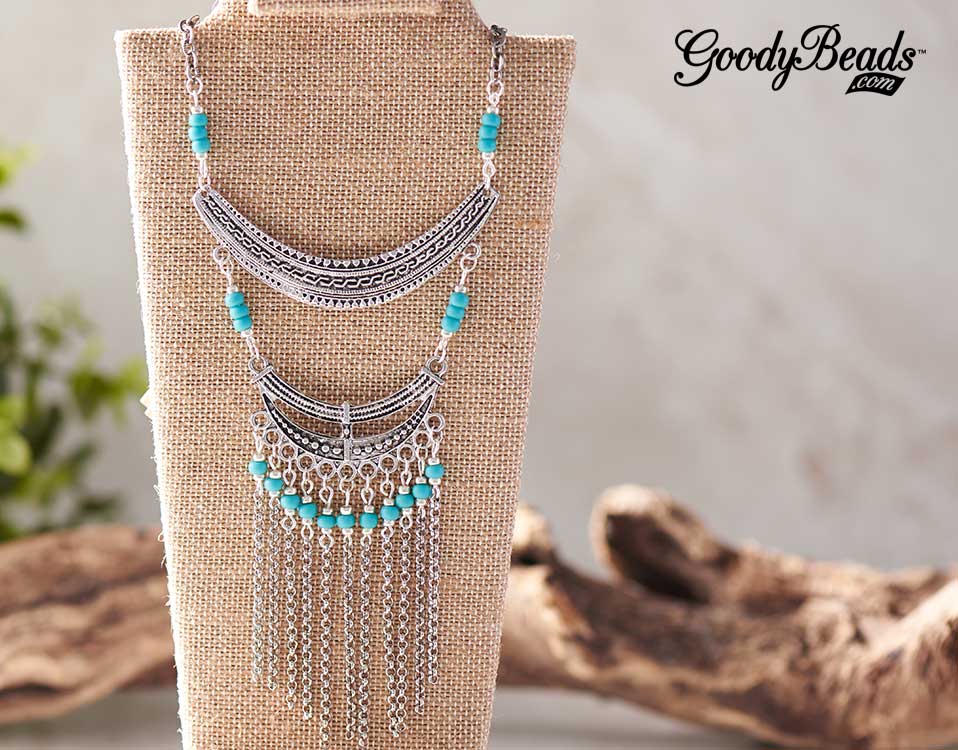
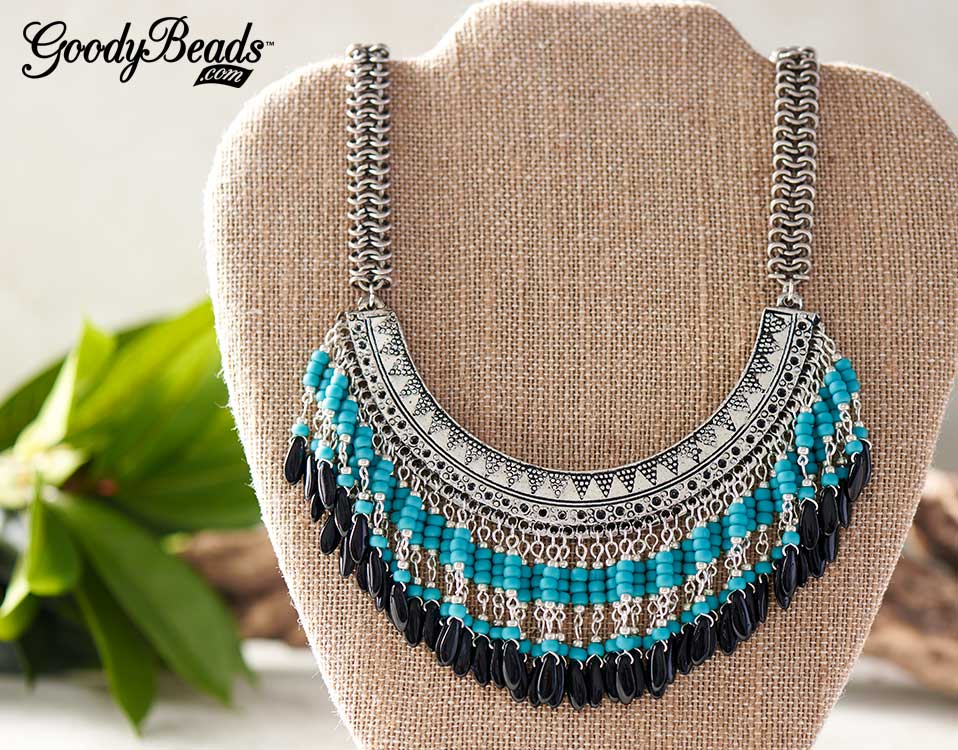
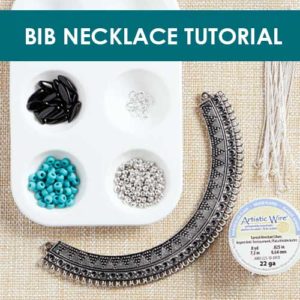
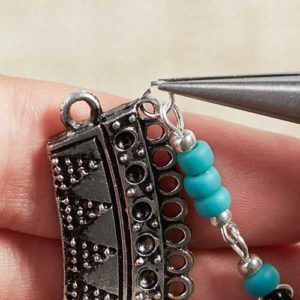
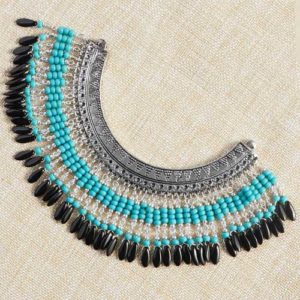
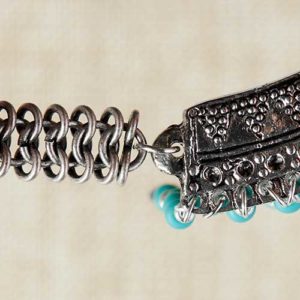
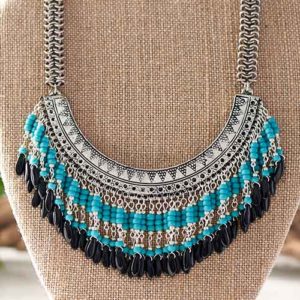
Boho-Inspired Bib Necklaces with FREE Tutorial
It’s on Pinterest, Tumblr and other social media image viewing boards; boho-inspired bib necklaces. Now with these Bib Connectors at GoodyBeads, you can customize your own statement necklaces with seed beads, Czech beads and daggers, and chain links.
What gives these necklaces a boho flare are the bib connectors. The intricate Bali designs and geometric patterns embellishes the overall look of creating a bib statement necklace.
Malin Fringe
Designed by So Vang
A fun simplistic way to use these Bib Connectors is linking two different connectors together. Show off your customized style with this easy-to-make bib chain necklace.
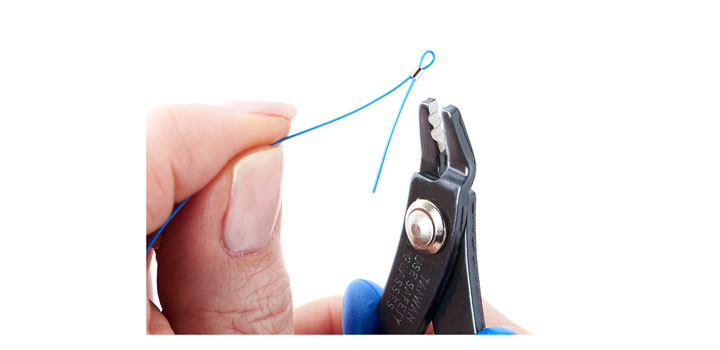
Step Three: Fold wires up and twist at the top of the dagger bead.
Step Four: Cut excess wire of shorter end.
Step Five: Slide one 6/0 seed bead and one 8/0 seed bead. Make a simple loop with loop facing the side of your dagger bead. (Refer to image.)
Step Six: Open eyepin loop and slide on dagger dangle.
Step Seven: slide on eyepin one 8/0 seed bead, three 6/00 seed beads and one 6/0 seed bead. Make a simple loop. Make sure to have loop facing in the same direction as your eyepin loop. (Refer to image.)
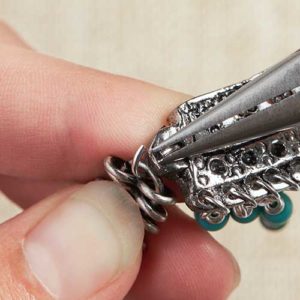
Step Eight: Open a 4mm jump ring, slide through dagger dangle and then slide through loop on bib connector.
Step Nine: Repeat steps 1-8 for every loop on bib connector. A total of 50.
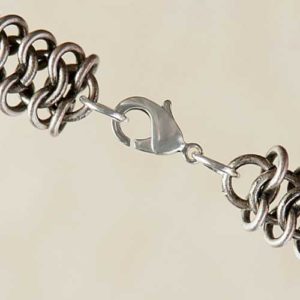
Step Ten: Cut two 6″ chain maille link. Open a 7mm jump ring and slide on one end of your chain link and side hole of bib connector. Close jump ring.
Step Eleven: Repeat to other bib end and second chain link.
Step Twelve: Open another 7mm jump ring and slide on one end of the chain link and lobster clasp. Close jump ring. Open another 7mm jump ring and slide on other chain link end and close jump ring.
Completed Bib Necklace.
Seed Bead and Leather Bead-Weaving Kits
Kids are going back to school and you have tons of time on your hands. Why not get one of our seed bead and leather kits. From our in-house designers, Harper Gray and So Vang, come a wave of bead-weaving kits featuring popular leather wrap bracelets, seed bead peyote stitch earrings and honeycomb beads weaved to add to leather or chain.
Leather Wrap Bracelets designed by So Vang
Be on trend with a three-wrap leather bracelet. Each kit is personally designed with genuine gemstones to Swarovski® crystals or pearls, and from dainty Picasso seed beads to Czech two hole beads. All starting with a theme-matching button closure. These kits can be modified to fit a 6” wrist or use all of the beads and make to fit up to an 8” bracelet.
All beads, leather, and needles are included in the kit. All you need are a pair of scissors, optional glue and time.
Honeycomb Bracelet and Necklace designed by So Vang
Honeycomb beads are hot on the trending list, so no wonder our in-house designer So Vang created these masterpieces. Kit comes with all the beads, thread and a needle plus, detailed illustrated instructions to make each piece.
Harper Gray designed these earrings kits with an array of colors and finishes. Learn to make these earrings using peyote stitching skills. Each kit comes with detailed instructions and illustrations to help you make each pair of earrings. You’ll probably find yourself wanting them all!
Beaded DiamonDuo Licorice Leather Bracelet with Tutorial
Featured in GoodyBeads July 2016 Trends, we are still loving the versatility of DiamonDuos especially when we pair them with licorice leather. Along with a FREE beaded loop tutorial, we will show you how to create DiamonDuo beaded loops and incorporate them in your licorice leather bracelets.
DiamonDuo Beaded Loop Tutorial
Download our DiamonDuo Beaded Loops pattern tutorial to get started. Create different color combinations with DiamonDuos, Czech O-beads and size 8/0 Miyuki round beads. Here are some examples of how we used these DiamonDuo Beaded Loops.
From our July 2016 trend, we featured this stunning bracelet with cork licorice leather. We made three loops with Matte Copper DiamonDuos and 2 with Matte Gold DiamonDuos. After cutting the cork licorice leather to your wrist size, slide on your beaded loops in alternating colors towards the center. We added a black rubber o-ring on both sides of the five loops to keep them in place. Glue on a clasp and let it dry for 24 hours before you wear. Crazy-neat, eh?
Using different colors can create a different look to your licorice leather. We created our DiamonDuo beaded loops using hues of metallic golds and white.
After we made five beaded loops, we cut our licorice leather to size. With some Super-lon Bead Cord (A012987), we wrapped the center section of our licorice leather with gold cord. Glue as needed on back side. Slide on a rubber ring, the 5 beaded loops and another rubber ring. ALL centered on the wrapped gold cord. Glue on a clasp and you have this flashy bracelet.
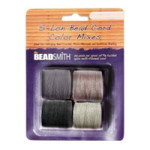
How to Use Silk Cord in Jewelry Making
Silk cord has been used as a stringing material in jewelry-making for centuries. No other beading cord offers the softness that natural silk provides. Jewelry designs made with 100% silk bead cord drape beautifully and the cord itself can become a feature with knotting techniques. Whether you’re looking to create a simple strand of beads or incorporate knotted bead clusters into your designs, GoodyBeads.com is here to show you how easy and versatile this timeless stringing material can be.
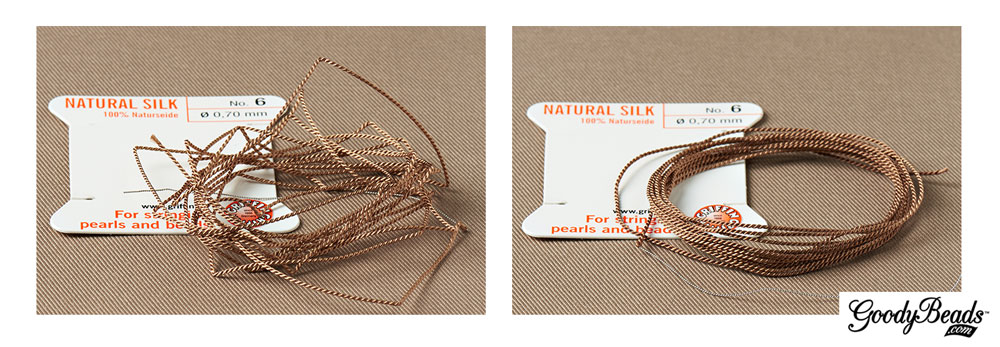
One of our favorite silk bead cord brands is Griffin. Griffin bead cords are made of 100% natural silk and come in a rainbow of colors and a variety of thread sizes.
Griffin bead cords are sold 2-meters per card. Two strands of twisted silk are wrapped around a cardboard backer. Each cord comes with its own needle for easy threading.
Choosing Silk Cord
Thread thickness is very important, especially if you plan on incorporating knots into your designs. Beads can slide over a knot if the cord is too thin for the bead hole you are working with. Griffin bead cords has its own numeric system for categorizing thread cord sizes: No. 0 – No. 12.
Each thread number has an associated millimeter size. Below is a quick reference guide for each number:
No. 0 = 0.30mm
No. 2 = 0.45mm
No. 4 = 0.60mm
No. 6 = 0.70mm
No. 8 = 0.80mm
No. 12 = 0.98mm
Smooth Out Silk Cord
Since silk bead cords come spooled on a card, you must prepare your new cord for use by smoothing out the kinks first.
To smooth out your cord, unravel the whole cord from the card. Starting from one end, dip your fingers in water and run your damp fingers through a section of the cord. Run your fingers over the section a few times to help straighten them out. Once that section is straight, continue on down to the next section of the cord with damp fingers until you’ve straightened the whole piece. Next, run a paper towel over the entire cord and gently squeeze to remove any residual water from the cord. That’s all you need to do. The cord will still be a bit damp but you can certainly use it right away. You can also wait a few minutes until it’s fully dried.
NOTE: You can use the same cord for multiple projects if you plan to keep using the needle that is attached to the cord. String bead(s) through the needle and utilize the end section of the cord.
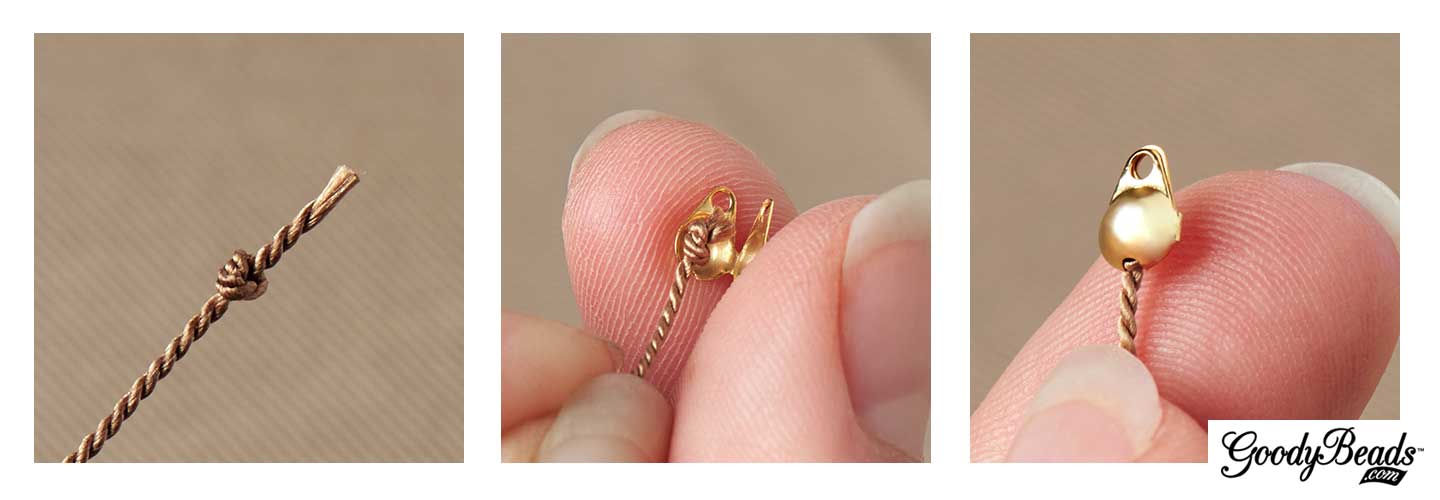
Using Clamshell Bead Tip with Silk Cord
A way to attach your silk cord to jump rings or clasps is to attach clamshell bead tips.
Start by making a knot at the end of your prepared silk cord. Cut any excess cord close to the knot. Add a dab of Super New Glue or fast-drying glue to the knot. Place the knot inside the clamshell center and fold the clamshell over the knot. The glue will keep the knot from unraveling and to adhere the silk cord to the inside of the clamshell bead tip. Once the glue is dry, it’s ready to use.
Need a little inspiration? Here are some ways we used Griffin silk bead cord in our jewelry designs. Plus, quick tips on how you can create these designs yourself!
Crystal Cluster Knotted Silk Cord Necklace
Designed by So Vang
Make a necklace with knotting in-between clusters of beads. Choose from Swarovski® crystals, Chinese crystals, seed beads or your favorite gemstones. For our necklace, we used the entire 2-meter cord and strung on clusters of one gold seed bead, three dainty round Chinese crystals and one gold seed bead, that were knotted with an inch gap between clusters. This version makes a 60” necklace that you can wrap around two or three times.
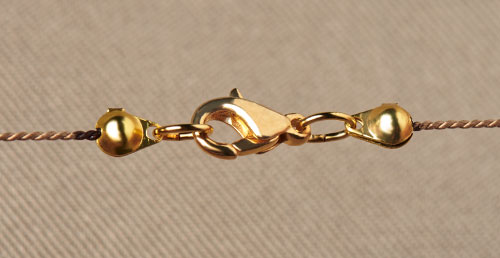
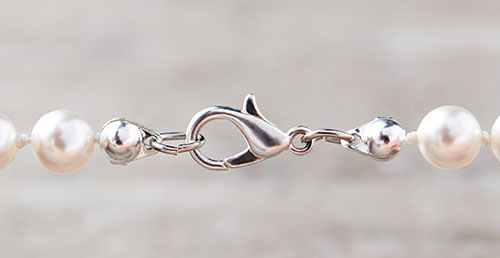
Here you can see how the clamshell bead tips are used in conjunction with jump rings and a lobster clasp.
Pearl beads and silk cord are a match made in heaven. Not only do they look great together, the silk cord also helps prolong the life of your pearl jewelry by preventing the beads from rubbing up against each other, which can breakdown the bead’s finish. Making this elegant necklace is super easy.
First, make a knot and clamp a clamshell over the knot. Make another knot close to the clamshell. String on a pearl. Make a knot close to that pearl. Repeat until a preferred length. Make two knots at the end and clamp a clamshell over the last knot. Finish with a lobster clasp and you’re done!
If you have a worn-out pearl necklace, you can undo all the pearls and restring on silk cord to extend its jewelry life.
Minimalist jewelry is a huge fashion trend right now. Dainty jewelry components shine alone or together in multiple strands like our layered silk cord necklace. For this necklace, we focused on the sleek simplicity of gold tube beads and the lightness of silk cord.
Step 1: String on 25 gold tube beads on white silk cord. With the beads strung on, cut 20” off the end of the silk cord. Make 2.
Step 2: String on 25 gold tube beads on white silk cord. With the beads strung on, cut 22” off the end of the silk cord. Make 2.
Step 3: Gather the four cord strands and make a knot. Repeat to the other end.
Step 4: Dab some Super New Glue to both knots. Clamp a clamshell over the knots.
Step 5: Add a jump ring to one of the clamshell tip ends.
Step 6: Add a jump ring and a lobster clasp to the other clamshell tip ends. Done.
This style of necklace is perfect for small dainty beads or seed beads or even some NEW 3mm or 2mm Czech round beads.
For this bracelet, we twisted groups of silk cord with size 11/0 Miyuki seed beads and gold plated chain.
Step 1: String on seed bead to 8” and cut 10” silk cord strands with seed bead on. Make twelve strands. Tip: You can use the Bead Spinner to help to string on seed beads.
Step 2: Gather three seed bead strands and knot all three strands at both ends as close as you can to the seed beads. Clamp a clamshell over the knots. Make four group of seed bead strands.
Step 3: Cut two chain links at 8” and attach oval jump rings to each end of the chains.
Step 4: Also cut a few links of chain for your bracelet chain extender.
Step 5: Open an oval jump ring and slide on your lobster clasp.
Step 6: Open a larger jump ring and slide on these:
chain extender piece, two seed bead groups, chain extender piece, two seed bead groups.
Step 7: Close Jump ring.
Step 8: Leaving the chain extender along, separate the strands into two sections of chain and two seed bead grouped strands. Make a “flemish twist” with the two sections.
Step 9: Open a large jump ring and slide on the other ends of the chain and grouped seed beads and lobster clasp jump ring.
Step 9: Close jump ring and you are done.
(Close-up shot of jump ring with grouped seed beads and chain links.)
We hope enjoyed these tips and tutorials. Check our next blog post where we show you how to create evenly spaced knots in your jewelry designs using The EasyKnotter® tool. Happy Beading!
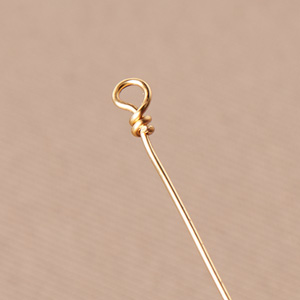
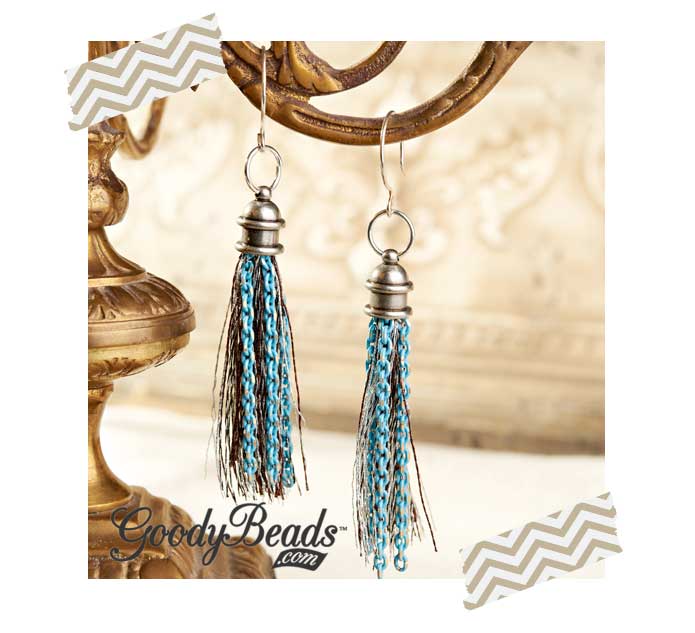
Step One: Cut 22-gauge wire and make a wire wrapped loop. Make sure to make a loop small enough so seed beads can not pass through.
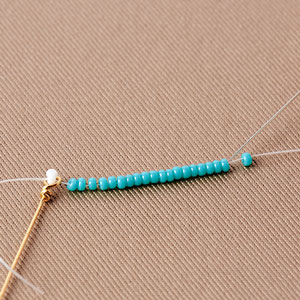
Step Two: Knot a bead to the end of the thread. Feed the thread through wire loop.
Step Three: String on your preferred amount of seed beads. (Here we are using size 11 Miyuki seed beads.)
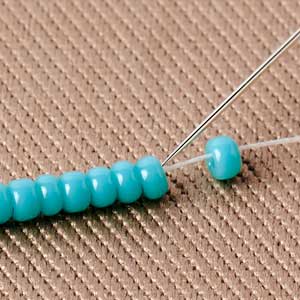
Step Four: Skip the last bead and thread the needle back though the beads.
Step Five: Thread through the wire loop.
Step Six: String on beads and thread back through the beads while skipping the last bead. Then go back through the wire loop.
Step Seven: Repeat until you’ve reached a desired thickness. This thickness is according to how full you want your tassel to look within the bead cap or end that is being used. Tie off the ends and cut excess. You can add fast-drying glue to secure the knots.
Step Eight: Add your bead cap or bead end and make a wire wrapped loop. You’ve completed your beaded tassel.
Guinevere Beaded Tassel Lariat Necklace
Designed by Tory Vezina
If Queen Guinevere wore a tassel necklace, this would be the necklace. With pearl seed beads and spiral rope chain, this necklace is perfect for common folk to feel like a queen!
The tassel was made with size 11 pearl seed beads and gold end caps. Make two beaded tassels. Cut some rope chain at 3-4 feet and attach each end with a brass jump ring and beaded tassel. Wear this lariat necklace loose while wrapped around once or twice. Or tie a knot 2-4 inches away from your beaded tassel.
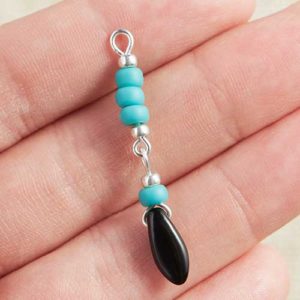
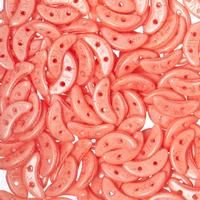
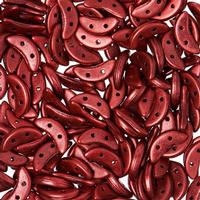
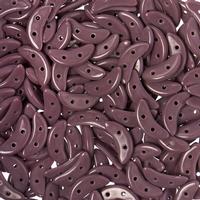
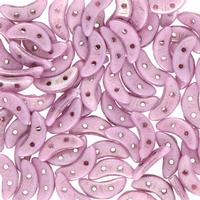
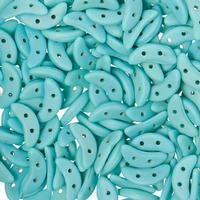
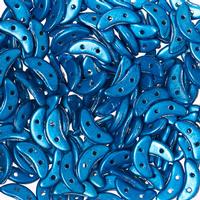
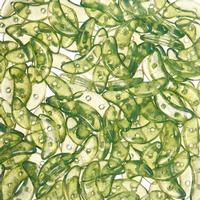
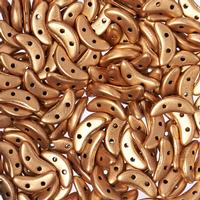
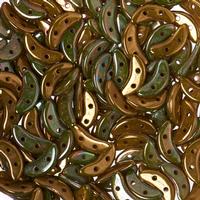
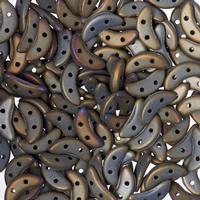
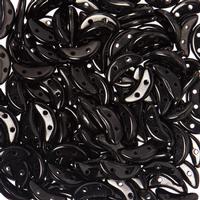
Czech Crescent Bracelet and Earrings with FREE Illustrated Tutorial
Czech Crescent beads are NEW at GoodyBeads. The Czech crescent beads are wedge-shaped beads with two holes. We have two easy and free tutorials using these Czech crescent beads.
Midnight Gold Czech Crescent Bracelet
Design by So Vang
For this bracelet, we used a combination of black and gold crescent beads with Swarovski® crystals in Graphite AB2X. The midnight glow of the AB2X is hauntingly beautiful in this piece.
We love this bracelet because it is simple to make. First, start by threading on 4 seed beads. Keep the ends of your thread untied. Then, you will thread on a top layer with a sequence of 3 Czech crescent, a seed bead and a 4mm bicone crystal. Repeat this sequence until you’ve reached your preferred bracelet length. End this top layer with 3 crescent beads and 4 seed beads. Now, bring the thread down to the bottom 3 crescent beads you’ve ended with. You will now be threading the bottom layer by adding a seed bead and bicone crystal in between each crescent bead grouping until you’ve reached the end. Tie both of your thread ends together. Feed your threads back through a few beads before you cut off excess thread. Add your clasp and chain link to the seed bead loop ends you’ve made with jump rings.
First thread on your top layer with, crescent bead, seed bead, bicone crystal (4 times). Tie both thread ends together to create a cylinder shape. Feed your thread through one crescent bead and loop down through the second hole of the crescent bead. Thread in reverse of your cylinder shape with adding a seed bead and bicone crystal inbetween the crescent bead. Once you’ve reached the end. Tie off thread ends and thread through a few beads before cutting off excess and you’ve completed your crescent bead design.
Slide these beads onto the headpin and make a simple loop:
Seed bead, bicone crystal, 8mm round crystal, 6mm round crystal, crescent bead design, bicone crystal and seed bead.
Open your Ear-wire loop and slide on your crescent bead design headpin loop. Repeat for other earring.
Czech Honeycomb beads are popular! We have two easy and free tutorials on how to use these popular honeycomb beads to make a bangle and cuff bracelet.
Honeycomb Bangle by Apollinariya Koprivnik
We followed BeadSmith’s Inspiration Squad Member, Apollinariya Koprivnik’s tutorial to make this stunning honeycomb bangle. We love its mesmerizing, 3D design. We dressed the bangle with the matte jet honeycomb and accented it with gold and silver seed beads and SuperDuos.
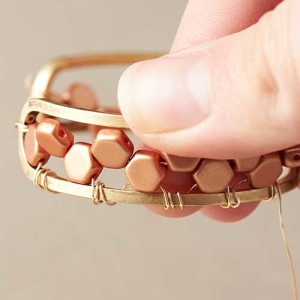
To create this wire-wrap cuff, we drew inspiration from Julie Romero’s honeycomb bangle bracelet. Follow our directions below to create this easy wire wrapped honeycomb cuff.
* Note: It is easier and quicker to work with shorter pieces of 26-gauge wire.
Step One: Start with 2 feet of 26-gauge wire. Wrap the end of the wire three times in the middle section of the cuff shown above.
Step Two: String on 26 honeycomb beads and secure it around to the other end of the cuff by making a few wraps.
Step Three: Bring the wire back behind the cuff and thread it through the first honeycomb hole. Bring wire over the bottom cuff frame and make three coiled wraps.
Step Four: Repeat step 3 for every other honeycomb bead on the bottom row.
Step Five: When you have finished the bottom row, coil wraps around the frame to wire wrap the top row of the cuff. See finished cuff above.
Make a Multi-Strand Necklace with Swarovski® Tahitian Pearls
by Kristal Wick
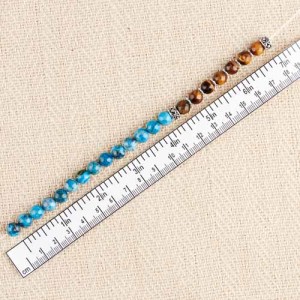
One of the easiest “go-to” designs I have found is a multi-strand necklace or bracelet. WHAT? You say these look soooooooo difficult? Not true! Once you master the multi-strand, you’ll be hooked! I like to start by making piles of my fave components; for example, sitting in my studio on a chilly (16 degrees below zero) January day in Minnesota, I CRAVED a splash of beach so I grabbed some TierraCast® dolphins and seashells, beautiful blue Swarovski Tahitian pearls and crystals and frosted seed beads to give the piece a sea glass effect. Use three different colors of beading wire with one exposed to add an additional dimension to the necklace. It’s trendy these days to mix metals so I threw in copper components to reflect the shades of glistening sand and a bit of silver to represent the crest of the waves breaking up on shore. Whether you’re physically on a beach or visiting one in your mind, I hope this seashore delight will help you get through this long winter! Use three colors of beading wire – one color exposed – to add an additional dimension to the necklace.
Cut five 16 inch pieces of beading wire (various colors).
Crimp one end of the wire leaving a small loop.
String the following onto strand #1:
Three Lined Light Seafoam AB Miyuki Seed Beads
Seven Matte Transparent Silver Lined Crystal Long Drop Miyuki Seed Beads
Antique Silver Diamond Bead Frame
Indicolite Round Mini Bead
Series: 20 Matte Transparent Silver Lined Crystal Long Drop Miyuki Seed Beads
Antique Silver Diamond Bead Frame
Indicolite Round Mini Bead
Repeat the series four more times and add the following:
Seven Matte Transparent Silver Lined Crystal Long Drop Miyuki Seed Beads
Three Lined Light Seafoam AB Miyuki Seed Beads
Crimp beading wire end leaving a small loop.
Add Copper Oval Jump Rings to the four dolphin charms
Crimp one end of the wire leaving a small loop and string the following onto strand #2:
Slide the following series onto the beading wire:
Series: Crimp tube
3mm Antique Silver Beaded Heishi Spacer
4mm Antique Silver Beaded Heishi Spacer
12mm Tahitian Swarovski Pearl
4mm Antique Silver Beaded Heishi Spacer
3mm Antique Silver Beaded Heishi Spacer
Crimp tube
Lay this strand down next to Strand # 1 and space the pearl series in the center of the first 20 Matte Transparent Silver Lined Crystal Long Drop Miyuki Seed Bead series and crimp on either side of the pearl series.
Gently squeeze the crimp covers over the crimps.
Add the series again and crimp about an inch down the beading wire. Repeat steps 8–10 for the remaining three pearl series.
NOTE: Before doing the final crimp on each strand, make sure they all end up the same length. Adjust the number of beads on each strand to ensure this.
Crimp beading wire end leaving a small loop.
Crimp one end of the wire leaving a small loop and string the following onto strand #3:
Three Silver Lined Capri Blue Miyuki Seed Beads
Series: Antique Copper Scalloped Bead Cap
Bicone Crystal Denim Blue AB2X
Antique Copper Scalloped Bead Cap
Silver Lined Capri Blue Miyuki Seed Bead
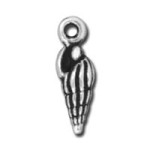
Antique Silver Small Spindle Shell Charm
Silver Lined Capri Blue Miyuki Seed Bead
Antique Copper Scalloped Bead Cap
Bicone Crystal Denim Blue AB2X
Antique Copper Scalloped Bead Cap
Silver Lined Capri Blue Miyuki Seed Bead
Antique Copper Small Shell Bead
Silver Lined Capri Blue Miyuki Seed Bead
Repeat the series seven more times alternating the Dolphin charms and Spindle Shell charms, then add two Silver Lined Capri Blue Miyuki Seed Beads.
Crimp beading wire end leaving a small loop.
Crimp one end of the wire leaving a small loop and string the following onto strand #4:
Two Matte Transparent Light Blue Miyuki Seed Beads
3mm Crystal Jade Swarovski Pearl
Series: Five Matte Dark Seafoam Delica Duracoat Galvanized Seed Beads
3mm Crystal Jade Swarovski Pearl
Matte Transparent Light Blue Miyuki Seed Bead
3mm Crystal Jade Swarovski Pearl
Five Matte Dark Seafoam Delica Duracoat Galvanized Seed Beads
3mm Crystal Jade Swarovski Pearl
Matte Transparent Light Blue Miyuki Seed Bead
3mm Crystal Jade Swarovski Pearl
Five Matte Dark Seafoam Delica Duracoat Galvanized Seed Beads
4mm Antique Copper Beaded Bead Cap by TierraCast
Swarovski® Crystal 14mm Aquamarine Emerald Cut Bead
4mm Antique Copper Beaded Bead Cap by TierraCast
Repeat the series four more times then add the following:
Five Matte Dark Seafoam Delica Duracoat Galvanized Seed Beads
3mm Crystal Jade Swarovski Pearl
Matte Transparent Light Blue Miyuki Seed Bead
3mm Crystal Jade Swarovski Pearl
Five Matte Dark Seafoam Delica Duracoat Galvanized Seed Beads
3mm Crystal Jade Swarovski Pearl
Matte Transparent Light Blue Miyuki Seed Bead
3mm Crystal Jade Swarovski Pearl
Five Matte Dark Seafoam Delica Duracoat Galvanized Seed Beads
3mm Crystal Jade Swarovski Pearl
Two Matte Transparent Light Blue Miyuki Seed Beads
Crimp beading wire end leaving a small loop as in Step #2.
Crimp one end of the wire leaving a small loop and string the following onto strand #5:
Transparent Aqua Miyuki Seed Bead
Series: 8mm Baby Blue Czech Faceted Rondelle Glass Bead
Transparent Aqua Miyuki Seed Bead
Sparkle Metallic Gold Lined Crystal Miyuki Seed Bead
Transparent Aqua Miyuki Seed Bead
Sparkle Metallic Gold Lined Crystal Miyuki Seed Bead
Transparent Aqua Miyuki Seed Bead
Repeat this series 17 more times. Add a Transparent Aqua Miyuki Seed Bead and then crimp beading wire end leaving a small loop.
Open eyepin, insert one end loop of all five strands and close the eye pin. Repeat for the other necklace end.
Slide on Antique Silver Spiral Cone Bead Cap, Swarovski® 6mm Indicolite Round Mini Bead, Antique Copper Beaded Bead Cap and make a simple loop on the end. Repeat for the other necklace end.
Add desired chain length (the sample shown uses 2-¼”) to simple loop.
Using a jump ring, add the toggle to the other end of the chain. Repeat steps 20-21 for the other necklace end.
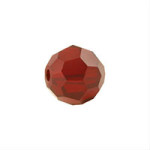
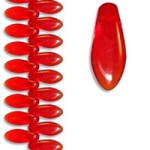
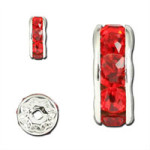
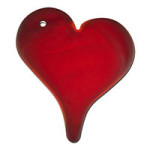
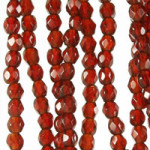
January Birthstone – Garnet/Siam
Happy January Birthdays! Being the first birthstone of the year, January’s garnet, also know as the “Gem of Faith,” derived its name from the Latin word Granatum or pomegranate, because it resembles a dark red fruit. While garnet is a rich red hue, it “signifies power, victory, truth, purity, faith, and protection,” (BirthstoneZodiac) as well as life, happiness and strength.
Swarovski® defines January birthstones with garnet and siam crystals. We have four simple jewelry projects to start your new year! Wear garnet or siam this year whether it is for showcasing your birthstone color or to showcase this vibrant red color.
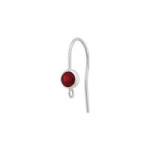
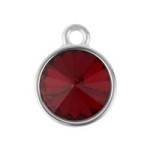
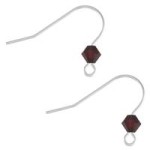
January Crystal Earrings
Designed by So Vang
This pair of earrings is made with TierraCast® bezel charm that uses Swarovski® crystals. Simply open up your sterling silver ear wire loop and slip these glimmering charms on. Because these charms are 18mm, they are the perfect statement earrings for January 2016!
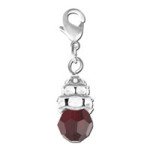
January Bangle Bracelet
Designed by So Vang
The fun thing about these expandable bracelets is that you can add any of your favorite charms. Add your garnet crystal charm and your favorite charms for this easy to do and wear popular expandable bracelet.
Red Golden Dagger Necklace
Designed by So Vang
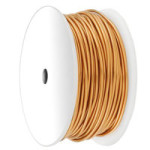
For this necklace, we paired sharp red dagger Czech beads with copper/gold-tone beads. Take some 22 gauge artistic wire and make a full loop. Before you finish it with a coiled wrap, insert your gold chain. Finish your loop with a wrapped coil. Insert your beads alternating between the dagger beads and copper/gold beads. Make another wrap loop at the other end while adding another piece of your gold chain. Bend your beaded wire piece to create a slight curve. Add your lobster clasp to one end of your chain and a jump ring to the other.
2-in-1 Necklace and Bracelet
Designed by So Vang
We used Chinese crystal beads, brass bali beads, seed beads and Czech O beads to create this simple elastic-strung jewelry piece that doubles as a wrap around bracelet or necklace. Create this fun sequential design as long as you want for an everlasting jewelry piece you can wear year round.
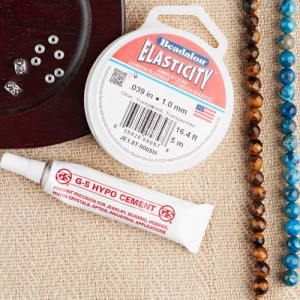
Remember when you were young and made stretchy elastic bracelets with a store-bought DIY kit of colorful beads and letters? Fast forward 10-20 years and let’s take that idea up a notch with a grown-up mentality of elastic bracelets. We love the concept of elastic bracelets because they are easy to make, inexpensive, and if you aren’t crimping the elastic, there are no tools needed.
Elastic Bracelets are simple to create, comfortable to wear and convenient: just slip them on and off! Elastic bracelets are the perfect jewelry piece for people with arthritis or those who have difficulty hooking on clasps with one hand. Layering different elastic bracelets is very on trend and bohemian looking.
We have two easy tutorials on how to finish your very own elastic bracelet.
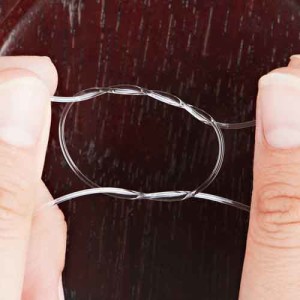
Our first tutorial is how to tie the elastic cord of your bracelet using a surgeon’s knot.
Step 1: Gather your elastic, beads, spacers, and adhesive.
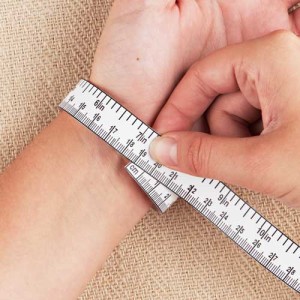
Step 2: measure your wrist size. An average size is 7″. You may add an inch if you’d like the fit of the bracelet to be a bit looser.
Step 3: Measure the elastic cord to your desired size, add about 4″-5″ and cut. Grab the cord at both ends and give it a tug, to loosen the elastic.
Step 4: String on the beads to the preferred length.
Step 5A: Make a cross knot and secure it by tying a square surgeon’s knot.
Step 5B: Illustrated look at the surgeon’s knot.
Step 6: Complete the bracelet by gluing the knot to reinforce its strength, then cut the excess cord, leaving about ¼”.
Step 7: Done!
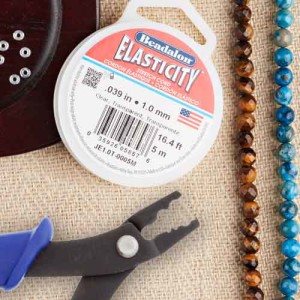
Our second tutorial is how to crimp your elastic ends to clasps, connectors, jump rings, toggle clasp, etc. Follow the same bead sequence as above or try your own sequence without tying the ends. For this tutorial, you will need a pair of Crimping Pliers, crimp beads/tubes, and your choice of clasp.
Step 1: Gather your products.
Step 2: First, measure your wrist size. An average size is 7″.
You may add an inch if you’d like the fit of the bracelet to be a bit looser.
Step 3: Measure the elastic cord to your desired size, add about 4″-5″ and cut. Grab the cord at both ends and give it a tug, to loosen the elastic.
Step 4: String on the beads to the preferred length.
Step 5: Use a Crimping Tool. There are 2 hole crimpers. Inner hole will have a U-shape that will turn the crimp tube into a U-Shape, while the other will fold the crimp tube. First, crimp to make the U-shape.
Step 6: Then, turning the crimping tool, use the other hole crimp to fold the crimp tube, as if you are folding a book close.
Step 7: Repeat for other end of clasp. Cut off excess cord and done!
A tip when using elastic cord: loosen the elasticity by giving it a tug/stretch before starting your project. This will help in two ways. First, if you start with a piece of elastic cord, sometimes you will find it stiff. Stretching it will help make the cord more manageable to use. And secondly, because over time you will constantly stretch the elastic when slipping them on and off, it will eventually loosen the elastic. Loosening it before starting your project can avoid a looser and larger fit in the future.
Another tip when knotting or crimping your elastic, is to have a large hole bead next to it. You can conceal the knot or crimp inside the bead for a clean and professional looking finish. Or you can use crimp covers to cover the crimp or knot as if it was another bead in your elastic bracelet design.
Here are some inspirational, simple elastic bracelets that we have made using our tutorial above.
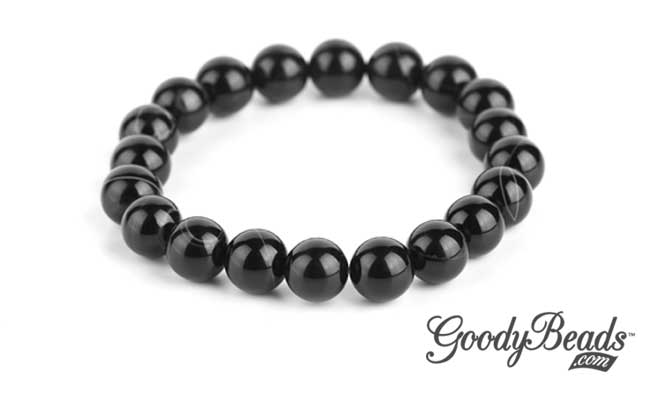
Onyx Stone Bracelet
Designed by So Vang
Elastic bracelets can be as simple as this Onyx Stone Bracelet. What makes this bracelet more grown up is the quality beads used for your projects. These Dakota Stone Sardonyx Gemstone Beads have a smooth, round shape with natural white lines. They are also cool to the touch so you know they are high-quality gemstones.
Wrap-Around Golden Ruby Bracelet
Designed by So Vang
You will find that elastic cords are thin yet sturdy enough for seed beads. Here, we used some size 8 seed Japanese Miyuki seed beads that have a hole size large enough for a .7mm elastic cord. Making a fun sequential design with faceted Chinese crystals, brass-plated Bali beads, Miyuki seed beads, and Czech O beads, we strung on a 28” long strand to wrap around four times a 7” wrist. You can always add more or less beads to accommodate your own wrist size.
Elastic Watch
Designed by So Vang
For this piece, we used crimp tubes/beads to connect the elastic ends to the watch face and toggle clasp. This is a fun combination of using a watch face and making it into an elastic bracelet.
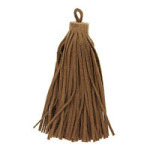
Wood Tassel Bracelet
Designed by So Vang
From our Tassel blog post, comes this pair of Wood Tassel Bracelet that were made with elastic cord. Wood beads were strung in a random sequence and an added tassel for extra embellishment. We adore these two bracelets because they are lightweight and trendy with tassel addition.
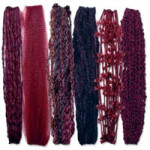
TierraCast Cord Ends have proven to be easy to use, with so much possibility for variation in materials and styles! The projects included here were designed by Tracy Gonzales, TierraCast’s Jewelry Designer and Product Educator. All designs were inspired by the current tassel trend and Goody Beads’ fabulous selection of fun fibers and threads.
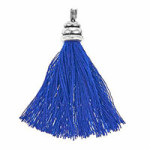
Tassel and Chain Earrings
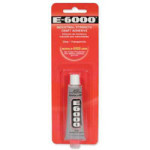
The Tassel & Chain earrings are a simple technique. We made the tassel ends and then used an additional piece of thread to attach a few short strands of chain at the top. After applying some E6000 adhesive inside a 6mm cord end, we tucked the tassel and chain inside. Added a jump ring and ear wire at the top, and Voila!
Seed Bead Loop Earrings
The Seed Bead Loop earrings involved stringing up several bead strands in varying lengths and making them into loops and secured with crimp tubes. We then layered 3 beaded loops with loops of fine, metallic-finish embellishment fibers. We secured both ends together at the top with E6000 adhesive and finished them up with jump rings and ear wires.
Multi-Strand Fiber Bracelet
The Multi-Strand Fiber bracelet uses cord ends that have a hole at the top, instead of a loop, so the finishing technique is wire wrapping instead of gluing. Start by threading four strands of Czech beads and TierraCast spacers with beading wire. Crimp each end to hold beads in place and cut leaving an excess of 1/4-1/2 inch. Take different fiber strands and cut them at equal lengths of the beaded wires. Next, make a slip knot with the strand ends, tying close enough to the crimp ends. Glue with Hypo Cement to secure the knot.
After it has dried, cut about 5 inches of Artistic wire and loop it under and in between the knot halfway. You should have two 2.5 inches of wire ends that you will feed through the cord end. Here, you can add more hypo cement in the cord end to secure the thread ends. Make a wire wrap loop with the Artistic Wire and repeat to the other bracelet end. Add a jump ring and clasp and you are done!
Our friends at TierraCast have an informative YouTube video on how to use Cord Ends. Check it out to guide you in the fun projects shown above and for more inspirational techniques.
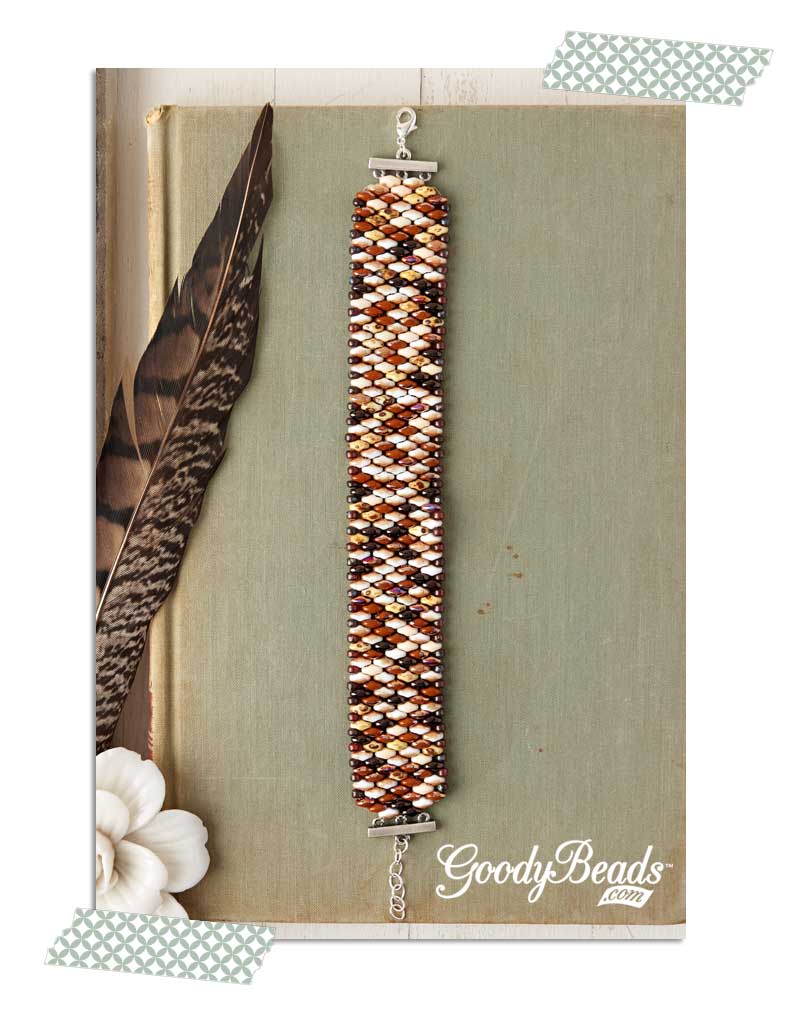
SuperDuo is a Czech-made glass seed bead with a diamond shape and two 0.8mm holes. They are great for dimensional bead weaving designs, from your basic flat stitching to more intricate 3D lace seed bead designs. We have two fun jewelry pieces using these versatile Czech SuperDuo seed beads; accompanied with pattern tutorials.
Ocean Pebble Bracelet
Design and tutorial illustration by So Vang
We love the different mixes that SuperDuo offers. The assorted SuperDuo colors make it easy to bead freely and not worry about color sequence. Our bracelet is weaved with a simple straight stitch and because Super Duo has two holes, they are easy to intertwine.
Below is our bracelet pdf pattern tutorial. With a tube of 300+ beads, we were able to make this bracelet project, with extra beads to spare. For our 7” bracelet, we started with 83 beads for the first row. You can add more or less for your wrist preference, but make sure to have an odd bead count before coming back around. When you reach the end of the pattern, tie the remaining string with the string closest to it and thread through a few more beads before snipping the string. As an option, you can glue the knot for a secure hold. Add your choice of lobster clasp to one end with a jump ring and on the other end, attach ¾” of chain with another jump ring. Or you can certainly choose a toggle or tube clasp to finish off your bracelet.
We love our dainty spiral SuperDuo earrings. They glisten with an edging of gold seed beads and findings. These earrings are simple to make and a great project for the beginning bead stitcher.
(1 pair) A014108 – Gold Plated French Wire Earrings
Tassel Jewelry
A hot trend this summer are tassels. We have three fun inspirational tassel jewelry projects for you to enjoy at your next music festival or relaxing under the shade by the beach.
Mala Meditate Necklace
Mala is a strand of counting beads used in Hindu or Buddhist practice for praying or reciting a mantra to aid concentration during meditation. A typical mala is made with 108 beads that are strung with a knot tied in between each bead. Depending on the type of chant, counts of strung beads may vary. It is said that with each knot, people recite a mantra to bless the beads. The strand is also accompanied with a larger bead named the “Guru” bead and a tassel.
For our Mala necklace, we used 8mm round gemstone beads for a 42” necklace. Using a sturdy Super-Lon bead cord, cut a piece of cord about 150″ and make a knot 6″ in. This will help stop the end bead from falling off. String on your first bead and make a knot (using a pliers or tweezers if needed) flush to the bead to keep it in place. Repeat until you’ve strung and knotted all 108 beads.
Now take both cord ends and tie together. At these two ends, you will string on your Guru bead and tassel.
We made our tassel portion by using a large rust suede leather tassel. Insert a 3” eyepin from the middle-bottom of the tassel up. Slip on a 10mm tulip end cap to cover the top of the tassel. Wrap the headpin and your tassel is ready. (see images below)
Now take the two tied ends, string on the 12mm wood bead and place the tired ends through the tassel wire loop. Bring the strings back through the bottom of the wood bead and make a knot or two. Secure it with some clear adhesive like GS Hypo Cement. Cut the ends and you are ready to meditate or wear your Mala as a fashion accessory.
Beaded Tassel Earrings
For these Beaded Tassel Earrings, we used our brand new Tassel Maker from Beadalon®. You can find a tutorial of how to make tassels HERE. We took Super-Lon bead cord and made 25 loops to make the tassel. Attach an eyepin to the top of the tassel and slip on a cone bead cap and a 4mm round bead. Make a simple wire loop and attach to earring hooks.
If you find that some of your tassel ends have kinks, twists or curls, dampen with water, twist and pull them straight. After a few seconds when dried, you will find them straightened out. Taking about a third or half of the tassel ends, string 10 beads to each strand and knot the end. We recommend using an already-mixed, size 8 seed bead for a fun colorful look. Cut the remaining, unstrung tassel ends at a variety of shorter lengths to blend into the rest of the beaded tassels. Now you are ready to rock these earrings at your next music festival!
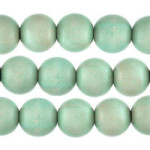
Wood Tassel Bracelets
One of our easier projects is our Wood Tassel Bracelets. Make these quick and easy bracelets to show your love of tassels. For each bracelets, we used different round wood beads in a sequential design along with a tassel, strung on elastic. Make sure to stretch the elastic string lightly to loosen the elasticity before stringing on beads. Also, after knotting the elastic, use GS Hypo Cement to secure your knot.