Pantone 2019 Color of the Year has come out and they’ve named Living Coral as their muse! Check out our bead and supply selection to play off this moving color!
Living Coral
Living Coral is a social statement that humanizes the consumers. It also mimics the literal meaning of coral reefs and how it gives home to a translucent array of colors, species and size. How would you define Living Coral?
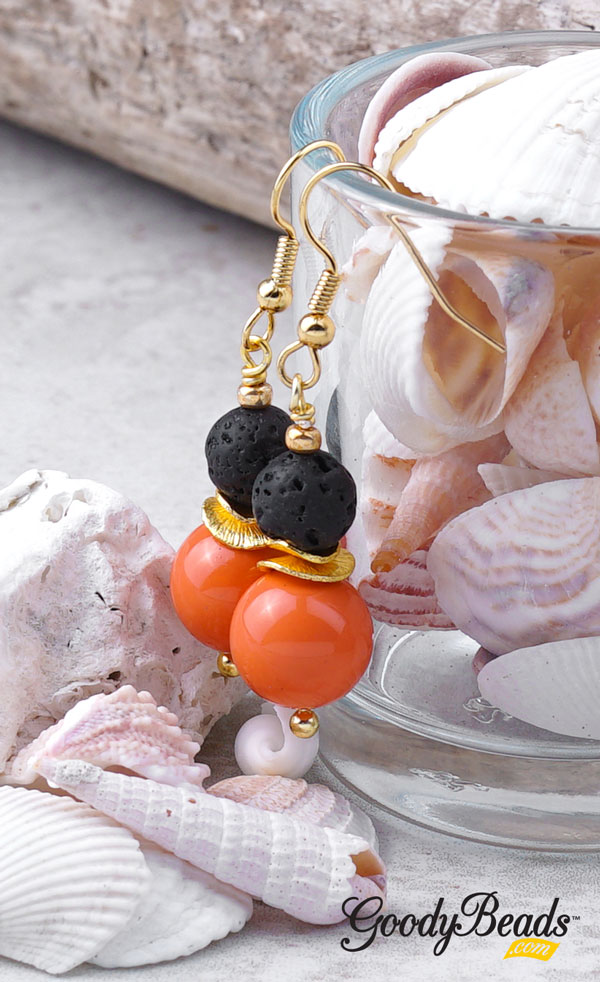
Here, we’ve taken the color of Coral and found products that are similar in color to help with your inspired, Color of the Year designs. For gemstones, we chose Cherry Quartz that has a similar hue or Red Avertine like this collar pendant. Another thought I had when first looking at Living Coral, was how it reminded me of Rose Gold.So some Rose Gold Hematite beads would work nicely also. Even check out Swarovski Pearl – Coral, it’s similarity is close also.
We made a simple pair of earrings using Swarovski Pearl – Coral. And because coral reefs have porous corals, we accented the pearl with porous lava beads!
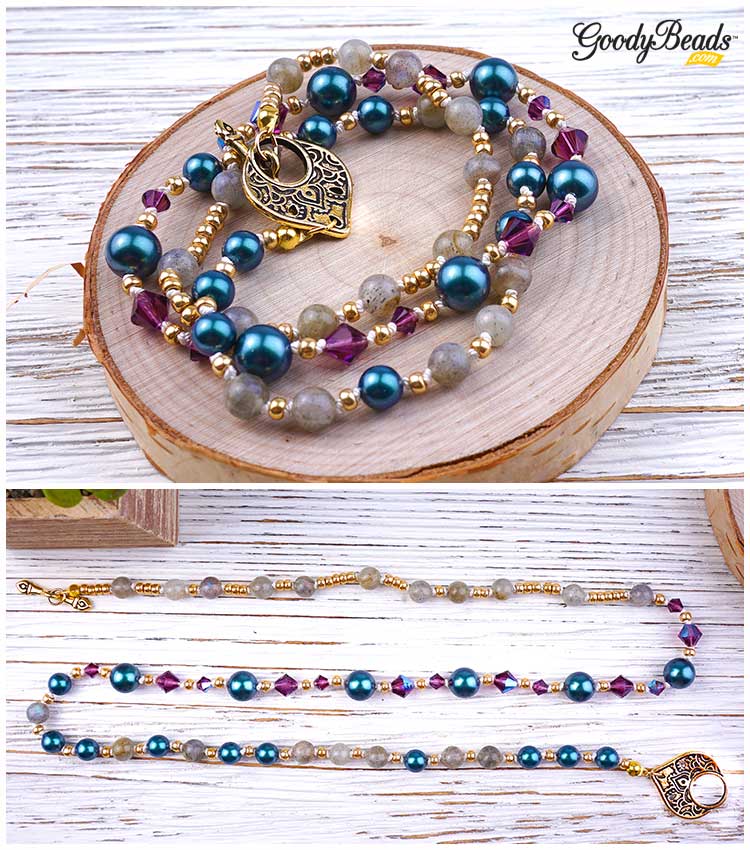
In this three -wrap bracelet, we used Griffin Silk Cord knotted with Tahitian Look Pearls, Amethyst Shimmer bicone crystals and 6mm Labradorite round beads with size 8/0 gold seed beads. Plus, we finished up this piece with gold findings.
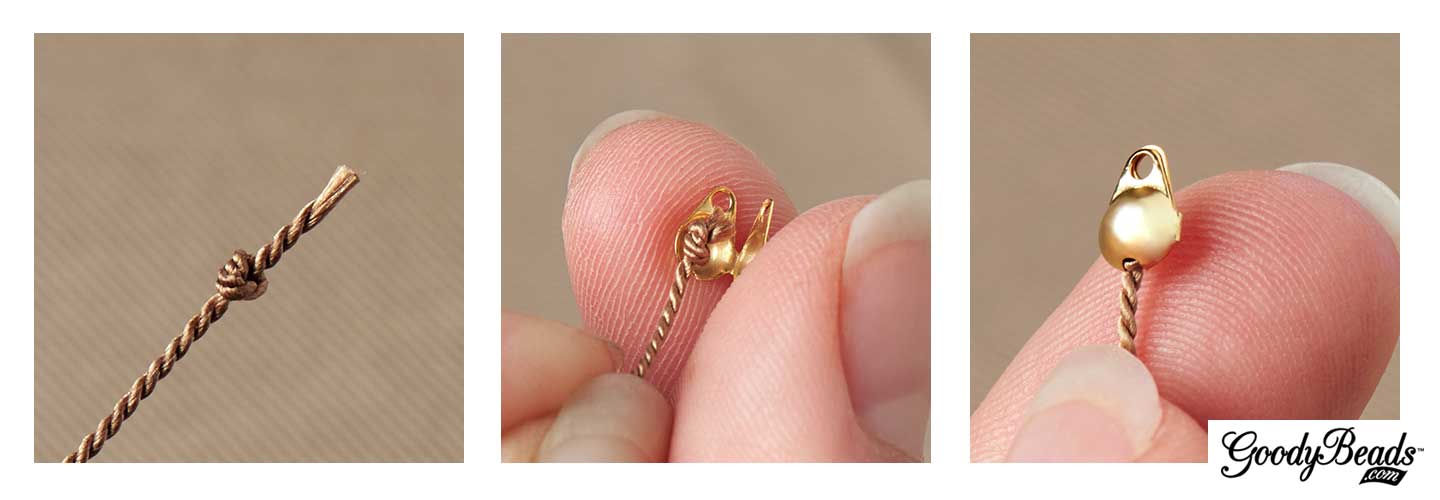
Make a knot at the end of the silk cord and cut excess end. Slide over knot with a clamshell bead tip (Check previous blog on examples). Optional, add a small dab of Super New Glue to the knot before sliding the clamshell over.
Slide on a seed bead and make another knot flushed to the seed bead.
Slide on a 6mm Tahitian Pearl and make a knot.
Side on a seed bead and make another knot.
Repeat with alternating with pearl beads or 6mm Labradorite beads until you reach your desired wrist length. This will be your first row.
Next row, alternate a knot between an 8mm Amethyst Shimmer bicone crystal, seed bead, 4mm Amythest Shimmer bicone crystal, seed bead, 8mm Tahitian Pearl and seed bead. Repeat until your desired wrist length.
For your third row, alternate seed beads and Labradorite beads in no particular order to wrist length.
End with a knot, add a small dab of glue and cap off with a clamshell bead tip.
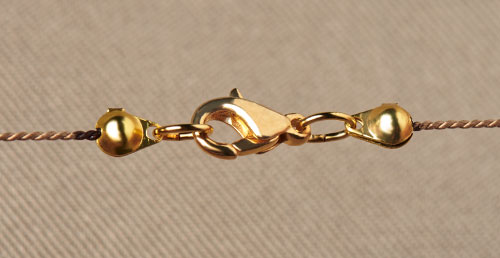
Open jump ring and attach either clamshell bead tip end to a toggle clasp. Repeat to other bead tip end.
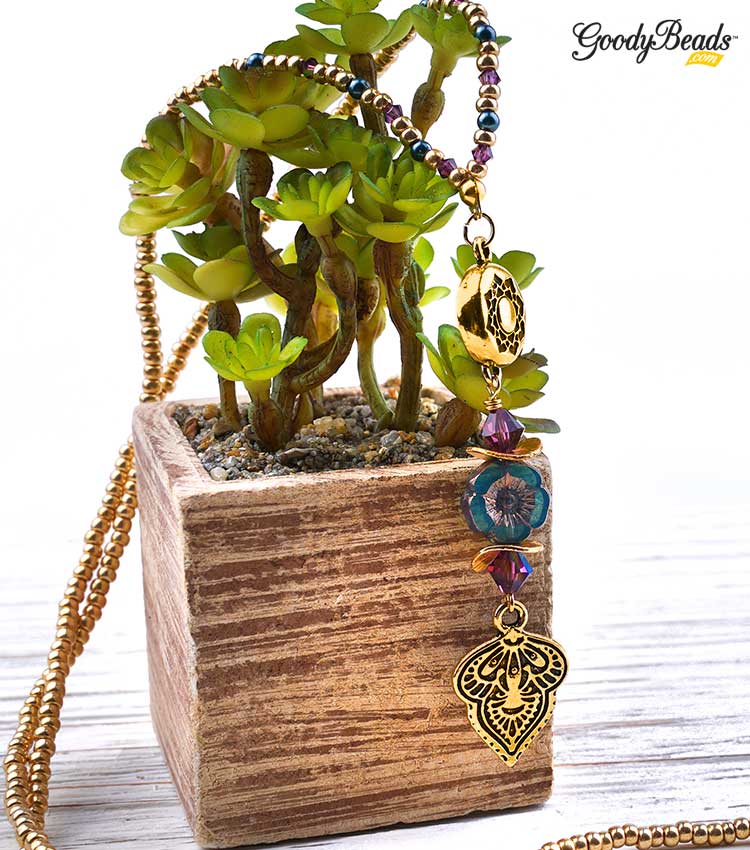
Passion Flower Necklace
We used the Griffin Silk cord to complete the bracelet with a necklace with similar beads as in the bracelet with TierraCast Findings.
Open loop of eyepin and slide on TierraCast Mehndi charm. Close loop.
Slide on the following beads onto the eyepin and make a simple loop or wrap loop: 8mm Ameythst Shimmer bicone crystal, wavy disc (concave down), Czech Hibiscus, wavy disc (concave up) and 8mm Amythest Shimmer bicone crystal. (If making a wrapped loop, make sure to slide on TierraCast magnetic clasp end before finishing loop off.)
Make a knot at the end of the silk cord. Slide on a seed bead, 3mm bicone, a seed bead, a pearl, 2 seed bead, 3mm bicone, 2 seed bead, a pearl, 3 seed bead, a 3mm bicone, 3 seed bead and a pearl.
Slide on seed beads to accomodate a length large enough to slide over your head.
End silk cord with pearl, 3 seed bead, 3mm bicone, 3 seed bead, a pearl, 2 seed bead, 3mm bicone, 2 seed bead, pearl, a seed bead, 3mm bicone and seed bead.
Take both ends of your silk cord and make a knot to tied the ends together.
Slide a clamshell bead tip over the knot.
Open jump ring and slide on loop of bead tip and other end of the TierraCast magnetic clasp. Close loop.
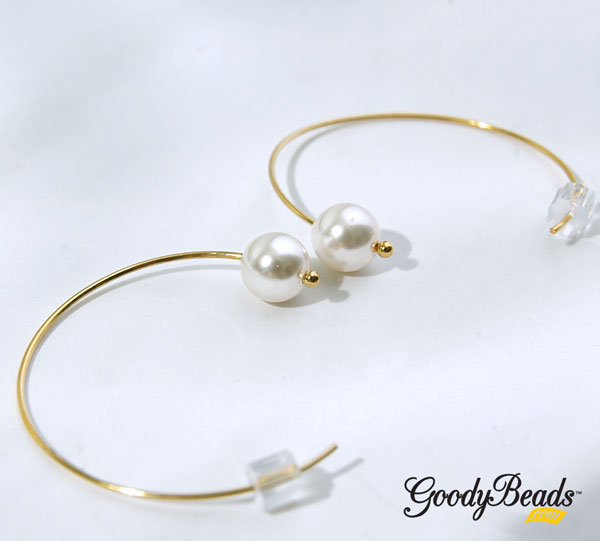
Beadable Findings: Fancy Fanned Earrings
One of our popular project request is our beadable fan earrings with 11/0 Miyuki Delicas and long tassels. Check our video to see how easy they are made.
Starting with 2.5′ to 3′ of beading thread, attach a stopper bead leaving a 6″ tail end.
Start from one end of the fan, come up through the bottom hole.
Add your three delicas and go across the beadable opening and down the hole.
Sew up the next hole, add your three delicas, go across the beadable opening and down the hole.
Repeat this until you’ve gone across the beadable fan pendant.
You will now add your pearl bead by sewing up the hole closest to the round opening, add your pearl bead and go across the circle opening and down the hole.
Sew through the pearl bead again and up the hole, through the pearl again and down the hole.
Tie off your ends and cut excess off.
Open small jump ring and slide on tassel and through the middle hole of your fan pendant. Close jump ring.
Open earwire loop and attached top fan pendant loop to earwire. Close loop.
Repeat all steps for other earring.
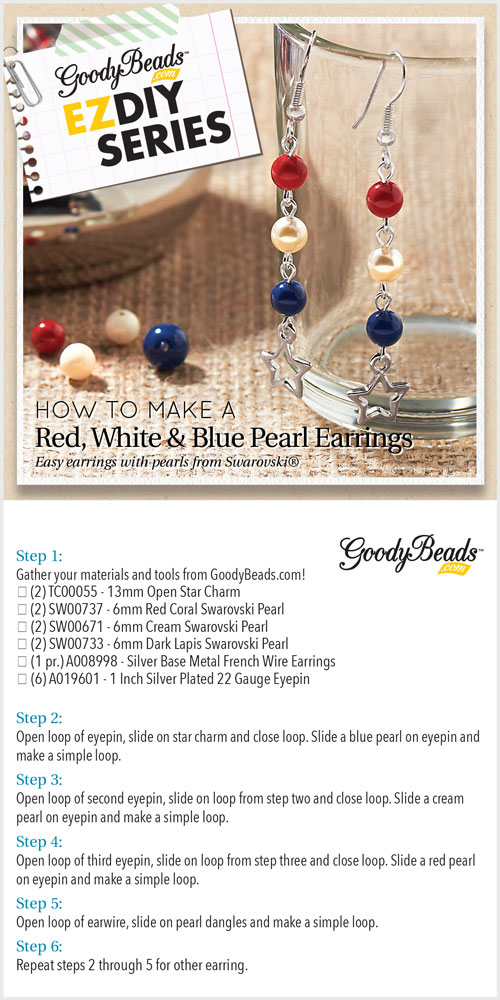
GoodyBeads EZ DIY Series: Red, White & Blue Pearl Earrings
Watch firecrackers, grill up some hotdogs and laugh it up with friends and family this July 4th! We have this cute red, white & blue Swarovski® pearl earrings to help you flaunt your patriotic side!
Don’t have a gift for Mother’s Day? We have 4 last-minute gift ideas for the deserving mother and women.
Whether it’s your Mom, sister, Aunt, Grandmother, wife or other beautiful women in your lives, a small gift can show your appreciation. If it’s handmade, that’s extra bonus points! Plan with handmade jewelry made with Swarovski Pearls, customized glass tiles with photos, easy-to-make beadable gifts or select the many DIY kits available.
Pearls
It’s been a tradition to gift pearls for mothers, so why not on Mother’s Day. While it embodies purity and love, it’s the kind of jewelry that reflects the elegance of a woman. Here are different ways to use Swarovski Pearls.
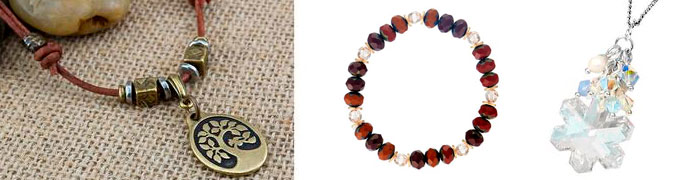
Wire-wrap pearls to make linked earrings or a waterfall necklace (Wire-Wrap Loop and June Birthstone Trend). Or make cascading earrings with Swarovski pearls and crystals in this stunning lampwork glass earrings (Wedding Jewelry Trend).
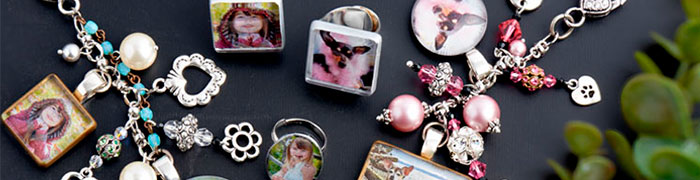
Customized Glass Tiles
One project you can get kids involved in making are customized glass tiles with photos. Check out our previous blog how to make customized glass tile for a fun keychain dangle, ring or add a magnet to stick on the fridge.
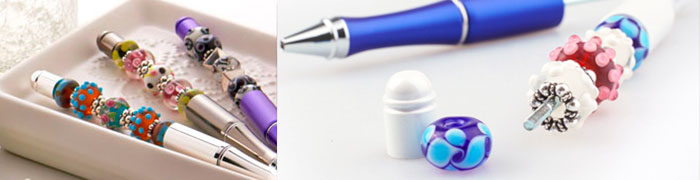
Bead pens are perfect for moms to slip into their handbag or on their work desk. They are sturdy in weight and customizable with beads. Check out Hot Category: Bead Pens for compatible bead pens and large-hole beads to create one today.
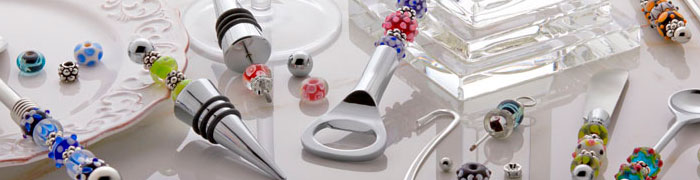
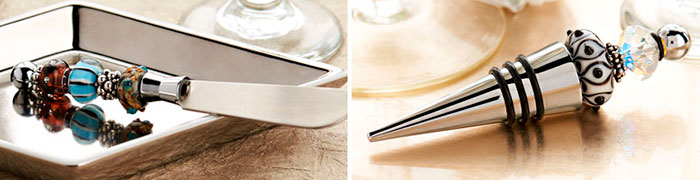
Don’t forget that moms will also love beadable gifts like a letter opener, winestopper or even a beadable keychain. Add large-hole beads and wrap it up for an acceptable gift!
If you can’t decide what to make, pick up a DIY kit. Make jewelry with an easy Earring, Bracelet or Necklace Kit and gift it. These kits are packaged with bead, findings and instructions, so you can even stick on a bow and gift the whole kit for the crafty, beading lady!
GoodyBeads Inspiration: Swarovski® Crystals and Pearls
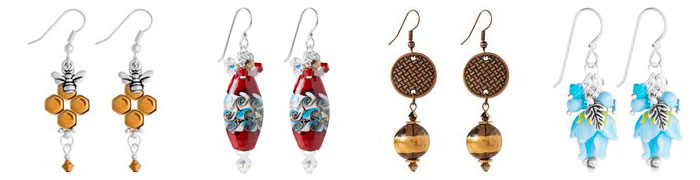
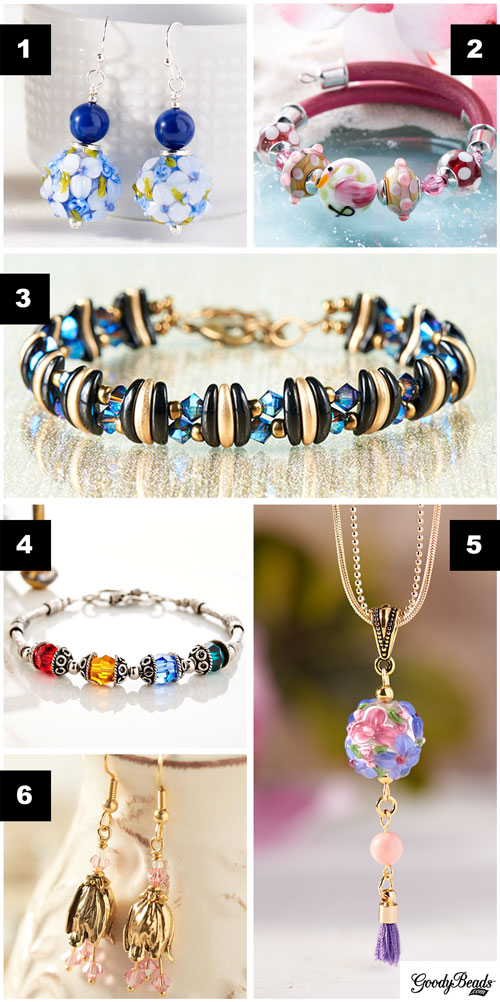
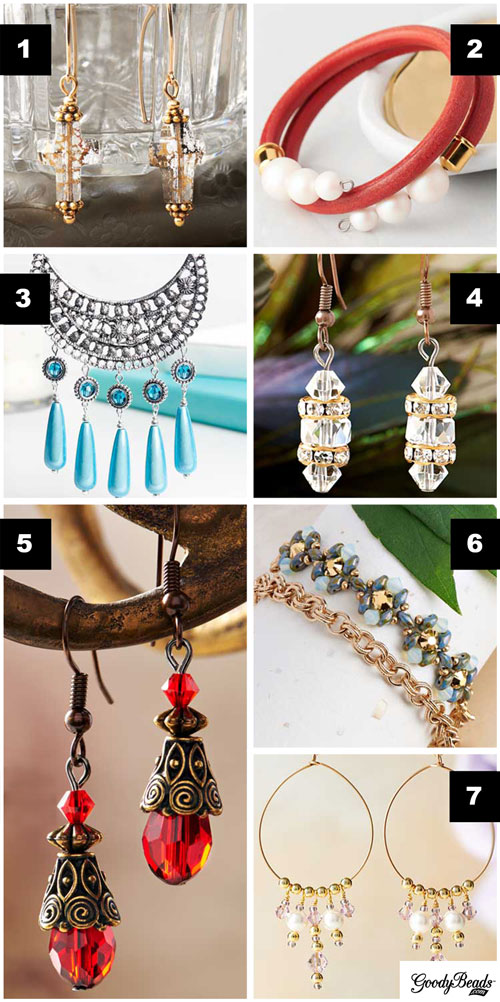
Swarovski crystals and pearls adds a shimmering and glistening effect to any jewelry project. Here are a few GoodyBeads jewelry pieces that can inspire your next jewelry piece!
Silk cord has been used as a stringing material in jewelry-making for centuries. No other beading cord offers the softness that natural silk provides. Jewelry designs made with 100% silk bead cord drape beautifully and the cord itself can become a feature with knotting techniques. Whether you’re looking to create a simple strand of beads or incorporate knotted bead clusters into your designs, GoodyBeads.com is here to show you how easy and versatile this timeless stringing material can be.
One of our favorite silk bead cord brands is Griffin. Griffin bead cords are made of 100% natural silk and come in a rainbow of colors and a variety of thread sizes.
Griffin bead cords are sold 2-meters per card. Two strands of twisted silk are wrapped around a cardboard backer. Each cord comes with its own needle for easy threading.
Choosing Silk Cord
Thread thickness is very important, especially if you plan on incorporating knots into your designs. Beads can slide over a knot if the cord is too thin for the bead hole you are working with. Griffin bead cords has its own numeric system for categorizing thread cord sizes: No. 0 – No. 12.
Each thread number has an associated millimeter size. Below is a quick reference guide for each number:
No. 0 = 0.30mm
No. 2 = 0.45mm
No. 4 = 0.60mm
No. 6 = 0.70mm
No. 8 = 0.80mm
No. 12 = 0.98mm
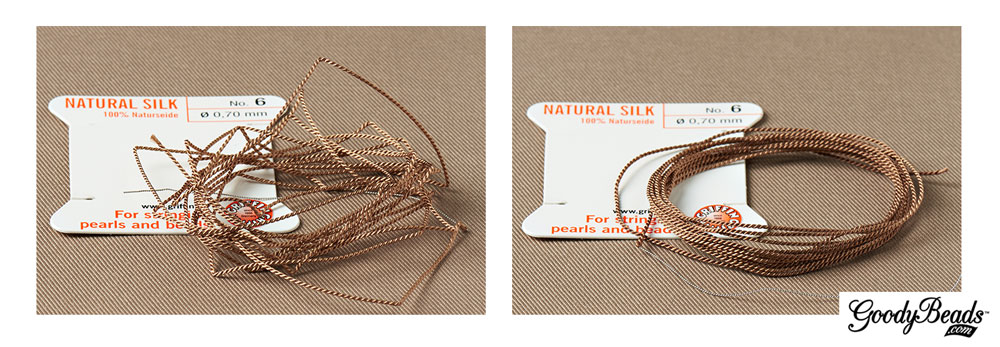
Smooth Out Silk Cord
Since silk bead cords come spooled on a card, you must prepare your new cord for use by smoothing out the kinks first.
To smooth out your cord, unravel the whole cord from the card. Starting from one end, dip your fingers in water and run your damp fingers through a section of the cord. Run your fingers over the section a few times to help straighten them out. Once that section is straight, continue on down to the next section of the cord with damp fingers until you’ve straightened the whole piece. Next, run a paper towel over the entire cord and gently squeeze to remove any residual water from the cord. That’s all you need to do. The cord will still be a bit damp but you can certainly use it right away. You can also wait a few minutes until it’s fully dried.
NOTE: You can use the same cord for multiple projects if you plan to keep using the needle that is attached to the cord. String bead(s) through the needle and utilize the end section of the cord.
Using Clamshell Bead Tip with Silk Cord
A way to attach your silk cord to jump rings or clasps is to attach clamshell bead tips.
Start by making a knot at the end of your prepared silk cord. Cut any excess cord close to the knot. Add a dab of Super New Glue or fast-drying glue to the knot. Place the knot inside the clamshell center and fold the clamshell over the knot. The glue will keep the knot from unraveling and to adhere the silk cord to the inside of the clamshell bead tip. Once the glue is dry, it’s ready to use.
Need a little inspiration? Here are some ways we used Griffin silk bead cord in our jewelry designs. Plus, quick tips on how you can create these designs yourself!
Crystal Cluster Knotted Silk Cord Necklace
Designed by So Vang
Make a necklace with knotting in-between clusters of beads. Choose from Swarovski® crystals, Chinese crystals, seed beads or your favorite gemstones. For our necklace, we used the entire 2-meter cord and strung on clusters of one gold seed bead, three dainty round Chinese crystals and one gold seed bead, that were knotted with an inch gap between clusters. This version makes a 60” necklace that you can wrap around two or three times.
Here you can see how the clamshell bead tips are used in conjunction with jump rings and a lobster clasp.
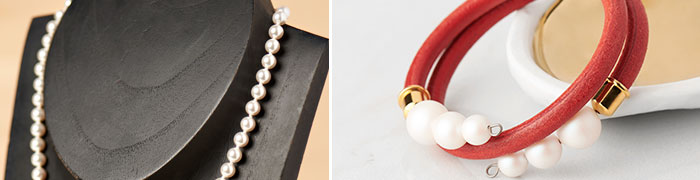
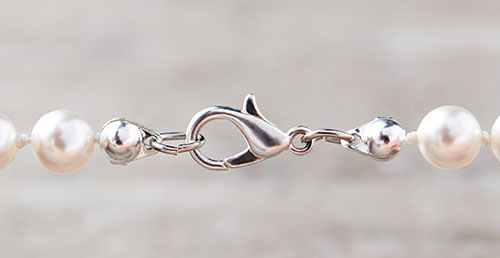
Pearl beads and silk cord are a match made in heaven. Not only do they look great together, the silk cord also helps prolong the life of your pearl jewelry by preventing the beads from rubbing up against each other, which can breakdown the bead’s finish. Making this elegant necklace is super easy.
First, make a knot and clamp a clamshell over the knot. Make another knot close to the clamshell. String on a pearl. Make a knot close to that pearl. Repeat until a preferred length. Make two knots at the end and clamp a clamshell over the last knot. Finish with a lobster clasp and you’re done!
If you have a worn-out pearl necklace, you can undo all the pearls and restring on silk cord to extend its jewelry life.
Minimalist jewelry is a huge fashion trend right now. Dainty jewelry components shine alone or together in multiple strands like our layered silk cord necklace. For this necklace, we focused on the sleek simplicity of gold tube beads and the lightness of silk cord.
Step 1: String on 25 gold tube beads on white silk cord. With the beads strung on, cut 20” off the end of the silk cord. Make 2.
Step 2: String on 25 gold tube beads on white silk cord. With the beads strung on, cut 22” off the end of the silk cord. Make 2.
Step 3: Gather the four cord strands and make a knot. Repeat to the other end.
Step 4: Dab some Super New Glue to both knots. Clamp a clamshell over the knots.
Step 5: Add a jump ring to one of the clamshell tip ends.
Step 6: Add a jump ring and a lobster clasp to the other clamshell tip ends. Done.
This style of necklace is perfect for small dainty beads or seed beads or even some NEW 3mm or 2mm Czech round beads.
For this bracelet, we twisted groups of silk cord with size 11/0 Miyuki seed beads and gold plated chain.
Step 1: String on seed bead to 8” and cut 10” silk cord strands with seed bead on. Make twelve strands. Tip: You can use the Bead Spinner to help to string on seed beads.
Step 2: Gather three seed bead strands and knot all three strands at both ends as close as you can to the seed beads. Clamp a clamshell over the knots. Make four group of seed bead strands.
Step 3: Cut two chain links at 8” and attach oval jump rings to each end of the chains.
Step 4: Also cut a few links of chain for your bracelet chain extender.
Step 5: Open an oval jump ring and slide on your lobster clasp.
Step 6: Open a larger jump ring and slide on these:
chain extender piece, two seed bead groups, chain extender piece, two seed bead groups.
Step 7: Close Jump ring.
Step 8: Leaving the chain extender along, separate the strands into two sections of chain and two seed bead grouped strands. Make a “flemish twist” with the two sections.
Step 9: Open a large jump ring and slide on the other ends of the chain and grouped seed beads and lobster clasp jump ring.
Step 9: Close jump ring and you are done.
(Close-up shot of jump ring with grouped seed beads and chain links.)
We hope enjoyed these tips and tutorials. Check our next blog post where we show you how to create evenly spaced knots in your jewelry designs using The EasyKnotter® tool. Happy Beading!
What kind of summer will you have? Whether it’s on the beach, surfing, roaming an outdoor mall or lounging on your back patio, be ready with our easy project using expandable wire bracelets and adjustable rings.
Stack multiple adjustable bracelets together. Or make a cluster of rings and wear them scattered around the base of your fingers or as knuckle rings. However you style it, remember to make it about you by personalizing and customizing them with simple charms and dangles with a quick open of a jump ring.
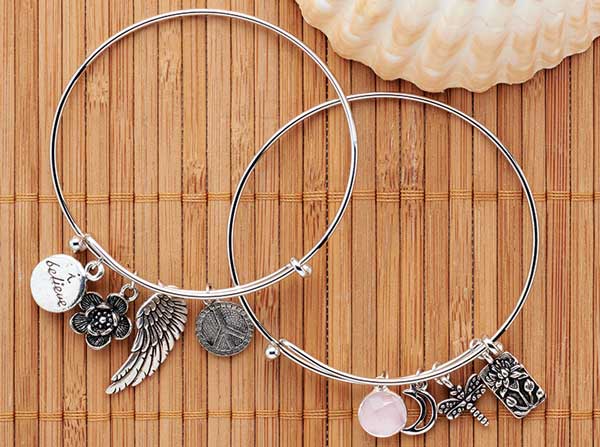
Expandable Bracelets
Designed by So Vang
What makes these bracelets expandable is the way you can slip them on and off any wrist size without altering the shape. You can get an antique silver finish or gold finish bracelet and complement them with gold or antique silver charms. Or mix up the colors. Create a theme or select your favorite charms. Attach charms with a jump ring and you are ready for summer fun!
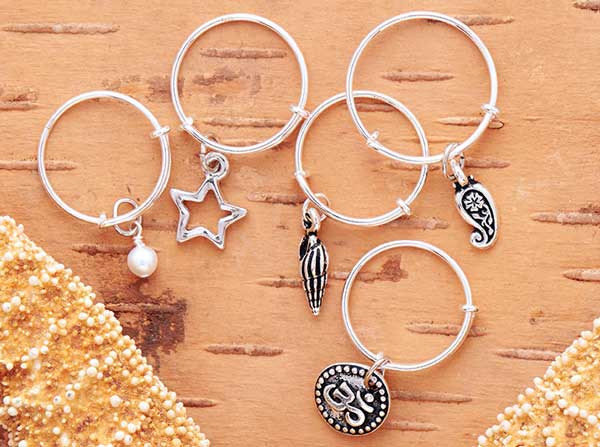
Adjustable Rings
Designed by So Vang
We are loving the versatility of these rings. They come in three different sizes to give you options to place them on your knuckles, thumbs or simply at the base of your fingers. We’ve added simple charms to our rings, as well as a cute pearl dangle to tie in a beachside look.
(2) Z003520 – Sterling Silver Adjustable Ring – Size 5-7
(2) Z003521 – Sterling Silver Adjustable Ring – Size 6-8
(1) Z003522 – Sterling Silver Adjustable Ring – Size 8-10
Boho Ring-Chain Bracelet
Designed by So Vang
Of course you can use these rings to help achieve a popular ring-chain bracelet. First, we made a simple chain bracelet with a lobster clasp. Then we put the ring on and measured a loose length of our chevron chain across the back of the hand. To finish, we connected the chevron chain to the ring and to the middle of the chain bracelet with two linked jump rings. It’s perfect for wearing with other selections of expandable bracelets and adjustable rings for a groovy summer!