DIY Bracelet Cuff with Mircofacet Garnet Gemstones
Today’s February Daily DIY features the DIY Bracelet Cuff with Mircofacet Garnet Gemstones from Dakota Stones. Kayla, jewelry designer from Dakota Stones, created this dainty and gorgeous cuff using gemstones wrapped around a Nunn Design cuff with 24-gauge wire.
Starting a third of the way up the cuff, wrap your wire making 4-5 coils. Pinch the coils together to keep the coils close and tight.
Slide on a gemstone bead, lay and situate the gemstone on the flat cuff and wrap the wire around the cuff two times, while keeping the gemstone in place.
Repeat step 3 to the rest of your gemstones and coiling 2 times between each gemstone. Make sure to pinch your coils together to keep coils tight.
At the last coil, make 4-5 coils before cutting off excess.
Jewelry Design by Kayla Braun-Waletzke
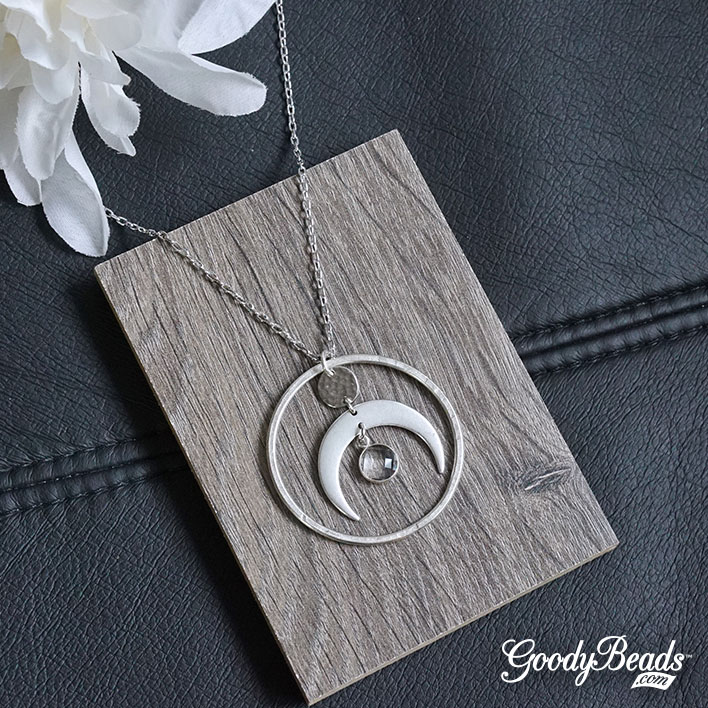
DIY Crescent Hoop Necklace with Nunn Design Component
The crescent shape is such a trendy shape to make DIY jewelry with. We have this fun and simple necklace using a crescent connector and a Nunn Design Hoop component.
Items used in necklace:
Z001033 – 32 Inch Rhodium Plated Cable Chain Necklace
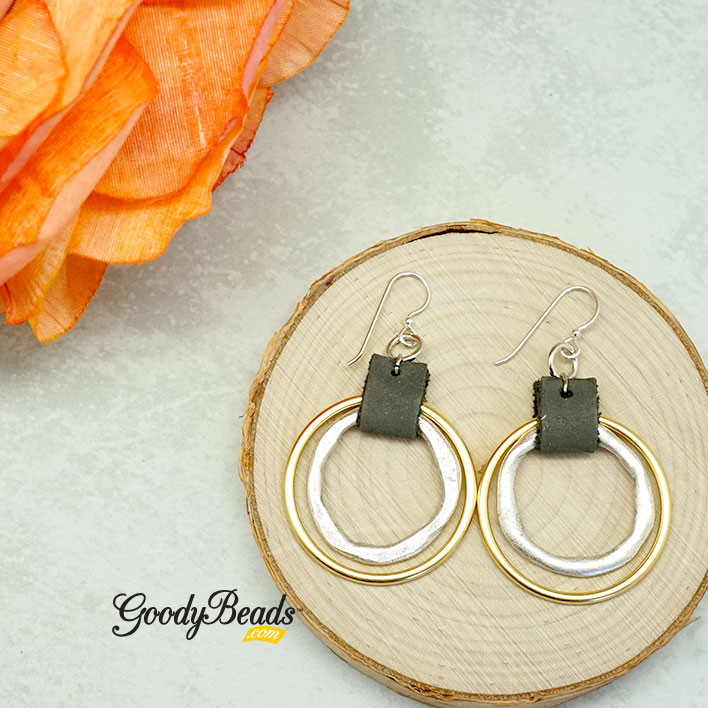
We’ve compiled some of our favorites in today’s project! We have TierraCast findings with Leather Cord USA Nubuck leather lace and mixing metals with Nunn Designs hoops. Try these DIY earrings out today!
Items used in earrings:
TCZ0077 – Sterling Silver Earring Wire by Tierracast®
Z004551 (2) – 30mm Ant. Silver Grande Organic Hoop by Nunn Design
Punch a hole 1/8″ from the edge of your piece of leather. Punch a hole on each leather end. Repeat on the other leather piece.
Open oval jump ring, slide on a hole of a leather piece, slide on a gold and silver ring and slide through other hole of that leather piece. Close jump ring.
Open 7mm jump ring, slide on oval jump ring from step 3 and through ear wire loop. Close jump ring.
Repeat Steps 3 and 4 for other earring.
DIY Chunky Paperclip Earring
Today’s tutorial is about minimalism with its clean look but also a statement with its bold paperclip chain. Design the Chunky Paperclip Earrings today for your hot summer!
Pewter Curved Triangle Post Earring by Nunn Design – Z010287
Two pairs of flat or needle nose pliers
Directions:
Take a link from the 26.mm chain by gently opening one link with two pliers. Once you slide it off, close the link back up. Repeat again to take off another link.
Take a link from the 10.9mm chain by gently opening one link with two pliers. Once you slide it off, add a link from Step 1 and slide through loop of post earring and gently close link.
Repeat step 2 for other earring.
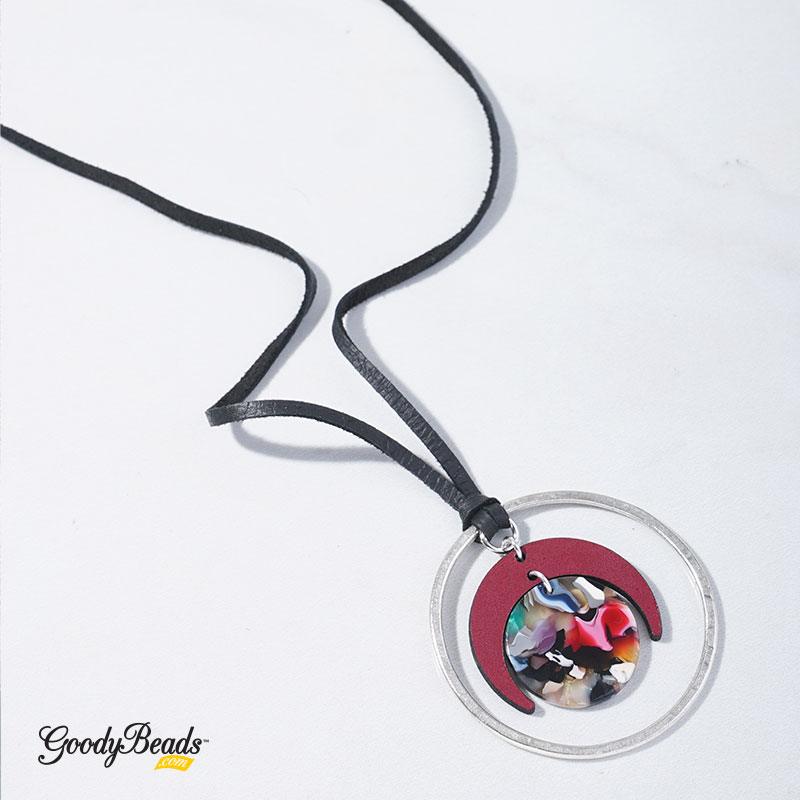
Leather Crescent & Acetate Necklace
We love mixing up different components in this DIY necklace. We have leather crescents mixed with acetate and silver findings, tied together with soft leather lace.
What you’ll need for necklace:
34mm Burgundy Leather Crescent Connector Charm – Y017383 Try out other colors in Black (Y017382) or Light Brown (Y017384)
Open 5.5mm jump ring, slide on acetate charm and concave-side hole of leather crescent. Close jump ring.
Open another 5.5mm jump ring, slide through other hole of leather crescent. Close jump ring.
Open 7mm jump ring, slide through jump ring from Step 2 and close jump ring.
Cut deerskin leather lace to 36 inches.
Fold leather in half, slide looped end through Large Open Frame Hoop and 7mm jump ring from Step 3. Make a lark’s head knot.
Make an overhand knot to both ends of leather together.
DIY Charmed Necklace with Paper Clip Chain
We’re channeling our simplicity in this DIY Charmed Necklace. Along with the trend of dainty and minimalistic jewelry, we’ve upped the size of our chain with paperclip chain and added a large clasp. Then tying it together with a gorgeous Nunn Design charm!
What you’ll need for necklace:
11.9mm Gold Plated Paper Clip Cable Chain – CH01151 (2)
Gently open loop of clasp with chain nose pliers. Slide chain end through loop and close.
Open jump ring, slide on charm and close jump ring.
Open clasp and slide charm through.
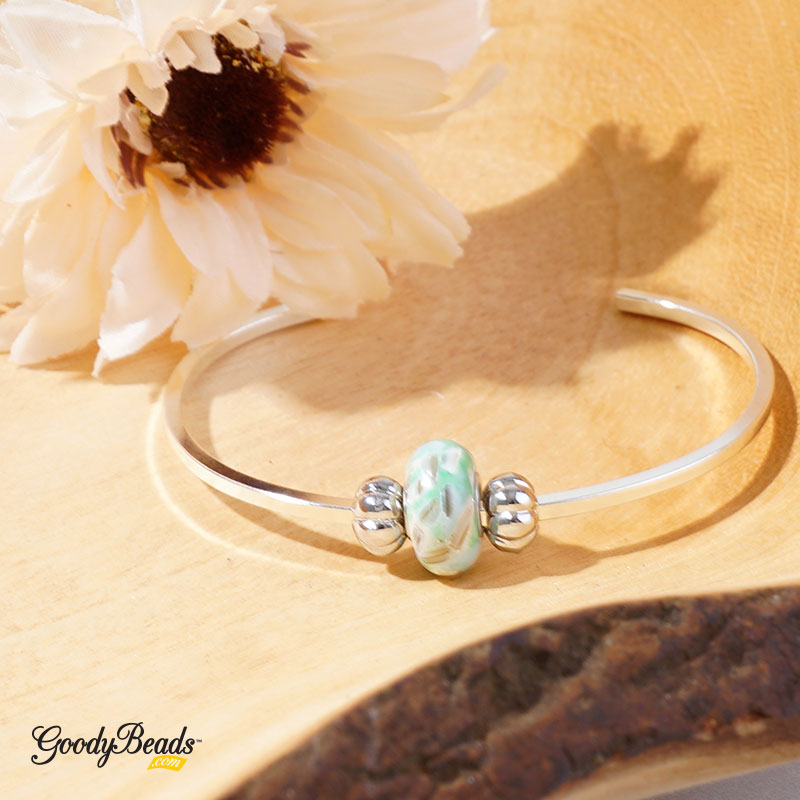
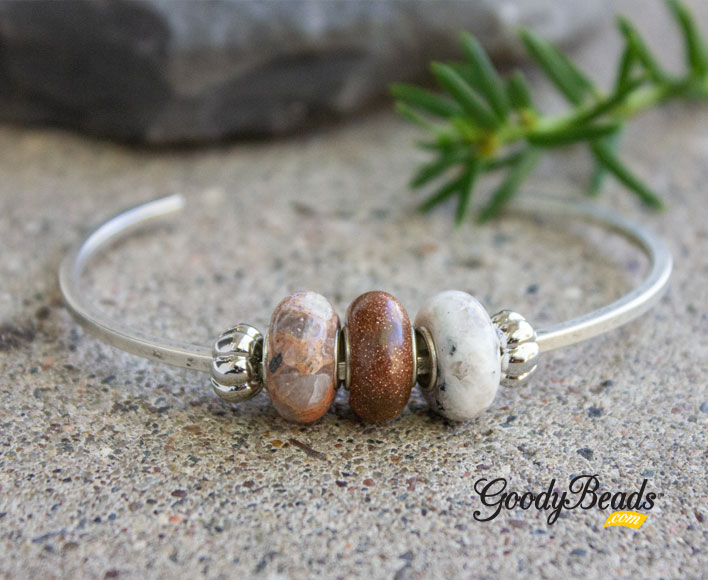
DIY Mint Mosaic Cuff
One our newer products are the Thin Square Flat Cuff Bracelet from Nunn Design. They’re so easy to use. Wear them as is or add some beads like our large selection of Large-Hole Interchangeable beads.
What you’ll need for cuff:
Thin Square Flat Cuff Bracelet from Nunn Design – Silver Z016184 or Antique Silver Z016185
Slide onto the cuff stopper bead, THREE large-hole bead and stopper bead.
Situate and center the beads on the cuff.
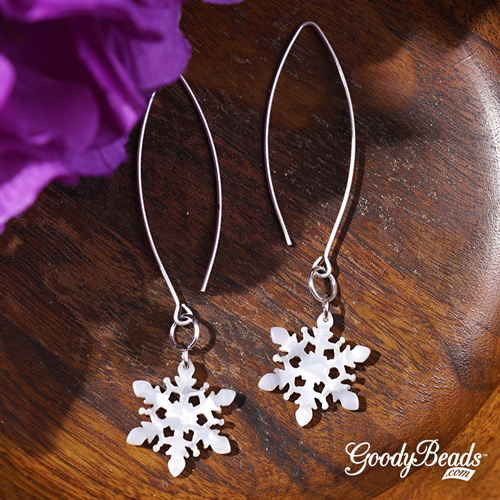
DIY Snowflake Acetate Earrings
It’s still a bit chilly here in Minnesota, so why not chill out with us! We have this cut pair of earrings using one of our newer acetate shape, a snowflake!
What you’ll need:
20mm Pearl Acetate Cutout Snowflake Pendant – Z006135
Open jump ring, slide on acetate snowflake and through ear wire loop. Close jump ring.
Repeat for other earring.
Gemstone Coin Cuff – Video Tutorial
Who doesn’t love a simple gemstone cuff? We made this Gemstone Coin Cuff using Dakota Stones’ coin-shaped gemstones and Nunn Design Thin Cuffs. Watch this short video and learn how easy it is to wire wrap gemstones onto a cuff.
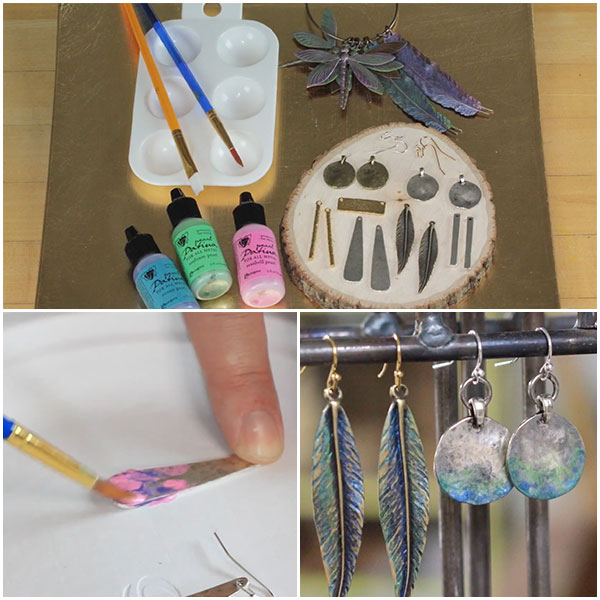
Vintaj Patinas are a water-base paint that is popular to use in painting jewelry components like metal charms and beads. You can even use them on leather, wood or other surfaces. They adhere well after a few seconds or minutes of drying time.
You aren’t limited to only metal charms. As an optional surface, you can check out Metal Blanks with various sizes and shapes and TierraCast Charms is also a fun alternative to textured surfaces for Patinas.
Video Tutorial
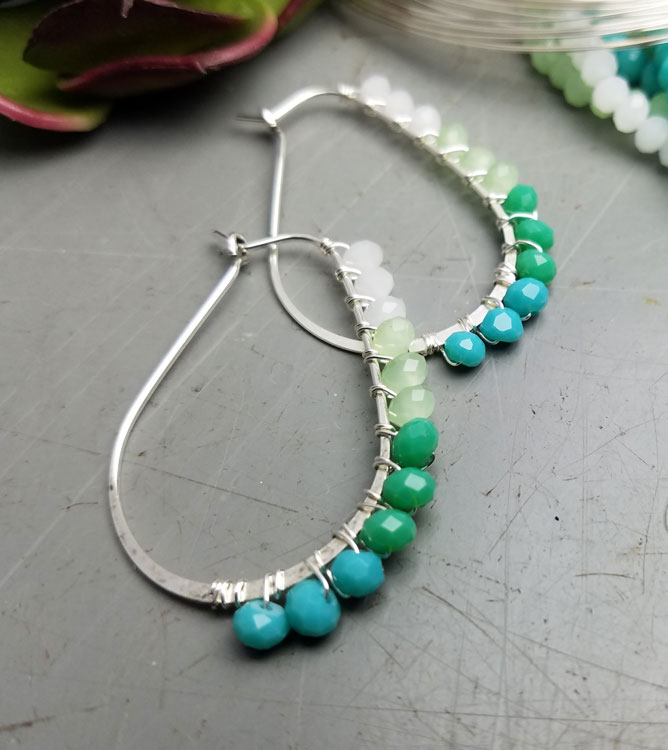
Ombré Earrings with Chinese Crystals
An assortment of Chinese crystal colors has arrived. We love the opaque and milky hues so we made some stunning earrings with Nunn Design® earwires. Check out these earrings and tutorial.
Wrapping wire can be a fun technique used to add beads to frame a hoop or link finding. Here, we used four Chinese crystal colors to wrap around these oval hoop earrings (A014374 & Z014371), creating an ombré look.
Coil 2-3 times around the top part of the earring hoop. (Use nylon pliers or non-serrated pliers to smooth the coil around the earring.) Pinch coil together to keep wires close.
Pick up a Chinese crystal bead and hold it perpendicular to the earring hoop. Wrap the wire the same direction as you’ve done in step two. Wrap around two time.
Repeat 11 more times. Note: If you want to create an ombré coloration, use four gradation of Chinese crystal colors. Wrap three beads of the same color individually then add the next color three more times, etc.
Make sure at the end you wrap your wire around the earring hoop three time. Cut excess wire. Use pliers to smooth the coil around the earring hoop.
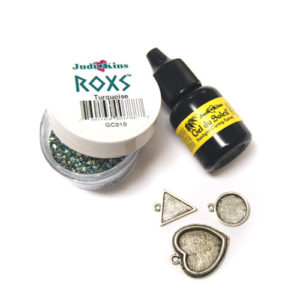
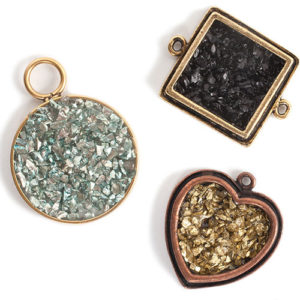
Nunn Design®: How to Make Pendants with Glitter Roxs and Gel du Soleil
From Nunn Design®, comes a fun tutorial on how to use Glitter Roxs and Gel du Soleil. Hop on the trend wagon and make a super easy pendant with glitter roxs.
Gel du Soleil
Gel du Soleil is a UV light sensitive resin. There is no mixing, no waste and the gel cures in 20 minutes when exposed to UV light. Because it is UV light sensitive, all aspects of the Gel du Soleil MUST be exposed to UV light in order for a piece to cure.
Glitter Roxs
Glitter Roxs are small pieces of translucent glass flakes imported from Germany. Because of their translucent quality, they fit the necessary restriction of curing success! Light can pass through the colored glass and cure.
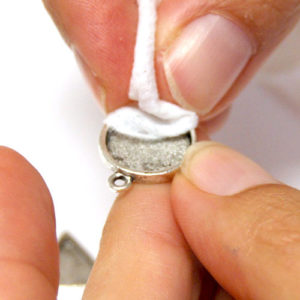
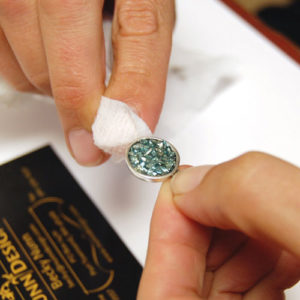
Step 2: When we plate our Nunn Design Findings, we have a process to antique them that often leaves some black antiquing. Use a wet wipe to clean the inside of the Nunn Design Bezel and remove any of the excess black antiquing that might be in your bezel.
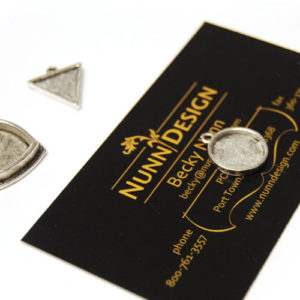
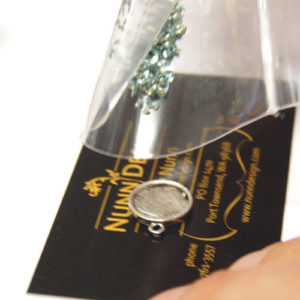
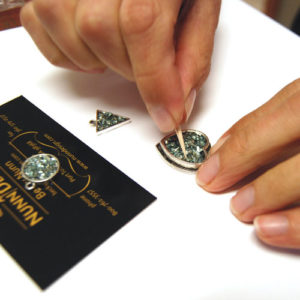
Step 3: Place your bezel onto a business card or a piece of card stock. This will aid you in transferring the bezel into the uv lamp once it is filled with resin.
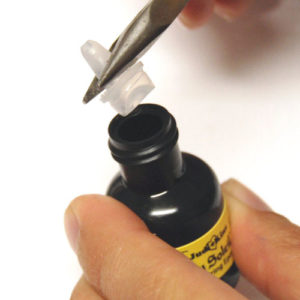
Step 4: Pop the nozzle off of your bottle of Gel du Soleil with a pair of needle nose pliers (if using the 5/16 oz bottle). Place the nozzle onto a small cello bag. Removing the nozzle will make is easier to pour the Gel du Soleil and limit excess bubbles in the resin.
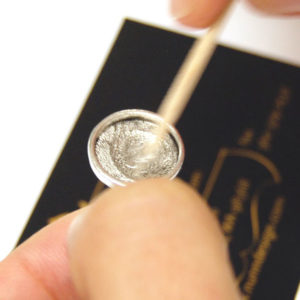
Step 5: Pour a very small drop of Gel du Soleil into the bezel, just enough to fill the base. Use a toothpick to move the Gel du Soleil around the base, making a nice even coating on the bottom of the bezel. When you are finished pouring the Gel du Soleil into the bezel, place the nozzle back onto the bottle and screw on the top.
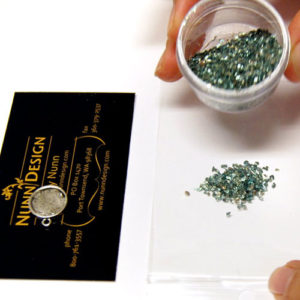
Step 6: I like to pour my Glitter Roxs from the plastic container onto a small cello bag. This helps avoid pouring too many of the Glitter Roxs into the bezel.
Step 7: Gently tap the small cello bag with Glitter Roxs to fill the base of your bezel. Warning: The Glitter Roxs are tiny shards of glass, so make sure to wear safety glasses and avoid putting your fingers near your eyes.
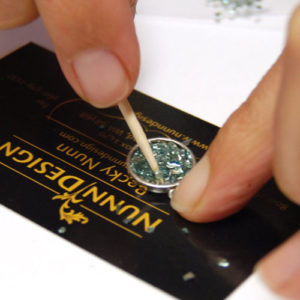
Step 8: Using a toothpick, stir your Glitter Roxs and Gel du Soleil until it feels like the flakes are slightly coated.
Step 9: If you have any excess Gel du Soleil on the bezel edges, use your wet wipe and Q-Tip to remove it. Once you expose the Gel du Soleil to the UV light, it will start to cure instantaneously, so make sure that you have all excess Gel du Soleil off of the sides. Pour your excess Glitter Roxs back into the containers avoiding any waste.
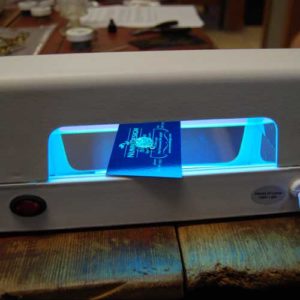
Step 10: Turn on the UV Lamp and transfer your business card with the bezel laying on the top, into the UV light. Make sure that your business card is level so that the Glitter Roxs will cure in the position you want them and not all squished to one side or the other. TIP: To allow multiple pieces in the uv light tray at the same time, you can remove the business card just minutes after you have placed the bezel in the uv light.
Step 11: Once 20 minutes has passed, remove your bezel. Using a toothpick, scrap over the top of your Glitter Roxs dislodging any pieces that might not have fully cured to the piece. If you have a lot of pieces that were dislodged, add some more Gel du Soleil, and place back into the Uv light.