Swarovski® Aquamarine Jewelry Tutorials
We have three COOL projects using July’s Swarovski Psychology of Color: Aquamarine. Revamp your DIY jewelry with these ideas!
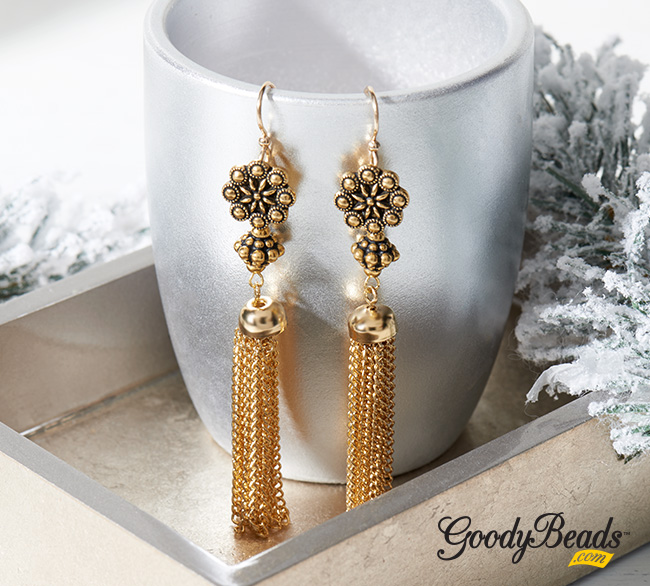
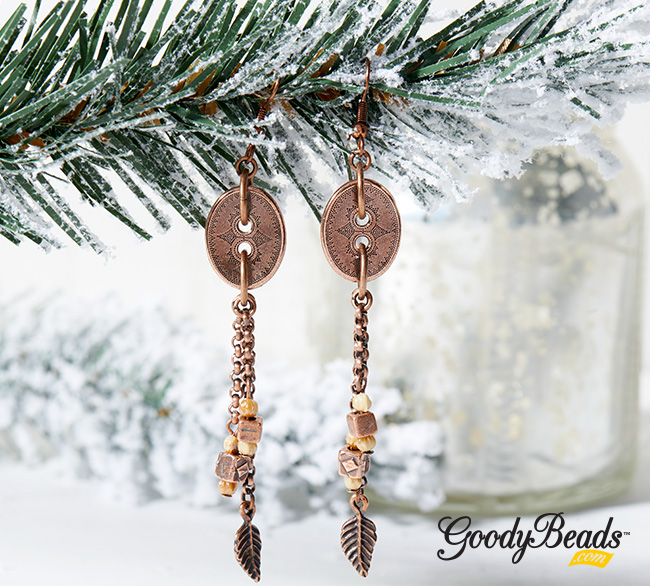
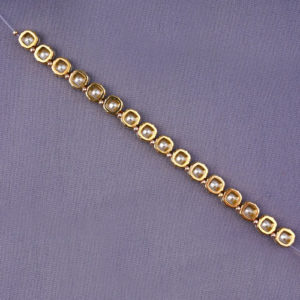
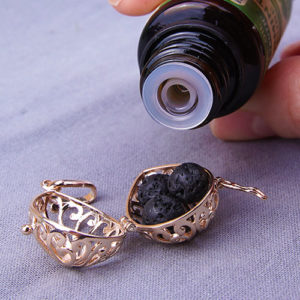
Aquamarine Bubble Earrings

Create cascading bubbles in this pair of Aquamarine earrings.
Items used in earrings: TCZ0077, TC00198 (2), A019672, A019606, SW00071 (6), SW00070 (10), SW00069 (6)
Directions:
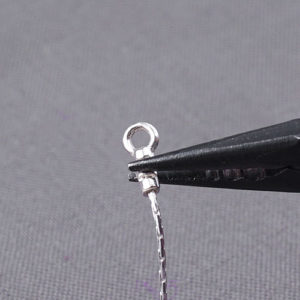
- On a headpin slide on a 6mm round crystal and make a simple loop. Repeat to make a total of FOUR 6mm dangle.
- On a headpin slide on a 8mm round crystal and make a simple loop. Make a total of SIX 8mm dangle.
- Open loop on eyepin, slide on a 6mm dangle from Step One and close loop. Slide a 4mm round crystal on the eyepin and make a simple loop. Repeat to make a total of FOUR links.
- Open loop of link, slide through outer loop of the TierraCast Bali 1-to-5 Link and close loop. Repeat to the other outer loop of TierraCast Link
- Repeat to other TierraCast Bali 1-to-5 Link.
- Open loop on eyepin, slide on a 8mm dangle from Step Two and close loop. Slide a 6mm round crystal on the eyepin and make a simple loop. Repeat to make a total of SIX links.
- Open loop of link, slide through second loop of the TierraCast Bali 1-to-5 Link and close loop. Skip middle loop and repeat to attached link to the fourth loop of TierraCast Link.
- Repeat to other TierraCast Bali 1-to-5 Link.
- Open loop on eyepin, slide loop of link you make in Step Four and close loop. Slide a 4mm round crystal on the eyepin and make a simple loop. Repeat to make a total of TWO links.
- Open loop of link, slide through the middle loop fo the TierraCast Bali 1-to-5 Link and close loop.
- Repeat to other TierraCast Bali 1-to-5 Link.
- Open ear wire loop and slide on top loop of TierraCast Bali Link. Close loop. Repeat to other ear wire and Bali Link.
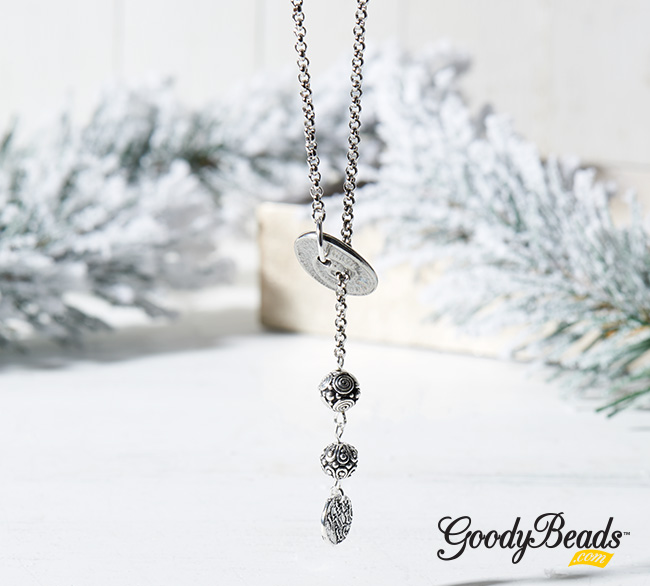
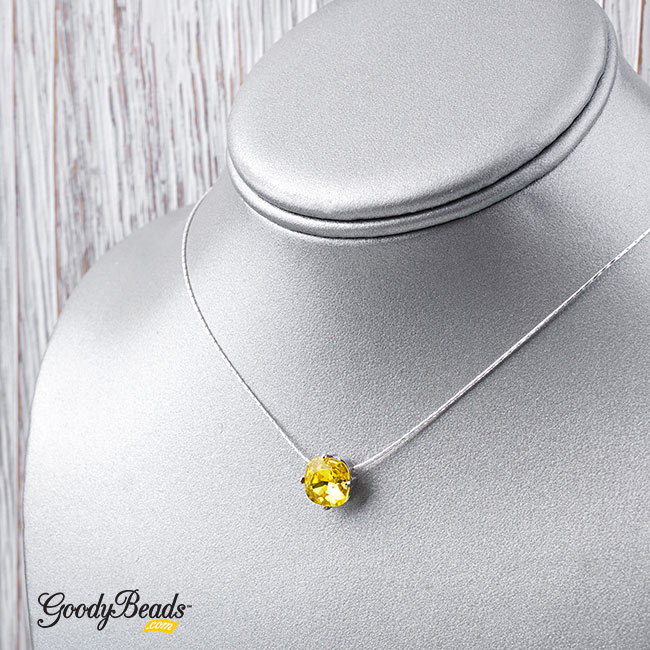
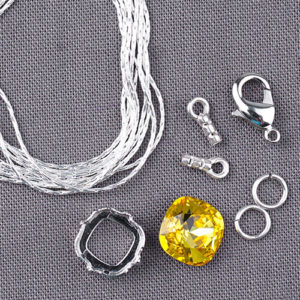
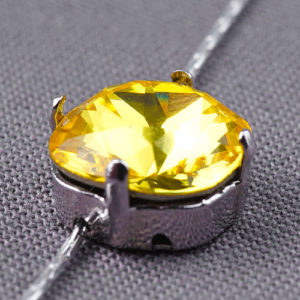
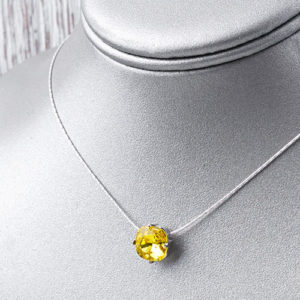
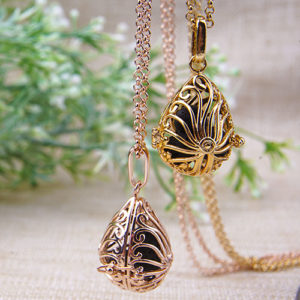
Aquamarine Raindrop Necklace
This easy DIY necklace requires minimal effort to make and a gorgeous piece to wear!
Items used in Necklace: SW02134, TC02317, Y003724
Directions:
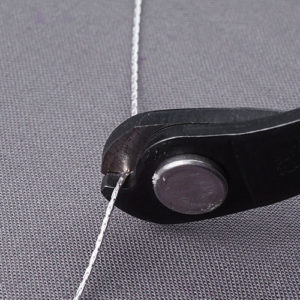
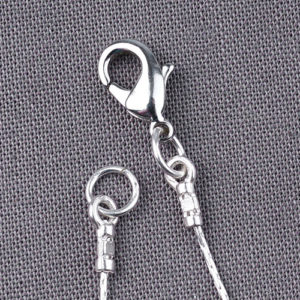
- Slide prong of the pinch bail to pendant hole and gently pinch the bail.
- Open clasp on necklace and slide necklace chain through bail.
Swarovski: Triple Ocean Waves Necklace
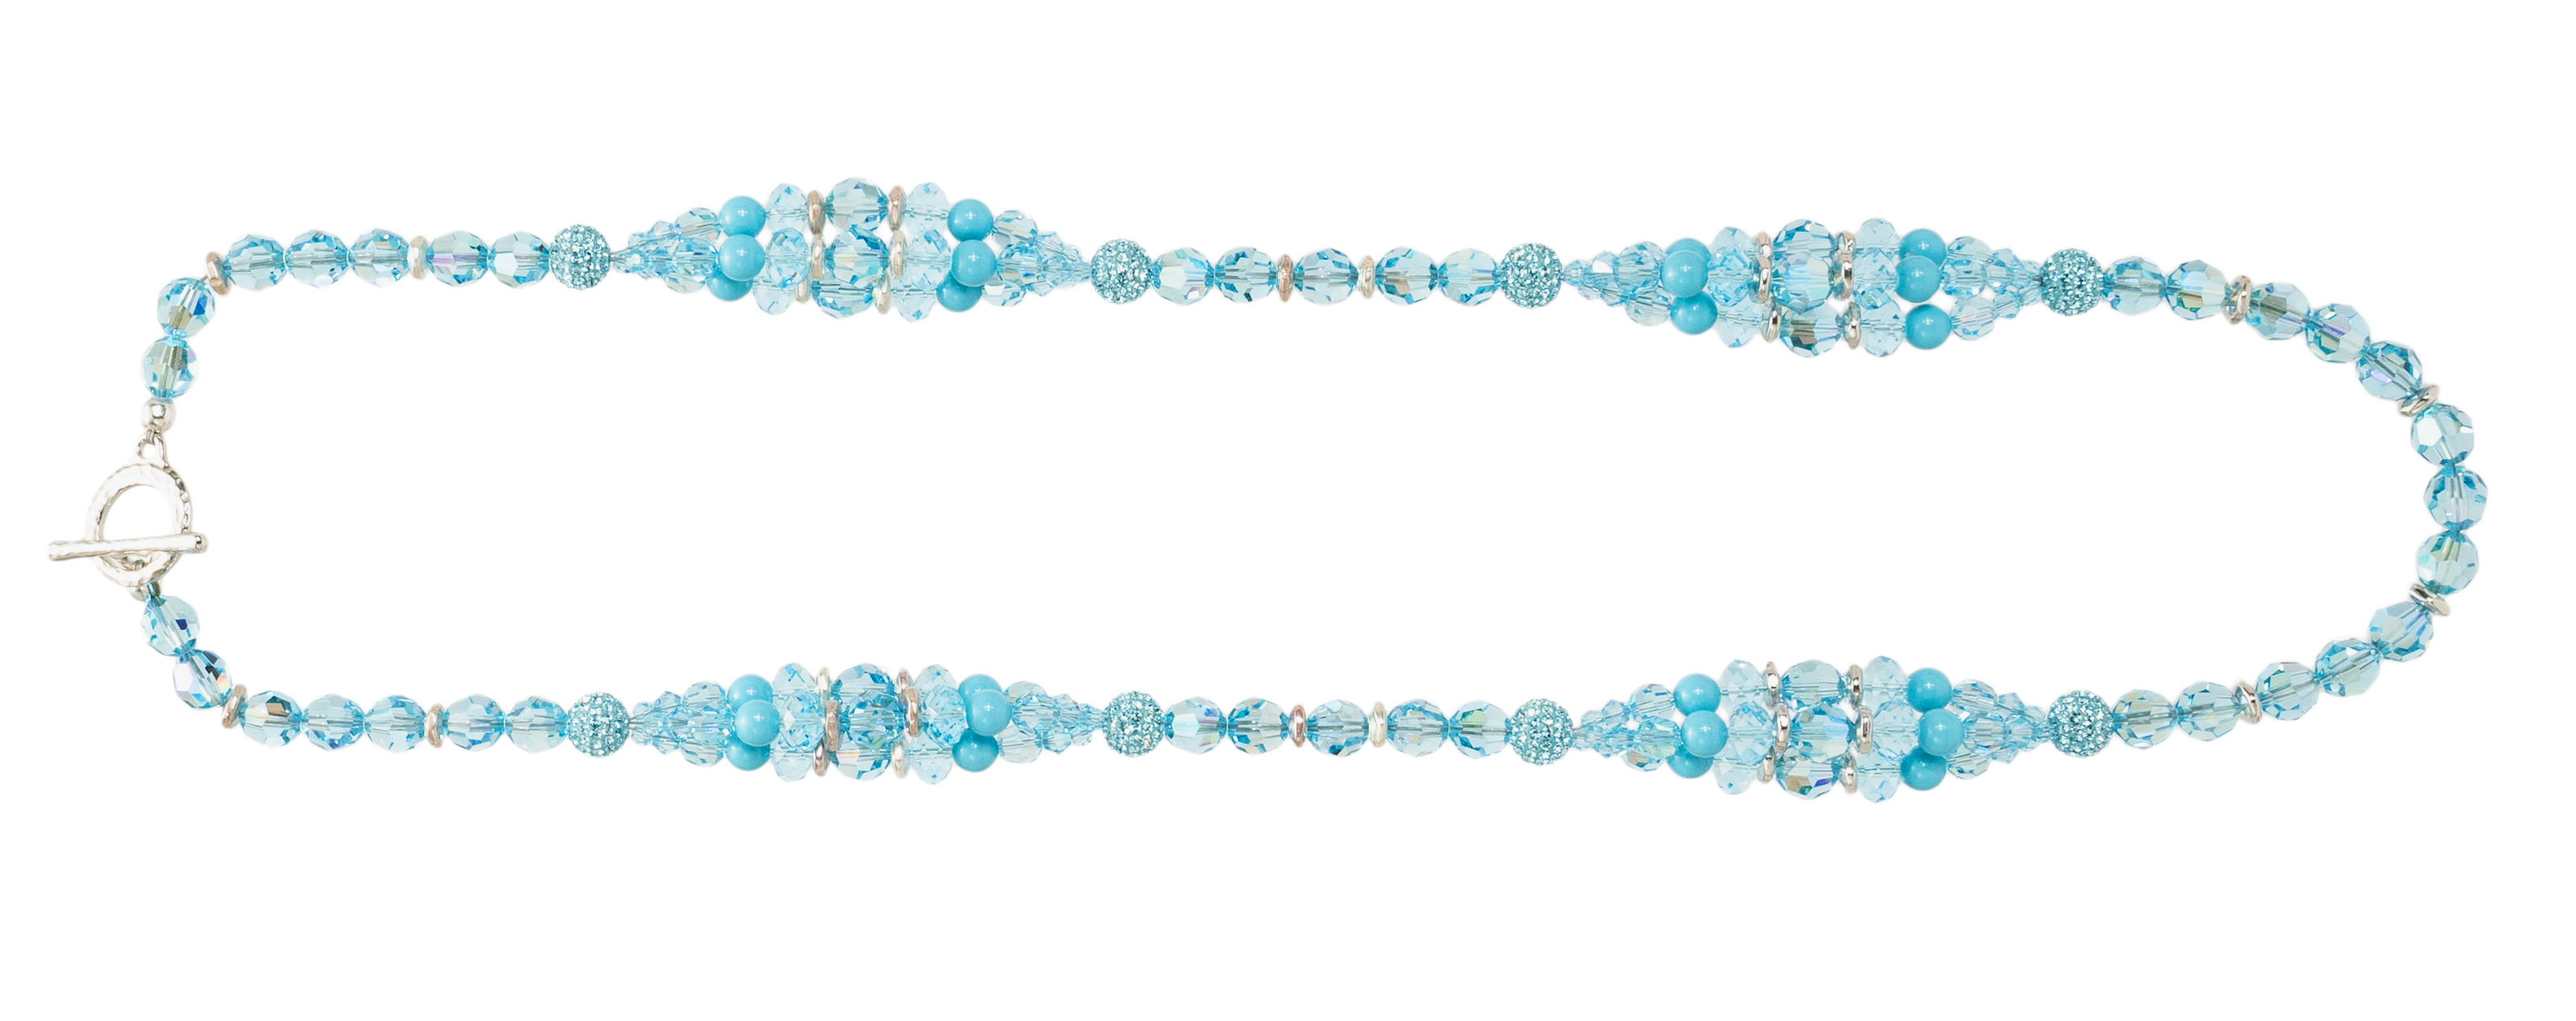
Our friends at Swarovski Create your Style, designed this stunning necklace.
What you’ll need:
- (24) SW00621
- (24) SW02035
- (49) SW02036
- (24) SW01462
- (24) SW02068
- (8) 8mm Swarovski Aquamarine Pavé Beads
- (24) SW00729
- TC01871
- (36) TC00034
- (2) 3mm Crimp Tube
- (2) 4mm Crimp Cover
- FTBW0001
Directions:
- Cut stringing wire into three 32” pieces.
- Using all three wires together string on one Pave Bead, two SW02036, one nugget bead, three SW02036, one nugget bead, three SW02036, one nugget bead, three SW02036, one nugget bead, two SW02036 and one Pave Bead. Position all these in the center of the three strands of wire.
- Starting with the right side of the necklace, and only using one of the three wires coming out of the pave bead, string on one SW00621, one SW02068, one SW02035, one SW00729, one Sw01462, one nugget bead, one SW02036, one nugget bead, one SW01462, one SW00729, one SW02035, one SW02068 and one SW00621. Repeat this two more times for the two remaining open wires.
- Now take all three wires together again and slide on one Pave Bead, two SW02036, one nugget bead, one SW02036, one nugget bead, two SW02036 and one Pave Bead.
- Repeat Step 3.
- Now take all three wires together again and slide on one Pave Bead, two SW02036, one nugget bead, three SW02036, one nugget bead, and two SW02036. Using all three wires slide on one crimp bead and one end of the toggle. Crimp to close and add crimp cover.
- Repeat Steps 3 – 6 to make left side of the necklace.