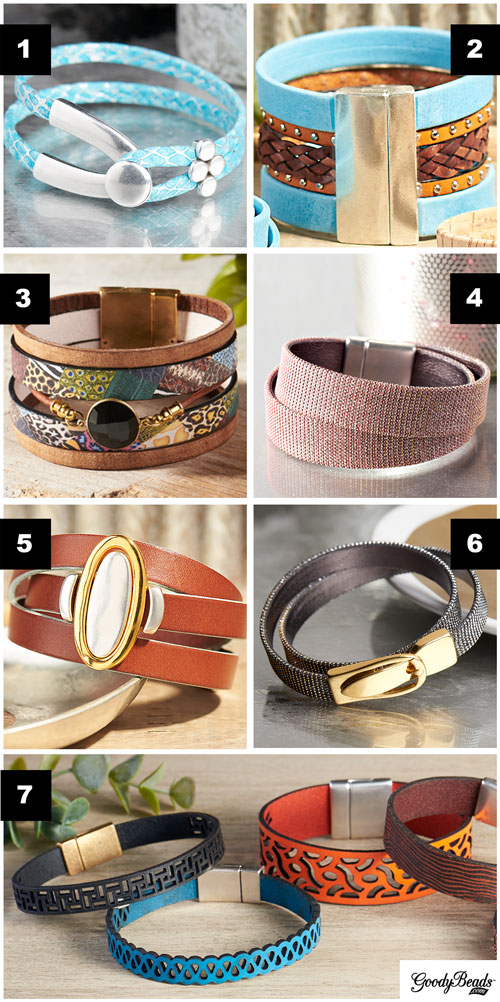
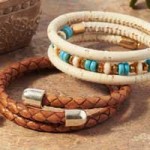
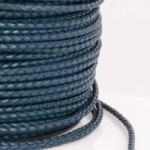
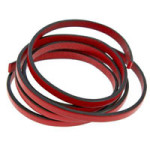
Flat leather bracelets are a modern and trendy fashion accessory. Take a look at some of our inspirational bracelets using flat leather. Create wide cuff or multiple wrap bracelets with different flat leather textures from smooth leather,
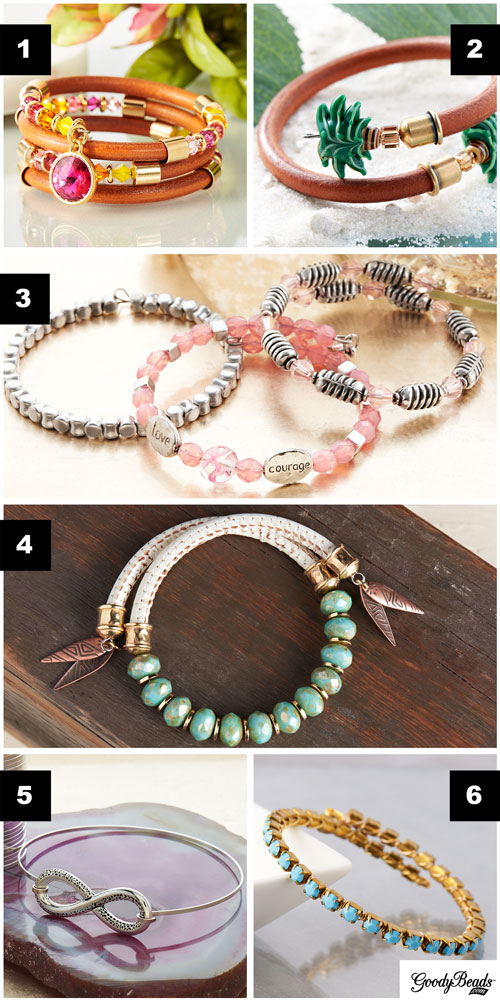
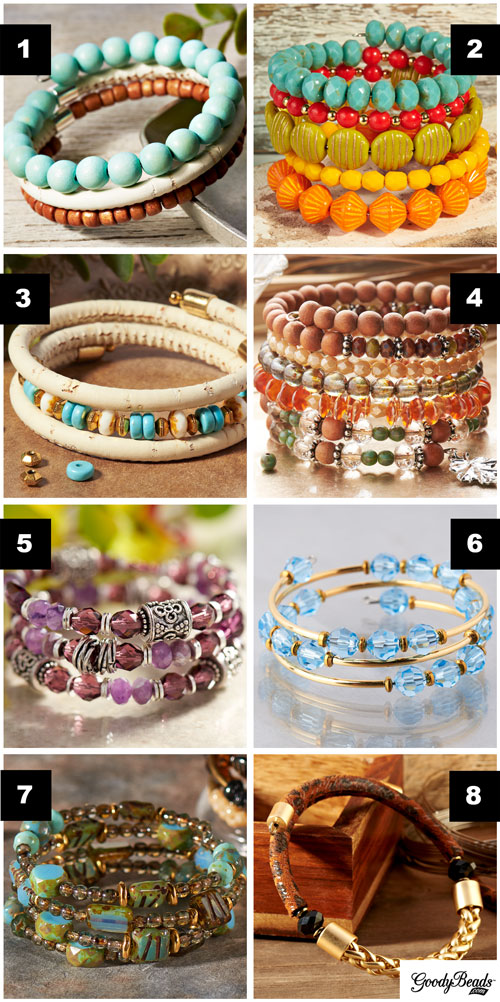
One of the most simple jewelry accessory to make are memory wire wrap bracelets. Memory wires are preformed to maintain its circular shape. All you have to do is add your choice of beads, leather, spacers and charms to memory wire and make a simple loop at both ends. Here are some fun examples of how we used memory wire.
Late 2016, celestial-inspired jewelry was making a rise in fashion popularity. Embrace some moon and star jewelry to vamp up your glorious fashionable wardrobe.
Moon and Star Earrings
Designed by Tory Vezina
Take a trip around the moon as you bedazzle yourself with these simplistic link earrings. Use some glass connectors with some lovely moon and star charms for easy-to-wear earrings.
We can’t get enough of lariat necklaces. We made a chain lariat necklace by using a 24” chain and attaching a filigree washer link to one end and star charms to the other. Loop the lariat around your neck and slide the charm end through your link for a sleek necklace that is out of this world!
Moon & Star Wrap Bracelet Kit with Swarovski® Crystals
Designed by Tory Vezina
Another great project to make is an easy bracelet kitlike our Moon & Star wrap bracelet. Embellished with moon and star charms, Swarovski star crystals and dainty miracle beads, you are ready to conjure up some magical fashion wear!
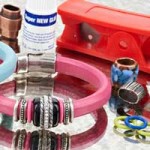
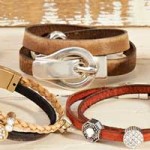
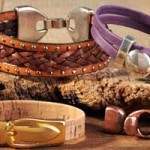
With our popular collection of flat and round leather supplies, choosing a clasp can further personalize your stunning bracelet accessory. Here are some of our favorite leather clasps to inspire your next DIY project.
Our popular half-circle magnetic clasp for 5mm round leather is a lovely addition for a single- or multi-wrap bracelet. Pair this clasp (Z006715, Z006726, Z006746, Z006785) with 5mm round leather that has been wrapped with ribbon and wire, braided leather or kumihimobraids.
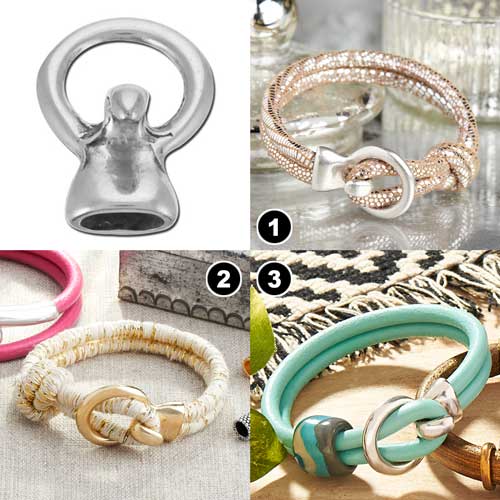
Loop your 5mm flat leather with this round hook clasp (A021499). Use a slider beads or charm to create your folded loop while your ends are glued into the clasp.
A different kind of clasp can create a whole new look. Take these wishbone disc clasps for flat leather (Z006859, Z006945, Z006861, Z007208), it widens two strands of 5mm flat leather to mimic larger band bracelets. We love the
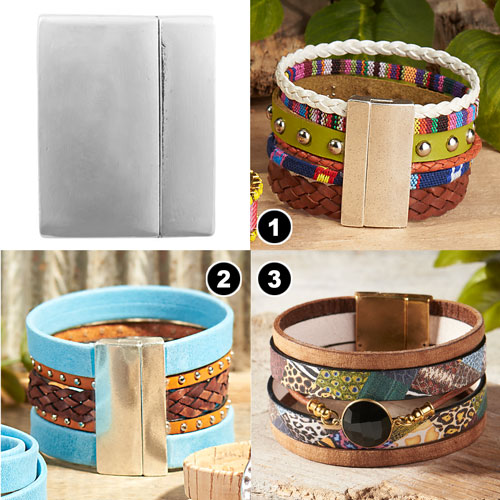
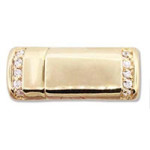
These magnetic clasps for licorice leatherare a popular choice. Choose from antique silver (A015313), antique brass (A015314), or antique copper (A015315) and pair it with our large selection of licorice leather or combine it with two strands of 5mm round leather.
These magnetic clasps for licorice leatherare a popular choice. Choose from antique silver (A015313), antique brass (A015314), or antique copper (A015315) and pair it with our large selection of licorice leather or combine it with two strands of 5mm round leather.
Having the right tools and adhesive for leather projects will make it easier to create stylish accessories. We will show you the basic tools for cutting leather and the types of adhesive to use when adding clasp ends to leather.
Leather Cutter Tools
When cutting leather, you want a precise and straight cut. This will help with adding clasps and keeping your measurements accurate.
Flat and small round leather (i.e. 1mm, 2mm, or 3mm) needs a pair of scissors. Before making your cut, measure your piece of leather and mark with a pencil lightly.
Licorice and round leather are thicker and need a heavy-duty cutter. Below, we have a two cutter tools you can use to cut thicker side leather.
The Little Cut (TL0053) has a sharp angle blade that cuts leather by squeezing the handles together.
Pinch the handles to open the cutter. Slide the leather under the cutter, lining it up with the middle groove. Bring your blade down to wedge the leather in place. Grasp the cutter towards the front and squeeze down.
NOTE: Make sure to always have your angle blade facing down.
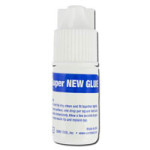
Leather Adhesive
We have two adhesive options to use when adding clasp ends.
Precut your leather. Put 1-2 drops of super new glue inside your clasp ends and swirl the glue inside to cover the edges and corners. Insert your leather and let it dry lying down on a flat surface. Dry time should take a few seconds to a minute or two.
E-6000
E-6000 (A011455) is used on heavy-duty beading and crafting projects. While it has a slower drying time, E6000 is a good filler especially when filling excess space or gaps around your leather when inserted into the clasp.
Precut your leather. Scoop up some E-6000 with a toothpick. Swab the inside of your clasp end. Repeat if necessary. You want to apply enough to coat the inside of the clasp. Insert leather ends and let it dry for 12-24 hours lying on a flat surface. Wipe excess glue cleanly if it flows out after leather is inserted.
Extra Note: You can use rubber bands to keep licorice leather in a round shape as the glue dries. And always use E6000 in a well ventilated area.
Important Notes:
Make sure the inside of your clasp end is clean and dry. This helps ensure that your leather end sits flushed inside the clasp. You can swab the inside with a toothpick or cotton swabs to clean any dust or moisture.
If you find your leather cords have extra space in the clasp end, you can coil thin wire or beading thread like SuperLon thread at the ends before insert clasps.
Leather is stored in spools, which in time will create a natural curve. Use the natural curve of your leather to wrap around your wrist. Licorice leather will have a slight curve which you will need to bend to create a round curve.
Having more length of leather is better than not having enough. This is because the inner size of the bracelet may decrease depending if you are adding beads, charms or other embellishments to the leather. First, plan out your design. Next, without using glue, slide on clasp and test it on your wrist. Measure and cut your leather to the desired length. Glue other side of clasp and let dry.
And always, always don’t glue your clasps until you’re sure you’ve added your design elements and your measurements are correct.
New GoodyBeads Valentine’s Day Kits – 2017
You’ll soon feel the love in the air because Valentine’s Day is coming. Our GoodyBeads Designers have new Valentine’s Day DIY kits to bling out your lovely look.
These kits include all the beads and findings, along with simple step-by-step instructions. They are also easy to make and give away as gifts.
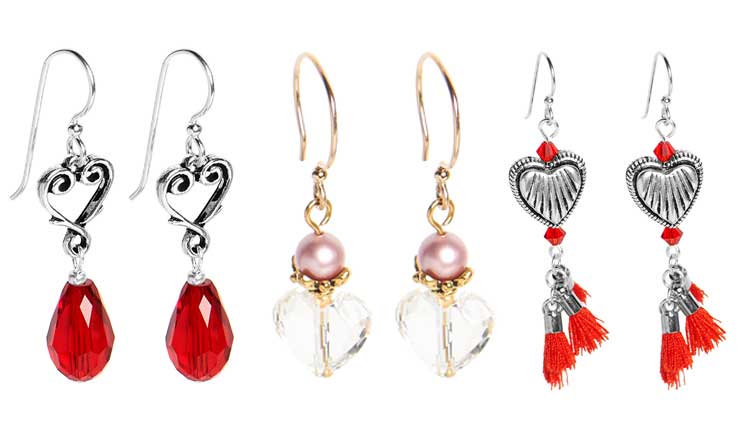
Eat your heart out with a box of chocolates and a beautiful selection of heart earrings.
GoodyBeads EZ DIY Series: How to Make a Rhinestone Link and Leather Bracelet
For supplies and tools totaling under $20, you can learn how to make a rhinestone link and leather bracelet with a Rhinestone Link Bracelet Kit (A020661/A020662) and 2mm Round Leather Cord.
Tutorial
Items used:
A020661 – Matte Silverstone Rhinestone Link Bracelet Kit
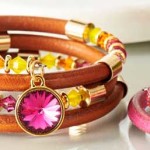
GoodyBeads’ Master Mixes with Swarovski® Crystals and Wrap Bracelets
Introducing all-new Master Mixes, hand-picked by our GoodyBeads’ in-house designers. Check out these new additions to GoodyBeads and how we use these mixes in making a leather wrap bracelet.
Swarovski 4mm Crystal Mixes
We did all the hard work for you in mixing and matching Swarovski crystals for any themed jewelry project. These selections of 4mm bicone crystals comes with a five or six color combination consisting of up to 150 crystals total. Each mix comes in a non-spill, poly-bag inside a gorgeously viewable tin.
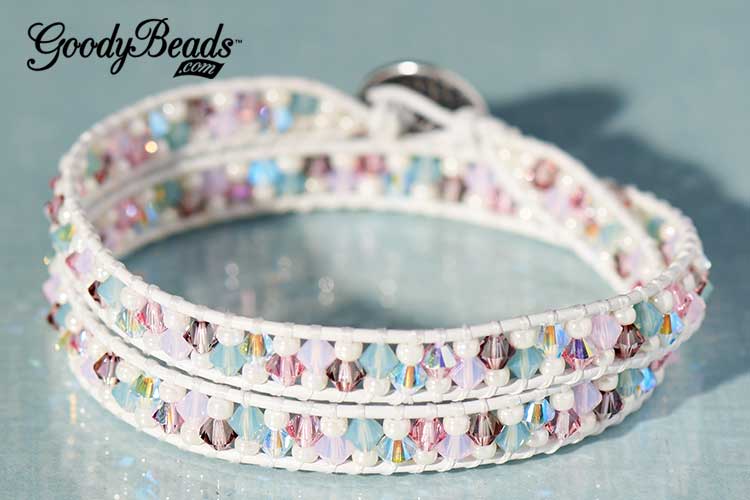
Leather Wrap Bracelet with Swarovski Mixes
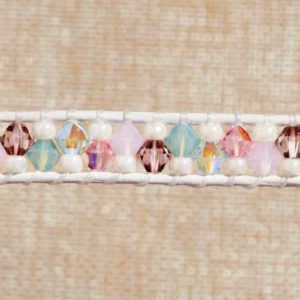
Be inspired with what you can make with these mixes. A favorite of ours is making wrap bracelets. Here are two examples:
Grapevine Bracelet by So Vang
Designed by So Vang
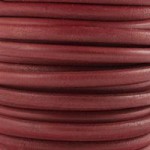
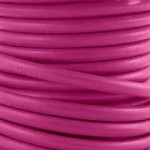
For this fall-theme bracelet, we used So’s Grapevine mix (MX00012), 1mm metallic berry leather cord (A022064), Crystal Fireline (A006587), size 8/0 galvanized silver seed beads (SB00106) and TierraCast® Button (TC01954).
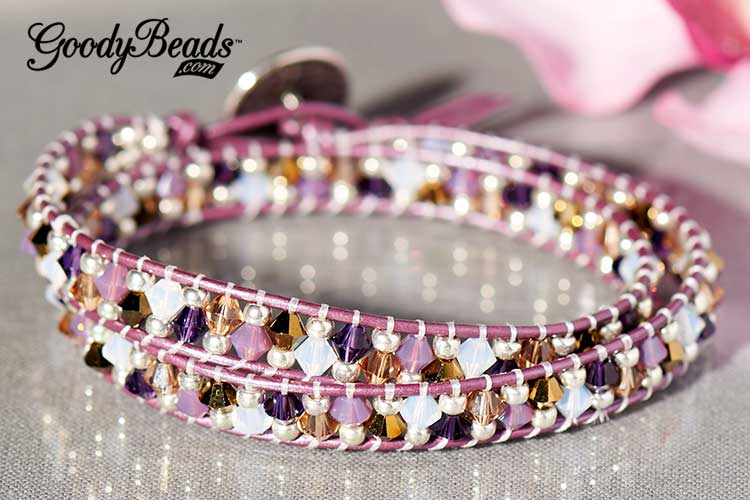
Victorian Rose Bracelet by So Vang
Designed by So Vang
Or, for a lovely pastel combo, we used the Victorian Rose mix (MX00004), 1mm white leather cord (A022071), Crystal Fireline (A006585), size 8/0 ivory ceylon seed beads (SB00098) and TierraCast® Button (TC01954).
Leather Wrap Bracelet with Swarovski Master Mixes
Here is a quick tutorial on how to make these Swarovski mix leather wrap bracelets. You may want to check out our leather wrap DIY blog post to give you a refresher on how to make a leather wrap bracelet.
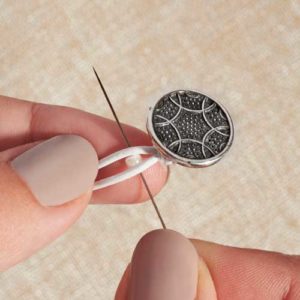
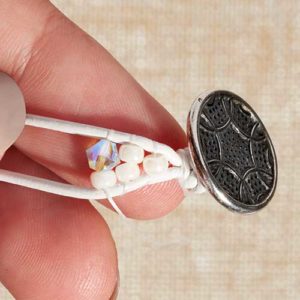
Step One: Slide button to the middle of your 1mm leather cord. Make a knot.
Step Two: Make a knot with your beading thread close to your leather knot. Pick up one 8/0 seed bead and lay in between and behind the leather cords. Pull your needle and thread through.
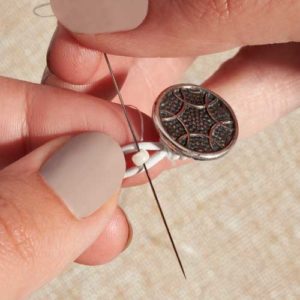
Step Three: Bring needle over leather cords and sew through seed bead.
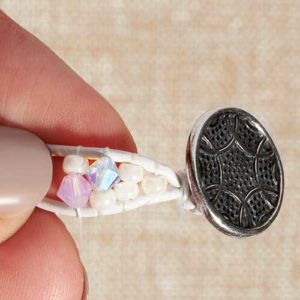
Step Four: Repeat steps two and three with two seed beads in this row.
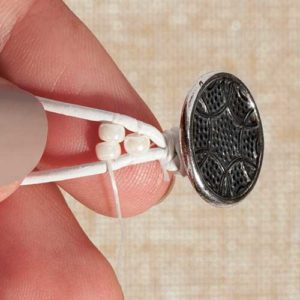
Step Five: For this row, you will pick up one seed bead and one bicone crystal from your mix, sewing under and then over the leather cords.
Step Six: For this row, you will pick up bicone crystal, then one seed bead. Sew under and then over the leather cords.
Step Seven: Repeat steps five and six until you’ve reached a comfortable length to wrap around your wrist two times.
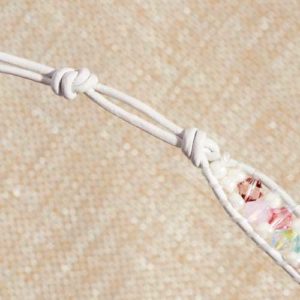
Step Eight: End with a row of two seed bead and the last row with one seed bead. Tie off beading thread and cut off excess. You can add a small dab of glue to secure the knot. Make a knot with the leather cords close to the seed bead. Make a second knot with a gap wide enough for your button to pass through. Cut excess leather cord end.
You’ve completed with your leather wrap bracelet.
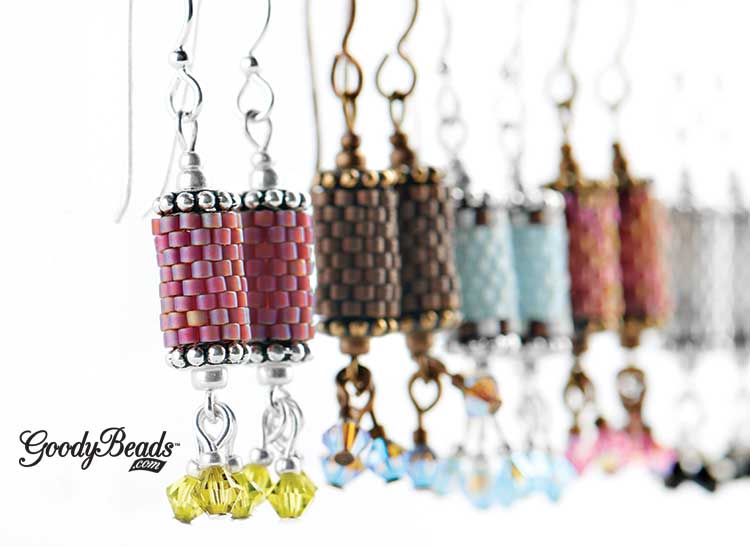
Seed Bead and Leather Bead-Weaving Kits
Kids are going back to school and you have tons of time on your hands. Why not get one of our seed bead and leather kits. From our in-house designers, Harper Gray and So Vang, come a wave of bead-weaving kits featuring popular leather wrap bracelets, seed bead peyote stitch earrings and honeycomb beads weaved to add to leather or chain.
Leather Wrap Bracelets designed by So Vang
Be on trend with a three-wrap leather bracelet. Each kit is personally designed with genuine gemstones to Swarovski® crystals or pearls, and from dainty Picasso seed beads to Czech two hole beads. All starting with a theme-matching button closure. These kits can be modified to fit a 6” wrist or use all of the beads and make to fit up to an 8” bracelet.
All beads, leather, and needles are included in the kit. All you need are a pair of scissors, optional glue and time.
Honeycomb Bracelet and Necklace designed by So Vang
Honeycomb beads are hot on the trending list, so no wonder our in-house designer So Vang created these masterpieces. Kit comes with all the beads, thread and a needle plus, detailed illustrated instructions to make each piece.
Harper Gray designed these earrings kits with an array of colors and finishes. Learn to make these earrings using peyote stitching skills. Each kit comes with detailed instructions and illustrations to help you make each pair of earrings. You’ll probably find yourself wanting them all!
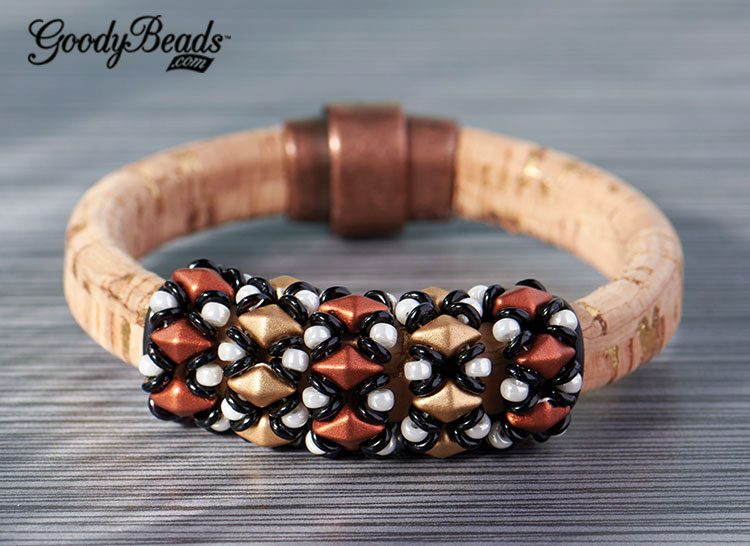
Beaded DiamonDuo Licorice Leather Bracelet with Tutorial
Featured in GoodyBeads July 2016 Trends, we are still loving the versatility of DiamonDuos especially when we pair them with licorice leather. Along with a FREE beaded loop tutorial, we will show you how to create DiamonDuo beaded loops and incorporate them in your licorice leather bracelets.
DiamonDuo Beaded Loop Tutorial
Download our DiamonDuo Beaded Loops pattern tutorial to get started. Create different color combinations with DiamonDuos, Czech O-beads and size 8/0 Miyuki round beads. Here are some examples of how we used these DiamonDuo Beaded Loops.
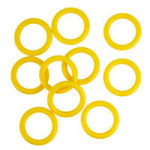
From our July 2016 trend, we featured this stunning bracelet with cork licorice leather. We made three loops with Matte Copper DiamonDuos and 2 with Matte Gold DiamonDuos. After cutting the cork licorice leather to your wrist size, slide on your beaded loops in alternating colors towards the center. We added a black rubber o-ring on both sides of the five loops to keep them in place. Glue on a clasp and let it dry for 24 hours before you wear. Crazy-neat, eh?
Using different colors can create a different look to your licorice leather. We created our DiamonDuo beaded loops using hues of metallic golds and white.
After we made five beaded loops, we cut our licorice leather to size. With some Super-lon Bead Cord (A012987), we wrapped the center section of our licorice leather with gold cord. Glue as needed on back side. Slide on a rubber ring, the 5 beaded loops and another rubber ring. ALL centered on the wrapped gold cord. Glue on a clasp and you have this flashy bracelet.
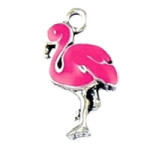
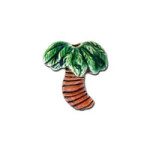
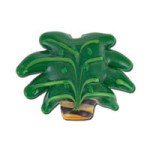
Beachy Flamingo and Palm Tree DIY Bracelets
Are you ready to head bang to the beat of “Boys of Summer,” while cruising along the beach? We have three bracelets that feature trending flamingo and palm tree motifs. Easy to make and slip on, you can make these simple stretch or leather bracelets while catching rays on the beach.
Beach Party Stretch Bracelet
Designed by So Vang
Wear your oversized floppy hat, romper, flip flops and this cool bracelet to your next beach party! You can whip up this bracelet and still have time to figure out if you want to change your outfit again.
What you will need for this bracelet is the following:
Step 3 – Cut with your memory wire cutters 1/2″ away from the last palm tree.
Step 4 – Round the wire end to make a simple loop.
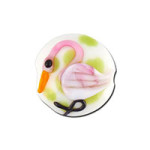
Blushing Flamingo Leather Bracelet
Designed by Tory Vezina
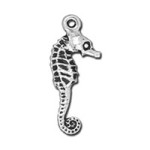
Can you imagine yourself wearing this bracelet, while humming and sipping on a fruity drink? We love the handmade flamingo glass bead surrounded with hues of pink.
Step 4 – Cut with your memory wire cutters 1/2″ away from the last cord end.
Step 5 – Round the wire end to make a simple loop.
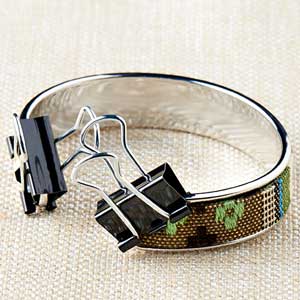
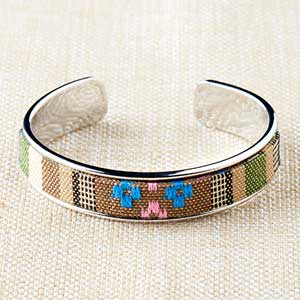
Easy Leather Cuff Tutorial
Rainy season is upon us. And what better way to a rainy day then making some leather cuffs. We have an easy leather cuff tutorial that will make you want to put away your rain boots and umbrellas, and “veg out” making these easy leather cuffs.
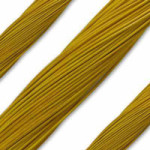
Instead of using a strand of 10mm flat leather, you can make two layers with two 5mm flat leather. We paired the mustard flat leather with this graphic neon splatter-printed leather on a gold-plated, glue-in-cuff.
(7) CH00047 – 5mm Mustard/Black Flat Leather (out of stock)
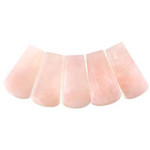
Rose Quartz and Serenity are Pantone’s color of the year winners. And for the first time they debuted a duo-color that blurs the line of femininity and masculinity.
We will show how we used these colors to inspire our Color of the Year Jewelry.
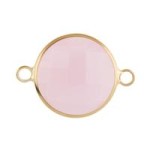
Link Earrings
Designed by So Vang
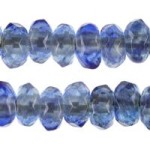
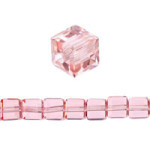
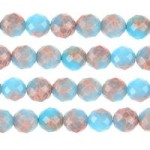
Made with blue foil tint beads and a hint of pink, these earrings pairs the two colors harmoniously.
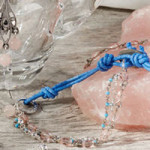
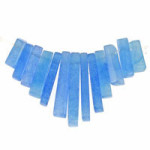
Necklace
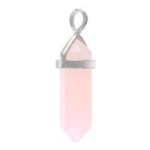
Pink Quartz Necklace Designed by Heidi Urlaub. Blue Serenity Neckalce Designed by Tory Vezina.
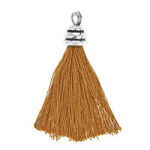
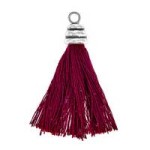
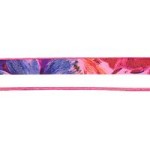
Rose Quartz Draped with a shiny tassel and beaded chain, this Rose Quartz necklace is the perfect statement piece to wear this spring. Can you imagine wearing it with your sweet summer dress and suede floppy hat?
Serenity This dream catcher necklace has the right Serenity hues for 2016. Made with handmade silk ribbon, Czech glass chip beads and feather charms, you can pair this with your trending flannel outfit and skinny jeans.
Bracelets
Designed by So Vang
Wire Wrap This wire wrap bracelet combines a darker shade of Serenity and square pink crystals. Accented with silver bali beads, string these colors onto memory wire for a three-loop bracelet with a simple loop on each end. This fun and easy Color of the Year-inspired memory wire bracelet is ready to flaunt.
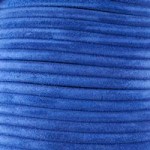
Leather cord When it comes to transcending gender barriers, leather is best to use to create an accessory that both men and women can casually wear. Using the same darker Serenity color as in the bracelet above, we used red aventurine beads on 1mm leather cords. We cut the 1mm cords into three equal strands. Taking the three strands, crimp one end with a revolving crimp tubes. Insert a bead on your top two strands and then the next bead will be on your bottom two strands. Repeat until desired length. Cut the three strand ends straight and crimp them with another revolving crimp tube. Add your choice of clasp and it is ready to wear.
How will you wear this year’s colors of the year?
Link Earrings
(2) Z007149 – 30mm Antique Silver Hammered Round Pewter Link
(1) A008998 – Silver Base Metal French Wire Earrings
Using Cold Connection in Jewelry: How to Rivet Leather
Cold connection is a unique metal technique that connects metal components without the use of heat. While you can connect metal pieces by glue or other adhesive, we will demonstrate some basic steps on how to use rivets with leather.
You will find many cold connection and riveting techniques in steampunk jewelry and metalworking. Once you have the basic tools and components for metal working and rivets, you will find how easy this versatile skill can be used for jewelry making.
Designed by So Vang
Rivet Leather (Part One)
For this project, we are using TierraCast® Rivets to show how to rivet on leather. When riveting on leather, use a two-part compression rivet, which will have a bottom and cap piece. Two-part compression rivets are best for leather, as they will create a tighter hold if you are adding embellishments with the rivets.
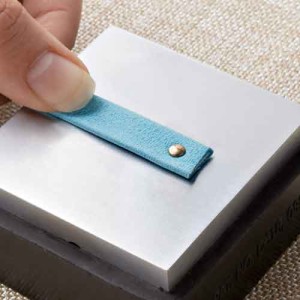
Punch leather through the backside using the Leather Hole Punch. Make sure to punch a hole that is large enough for the rivet to sit it, but not too big. If the hole is too big the rivet may not catch the leather, and may fall out. Tip: Punch with the smallest setting first. Increase hole size if the rivet does not go through.
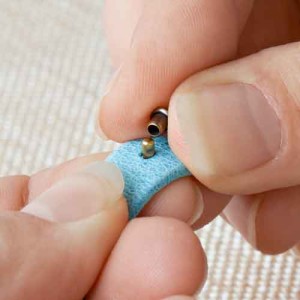
Insert bottom rivet piece through the backside of the leather and put cap piece on top.
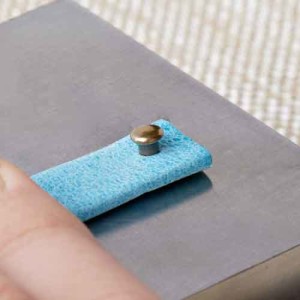
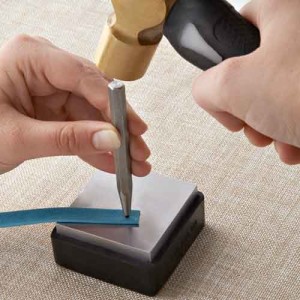
Press the two pieces together until it stops. Place on Bench Block.
Use the Rivet Setter that complies with the size of the rivets. i.e. 4mm rivets will need the 4mm TierraCast® rivet setter tool, while 6mm rivets will use the 6mm TierraCast® rivet setter. Use steel hammer to hit the rivet setter with 2-3 good strikes.
Your rivet is complete.
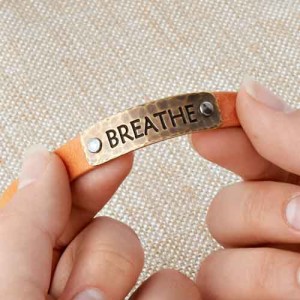
You can sandwich in TierraCast® Components for added embellishments. Or for our bracelet, we used TierraCast® Breathe Link. Use Bending Pliers to curve the link. Line up the leather behind the link and mark the holes of where the rivets will go. Punch the holes where you marked them and rivet the link to sandwich the leather and link together. Glue your clasp and you are done.
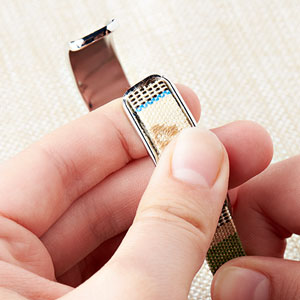
Rivet Leather (Part Two)
Designed by So Vang
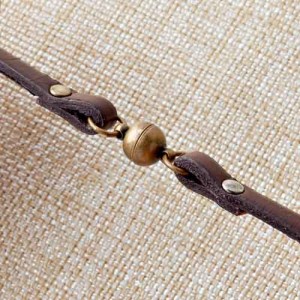
Make leather loop for jump rings, clasps, or joining components together. Create this wrap-around leather watch by using these two part compression rivets. Cut two 12” 5mm flat leather. Make leather loops on all four ends. Attach your clasps and watch face for a fun wrap-around leather watch.
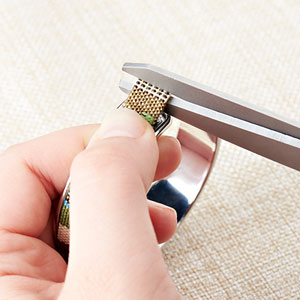
Measure an inch distance between the holes. Punch with Leather hole punch pliers.
Fold and insert your top and cap pieces.
Hammer the rivets with your rivet setter and you are done.
Make loops to add jump rings and clasp as shown in this watch bracelet example.
The holiday season is here and it’s the time of reconnecting with loved ones and gift giving. Looking for a quick holiday gift? We have some inspirational easy leather DIY projects. Jump on the trend of fashionable leather bracelets or try out an alternative use of flat leather for an easy DIY key chain.
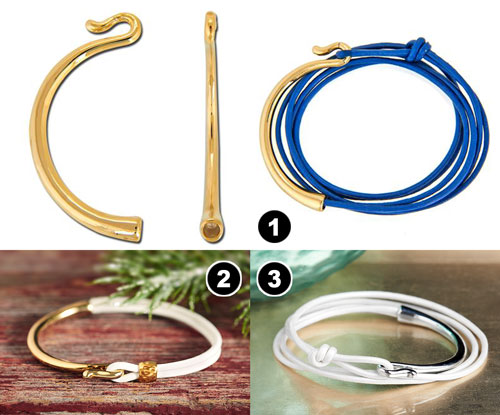
Winter White Splendor Leather Bracelet
Designed by Tory Vezina
Simplify gift-giving with a stunning bracelet using 2mm leather cord. Cut the 2mm round cord at 8 inches. Fold the cord in half and slide the TierraCast® barrel bead (TC01538) through the cord ends to create a loop. Glue the cord ends to a hooked curved clasp (A019043) and you are done! You may want to make a few of these because you’ll want to keep one for yourself.
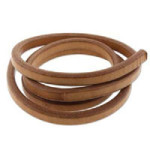
Licorice Leather Bracelet
Designed by Tory Vezina
Licorice leather bracelets are the perfect statement jewelry. Cut the licorice leather to the preferred wrist length. Add a combination of beads and spacers to add color and use O-rings to keep beads and spacers in place. Lastly, glue your choice of licorice clasp.