Easy DIY Earrings with Faceted Glass Charms & Links
Learn to make easy DIY earrings with faceted glass charms today! These fabulous earrings projects are the perfect easy DIY for your fast and fun adventures! All you need is a pair of pliers and jump ring opening skills.
Check out our previous post about opening Jump Rings.
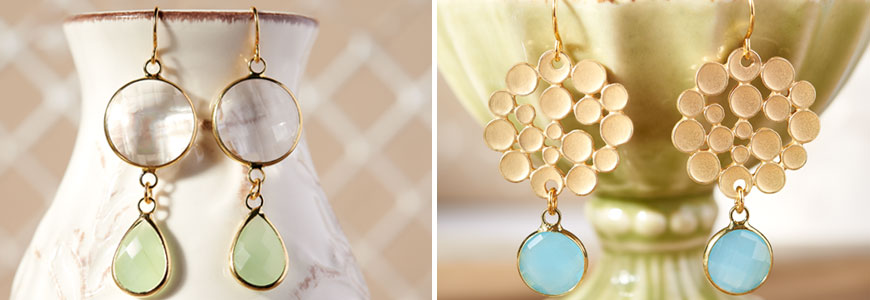
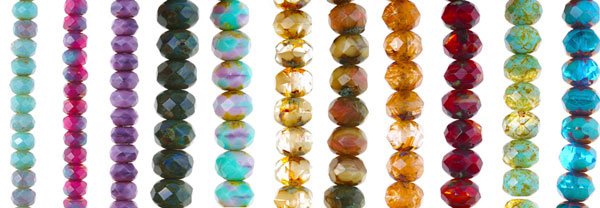
The star of these earrings are the faceted glass charms and links. They are sold in gorgeous pastel hues and easy to use.
These pair of earrings uses link findings with Faceted Glass Charms attached with a small jump ring. What a simple idea, don’t you think? The first pair uses the combination of Faceted Glass Charms and Faceted Glass Links, while the second pair is so bubbly cute with Circles Connector and Faceted Glass Charms.
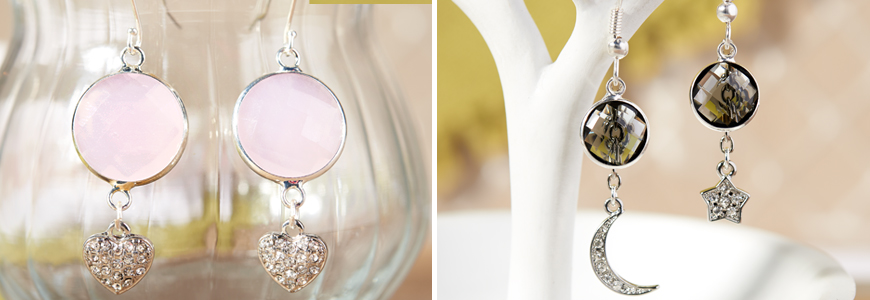
This first stunning pair of earrings uses the Faceted Glass Links with cute heart charms! All you need is to open a jump ring to attach the charm to the faceted glass links.
And we especially LOVE the star and moon combination. Talk about being trendy with asymmetrical earrings! Cut chain to 1/2″ and cut two pieces. Open a jump ring and attach star/moon charm to chain pieces. Open Earwire loop and slide on one end of the chain dangles and a faceted glass charm. Close loop. Repeat to make the second earring.
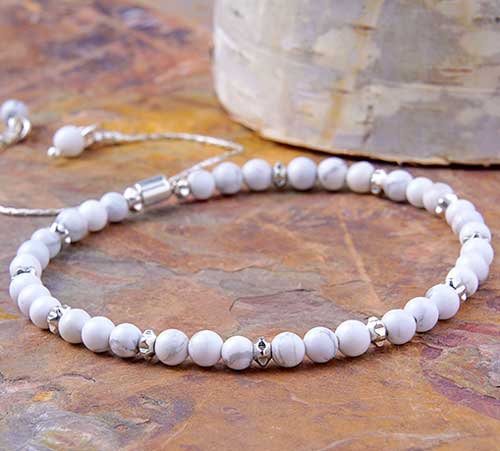
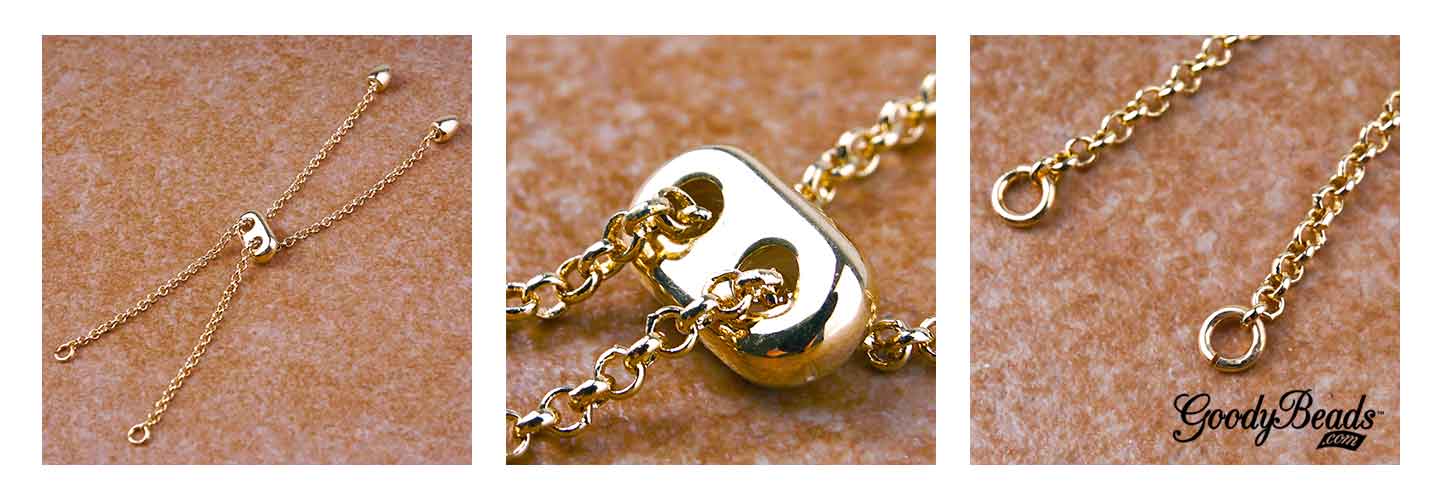
Learn how easy it is to make an adjustable bracelet using Slide on Clasps with Beading Chain.
Adjustable bracelets can be a versatile piece of jewelry to fit any size wrist. From our Adjustable Beading Chain Jewelry trend, we used dainty 0.7mm or 1.25mm chains with beads, while adding a Slide on Clasp to create an adjustable bracelet.
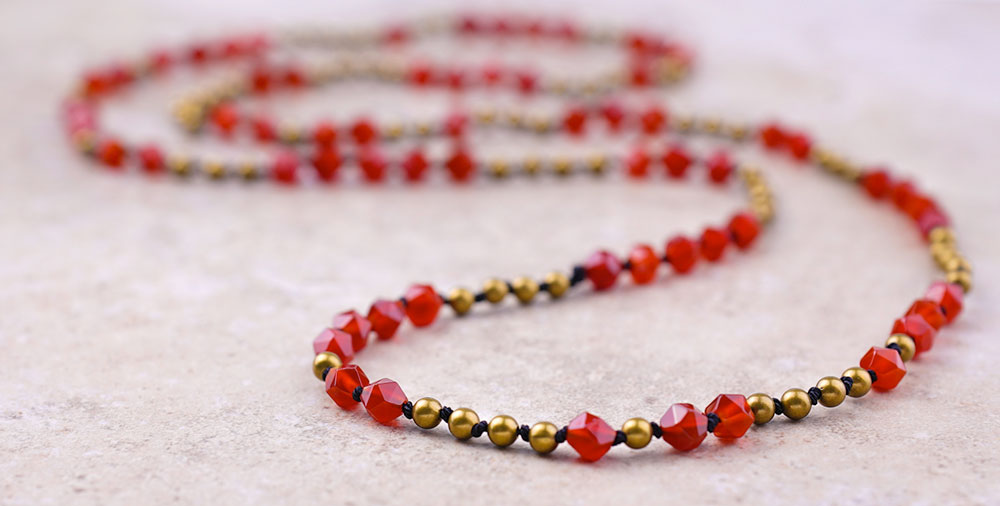
Knotted necklace are fun to make with or for friends. Once you get into a rhythm, you can whip one out in no time. Plus, we have a quick video tutorial on how to use the Easy Knotter Tool to help make knots between beads.
Knotted necklaces are super easy to make. You will need Griffin Silk Cord and an assortment of your favorite beads like gemstones, Chinese crystals, metal beads, seed beads, etc. We love using Griffin Silk Cord because you get about 6 1/2 feet of twisted silk cord with a twisted needle. This will give you a 32″ necklace, give or take. In the examples below, we use size No.8 Griffin Cord.
Tutorial Video
Hazy Turquoise Necklace
We used glossy rondelle Chinese crystals and triangle brass beads to create this necklace.
We love the texture of these Star Cut gemstones. We knotted this necklace with antique gold beads in an organic way without a pattern sequence, paired with black silk cord to pop out the Carnelian color.
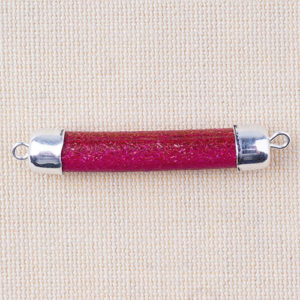
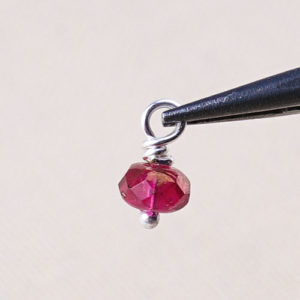
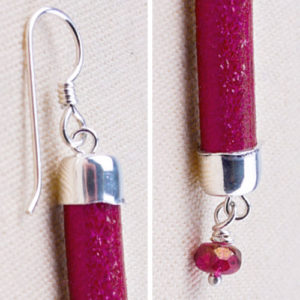
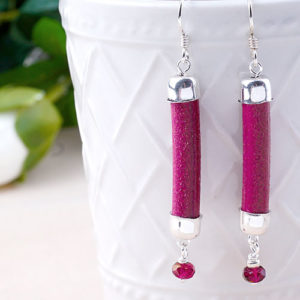
Eat your heart out ladies and swoon over this simple pair of leather earrings using round leather cord and Czech rondelles. Learn to make with this visual tutorial!
This tutorial is perfect for using a short amount of round leather or leftover cuts from previous projects. What you will need for this DIY leather earrings are:
An easy-to-wear piece of jewelry are cuff bracelets. We have this easy tutorial that will take less than 5 minutes to make and ready to wear. What you will need for this project are:
Wrap the end of the wire to the hoop. Use pliers to make a tighter wrap. Push wrapped coils together.
Pick up an Amethyst rondelle, loop wire towards middle of hoop and wrap two times. Make sure to push the wrapped coils together.
Pick up a Czech bead and repeat.
Repeat steps 3 and 4, going around the hoop earrings.
Make your coils at the end and cut off excess wire. Use pliers to make tighter coil wraps.
Repeat all steps for other earring.
Raven’s Journey: Czech Glass Beads
Lenka Bindzar, owner of Raven’s Journey, specializes in Czech glass beads. The quality, expertise, detail and modernizing she puts into her Czech bead designs helps to obtain an overall mission of continuing Czech Republic tradition and customer satisfaction. Check out these new Raven’s Journey Czech beads we’ve just added to our inventory!
Before starting Raven’s Journey, Lenka’s own journey started when she settled in Seattle, WA from Czechoslovakia. While looking for beads to make a collar for her dog, she stumbled upon a shop that sold Czech beads. With the small selection she encountered, she traveled back home in search of finding Czech bead manufacturers. She happened to find a small family-owned bead pressing company. And from there, her ideas flourished and has been designing and creating pressed glass beads since. You can see the hard work she puts continuing her mission to “work closely with artisans in the Czech Republic to continue the tradition of creating and producing the finest quality glass beads in the world.” We are proud to support the tradition and history of Czech glass beads!
We love the coin beads with pressed lotus, owls, skulls and bird bead.
One of the most popular Czech bead shapes are rondelles. Some mimics a picasso finish, opaque, translucent and more. These Czech beads has an organic look and color, making them easy to use and pair up with different beads like gemstones, boro glass, pearls, etc.
One of our favorites are the beautiful Czech Hibiscus. They are prefect for summer jewelry designing or for flower-lovers! And they come in a smaller 7mm size. Try these hibiscus beads with Porcelain beads, Swarovski crystals and wood beads.
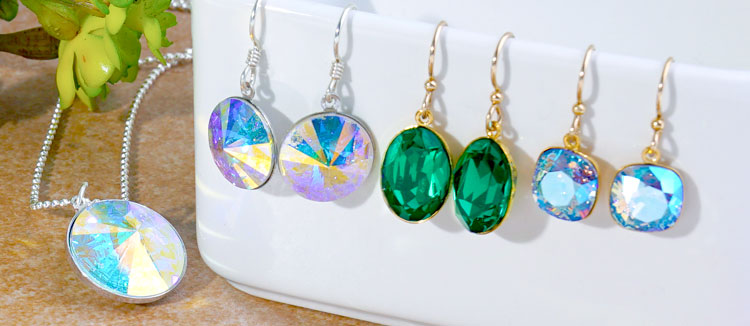
Statement jewelry is about making your presence known. So why not create your own earrings or necklace with Swarovski crystal fancy stones? In minutes, you can create sparkling jewelry!
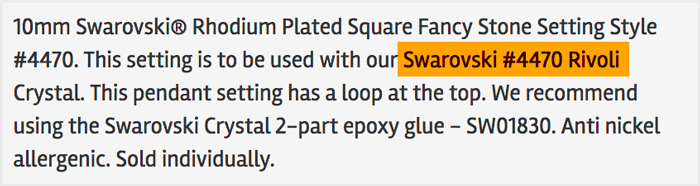
Swarovski Crystal and Settings
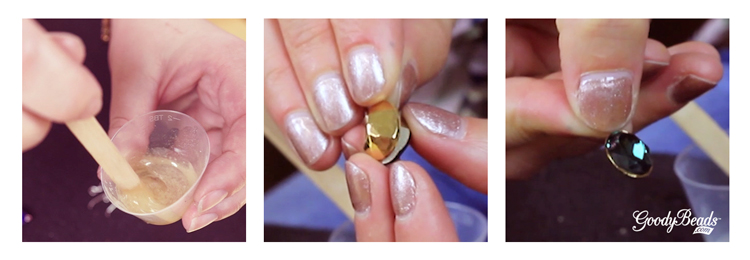
What you will need to create your pendant or dangle crystals are the following:
When determining the right crystal stone for the right setting, read the description to determine the correct crystal style #. Take the style # and put that into the search bar to find crystals that will fit that setting.
Another key component to creating these crystal dangles is the two-part epoxy. CG 500 (A+B) is a high-performance gluing system for both foiled and unfoiled Swarovski crystals, exclusively distributed by Swarovski for professional use within the jewelry industry. CG 500 (A+B) absorbs impacts and withstands distortion. In addition, maximum elasticity protects the crystal foiling.
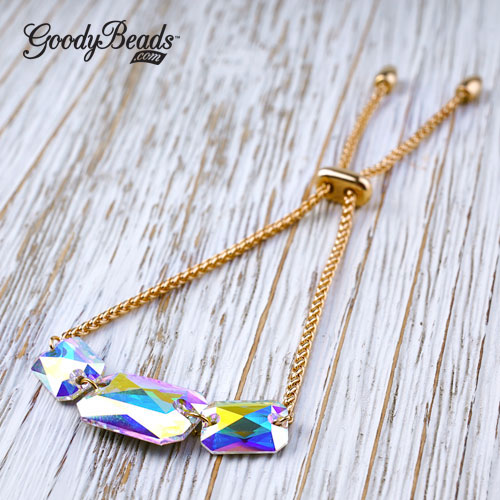
We have an easy DIY project for you that makes creating bracelets even easier. With the Adjustable Bracelet Sliding Clasp, all you need to add is your favorite link! This project consists of sparkling Swarovski Crystals and two simple ways to incorporate them with the adjustable bracelet finding!
Adjustable Bracelet Sliding Clasp
The Adjustable Bracelet Sliding Clasp comes in two different chain types in gold, silver or rhodium finishes. These findings come in wheat or rollo chain, with a sliding clasp that easily moves to adjust to your wrist size and jump rings that make attaching links, beads, connectors and more a breeze.
Link Swarovski Sew-On Stone Crystals with jump rings. We opened one of the jump rings on the chain and slid on one end of the crystal. Do the same to the other jump ring. Link a large sew-on crystal with 5mm oval jump rings. This bracelet is all set and ready to wear!
We can’t get enough of the Swarovski Fine Rocks Tube Crystal! We used 22-Gauge wire, cut a 3″ piece and made a wrapped loop on one end. Slide on a silver disc spacer (Z002570), tube crystal and another spacer. Made another wrapped loop to finish off the link! We love the jump rings on the clasp because you can easily open the jump rings and attach your tube crystal!
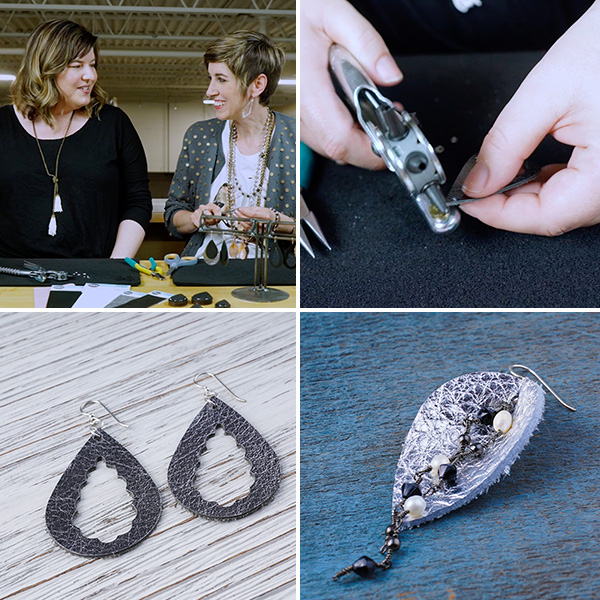
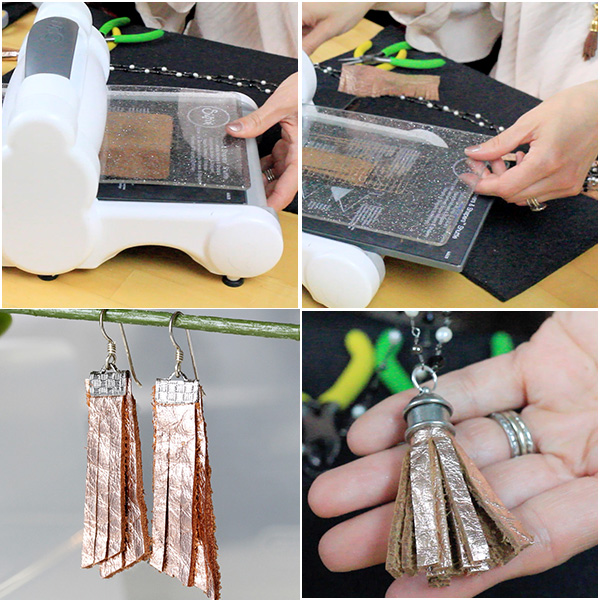
Make trendy and fashionable leather earrings using the Sizzix Big Shot and the Teardrop Dies (SZ00025). Watch this video tutorial as Tory and Candie Cooper show you how easy it is to create some earring for yourself!
Check out our previous blog where you can learn how to Set Up your Sizzix Big Shot and even learn to make DIY Tassels. Theres a ton of ideas we can’t wait to show you!
Here are leather and chain components that was used in this video tutorial:SZ00002, SZ00003, CH00659.
Hope you have fun making some earrings.Add your choice of jump rings and earring findings to finish off your earrings. Or make them into a focal necklace pendant. So many possibilities!
Even Peyote Stitch on Czech Carrier Beads with FREE Patterns
New to GoodyBeads are the oh-so popular Czech Carrier Beads. We have an easy even count peyote stitch pattern to get you started.
Czech Carrier beads are making waves in the DIY jewelry making world. They have two holes and can be used for a stretch bracelet or intricate necklaces! Because they have two holes, they can be easily used in your favorite bead-stitching projects! The typical way to style carrier beads is bead stitching a tube of beads or seed beads to encase the carrier beads. We are using the classic peyote stitch tubes to slide over the carrier beads. Check out this tutorial and pattern ideas below!
Even Count Peyote Stitch
For these patterns, we used an even count peyote stitch pattern and created tubes to side over Czech Carrier beads. Check out this simple illustration below to understand how to do an even count peyote stitch pattern. Don’t forget to PIN this for later!
Even Count Peyote Stitch Tutorial
Peyote Stitch Patterns
We adore these colors! We used four colors to design these 15 different patterns. Make sure to DOWNLOAD PDF of these patterns and a quick tutorial of how to create tubes to add to your Czech carrier beads.
This step is important because this avoids the tubes from sliding off the carrier beads. We would recommend using GS Hypo Cement (A007224). It has a precision applicator, which helps get into small openings and a cap that stops overflowing glue from escaping and drying up. You have two options of when to add your glue.
First option is before you zip up your tube pattern. Apply glue to both sides of the carrier bead and lay it in the middle of your pattern. Fold your pattern around the carrier bead and sew the ends to zip up the tube patter.
Second option is after making your peyote stitch tubes. Complete your tubes and slide carrier bead half way through, still exposing the bead. Run your glue around the exposed area of the bead, let it sit for a second or two and slide the tube over the rest of the carrier bead.
Let it the beads dry completely before using. Make sure to read instructions for more information.
First we cut a 4 feet piece of wire. Fed one end of the wire through a 2′ piece of chain (this will be the extender chain for the necklace) and centered the chain at the middle of the beading wire. Slide on a 2mm crimp tube and using the Magic Crimper (TL00288) crimped the tube into a bead. You can check out our previous blog post HERE about the tool. Next, with both ends, slide on (25) size 4mm ivory miracle bead, (3) size 6mm miracle bead and (3) size 8mm miracle bead. Slide a 6mm miracle bead on each wire thread and slide on first carrier bead. As you can see we added a miracle bead in between each carrier bead. from the top strand, we used size 6mm miracle bead and the bottom used size 8mm miracle bead. This helps the necklace take shape. Reverse the pattern of strung beads to the end and crimp off the end with a lobster claw clasp.
Can we say we are excited to get these tassel and fringe dies in. Here are some examples we saw in Tuscon last Gem Show in January 2018 at the Sizzix booth. We adore all the fun ways to use the Sizzix machine and their multiple Dies!
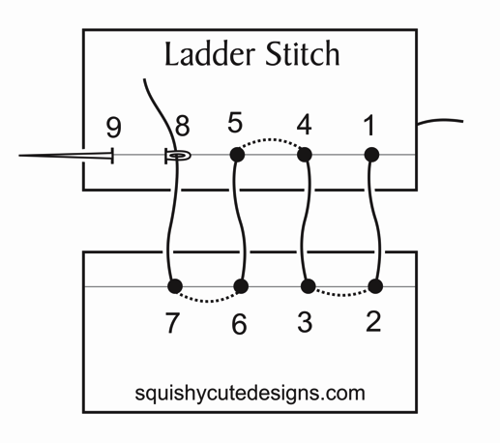
If you’ve done fabric sewing and done a ladder stitch to close openings, this technique would be easy for you. Below is a illustrated look at what a ladder stitch looks like from this external website we found. So every time you come up, that’s when you will sew through your bead hole before sewing across and down.
One of our popular demos was bead stitching Swarovski two-hole spike beads on Beadable Accessories like the cuff and rings. Download our components list HERE for this demo and watch our facebook video of how So Vang ladder stitches the spike beads on beadable rings and cuffs.
Make simple drop earrings using Memory Wire and a few tools. Watch as So shows you how easy it is to create hoops and dangle crystal pendants off it. Download the pdf file HERE to get components and tools used for this super easy demo!
One of our popular project request is our beadable fan earrings with 11/0 Miyuki Delicas and long tassels. Check our video to see how easy they are made.
Starting with 2.5′ to 3′ of beading thread, attach a stopper bead leaving a 6″ tail end.
Start from one end of the fan, come up through the bottom hole.
Add your three delicas and go across the beadable opening and down the hole.
Sew up the next hole, add your three delicas, go across the beadable opening and down the hole.
Repeat this until you’ve gone across the beadable fan pendant.
You will now add your pearl bead by sewing up the hole closest to the round opening, add your pearl bead and go across the circle opening and down the hole.
Sew through the pearl bead again and up the hole, through the pearl again and down the hole.
Tie off your ends and cut excess off.
Open small jump ring and slide on tassel and through the middle hole of your fan pendant. Close jump ring.
Open earwire loop and attached top fan pendant loop to earwire. Close loop.