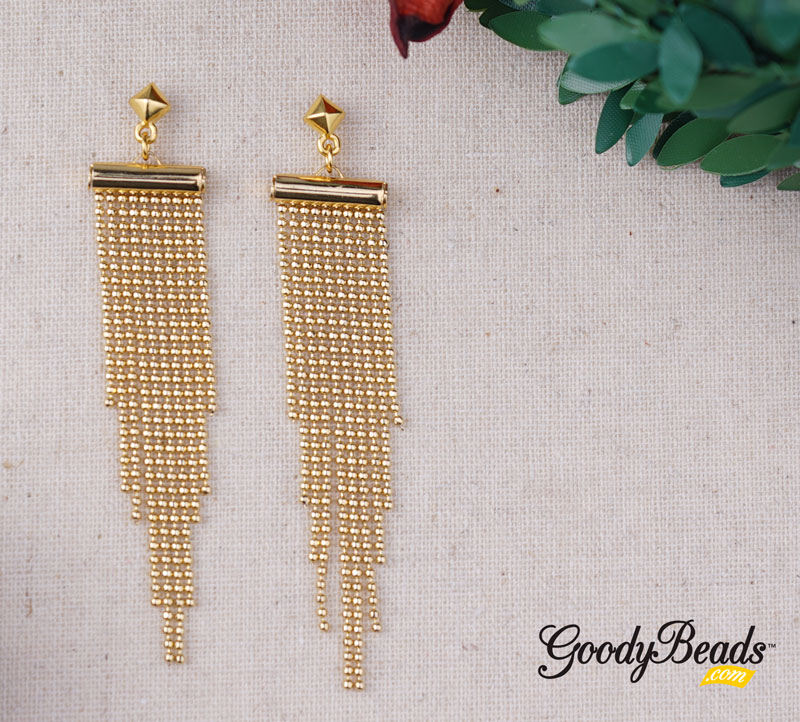
DIY Golden Goddess Earrings with Lapis Gemstones
Our February Daily DIY project is all about layering! The DIY Golden Goddess Earrings with Lapis Gemstones are designed by Jacque, who made the amazing Macrame Planter Hanger with Large-Hole Beads last summer. She is showing off her jewelry skills with these post earring made with Lapis gemstones, enamel connector and gold findings.
Items used in Post Earrings:
- Z016675 (2) – 43mm Satin Gold Etched Round Hoop
- Z016258 (2) – 27mm White Enamel Gold Plated Ring Connector Pendant
- Z006000 – 12mm Gold Plated Stainless Steel Sun Burst Post Earrings with Loop
- LAP12DC-8 – 12mm Lapis Coin Gemstone Beads
- A011525 – 9mm Gold Plated 20 Gauge Round Jump Ring
- A011523 – 8mm Gold Plated 20 Gauge Round Jump Ring
- A008801 – 5mm Gold Plated 21 Gauge Oval Jump Rings
- A019662 – 1 Inch Gold Plated 22 Gauge Headpins

Directions:
- Slide a lapis gemstone onto a headpin and make a simple or wrapped loop.
- Open 8mm jump ring, slide on one hole of enamel link and through hoop of Gold Etched Round Hoop. Close jump ring.
- Open 9mm jump ring, slide through other hole of enamel link, lapis dangle and top loop of Gold Etched Round Hoop. You want to make sure the dangle is behind the enamel. Close jump ring.
- Open oval jump ring, through top loop of Gold Etched Round Hoop and post earring loop. Close jump ring. Make sure the white enamel is facing outwards.
- Repeat all steps for other earring.
Designed by Jacque