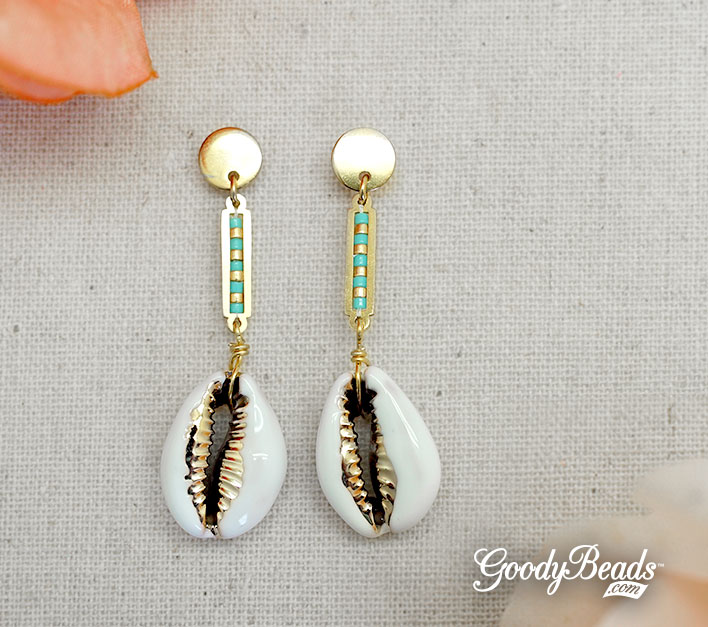
Can you hear this DIY calling to you? This pair of cowrie shell earrings is designed with enamel cowrie shells and our fun beadable links. Get this free tutorial today and be summer-ready!
Add a foot of beading thread to your needle and add a bead stopper to your thread end, leaving about a 5 inch tail.
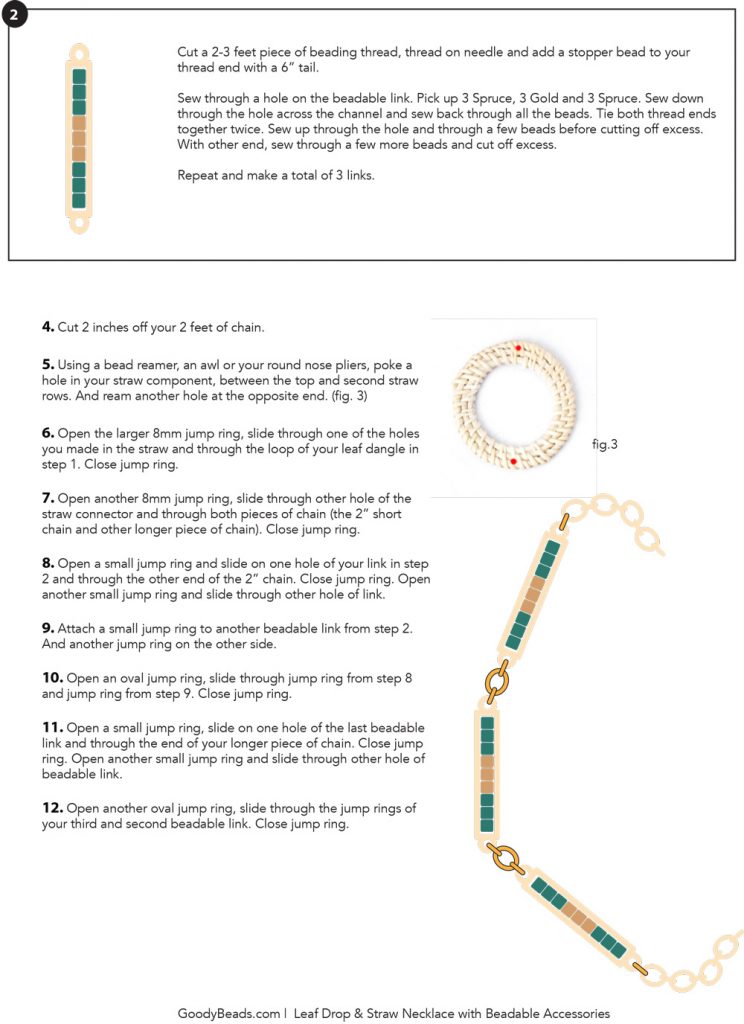
Sew through one hole of beadable link and pick up Sea Opal and Gold Delica seed beads, alternating between the colors. Pick up a total of 9 beads. Sew down through the other beadable link across the link channel. Sew back through all the beads. Pull off the bead stopper and tie both threads together, tie two times. Sew thread ends through a few beads before cutting off excess.
Cut a 3 inch piece of wire. Insert a third of the wire through the shell and fold wire. Wrap the longer piece of wire on top and around the shorter piece of wire.
Make a simple loop with the shorter wire.
Open loop, slide in beadable link and close loop.
Open earwire loop and slide on other end of beadable link.
Pantone 2021 Color of the Year: Ultimate Gray & Illuminating
Pantone has produced their color pick for 2021. Or should we say picks! With 2020 being a rough year for everyone around the world, Pantone’s color picks Ultimate Gray and Illuminating challenges a ‘forward’ thinking for the future. We will dive into Pantone’s meaning for their color picks for 2021 and we’ll give you a fun DIY jewelry to embrace this color combination!
2016 was the year Pantone debuted a first-time, duo-color that blurs the line of femininity and masculinity; Rose Quartz and Serenity. With the current event of 2020, it is no wonder their pick for 2021 doesn’t blur the line of colors but complement two opposite colors that works “together to support one another.” While Ultimate Gray is justly a neutral gray color, Illuminating is a bright yellow, it is “a marriage of color conveying a message of strength and hopefulness that is both enduring and uplifting.“
Pantone states, ” Emboldening the spirit, the pairing of PANTONE 17-5104 Ultimate Gray + PANTONE 13-0647 [Illuminating] highlights our innate need to be seen, to be visible, to be recognized, to have our voices heard. A combination of color whose ties to insight, innovation and intuition, and respect for wisdom, experience, and intelligence inspires regeneration, pressing us forward toward new ways of thinking and concepts.”
How do you feel about Pantone’s picks for 2021?
DIY Beaded Silvery Yellow Diamond Color Block Earrings
We love the color combination and the emboldening message it represents. Here is a fun design using the two colors in our pair of DIY earrings. We’ve made a simple colorblock diamond earrings using Delica beads in a brick stitch.
DIY Beadable Bezel Bangle with Miyuki Delica Seed Beads
Following our very popular Column Beads, a brand new item in the last two months, why not make a matching pair of beadable jewelry with this Beadable Bangle with Miyuki Delica Mix!
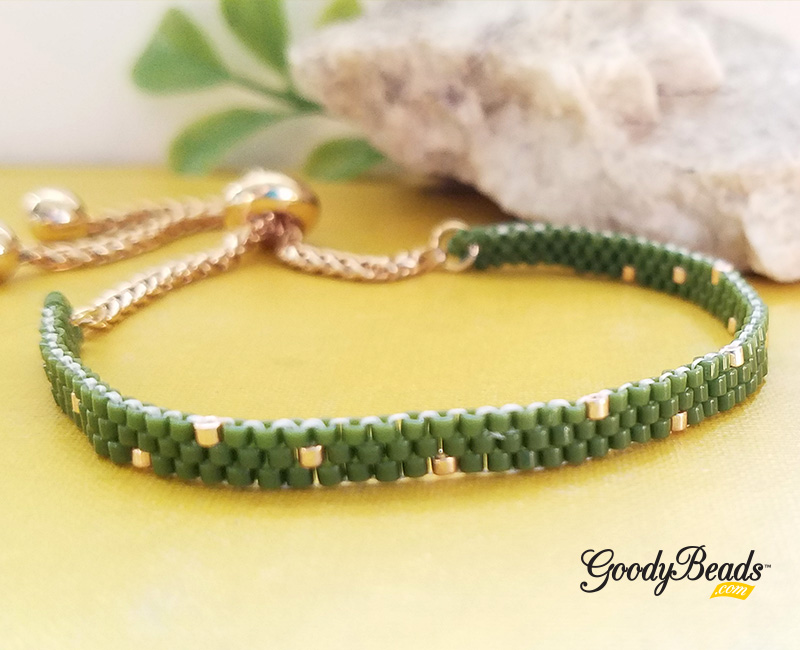
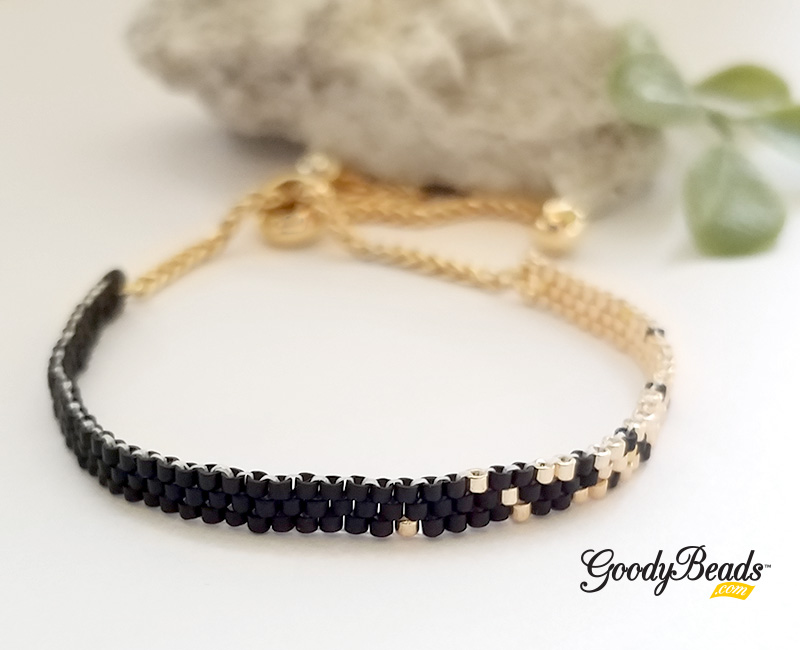
Looking for an easy weekend project? Why not get into a super simple peyote stitch pattern and make it into an adjustable bracelet! We’re using size 11/0 Delica seed beads, making an odd-stitch peyote stitch pattern. Make a simple wrap bracelet with one color delica or multiple, you choose! Get the FREE downloadable PDF tutorial for the Delicate Delica Adjustable Bracelet HERE!
If you’re not a fan of an adjustable bracelet, you can also alter it with a lobster clasp and jump ring. Or even make a multi-wrap bracelet
Even Peyote Stitch on Czech Carrier Beads with FREE Patterns
New to GoodyBeads are the oh-so popular Czech Carrier Beads. We have an easy even count peyote stitch pattern to get you started.
Czech Carrier beads are making waves in the DIY jewelry making world. They have two holes and can be used for a stretch bracelet or intricate necklaces! Because they have two holes, they can be easily used in your favorite bead-stitching projects! The typical way to style carrier beads is bead stitching a tube of beads or seed beads to encase the carrier beads. We are using the classic peyote stitch tubes to slide over the carrier beads. Check out this tutorial and pattern ideas below!
Even Count Peyote Stitch
For these patterns, we used an even count peyote stitch pattern and created tubes to side over Czech Carrier beads. Check out this simple illustration below to understand how to do an even count peyote stitch pattern. Don’t forget to PIN this for later!
Even Count Peyote Stitch Tutorial
Peyote Stitch Patterns
We adore these colors! We used four colors to design these 15 different patterns. Make sure to DOWNLOAD PDF of these patterns and a quick tutorial of how to create tubes to add to your Czech carrier beads.
This step is important because this avoids the tubes from sliding off the carrier beads. We would recommend using GS Hypo Cement (A007224). It has a precision applicator, which helps get into small openings and a cap that stops overflowing glue from escaping and drying up. You have two options of when to add your glue.
First option is before you zip up your tube pattern. Apply glue to both sides of the carrier bead and lay it in the middle of your pattern. Fold your pattern around the carrier bead and sew the ends to zip up the tube patter.
Second option is after making your peyote stitch tubes. Complete your tubes and slide carrier bead half way through, still exposing the bead. Run your glue around the exposed area of the bead, let it sit for a second or two and slide the tube over the rest of the carrier bead.
Let it the beads dry completely before using. Make sure to read instructions for more information.
First we cut a 4 feet piece of wire. Fed one end of the wire through a 2′ piece of chain (this will be the extender chain for the necklace) and centered the chain at the middle of the beading wire. Slide on a 2mm crimp tube and using the Magic Crimper (TL00288) crimped the tube into a bead. You can check out our previous blog post HERE about the tool. Next, with both ends, slide on (25) size 4mm ivory miracle bead, (3) size 6mm miracle bead and (3) size 8mm miracle bead. Slide a 6mm miracle bead on each wire thread and slide on first carrier bead. As you can see we added a miracle bead in between each carrier bead. from the top strand, we used size 6mm miracle bead and the bottom used size 8mm miracle bead. This helps the necklace take shape. Reverse the pattern of strung beads to the end and crimp off the end with a lobster claw clasp.