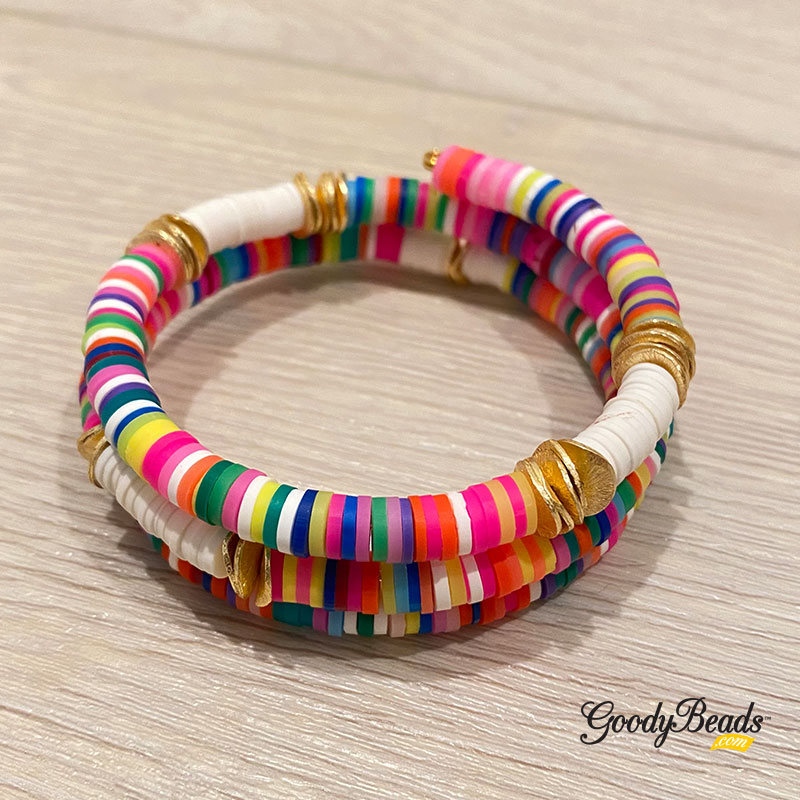
DIY Colorblock Memory Wire Bracelet Wrap with Vinyl Beads
Today’s DIY Colorblock project was featured in our previous Facebook LIVE episode, and uses bright Vinyl beads and memory wire. Create color blocking with separating chunks of color and wavy disc beads.
Items used in DIY colorblock bracelet project:
- X002168 – 6mm Multi Color Vinyl Beads
- X001538 – 6mm Black/Grey Vinyl Beads
- WR00126 – Gold Memory Wire
OR WR00139 Gold Assortment Memory Wire - Z018412 – 6mm Gold Wavy Disc
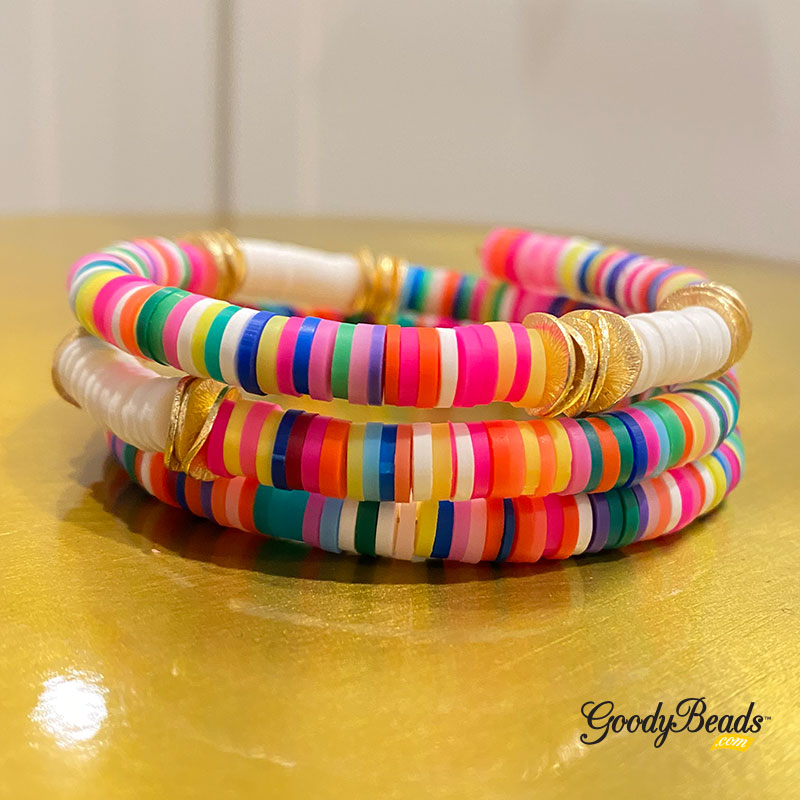
Directions:
- Make a simple loop on one end of memory wire.
- Without pulling all the beads off the multi-color strand, grab about an inch off and hold between your fingers while you feed the memory wire through them. Grab another chunk and slide on memory wire. Do this to add 30-50 vinyl beads.
- Add 5 wavy disc beads to memory wire, making sure to feed them in opposition directions to create the wavy look.
- Separate the whites from the Black/Grey strand and slide on 10-15 white vinyl beads on the memory wire.
- Add 5 wavy disc beads.
- Repeat Steps 2-5 another two or three more times, or to your desired length.
- Add another 2-3 inch length of multi-color vinyl.
- Cut off excess memory wire with memory wire cutters, leaving about 1/4 inch tail.
- Loop that end to finish your bracelet.
Video Tutorial
Check out the Facebook video on how to make this bracelet. Go to this VIDEO LINK and tutorial starts at 9:00 minutes.