Spend the Holidays with Swarovski® – Fall/Halloween
We’re going to dive into fall weather with our friends at Swarovski: Create Your Style and celebrating with Fall & Halloween colors. Because we live here in the Midwest, we’ve started to see trees bursting with fall colors like dark greens, bright yellows and oranges, flaming reds and popping purples! Plus, we have a fun DIY project to get your spooky Halloween going.
Here are our selection of Swarovski crystals to embrace the fall and Halloween colors:
- Black Colors – Jet Black, Silver Shade
- Browns – Topaz, Light Topaz, Light Colorado Topaz, Golden Shadow
- Oranges – Tangerine, Fire Opal, Sunflower
- Even try our Halloween Master Mixes – MX0028
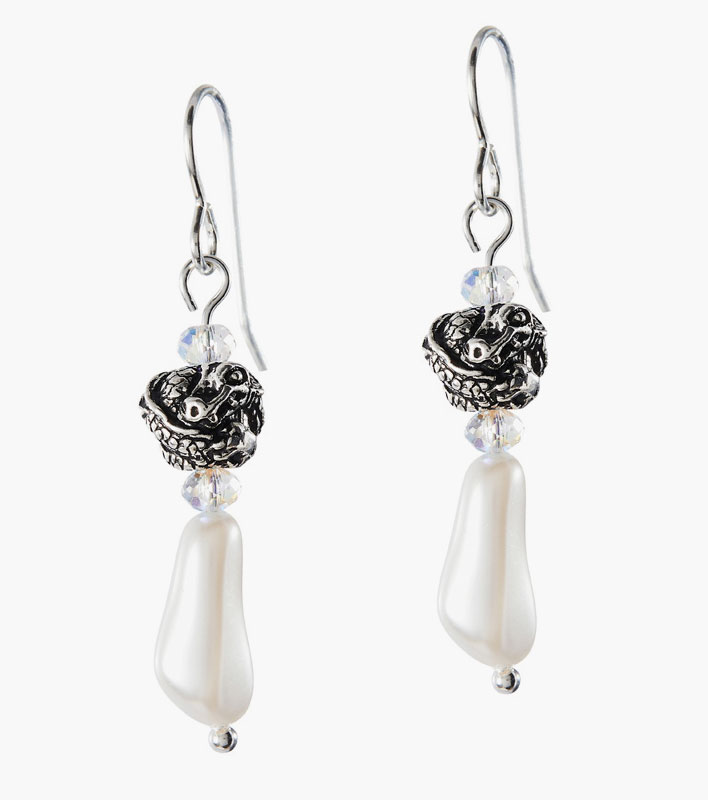
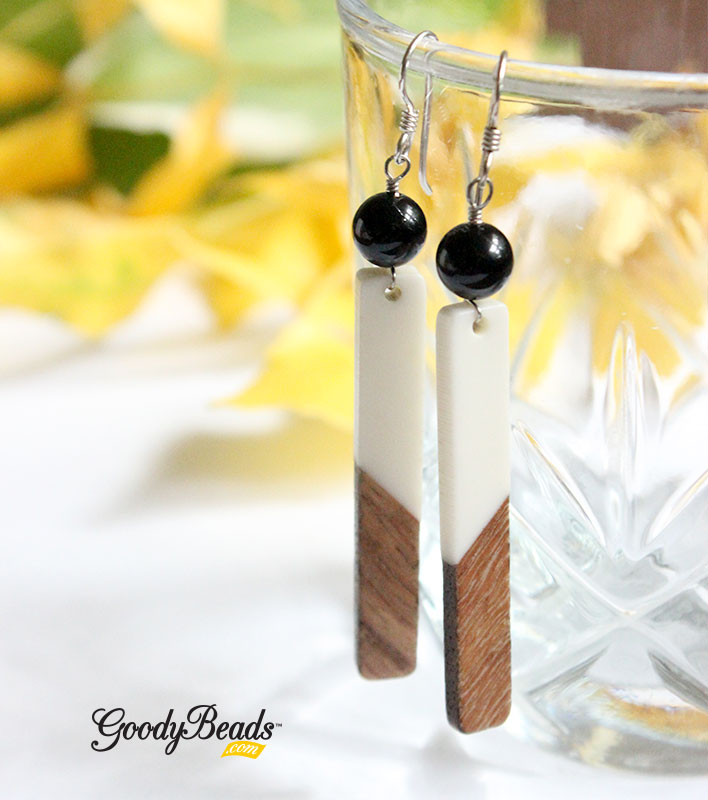
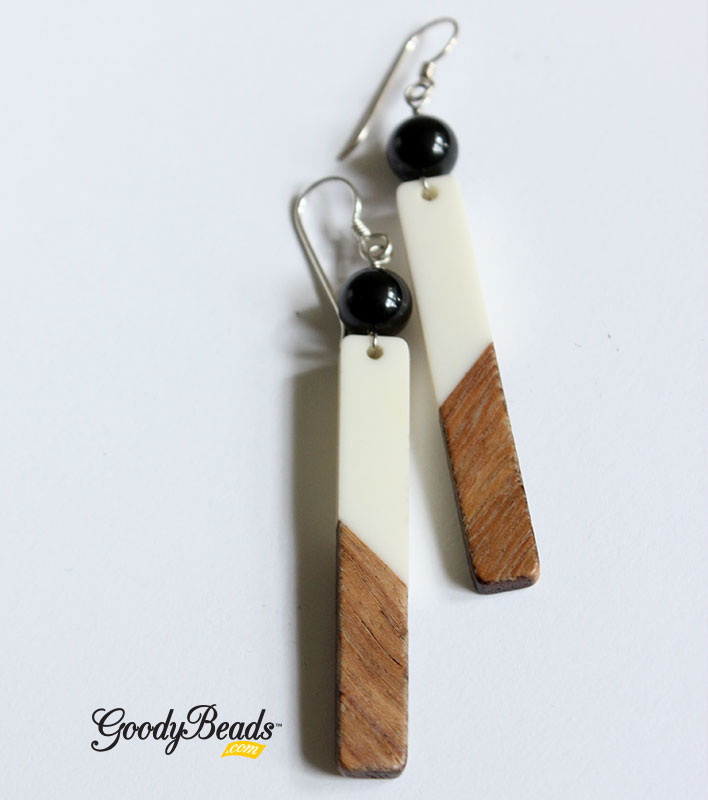
Scaredy Cat Earrings
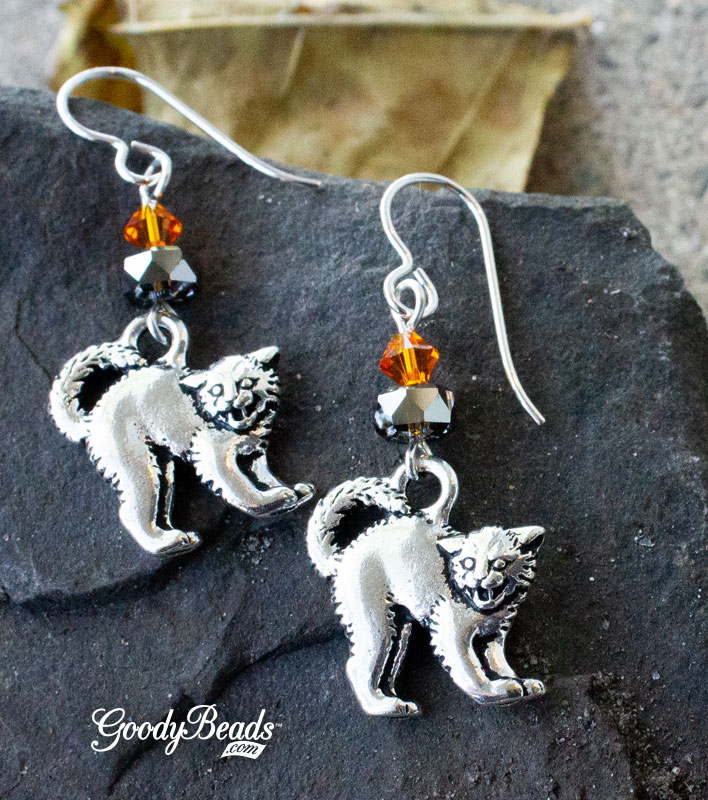
Items used in earrings: TC02297, SW01187 (2), SW00969 (2), A007659 & TC01590 (2).
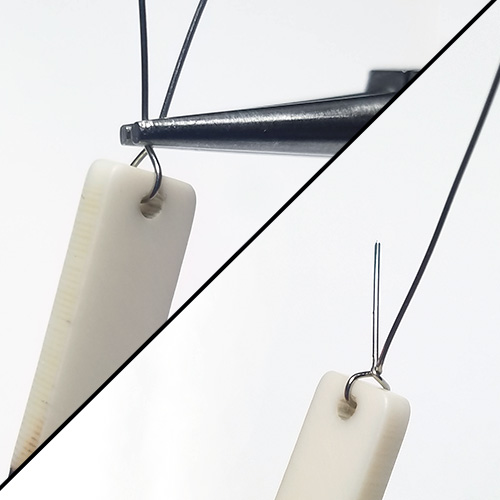
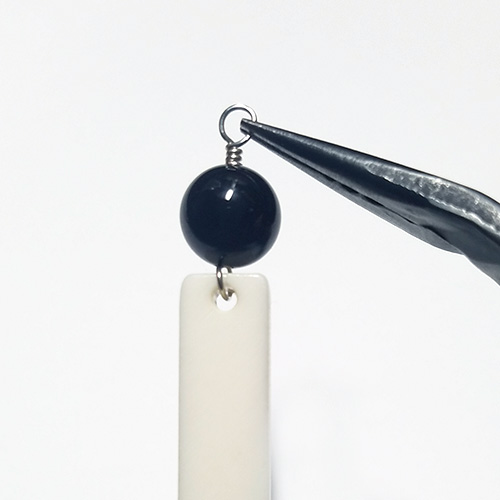
Directions:
- Open eyepin loop, slide on cat charm and close loop.
- ON the eyepin slide on the following and make a simple loop (make sure loops are facing opposite directions):
rondelle crystal and bicone crystal. - Open earwire loop, slide on dangle and close loop.
- Repeat all steps for other earring.