Tourmaline Mining Adventure

Our Designer So Vang went Tourmaline mining in southern California. Check out her rocky finds and simple wire tutorial to wrapping raw gemstones.

Written by So Vang-

My husband and I visited the Himalaya Tourmaline Mine in Santa Ysabel, California, known for their pink and green Tourmaline. You can also fine crystal quartz and black tourmaline. The added bonus about going to this mine is that you don’t have to bring any tools. With the day fee, you get buckets to use, mesh sifters and shovel. Wear comfortable shoes, a hat and clothes you don’t mind getting dirt on, because you will get dirty. I suggest bringing a toothbrush to help brush the dirt and long gloves because yours nails will get chipped if you have brittle nails like me. And lastly a container to put all your fabulous finds in!


Keep in mind that at their mining site, larger gems has been sorted out and what you sift through is a sifted pile. Granted, be open minded because you can still get a large piece of gem and gorgeous tourmaline chips! They also have a higher-quality bag that you can sift through for an extra $100. But enjoy what you find because the small gems you find and discover is all in the adventure itself.


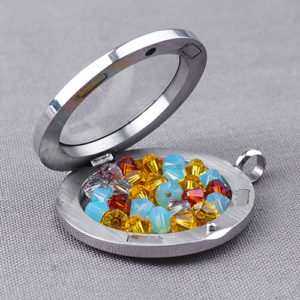
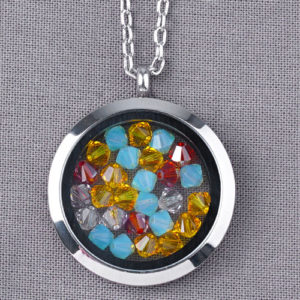
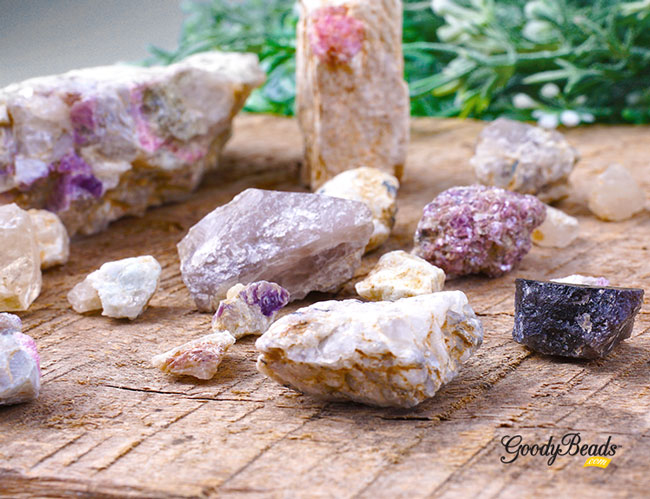
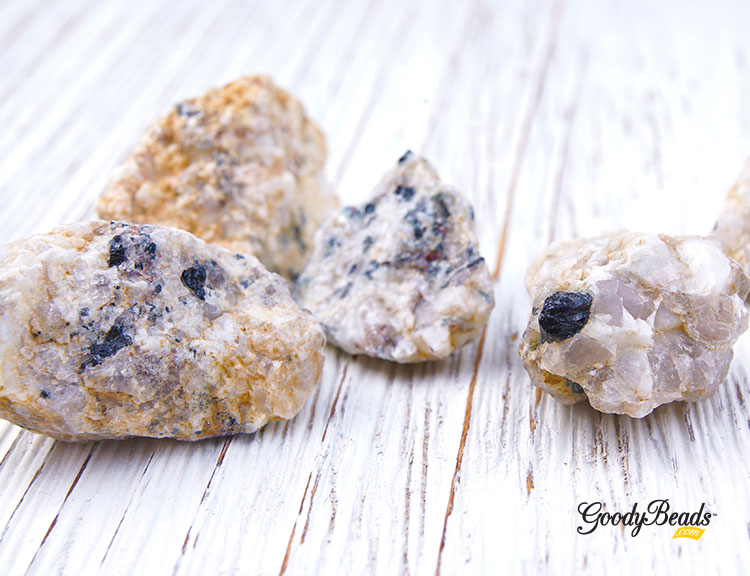
Below is a pile of small pink, green and black Tourmaline we found. They certainly look gorgeous in their raw state.

GoodyBeads Blog: Mining for Pink Green and Black Tourmaline


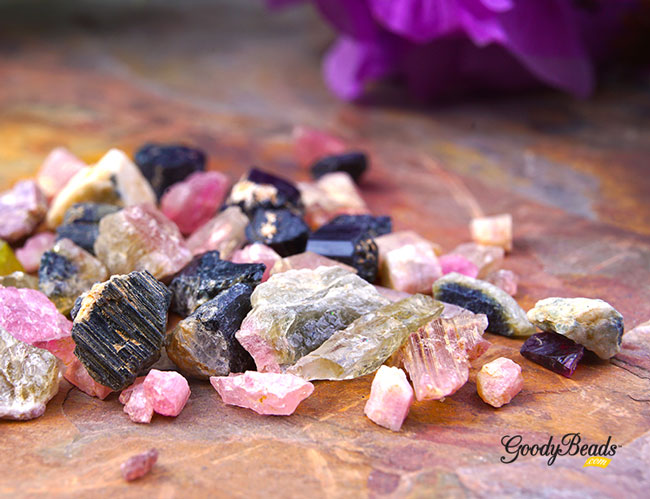
The way Tourmaline is created it by the natural minerals and chemicals within the pockets of crystal quartz. You can see in the images below the raw forms of quartz with pieces of pink, green and black tourmaline jutting out of them.

GoodyBeads Blog: Mining for Pink, Green and Black Tourmaline

GoodyBeads Blog: Mining for Pink, Green and Black Tourmaline


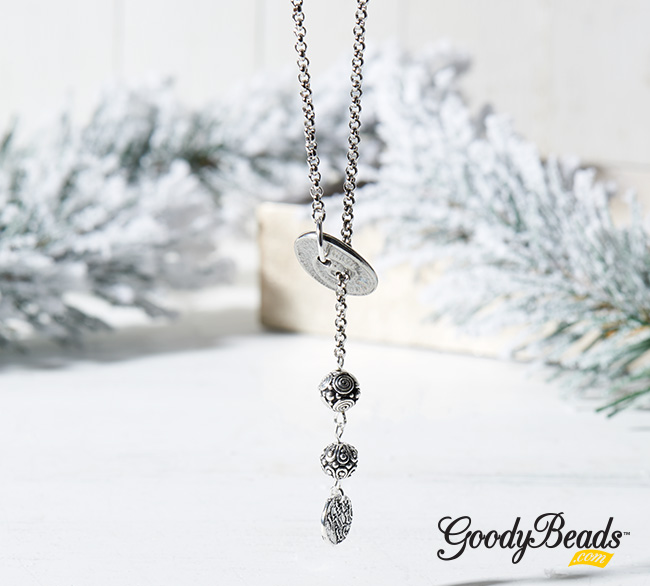
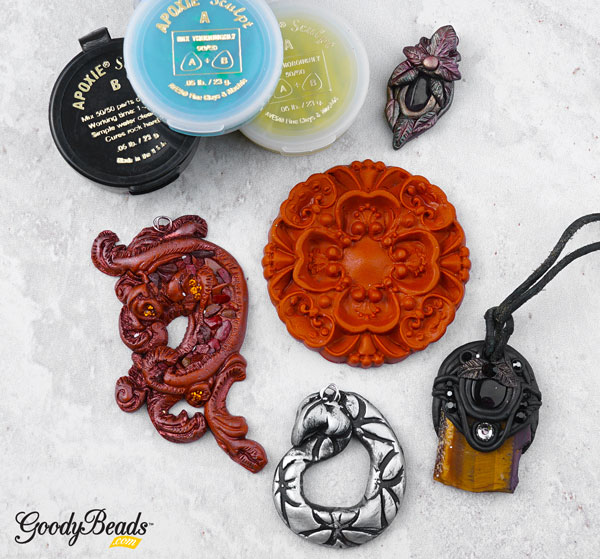
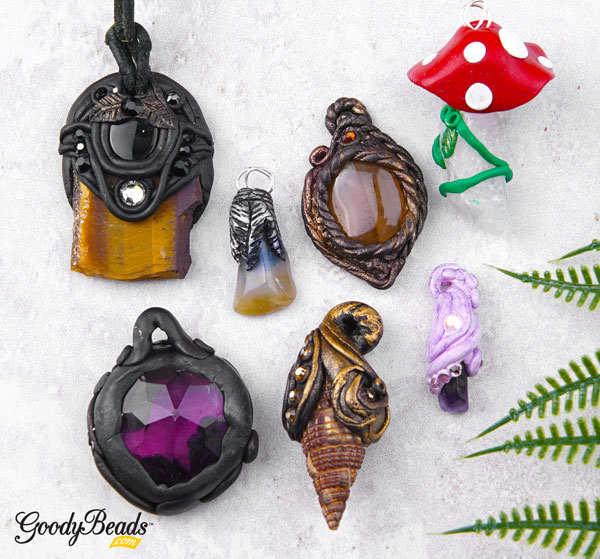
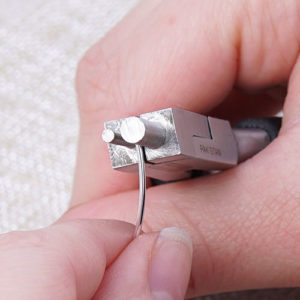
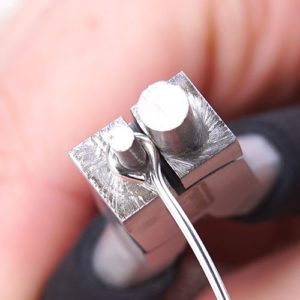
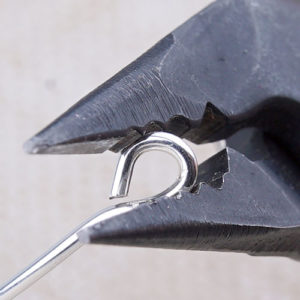
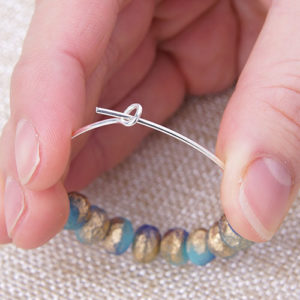
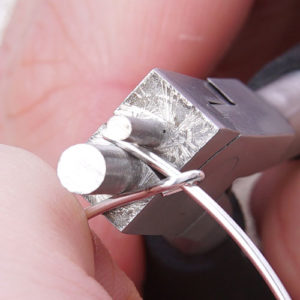
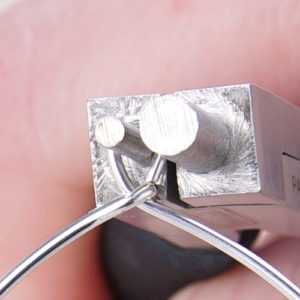
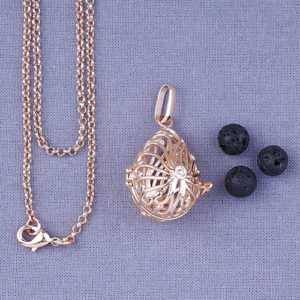
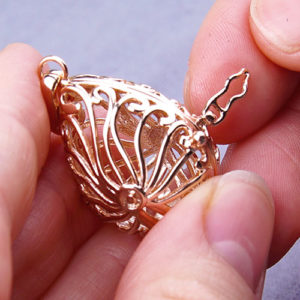
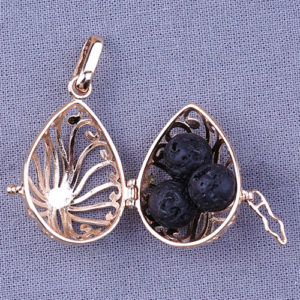
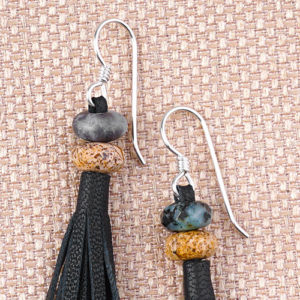
Pendant with Raw Tourmaline – Tutorial

GoodyBeads Blog: DIY wire wrapping raw gemstones

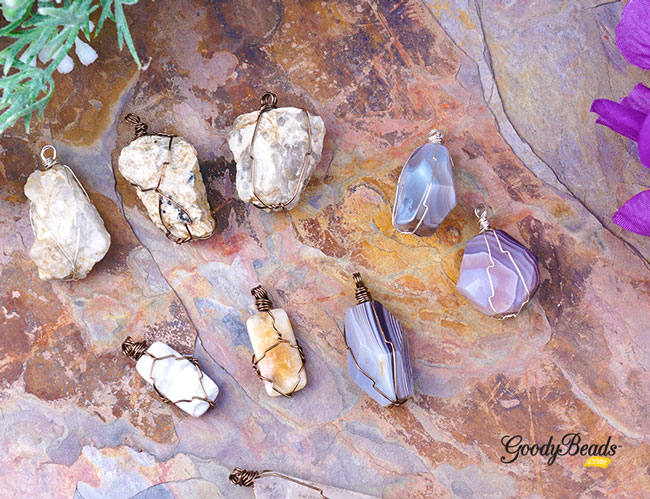
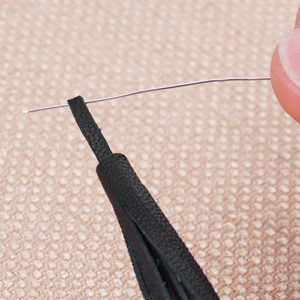
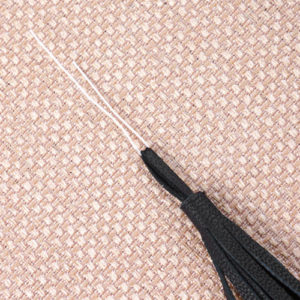
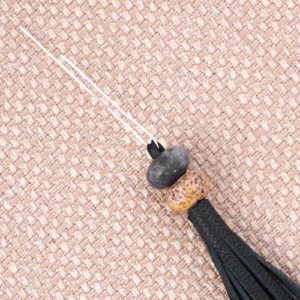
Now that you have your Tourmaline, what do you make with them? I love this easy trick to making rock pendants by wrapping and encasing them with wire. You can easily use some Dakota Stones gemstones in this tutorial. Especially the faceted Botswana Agate stones.

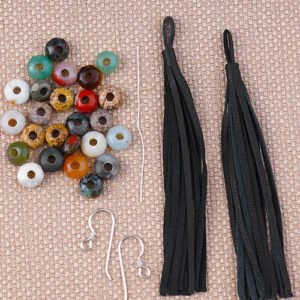
What you’ll need for this tutorial is:
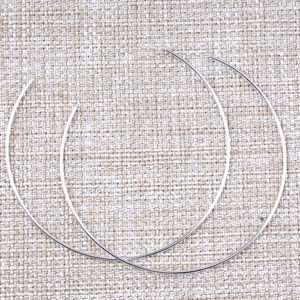
Watch our previous Facebook LIVE where I talked about these amazing rocks and do a quick tutorial to create your very own pendant!


If you are in the San Diego area and need an adventure to go gemstone mining, I recommend trying out the Himalaya Tourmaline Mine!


Leather Wrap Bracelet with Matubo Beads – Video Tutorial

We’ll show you how to make a leather wrap bracelet by fishtail braiding leather with new 2/0 Czech Matubo Beads.


For this bracelet tutorial, you’ll need:


Determine Length of 1.5mm Leather needed for a wrap bracelet

Use this method to determine the leather cord length you may need for a multi-wrap bracelet.

Take your wrist length and double the length. Multiply that by the number of wraps you want and then add 12”. That will give you an approximate cord length you will need to start your bracelet. (The extra 12” factors in the beads and leather you’ll be adding along with loop end.)

Example:

2 wraps for an 8.5” bracelet: (8.5” x2) x 2 wraps = 34 + 12 = 46” needed.

Or

4 wraps for a 7.5” bracelet: (7.5” x2) x 4 wraps = 60 + 12 = 72” needed.

Keep in mind, these total numbers are approximate. You will want to test the wrap length while you’re making your bracelet. Having extra length is better than being short on your wrapped length goal.


Video Tutorial

Leather bracelet tutorial begins at 15:00 mark.


Using TierraCast Buttons in DIY Jewelry – Tutorial

Launch yourself into this cute trend of button DIY jewelry with TierraCast buttons. We have three projects using TierraCast buttons; two pair of earrings and a lariat necklace.

TierraCast has a large assortment of button components. Of course when it comes to button components, you easily gravitate your DIY mind to making bracelets. Which is the perfect use for them. But we’ve expand our thinking into using buttons as earrings and necklace components. Here are three examples using TierraCast buttons designed by Heidi!

Golden Rosette Button Earrings

GoodyBeads Blog: TierraCast Button Earrings FREE Tutorial

There is always room for a pair of tassel earrings in your jewelry stash. Why not make it shine like gold in this pair of Golden Rosette Button Earrings, using TierraCast’s Czech Rosette Button. The shank button makes it easy to hang your golden components. Unlike a typical button with two or four holes in the center, a shank has a protrusion in the back of the button with a hole so that when sewn on fabric, there is space allowed for the fabric to sit behind.

Directions:

  1. Open eyepin loop, slide on chain tassel and close loop.
  2. Slide on a TierraCast Pamada bead and make a simple loop.
  3. Open a jump ring, slide on loop from bead dangle from Step 2 and through shank hole of button. Close jump ring.
  4. Open another jump ring and slide through loop of ear wire and through shank hold of button. Close jump ring.
  5. Repeat all steps for other earring.

Items used in earrings: TCZ0139, Z011522, TC02267 (2), TC02679 (2), Z010982, A013211 (2)

Copper Cluster Button Earrings

GoodyBeads Blog: TierraCast Button Earrings FREE Tutorial

In this pair of earrings, the button acts as a focal link piece. It’s designed with fringe chain tassels with embellished ends.

Directions:

  1. Cut three rollo chain with 8 links, 13 links and 22 links.
  2. Open small jump ring, slide on leaf charm and the 22 link chain. Close jump ring. Open another small loop and attach to other end of chain.
  3. On a head pin slide on melon bead, cube bead and another melon bead. Make a simple loop. Make another for a total of two.
  4. Open loop of cube dangle from Step 3 and slide on an 8 link chain. Close loop. Open another small loop and attach to other end of chain.
  5. Open loop of cube dangle from Step 3 and slide on an 13 link chain. Close loop. Open another small loop and attach to other end of chain.
  6. Open large jump ring and slide through button. Also slide jump ring from Step 2, then Step 5 and then Step 4. Close jump ring.
  7. Open small jump ring, slide on large jump ring from Step 6 and through loop of ear wire. Close jump ring.
  8. Repeat all steps for other earring.

Items used in earrings: A009401, Z012870, A011518, CH00496 (1′), TC01191 (2), A021855, TC01114 (4), A019622, TC02278 (2)

Charming Lariat Button Necklace

GoodyBeads Blog: TierraCast Button Earrings FREE Tutorial

Design this lariat necklace with a button connecting your chain around. Dangle your ends with a sequence of TierraCast bead links and/or charm.

Directions:

  1. Open small jump ring and slide on charm and loop of eyepin. Close jump ring.
  2. On eyepin, slide on a silver bead and make a simple loop.
  3. Open loop made from step 2 and slide on an eyepin loop.
  4. On this eyepin, slide on another silver bead and make a simple loop.
  5. Open loop made from step 4 and slide on one end of your chain. Close loop.
  6. Feed chain through one hole of your TierraCast button.
  7. Open large jump ring, slide on other end of chain and through other hole of the TierraCast button. Close jump ring.

Items used in necklace: CH01095 (24″-36″), TC02279, A002814, TC00298 (2), Z004093, TC00454, A001495


DIY Locket with Swarovski® Crystals – Tutorial

Check out this easy DIY Locket project using 4mm Swarovski crystals and glass locket.


We here at GoodyBeads LOVE a good simple DIY jewelry piece. We believe DIY jewelry can be fun and easy for an advance jeweler and one who aspires to learn. This DIY locket is an easy DIY that anyone can do in mere seconds or minutes.


What you’ll need to make a DIY locket:


For our projects, we are using GoodyBeads Master Mixes which are predesigned by our Designers with an assortment of colors. You can surely make your own assortment of choose one color of your choice.


DIY Tutorial

Items used in tutorial: MX00008, A019583, Z001033


Other Locket SamplesGoodyBeads Blog: DIY Glass Locket with Swarovski Crystals

Items used in image: Z006045, Y003724, MX00026, Z006175, MX00016


Glass Bead Sun Catcher Tutorial

To celebrate Spring, we have a cute Sun Catcher tutorial you can make with glass beads, crystals, metal beads or all your leftover beads.


A fun way to using leftover beads is by making a Sun Catcher. A Sun Catchers is a mobile that you hang by a window. It is said that sun catchers are a good way to deter birds flying into your windows. For our project, we used our glass bead mix: Z010800 but you can feel free to use metal beads, Chinese crystals, Swarovski crystals or other various products you have. I am guilty of stashing beads and having leftover beads, so using them in this project is great!


What you’ll need:


GoodyBeads SunCatcher Tutorial with Glass Beads

GoodyBeads SunCatcher Tutorial with Glass Beads


Directions

  1. Take a coil of your Bracelet Memory Wire and make a Loop. You can find tutorial here to make a Memory Wire Hoop.
    1. For a larger Sun Catcher, use the Necklace Memory Wire.
  2. Before completing your second loop, slide on 6 glass beads. You can use any color beads you want.
  3. Cut 2 feet of S-long Bead Cord. Cut 5 pieces. (You can cut more for a fuller or larger Sun Catcher)
  4. Make an overhand knot with the bead cord in between each bead on your hoop.
  5. Slide a glass bead and small seed bead onto a bead cord. Slide it close to the hoop and make an overhand knot below the seed bead.
  6. Repeat Step 5 spacing out your sections of glass beads. Make sure to add heavier beads to the bottom to help weight your bead cord straight.
  7. Repeat Steps to other bead cord and be organic with your spacing.

(Items used in tutorial: Z010800, WR00135, A012987, GBIB0002, various 8/0 Seed Beads)

Make your Sun Catcher long or short, you have free range to your Sun Catcher. You can even add charms to your bead cord!

May19_Suncatcher_03


Video Tutorial

Make sure to check out our previous Facebook LIVE with So demonstrating how to making your own Sun Catcher.


Wood & Gemstone Stretch Bracelet – Pinners Tutorial

Make and Take project at MN Pinners Conference for you to try out, featuring wood and gemstone beads tied into an easy stretch bracelet!


We are at the Pinners Conference this weekend and could not be happier that it’s in Minneapolis, our own backyard. We have loads of Make & Take projects taught by GoodyBeads, TierraCast and LeatherCord USA. AND classes being taught by our own Tory Vezina and our friend Ricky and Kayla from Dakota Stones. If you’re unable to make it out to us and participate in our DIY Jewelry Make & Take, no worries! We have this super simple stretch bracelet we are offering at the booth, but featuring them here for all to make!


This stretch bracelet is made with 8mm round gemstones from Dakota Stones, Stretchy cord from Beadalon and lightweight wood beads.  Plus, make sure you check out many videos featuring the famous Tricky Ricky Knot by Ricky from Dakota Stones.


What you’ll need for bracelet:


GB_MakeTake_Bracelet02


Instructions:

  1. Pull and pre-stretch elastic to loosen the elasticity.
  2. Find the middle point of the elastic and slide needle to that point. Cut one side of the needle to open the needle.
  3. Slide the following beads onto the elastic: 20 wood beads, spacer, 5 gemstones and spacer.
  4. Slide off needle and follow Ricky’s Knot Instructions to tie elastic.
    a. Take elastic ends and feed it through the loop of the elastic.
    b. Take elastic ends and wrap behind elastic loop going in opposite directions.
    c. Bring both elastic ends foward and tie an overhand knot going right over left.
    d. Tie a second knot going left over right.
  5. Cut off excess elastic leaving an 1/8” or 1/4” end.


Items used in bracelet: A021633, (2) TC00342WD-BYG8RD, TL00281, DMT8RD-8


DIY Spring Earrings and Necklace

Who doesn’t love warm weather and the bright colors of spring? We have two fun and easy projects for you to get you ready for spring weather!


Easy Flower Pendant

GoodyBeads Instant Pendant Flower Necklace - Free Tutorial

Instructions:

  1. With the instant pendant you easily unscrew the bottom piece and slide on the following: Silver bead, pink bead, flower bead, pink bead and silver bead.
  2. Screw back on the bottom piece.
  3. Unclasp your necklace chain and slide chain through top loop of your instant pendant. Clasp necklace chain.
  4. Open jump ring and slide on dangle and through bottom loop of the instant pendant. Close jump ring.

Items used in necklace: Z003706, A021423, Z009386 (2), Z005486, Z020510, A001529, Z001033


Pretty Pink Leather Earrings

GoodyBeads Pretty Pink Leather Earrings - FREE Tutorial

Instructions:

  1. Cut 2 pieces of leather at 3 inches.
  2. Slide pink bead, silver bead and pink bead on a leather piece.
  3. Take both ends of your leather and lay on crimp end. Fold both sides of crimp ends over the leather ends.
  4. Open ear wire loop, slide on loop of crimp end and close loop.
  5. Repeat steps 2-4 for other earring.

Items used in earrings: Z007632, Z003706, TC02297, A022076, Z009386 (2)


Peacock Eden Green Pearl Earrings – Pattern Tutorial

We are back with a new pattern tutorial using the new Eden Green Pearl from Swarovski®. Make yourself a pair of these earrings to your next spring outing!


Shown on our previous Facebook LIVE video, So Vang and Tory Vezina took on the challenge of designing with the new pearl from Swarovski. As the pearl itself is a vibrant hue and luster of green, So Vang had designed it with black and gold, to highlight and frame the pearl, creating what almost resembles a peacock feather. Get this FREE Pattern today here!


Items you’ll need to complete earring:


GoodyBeads Blog - Eden Green Swarovski Pearl Earrings FREE tutorial

Items used in earring above: SW02125 (2), SW02121 (2), SB00269, SB00423, SB00066, SB01406, A019596, A006588, TCZ0139, A015211


Apoxie® Sculpt 101

Check out this easy and simple tutorial with a video tutorial on Apoxie Sculpting clay.


We were lucky to have Erin Gerlach from Aves® Studio to join us in the GoodyBeads mezzanine to show one of our newest products: Apoxie Sculpt. ‘Apoxie® Sculpt combines the features and benefits of sculpting clay with the adhesive power of epoxy! Its smooth, putty-like consistency is easy to mix & use.’ (Aves) It self hardens and will adhere to any surface such as wood, glass, metal, plastic, etc.


Apoxie Colors

GoodyBeads sells all the colors that Aves has to offer in different sizes amounts. Being new to Apoxie Sculpt, we would recommend the small .10 lb product to test out the product. It’s a good amount to get started and even make a few beads!


Mixing Apoxie Sculpt and Curing

Apoxie Sculpt comes in a two part package. Part A will consist the color of your clay, while Part B is the hardener. When both parts are mixed at a 1:1 ratio, it will begin it’s curing and hardening process. You will have a limited amount of time to mold, adhere and design before it begins to thicken and harden, making it harder to shape and mold. Here is a step-by-step tutorial from Aves Studio on mixing Apoxie Sculpt:

  1. Wear disposable gloves to measure equal parts of A & B. Always retrieve parts A & B with different tools.
  2. Mix & knead together for 2 minutes until thoroughly combined and a uniform color is achieved. Note: incomplete mixing will give poor results. *Allow mixed product to rest up to 5 minutes for better handling.
  3. Apoxie® Sculpt is ready to use; working time is 1- 3 hours. Shape as desired. Smooth or texture with a wet finger, brush, Q-tip or sculpting tool. Self-hardens (NO BAKING); 24 hour full cure. 24 hr. full cure required for hard finishing purposes such as sanding, carving, drilling, machining, etc., without chipping, cracking or flaking.

One of the best surface to lay your designs on is a silicone mat. If you don’t have a silicone mat, a plastic sheet like a Ziplock bag will work. You want a pliable surface so that you can peal your piece off easily.

Make sure to check out Apoxie Color Chart blog post to see the many colors you can create.


Video: Product Feature and Tutorial


Additional Tools (Optional)

  • To keep your work surface clean, use a silicone mat.
  • Rubber fondant roller to roll out your clay
  • Cookie cutters
  • Silicone Molds
  • Mica Powder or Powder Pigments: add color to the surface of your clay.

Tips and Tricks

  • Wear gloves for easy cleanup.
  • If you are not wearing gloves, make sure to fully wash and clean hands and nails thoroughly.
  • Use a dab of Vaseline or olive oil, or a light spray of coconut oil on your gloved hands before mixing the clay. This will help to easier to mix the clay, lessen the stickiness on your fingers.
  • For cleanups, use Aves® Safety Solvent to clean up pigment/product residue. Put a drop of solvent on a paper towel for cleanups or on a Qtip for small detailed cleanups. Use solvent to also smooth clay or remove fingerprints.
  • Properly close unused containers to extend shelf life.
  • Put mixed Apoxie in the freezer to halt curing time.
  • Spray molds or rollers with coconut oil for easy


Apoxie Sculpt Samples

Here are samples of what you can make! Designs by Erin Gerlach.

GoodyBeads Blog - Apoxie Sculpt from Aves Studio Video Tutorial

GoodyBeads Blog - Apoxie Sculpt from Aves Studio Video Tutorial

GoodyBeads Blog - Apoxie Sculpt from Aves Studio Video Tutorial

How will you design with Apoxie Sculpt? We would love to see your creations!


Extra Heavy Duty Memory Wire Hoop Earrings – Tutorial

Make memory wire hoop earrings using the new Beadalon® Extra Heavy Duty Memory Wire. They’re so easy, you’ll find yourself making them over and over!

Hoop earrings have been a big fashion trend since the 1970’s. This pictorial shows how easy it is to make your own pair of hoop earrings with Czech beads. This tutorial was also demonstrated by So Vang during the 2018 Bead and Button show. Check out the video tutorial and blog. And when Candie Cooper was here, Tory and Candie did a Facebook LIVE video on this same tutorial. (Tutorial starts at 30 minutes)

What you’ll need:

Tools you’ll need:

Tips to note when making your hoops. The Extra Heavy Duty Memory Wire is thick, so make sure you grasp tightly with the Finishing Pliers when you make your loops. AND make your loops at the base of your pliers. You’ll get a firmer grasp on the wire and lessen the tension and strain you will put on your Finishing Pliers. You can also make these hoops using other memory wires, it will work just the same.

Tutorial

Items used in earrings tutorial: WR00131, Z012031 & Z011359


Beadalon Knot-a-Bead Tool – Video Tutorial

Candie Cooper is back with Tory to show how easy it is to use the Beadalon Knot-A-Bead tool. Check out today’s video tutorial to knotting your own creating today!


GoodyBeads Blog | Beadalon Knot-a-Bead Tool Video Tutorial

Making knotted jewelry is a delicate skill that can be done with chain nose pliers, awl or tweezers. But with the Beadalon Knot-A-Bead tool, you can easily make quick and easy knots. Here is what you’ll need to get you started:


Video Tutorial


Instructions

  1. Make a loop with the end of your beading thread and make an over hand knot. This will create a loop for your necklace later.
  2. Slide on the silk cord, all the beads you’ll be knotting. It is helpful to layout your design ahead of time to determine your sequence.
  3. Slide a bead down to your first knot. Take thread and wrap it over the metal dowel/awl, and then under.
  4. Tie a knot and pull the silk cord upwards to cinch the knot together.
  5. Take the beaded portion and push it to the back to get it out of the way.
  6. Slide knot over to the right and hook thread under the yoke and pulling downwards and across to tighten the knot. There is a button lever on the left side. Push that to release the knot and thread.
  7. Slide over next bead and repeat.
  8. Once you’ve made a knot in between all your beads, repeat step 1 to other end of knotted beads to create a loop.
  9. Cut excess thread.
  10. Open a jump ring, slide through beading thread loop and a 6″-8″ chain end. Close jump ring.
  11. Repeat steps 10 to other end of knotted beads.
  12. Add your clasp to one end of your chain piece with a jump ring and your necklace is complete!


Along with the Beadalon Knot-a-Bead, you will get instructions on how to easily use the tool:

Beadalon Knot a Bead Tool Instructions


DIY Diffuser Necklace with Lava Beads – Tutorial

Check out this easy tutorial for making your own DIY Diffuser Necklace with lava beads.


Essential oils are a rapid trend that is used in aromatherapy. “Scientists think they work by sending chemical messages to parts of the brain that affect mood and emotion. Although these scents alone won’t take all your stress away, the aroma may help you relax.” (WebMD) Check out our previous post on some popular essential oil scents and its healing properties. 


Many users of essential oils just rub it on their skin, but you could design DIY jewelry with lava beads for a fashionable statement. Learn how to make your own diffuser pendant necklace with scented lava beads in this easy DIY tutorial.

GoodyBeads Blog - DIY Lava Diffuser Necklace


What you’ll need for DIY Diffuser Necklace:


Tutorial


Using Spacer Beads with New Czech Lentil Coins

Accentuate your designs and beads with spacer beads. Here was different ways to use spacer beads with our NEW Czech Lentil Coin beads.

One of the many reasons to using spacer beads in a design, is to create space between larger or more pronoun beads, hence the name. What it also does when space is added, is to alleviate the rubbing between beads. For larger beads or crystals, sometime when you lay then next to each other, the movement you put into wearing your design will eventually shift and rub. This may in time, chip or crack the beads. So adding spacer beads or smaller beads will lessen the rubbing.

Plus, it adds a pop of color, style and overall look with spacers. For this example, we’ll use these New Czech Lentil Coins.

GoodyBeads NEW Czech Lentil Coin Beads

Lentil Coin Beads: Z014437, A014438, Z014441, Z014443, Z014445, Z014447

Using Spacer Beads

here are different beads and spacers you can add in between beads to bring out a fun look to your beaded strand!

SpacerBead_01

A. Use a bead as a spacer bead. Here, we used Czech Fire-polish beads. (A011558)
B. Size 8/0 Miyuki Seed Beads (SB00106)
C. Czech O-Beads (SB01893)
D. Daisy Bali Spacer Beads (Silver A003563/Gold A004238/Copper A004216)
E. Bali Spacer Bead (Silver A003564/Gold A004239/Copper A004218)
F. Triangle Brass Bead (Silver A022195/Brass A022196/Gold A022197/ Copper A022198)
G. 6mm Wavy Disc Beads (Silver Z018411/ Gold Z018412)

Purple Passion Bracelet

Here’s a bracelet we made using spacer beads and Czech Lentil coin beads. It makes for a flat design, simple yet fun. Can you imagine the possibilities!

GoodyBeads Blog | Czech Lentil Coins

Items used in bracelet: FTBW0001, Z014445, SB00106, (2) TC01897, Z010740, A003577

Bracelet Instructions:

  1. Cut a 9 inch piece of Soft Flex Wire.
  2. Slide on a crimp tube and make a flat crimp to one end of flex wire.
  3. Slide on clamshell and cover crimped tube. (Check out Clamshell Blog for more information)
  4. Slide on a seed bead and Lentil Coin. Repeat sequence until you’ve used a full strand of Lentil Coins. You can add more until you’ve reached your desired length.
  5. Add a seed bead to the end. Slide on a clamshell and another crimp tube.
  6. Make a flat crimp to the crimp tube, close inside the clamshell.
  7. Cut excess flex wire and close clamshell over the crimped tube.
  8. Slide jump ring from Hook Clasp through loop of clamshell. Close clamshell loop.
  9. Repeat step 8 to other end.
    (Optional: you can substitute hook clasp for a clasp of your choice.)


Gemstone Tassel Earrings – Tutorial

We love a good tassel, and these leather tassels from LeatherCord USA are no exception! Here is a fun and easy DIY gemstone tassel earrings you can make in seconds!


GoodyBeads | Blog - Gemstone Tassel Earrings FREE tutorial

We adore these leather tassels from LeatherCord USA, because they have a long enough loop at the top, which will hold these large-hole gemstone bead from DakotaStones and then topped off with a TierraCast ear wire. With high-quality materials from well-known brands, you’re sure to make a fabulous pair of earrings!


What you’ll need for earrings:


Earring Tutorial


Sizzix Framelits And Embossing – Video Tutorial

Get your Sizzix Big Shot out and learn how to use Framelits Die and Embossing in this video segment with Candie Cooper and Tory Vezina!


GoodyBeads Blog | Sizzix How to Use Framelits and Embossing Folders Video Tutorial


Today’s blog post will feature Sizzix Framelits and Embossing Folders. Use Framelits to cut fun shapes to display your earrings or even use it for your scrapbooking needs. And use Embossing Folders to add a 3D texture to paper, fabric or even thin copper/metal pieces.


Embossing Folders

The first important rule when using Embossing Folders with the Sizzix Big Shot is the Extended Platform (SZ00053).

GoodyBeads Blog | Sizzix How to Use Framelits and Embossing Folders Video Tutorial

You will need the Extended Platform, which is included with Sizzix Big Shot Machine; to place your Embossing folder on to run it through the Sizzix Big Shot, instead of using the Movers and Shaper platform you would usually use to place your Dies on. There will be a visual on the Platform on how to use it with your Big Shot.


The Process to running the Embossing Folder through your Big Shot is to place the Extended Platform down, put your paper or thin piece of metal inside your Embossing Folder, put the Embossing folder on the Extended Platform and place the Cutting Pad on top. Run the whole thing through the machine and you will get a textured piece of paper or thin metal!


Make sure to check out these fun Embossing Folders to creating your own designs:

GoodyBeads Blog | Sizzix How to Use Framelits and Embossing Folders Video Tutorial

Embossing folders: SZ00075, SZ00074, SZ00073, SZ00072, SZ00070, SZ00071


Sizzix Framelits

The next important rule to cutting shapes using Framelits is the Extended Thin Die Adapter you will need to accompany the Extended Platform in using Framelit Dies (SZ00046 & SZ00048).

GoodyBeads Blog | Sizzix How to Use Framelits and Embossing Folders Video Tutorial


Framelits are dies with intricate and detailed designs best used with paper, fabric or thin pieces of metal or copper. Do not use Framelits with thick pieces of leather.


The process in running the Framelit Dies through the Big Shot is to place the Extended Platform down, then place the Extended Thin Die Adapter on top, followed by a Cutting Pad, Framelit with the form side facing up, your piece of paper and another Cutting Pad. Run all parts through the Big Shot for an intricate cut out piece of paper!


Video Tutorial

Candie and Tory will show you how easy it is using the Framelits Dies and Embossing Folders in this video tutorial!