DIY Bookmarks Using Metal Stamping Bracelet Blanks
If you’re planning to staying home this weekend but still looking for an adventure, why not curl up to a book! We have this wicked DIY idea taking metal bracelet blanks and making them into bookmarks! Plus, you can customize it with your own metal stamping design or verbiage and top it off with embellishments like leather, tassels, links and more!
What you’ll need:
- 6 Inch Stamping Bracelet Blanks:
- Silver in widths of 1/4″ (A018033), 3/8″ (A021496) or 5/8″ (A021497)
- Brass in widths of 1/4″ (Z001850) or 3/8″ (Z001851)
- Copper in widths of 1/4″ (Z001852) or 3/8″ (Z001854)
- You can also try other short rectangular blanks.
- Hole Punch – A011781
- Or Metal Punch – A018983
- Letter Metal Stamps
- Bench Block (A011605/A014415) and Hammer (TL00277/TL00235)
- Enamel Marker (Black/Gold/Green/Brown)
Bookmark Tutorial
-

Step 1: Mark where you will punch a hole. -
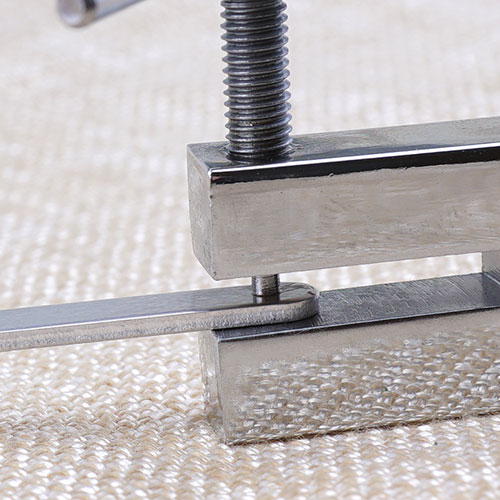
Step 2: Place blank under hole punch, situating the marked dot. -

Step 3: Gently twist the hole punch to fully punch a hole. -
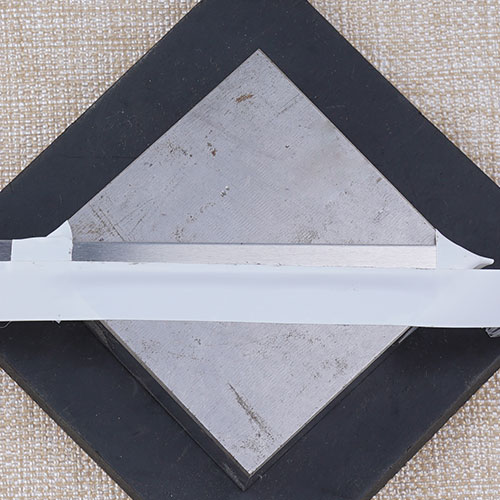
Step 4: Tape your blank onto your bench block. -

Step 5: Gently hammer words you want onto the blank. -
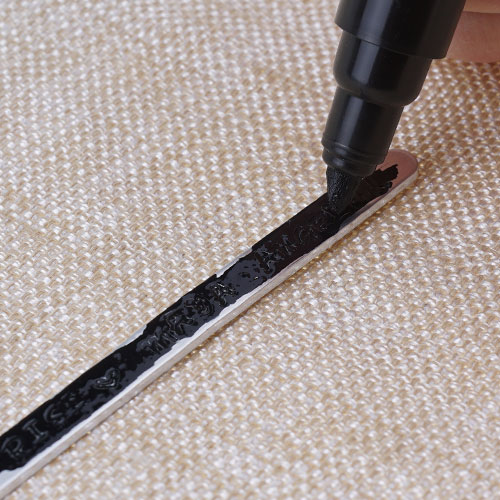
Step 6: Take blank off the block and using the enamel marker, mark what you’ve stamped. -
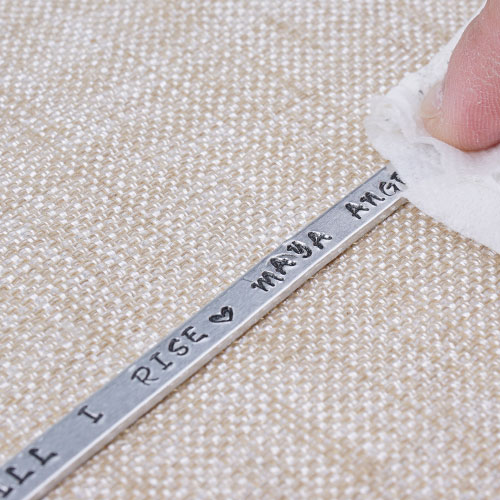
Step 7: Take a paper towel and wipe off excess enamel. If a letter is not fully marked, use enamel marker again and wipe. -

Step 8: Embellish your bookmark with leather and large-hole gemstones or even chain with beads and tassels!
Bookmark Examples

‘Bead a Book’ Brass bookmark: Z001851, A022076, WAF8RDLH-M-8, TL00191
For this bracelet, we used 12″ of leather cord and slid the leather cord through the hole. Center leather and make an overhand knot or Sliding Knot (Use this Tutorial). Add a large-hole gemstone to each leather end with knots.
Maya Angelou, Silver bookmark: Z018033, A008128, A001529, Z008860, Z004947, TC01253.
We wanted to add a fun quote and used “Still I Rise” a poem title by the famous Maya Angelou. to embellish, we attached a 3 inch piece of chain with a jump ring. Open eyepin, and attach other end of chain and close. Add Czech bead and make a simple loop. Open loop and add tassel.