Pantone® Color of the Year for 2017 goes to Greenery. This yellow-green hue is “nature’s neutral.” While it resembles the awakening of spring and the new life the season brings, it also plays a part to represent “the reconnection we seek with nature, one another and a larger purpose.”
Colors that can be used to closely resemble the Greenery colors are lime green, peridot and chartreuse. Find out how we transform this color into jewelry pieces for 2017.
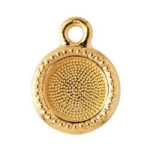
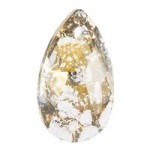
We used this lime green cabochon (A016880) and adhered it to a Kabela filigree circle center (Z007181). We even pulled this beaded chain (CH00288) that mimics the hues of Greenery.
We’ve offset the bright green color with earthly bronze and brown beads (A017137) to show-off the vibrancy of the green (A005377) in this stretch bracelet.
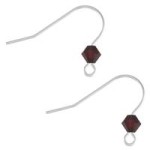
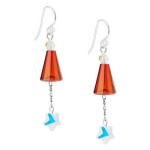
The sheen in this green miracle bead (A014932) is paired with the new cross tribe crystal pendant from Swarovski® (SW01518) for a long drop pair of earrings.
These chartreuse seed beads (SB00078) are sewn with size 11/0 galvanized silver seed beads (SB00422) around a drop groovy bead frame (Z019397) to create these simple pair of earrings.
How will you show off Pantone’s 2017 Color of the Year, Greenery?
New Year’s Statement Necklaces
Glam up your New Year’s Eve party with your favorite dress, dancing shoes and statement necklace. We have a few fashion trend necklaces sure to turn heads before the ball drops!
Tease your fun side with a statement necklace donned with Jesse James beads from our Dec ’16 trend. Create this statement necklace with the Cabin by the Lake Mix, chain, bib connectorsand feather charms. Finish it up with leather cord and you can get on with the partying!
Designed by So Vang
Check out this waterfall necklace from our June ‘16 Birthstone Trend. This statement necklace has Swarovski® pearls linked together by wire wrapping each dangle and attaching each dangle to the gold-plated necklace with jump rings.
From our July ’16 Birthstone Trend, this statement necklace has the perfect hues for the festive holidays. Headpins are strung with Czech fire polish beads, through Textured Large Oval Links (CH00738/CH00739) and teardrop Chinese crystals.
Designed by So Vang
Let these Dakota Stone Gemstone Pendants (Nov ’16 Trend) create the ultimate focal statement necklace. Simply string one of these pendants with small round beads to separate the stunning sets and add your favorite chain to complete a necklace you can wear year ‘round!
Introducing our new gift jewelry kits perfect for gift-giving. Created by our in-house designers, So Vang, Tory Vezina and Heidi Urlaub, these kits are easy to make and versatile to wear to all of your upcoming events and celebrations. Plus, the kits are conveniently packaged inside a plastic pillow-shaped container for easy gift giving to the DIYers in your life!
Thinking of what to give this holiday season or for birthdays or special occasions? Gift kits are the perfect gift to give to your girlfriends, sisters, bridesmaids, work buddies, etc.
Heidi’s kits have an earthy and edgy vibe with her love of leather and gemstones. You can easily wear her jewelry with the intent of going everywhere and still be on trend. Her Tears of Leather Earringsand On the Fringe Leather Earrings are so gorgeous, you’ll long to own one, two or all of her styles! Meditation Stretch Bracelets have a harmonic combination of round gemstones and emerald-cut Swarovski® crystals, while the Boho Belle Tube Necklace is decorated with small gemstones and curved tubes that gently hug your collarbone.
Swarovski® Fall/Winter 2017/2018 NEW Collection: NEW Jewelry
Our selection of Swarovski® 2017/2018 Collection: Nature of Us, is here. Our fingers were itching to create with them! Here are three jewelry pieces featuring some of the new items GoodyBeads received!
Rainbow Pearl Earrings
Designed by So Vang
We just love the matte vibrancy of the pearls and the gleaming dark rainbow effect from the crystal drop. Paired with disc spacers, amethyst 2x AB bicone crystals and gold-plated finding, it’s certainly the pair of earrings worth waiting for.
Slide a bicone crystal on a headpin and make a simple loop. Make a total of two.
Open loop of crystal dangle and slide on side loop of link. Close loop. Repeat to other end.
Open oval jump ring and slide on cross pendant and middle loop of link. Close jump ring.
Cut two 1/2” of chain.
Open small jump ring and slide on one chain link end and top side loop of link. Close jump ring. Repeat to other chain link.
Open oval jump ring and slide on both ends of chain link and loop of earwire. Close loop.
Repeat all steps for other earring.
Save
GoodyBeads’ Master Mixes with Swarovski® Crystals and Wrap Bracelets
Introducing all-new Master Mixes, hand-picked by our GoodyBeads’ in-house designers. Check out these new additions to GoodyBeads and how we use these mixes in making a leather wrap bracelet.
Swarovski 4mm Crystal Mixes
We did all the hard work for you in mixing and matching Swarovski crystals for any themed jewelry project. These selections of 4mm bicone crystals comes with a five or six color combination consisting of up to 150 crystals total. Each mix comes in a non-spill, poly-bag inside a gorgeously viewable tin.
Leather Wrap Bracelet with Swarovski Mixes
Be inspired with what you can make with these mixes. A favorite of ours is making wrap bracelets. Here are two examples:
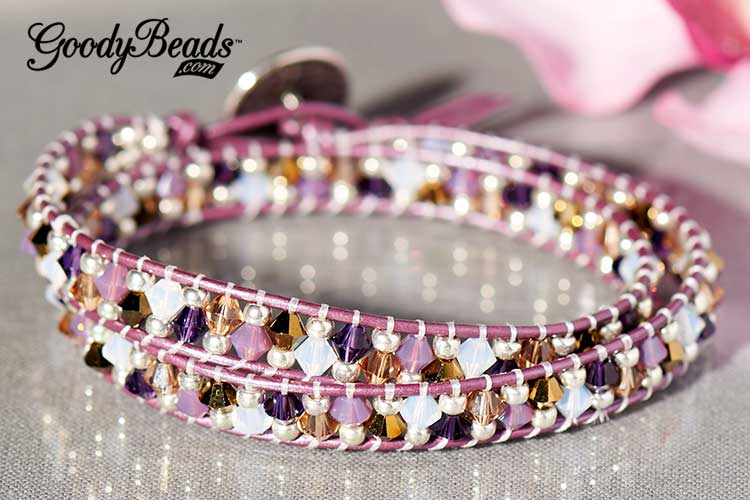
Grapevine Bracelet by So Vang
Designed by So Vang
For this fall-theme bracelet, we used So’s Grapevine mix (MX00012), 1mm metallic berry leather cord (A022064), Crystal Fireline (A006587), size 8/0 galvanized silver seed beads (SB00106) and TierraCast® Button (TC01954).
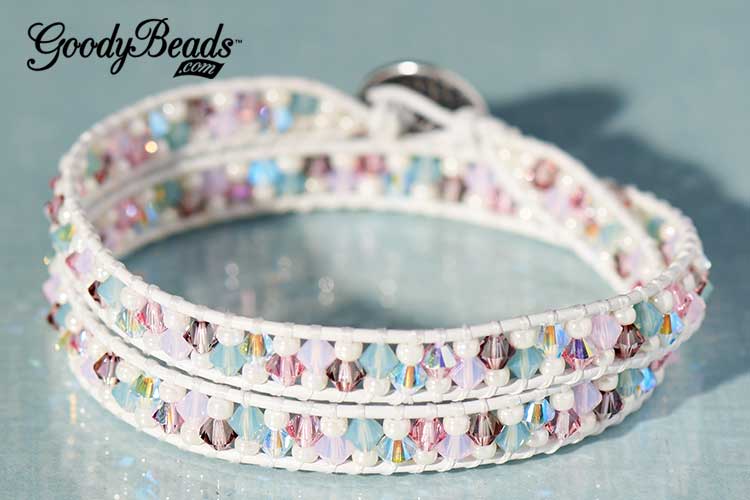
Victorian Rose Bracelet by So Vang
Designed by So Vang
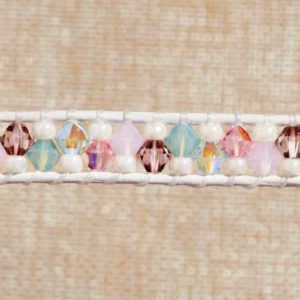
Or, for a lovely pastel combo, we used the Victorian Rose mix (MX00004), 1mm white leather cord (A022071), Crystal Fireline (A006585), size 8/0 ivory ceylon seed beads (SB00098) and TierraCast® Button (TC01954).
Leather Wrap Bracelet with Swarovski Master Mixes
Here is a quick tutorial on how to make these Swarovski mix leather wrap bracelets. You may want to check out our leather wrap DIY blog post to give you a refresher on how to make a leather wrap bracelet.
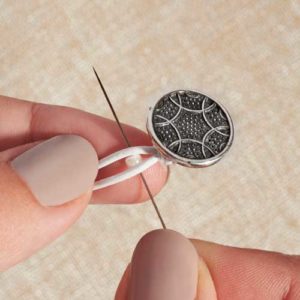
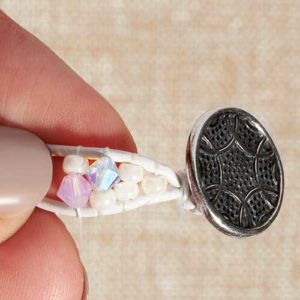
Step One: Slide button to the middle of your 1mm leather cord. Make a knot.
Step Two: Make a knot with your beading thread close to your leather knot. Pick up one 8/0 seed bead and lay in between and behind the leather cords. Pull your needle and thread through.
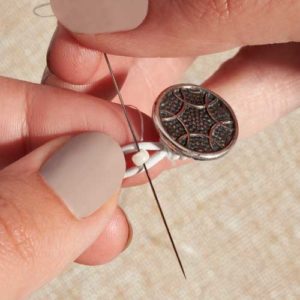
Step Three: Bring needle over leather cords and sew through seed bead.
Step Four: Repeat steps two and three with two seed beads in this row.
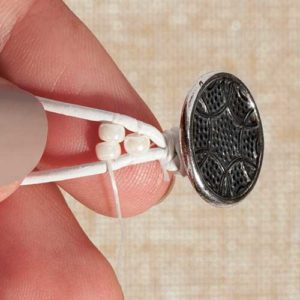
Step Five: For this row, you will pick up one seed bead and one bicone crystal from your mix, sewing under and then over the leather cords.
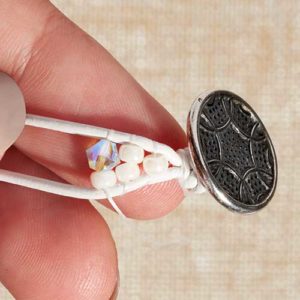
Step Six: For this row, you will pick up bicone crystal, then one seed bead. Sew under and then over the leather cords.
Step Seven: Repeat steps five and six until you’ve reached a comfortable length to wrap around your wrist two times.
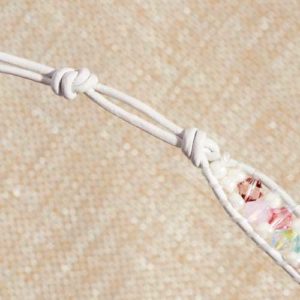
Step Eight: End with a row of two seed bead and the last row with one seed bead. Tie off beading thread and cut off excess. You can add a small dab of glue to secure the knot. Make a knot with the leather cords close to the seed bead. Make a second knot with a gap wide enough for your button to pass through. Cut excess leather cord end.
You’ve completed with your leather wrap bracelet.
Swarovski® Fall/Winter 2017/2018 NEW Collection: The Nature of Us
Swarovski® launched their Fall/Winter 2017/2018 collection of crystals. We are excited about the new cuts and vibrant hues to come from this line. Here’s a few items that GoodyBeads will add to their already stunning selection of Swarovski crystals and pearls.
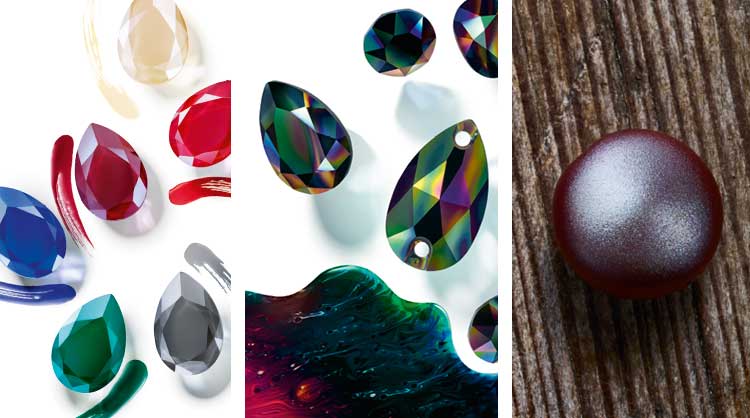
New Hues and Effects
Dedicated to the idea of sustainability, Swarovski’s bold collection has been named The Nature of Us. With a collection that speaks to a hearty crowd of millennials or self-expressionists, Swarovski new color effects include Crystal LacquerPRO in beautiful earthy hues, Crystal Rainbow Dark with vibrant metallic glow and the Crystal Iridescent Red Pearl featuring a red/gray luster.
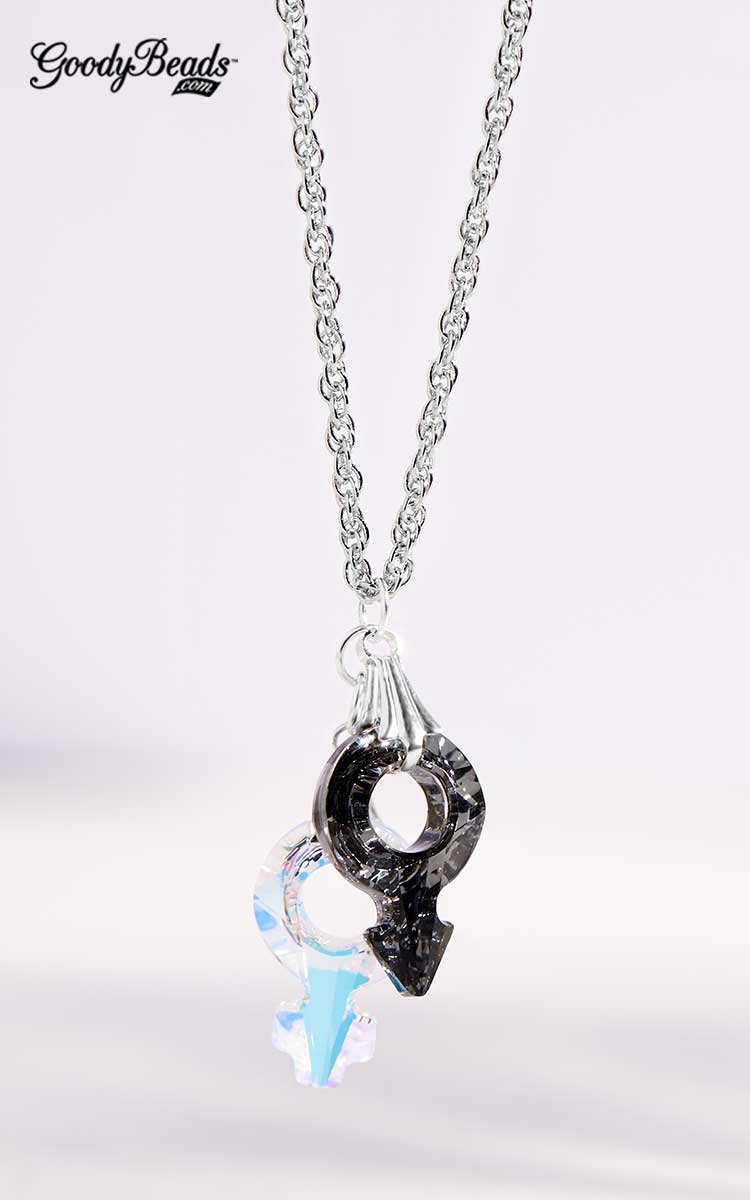
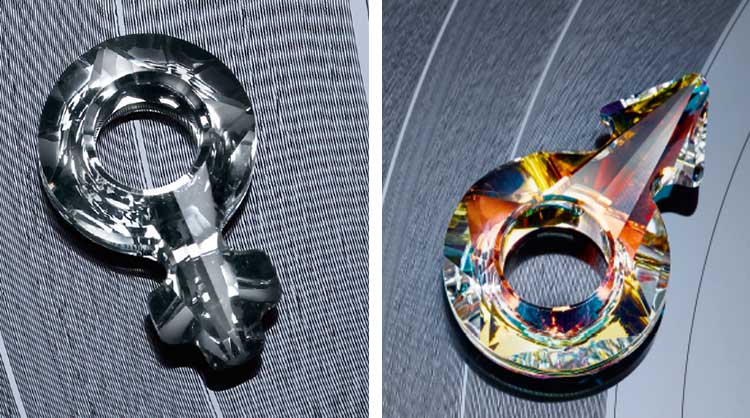
Gender Symbol Fancy Stone
In this beautiful era of blending feminine and masculine fashion together, just like Pantone’s 2016 Color of the Year choices, we are stoked about Swarovski’s gender symbol fancy stones. Swarovski 2017/2018 collection speaks to a rebellious generation of defining a “hard-edge glam-rock attitude” and redefining gender roles in today’s fashion.
Each pendant is carefully crafted and cut into the female and male symbol. It’s a no-brainer that these will be popular! Especially since we are from Minnesota, we surely want to flaunt these fancy stones and be reminded of our hometown musical legend.
Céline Cousteau – Cross Tribe Pendant
This collection reminds us about the value of family and generations of tradition and culture, which inspired Céline Cousteau’s second Designer Edition: Tribute to Tribe. Inspired by the story, culture and importance of biodiversity of the indigenous tribes in Vale Do Javari, from the depths of the Brazilian rainforest, Céline’s crystal designs came from the drawings and patterns drawn on their skins to the jewelry they wear.
The Cross Tribe Pendant is a symbol that carries the “message of social responsibility and mutual respect.”
Swarovski Innovations 2017/2018 Fall/Winter Video
Check out Swarovski® video on what is new in this collection. See something you must have? Let us know!
What do you think about the new collection? We feel inspired from the backstory of this meaningful collection and can’t wait to work with them. We hope you feel the same way!
How to Use Silk Cord in Jewelry Making
Silk cord has been used as a stringing material in jewelry-making for centuries. No other beading cord offers the softness that natural silk provides. Jewelry designs made with 100% silk bead cord drape beautifully and the cord itself can become a feature with knotting techniques. Whether you’re looking to create a simple strand of beads or incorporate knotted bead clusters into your designs, GoodyBeads.com is here to show you how easy and versatile this timeless stringing material can be.
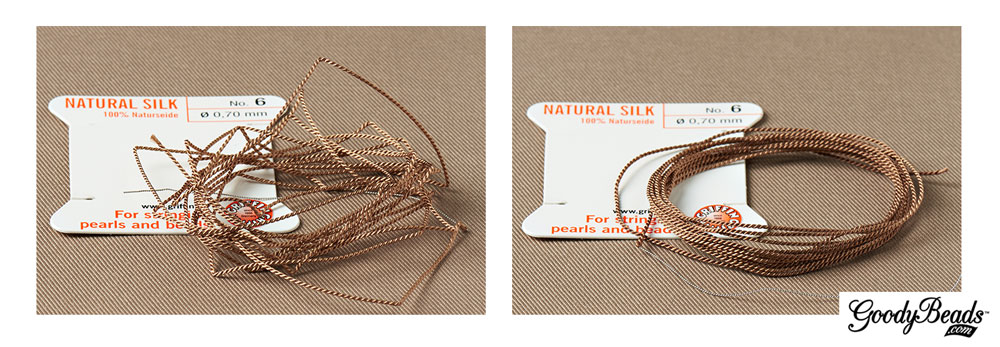
One of our favorite silk bead cord brands is Griffin. Griffin bead cords are made of 100% natural silk and come in a rainbow of colors and a variety of thread sizes.
Griffin bead cords are sold 2-meters per card. Two strands of twisted silk are wrapped around a cardboard backer. Each cord comes with its own needle for easy threading.
Choosing Silk Cord
Thread thickness is very important, especially if you plan on incorporating knots into your designs. Beads can slide over a knot if the cord is too thin for the bead hole you are working with. Griffin bead cords has its own numeric system for categorizing thread cord sizes: No. 0 – No. 12.
Each thread number has an associated millimeter size. Below is a quick reference guide for each number:
No. 0 = 0.30mm
No. 2 = 0.45mm
No. 4 = 0.60mm
No. 6 = 0.70mm
No. 8 = 0.80mm
No. 12 = 0.98mm
Smooth Out Silk Cord
Since silk bead cords come spooled on a card, you must prepare your new cord for use by smoothing out the kinks first.
To smooth out your cord, unravel the whole cord from the card. Starting from one end, dip your fingers in water and run your damp fingers through a section of the cord. Run your fingers over the section a few times to help straighten them out. Once that section is straight, continue on down to the next section of the cord with damp fingers until you’ve straightened the whole piece. Next, run a paper towel over the entire cord and gently squeeze to remove any residual water from the cord. That’s all you need to do. The cord will still be a bit damp but you can certainly use it right away. You can also wait a few minutes until it’s fully dried.
NOTE: You can use the same cord for multiple projects if you plan to keep using the needle that is attached to the cord. String bead(s) through the needle and utilize the end section of the cord.
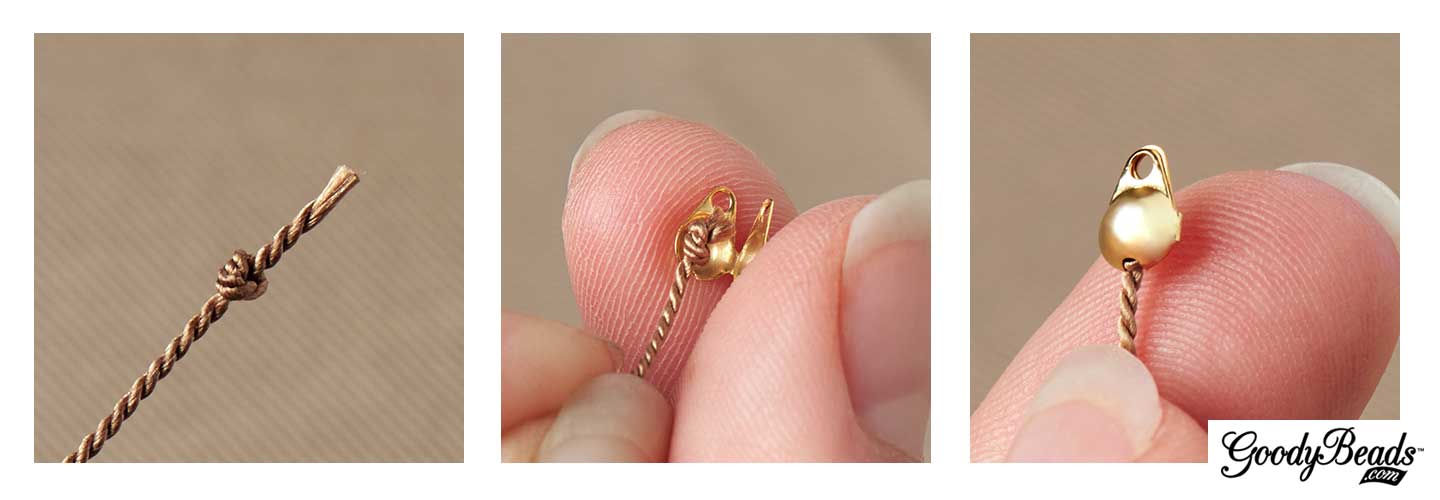
Using Clamshell Bead Tip with Silk Cord
A way to attach your silk cord to jump rings or clasps is to attach clamshell bead tips.
Start by making a knot at the end of your prepared silk cord. Cut any excess cord close to the knot. Add a dab of Super New Glue or fast-drying glue to the knot. Place the knot inside the clamshell center and fold the clamshell over the knot. The glue will keep the knot from unraveling and to adhere the silk cord to the inside of the clamshell bead tip. Once the glue is dry, it’s ready to use.
Need a little inspiration? Here are some ways we used Griffin silk bead cord in our jewelry designs. Plus, quick tips on how you can create these designs yourself!
Crystal Cluster Knotted Silk Cord Necklace
Designed by So Vang
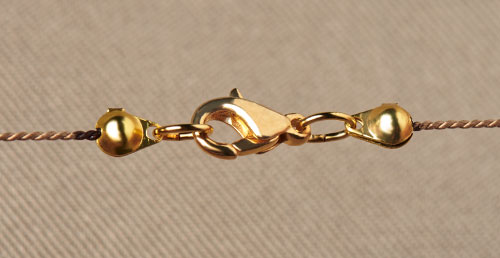
Make a necklace with knotting in-between clusters of beads. Choose from Swarovski® crystals, Chinese crystals, seed beads or your favorite gemstones. For our necklace, we used the entire 2-meter cord and strung on clusters of one gold seed bead, three dainty round Chinese crystals and one gold seed bead, that were knotted with an inch gap between clusters. This version makes a 60” necklace that you can wrap around two or three times.
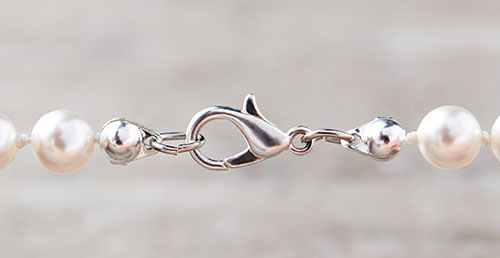
Here you can see how the clamshell bead tips are used in conjunction with jump rings and a lobster clasp.
Pearl beads and silk cord are a match made in heaven. Not only do they look great together, the silk cord also helps prolong the life of your pearl jewelry by preventing the beads from rubbing up against each other, which can breakdown the bead’s finish. Making this elegant necklace is super easy.
First, make a knot and clamp a clamshell over the knot. Make another knot close to the clamshell. String on a pearl. Make a knot close to that pearl. Repeat until a preferred length. Make two knots at the end and clamp a clamshell over the last knot. Finish with a lobster clasp and you’re done!
If you have a worn-out pearl necklace, you can undo all the pearls and restring on silk cord to extend its jewelry life.
Minimalist jewelry is a huge fashion trend right now. Dainty jewelry components shine alone or together in multiple strands like our layered silk cord necklace. For this necklace, we focused on the sleek simplicity of gold tube beads and the lightness of silk cord.
Step 1: String on 25 gold tube beads on white silk cord. With the beads strung on, cut 20” off the end of the silk cord. Make 2.
Step 2: String on 25 gold tube beads on white silk cord. With the beads strung on, cut 22” off the end of the silk cord. Make 2.
Step 3: Gather the four cord strands and make a knot. Repeat to the other end.
Step 4: Dab some Super New Glue to both knots. Clamp a clamshell over the knots.
Step 5: Add a jump ring to one of the clamshell tip ends.
Step 6: Add a jump ring and a lobster clasp to the other clamshell tip ends. Done.
This style of necklace is perfect for small dainty beads or seed beads or even some NEW 3mm or 2mm Czech round beads.
For this bracelet, we twisted groups of silk cord with size 11/0 Miyuki seed beads and gold plated chain.
Step 1: String on seed bead to 8” and cut 10” silk cord strands with seed bead on. Make twelve strands. Tip: You can use the Bead Spinner to help to string on seed beads.
Step 2: Gather three seed bead strands and knot all three strands at both ends as close as you can to the seed beads. Clamp a clamshell over the knots. Make four group of seed bead strands.
Step 3: Cut two chain links at 8” and attach oval jump rings to each end of the chains.
Step 4: Also cut a few links of chain for your bracelet chain extender.
Step 5: Open an oval jump ring and slide on your lobster clasp.
Step 6: Open a larger jump ring and slide on these:
chain extender piece, two seed bead groups, chain extender piece, two seed bead groups.
Step 7: Close Jump ring.
Step 8: Leaving the chain extender along, separate the strands into two sections of chain and two seed bead grouped strands. Make a “flemish twist” with the two sections.
Step 9: Open a large jump ring and slide on the other ends of the chain and grouped seed beads and lobster clasp jump ring.
Step 9: Close jump ring and you are done.
(Close-up shot of jump ring with grouped seed beads and chain links.)
We hope enjoyed these tips and tutorials. Check our next blog post where we show you how to create evenly spaced knots in your jewelry designs using The EasyKnotter® tool. Happy Beading!
Easy DIY Jewelry with Swarovski® Raindrop Pendants
Swarovski® has introduced a simply stunning crystal collection called Innovations Spring/Summer 2017, inspired by the balance of nature. Along with Céline Cousteau’s inspiration crystal designs from the depths of the ocean, Swarovski included the popular Raindrop Pendants. We have three easy jewelry pieces to accentuate the beautiful shape of these raindrop pendants.
Drops of Midnight Earrings
We took TierraCast® 2-Hole Hammertone Disk and attached 33mm jet raindrop pendants and sterling silver ear wires with jump rings.
Drops of Midnight Earrings:
(2) TC01406 – 25mm Antique Pewter 2 Hole Hammertone Disk
Frame some of the raindrop earrings in a teardrop frame from TierraCast®. Hook sterling silver ear wires and attach a 17.5mm Swarovski® raindrop pendant with 5mm jump rings for an easy pair of earrings.
Making this chain tassel necklace is super easy. We cut chains at 10”, 3”, 2.5”, 2” 1.5” and 1” (times 2). Attach a small jump ring to the raindrop pendant. On a large jump ring (roughly 10mm), open and insert 10” chain, 1” chain, 1.5” chain, 2” chain, 2.5” chain, 3” chain, small jump ring with raindrop pendant, 3” chain, 2.5” chain, 2” chain, 1.5” chain, 1” chain, 10” chain. Close jump ring. Attached a lobster clasp to one of the 10” chain end and attach a small jump ring to the other 10” chain. Voilà and your necklace is complete!
Chain Tassel Raindrop Necklace:
(1) SW01399 – 23mm Crystal Silver Raindrop Pendant
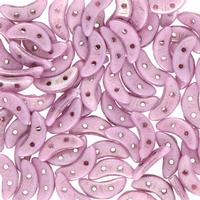
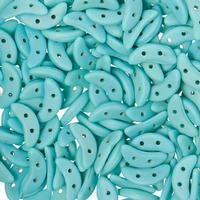
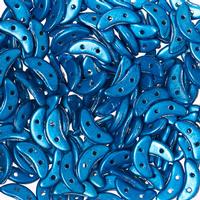
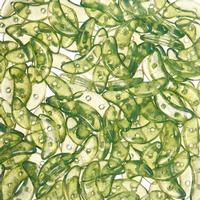
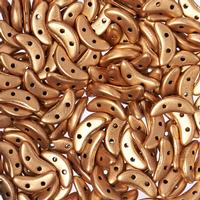
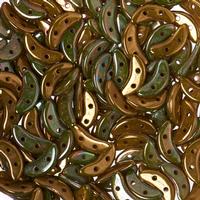
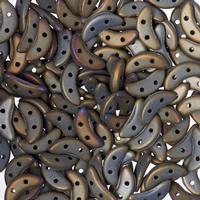
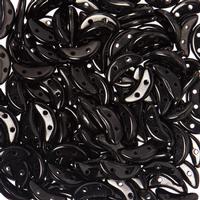
Czech Crescent Bracelet and Earrings with FREE Illustrated Tutorial
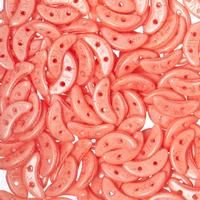
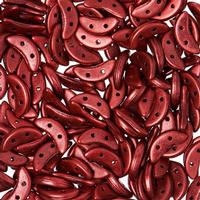
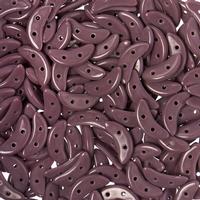
Czech Crescent beads are NEW at GoodyBeads. The Czech crescent beads are wedge-shaped beads with two holes. We have two easy and free tutorials using these Czech crescent beads.
Midnight Gold Czech Crescent Bracelet
Design by So Vang
For this bracelet, we used a combination of black and gold crescent beads with Swarovski® crystals in Graphite AB2X. The midnight glow of the AB2X is hauntingly beautiful in this piece.
We love this bracelet because it is simple to make. First, start by threading on 4 seed beads. Keep the ends of your thread untied. Then, you will thread on a top layer with a sequence of 3 Czech crescent, a seed bead and a 4mm bicone crystal. Repeat this sequence until you’ve reached your preferred bracelet length. End this top layer with 3 crescent beads and 4 seed beads. Now, bring the thread down to the bottom 3 crescent beads you’ve ended with. You will now be threading the bottom layer by adding a seed bead and bicone crystal in between each crescent bead grouping until you’ve reached the end. Tie both of your thread ends together. Feed your threads back through a few beads before you cut off excess thread. Add your clasp and chain link to the seed bead loop ends you’ve made with jump rings.
First thread on your top layer with, crescent bead, seed bead, bicone crystal (4 times). Tie both thread ends together to create a cylinder shape. Feed your thread through one crescent bead and loop down through the second hole of the crescent bead. Thread in reverse of your cylinder shape with adding a seed bead and bicone crystal inbetween the crescent bead. Once you’ve reached the end. Tie off thread ends and thread through a few beads before cutting off excess and you’ve completed your crescent bead design.
Slide these beads onto the headpin and make a simple loop:
Seed bead, bicone crystal, 8mm round crystal, 6mm round crystal, crescent bead design, bicone crystal and seed bead.
Open your Ear-wire loop and slide on your crescent bead design headpin loop. Repeat for other earring.
We just got some NEW Swarovski® flat backs crystals to play with. We love the subtle sparkle they brings to trending minimalist jewelry. Here are a few projects that use flat back crystals.
To get started, we recommend these tools to help you start BLINGING your jewelry with Swarovski flat back crystals:
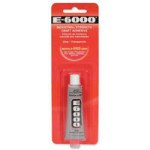
Adhesive: Check our Adhesive page for options. Fast-drying glue are ideal for quick placements of flat backs. When you are covering a larger area, we recommend using E-6000 as you still have time to adjust the flat backs when it has been placed. Please keep in mind when using adhesives, to make sure you are in a well-ventilated area.
Pick Tools/Tweezers: Because Swarovski crystals are small, pick tools will help to accurately place your flat backs. We recommended handling them by using a BeadSmith® Magic Pick or a Crystal Kanata. Tweezers will also help with adjusting your crystals once they have been placed.
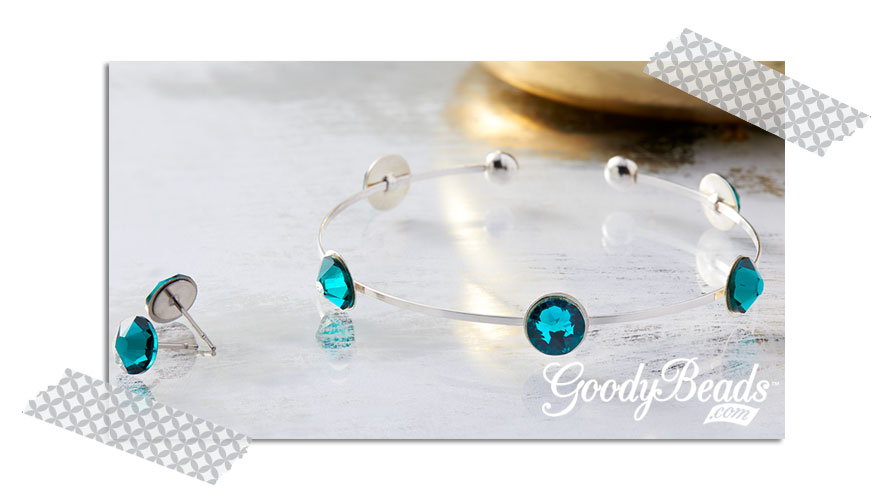
Emerald Bangle and Earring Studs
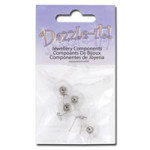
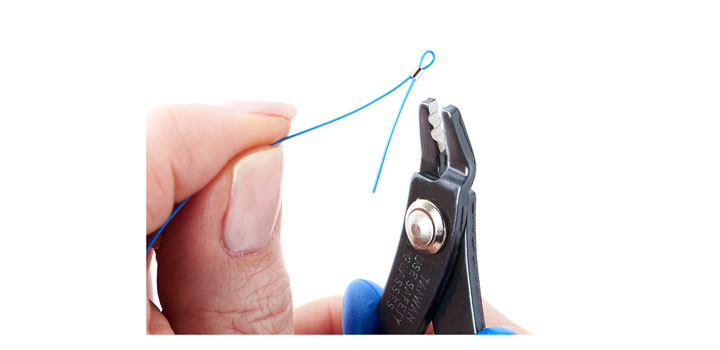
For this simple bangle, it consists of flat memory wire with Round Silver Flat Memory Wire Finding (A021628) with 7mm flat back crystal studs. First, cut one round of the flat memory wire with a memory wire cutter. Slide on the flat findings and hold it in place while you add your adhesive and flat back crystals. When you have finished gluing all your flat back crystals and it has dried, glue on a Flat Memory Wire End Cap to both ends of the memory wire.
For these stud earrings, we also used 7mm Swarovski crystals. Glue crystals onto Flat Post Earrings and you have simple, crystal studs to glam up your ears!
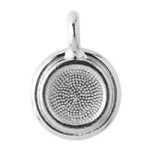
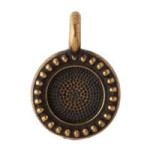
Tierra Cast® Bezel Earrings
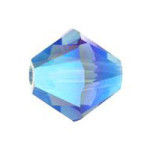
TierraCast® has bezel charms that accommodate the 7mm Swarovski flat back crystals. These bezel charms are available in a selection of finishes and are perfect for showcasing the color of crystals you want to use. We used the bright rhodium bezel with a vibrant Capri Blue crystal in this pair of earrings.
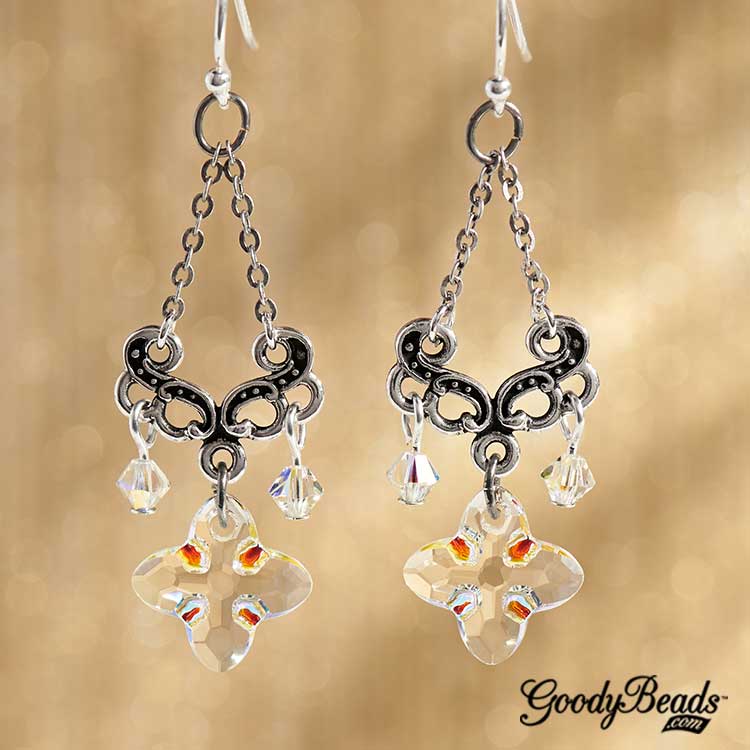
Gold and Red Earrings
Flat backs are a versatile jewelry embellishment because you can adhere them to charms and even jewelry findings. For these earrings, we used 3mm flat back crystals to embellish the top two rows of these Chandelier Earrings. Adding an inch of gold chain to the bottom rows with a jump ring and you have yourself a boho-style earring.
There are endless possibilities for flat backs. Flat back are easy to use as an embellishment to charms, jewelry, and even everyday items around the house, such as your tape dispenser or thumbtacks. Add Swarovski flat back crystals to your phone case, wallet, or couture clothing! Even nail artists, uses flat backs for a 3D design. How will you use it?
Make a Multi-Strand Necklace with Swarovski® Tahitian Pearls
by Kristal Wick
One of the easiest “go-to” designs I have found is a multi-strand necklace or bracelet. WHAT? You say these look soooooooo difficult? Not true! Once you master the multi-strand, you’ll be hooked! I like to start by making piles of my fave components; for example, sitting in my studio on a chilly (16 degrees below zero) January day in Minnesota, I CRAVED a splash of beach so I grabbed some TierraCast® dolphins and seashells, beautiful blue Swarovski Tahitian pearls and crystals and frosted seed beads to give the piece a sea glass effect. Use three different colors of beading wire with one exposed to add an additional dimension to the necklace. It’s trendy these days to mix metals so I threw in copper components to reflect the shades of glistening sand and a bit of silver to represent the crest of the waves breaking up on shore. Whether you’re physically on a beach or visiting one in your mind, I hope this seashore delight will help you get through this long winter! Use three colors of beading wire – one color exposed – to add an additional dimension to the necklace.
Cut five 16 inch pieces of beading wire (various colors).
Crimp one end of the wire leaving a small loop.
String the following onto strand #1:
Three Lined Light Seafoam AB Miyuki Seed Beads
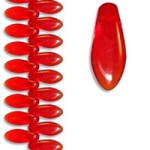
Seven Matte Transparent Silver Lined Crystal Long Drop Miyuki Seed Beads
Antique Silver Diamond Bead Frame
Indicolite Round Mini Bead
Series: 20 Matte Transparent Silver Lined Crystal Long Drop Miyuki Seed Beads
Antique Silver Diamond Bead Frame
Indicolite Round Mini Bead
Repeat the series four more times and add the following:
Seven Matte Transparent Silver Lined Crystal Long Drop Miyuki Seed Beads
Three Lined Light Seafoam AB Miyuki Seed Beads
Crimp beading wire end leaving a small loop.
Add Copper Oval Jump Rings to the four dolphin charms
Crimp one end of the wire leaving a small loop and string the following onto strand #2:
Slide the following series onto the beading wire:
Series: Crimp tube
3mm Antique Silver Beaded Heishi Spacer
4mm Antique Silver Beaded Heishi Spacer
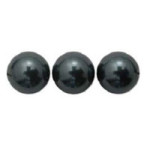
12mm Tahitian Swarovski Pearl
4mm Antique Silver Beaded Heishi Spacer
3mm Antique Silver Beaded Heishi Spacer
Crimp tube
Lay this strand down next to Strand # 1 and space the pearl series in the center of the first 20 Matte Transparent Silver Lined Crystal Long Drop Miyuki Seed Bead series and crimp on either side of the pearl series.
Gently squeeze the crimp covers over the crimps.
Add the series again and crimp about an inch down the beading wire. Repeat steps 8–10 for the remaining three pearl series.
NOTE: Before doing the final crimp on each strand, make sure they all end up the same length. Adjust the number of beads on each strand to ensure this.
Crimp beading wire end leaving a small loop.
Crimp one end of the wire leaving a small loop and string the following onto strand #3:
Three Silver Lined Capri Blue Miyuki Seed Beads
Series: Antique Copper Scalloped Bead Cap
Bicone Crystal Denim Blue AB2X
Antique Copper Scalloped Bead Cap
Silver Lined Capri Blue Miyuki Seed Bead
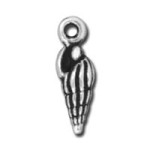
Antique Silver Small Spindle Shell Charm
Silver Lined Capri Blue Miyuki Seed Bead
Antique Copper Scalloped Bead Cap
Bicone Crystal Denim Blue AB2X
Antique Copper Scalloped Bead Cap
Silver Lined Capri Blue Miyuki Seed Bead
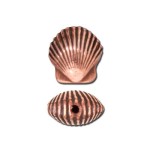
Antique Copper Small Shell Bead
Silver Lined Capri Blue Miyuki Seed Bead
Repeat the series seven more times alternating the Dolphin charms and Spindle Shell charms, then add two Silver Lined Capri Blue Miyuki Seed Beads.
Crimp beading wire end leaving a small loop.
Crimp one end of the wire leaving a small loop and string the following onto strand #4:
Two Matte Transparent Light Blue Miyuki Seed Beads
3mm Crystal Jade Swarovski Pearl
Series: Five Matte Dark Seafoam Delica Duracoat Galvanized Seed Beads
3mm Crystal Jade Swarovski Pearl
Matte Transparent Light Blue Miyuki Seed Bead
3mm Crystal Jade Swarovski Pearl
Five Matte Dark Seafoam Delica Duracoat Galvanized Seed Beads
3mm Crystal Jade Swarovski Pearl
Matte Transparent Light Blue Miyuki Seed Bead
3mm Crystal Jade Swarovski Pearl
Five Matte Dark Seafoam Delica Duracoat Galvanized Seed Beads
4mm Antique Copper Beaded Bead Cap by TierraCast
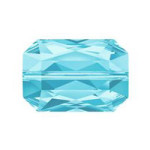
Swarovski® Crystal 14mm Aquamarine Emerald Cut Bead
4mm Antique Copper Beaded Bead Cap by TierraCast
Repeat the series four more times then add the following:
Five Matte Dark Seafoam Delica Duracoat Galvanized Seed Beads
3mm Crystal Jade Swarovski Pearl
Matte Transparent Light Blue Miyuki Seed Bead
3mm Crystal Jade Swarovski Pearl
Five Matte Dark Seafoam Delica Duracoat Galvanized Seed Beads
3mm Crystal Jade Swarovski Pearl
Matte Transparent Light Blue Miyuki Seed Bead
3mm Crystal Jade Swarovski Pearl
Five Matte Dark Seafoam Delica Duracoat Galvanized Seed Beads
3mm Crystal Jade Swarovski Pearl
Two Matte Transparent Light Blue Miyuki Seed Beads
Crimp beading wire end leaving a small loop as in Step #2.
Crimp one end of the wire leaving a small loop and string the following onto strand #5:
Transparent Aqua Miyuki Seed Bead
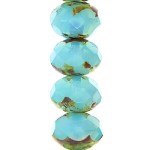
Series: 8mm Baby Blue Czech Faceted Rondelle Glass Bead
Transparent Aqua Miyuki Seed Bead
Sparkle Metallic Gold Lined Crystal Miyuki Seed Bead
Transparent Aqua Miyuki Seed Bead
Sparkle Metallic Gold Lined Crystal Miyuki Seed Bead
Transparent Aqua Miyuki Seed Bead
Repeat this series 17 more times. Add a Transparent Aqua Miyuki Seed Bead and then crimp beading wire end leaving a small loop.
Open eyepin, insert one end loop of all five strands and close the eye pin. Repeat for the other necklace end.
Slide on Antique Silver Spiral Cone Bead Cap, Swarovski® 6mm Indicolite Round Mini Bead, Antique Copper Beaded Bead Cap and make a simple loop on the end. Repeat for the other necklace end.
Add desired chain length (the sample shown uses 2-¼”) to simple loop.
Using a jump ring, add the toggle to the other end of the chain. Repeat steps 20-21 for the other necklace end.
January Birthstone – Garnet/Siam
Happy January Birthdays! Being the first birthstone of the year, January’s garnet, also know as the “Gem of Faith,” derived its name from the Latin word Granatum or pomegranate, because it resembles a dark red fruit. While garnet is a rich red hue, it “signifies power, victory, truth, purity, faith, and protection,” (BirthstoneZodiac) as well as life, happiness and strength.
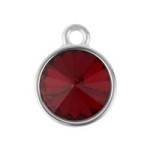
Swarovski® defines January birthstones with garnet and siam crystals. We have four simple jewelry projects to start your new year! Wear garnet or siam this year whether it is for showcasing your birthstone color or to showcase this vibrant red color.
January Crystal Earrings
Designed by So Vang
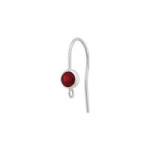
This pair of earrings is made with TierraCast® bezel charm that uses Swarovski® crystals. Simply open up your sterling silver ear wire loop and slip these glimmering charms on. Because these charms are 18mm, they are the perfect statement earrings for January 2016!
January Bangle Bracelet
Designed by So Vang
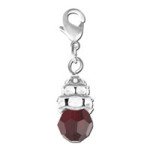
The fun thing about these expandable bracelets is that you can add any of your favorite charms. Add your garnet crystal charm and your favorite charms for this easy to do and wear popular expandable bracelet.
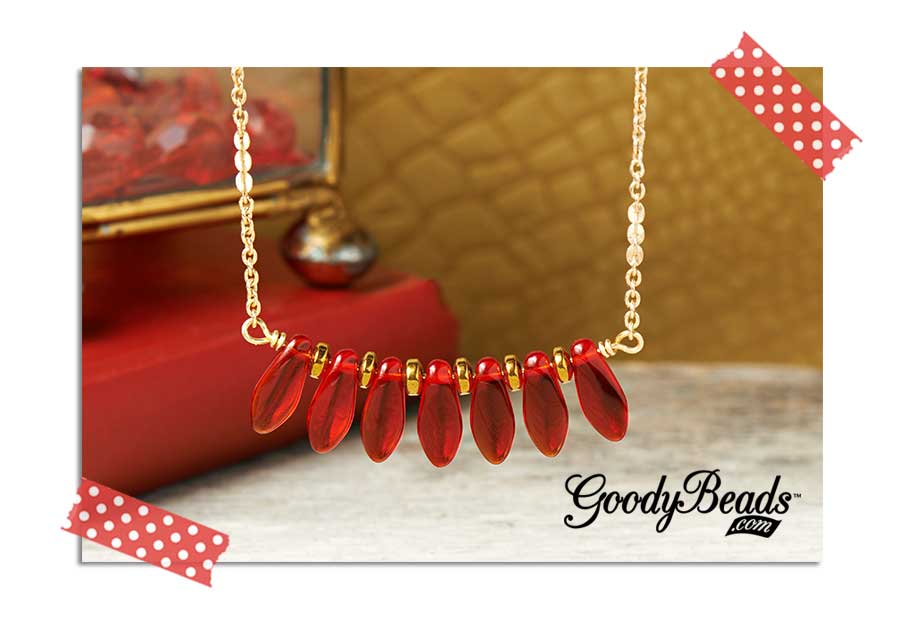
Red Golden Dagger Necklace
Designed by So Vang
For this necklace, we paired sharp red dagger Czech beads with copper/gold-tone beads. Take some 22 gauge artistic wire and make a full loop. Before you finish it with a coiled wrap, insert your gold chain. Finish your loop with a wrapped coil. Insert your beads alternating between the dagger beads and copper/gold beads. Make another wrap loop at the other end while adding another piece of your gold chain. Bend your beaded wire piece to create a slight curve. Add your lobster clasp to one end of your chain and a jump ring to the other.
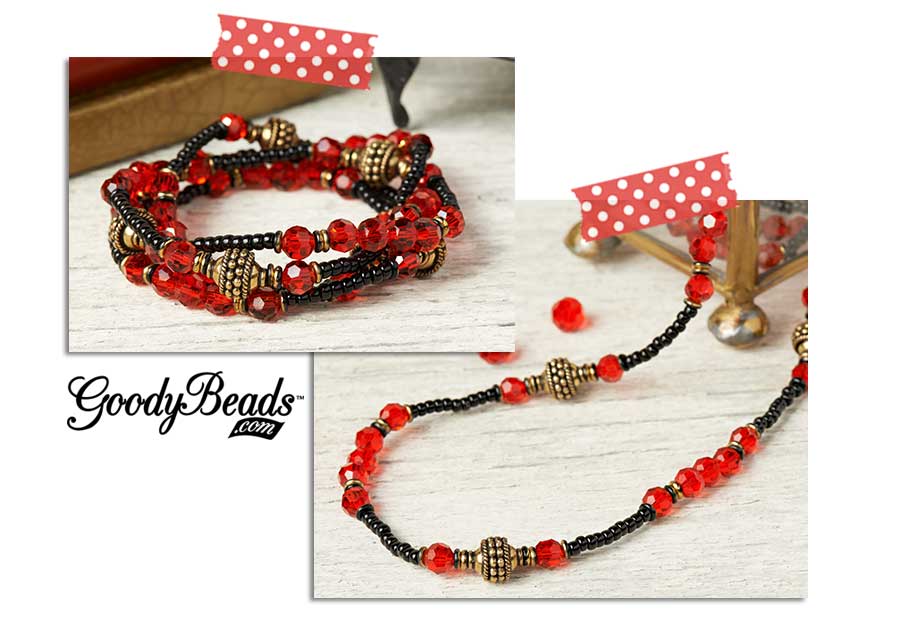
2-in-1 Necklace and Bracelet
Designed by So Vang
We used Chinese crystal beads, brass bali beads, seed beads and Czech O beads to create this simple elastic-strung jewelry piece that doubles as a wrap around bracelet or necklace. Create this fun sequential design as long as you want for an everlasting jewelry piece you can wear year round.
New Year’s Eve Swarovski® Earrings, PLUS How to Wire Wrap Briolette Beads
Who doesn’t love ringing in the New Year? You may find yourself at a rooftop party, celebrating New Year’s Eve with cheerful faces, sparkling fireworks, glittering streamers, plastic party hats, bubbly beverages, and midnight kisses! Whether you are dancing the night away or making a toast, we have the perfect earrings, made with Swarovski® crystals, to help ring in the New Year! PLUS, learn how to wire wrap Briolette Beads!
Pendulum Posh
Designed by Tory Vezina
Make these fun statement earrings with GoodyBeads.com NEW stock of Swarovski® pendulum beads. Take an eyepin and thread on the 10mm and 8mm crystal beads and make a simple loop. Attach the TierraCast® bar link to each loop. Connect the two bar links with the 6mm jump ring. Add your favorite choice of ear wires. Can’t you see yourself at a FABULOUS party wearing these FABULOUS earrings?!
Swarovski® and Rhinestone Earrings
You can’t have enough sparkle when it comes to dressing up for New Year’s. You have to sparkle as much as the flashy New Year’s ball!
Designed by So Vang
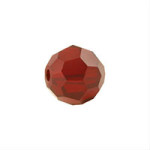
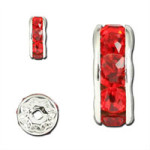
We’ve given these Swarovski® an extra boost of bling with rhinestone rondelles. We made these earrings with an eyepin, 8mm round Swarovski® bead, 6mm rhinestone rondelle bead and a 4mm bicone Swarovski® crystal. Thread on beads and make a simple loop. Open the eyepin loop closest to the 4mm crystal and attach 1 inch of CH00412 – 5mm Filigree Leaves Chain. Open the other loop and attach 1 inch of CH00533 – 2.5mm Soldered Cable Chain. Attach the other end of CH00533 chain to your choice of ear wire. You are ready to rock the night away when the ball drops for 2016!
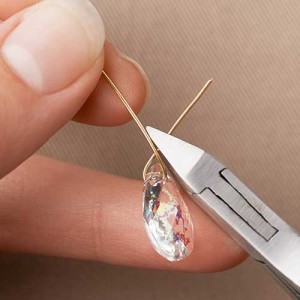
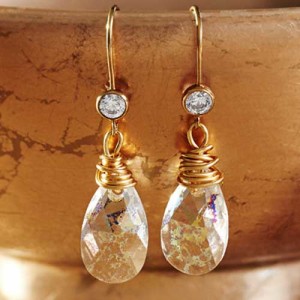
Wrapped Crystal Drop Earrings
Designed by So Vang
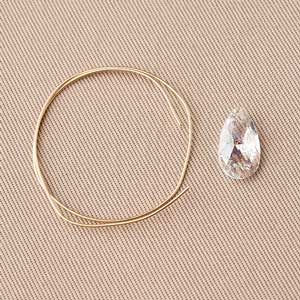
We love these pear-shaped Swarovski® earrings with patina sparkle that add a glittery shine. Paired with gold earring hooks and gold artistic wire, heads will turn to ask, “Where’d you get those?” Check out our tutorial below on how to wire wrap a briolette or top-drilled bead.
Tools Needed:
Round Nose Pliers, Flat Nose Pliers, and Side Cutter.
STEP 1: Start with 6 inches of 22 gauge artistic wire.
STEP 2: Feed an inch of wire through the briolette bead hole and bend both ends upwards and cross. Cut the shorter end where both wires cross.
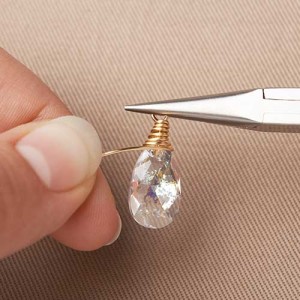
STEP 3: Take round nose pliers and grip the longer wire where the wires touch. Wrap wire back towards bead into a full round loop.
STEP 4: Use flat nose pliers to clamp onto loop. Wrap/coil the wire down and over the tip of the bead.
STEP 5: Next, hold the bead in one hand and the wire in the other. Twist the bead to coil the wire back up to the loop. It’s alright if your coils are not even, this creates a handmade look.
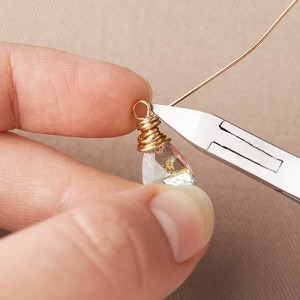
STEP 6: Cut excess wire with a side cutter and use flat nose pliers to tuck ends within coils.
STEP 7: For earrings, hook crystal loop to ear wires and you are done!
Jewelry Components List
Pendulum Posh
(1 pair) A012827 – Sterling Silver Filled French Wire Earrings
Nothing says celebrate like darling, dangling ear candy, am I right beady peeps? And since this is the time of year for pulling out all the stops on festivities, here are five new Merrily Bright Holiday Earring Kits for your DIY pleasure!
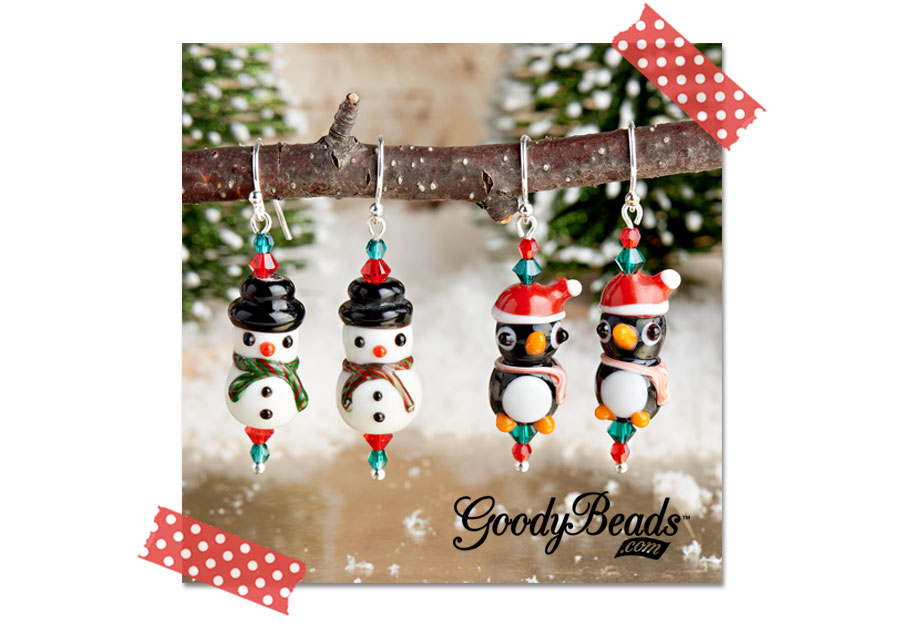
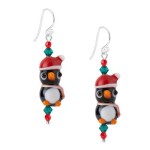
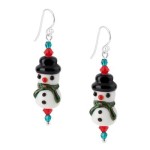
Frosty the Snowman and Penguin Santa Swarovski® Earring Kits
Everyone needs a little whimsy now and then, don’t you think? These little snowmen and penguins are just the ticket. Whether you’re gift giving to a youngster or a young-at-heart-ster, these are sure to bring a smile—not to mention they’re simple and quick!
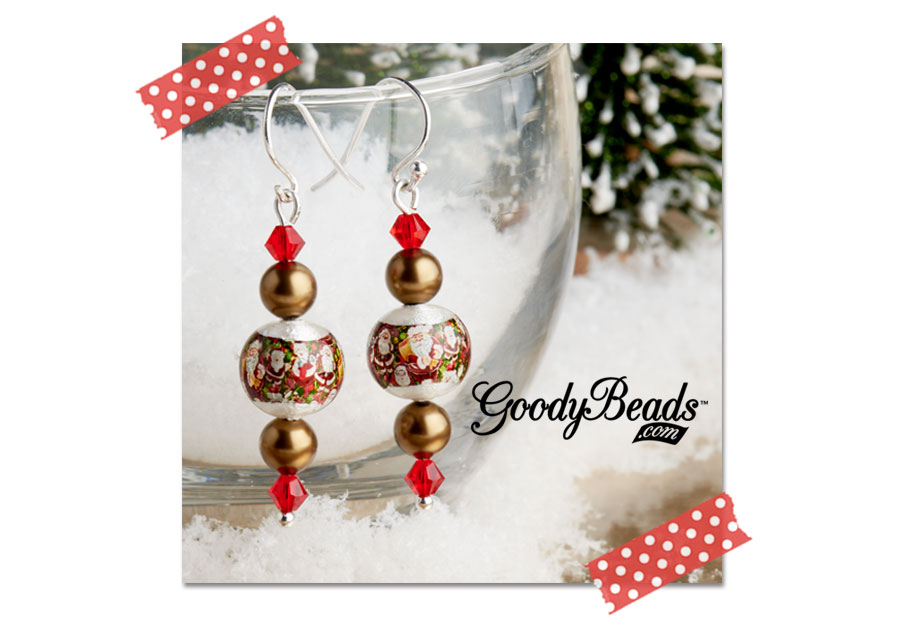
Mini Snow Globe Swarovski® Earring KitNostalgic Nana on your nice list? These darling mini snow globe kits have the daintiest, detailed Santas just waiting to delight all ages (mostly yours). They’re very lightweight and wearable, perfect for the office.
Star Bright Swarovski® Earring Kits
Need a cup of classy cheer? Our Star Bright earring kits made with Swarovski® Artemis crystals are excellent for those holiday parties and events where you need a more elegant look. There’s nothing better than Swarovski® to deliver stylish chic. Make a red pair and a green pair, keep one earring of each and gift the other set to your BFF so you’ll have a matching “unmatched” set of earrings for the holidays. Remember our Merrily Bright Holiday Earring Kits make great necklaces as well. Just add a chain, leather or suede cord to your earring loop and you have an instant pair of matching necklaces! Or gift a kit to one of your “jewelry-making-wannabee” friends and guide her through the first kit. We’ve given you everything you need (you provide the tools) to ensure success and convert another pal to the wonderful world of jewelry-making!
Personalized Glass Tile Charms
by Kristal Wick
Customized purse charms and accessories have been on trend for many moons and for good reason! They’re darling reminders of what we carry near and dear to our hearts from kitties to cupcakes. Designs are all up to your own imagination and creativity.
Nylah Glass Tiles
Here at GoodyBeads, we love our kids and pets (they’re kind of the same thing to many of us) so we’ve come up with some super easy instructions for making your own personalized glass tile charms for purse charms, pendants and rings, with the cutest models Nylah, Sparkle and Bling (we realize we’re slightly biased but you have to admit, they are adorable)! Embellish a chain with Swarovski pearls, TierraCast® charms and other “Goodys” and you’ve created a masterpiece.
Bling and Sparkle Glass Tiles
Nylah is Carlee’s — our Graphics Designers’ – four-year-old daughter. Sparkle and Bling are my rescue pups who pose for treats any time — day or night! Whether you’re making these customized glass tiles for yourself, grandma or a BFF, let your creative juices flow when in design mode. They make great custom holiday and birthday gifts, wedding party jewelry and school picture memorabilia pieces – for just a few ideas.
Nylah, Sparkle and Bling Tiles
(1) A013854 – 35mm Large Circle Glass Tile (Nylah tile)
(1) A013863 – 35mm Large Square Glass Tile (Sparkle and Bling tile)
(1) A013850 – 23mm Small Square Glass Tile (Nylah tile and Bling ring)
(1) A013856 – 23mm Oval Dome Cabochon Glass Tile (Nylah ring tile)
(1) Z010105 – 20mm Adjustable Silver-Plated Flat Ring with Glue Pad (Nylah ring)
(1) A015180 – 12mm Adjustable Silver-Plated Ring with Glue Pad (Nylah ring)
1. Size and print out your images on a laser printer (the ink from ink jet printers tends to run).
2. Cut out your image(s) to fit a specific glass tile, making sure the image is a tad smaller than the tile itself.
3. Using a soft paint brush, apply a light coat of Diamond Glaze to the back of a tile.
4. Carefully press the colored side of the image to the Diamond Glaze and press out any bubbles or air pockets.
5. When dry, color the edges of the tile with a metallic oil-based Sharpie maker (we used silver and gold in our samples). Let dry.
For a Pendant
6. Attach the pendant finding to the back of the pendant using E6000 and let dry.
For a Ring
6. Color the back of the tile with the Sharpie pen and let dry. Then attach to ring back using E6000 and let dry.