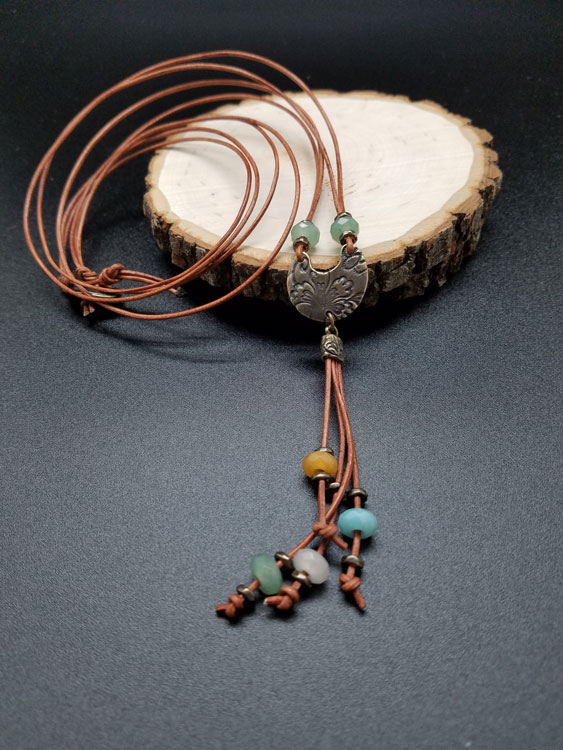
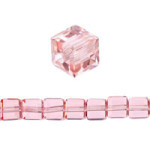
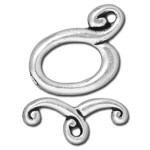
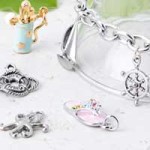
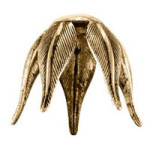
Tory’s Make and Take class was a HIT at the Twin Cities Bead Bazaar! It consists of Dakota Stones® faceted large-hole gemstones and TierraCast® new collection: Vida Más Dulce. We are happy to share with you this necklace and a tutorial you can make!
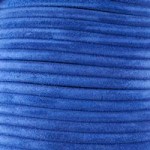
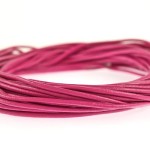
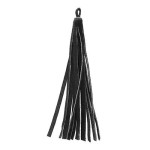
Start by cutting the leather for your tassel. For a long tassel cut 4 pcs of leather at 5”, 4.5”, 4” and 3.5”. For a short Tassel start with 3.5” and cut the others at 3.25”, 3 and 2.75”.
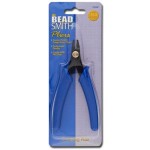
Put the 4 ends of your cut leather into the cord end and crimp the cord end on both sides with a non-serrated or nylon Pliers. Make sure to squeeze both sides or you may loose a piece of leather on either end.
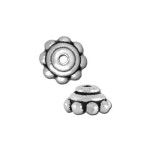
Add a spacer bead, gemstone and spacer bead to each piece of leather cord in your tassel and tie a overhand knot at the end. Pull tight so they do not come undone. Make any adjusts you need to the tassel length at this time.
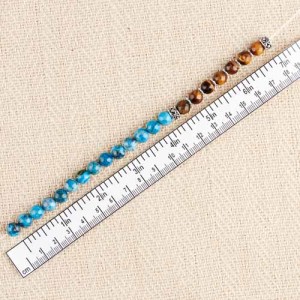
Measure how long you want your necklace to be around your neck. Take this length and double it and cut. Then cut a second piece the same length.
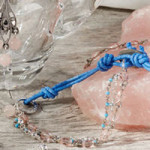
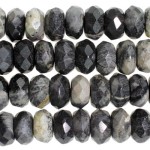
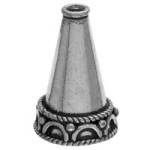
String your leather thru the top holes of the TierraCast connector piece. Then trim the ends of your leather to a point, to make it easier to slide on your beads. On each side string both pieces of leather thru the spacer bead, gemstone bead and another spacer bead.
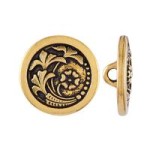
Pick one side to add your button to and put one piece of leather cord from that side thru each of your button holes and do an overhand knot with both cords. Then do a second over hand knot under the button and pull it up so it is flush with the button.
On the other side do an overhand knot at the top and then about a half an inch down, add a second overhand knot and this will become your button hole to act as a clasp for your necklace.
Open your jump ring and add your tassel and the bottom hole of the TierraCast Connector. Close your jump ring.
New Year’s Statement Necklaces
Glam up your New Year’s Eve party with your favorite dress, dancing shoes and statement necklace. We have a few fashion trend necklaces sure to turn heads before the ball drops!
Tease your fun side with a statement necklace donned with Jesse James beads from our Dec ’16 trend. Create this statement necklace with the Cabin by the Lake Mix, chain, bib connectorsand feather charms. Finish it up with leather cord and you can get on with the partying!
Designed by So Vang
Check out this waterfall necklace from our June ‘16 Birthstone Trend. This statement necklace has Swarovski® pearls linked together by wire wrapping each dangle and attaching each dangle to the gold-plated necklace with jump rings.
From our July ’16 Birthstone Trend, this statement necklace has the perfect hues for the festive holidays. Headpins are strung with Czech fire polish beads, through Textured Large Oval Links (CH00738/CH00739) and teardrop Chinese crystals.
Designed by So Vang
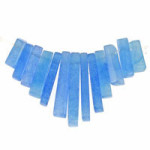
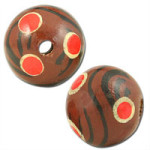
Let these Dakota Stone Gemstone Pendants (Nov ’16 Trend) create the ultimate focal statement necklace. Simply string one of these pendants with small round beads to separate the stunning sets and add your favorite chain to complete a necklace you can wear year ‘round!
Introducing our new gift jewelry kits perfect for gift-giving. Created by our in-house designers, So Vang, Tory Vezina and Heidi Urlaub, these kits are easy to make and versatile to wear to all of your upcoming events and celebrations. Plus, the kits are conveniently packaged inside a plastic pillow-shaped container for easy gift giving to the DIYers in your life!
Thinking of what to give this holiday season or for birthdays or special occasions? Gift kits are the perfect gift to give to your girlfriends, sisters, bridesmaids, work buddies, etc.
Heidi’s kits have an earthy and edgy vibe with her love of leather and gemstones. You can easily wear her jewelry with the intent of going everywhere and still be on trend. Her Tears of Leather Earringsand On the Fringe Leather Earrings are so gorgeous, you’ll long to own one, two or all of her styles! Meditation Stretch Bracelets have a harmonic combination of round gemstones and emerald-cut Swarovski® crystals, while the Boho Belle Tube Necklace is decorated with small gemstones and curved tubes that gently hug your collarbone.
Here in GoodyBeads land, we can’t wait for Christmas. We love everything from the decorated trees, freshly fallen snowflakes, holiday music to the aroma of peppermint candy canes. Get your gift shopping done early by making some easy DIY necklaces. Fulfill all of your gifts and still have time to enjoy the holidays, even if it is six months away.
Chain
Choose your chain from larger links or dainty links, silver-plated or gold-plated, beaded chain or bar chain. One of the easiest necklace to wear is an extra-long style, like a 30” length is easy to slip over your bead or double for a different look. Though a shorter necklace length is doable, by adding your own clasp findings with jump rings. Check out our image below to determine your necklace preference.
Pendants
An stunning focal piece you can use to make an easy necklace are slice pendants or gemstone pendants. We are loving this quartz pendant as it comes with a bail that you can slip a chain through for easy making and wearing.
Another easy addition to a necklace are charms and links. Choose a favorite charm or link and attach it to your necklace with a jump ring. Check out our bar connectors for a trendy boho look, alphabetcharms for a personalized touch, or quirky TierraCast® or metal charm for a quirky personality.
Rose Quartz and Serenity are Pantone’s color of the year winners. And for the first time they debuted a duo-color that blurs the line of femininity and masculinity.
We will show how we used these colors to inspire our Color of the Year Jewelry.
Link Earrings
Designed by So Vang
Made with blue foil tint beads and a hint of pink, these earrings pairs the two colors harmoniously.
Necklace
Pink Quartz Necklace Designed by Heidi Urlaub. Blue Serenity Neckalce Designed by Tory Vezina.
Rose Quartz Draped with a shiny tassel and beaded chain, this Rose Quartz necklace is the perfect statement piece to wear this spring. Can you imagine wearing it with your sweet summer dress and suede floppy hat?
Serenity This dream catcher necklace has the right Serenity hues for 2016. Made with handmade silk ribbon, Czech glass chip beads and feather charms, you can pair this with your trending flannel outfit and skinny jeans.
Bracelets
Designed by So Vang
Wire Wrap This wire wrap bracelet combines a darker shade of Serenity and square pink crystals. Accented with silver bali beads, string these colors onto memory wire for a three-loop bracelet with a simple loop on each end. This fun and easy Color of the Year-inspired memory wire bracelet is ready to flaunt.
Leather cord When it comes to transcending gender barriers, leather is best to use to create an accessory that both men and women can casually wear. Using the same darker Serenity color as in the bracelet above, we used red aventurine beads on 1mm leather cords. We cut the 1mm cords into three equal strands. Taking the three strands, crimp one end with a revolving crimp tubes. Insert a bead on your top two strands and then the next bead will be on your bottom two strands. Repeat until desired length. Cut the three strand ends straight and crimp them with another revolving crimp tube. Add your choice of clasp and it is ready to wear.
How will you wear this year’s colors of the year?
Link Earrings
(2) Z007149 – 30mm Antique Silver Hammered Round Pewter Link
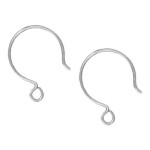
(1) A008998 – Silver Base Metal French Wire Earrings
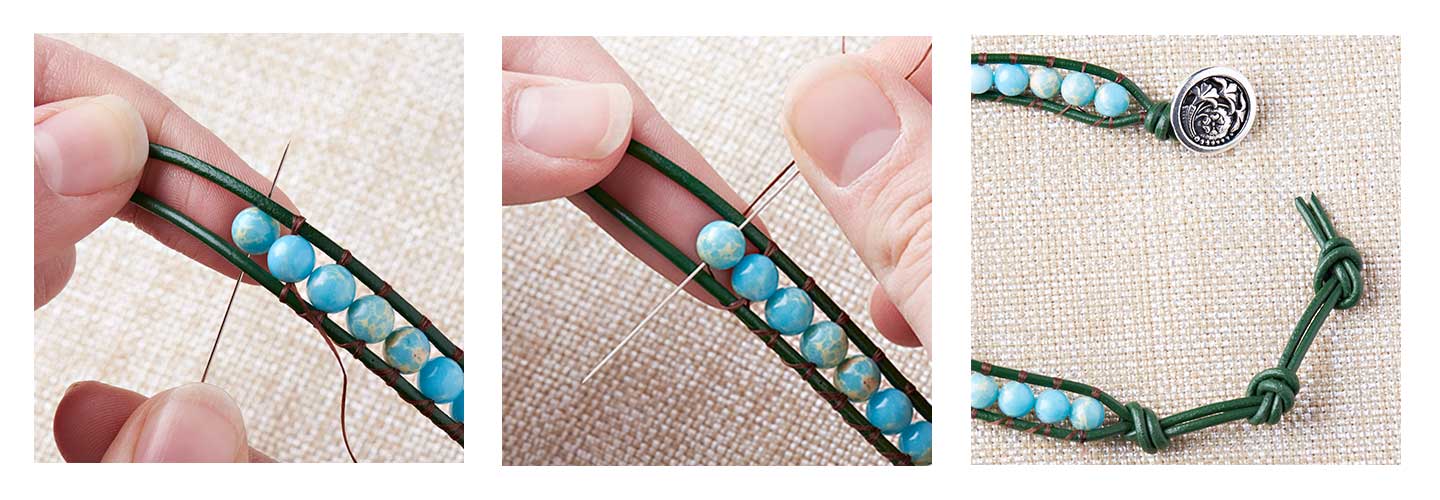
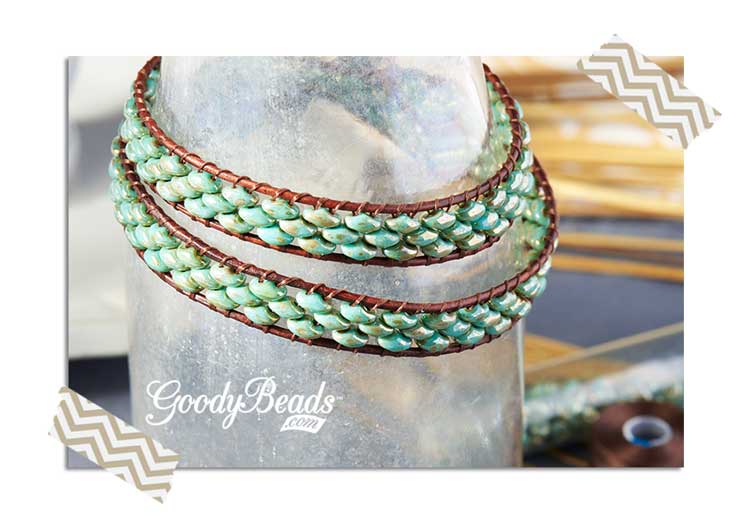
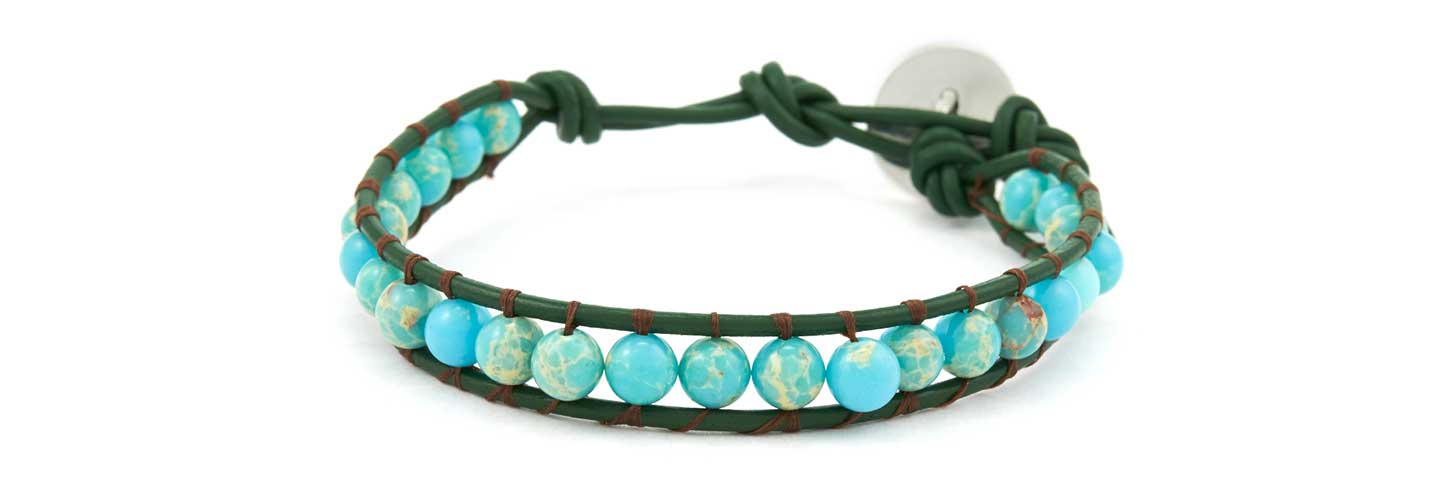
How to Make Leather Wrap Bracelets with Illustrated Tutorial
Leather wrap bracelets is a trending favorite to spice up a boho outfit or rock out to a head-banging concert or add to a casual outing with your girlfriends. Wrap bracelets are a must-have for 2016. We will show you how to make wrap bracelets with illustrated tutorial that you can download.
They may look difficult to make, but after a few attempts, they are honestly easy to make. We will show you a tutorial on how to make these bracelets using one-hole beads and super duo beads, as well as a few tips and tricks to help you make these wrap bracelets.
The basic components you need for these bracelets are:
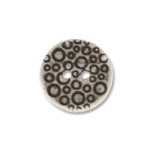
Button findings: which will act as your clasp. Button Ends will work well, also.
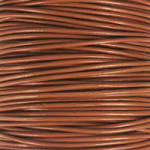
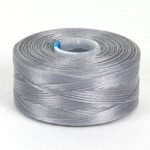
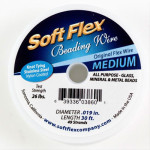
Leather or cotton round cord: these could range from 1mm to 2mm or larger, depending your preference and on the size of beads you are going to use. The length of cord needed for your bracelet will be determined below.
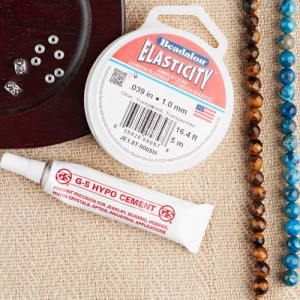
Thread: you can match the thread to your leather cord to hide the look or to add color. Check out some Beading Thread options but keep in mind that you will need a thin enough thread to go through the hole of your beads twice.
Beading Needle: size will be according to your thread and bead’s hole size.
Adhesive: Hypo-Cement with precision tip, is a good choice to glue thread ends or any fast-drying glue will do.
Beads: use your preference of beads or seed beads. Have enough if you plan to have a multi-wrap bracelet.
Determine leather length needed for a wrap bracelet
Use this method to determine the leather cord length you may need for a multi-wrap bracelet.
Take your wrist length and double the length. Multiply that by the number of wraps you want and then add 12”. That will give you an approximate cord length you will need to start your bracelet. (The extra 12” factors in the button knot, end knot(s) and bead size.)
Example:
2 wraps for an 8.5” bracelet: (8.5” x2) x 2 wraps = 34 + 12 = 46” needed.
Or
4 wraps for a 7.5” bracelet: (7.5” x2) x 4 wraps = 60 + 12 = 72” needed.
Keep in mind, these total numbers are approximate. You will want to test the wrap length while you’re making your bracelet. Having extra length is better than being short on your wrapped length goal.
Basic Leather Wrap Bracelet Tutorial
The basic weaving of the thread will be going under the leather cords and then coming over leather cords.
With Czech SuperDuo seed beads, you will be layering the bead holes to create a layer sequence. Below is a tutorial on how to make this SuperDuo wrap around bracelet.
This is a simple one-wrap bracelet. Think about using a different thread color than your leather cord color for a mix of colors.
Use more than one bead on each layer for more embellishment options.
Make a bracelet with multiple combinations of beads to create a fun layered look.
These SuperDuo beads look like tiny stone pebbles, don’t you think? Try a SuperDuo mix set for a colorful bracelet or create a zigzag pattern. What will you try?
Other Tips
How to add on additional thread: Tie thread to closest leather cord and glue with Hypo Cement or fast-drying glue. Cut off excess. Tie new thread to leather cord, glue knot and continue.
How to hold leather strands: An alternative to holding the leather strands, for stability when adding beads, is to clamp the button to a clipboard.
How to straighten leather cords: While you are stringing on beads, adjust previous beads with fingers to straighten out leather cords. Or when you have reached your desired bracelet length, lay the bracelet down and run your hand across your bracelet. This will help to smoothen and straighten your leather cords.
How to tighten threads/bead layers: If you find that your thread does not keep your bead(s) sandwiched in place or the bead sits loosely, sew up and under the cords and through the bead again. Over and down through the bead. Sewing through the bead twice on the leather cords will give your beads a tighter hold.
Tighten leather knots: If your leather cord knots are loosening, add a small dab of fast-drying glue or Hypo-Cement to knot(s) for tighter holds.
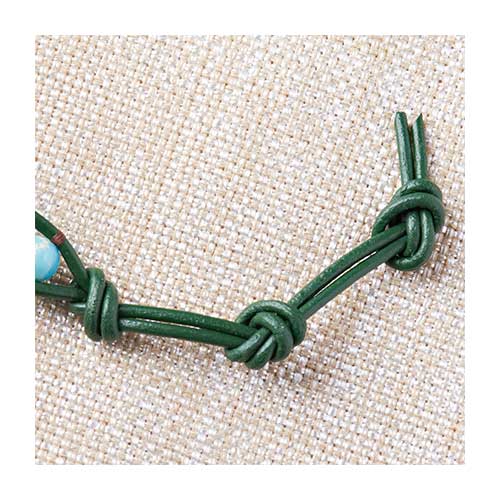
How to make an adjustable bracelet: Make additional knotted ends for an adjustable bracelet.
We love everything about a good tassel here at Goodybeads. You can create the simplest of jewelry designs, add a tassel and violà you’ve got instant glam! Traditionally, tassels were popular for embellishing home goods (Aunt Gertrude’s curtains, pillows, lampshades and even chandeliers), but they’ve “trended” their way into our jewelry and DIY projects — thank goodness! “Tassel” originated from “tassau”, a Latin term referring to a clasp at the neck of a garment that was originally worn by military officers and priests as talismans to ward off evil spirits. Also known as “passementerie” in France, “passamanaria” in Italy and “aziamentos” in Spain, the simple tassel can be traced back to the ancient tombs of the pharaohs in Egypt.
The Chinese incorporated tassels into their woven silks. But it was those trendsetting French folks that turned tassels into some serious ornamentation. In the 16th century, the first Guild of the Passementiers was founded and passementiers had to complete a seven year apprenticeship in order to become a Master in one of the many guilds. Each tassel was made from highly valued materials like silk or metallic gold-and-silver threads, so they became a symbol of wealth, power and prestige. With at least 300 threads per tassel, it is no wonder that the passementiers took such great pride in their work (and you thought seed beading took a lot of time to perfect)!
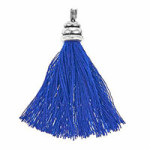
Tassel Earrings
You can actually make your own tassel (perhaps not quite as elaborate as the passementiers’ version) or you can use ready-to-wear tassels such as these in our earring and bracelet projects. They come in some very popular colors so you can customize to your liking. Earrings can also become dangle purse charms, or make a necklace using a single tassel. Here’s the #411 on how to make these terrific tassel beauties:
Tassel Earrings
(2) Z007553 – 8cm Small Black Suede Leather Tassel
Cut a piece of beading wire 12 inches long, add a beadstopper to one end.
String on silver spacer, black spacer, silver spacer, rondelle.
Repeat Step #3 nine more times.
Add black spacer, tassel jumpring, black spacer, rondelle and repeat Step #3 ten more times.
Slide a crimp tube into the wire, add the toggle and pass the wire back through the crimp tube.
Place the crimp tube into the crimping pliers’ notch closest to the handle and squeeze the pliers until you feel the crimp tube squish into a little taco shape.
Place the crimp in the first notch of the pliers so the taco is standing up.
Squeeze the pliers until the crimp is fully squished. Give the wire a gentle tug to make sure the wire is secured.
Trim the wire using your wire cutter so the wire is flush with the crimp tube.
Add a crimp cover over the crimp end and place in the 1st notch of the crimping pliers. Gently squeeze until the crimp tube is completely surrounding the crimp forming a round bead shape.
Repeat crimping the other bracelet end attaching the toggle bar using two jumprings.
Repeat Step #11 on the other bracelet end.
Trim tassel to your liking.
Easy Elastic Bracelet Tutorial
Remember when you were young and made stretchy elastic bracelets with a store-bought DIY kit of colorful beads and letters? Fast forward 10-20 years and let’s take that idea up a notch with a grown-up mentality of elastic bracelets. We love the concept of elastic bracelets because they are easy to make, inexpensive, and if you aren’t crimping the elastic, there are no tools needed.
Elastic Bracelets are simple to create, comfortable to wear and convenient: just slip them on and off! Elastic bracelets are the perfect jewelry piece for people with arthritis or those who have difficulty hooking on clasps with one hand. Layering different elastic bracelets is very on trend and bohemian looking.
We have two easy tutorials on how to finish your very own elastic bracelet.
Our first tutorial is how to tie the elastic cord of your bracelet using a surgeon’s knot.
Step 1: Gather your elastic, beads, spacers, and adhesive.
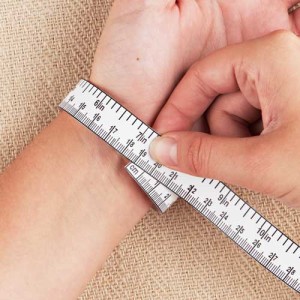
Step 2: measure your wrist size. An average size is 7″. You may add an inch if you’d like the fit of the bracelet to be a bit looser.
Step 3: Measure the elastic cord to your desired size, add about 4″-5″ and cut. Grab the cord at both ends and give it a tug, to loosen the elastic.
Step 4: String on the beads to the preferred length.
Step 5A: Make a cross knot and secure it by tying a square surgeon’s knot.
Step 5B: Illustrated look at the surgeon’s knot.
Step 6: Complete the bracelet by gluing the knot to reinforce its strength, then cut the excess cord, leaving about ¼”.
Step 7: Done!
Our second tutorial is how to crimp your elastic ends to clasps, connectors, jump rings, toggle clasp, etc. Follow the same bead sequence as above or try your own sequence without tying the ends. For this tutorial, you will need a pair of Crimping Pliers, crimp beads/tubes, and your choice of clasp.
Step 1: Gather your products.
Step 2: First, measure your wrist size. An average size is 7″.
You may add an inch if you’d like the fit of the bracelet to be a bit looser.
Step 3: Measure the elastic cord to your desired size, add about 4″-5″ and cut. Grab the cord at both ends and give it a tug, to loosen the elastic.
Step 4: String on the beads to the preferred length.
Step 5: Use a Crimping Tool. There are 2 hole crimpers. Inner hole will have a U-shape that will turn the crimp tube into a U-Shape, while the other will fold the crimp tube. First, crimp to make the U-shape.
Step 6: Then, turning the crimping tool, use the other hole crimp to fold the crimp tube, as if you are folding a book close.
Step 7: Repeat for other end of clasp. Cut off excess cord and done!
A tip when using elastic cord: loosen the elasticity by giving it a tug/stretch before starting your project. This will help in two ways. First, if you start with a piece of elastic cord, sometimes you will find it stiff. Stretching it will help make the cord more manageable to use. And secondly, because over time you will constantly stretch the elastic when slipping them on and off, it will eventually loosen the elastic. Loosening it before starting your project can avoid a looser and larger fit in the future.
Another tip when knotting or crimping your elastic, is to have a large hole bead next to it. You can conceal the knot or crimp inside the bead for a clean and professional looking finish. Or you can use crimp covers to cover the crimp or knot as if it was another bead in your elastic bracelet design.
Here are some inspirational, simple elastic bracelets that we have made using our tutorial above.
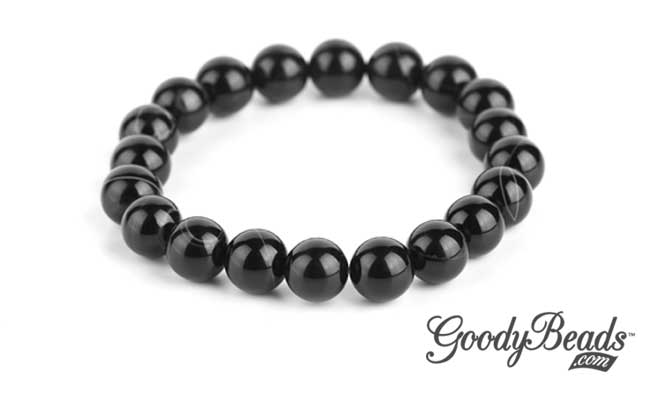
Onyx Stone Bracelet
Designed by So Vang
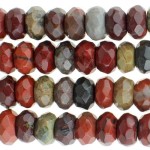
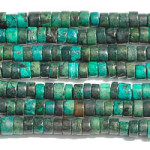
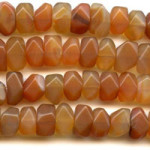
Elastic bracelets can be as simple as this Onyx Stone Bracelet. What makes this bracelet more grown up is the quality beads used for your projects. These Dakota Stone Sardonyx Gemstone Beads have a smooth, round shape with natural white lines. They are also cool to the touch so you know they are high-quality gemstones.
Wrap-Around Golden Ruby Bracelet
Designed by So Vang
You will find that elastic cords are thin yet sturdy enough for seed beads. Here, we used some size 8 seed Japanese Miyuki seed beads that have a hole size large enough for a .7mm elastic cord. Making a fun sequential design with faceted Chinese crystals, brass-plated Bali beads, Miyuki seed beads, and Czech O beads, we strung on a 28” long strand to wrap around four times a 7” wrist. You can always add more or less beads to accommodate your own wrist size.
Elastic Watch
Designed by So Vang
For this piece, we used crimp tubes/beads to connect the elastic ends to the watch face and toggle clasp. This is a fun combination of using a watch face and making it into an elastic bracelet.
Wood Tassel Bracelet
Designed by So Vang
From our Tassel blog post, comes this pair of Wood Tassel Bracelet that were made with elastic cord. Wood beads were strung in a random sequence and an added tassel for extra embellishment. We adore these two bracelets because they are lightweight and trendy with tassel addition.
Threader Earrings are a chic, modern jewelry that’s dainty and subtle, yet offers a simple to sophisticated look. These threader earrings are easy to make and wear. At one end you have a jump ring, where it is best to add a charm or wire-looped dangle of beads or crystals. Simple enough.
Below we have some simple and easy threader earrings that we’ve made. What will you add to your threader earring?
Golden Star Earrings
Get ready to rock out to your favorite head-banging song with these pair of star charm earrings. We used 4mm gold-plated jump rings to attach these cut-out gold-plated stars to the threader earrings. Let’s get jamming!
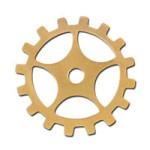
Golden Gear Earrings
For your secret love of steampunk fashion and jewelry, gear charms offers a modern, Victorian, and mechanical edge. Also attached with 4mm gold-plated jump rings to the threader earrings, these earrings bring an awareness to all types of fashion jewelry we are yet to explore.
Sparkly Ball Earrings
Using 1” headpins, we made rhinestone ball dangles to attach to our threader earrings. They add a pop of sparkle and shimmer!
Turquoise Drop Earrings
Still using the 1” headpins, we used turquoise beads to give these threader earrings a dab of color.
Golden Star Earrings:
(1) Y001135 – U-Threader Gold Filled Chain Drop Earrings
A hot trend this summer are tassels. We have three fun inspirational tassel jewelry projects for you to enjoy at your next music festival or relaxing under the shade by the beach.
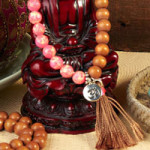
Mala Meditate Necklace
Mala is a strand of counting beads used in Hindu or Buddhist practice for praying or reciting a mantra to aid concentration during meditation. A typical mala is made with 108 beads that are strung with a knot tied in between each bead. Depending on the type of chant, counts of strung beads may vary. It is said that with each knot, people recite a mantra to bless the beads. The strand is also accompanied with a larger bead named the “Guru” bead and a tassel.
For our Mala necklace, we used 8mm round gemstone beads for a 42” necklace. Using a sturdy Super-Lon bead cord, cut a piece of cord about 150″ and make a knot 6″ in. This will help stop the end bead from falling off. String on your first bead and make a knot (using a pliers or tweezers if needed) flush to the bead to keep it in place. Repeat until you’ve strung and knotted all 108 beads.
Now take both cord ends and tie together. At these two ends, you will string on your Guru bead and tassel.
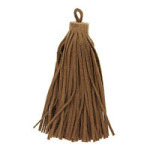
We made our tassel portion by using a large rust suede leather tassel. Insert a 3” eyepin from the middle-bottom of the tassel up. Slip on a 10mm tulip end cap to cover the top of the tassel. Wrap the headpin and your tassel is ready. (see images below)
Now take the two tied ends, string on the 12mm wood bead and place the tired ends through the tassel wire loop. Bring the strings back through the bottom of the wood bead and make a knot or two. Secure it with some clear adhesive like GS Hypo Cement. Cut the ends and you are ready to meditate or wear your Mala as a fashion accessory.
Beaded Tassel Earrings
For these Beaded Tassel Earrings, we used our brand new Tassel Maker from Beadalon®. You can find a tutorial of how to make tassels HERE. We took Super-Lon bead cord and made 25 loops to make the tassel. Attach an eyepin to the top of the tassel and slip on a cone bead cap and a 4mm round bead. Make a simple wire loop and attach to earring hooks.
If you find that some of your tassel ends have kinks, twists or curls, dampen with water, twist and pull them straight. After a few seconds when dried, you will find them straightened out. Taking about a third or half of the tassel ends, string 10 beads to each strand and knot the end. We recommend using an already-mixed, size 8 seed bead for a fun colorful look. Cut the remaining, unstrung tassel ends at a variety of shorter lengths to blend into the rest of the beaded tassels. Now you are ready to rock these earrings at your next music festival!
Wood Tassel Bracelets
One of our easier projects is our Wood Tassel Bracelets. Make these quick and easy bracelets to show your love of tassels. For each bracelets, we used different round wood beads in a sequential design along with a tassel, strung on elastic. Make sure to stretch the elastic string lightly to loosen the elasticity before stringing on beads. Also, after knotting the elastic, use GS Hypo Cement to secure your knot.
Goody Beads has a fun collection of watercolor flat leather. With a touch of soft and vibrant hues and strokes of whimsical patterns, watercolor flat leather projects can be perfect for bright summer days ahead. Here are some inspiring bracelet designs you can do with watercolor flat leather.
Watercolor Double Rainbow Bracelet Have you seen a double rainbow before? I almost lost my head the first time I saw one; which would have literally been a bad idea since I was driving in traffic. To make this bracelet, I chose 5mm squares watercolor flat leather, because it reminds me of rainbows. A double wrap-around style would be prefect for my double rainbow-themed design.
Because I wanted to show a different way to clasp a flat leather bracelet, use this alternative on your next flat leather project: first, cut the 5mm watercolor flat leather at twice the length of your wrist, and add 2-3 inches. Fold over each leather end about 1” and loop through a jump ring. Flatten the each jump ring using a serrated pliers, squeezing the leather together gently. Add another jump ring to each of the leather loops you’ve created. Add fun charms, or create a bead dangle to decorate your bracelet. Finish it off with a lobster claw and you are ready to wrap yourself in a watercolor double rainbow bracelet.
Crisscrossed Watercolor Bracelet Here’s an interesting take on combining flat leathers.
Take two same-length 5mm watercolor flat leather, glue both ends side by side into one side of the clasp. For this project we used a solid color flat leather to enhance the colors of the watercolor flat leather. Keeping the strands straight side by side, thread through the bar slider. Now, cross the watercolor leather over the solid color flat leather. Thread through the second bar slider and glue the ends to the other side of the clasp. Neat, huh?
Golden Watercolor Bracelet This Golden Watercolor Bracelet is simple yet packs a golden glow!
What you will need:
(6) CH00579 – 10mm Brushed Water Color Flat Leather
After measuring your 10mm watercolor flat leather to your preferred wrist length, slide on the gold double bar and then glue the ends to its golden clasp. You can make this simple bracelet in less than a minute and it is sure to brighten your sunny outfit!
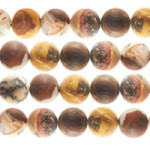
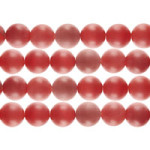
Feature: Dakota Stones and the Process of Matte Finish Gemstones
Our friends at Dakota Stones have been generous to supply us with semi-precious and gemstones beads in a variety of natural stones, shapes, sizes, and finishes. We’re especially fond of the matte-finished gemstones. They are stunning with unique, nature-made cracks, lines, and spots.
Dakota Stones shares with us more about matte finishes and their matte-finish production process:
“Matte-finished or frosted gemstones have become a popular design choice in jewelry. They complement many of the newer design materials such as ribbon, leather, chain, rusted auto parts or whatever designers dream up. Matte finished beads work with many of the alternative metals and the variety of finishes now available such as gun metal, copper, antiqued, etc. Matte-finish offers a subtle accent or an understated elegance to designs and is a great choice when designing men’s jewelry.
The process to matte-finish a bead is counter intuitive and actually requires more steps than the traditional polished stone. The stone bead is put through all the normal steps of a polished bead; cut, drilled polished, then it goes back into the tumbler with a fine grit powder, water and additional tiny stones and tumbled to the desired look. Each stone type requires a different amount of time in the tumbler depending on the material’s hardness and characteristics. Harder materials can require up to 2 hours in the tumbler and occasionally it takes multiple tumbles with different various-sized grit powder.”
So, the next time you pick up some matte-finish gemstones and awe over their texture and smoothness, take a second to appreciate the time and care that went into creating these natural-looking gemstones. These types of stones will make a great addition to your next design project.
(image source Dakota Stones and original Post HERE.)