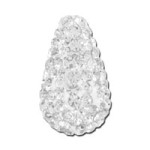
Swarovski® Fall/Winter 2017/2018 NEW Collection: NEW Jewelry
Our selection of Swarovski® 2017/2018 Collection: Nature of Us, is here. Our fingers were itching to create with them! Here are three jewelry pieces featuring some of the new items GoodyBeads received!
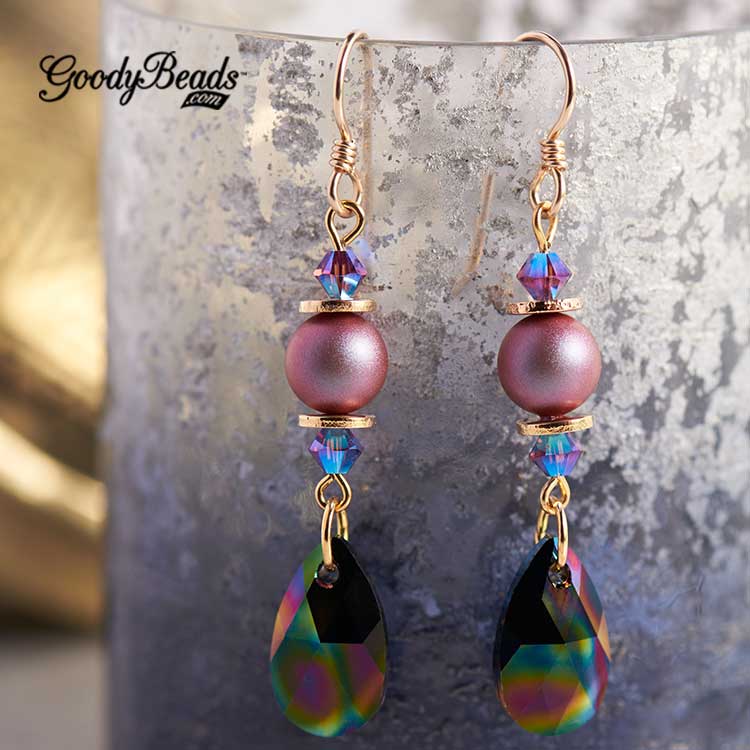
Rainbow Pearl Earrings
Designed by So Vang
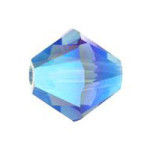
We just love the matte vibrancy of the pearls and the gleaming dark rainbow effect from the crystal drop. Paired with disc spacers, amethyst 2x AB bicone crystals and gold-plated finding, it’s certainly the pair of earrings worth waiting for.
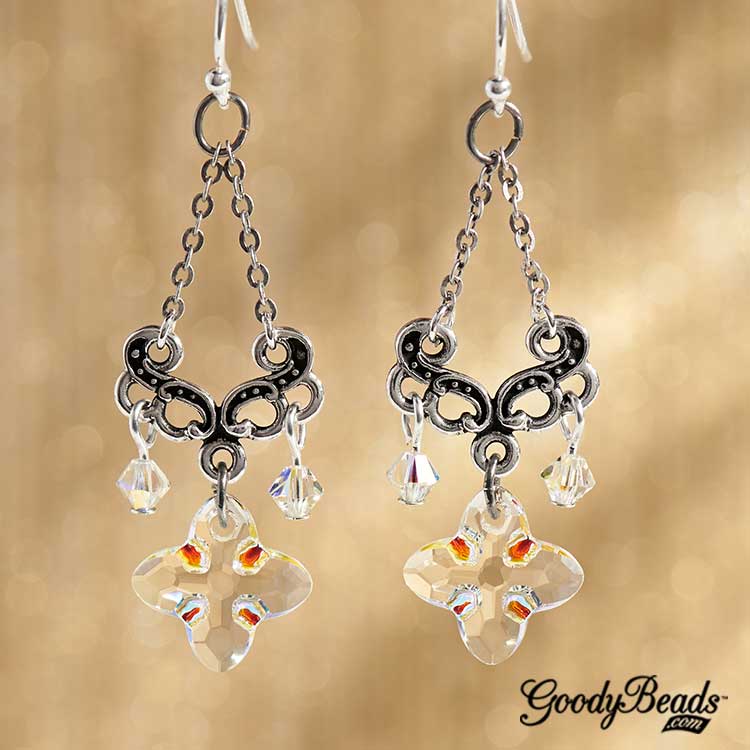
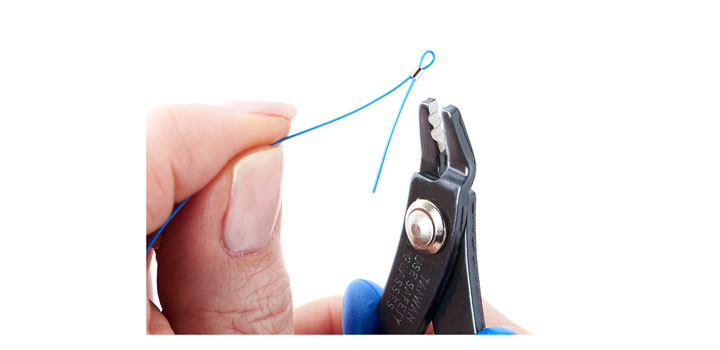
Slide a bicone crystal on a headpin and make a simple loop. Make a total of two.
Open loop of crystal dangle and slide on side loop of link. Close loop. Repeat to other end.
Open oval jump ring and slide on cross pendant and middle loop of link. Close jump ring.
Cut two 1/2” of chain.
Open small jump ring and slide on one chain link end and top side loop of link. Close jump ring. Repeat to other chain link.
Open oval jump ring and slide on both ends of chain link and loop of earwire. Close loop.
Repeat all steps for other earring.
Save
Lampwork Jewelry
Make your next jewelry POP with some lampwork beads. Our selection of these glass beads are quality handmade, which makes each bead uniquely one-of-a-kind. Check out our three simple designs that utilizes these stunning, focal beads.
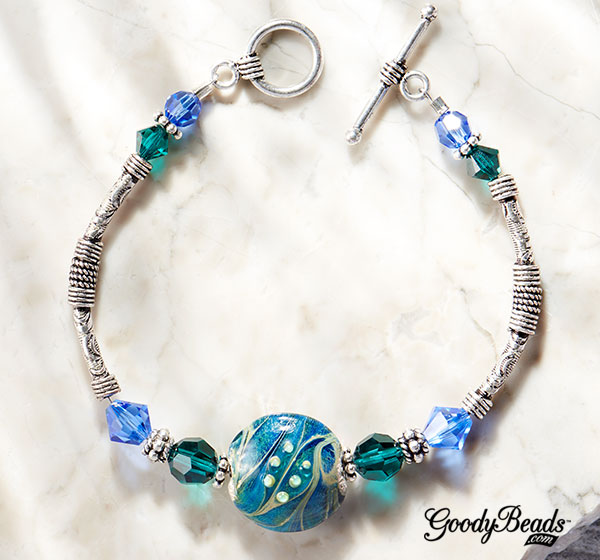
Glass Menagerie Bracelet
Designed by Tory Vezina
Mix up different glass lampwork and Bali style beads for this sandy and colorful bracelet.
What you will need:
(1) A013548 – 20mm Spiral with Spots Glass Disc Beads
Slide on your crimp tube and beads. Refer to image to slide on the bead sequence. End with a crimp tube. (Click on image for a larger view)
Crimp both sides to the toggle clasp loops. Cut excess wire with flex wire cutters.
Place a crimp cover over the crimped tube. Use a flat-nose plier or serrated pliers to gently close the cover over the crimped tube. And you are done.
Coastal Ripples Bracelet
Designed by Tory Vezina
Sail away with beautiful thoughts of the ocean wearing our Coastal Ripples Bracelet. Our ocean waves disc bead is dressed with sparkling Swarovski® crystals and elongated with Bali style tube beads.
Compile your beads and tools. (List of components below.)
Slide a blue bicone crystal on headpin and make a simple loop. Make 4 bead dangles.
Slide a darker blue bicone crystal on headpin and make a simple loop. Make 4 bead dangles.
Slide a pearl on headpin and make a simple loop. Make 4 bead dangles.
Cut chain link to have 5 links.
Open eyepin and slip on chain link.
Attach two different bead dangles to each link and eyepin loop.
Slide these beads onto the eyepin and make a wrapped loop: pearl, bead cap, lampwork bead, bead cap, pearl.
Open earring loop and slide on eyepin dangle.
Repeat to other earring.
How to Use Silk Cord in Jewelry Making
Silk cord has been used as a stringing material in jewelry-making for centuries. No other beading cord offers the softness that natural silk provides. Jewelry designs made with 100% silk bead cord drape beautifully and the cord itself can become a feature with knotting techniques. Whether you’re looking to create a simple strand of beads or incorporate knotted bead clusters into your designs, GoodyBeads.com is here to show you how easy and versatile this timeless stringing material can be.
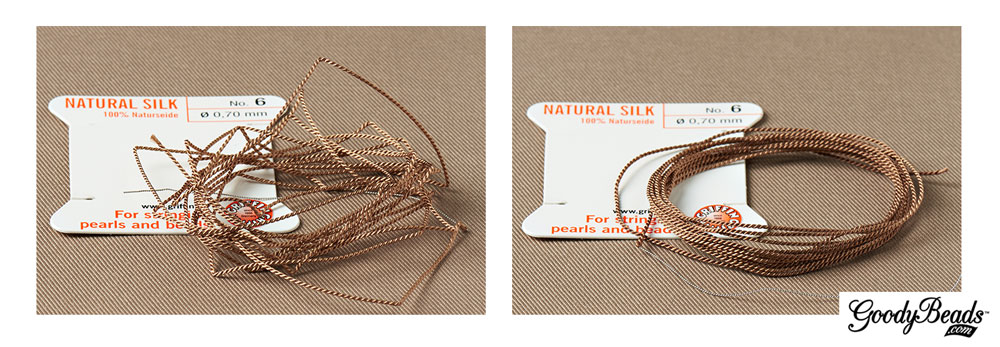
One of our favorite silk bead cord brands is Griffin. Griffin bead cords are made of 100% natural silk and come in a rainbow of colors and a variety of thread sizes.
Griffin bead cords are sold 2-meters per card. Two strands of twisted silk are wrapped around a cardboard backer. Each cord comes with its own needle for easy threading.
Choosing Silk Cord
Thread thickness is very important, especially if you plan on incorporating knots into your designs. Beads can slide over a knot if the cord is too thin for the bead hole you are working with. Griffin bead cords has its own numeric system for categorizing thread cord sizes: No. 0 – No. 12.
Each thread number has an associated millimeter size. Below is a quick reference guide for each number:
No. 0 = 0.30mm
No. 2 = 0.45mm
No. 4 = 0.60mm
No. 6 = 0.70mm
No. 8 = 0.80mm
No. 12 = 0.98mm
Smooth Out Silk Cord
Since silk bead cords come spooled on a card, you must prepare your new cord for use by smoothing out the kinks first.
To smooth out your cord, unravel the whole cord from the card. Starting from one end, dip your fingers in water and run your damp fingers through a section of the cord. Run your fingers over the section a few times to help straighten them out. Once that section is straight, continue on down to the next section of the cord with damp fingers until you’ve straightened the whole piece. Next, run a paper towel over the entire cord and gently squeeze to remove any residual water from the cord. That’s all you need to do. The cord will still be a bit damp but you can certainly use it right away. You can also wait a few minutes until it’s fully dried.
NOTE: You can use the same cord for multiple projects if you plan to keep using the needle that is attached to the cord. String bead(s) through the needle and utilize the end section of the cord.
Using Clamshell Bead Tip with Silk Cord
A way to attach your silk cord to jump rings or clasps is to attach clamshell bead tips.
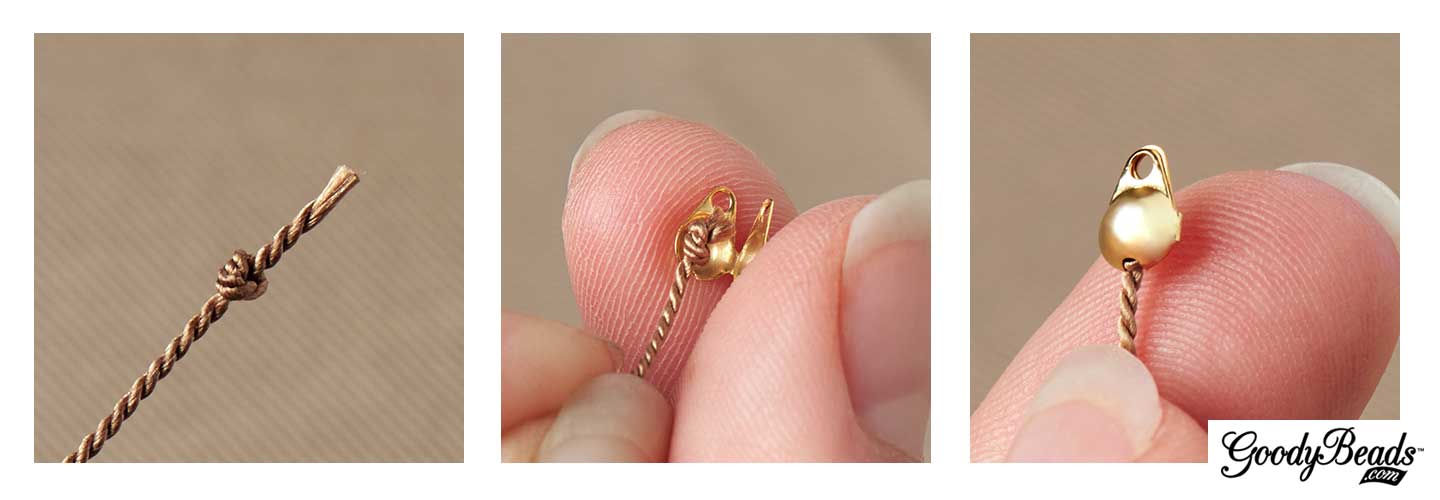
Start by making a knot at the end of your prepared silk cord. Cut any excess cord close to the knot. Add a dab of Super New Glue or fast-drying glue to the knot. Place the knot inside the clamshell center and fold the clamshell over the knot. The glue will keep the knot from unraveling and to adhere the silk cord to the inside of the clamshell bead tip. Once the glue is dry, it’s ready to use.
Need a little inspiration? Here are some ways we used Griffin silk bead cord in our jewelry designs. Plus, quick tips on how you can create these designs yourself!
Crystal Cluster Knotted Silk Cord Necklace
Designed by So Vang
Make a necklace with knotting in-between clusters of beads. Choose from Swarovski® crystals, Chinese crystals, seed beads or your favorite gemstones. For our necklace, we used the entire 2-meter cord and strung on clusters of one gold seed bead, three dainty round Chinese crystals and one gold seed bead, that were knotted with an inch gap between clusters. This version makes a 60” necklace that you can wrap around two or three times.
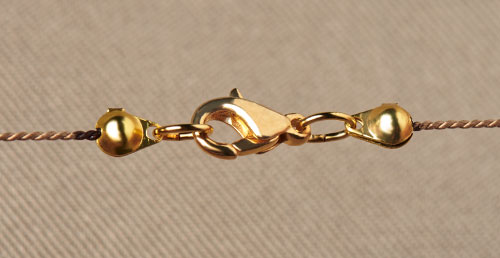
Here you can see how the clamshell bead tips are used in conjunction with jump rings and a lobster clasp.
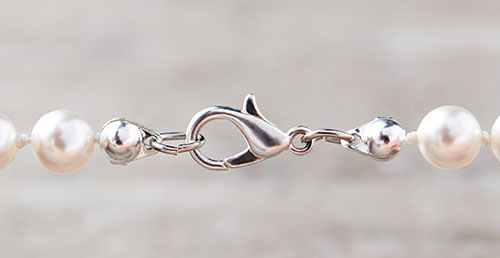
Pearl beads and silk cord are a match made in heaven. Not only do they look great together, the silk cord also helps prolong the life of your pearl jewelry by preventing the beads from rubbing up against each other, which can breakdown the bead’s finish. Making this elegant necklace is super easy.
First, make a knot and clamp a clamshell over the knot. Make another knot close to the clamshell. String on a pearl. Make a knot close to that pearl. Repeat until a preferred length. Make two knots at the end and clamp a clamshell over the last knot. Finish with a lobster clasp and you’re done!
If you have a worn-out pearl necklace, you can undo all the pearls and restring on silk cord to extend its jewelry life.
Minimalist jewelry is a huge fashion trend right now. Dainty jewelry components shine alone or together in multiple strands like our layered silk cord necklace. For this necklace, we focused on the sleek simplicity of gold tube beads and the lightness of silk cord.
Step 1: String on 25 gold tube beads on white silk cord. With the beads strung on, cut 20” off the end of the silk cord. Make 2.
Step 2: String on 25 gold tube beads on white silk cord. With the beads strung on, cut 22” off the end of the silk cord. Make 2.
Step 3: Gather the four cord strands and make a knot. Repeat to the other end.
Step 4: Dab some Super New Glue to both knots. Clamp a clamshell over the knots.
Step 5: Add a jump ring to one of the clamshell tip ends.
Step 6: Add a jump ring and a lobster clasp to the other clamshell tip ends. Done.
This style of necklace is perfect for small dainty beads or seed beads or even some NEW 3mm or 2mm Czech round beads.
For this bracelet, we twisted groups of silk cord with size 11/0 Miyuki seed beads and gold plated chain.
Step 1: String on seed bead to 8” and cut 10” silk cord strands with seed bead on. Make twelve strands. Tip: You can use the Bead Spinner to help to string on seed beads.
Step 2: Gather three seed bead strands and knot all three strands at both ends as close as you can to the seed beads. Clamp a clamshell over the knots. Make four group of seed bead strands.
Step 3: Cut two chain links at 8” and attach oval jump rings to each end of the chains.
Step 4: Also cut a few links of chain for your bracelet chain extender.
Step 5: Open an oval jump ring and slide on your lobster clasp.
Step 6: Open a larger jump ring and slide on these:
chain extender piece, two seed bead groups, chain extender piece, two seed bead groups.
Step 7: Close Jump ring.
Step 8: Leaving the chain extender along, separate the strands into two sections of chain and two seed bead grouped strands. Make a “flemish twist” with the two sections.
Step 9: Open a large jump ring and slide on the other ends of the chain and grouped seed beads and lobster clasp jump ring.
Step 9: Close jump ring and you are done.
(Close-up shot of jump ring with grouped seed beads and chain links.)
We hope enjoyed these tips and tutorials. Check our next blog post where we show you how to create evenly spaced knots in your jewelry designs using The EasyKnotter® tool. Happy Beading!
Make a Multi-Strand Necklace with Swarovski® Tahitian Pearls
by Kristal Wick
One of the easiest “go-to” designs I have found is a multi-strand necklace or bracelet. WHAT? You say these look soooooooo difficult? Not true! Once you master the multi-strand, you’ll be hooked! I like to start by making piles of my fave components; for example, sitting in my studio on a chilly (16 degrees below zero) January day in Minnesota, I CRAVED a splash of beach so I grabbed some TierraCast® dolphins and seashells, beautiful blue Swarovski Tahitian pearls and crystals and frosted seed beads to give the piece a sea glass effect. Use three different colors of beading wire with one exposed to add an additional dimension to the necklace. It’s trendy these days to mix metals so I threw in copper components to reflect the shades of glistening sand and a bit of silver to represent the crest of the waves breaking up on shore. Whether you’re physically on a beach or visiting one in your mind, I hope this seashore delight will help you get through this long winter! Use three colors of beading wire – one color exposed – to add an additional dimension to the necklace.
Cut five 16 inch pieces of beading wire (various colors).
Crimp one end of the wire leaving a small loop.
String the following onto strand #1:
Three Lined Light Seafoam AB Miyuki Seed Beads
Seven Matte Transparent Silver Lined Crystal Long Drop Miyuki Seed Beads
Antique Silver Diamond Bead Frame
Indicolite Round Mini Bead
Series: 20 Matte Transparent Silver Lined Crystal Long Drop Miyuki Seed Beads
Antique Silver Diamond Bead Frame
Indicolite Round Mini Bead
Repeat the series four more times and add the following:
Seven Matte Transparent Silver Lined Crystal Long Drop Miyuki Seed Beads
Three Lined Light Seafoam AB Miyuki Seed Beads
Crimp beading wire end leaving a small loop.
Add Copper Oval Jump Rings to the four dolphin charms
Crimp one end of the wire leaving a small loop and string the following onto strand #2:
Slide the following series onto the beading wire:
Series: Crimp tube
3mm Antique Silver Beaded Heishi Spacer
4mm Antique Silver Beaded Heishi Spacer
12mm Tahitian Swarovski Pearl
4mm Antique Silver Beaded Heishi Spacer
3mm Antique Silver Beaded Heishi Spacer
Crimp tube
Lay this strand down next to Strand # 1 and space the pearl series in the center of the first 20 Matte Transparent Silver Lined Crystal Long Drop Miyuki Seed Bead series and crimp on either side of the pearl series.
Gently squeeze the crimp covers over the crimps.
Add the series again and crimp about an inch down the beading wire. Repeat steps 8–10 for the remaining three pearl series.
NOTE: Before doing the final crimp on each strand, make sure they all end up the same length. Adjust the number of beads on each strand to ensure this.
Crimp beading wire end leaving a small loop.
Crimp one end of the wire leaving a small loop and string the following onto strand #3:
Three Silver Lined Capri Blue Miyuki Seed Beads
Series: Antique Copper Scalloped Bead Cap
Bicone Crystal Denim Blue AB2X
Antique Copper Scalloped Bead Cap
Silver Lined Capri Blue Miyuki Seed Bead
Antique Silver Small Spindle Shell Charm
Silver Lined Capri Blue Miyuki Seed Bead
Antique Copper Scalloped Bead Cap
Bicone Crystal Denim Blue AB2X
Antique Copper Scalloped Bead Cap
Silver Lined Capri Blue Miyuki Seed Bead
Antique Copper Small Shell Bead
Silver Lined Capri Blue Miyuki Seed Bead
Repeat the series seven more times alternating the Dolphin charms and Spindle Shell charms, then add two Silver Lined Capri Blue Miyuki Seed Beads.
Crimp beading wire end leaving a small loop.
Crimp one end of the wire leaving a small loop and string the following onto strand #4:
Two Matte Transparent Light Blue Miyuki Seed Beads
3mm Crystal Jade Swarovski Pearl
Series: Five Matte Dark Seafoam Delica Duracoat Galvanized Seed Beads
3mm Crystal Jade Swarovski Pearl
Matte Transparent Light Blue Miyuki Seed Bead
3mm Crystal Jade Swarovski Pearl
Five Matte Dark Seafoam Delica Duracoat Galvanized Seed Beads
3mm Crystal Jade Swarovski Pearl
Matte Transparent Light Blue Miyuki Seed Bead
3mm Crystal Jade Swarovski Pearl
Five Matte Dark Seafoam Delica Duracoat Galvanized Seed Beads
4mm Antique Copper Beaded Bead Cap by TierraCast
Swarovski® Crystal 14mm Aquamarine Emerald Cut Bead
4mm Antique Copper Beaded Bead Cap by TierraCast
Repeat the series four more times then add the following:
Five Matte Dark Seafoam Delica Duracoat Galvanized Seed Beads
3mm Crystal Jade Swarovski Pearl
Matte Transparent Light Blue Miyuki Seed Bead
3mm Crystal Jade Swarovski Pearl
Five Matte Dark Seafoam Delica Duracoat Galvanized Seed Beads
3mm Crystal Jade Swarovski Pearl
Matte Transparent Light Blue Miyuki Seed Bead
3mm Crystal Jade Swarovski Pearl
Five Matte Dark Seafoam Delica Duracoat Galvanized Seed Beads
3mm Crystal Jade Swarovski Pearl
Two Matte Transparent Light Blue Miyuki Seed Beads
Crimp beading wire end leaving a small loop as in Step #2.
Crimp one end of the wire leaving a small loop and string the following onto strand #5:
Transparent Aqua Miyuki Seed Bead
Series: 8mm Baby Blue Czech Faceted Rondelle Glass Bead
Transparent Aqua Miyuki Seed Bead
Sparkle Metallic Gold Lined Crystal Miyuki Seed Bead
Transparent Aqua Miyuki Seed Bead
Sparkle Metallic Gold Lined Crystal Miyuki Seed Bead
Transparent Aqua Miyuki Seed Bead
Repeat this series 17 more times. Add a Transparent Aqua Miyuki Seed Bead and then crimp beading wire end leaving a small loop.
Open eyepin, insert one end loop of all five strands and close the eye pin. Repeat for the other necklace end.
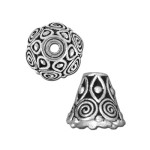
Slide on Antique Silver Spiral Cone Bead Cap, Swarovski® 6mm Indicolite Round Mini Bead, Antique Copper Beaded Bead Cap and make a simple loop on the end. Repeat for the other necklace end.
Add desired chain length (the sample shown uses 2-¼”) to simple loop.
Using a jump ring, add the toggle to the other end of the chain. Repeat steps 20-21 for the other necklace end.
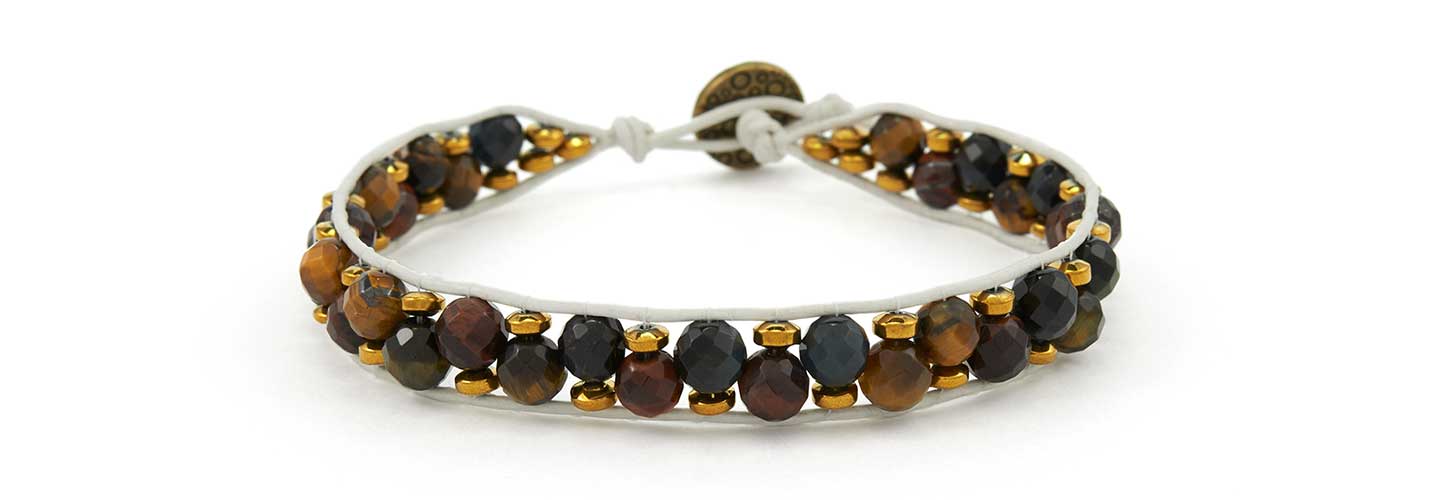
How to Make Leather Wrap Bracelets with Illustrated Tutorial
Leather wrap bracelets is a trending favorite to spice up a boho outfit or rock out to a head-banging concert or add to a casual outing with your girlfriends. Wrap bracelets are a must-have for 2016. We will show you how to make wrap bracelets with illustrated tutorial that you can download.
They may look difficult to make, but after a few attempts, they are honestly easy to make. We will show you a tutorial on how to make these bracelets using one-hole beads and super duo beads, as well as a few tips and tricks to help you make these wrap bracelets.
The basic components you need for these bracelets are:
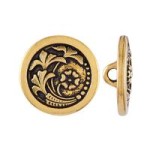
Button findings: which will act as your clasp. Button Ends will work well, also.
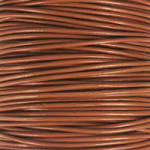
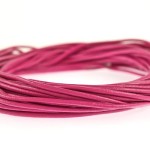
Leather or cotton round cord: these could range from 1mm to 2mm or larger, depending your preference and on the size of beads you are going to use. The length of cord needed for your bracelet will be determined below.
Thread: you can match the thread to your leather cord to hide the look or to add color. Check out some Beading Thread options but keep in mind that you will need a thin enough thread to go through the hole of your beads twice.
Beading Needle: size will be according to your thread and bead’s hole size.
Adhesive: Hypo-Cement with precision tip, is a good choice to glue thread ends or any fast-drying glue will do.
Beads: use your preference of beads or seed beads. Have enough if you plan to have a multi-wrap bracelet.
Determine leather length needed for a wrap bracelet
Use this method to determine the leather cord length you may need for a multi-wrap bracelet.
Take your wrist length and double the length. Multiply that by the number of wraps you want and then add 12”. That will give you an approximate cord length you will need to start your bracelet. (The extra 12” factors in the button knot, end knot(s) and bead size.)
Example:
2 wraps for an 8.5” bracelet: (8.5” x2) x 2 wraps = 34 + 12 = 46” needed.
Or
4 wraps for a 7.5” bracelet: (7.5” x2) x 4 wraps = 60 + 12 = 72” needed.
Keep in mind, these total numbers are approximate. You will want to test the wrap length while you’re making your bracelet. Having extra length is better than being short on your wrapped length goal.
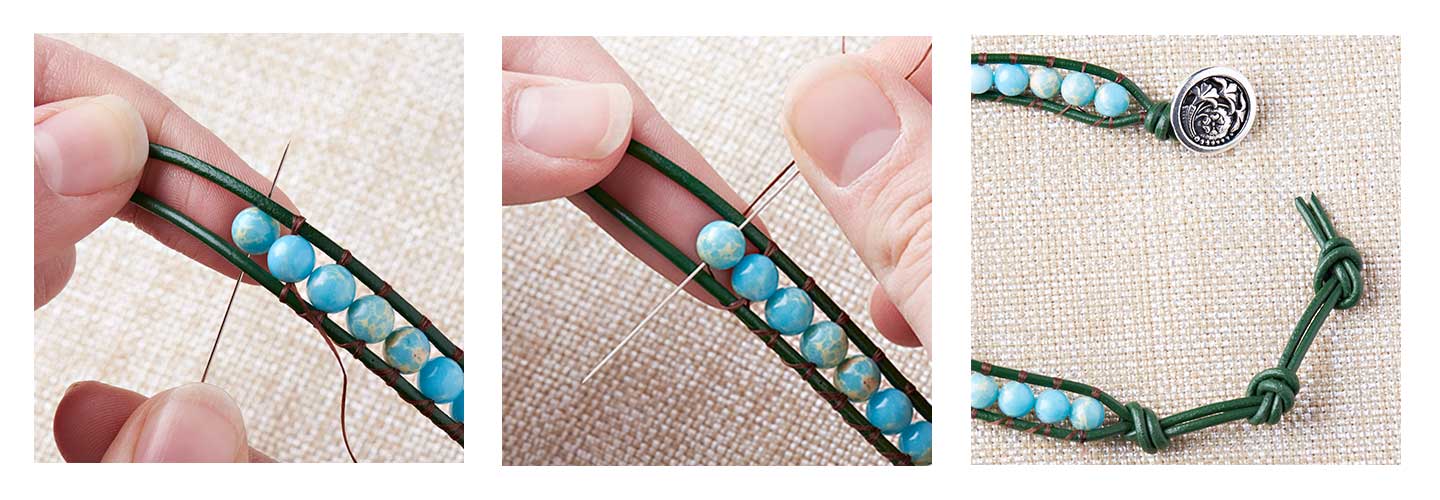
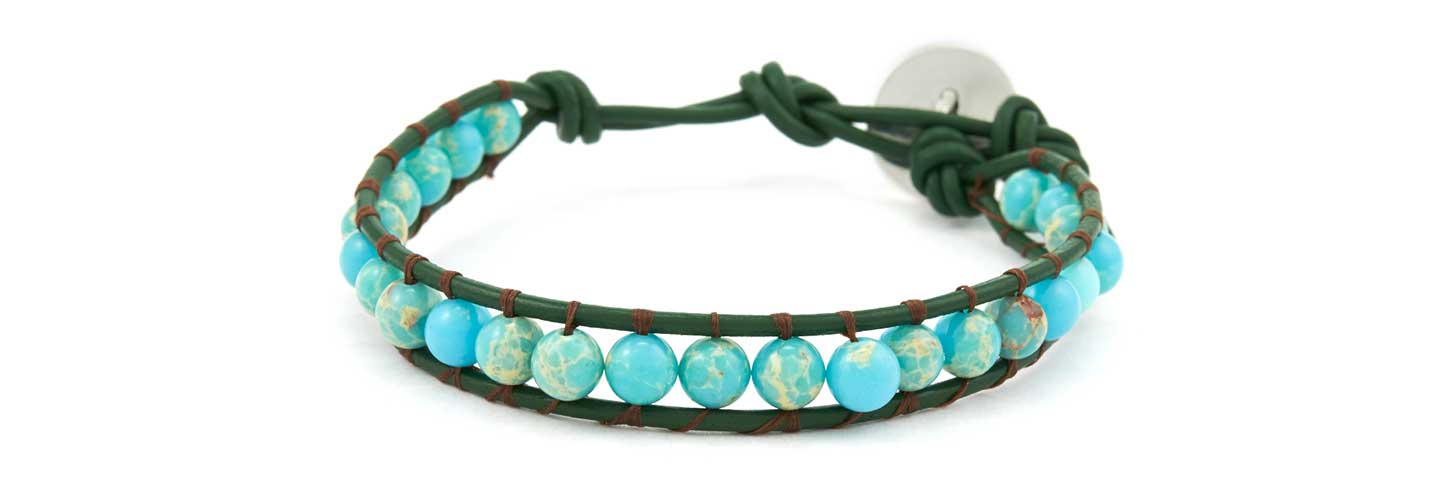
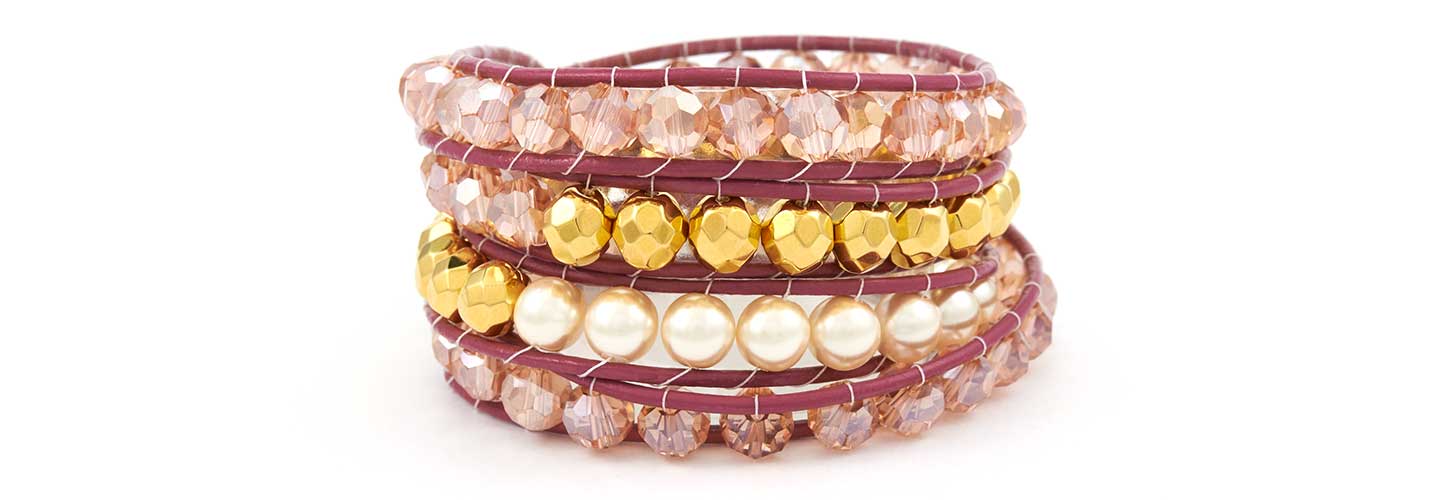
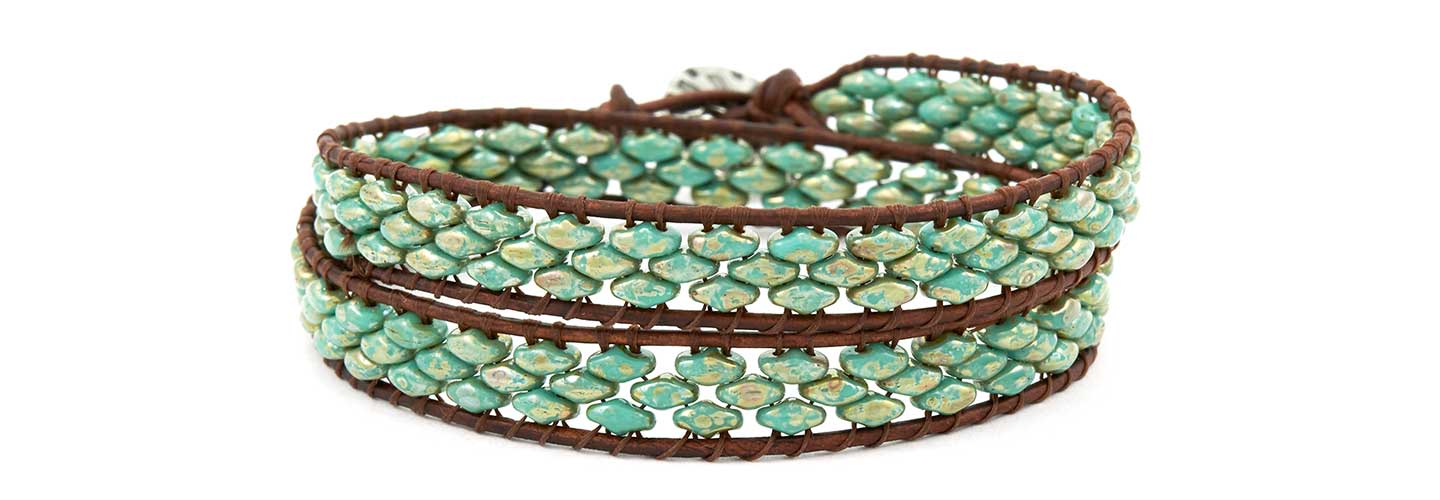
Basic Leather Wrap Bracelet Tutorial
The basic weaving of the thread will be going under the leather cords and then coming over leather cords.
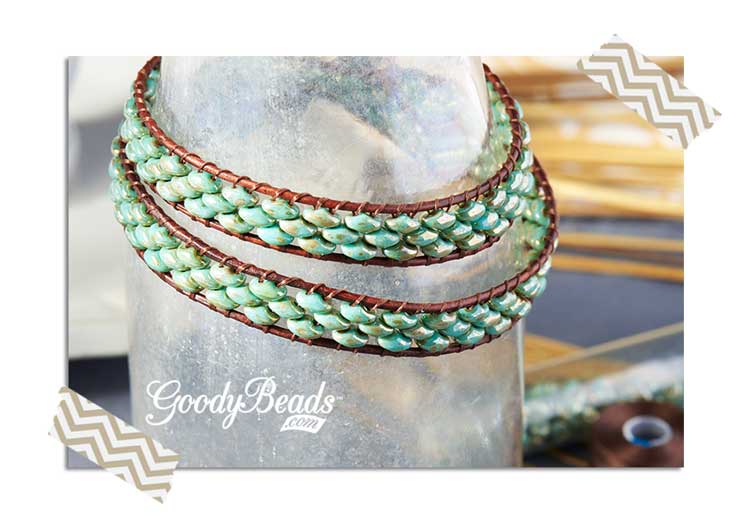
With Czech SuperDuo seed beads, you will be layering the bead holes to create a layer sequence. Below is a tutorial on how to make this SuperDuo wrap around bracelet.
This is a simple one-wrap bracelet. Think about using a different thread color than your leather cord color for a mix of colors.
Use more than one bead on each layer for more embellishment options.
Make a bracelet with multiple combinations of beads to create a fun layered look.
These SuperDuo beads look like tiny stone pebbles, don’t you think? Try a SuperDuo mix set for a colorful bracelet or create a zigzag pattern. What will you try?
Other Tips
How to add on additional thread: Tie thread to closest leather cord and glue with Hypo Cement or fast-drying glue. Cut off excess. Tie new thread to leather cord, glue knot and continue.
How to hold leather strands: An alternative to holding the leather strands, for stability when adding beads, is to clamp the button to a clipboard.
How to straighten leather cords: While you are stringing on beads, adjust previous beads with fingers to straighten out leather cords. Or when you have reached your desired bracelet length, lay the bracelet down and run your hand across your bracelet. This will help to smoothen and straighten your leather cords.
How to tighten threads/bead layers: If you find that your thread does not keep your bead(s) sandwiched in place or the bead sits loosely, sew up and under the cords and through the bead again. Over and down through the bead. Sewing through the bead twice on the leather cords will give your beads a tighter hold.
Tighten leather knots: If your leather cord knots are loosening, add a small dab of fast-drying glue or Hypo-Cement to knot(s) for tighter holds.
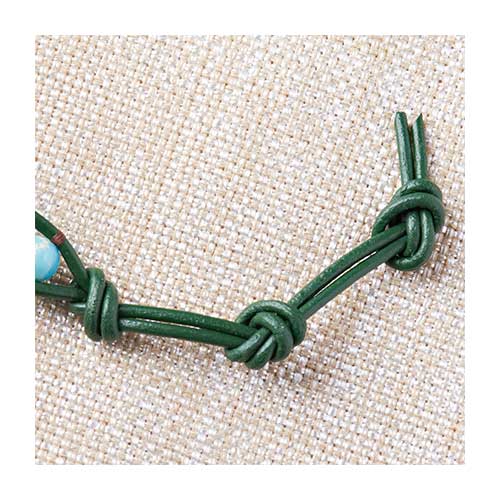
How to make an adjustable bracelet: Make additional knotted ends for an adjustable bracelet.
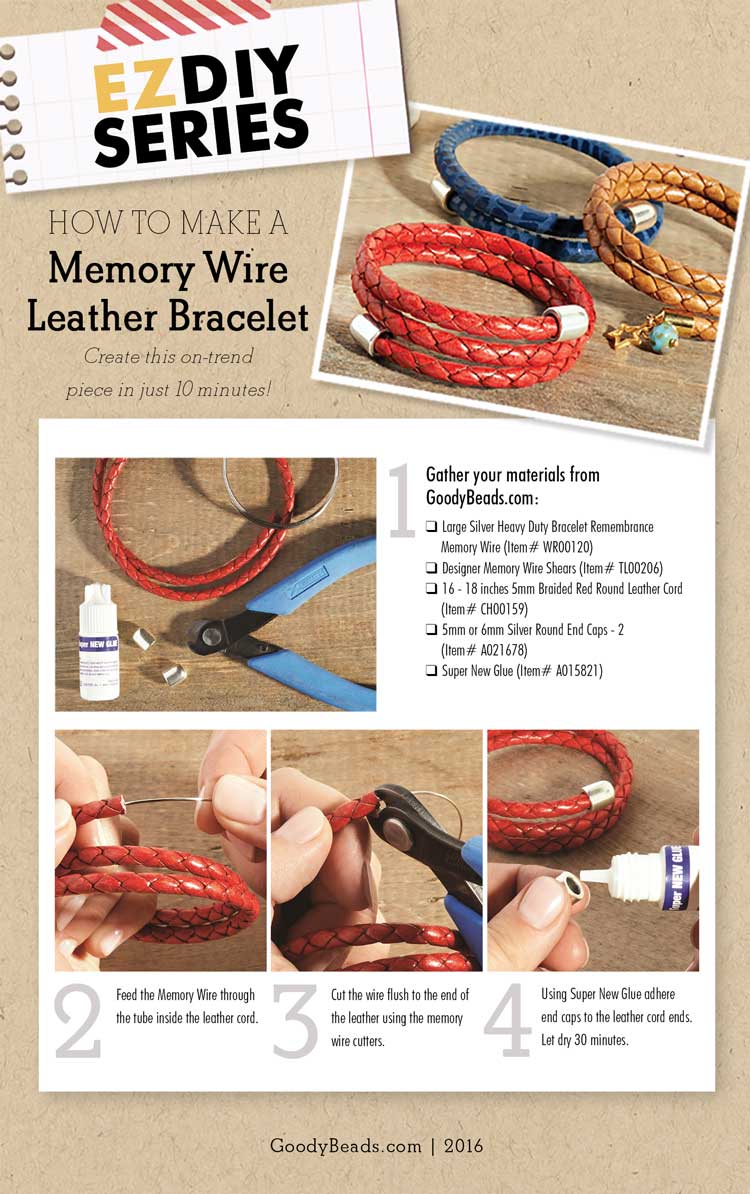
A fun new trend is memory wire leather wrap bracelets. They are easy to pair with your casual outfits, easy to slip-on on your way out the door, and definitely easy to make.
Memory wire leather wrap bracelets are easy to make and require only three components: leather cord, memory wire, and end/bead caps. The best type of leather cord to use for these bracelets has a hollow inner tube or has a hollow center, such as our braided leather and cork cord. The great thing about using memory wire with leather cord is that the bracelet will retain its round shape through many wears. For a clean look, cap off your leather bracelets with bead caps and end caps. You can also add extra character, color and movement to a bracelet with beads, spacers and/or charms.
Memory Wire and Leather Bracelet Tutorial
Memory Wire Tips
When making your wrap leather bracelet, don’t cut the memory wire before adding your bracelet components. First, slip all beads, leather pieces, and caps onto the loops of memory wire. Then you can see how the whole bracelet will look and still have a chance to make changes.
Use Memory Wire Cutters to cut the memory wire, as regular cutters may not be strong enough to cut through the wire.
For this bracelet, we broke up the leather into two pieces and used Czech beads and flat spacers to accent the middle portion of this bracelet. We added drop charms to each ends for extra movement.
Make a simple loop at one end of your memory wire.
Cut cork cord in half.
Refer to image above to slide on the following cork cord, end caps and beads.
Make another simple loop and cut excess wire.
Open one side of the memory wire loop and slide two drop charms. Close loop.
Repeat step 5 to other memory wire loop end.
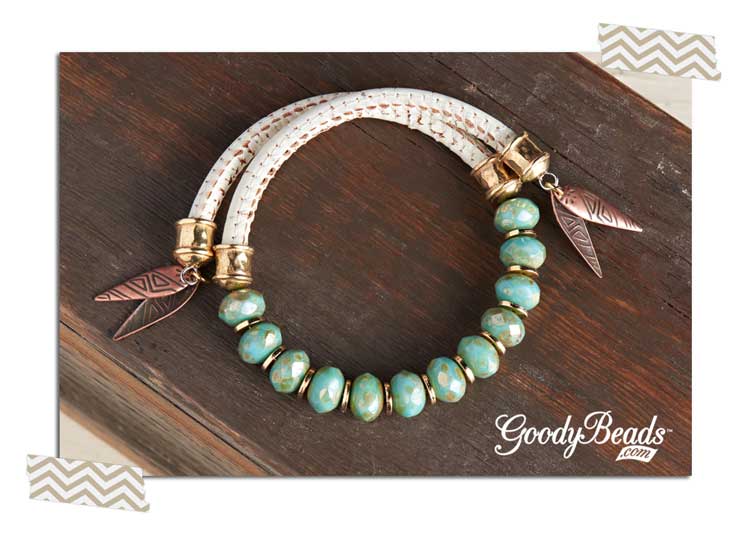
Pink and Pearly Wrap Bracelet
Designed by So Vang
For this leather bracelet, instead of having beads in the middle, we added pearls to the ends of the bracelet for a for a pretty accent before finishing it off with a simple loop.
June is known for wedding days with tiered cakes, delicious finger foods and of course, the beautiful bride coming down the aisle. From choosing bridesmaids dresses to the color of reception napkins, everything can and will be perfect. Cut back on a little expense by making beautiful wedding jewelry of your own or for the bride with Preciosa crystals and pearls. About half the cost of Swarovski ®, they give off an elegant look without the price.
Below, we have picked three popular 2015 wedding themes and paired them with their own jewelry pieces, fully handmade with Preciosa crystal and pearls.
Rustic Chic Necklace Rustic chic has its charm of pastel and greenery colors, a backyard tent with white garland lights, and the bride in her white chiffon, flowing dress with side swept braid. Our jewelry piece for this fun and charming wedding theme is something fun and charming itself.
Our rustic chic themed necklace is a long, loose flowing necklace meant to wrap around twice for a layered look. The fun part about making this necklace is that there is no wrong sequence, pearl/crystal quantity, or length you need to follow. Starting out with three feet of silver chain (CH00341), prep the 6mm Preciosa crystals, 10mm Preciosa Pearls, and 6mm Preciosa Pearls by making double loop wire bead segments by using eyepins and making a second loop on the other end. Once there is a good amount of pearls and crystals (about 10 or so each), start at one end of the chain by cutting about an inch off and attaching a crystal, pearl, or a combo of both segments. The various length of where you cut the chain and the type of pearl or crystal segments, really adds to the rustic charm of this necklace. Make more segments as you go along if needed. Once you get to the end, use one more bead segment to attach the chain ends together. Now it’s ready to be showcased on the aisle
Vintage Style Necklace Inspired by Downton Abbey, TheGreat Gatsby and the royal wedding, gives a chance for vintage-inspired weddings of a courtyard garden, lace wedding dress, satin gloves and curled updos.
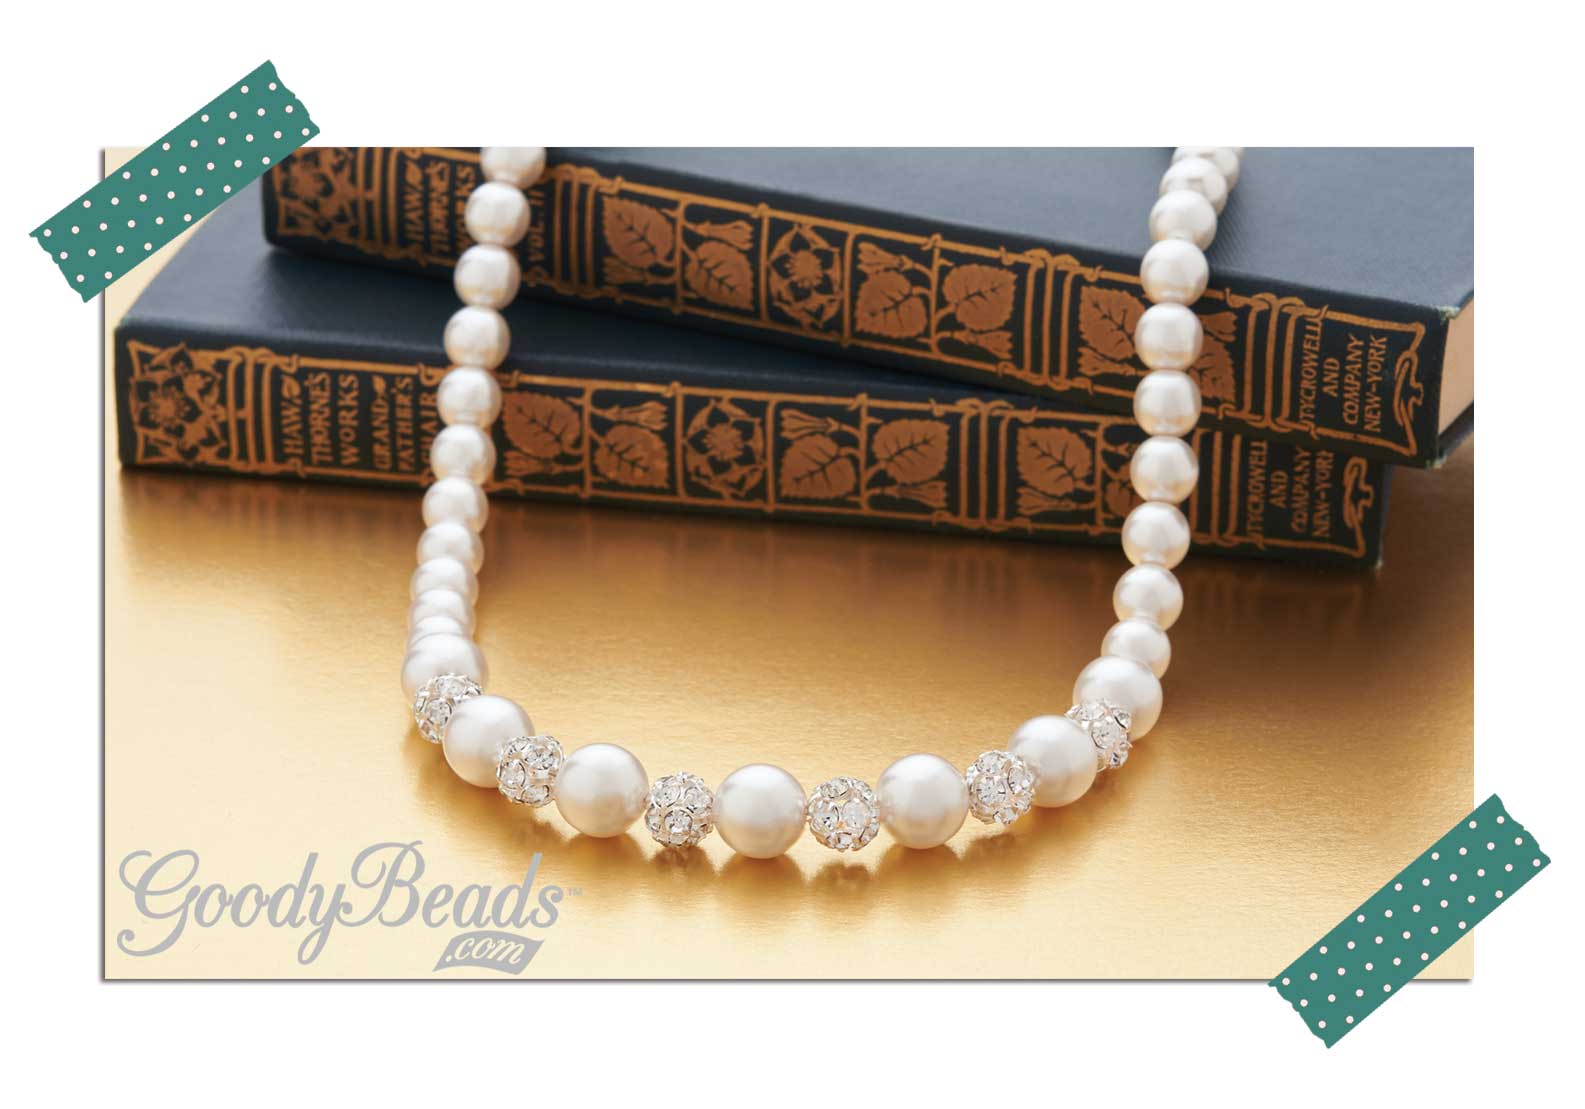
A lovely pearl strung necklace is perfect for this celebration. A sequence combination of Preciosa Pearls and Rhinestone Crystals give the bride an elegant statement necklace to wear.
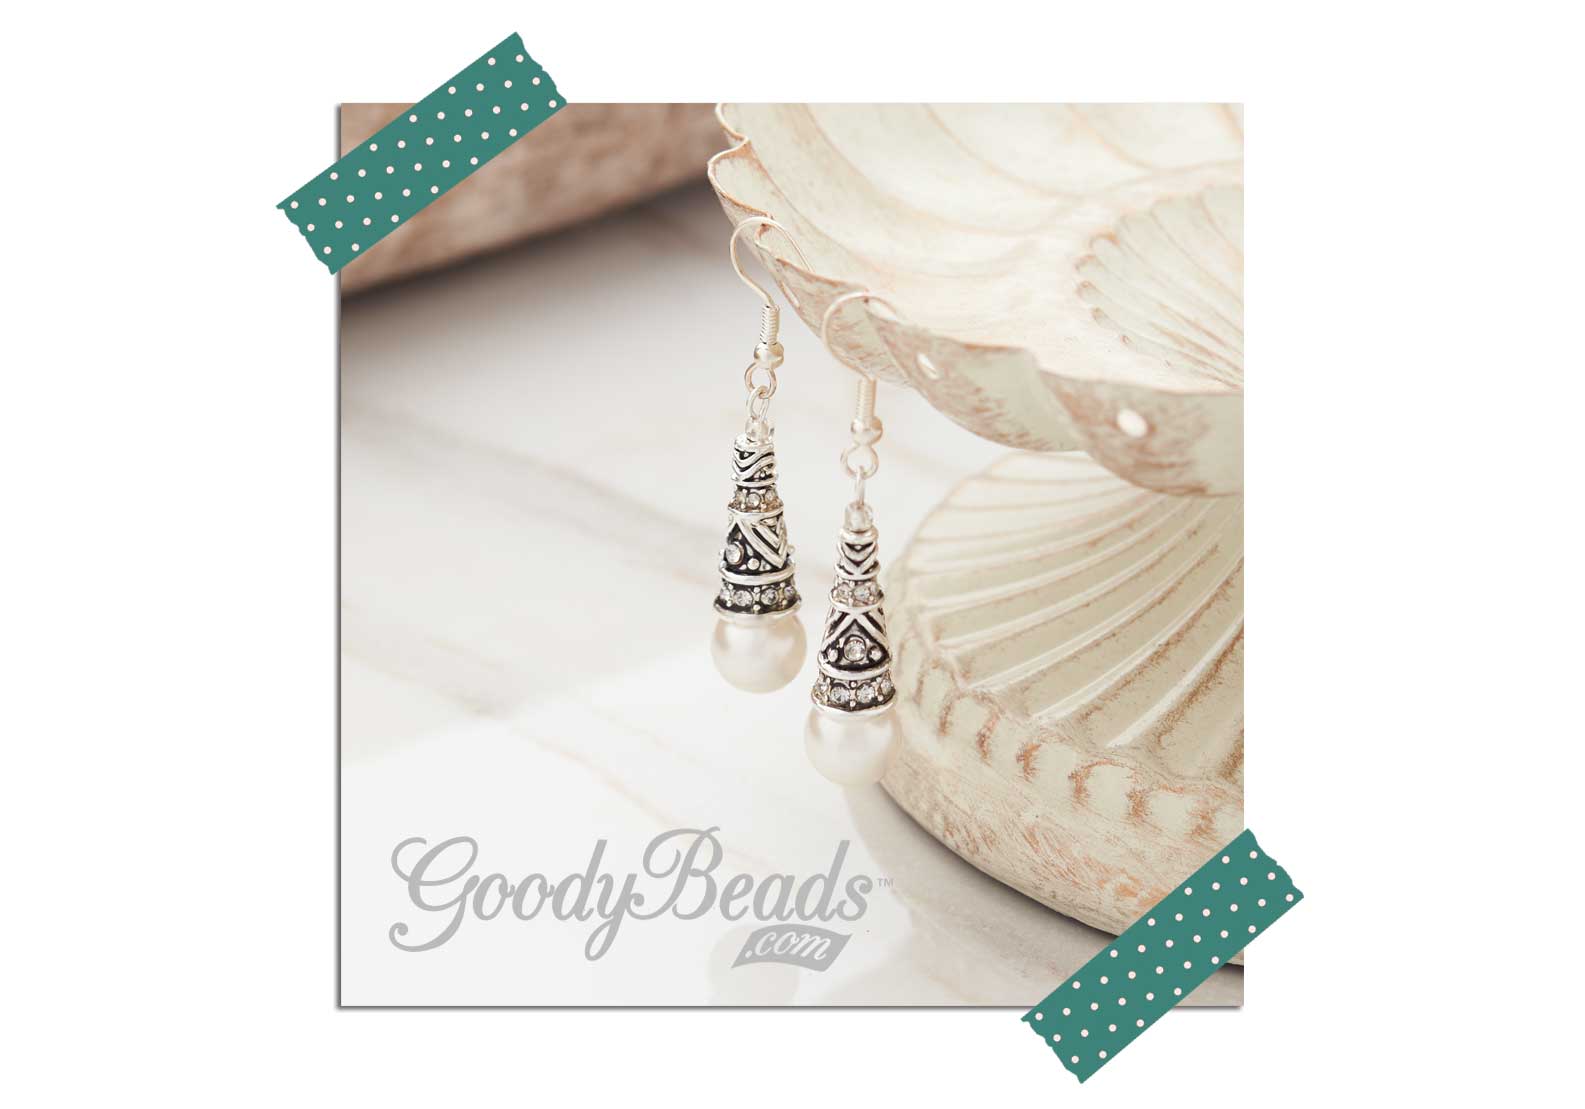
Boho Pearl Earrings Imagine wild flowers hanging dangling from the ceiling canopy, the lush smell of grass under your toes, and the bride in a draped, maxi wedding gown with tousled hair and flowered headpiece.
Trying not to take away from the natural beauty of it all, a perfect pair of boho-inspired earrings would be subtle enough for a little sparkle to this dreamy celebration. We chose these Rhinestone Silver cones to accent a 10mm Preciosa Pearl. They give off a fresh, whimsical touch to a perfect wedding day.