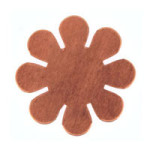
Have you tried metal stamping lately? It is a great time to start a new jewelry making adventure with metal stamping. Let’s start something easy with a heart blank and an adjustable chain necklace.
Stamp your message on heart blank. Optional: Use bracelet guides to help center your message.
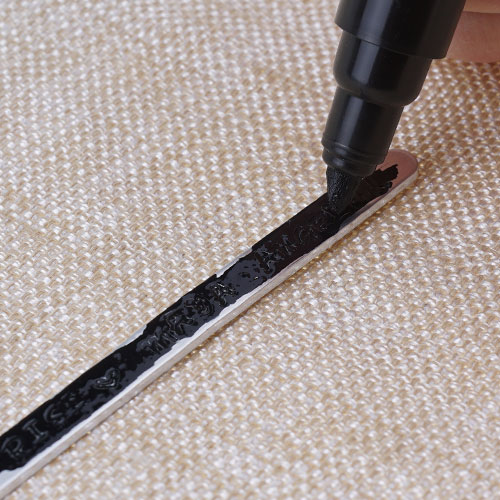
Mark in your stamps with a sharpie and wipe excess with a paper towel.
Determine the length of your necklace. wrap chain around the back of your neck and determine where you would want to situate your heart pendant. Cut length with cutters. And then cut chain piece in half.
Connect one chain piece with a jump ring to one side of your heart blank. Repeat to other chain and heart blank hole.
Add a jump ring to the left chain and close jump ring.
Add a jump ring to the right chain, while attaching the lobster clasp. Close jump ring.
DIY Bookmarks Using Metal Stamping Bracelet Blanks
If you’re planning to staying home this weekend but still looking for an adventure, why not curl up to a book! We have this wicked DIY idea taking metal bracelet blanks and making them into bookmarks! Plus, you can customize it with your own metal stamping design or verbiage and top it off with embellishments like leather, tassels, links and more!
For this bracelet, we used 12″ of leather cord and slid the leather cord through the hole. Center leather and make an overhand knot or Sliding Knot (Use this Tutorial). Add a large-hole gemstone to each leather end with knots.
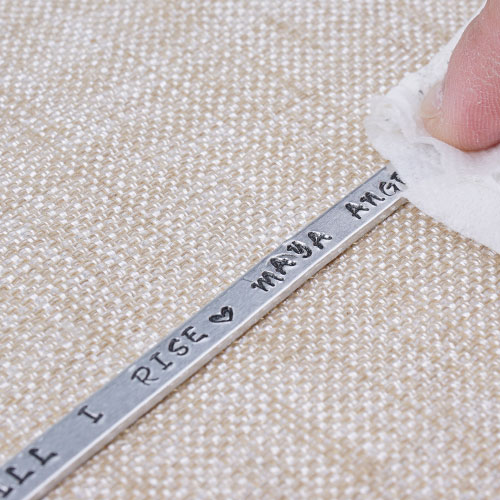
We wanted to add a fun quote and used “Still I Rise” a poem title by the famous Maya Angelou. to embellish, we attached a 3 inch piece of chain with a jump ring. Open eyepin, and attach other end of chain and close. Add Czech bead and make a simple loop. Open loop and add tassel.
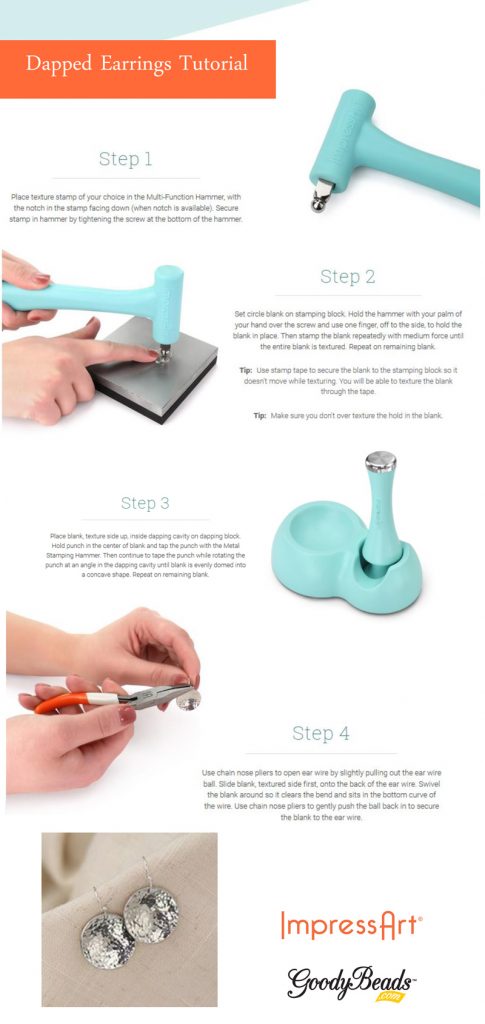
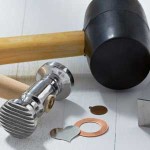
ImpressArt®: How to Use the Dapping Tool
This week’s tutorial from ImpressArt is a simple tutorial on dapping. Turn flat ImpressArt stamping blanks into beautifully domed pieces of jewelry!
Here is what you’ll need to start dapping:
Dapping Block Set (TL00351): This tool is what you will need to create the curved/domed shape.
Tutorial also uses the texturing skill used in last week’s ImpressArt Tutorial.
ImpressArt Texture Stamper Hammer – Video Tutorial
Add texture to your metal stamping jewelry with this Texture Stamper Hammer from ImpressArt. Watch this vendor video and see how simple you can add dimension to your designs!
A perk to ordering the Texture Stamper Hammer (TL00266) is that it comes with the Sprinkle Design Stamp, so you can start using this tool right away when you get it. Plus, with the twist of the handle knob, you can easily switch out different stamps for different designs! The Texture Stamper Hammer is the perfect tool for all skill levels. So start stamping right away!
Vendor Video: ImpressArt Bracelet & Ring Bending Pliers
Brand New to GoodyBeads are the Ring Bending Pliers from ImpressArt®. Watch this instructional video from ImpressArt and learn how to create your very own DIY rings and bracelets with the Bracelet Bending Pliers and Ring Bending Pliers.
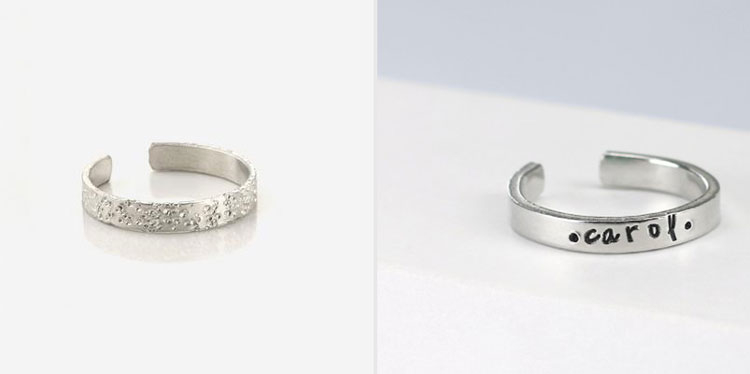
Ring Bending Pliers and Blanks
Custom-make rings by using these new Ring Bending Pliers (TL00282) from ImpressArt. Along with the pliers, all you need to make custom rings are Ring Blank and some metal stamps.
Make sure to get a pair of Nylon Bracelet Bending Pliers (Z005839) to custom-make stamped bracelets. Here are some examples of bracelet blanks and what you can make with them:
Z021577 5/8 x 6 Inches Tapered Bracelet Aluminum Stamping Blank
Z021579 7/8 x 6 Inches Tapered Bracelet Aluminum Stamping Blank
Z018033 Mini 1/4 x 6 Inch Aluminum Stamping Bracelet Blanks
Other Bracelet Blanks:
A021496 3/8×6 Inch Bracelet Strip Soft Strike Aluminum Stamping Blank
A021497 5/8×6 Inch Bracelet Strip Soft Strike Aluminum Stamping Blank
Z005837 1/4×6 Inch Rectangle Copper Stamping Blank
A021460 1/4×6 Inch Rectangle Nickel Silver Stamping Blank
Using Cold Connection in Jewelry: How to Rivet Leather
Cold connection is a unique metal technique that connects metal components without the use of heat. While you can connect metal pieces by glue or other adhesive, we will demonstrate some basic steps on how to use rivets with leather.
You will find many cold connection and riveting techniques in steampunk jewelry and metalworking. Once you have the basic tools and components for metal working and rivets, you will find how easy this versatile skill can be used for jewelry making.
Designed by So Vang
Rivet Leather (Part One)
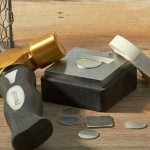
For this project, we are using TierraCast® Rivets to show how to rivet on leather. When riveting on leather, use a two-part compression rivet, which will have a bottom and cap piece. Two-part compression rivets are best for leather, as they will create a tighter hold if you are adding embellishments with the rivets.
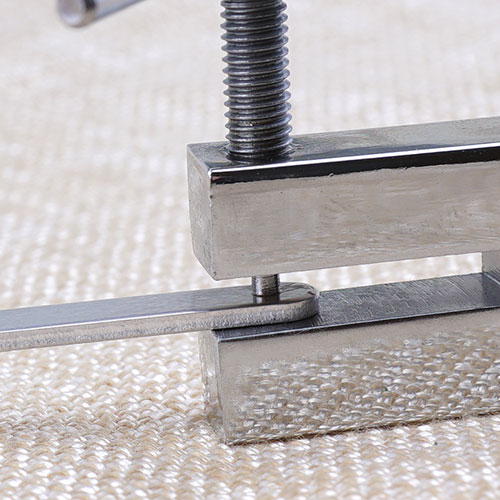
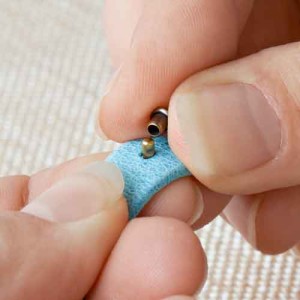
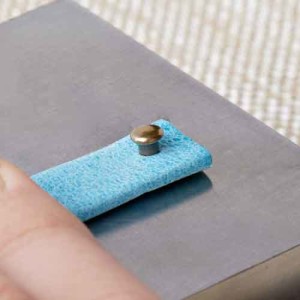
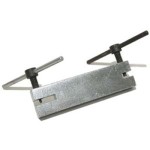
Punch leather through the backside using the Leather Hole Punch. Make sure to punch a hole that is large enough for the rivet to sit it, but not too big. If the hole is too big the rivet may not catch the leather, and may fall out. Tip: Punch with the smallest setting first. Increase hole size if the rivet does not go through.
Insert bottom rivet piece through the backside of the leather and put cap piece on top.
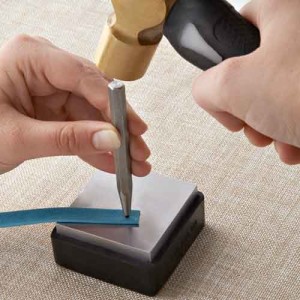
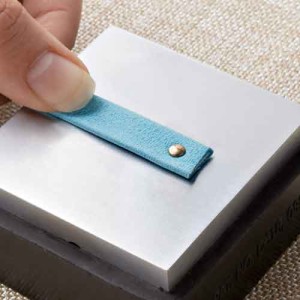
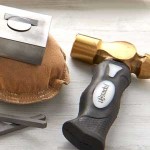
Press the two pieces together until it stops. Place on Bench Block.
Use the Rivet Setter that complies with the size of the rivets. i.e. 4mm rivets will need the 4mm TierraCast® rivet setter tool, while 6mm rivets will use the 6mm TierraCast® rivet setter. Use steel hammer to hit the rivet setter with 2-3 good strikes.
Your rivet is complete.
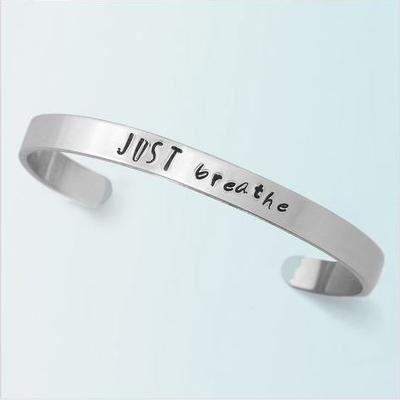
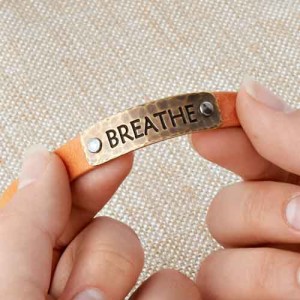
You can sandwich in TierraCast® Components for added embellishments. Or for our bracelet, we used TierraCast® Breathe Link. Use Bending Pliers to curve the link. Line up the leather behind the link and mark the holes of where the rivets will go. Punch the holes where you marked them and rivet the link to sandwich the leather and link together. Glue your clasp and you are done.
Rivet Leather (Part Two)
Designed by So Vang
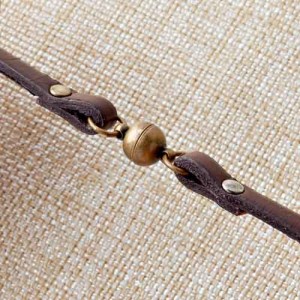
Make leather loop for jump rings, clasps, or joining components together. Create this wrap-around leather watch by using these two part compression rivets. Cut two 12” 5mm flat leather. Make leather loops on all four ends. Attach your clasps and watch face for a fun wrap-around leather watch.
Measure an inch distance between the holes. Punch with Leather hole punch pliers.
Fold and insert your top and cap pieces.
Hammer the rivets with your rivet setter and you are done.
Make loops to add jump rings and clasp as shown in this watch bracelet example.
As the clock starts ticking down the hours, minutes and seconds to finish off 2015 and chime into 2016, did you make any last minute New Year’s resolution? Making New Year’s resolutions are easy but the hardest part is the commitment. Resolution bracelets are the perfect accessory companions to help you stick to your 2016 plans. Here are some inspiring resolution bracelets that we’ve made showcasing metal stamping. Check out our previous blog post on how to get started with metal stamping, to learn how to make this popular personalized jewelry.
Quoted Stamped Bangle
Designed by So Vang
Quotes are words of encouragement. We have quoted Ghandi on this bangle with, “The future depends on what you do today.” What is your favorite quote?
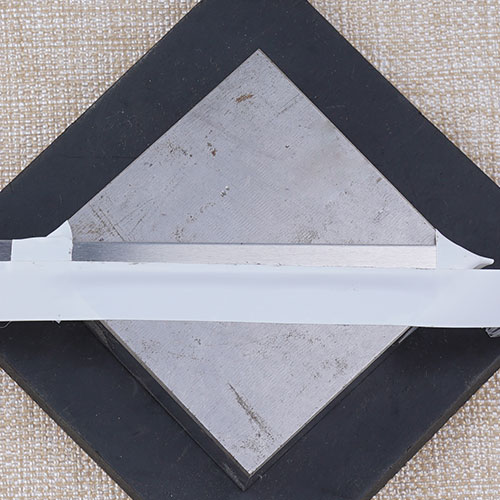
To make this bangle, start out with a Z005837 copper stamping blank. Take some Sanding Sponges like TL00154 and sand down the edges and corners of the stamping blank. Once you have smoothed them down, lightly pencil your quote on the stamping blank, keep in mind the size of the letter stamps you intend to use. Space words evenly to fit the whole quote. Stamp your quote. Use a black permanent market or Stamp Enamel to fill in your letters. Wipe and shine your stamping blank with a polishing cloth. This will also help rub off the light pencil marks. Use a Bending Bar to curve your bangle and Bending Pliers to help shape the bangle.
Items Used:
(1) Z005837 – 1/4×6 Inch Rectangle Copper Stamping Blank
A010615 – Lower Case Jeanie Metal Letters Stamping Set
Picture Jasper Charm Bracelet
Designed by So Vang
Picture Jasper is about peace and relaxation. It’s why we included some Picture Jasper dangle charms in this bracelet to help calm your mind and soul for 2016. We’ve also added a few Chinese crystal dangle charms for added sparkle. We’ve used metal blanks and stamped words to help encourage the mind and soul to “take chances” and “be patient,” as wells as to just “breathe,” “heal” and to “laugh more” in the New Year.
We love the versatility of this wrapped bracelet. We cut a piece of our Lycra cord in half and pulled/stretched it until it curled sideways, providing a soft yet strong, stretchy bracelet base. Thread the lycra cord through both sides of the metal blank we have stamped “Focus” on. Tie it according to the example we have below and wrap around your bracelet three times for a versatile look.
This bracelet is perfect to wrap around your wrist for a morning jog to “focus” on a healthy goal. Or wear this bracelet while studying your next school exam, so you can “focus” on getting that A+! Focus on the goal and you shall succeed!
Items Used:
(1) A021495 – 1.375 Inch Oval Pewter Stamping Blank
(1) A017779 – 30mm Yellowish Paisley Italian Lycra Cord
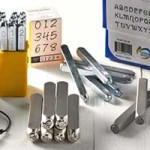
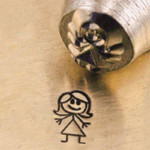
A great addition to any jewelry or crafting project is metal stamping. Personalize a piece by stamping a specific name, inspirational quote, special date, sentiment, etc. There are a variety of fun, decorative designs for stamping, too, such as hearts, animals and flowers. The options are endless!
Take a look at our recommended metal stamping essentials to get you started with this exciting jewelry-making trend.
Our friend, Adrienne, from Happy Hour Projects, wrote an introduction to metal stamping and a tutorial on stamping for beginners. Her advice and instructions are easy to follow, so you can start stamping pieces right away. Check out her metal stamping tips.
Don’t feel intimidated by the thought of metal stamping. Once you learn the skill and develop your own technique, you’ll add it to all of your everyday jewelry making ideas. Make your next project meaningful and memorable with metal stamping.