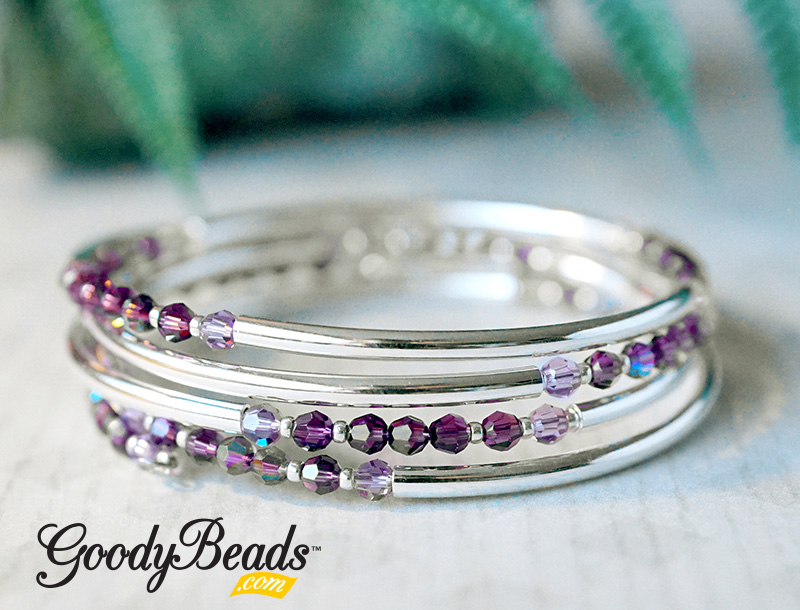
On a headpin, slide on the following and make a simple or wrapped loop: Amethyst bicone, seed bead, amethyst bicone, seed bead, light amethyst, seed bead, light amethyst, seed bead, clear crystal, seed bead, clear crystal and seed bead.
Open earwire loop and slide on crystal dangle. Close loop.
Repeat all steps for other earring.
2 DIY Jewelry Using Cymbals Components & Ginko Duo Beads
Czech Ginko Duos and Cymbal components are fairly new in the beading market; they’re less than a year old. And we’ve got two amazing bead-stitching project using Ginko beads and NEW Cymbal components for Ginkos.
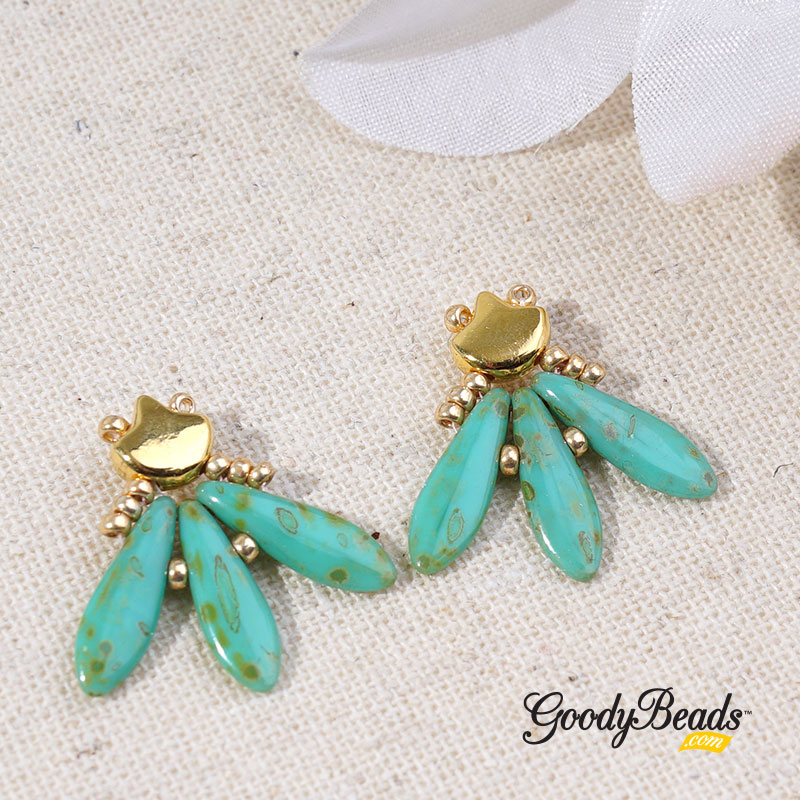
We’re showing you how easy bead-stitching can be with these Spike Drop Earrings. It uses two-hole Swarovski® spike crystal beads, Cymbal components, seed beads and TierraCast® Hammertone Dagger Bead.
What you’ll need for earrings:
2-Hole Swarovski Spike Beads – item used in example SW01709 (6) Instead of the hexagon shape, you can use the round and square 2-hole crystal bead.
With 2 feet of thread, pick up a seed bead, cymbal, seed bead, 1st spike bead, seed bead, 2nd spike bead, seed bead, 3rd spike bead, seed bead, dagger bead, seed bead. (Make sure to be sewing through the correct hole of spike beads)
Sew up through the second hole of the 3rd spike bead, pick up a seed bead, through the second hole of the 2nd spike bead, pick up a seed bead and through the second hole of the 1st spike bead.
Tie both ends together to bring your looped pattern together. (You can see something similar to the Honeycomb Tassel Drop PDF tutorial, as you’re substituting a few beads in the pattern.)
Sew through a few beads before cutting thread ends off.
Open earwire loop and slide on cymbal component. Close loop.
Repeat all steps for other earring.
DIY Charmed Necklace with Paper Clip Chain
We’re channeling our simplicity in this DIY Charmed Necklace. Along with the trend of dainty and minimalistic jewelry, we’ve upped the size of our chain with paperclip chain and added a large clasp. Then tying it together with a gorgeous Nunn Design charm!
What you’ll need for necklace:
11.9mm Gold Plated Paper Clip Cable Chain – CH01151 (2)
Gently open loop of clasp with chain nose pliers. Slide chain end through loop and close.
Open jump ring, slide on charm and close jump ring.
Open clasp and slide charm through.
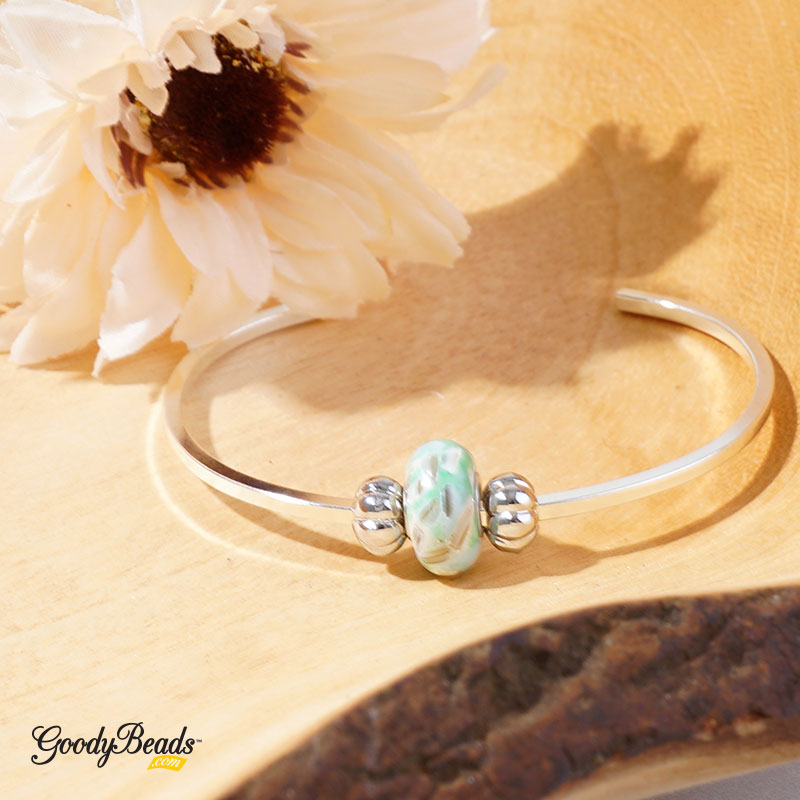
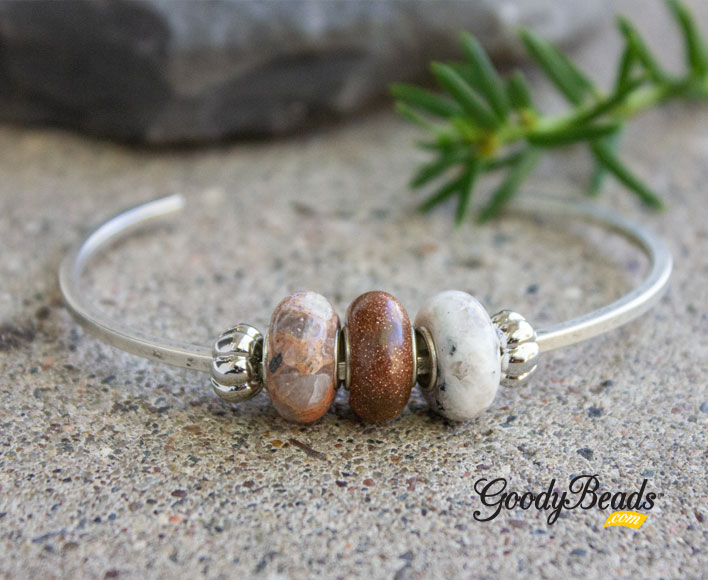
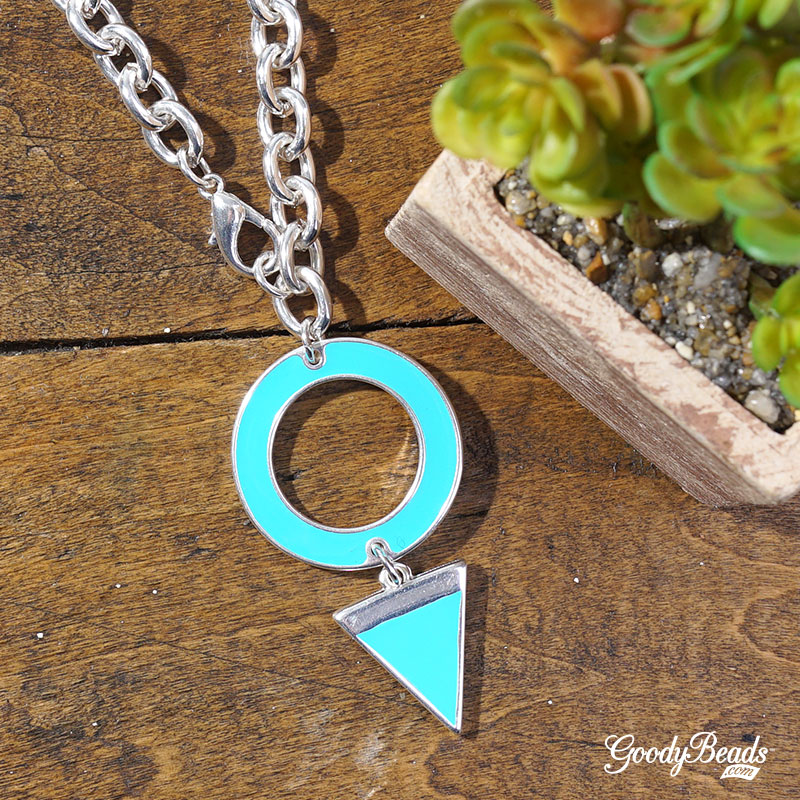
DIY Mint Mosaic Cuff
One our newer products are the Thin Square Flat Cuff Bracelet from Nunn Design. They’re so easy to use. Wear them as is or add some beads like our large selection of Large-Hole Interchangeable beads.
What you’ll need for cuff:
Thin Square Flat Cuff Bracelet from Nunn Design – Silver Z016184 or Antique Silver Z016185
Open jump ring, slide on triangle charm and through one hole of link. Close jump ring.
Open another jump ring, slide through other hole of link and through the last link on the chain necklace. Close jump ring.
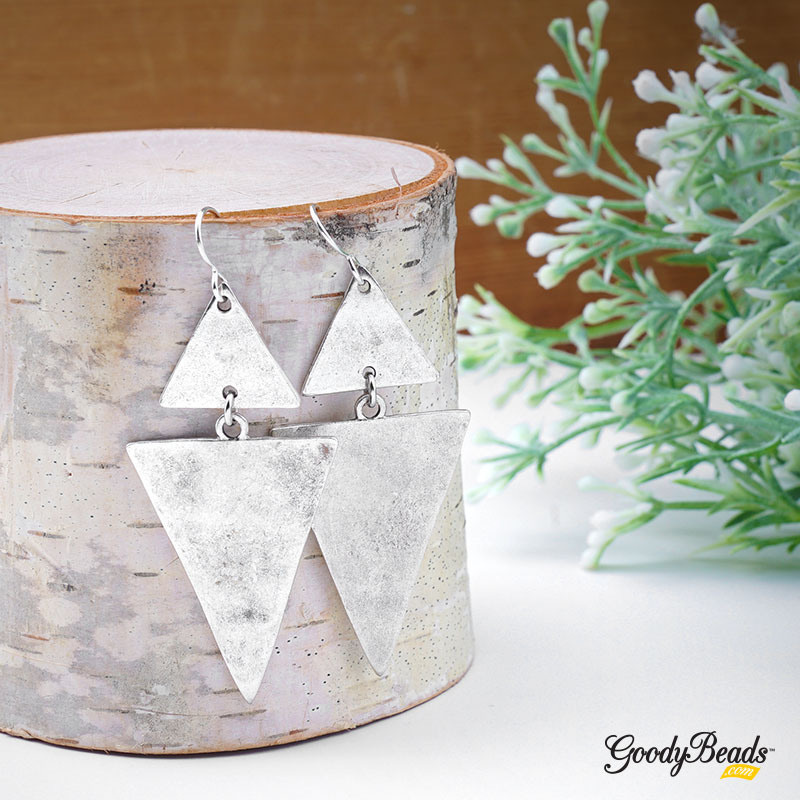
Geometric Triangle Earrings
Today’s easy tutorial is designed by Heidi! She has an eye for large, geometric and statement jewelry. So these pair of Geometric Triangle Earrings is definitely the pair for her!
Open jump ring, slide on triangle charm and triangle link (hole on flat side) and close jump ring.
Open ear wire loop, slide on triangle link (hole at the point) and close loop.
Repeat all steps for other earring.
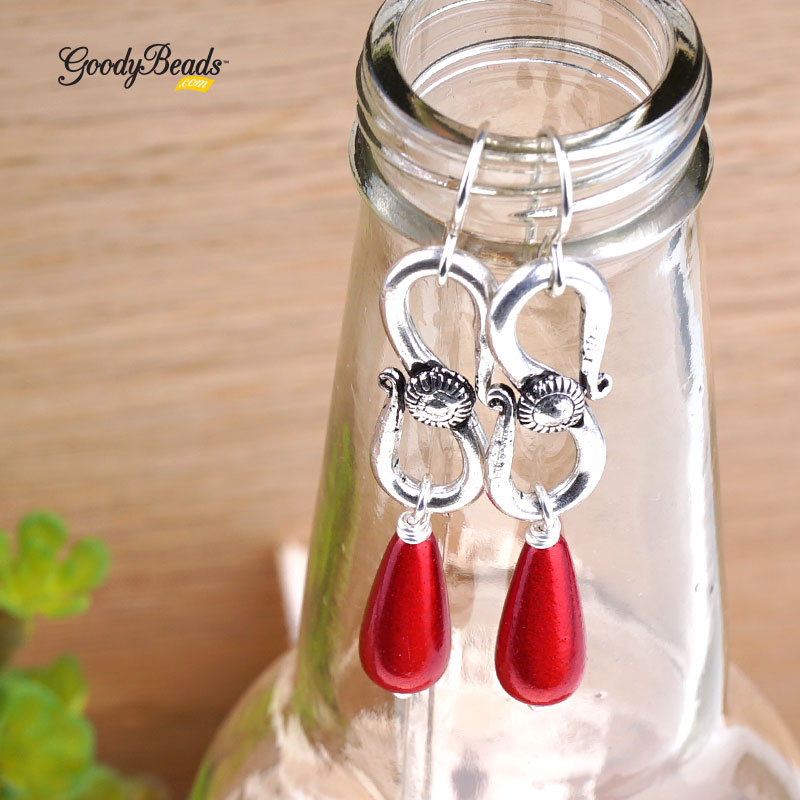
DIY Red Bali Drop Earrings
We love to take our products and use it in different ways. In our Red Bali Drop Earrings, we’ve taken an S-Hoop Clasp and transformed it into a connector piece.
Here is what you’ll need to make the drop earrings:
On an eyepin, slide on pavé bead and make a simple loop.
Open loop, slide one loop of satin bracelet end. Close loop.
Repeat step 2 to other end of bead loop.
DIY Straw Post Earrings
We are looking forward to warmer weather, so we’re getting ready by making spring- or summer-like jewelry. In this pair Straw Post Earrings, we’ve incorporated our favorite straw components and post earrings!
What you’ll need:
15mm Gold Hoop Post Earrings – Y003013 You get other post earring sizes 18mm OR 21mm
Handmade Woven Rattan Straw Oval Ring Pendant/Connector – Z001659