Make your next jewelry POP with some lampwork beads. Our selection of these glass beads are quality handmade, which makes each bead uniquely one-of-a-kind. Check out our three simple designs that utilizes these stunning, focal beads.
Glass Menagerie Bracelet
Designed by Tory Vezina
Mix up different glass lampwork and Bali style beads for this sandy and colorful bracelet.
What you will need:
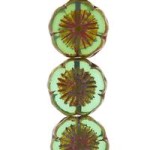
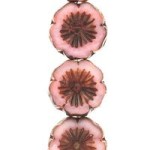
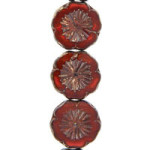
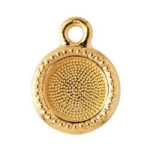
(1) A013548 – 20mm Spiral with Spots Glass Disc Beads
Slide on your crimp tube and beads. Refer to image to slide on the bead sequence. End with a crimp tube. (Click on image for a larger view)
Crimp both sides to the toggle clasp loops. Cut excess wire with flex wire cutters.
Place a crimp cover over the crimped tube. Use a flat-nose plier or serrated pliers to gently close the cover over the crimped tube. And you are done.
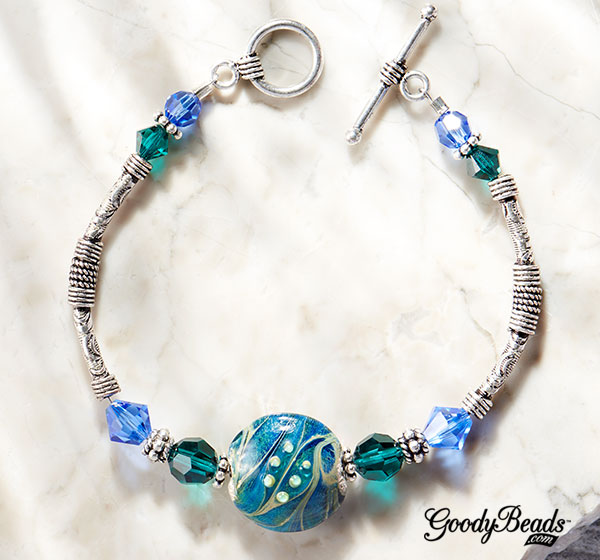
Coastal Ripples Bracelet
Designed by Tory Vezina
Sail away with beautiful thoughts of the ocean wearing our Coastal Ripples Bracelet. Our ocean waves disc bead is dressed with sparkling Swarovski® crystals and elongated with Bali style tube beads.
Compile your beads and tools. (List of components below.)
Slide a blue bicone crystal on headpin and make a simple loop. Make 4 bead dangles.
Slide a darker blue bicone crystal on headpin and make a simple loop. Make 4 bead dangles.
Slide a pearl on headpin and make a simple loop. Make 4 bead dangles.
Cut chain link to have 5 links.
Open eyepin and slip on chain link.
Attach two different bead dangles to each link and eyepin loop.
Slide these beads onto the eyepin and make a wrapped loop: pearl, bead cap, lampwork bead, bead cap, pearl.
Open earring loop and slide on eyepin dangle.
Repeat to other earring.
Christmas in July: Easy DIY Necklaces
Here in GoodyBeads land, we can’t wait for Christmas. We love everything from the decorated trees, freshly fallen snowflakes, holiday music to the aroma of peppermint candy canes. Get your gift shopping done early by making some easy DIY necklaces. Fulfill all of your gifts and still have time to enjoy the holidays, even if it is six months away.
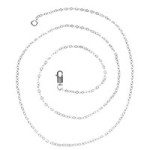
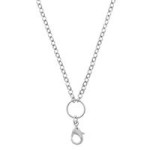
Chain
Choose your chain from larger links or dainty links, silver-plated or gold-plated, beaded chain or bar chain. One of the easiest necklace to wear is an extra-long style, like a 30” length is easy to slip over your bead or double for a different look. Though a shorter necklace length is doable, by adding your own clasp findings with jump rings. Check out our image below to determine your necklace preference.
Pendants
An stunning focal piece you can use to make an easy necklace are slice pendants or gemstone pendants. We are loving this quartz pendant as it comes with a bail that you can slip a chain through for easy making and wearing.
Another easy addition to a necklace are charms and links. Choose a favorite charm or link and attach it to your necklace with a jump ring. Check out our bar connectors for a trendy boho look, alphabetcharms for a personalized touch, or quirky TierraCast® or metal charm for a quirky personality.
Silk cord has been used as a stringing material in jewelry-making for centuries. No other beading cord offers the softness that natural silk provides. Jewelry designs made with 100% silk bead cord drape beautifully and the cord itself can become a feature with knotting techniques. Whether you’re looking to create a simple strand of beads or incorporate knotted bead clusters into your designs, GoodyBeads.com is here to show you how easy and versatile this timeless stringing material can be.
One of our favorite silk bead cord brands is Griffin. Griffin bead cords are made of 100% natural silk and come in a rainbow of colors and a variety of thread sizes.
Griffin bead cords are sold 2-meters per card. Two strands of twisted silk are wrapped around a cardboard backer. Each cord comes with its own needle for easy threading.
Choosing Silk Cord
Thread thickness is very important, especially if you plan on incorporating knots into your designs. Beads can slide over a knot if the cord is too thin for the bead hole you are working with. Griffin bead cords has its own numeric system for categorizing thread cord sizes: No. 0 – No. 12.
Each thread number has an associated millimeter size. Below is a quick reference guide for each number:
No. 0 = 0.30mm
No. 2 = 0.45mm
No. 4 = 0.60mm
No. 6 = 0.70mm
No. 8 = 0.80mm
No. 12 = 0.98mm
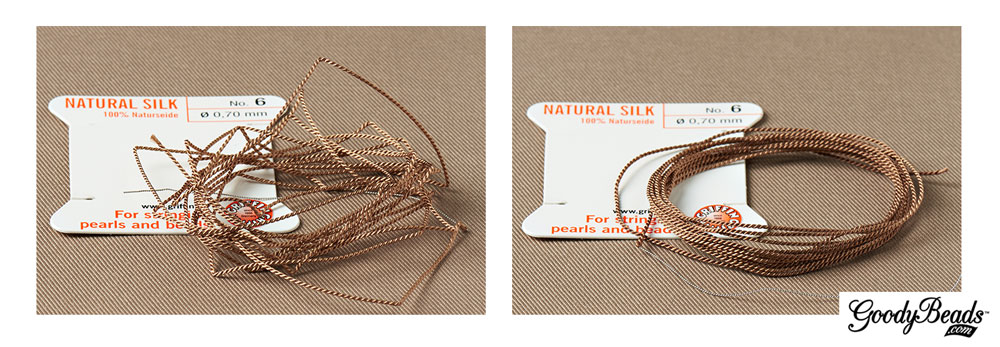
Smooth Out Silk Cord
Since silk bead cords come spooled on a card, you must prepare your new cord for use by smoothing out the kinks first.
To smooth out your cord, unravel the whole cord from the card. Starting from one end, dip your fingers in water and run your damp fingers through a section of the cord. Run your fingers over the section a few times to help straighten them out. Once that section is straight, continue on down to the next section of the cord with damp fingers until you’ve straightened the whole piece. Next, run a paper towel over the entire cord and gently squeeze to remove any residual water from the cord. That’s all you need to do. The cord will still be a bit damp but you can certainly use it right away. You can also wait a few minutes until it’s fully dried.
NOTE: You can use the same cord for multiple projects if you plan to keep using the needle that is attached to the cord. String bead(s) through the needle and utilize the end section of the cord.
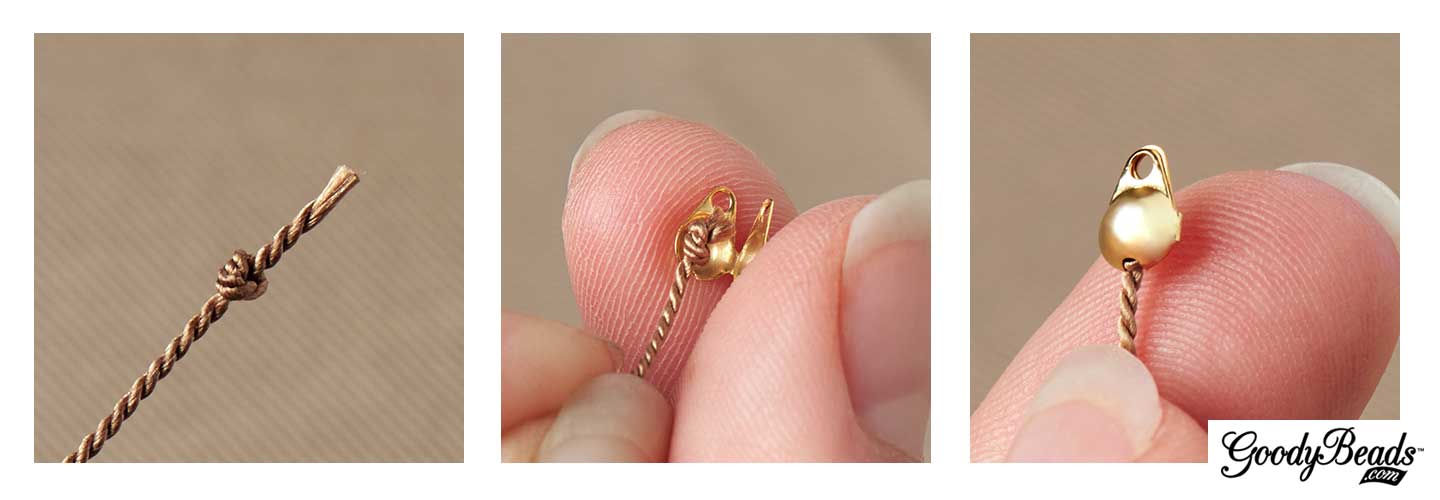
Using Clamshell Bead Tip with Silk Cord
A way to attach your silk cord to jump rings or clasps is to attach clamshell bead tips.
Start by making a knot at the end of your prepared silk cord. Cut any excess cord close to the knot. Add a dab of Super New Glue or fast-drying glue to the knot. Place the knot inside the clamshell center and fold the clamshell over the knot. The glue will keep the knot from unraveling and to adhere the silk cord to the inside of the clamshell bead tip. Once the glue is dry, it’s ready to use.
Need a little inspiration? Here are some ways we used Griffin silk bead cord in our jewelry designs. Plus, quick tips on how you can create these designs yourself!
Crystal Cluster Knotted Silk Cord Necklace
Designed by So Vang
Make a necklace with knotting in-between clusters of beads. Choose from Swarovski® crystals, Chinese crystals, seed beads or your favorite gemstones. For our necklace, we used the entire 2-meter cord and strung on clusters of one gold seed bead, three dainty round Chinese crystals and one gold seed bead, that were knotted with an inch gap between clusters. This version makes a 60” necklace that you can wrap around two or three times.
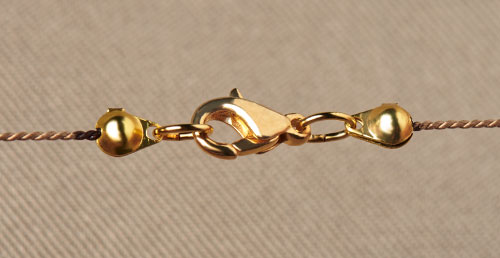
Here you can see how the clamshell bead tips are used in conjunction with jump rings and a lobster clasp.
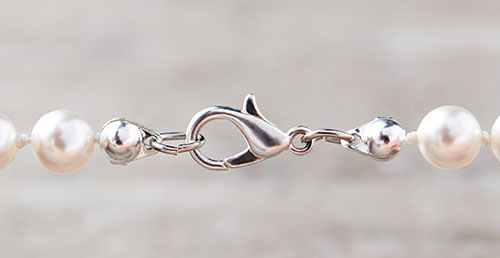
Pearl beads and silk cord are a match made in heaven. Not only do they look great together, the silk cord also helps prolong the life of your pearl jewelry by preventing the beads from rubbing up against each other, which can breakdown the bead’s finish. Making this elegant necklace is super easy.
First, make a knot and clamp a clamshell over the knot. Make another knot close to the clamshell. String on a pearl. Make a knot close to that pearl. Repeat until a preferred length. Make two knots at the end and clamp a clamshell over the last knot. Finish with a lobster clasp and you’re done!
If you have a worn-out pearl necklace, you can undo all the pearls and restring on silk cord to extend its jewelry life.
Minimalist jewelry is a huge fashion trend right now. Dainty jewelry components shine alone or together in multiple strands like our layered silk cord necklace. For this necklace, we focused on the sleek simplicity of gold tube beads and the lightness of silk cord.
Step 1: String on 25 gold tube beads on white silk cord. With the beads strung on, cut 20” off the end of the silk cord. Make 2.
Step 2: String on 25 gold tube beads on white silk cord. With the beads strung on, cut 22” off the end of the silk cord. Make 2.
Step 3: Gather the four cord strands and make a knot. Repeat to the other end.
Step 4: Dab some Super New Glue to both knots. Clamp a clamshell over the knots.
Step 5: Add a jump ring to one of the clamshell tip ends.
Step 6: Add a jump ring and a lobster clasp to the other clamshell tip ends. Done.
This style of necklace is perfect for small dainty beads or seed beads or even some NEW 3mm or 2mm Czech round beads.
For this bracelet, we twisted groups of silk cord with size 11/0 Miyuki seed beads and gold plated chain.
Step 1: String on seed bead to 8” and cut 10” silk cord strands with seed bead on. Make twelve strands. Tip: You can use the Bead Spinner to help to string on seed beads.
Step 2: Gather three seed bead strands and knot all three strands at both ends as close as you can to the seed beads. Clamp a clamshell over the knots. Make four group of seed bead strands.
Step 3: Cut two chain links at 8” and attach oval jump rings to each end of the chains.
Step 4: Also cut a few links of chain for your bracelet chain extender.
Step 5: Open an oval jump ring and slide on your lobster clasp.
Step 6: Open a larger jump ring and slide on these:
chain extender piece, two seed bead groups, chain extender piece, two seed bead groups.
Step 7: Close Jump ring.
Step 8: Leaving the chain extender along, separate the strands into two sections of chain and two seed bead grouped strands. Make a “flemish twist” with the two sections.
Step 9: Open a large jump ring and slide on the other ends of the chain and grouped seed beads and lobster clasp jump ring.
Step 9: Close jump ring and you are done.
(Close-up shot of jump ring with grouped seed beads and chain links.)
We hope enjoyed these tips and tutorials. Check our next blog post where we show you how to create evenly spaced knots in your jewelry designs using The EasyKnotter® tool. Happy Beading!
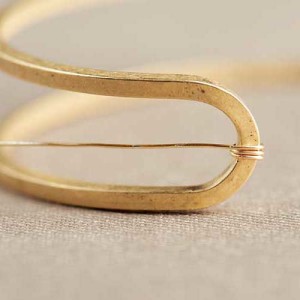
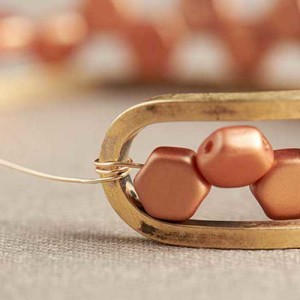
What kind of summer will you have? Whether it’s on the beach, surfing, roaming an outdoor mall or lounging on your back patio, be ready with our easy project using expandable wire bracelets and adjustable rings.
Stack multiple adjustable bracelets together. Or make a cluster of rings and wear them scattered around the base of your fingers or as knuckle rings. However you style it, remember to make it about you by personalizing and customizing them with simple charms and dangles with a quick open of a jump ring.
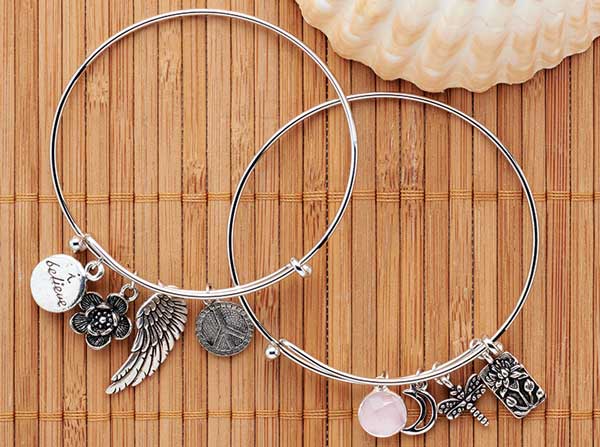
Expandable Bracelets
Designed by So Vang
What makes these bracelets expandable is the way you can slip them on and off any wrist size without altering the shape. You can get an antique silver finish or gold finish bracelet and complement them with gold or antique silver charms. Or mix up the colors. Create a theme or select your favorite charms. Attach charms with a jump ring and you are ready for summer fun!
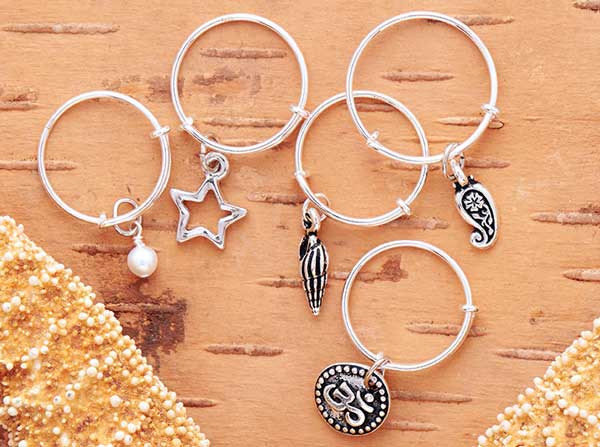
Adjustable Rings
Designed by So Vang
We are loving the versatility of these rings. They come in three different sizes to give you options to place them on your knuckles, thumbs or simply at the base of your fingers. We’ve added simple charms to our rings, as well as a cute pearl dangle to tie in a beachside look.
(2) Z003520 – Sterling Silver Adjustable Ring – Size 5-7
(2) Z003521 – Sterling Silver Adjustable Ring – Size 6-8
(1) Z003522 – Sterling Silver Adjustable Ring – Size 8-10
Boho Ring-Chain Bracelet
Designed by So Vang
Of course you can use these rings to help achieve a popular ring-chain bracelet. First, we made a simple chain bracelet with a lobster clasp. Then we put the ring on and measured a loose length of our chevron chain across the back of the hand. To finish, we connected the chevron chain to the ring and to the middle of the chain bracelet with two linked jump rings. It’s perfect for wearing with other selections of expandable bracelets and adjustable rings for a groovy summer!
Easy DIY Jewelry with Swarovski® Raindrop Pendants
Swarovski® has introduced a simply stunning crystal collection called Innovations Spring/Summer 2017, inspired by the balance of nature. Along with Céline Cousteau’s inspiration crystal designs from the depths of the ocean, Swarovski included the popular Raindrop Pendants. We have three easy jewelry pieces to accentuate the beautiful shape of these raindrop pendants.
Drops of Midnight Earrings
We took TierraCast® 2-Hole Hammertone Disk and attached 33mm jet raindrop pendants and sterling silver ear wires with jump rings.
Drops of Midnight Earrings:
(2) TC01406 – 25mm Antique Pewter 2 Hole Hammertone Disk
Frame some of the raindrop earrings in a teardrop frame from TierraCast®. Hook sterling silver ear wires and attach a 17.5mm Swarovski® raindrop pendant with 5mm jump rings for an easy pair of earrings.
Making this chain tassel necklace is super easy. We cut chains at 10”, 3”, 2.5”, 2” 1.5” and 1” (times 2). Attach a small jump ring to the raindrop pendant. On a large jump ring (roughly 10mm), open and insert 10” chain, 1” chain, 1.5” chain, 2” chain, 2.5” chain, 3” chain, small jump ring with raindrop pendant, 3” chain, 2.5” chain, 2” chain, 1.5” chain, 1” chain, 10” chain. Close jump ring. Attached a lobster clasp to one of the 10” chain end and attach a small jump ring to the other 10” chain. Voilà and your necklace is complete!
Chain Tassel Raindrop Necklace:
(1) SW01399 – 23mm Crystal Silver Raindrop Pendant
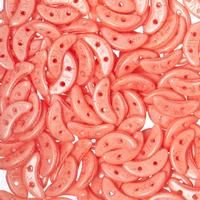
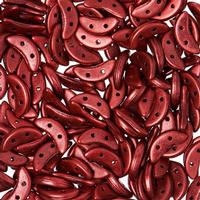
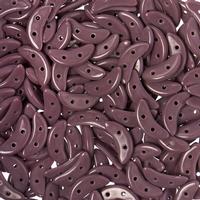
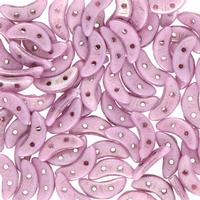
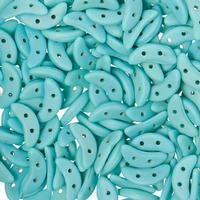
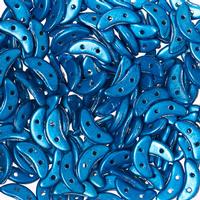
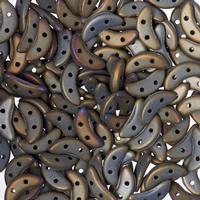
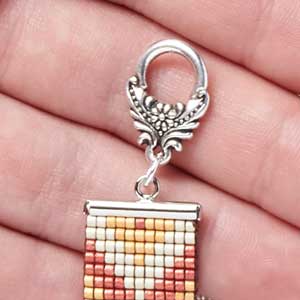
Czech Crescent Bracelet and Earrings with FREE Illustrated Tutorial
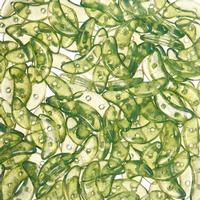
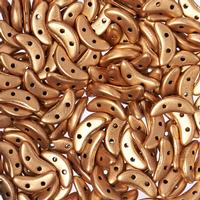
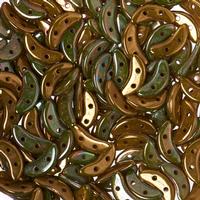
Czech Crescent beads are NEW at GoodyBeads. The Czech crescent beads are wedge-shaped beads with two holes. We have two easy and free tutorials using these Czech crescent beads.
Midnight Gold Czech Crescent Bracelet
Design by So Vang
For this bracelet, we used a combination of black and gold crescent beads with Swarovski® crystals in Graphite AB2X. The midnight glow of the AB2X is hauntingly beautiful in this piece.
We love this bracelet because it is simple to make. First, start by threading on 4 seed beads. Keep the ends of your thread untied. Then, you will thread on a top layer with a sequence of 3 Czech crescent, a seed bead and a 4mm bicone crystal. Repeat this sequence until you’ve reached your preferred bracelet length. End this top layer with 3 crescent beads and 4 seed beads. Now, bring the thread down to the bottom 3 crescent beads you’ve ended with. You will now be threading the bottom layer by adding a seed bead and bicone crystal in between each crescent bead grouping until you’ve reached the end. Tie both of your thread ends together. Feed your threads back through a few beads before you cut off excess thread. Add your clasp and chain link to the seed bead loop ends you’ve made with jump rings.
First thread on your top layer with, crescent bead, seed bead, bicone crystal (4 times). Tie both thread ends together to create a cylinder shape. Feed your thread through one crescent bead and loop down through the second hole of the crescent bead. Thread in reverse of your cylinder shape with adding a seed bead and bicone crystal inbetween the crescent bead. Once you’ve reached the end. Tie off thread ends and thread through a few beads before cutting off excess and you’ve completed your crescent bead design.
Slide these beads onto the headpin and make a simple loop:
Seed bead, bicone crystal, 8mm round crystal, 6mm round crystal, crescent bead design, bicone crystal and seed bead.
Open your Ear-wire loop and slide on your crescent bead design headpin loop. Repeat for other earring.
Memorial Day is a special day to honor those who have died while serving in the United States of America armed forces. We have a few DIY jewelry projects to commemorate this day and all American holidays.
Red, White and Blue Flat Leather Bracelet
Designed by So Vang
Here’s a clean and sleek bracelet made from 5mm flat leather and rivets. First, measure four strands of leather at your wrist size plus two more inches for the loops. You can learn how to rivet leather loops by reading our previous blog. Make sure to loop your ends through the bar end before you hammer your rivets. Add a clasp and you are ready to rock to the beat of an American song.
We made this bracelet easy to wear, make, and adjust. Take a strand of red, white and blue 2mm leather cord and line them up at one end. Take a silver clamp and clamp the three ends with serrated chain nose pliers. Hold your strands together and evenly straighten your strands. Make a flush cut at the other end and use another silver clamp to clamp those ends. Add your clasp and a simple USA charm. What’s versatile about this bracelet is that you can add knots in between your leather cords if you find the bracelet to be a bit loose. Plus, we think the added knots are a neat feature to the bracelet. Wrap 4 or 5 times around your wrist for a fire cracking weekend.
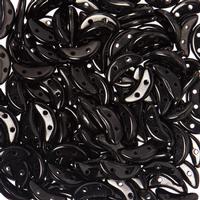
To make the pin, you will make Czech dagger rings by threading on Czech daggers and making a knot with the thread ends. Cut off excess thread. You will need to make three rings with 10 red Czech dagger beads, 9 red Czech dagger beads and 7 black Czech dagger beads.
Next, slide on your headpin the 8mm black round crystal, black dagger ring, red dagger smaller ring, red dagger larger ring and 8mm red bicone crystal. Make a simple loop. Open the headpin dangle loop and attach to the loop on the bow pin.
For this ring, you will need to make two rings with 10 red dagger beads and 7 red dagger beads. Use a fast-drying glue, like Super New Glue to add to the base of your ring. Lay the larger red ring on top and press down with your finger. This will help the ring to lay flat. This should only take a few seconds to dry. Add some glue on the inner part of the red dagger ring and add your smaller red dagger ring. Hold it in place with your finger for a few seconds. Add some glue to that layer and place the jet round crystal on top.
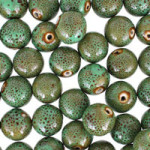
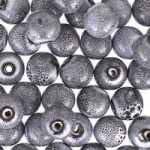
Czech Honeycomb Bracelet Tutorials
Czech Honeycomb beads are popular! We have two easy and free tutorials on how to use these popular honeycomb beads to make a bangle and cuff bracelet.
Honeycomb Bangle by Apollinariya Koprivnik
We followed BeadSmith’s Inspiration Squad Member, Apollinariya Koprivnik’s tutorial to make this stunning honeycomb bangle. We love its mesmerizing, 3D design. We dressed the bangle with the matte jet honeycomb and accented it with gold and silver seed beads and SuperDuos.
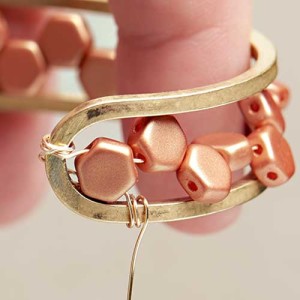
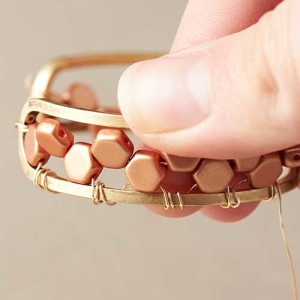
To create this wire-wrap cuff, we drew inspiration from Julie Romero’s honeycomb bangle bracelet. Follow our directions below to create this easy wire wrapped honeycomb cuff.
* Note: It is easier and quicker to work with shorter pieces of 26-gauge wire.
Step One: Start with 2 feet of 26-gauge wire. Wrap the end of the wire three times in the middle section of the cuff shown above.
Step Two: String on 26 honeycomb beads and secure it around to the other end of the cuff by making a few wraps.
Step Three: Bring the wire back behind the cuff and thread it through the first honeycomb hole. Bring wire over the bottom cuff frame and make three coiled wraps.
Step Four: Repeat step 3 for every other honeycomb bead on the bottom row.
Step Five: When you have finished the bottom row, coil wraps around the frame to wire wrap the top row of the cuff. See finished cuff above.
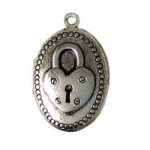
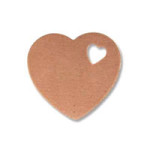
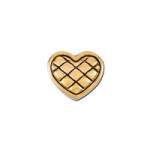
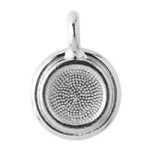
Mother’s Day is approaching and what better way to say thanks to our mothers by customizing a one-of-a-kind Mother’s Day locket. We have two easy DIY locket gift ideas for the loving mothers, special aunts, and caring grandmothers in your lives.
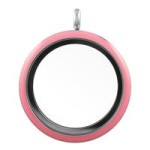
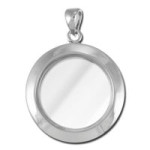
Charmed Locket
Lockets and floating charms are an easy gift to make for Mother’s Day. Choose your glass locket and fill it with floating charms and mementos. Here, we have filled our pink locket with a brass heart stamping blank and three floating charms.
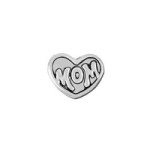
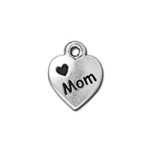
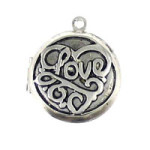
Picture Love Locket
Tell her that you love her with this love locket with a picture inside, so that she can wear it close to her heart. We filled this LOVE locket with a ½” gold-plated blank and used stamping tools to stamp MOM along with two small hearts. We then sized a photo down to fit inside a ½” circle. Glue both pieces inside the locket and add a necklace. This heart-filled necklace is ready for a box and bow for Mother’s Day.
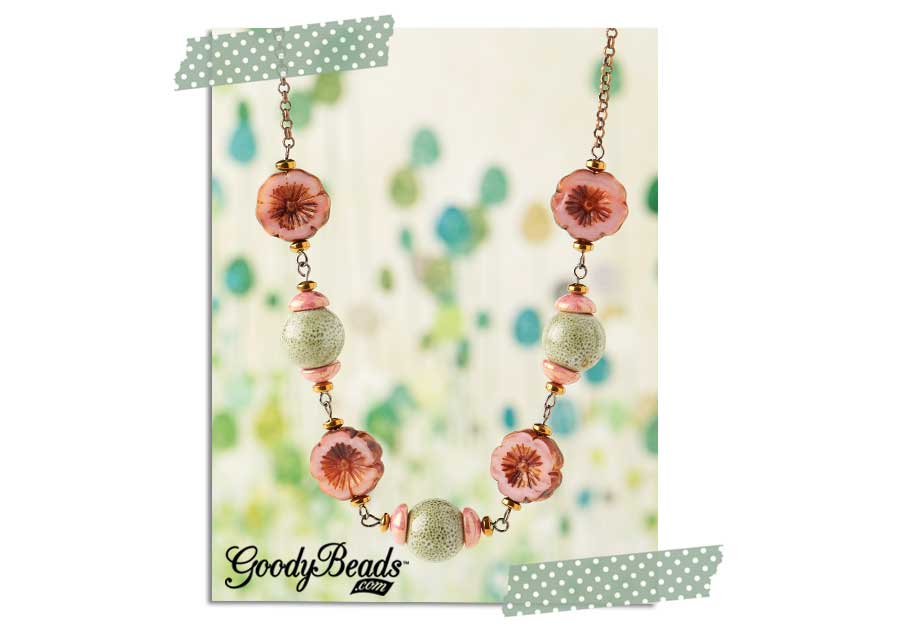
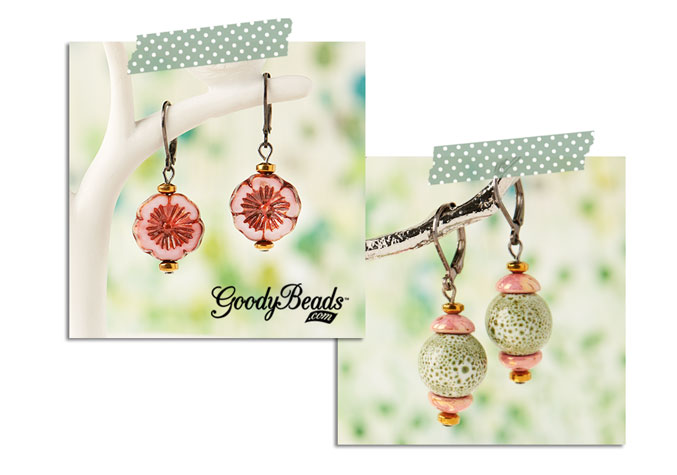
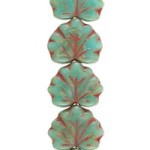
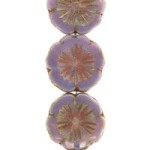
We are celebrating spring with some fresh Czech hibiscus flower beads. Flowers always come to mind when thinking about spring. And tropical hibiscus flowers are the perfect reminder that warmer months are ahead. We have some easy and inspiring spring jewelry projects that use beautiful Czech hibiscus flower glass beads and porcelain beads.
Porcelain and Czech Elastic Bracelet
Designed by So Vang
Here is a perfect bracelet to add to your spring outfits. Made with Czech hibiscus flower beads, Czech leaves, and pink porcelain beads, it is strung on elastic for an easy and wearable bracelet. For additional ideas, check out out our previous blog on elastic bracelets.
Rainy season is upon us. And what better way to a rainy day then making some leather cuffs. We have an easy leather cuff tutorial that will make you want to put away your rain boots and umbrellas, and “veg out” making these easy leather cuffs.
Instead of using a strand of 10mm flat leather, you can make two layers with two 5mm flat leather. We paired the mustard flat leather with this graphic neon splatter-printed leather on a gold-plated, glue-in-cuff.
(7) CH00047 – 5mm Mustard/Black Flat Leather (out of stock)
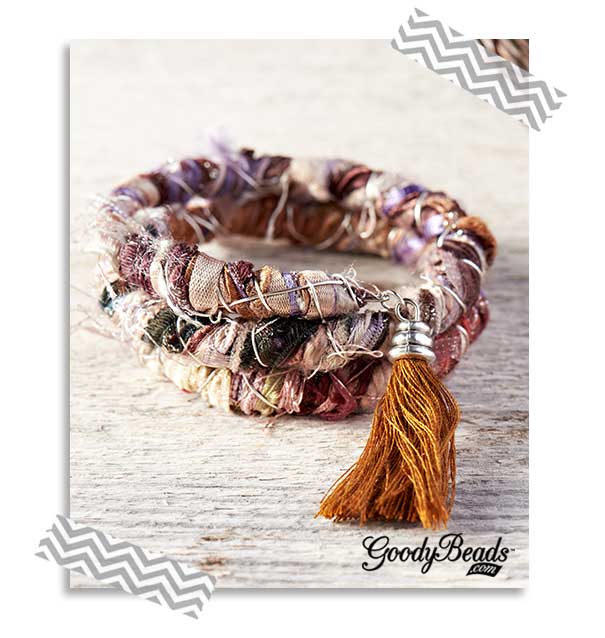
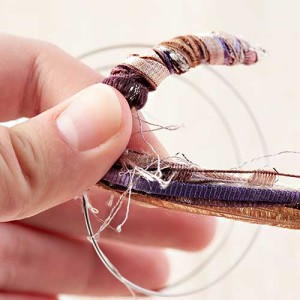
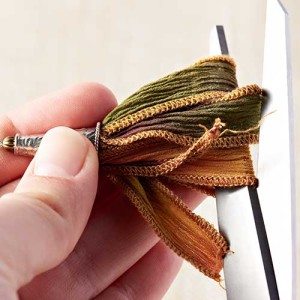
To encompass the trend of boho, we have pulled our wonderful stock of silk ribbon and ribbon mixes to show you how to use silk ribbon in jewelry. We will show you how to make an easy wrap memory wire bracelet with silk ribbon and silk ribbon tassel earrings.
Boho Silk Memory Wire Bracelet
Designed by So Vang
This bracelet is perfect to wear on a beautiful summer day. We used the Hand Dyed Ribbon Mix, which has eight 2 yards of ribbon, yarn and fabric mix. When wrapped around memory wire, the colors and various fibers has a boho charm. You can finish off your bracelet with a tassel attached at the memory wire loop end or add charms scattered around the bracelet with jump rings. This memory wire ribbon wrap bracelet is easy to make and to pair with your everyday outfit. Just follow our easy instructions or DOWNLOAD our pdf tutorial.
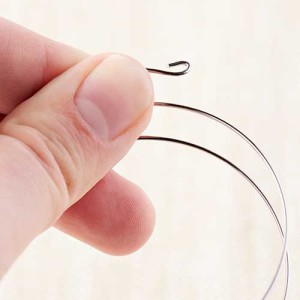
Step 1: Cut memory wire for 2-3 wraps. Make a simple loop at each end.
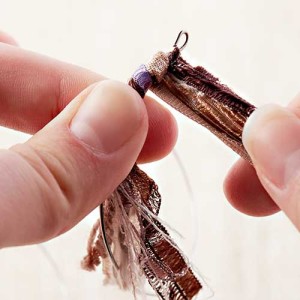
Step 2: Gather your strands of ribbon mix to one end. Hold about 3 inches of the ribbon strands with the memory wire. Start wrapping your ribbon around a few times close to the loop.
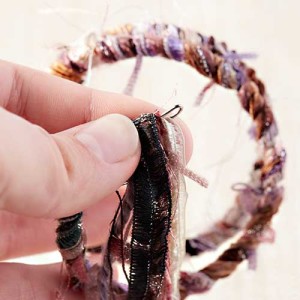
Step 3: Tightly coil the ribbon strands around the memory wire. Make sure to keep your strands flat and not twisted when coiling the strands. Take your time.
Step 4: At the end, glue to secure. Wrap strands back towards the beginning of memory wire to create a fuller looking bracelet. Once you run out of strands, dab a small amount of glue to hold ends down.
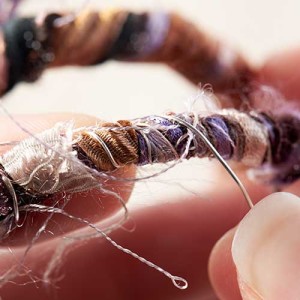
Step 5: Wrap 26 Gauge wire around ribbon strands to secure the strands.
Step 6: Embellish with charms, bead dangles, tassel, or wear as is. Your boho fiber bracelet is complete!
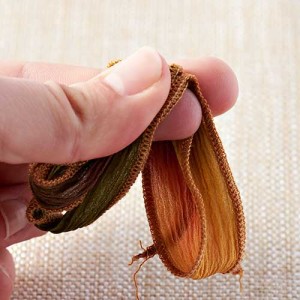
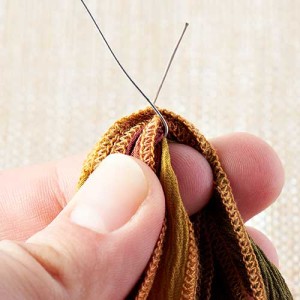
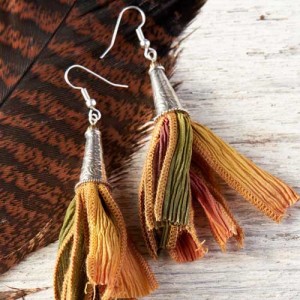
Use silk ribbon to make a trendy pair of tassel earrings. Make some fun pair of earrings like what we have made here. OR create a longer tassel to use in a statement necklace.
Step 1: Cut silk ribbon in half. Take one half and fold in half. Fold again and again for a total of three half folds.
Step 2: Cut 4 inches of 22 Gauge wire. Insert under last ribbon fold a third of the way and cross the wire strands.
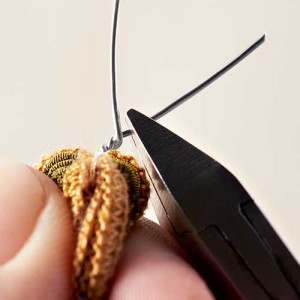
Step 3: Twist the two wire strands. Cut excess length of the shorter wire strand.
Step 4: Insert cone on wire and use flat nose pliers to pull tassel snuggly inside cone.
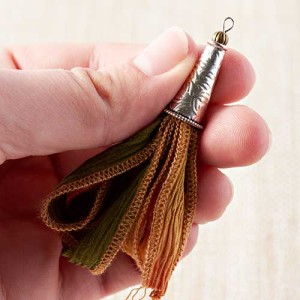
Step 5: Add a small bead and make a simple loop.
Step 6: Cut the ribbon loops.
Step 7: Attach ear wire and repeat for the other tassel earring.
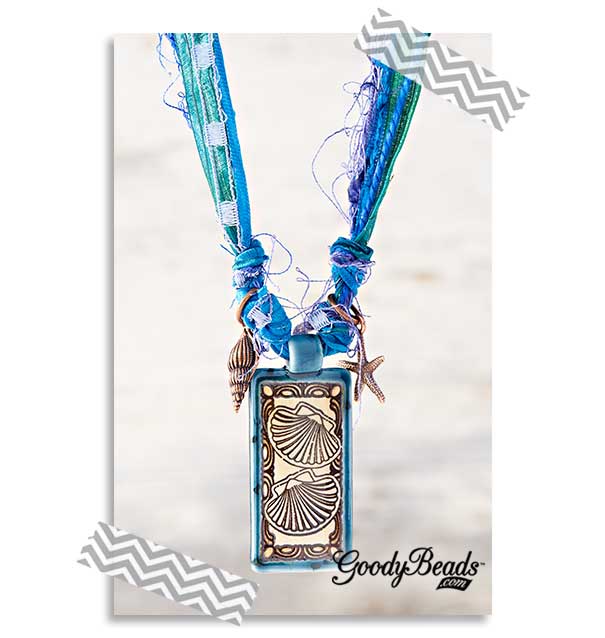
Center a porcelain pendant to these mix ribbon and make knots on both sides. Then make another knot next to those knots and added seashell and starfish charms with copper jump rings in between each knots. This necklace takes you to the beach without even being there!
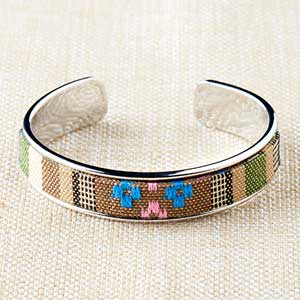
How to Use Ricks Bead Loom, PLUS Two Ways to Clasp Loom Bracelets
From traditional Native American Indian-loomed wampum belts to popular and modern Julie Rofman wrap bracelets, bead looming has transcended through changes in time, culture and fashion. A bead loom can help you make elaborate, beautiful necklaces to simplistic bracelets.
If you are new to using the bead loom or have been wanting to use a bead loom, believe us when we say that using the Ricks Bead Loom is super easy and simple. Here are some tips and tricks to using Ricks Bead Loom, as well as some inspirational loom bracelets to get you started. We also provide two different ways to clasp loom bracelets.
Ricks Bead Loom
When you purchase a Ricks Bead Loom, you receive the bead loom and its components, as well as a detailed, visual instructions of how to set up and use the bead loom. You can also check out Ricks video tutorial on his webpage on how to use his bead loom.
The basic method of bead looming is weaving a thread back and forth through rows of seed beads that are sandwiched in between vertical strands or “warp strands”. The difference between a traditional bead loom and Ricks Bead Loom is the amount of warp strands you are using. A traditional loom will have multiple warp strands going up and down along the loom, while a Ricks Bead Loom will have only one strand that wraps back and forth, up and around between the two rods. This continuous wrapping of the strands between rods will leave you with two threads at the end.
Like the instructions you will receive, first you insert your metals rods. These rods are where your vertical warp strands will lay. Adjust the wood piece/tailstock to your preferred bracelet length and start making your warp strands. The amount of warps you have is according to the amount of beads you have in a row, PLUS ONE. If you see the image below, you will see that we have eight seed beads per row and thus we need nine warp strands.
Next, lay your card separator in between the warp strands. It is optional to use the card separator. You can use the warp separator card that comes with the kit. Here, we cut a ½ inch piece of cardstock paper to get us started.
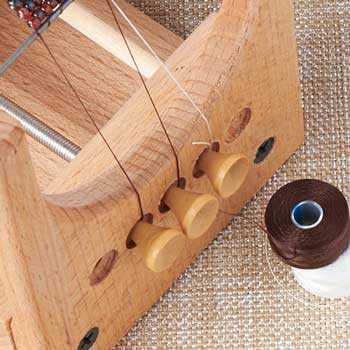
Hook your thread end to your peg and insert it into one of the holes in the front.
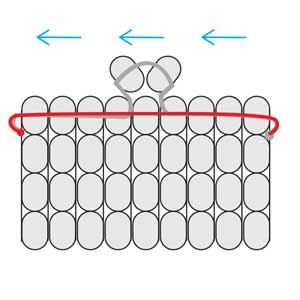
You are ready to start your rows. The basic motion of weaving each row is by weaving behind the warp strands with your beads and string. You will then weave back into the same row of beads, but when you feed your needle through, you are gracing the top side of the warp strands.
TIP: When bringing your needle back, use the backside of your needle. Using the backside of the needle will give you a smoother glide through the beads. Be careful not to prick yourself with the sharp end when using this method. Makes you wish you had a thimble on hand, huh? I did.
The first two rows will be tricky but after that you get those two on, it will be easier.
After your two rows are done, slide off the separator and pull your two rows down so it is flushed against the metal rod. Twist the peg that attaches to your thread to keep loose thread tight.
And you are ready to continue with your rows until you’ve reached the end.
TIP: When bringing your needle back through the row of beads, press up on the beads so that they protrude upward. Then, when you sew back through the beads, you will go over the vertical warp strands.
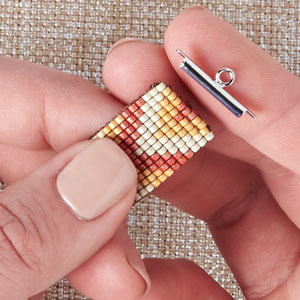
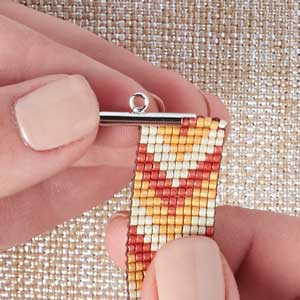
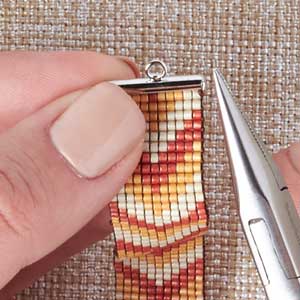
When you have finished your piece, unhook your threads from the pegs and sew the end threads through the rows and knot them. Cut excess thread. Slide your loomed piece off the metal bars and spread out your bead rows evenly outwards towards the ends to hide the loops of the warp strands. Then you are ready to add your clasp ends. Here are two types of loomed bracelets with instructions for adding a Miyuki Tube Finding and sewing on a bead loop to add your clasp.
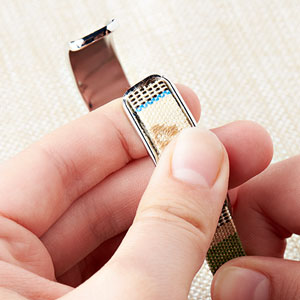
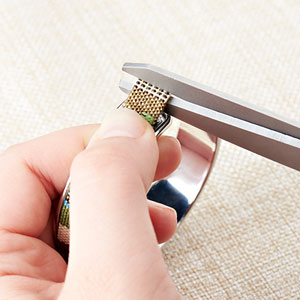
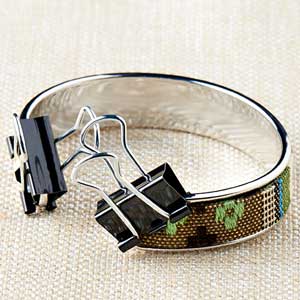
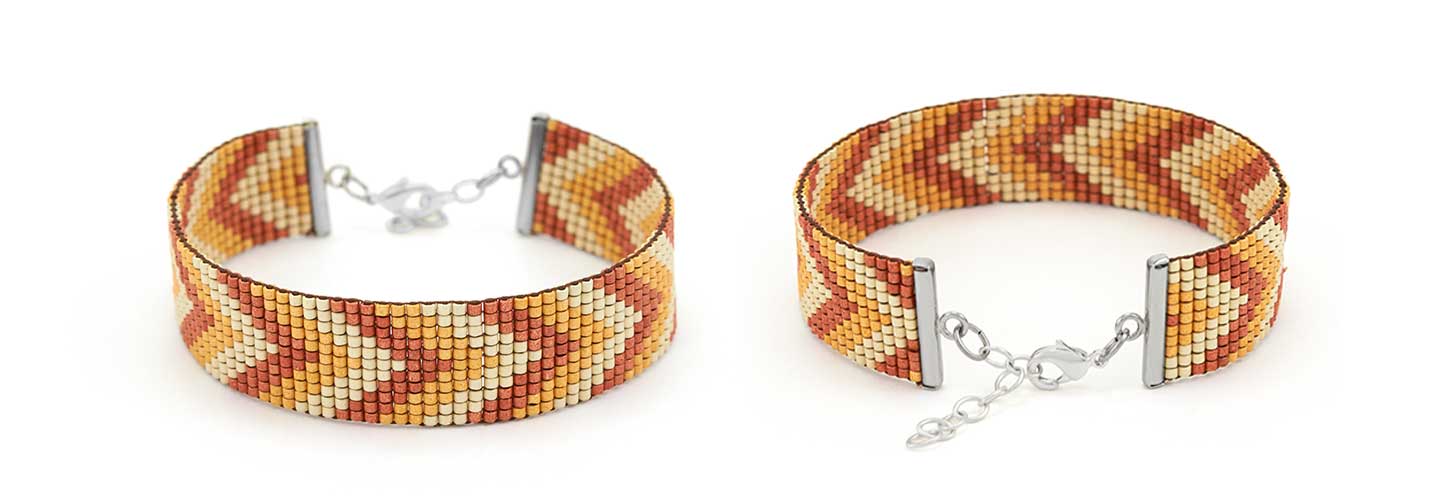
For this bracelet, we used Miyuki Tube Findings, which are used particularly with Miyuki Delica Size 11 seed beads. GoodyBeads has four available sizes at 15mm, 20mm, 35mm, and 60mm, which will accommodate a certain amount of seed bead per row.
You can make a design like our Delica seed bead bracelet or you can use a Miyuki seed bead mix like our bracelet here. For our clasp for this bracelet, we made a loop using seed beads.
Step 1: Tie your thread end and insert your needle halfway through your row of beads.
Step 2: Add two seed beads. Skip one seed bead in your row and insert needle through the rest of your row. Make a knot.
3. After you make a knot, go back through the seed beads you threaded through. Make a knot on the other end.
Step 4: Then, feed your needle and run through your entire bead row and make a knot. Cut excess thread.
Step 5: Your end result.
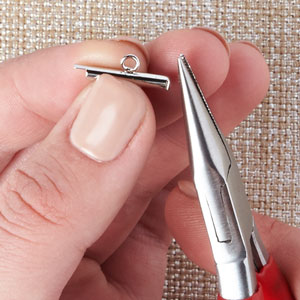
Step 6: Insert jump ring in the loop you’ve made and add your choice of clasp. You are finished.
How to Use Your Leftover Beads
It is official! Spring is just around the corner for 2016! Soon the snow will be melting and spring will be knocking at our doors. It’s the perfect time to rummage through your beads and do some spring cleaning: to make way for MORE beads, of course. Here are three different ways to use your leftover beads, findings and chains.
As a beader, you know that you always have extra beads from previous projects lying around. We, at GoodyBeads, are guilty about that! There is a whole shelf dedicated to leftover items of miscellaneous beads, findings, chains, cords, tools, crystals and the list goes on and on. It was hard to not open a fresh pack of new beads or a full length of cut chain or a string of gemstones. But with our wall of STUFF, there were enough items for this spring cleaning project!
An Array of Colorful Beads for a Wrap Bracelet
A perfect way to use your extra beads is to make a quick and easy wrap bracelet. Check out our previous blog, How to Make Wrap Bracelets, for a tutorial.
Designed by So Vang
For this particular bracelet, we gathered similar round 8mm of gemstones and Czech glass beads. Using our used roll of Waxed Cotton Cord and Superlon Brown Thread, we made a wrap bracelet that wraps 4 times. Even check out our button piece. Instead of grabbing a new button, we used a Bali spacer (A021466) and made knots to act as a button piece. Love this idea! What a way to think outside of the box, eh?
If you need supplies, head over to our Gemstone and Czech section. If you are looking for a particular size or shape, we have that option on the left hand navigation under “Size Range” or “Shape.” Or you can even check our selection of Bead Set and Mixes for a quick mix.
Chain Chain Chain
Do you have various length of chain bunched together waiting to be used for bracelet extenders pieces or necklace additions? Make CHAIN the main piece of your jewelry!
Designed by So Vang
What we made here is a multi-chain bracelet. Randomly select a few chain pieces, then measure each chain to your bracelet length. Using a 7mm jump ring to combine each piece of chain end. Do the same to the other end. Use another 7mm jump ring and attach to each end with a magnetic clasp. We have to be honest here and say that we cheated. We did have to get a magnetic clasp from GoodyBeads inventory. You can go ahead and cheat too. We won’t tell if you don’t either!
Another idea is to make a statement necklace with miscellaneous chain braided together. What’d you think?
Linking Bead Dangles
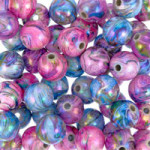
We love our selection of glass beads. The vibrant colors and designs are BEA-U-TIFUL! One way to weed through your stash of beads is to find a HERO bead and play off on the colors and shapes. Grab some eyepins and start making simple loop dangles of the beads you’ve chose. By linking them, you can make a bunch of different jewelry pieces.
Our hero bead was this blue and amber glass bead (A013249). We pulled beads with hues of blue, light blue, and amber as well as some bronze Czech fire polish beads. Using gold eyepins, make a simple loop with the glass and Czech beads. We made enough eyepin dangles until we ran out of the bronze Czech fire polish beads. Plus, we made a handful of Black Diamond Chinese crystal dangles.
Start linking them up to make a necklace, bracelet or earrings. Play with the sequence of the beaded dangles and add chain and different findings. Using up every last beaded dangle and with the help of gold plated findings and chain, we made two necklaces, earrings and a bracelet.
Designed by So Vang
Designed by So Vang
LOVE LOVE LOVE this idea because it gives you the chance to use up beads that you can’t find anymore. Even some of these beads we used are styles that we no longer have. It makes it more unique don’t you think?
Now that you’ve used your beads up, there’s room to buy more!
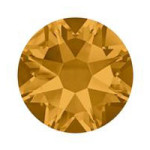
Using Swarovski® Flat Back Crystals
We just got some NEW Swarovski® flat backs crystals to play with. We love the subtle sparkle they brings to trending minimalist jewelry. Here are a few projects that use flat back crystals.
To get started, we recommend these tools to help you start BLINGING your jewelry with Swarovski flat back crystals:
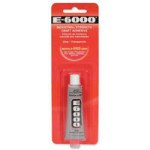
Adhesive: Check our Adhesive page for options. Fast-drying glue are ideal for quick placements of flat backs. When you are covering a larger area, we recommend using E-6000 as you still have time to adjust the flat backs when it has been placed. Please keep in mind when using adhesives, to make sure you are in a well-ventilated area.
Pick Tools/Tweezers: Because Swarovski crystals are small, pick tools will help to accurately place your flat backs. We recommended handling them by using a BeadSmith® Magic Pick or a Crystal Kanata. Tweezers will also help with adjusting your crystals once they have been placed.
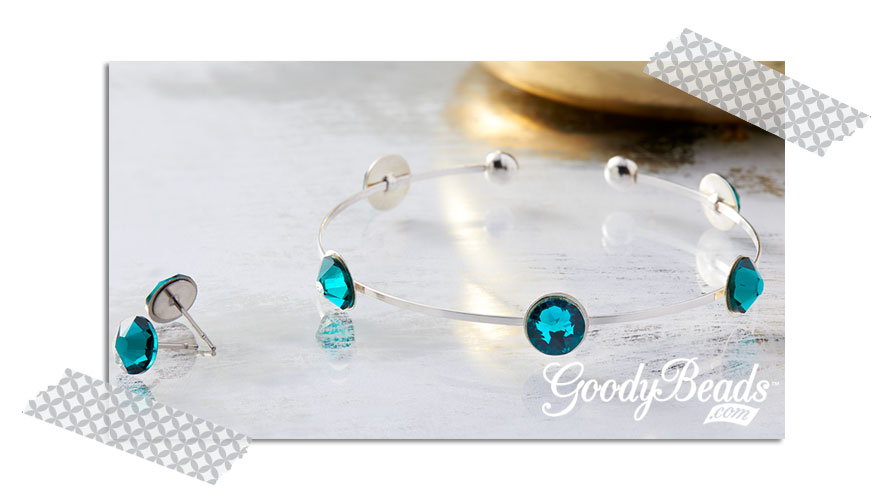
Emerald Bangle and Earring Studs
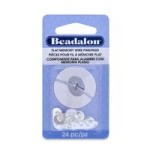
For this simple bangle, it consists of flat memory wire with Round Silver Flat Memory Wire Finding (A021628) with 7mm flat back crystal studs. First, cut one round of the flat memory wire with a memory wire cutter. Slide on the flat findings and hold it in place while you add your adhesive and flat back crystals. When you have finished gluing all your flat back crystals and it has dried, glue on a Flat Memory Wire End Cap to both ends of the memory wire.
For these stud earrings, we also used 7mm Swarovski crystals. Glue crystals onto Flat Post Earrings and you have simple, crystal studs to glam up your ears!
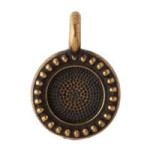
Tierra Cast® Bezel Earrings
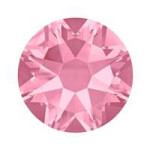
TierraCast® has bezel charms that accommodate the 7mm Swarovski flat back crystals. These bezel charms are available in a selection of finishes and are perfect for showcasing the color of crystals you want to use. We used the bright rhodium bezel with a vibrant Capri Blue crystal in this pair of earrings.
Gold and Red Earrings
Flat backs are a versatile jewelry embellishment because you can adhere them to charms and even jewelry findings. For these earrings, we used 3mm flat back crystals to embellish the top two rows of these Chandelier Earrings. Adding an inch of gold chain to the bottom rows with a jump ring and you have yourself a boho-style earring.
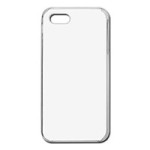
There are endless possibilities for flat backs. Flat back are easy to use as an embellishment to charms, jewelry, and even everyday items around the house, such as your tape dispenser or thumbtacks. Add Swarovski flat back crystals to your phone case, wallet, or couture clothing! Even nail artists, uses flat backs for a 3D design. How will you use it?