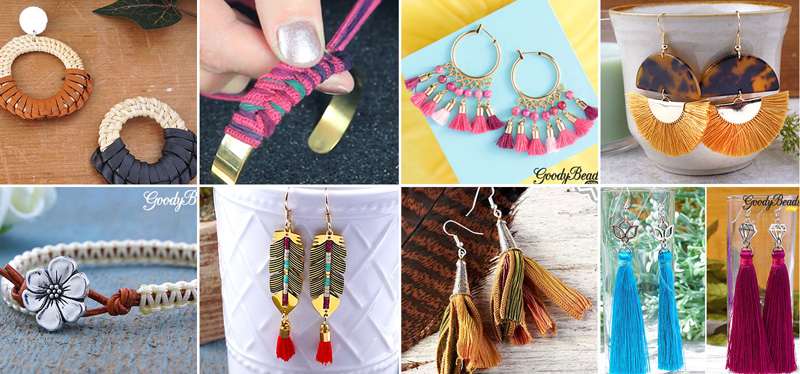
These Holiday DIY gift ideas are for the Boho Beauty in your life.She seeks a relaxing vibe and a moment of zen. She loves natural and earthy tone, so make sure you design with fibers like Ribbon, Tassels, Leather and Straw, as well as some Gemstone. Here are some great DIY projects for the Boho Beauty!
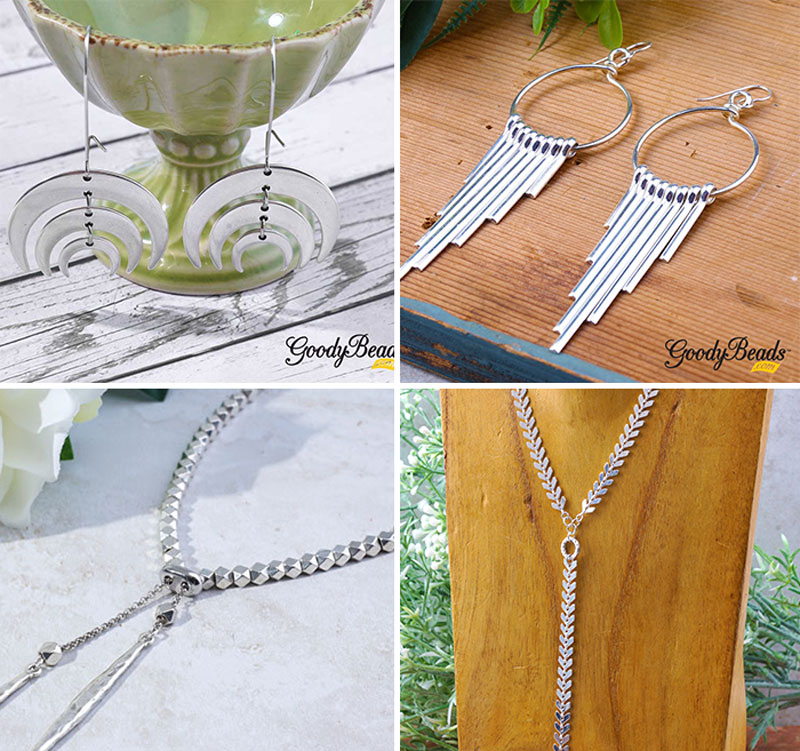
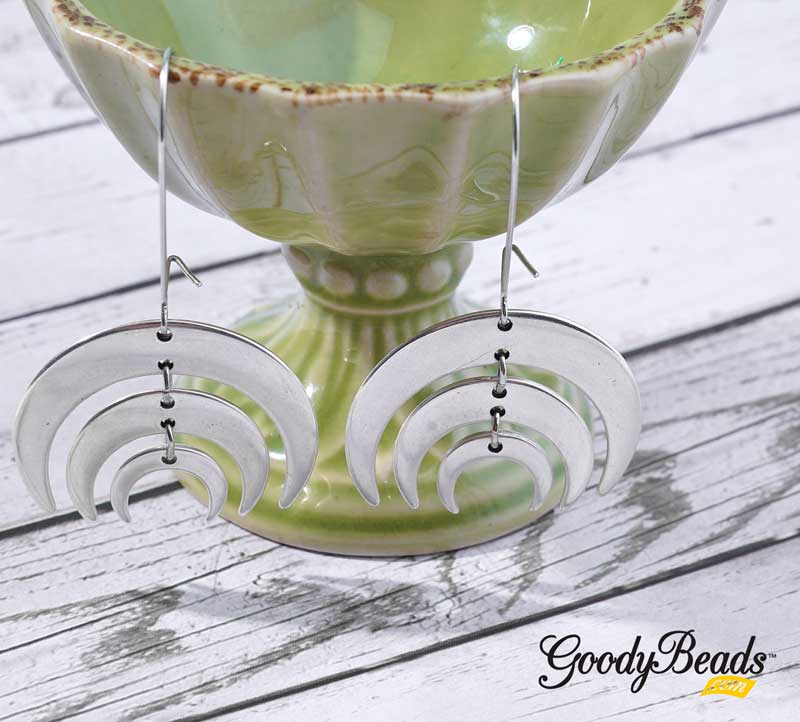
These gift ideas are for the Modern Minimalistic stylist in your life. They love the simplistic, clean lines like a single chain necklace and dramatic shapes like a large pair of hoop earrings or a triangular pendant. They like the monochromatic of silver and the bold shine of gold or even feel gorgeous with the rose gold color! There’s minimal colors in their jewelry palette and LOVE the many ways they can layer up their pieces!
Here are some DIY projects to gift to your Modern Minimalistic friend:
Using a 3 feet piece of beading thread, add a stopper bead to the end of your beading thread, leaving 4-5 inch tail. (To add a stopper bead, pick up a bead and slide towards to end of your thread end, leaving 4-5 inch tail. Sew through the bead, looping two times through the seed bead.)
Sew through an outer hole of your beadable pendant.
Pick up 7 beads (do variation of reds and green, using more green than reds).
Sew down the hole across the channel. (The beads wont be sitting in the channel.)
Sew up through the next hole and repeat steps 3 and 4.
You will repeat this process, zigzagging through the pendant until you have gone all the way around.
While on the backside of your pendant, sew up the next hole and through the first seed bead. Pick up 4 seed beads, sew across the channel, down the last delica bead and through the hole.
Repeat step 7 as you sew back through the beadable pendant again.
Once you’ve finished, tie off your thread ends and cut off excess.
Open your earring loop and slide your beadable wreath on.
Repeat all steps for other earring.
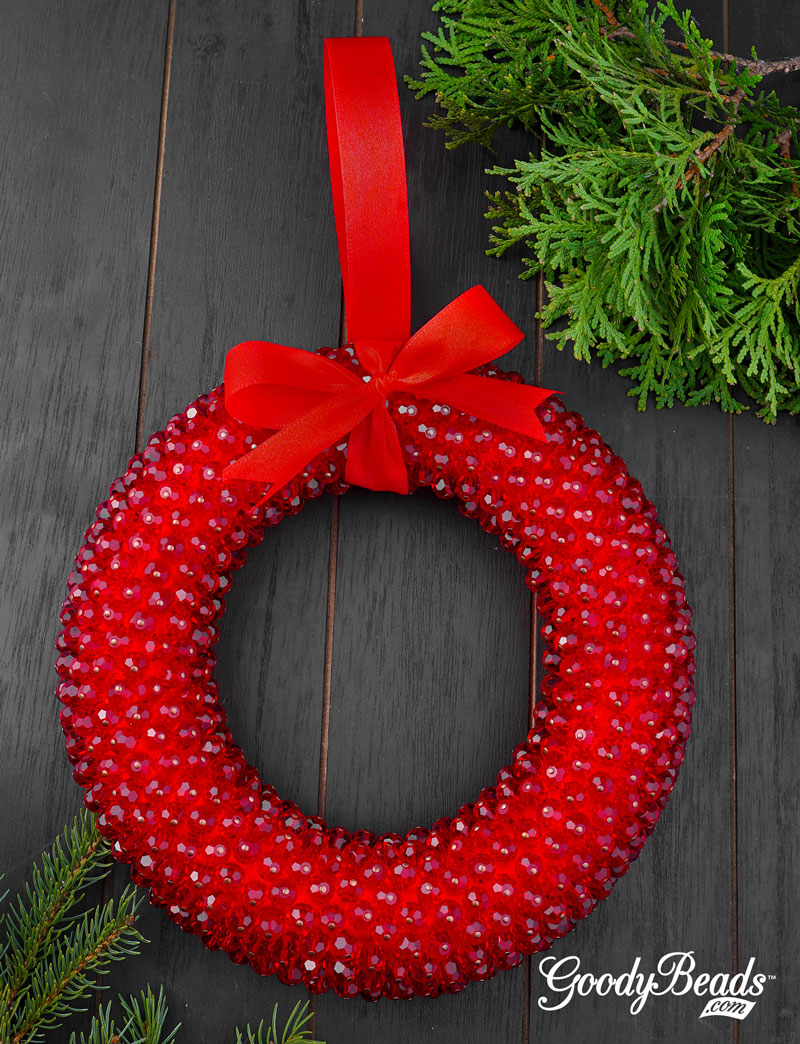
Sparkling Beaded Holiday Wreath with Chinese Glass Beads
We have a show stopping DIY craft for you this holiday season. Make a stunning, sparkly beaded holiday wreath with beads!
Inspired by Martha Stewart, because she is the Queen of DIY, we followed the video instructions to her Holiday Druk Bead Wreath to create our own! For our version, we’re using different beads and findings, but using the same process.
What you’ll need for wreath:
8 Inch foam wreath from your local craft store. (We got ours from Joann Fabric.)
Red Wide Satin Ribbon (Also got this from Joann Fabric)
As a note, you can use different color and size Chinese Crystals. You can also use other kinds of beads, such as Satin or Miracle beads, Swarovski Crystals or Pearls, Gemstone Beads or even some wood beads. The ideas are limitless. One thing to keep in mind is to make sure to have a similar ribbon color to match the beads you will be using. If you have a variation of colors, testing on white or black ribbon would work. You can also use a variation of sizes from 4mm to 12mm beads in your wreath.
Directions:
Wrap your wreath with ribbon all the way around. Secure the end with a pin. (You can use crafting glue to help secure your ribbon in place.)
Cut all your headpin tips at an angle. This will help you push through the ribbon and foam. (Martha Stewart colored her pin tips with red nail polish or paint. You can if you want, we opted out of this option.)
Slide a bead onto a headpin, dip the tip into your glue and push headpin into your wreath. You may need to twist the headpin sometime to punch through the ribbon.
Repeat and stagger your beads throughout. (You only need to fill the front side of your wreath and not the back. However, you can if you would like to.)
Finish it off with a ribbon bow and a loop of ribbon (pinned and glued to the back).
Have a Happy DIY Holiday!
Heidi’s Geometric Jewelry with Tutorials
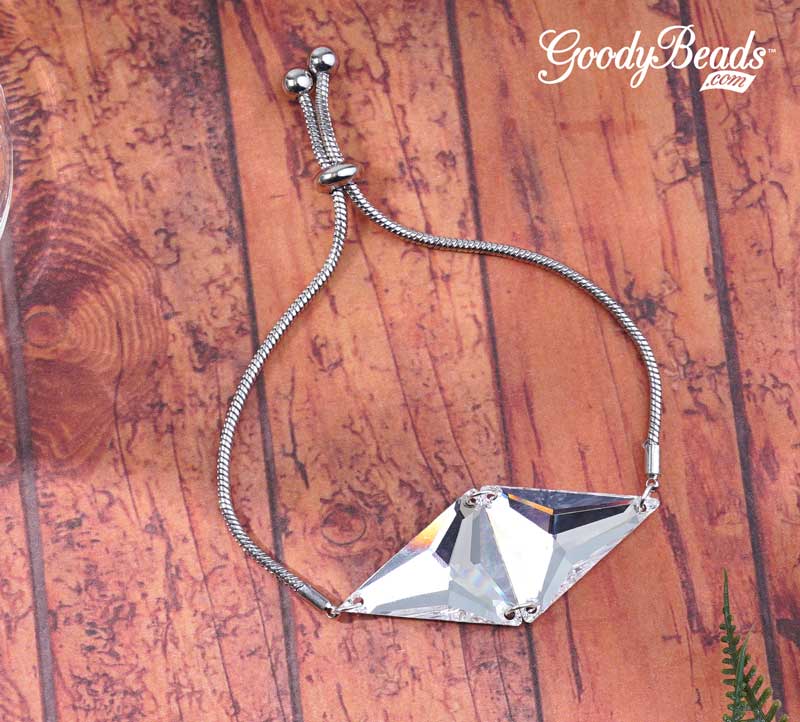
Heidi’s jewelry style has a lot of geometric shapes and simplistic angles. Her use of connectors, dangles and findings are everything you’d love in minimalistic jewelry!
Connect both Swarovski triangle sew-ons with two jump rings (A001529) at the bottom/base of the connector.
Remove both jump rings on sliding clasp.
Connect each end or points of the triangle to either ends of the sliding clasp with 6mm jump ring (A001529).
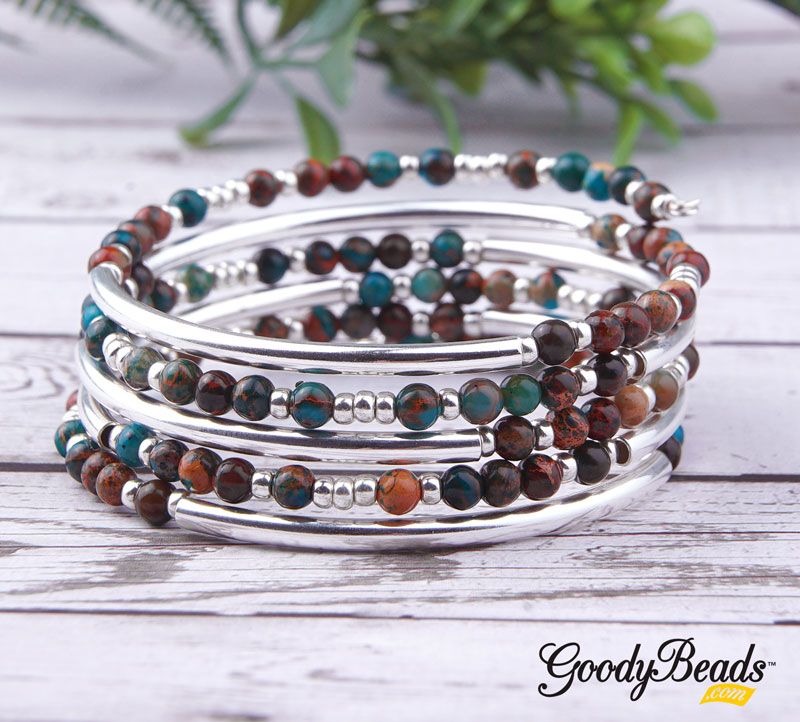
So Vang’s Teal Brown Impression Jasper Wrap Bracelet
The holidays are upon us and we’re starting off your DIY holiday gifts with So Vang’s wrap bracelet using her new favorite Teal Brown Impression Jasper beads. Wrap bracelets are easy to make and design with Beadalon Memory Wire and your favorite beads! Here’s what you need to design this Teal Brown Impression Jasper Wrap Bracelet:
4mm Teal Brown Impression Jasper Round Bead – TBRIM4RD
Make a simple loop to memory wire end you just cut. (Option: Wrap simple loop into a coil to tighten your designs.)
DIY Satin Wrap Bracelet with Memory Wire
Talk about arm candy with this festive Satin Wrap Bracelet with memory wire, satin beads, miracle beads, Chinese crystals and gold split rings. Make it in time for the winter holidays because its got the fancy red, ivory and gold look!
Here is what you’ll need to make this wrap bracelet:
Create a simple loop at one end of the memory wire using the Memory Wire Finishing Pliers.
Slide on the following sequence of beads onto the memory wire:
3 miracle bead, two split rings, three clear Chinese crystal and two split rings. Repeat two more times. Add three miracle beads, two split rings and three clear Chinese crystal.
Three red satin beads and brass bead. Repeat 4 more times.
Three red satin beads, two split rings, three clear Chinese crystal and two split ring. Repeat 4 more times. Omit last two split rings.
Miracle bead, two split rings, miracle bead, two split rings, miracle bead, two split rings, red satin, two split rings, red satin, two split rings, red satin and two split rings. Repeat 2 more times.
End with miracle bead, two split rings, miracle bead, two split rings, miracle bead.
Trim memory wire with Memory Wire Cutter so there is a 3/8” to 1/2” tail. Create a simple loop using Memory Wire Finishing Pliers.
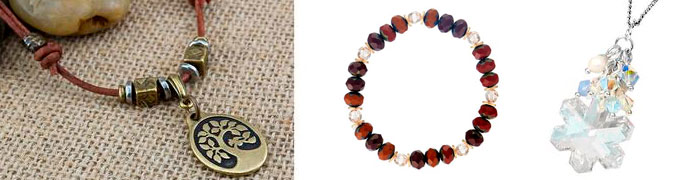
Holiday Lightbulb Snowflake Ornament with Swarovski® Crystals
We LOVE the holidays because of the bright and beautiful decorations. Are you busting out your lights and tree soon? Why not make some festive holiday snowflake ornaments to elevate your holiday design! These are designed with glass lightbulb beads and Swarovski crystals.
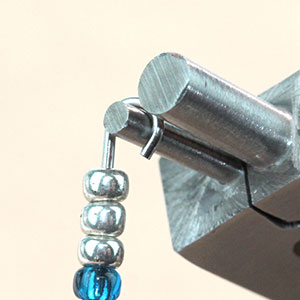
On a spoke, slide on a seed bead, an emerald bicone, red lightbulb, seed bead, crystal rondelle, seed bead & white lightbulb bead. Make a simple loop with memory finishing pliers.
Skip a spoke and on the third spoke, slide on a seed bead, clear bicone, green lightbulb, seed bead, crystal rondelle, seed bead & red lightbulb bead. Make a simple loop.
Skip a spoke and on the fifth spoke, slide on a seed bead, red bicone, white lightbulb, seed bead, crystal rondelle, seed bead & green lightbulb bead. Make a simple loop.
On the next spoke, slide on a seed bead, clear bicone, green lightbulb, seed bead, crystal rondelle, seed bead & red lightbulb bead. Make a simple loop. (This sequence should mimic the spoke across.)
On the next open spoke, slide on a seed bead, red bicone, white lightbulb, seed bead, crystal rondelle, seed bead & green lightbulb bead. Make a simple loop. (This sequence should mimic the spoke across.)
On the last open spoke, an emerald bicone, red lightbulb, seed bead, crystal rondelle, seed bead & white lightbulb bead. Make a simple loop with memory finishing pliers. (This sequence should mimic the spoke across.)
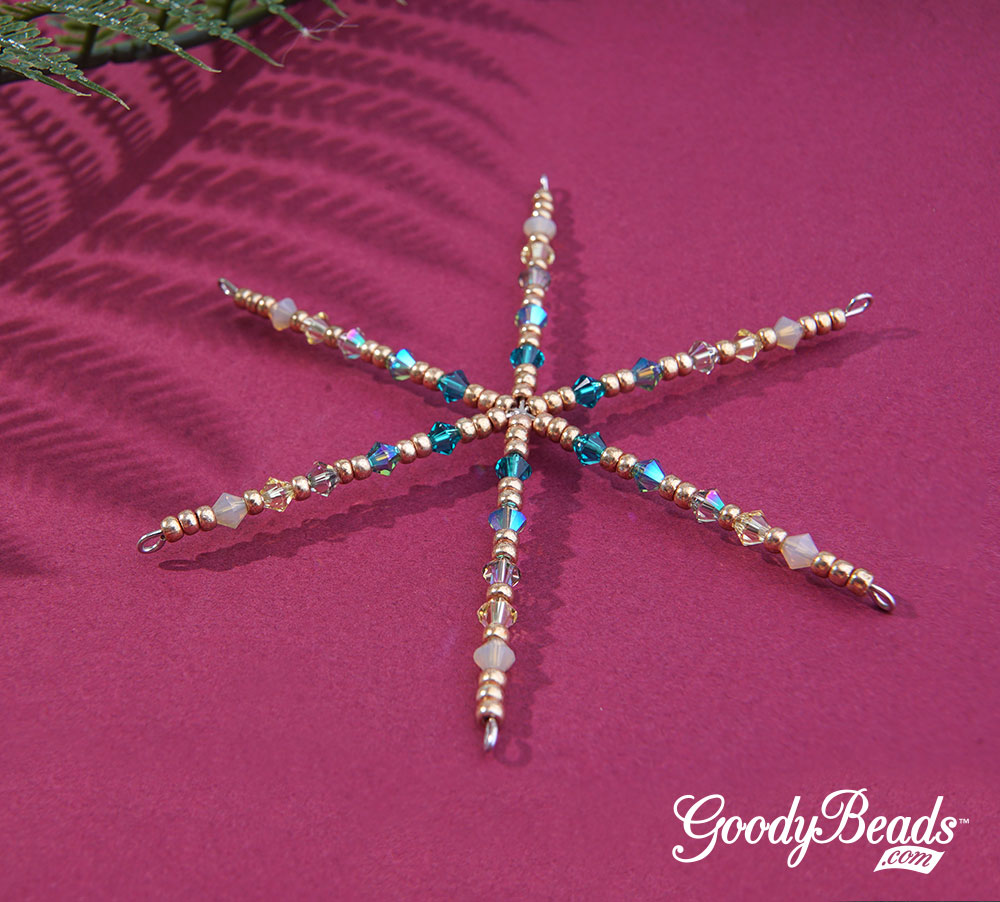
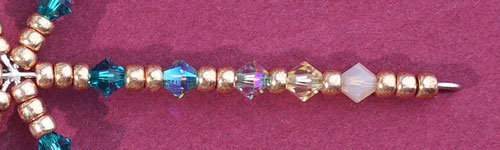
Fancy Swarovski Snowflake with GoodyBeads’ Master Mixes
Make festive and fancy Snowflake ornaments with GoodyBeads’ Master Mixes with 4mm bicone crystals in today’s tutorial.
Christmas may be a few month away, but you can never be too early to prep for the holidays. Plus, making these snowflake ornaments can be used and displayed all year round. Hang them on your window or as an outdoor mobile, you can surely get some twinkling reflections on a sunny summery day.
The FIRST thing to do is separate out your Mix. Each mix will have 5 different crystal color. Once you have your piles, create a crystal/color sequence of how your want to snowflake to look. A suggestion is to make piles of graduating colors from dark to light. You can see a closeup of how our sample looks.
On each spoke, slide on the following:
Three seed beads, 1st crystal, two seed beads, 2nd crystal, two seed beads, 3rd crystal, seed bead, 4th crystal, seed bead, 5th crystal and three seed beads.
Make a simple loop at the end of your spoke.
Skip a spoke and repeat steps 2 & 3 to that spoke.
Skip another spoke and repeat steps 2 & 3 to that spoke. (You want to fill in every other spoke so that your design will sit evenly.)
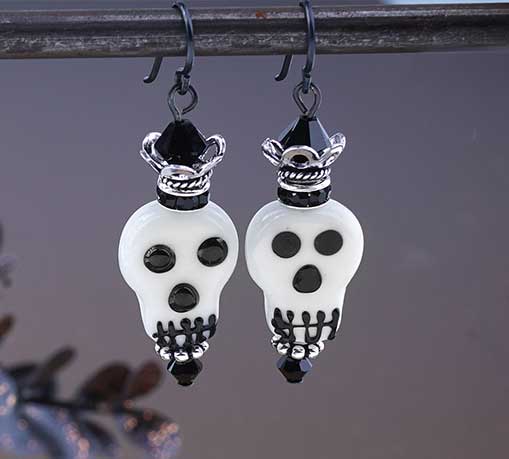
Halloween is creeping up on us soon! Inspired by a Halloween movie favorite, Nightmare Before Christmas, we have these spooky DIY earrings dedicated to the pumpkin king himself!
We dressed these lampwork skull beads with black findings, Swarovski® jet crystals, black rhinestone rondelles and shiney silver crown. Be ready for Halloween with this pair of frightening earrings.
Slide on a headpin the following and make a simple loop: 4mm bicone, heishi spacer, skull bead, rhinestone rondelle, bead cap (concave up) and 6mm bicone.
Open loop of earwire and slide on skull dangle. Close loop.
Repeat for other earring.
Gift Ideas for Dad
Celebrate fathers everywhere with gifts he can proudly wear and still be fashionable! Check out these easy DIY gift ideas to prepare for Father’s Day.
Leather Keychain
Keychains are a smart gift to give Dad! Make it a memorable accessory that he can hang his keys from! From our Facebook Live show, we showed how easy it is to make braided leather keychains. And from a previous Father’s Day post, we did a tutorial on riveting flat leather for a simplistic keychain with a stamped dogtag charm.
Create a modern leather bracelet with round and Regaliz® leather. From our Men’s Bracelet trend, these leather bracelets will never go out of style. Leather bracelets with a touch of silver makes accessorizing with men’s fashion easily from casual denim to a neat blazer.
From rock stars to movie stars, you see more men wearing stretch bracelets everywhere. We especially love a bracelet of all Gemstones like these dark Sardonyx or mix it up some gemstones with silver spacers or beads. Check our Easy Elastic Bracelet Tutorial to learn how to make a stretch bracelet with a surgeon’s knot. Or use the Elastic Cord Needle and watch how Beadalon® finishes off their stretch bracelet in this Vendor Video Post.
Don’t have a gift for Mother’s Day? We have 4 last-minute gift ideas for the deserving mother and women.
Whether it’s your Mom, sister, Aunt, Grandmother, wife or other beautiful women in your lives, a small gift can show your appreciation. If it’s handmade, that’s extra bonus points! Plan with handmade jewelry made with Swarovski Pearls, customized glass tiles with photos, easy-to-make beadable gifts or select the many DIY kits available.
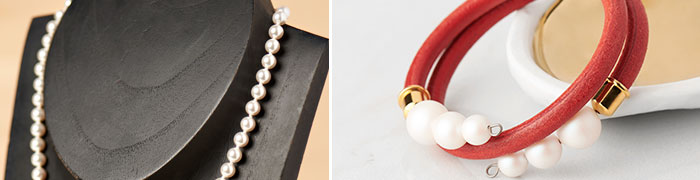
Pearls
It’s been a tradition to gift pearls for mothers, so why not on Mother’s Day. While it embodies purity and love, it’s the kind of jewelry that reflects the elegance of a woman. Here are different ways to use Swarovski Pearls.
Wire-wrap pearls to make linked earrings or a waterfall necklace (Wire-Wrap Loop and June Birthstone Trend). Or make cascading earrings with Swarovski pearls and crystals in this stunning lampwork glass earrings (Wedding Jewelry Trend).
Customized Glass Tiles
One project you can get kids involved in making are customized glass tiles with photos. Check out our previous blog how to make customized glass tile for a fun keychain dangle, ring or add a magnet to stick on the fridge.
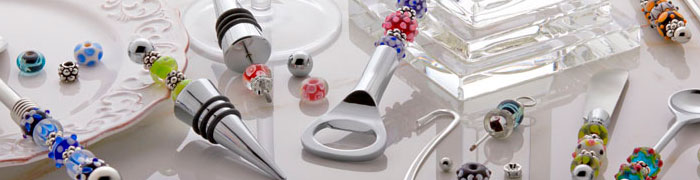
Bead pens are perfect for moms to slip into their handbag or on their work desk. They are sturdy in weight and customizable with beads. Check out Hot Category: Bead Pens for compatible bead pens and large-hole beads to create one today.
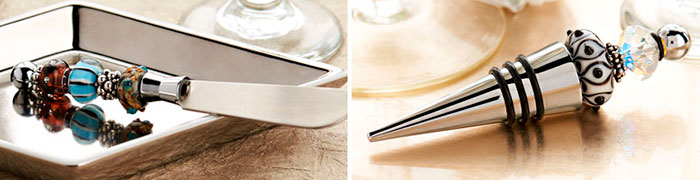
Don’t forget that moms will also love beadable gifts like a letter opener, winestopper or even a beadable keychain. Add large-hole beads and wrap it up for an acceptable gift!
If you can’t decide what to make, pick up a DIY kit. Make jewelry with an easy Earring, Bracelet or Necklace Kit and gift it. These kits are packaged with bead, findings and instructions, so you can even stick on a bow and gift the whole kit for the crafty, beading lady!
Bead pens are a sentimental and personable gift the gift-receiver will love and use forever. We have a few holiday-inspired bead pens that you can make and gift this holiday season.
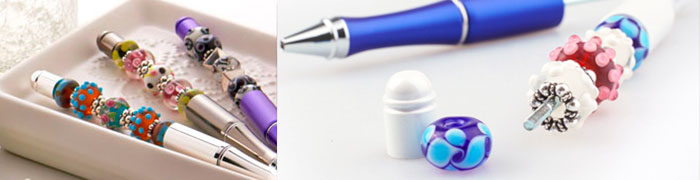
Lampwork Tube Bead Pen
We took this gorgeous lampwork tube bead (Z007050) and reamed the hole with a bead reamer (A002370) wide enough to slide onto the mandrel of the bead pen. Then added some beads around to accent this focal lampwork bead.
Another different addition to bead pens are beaded beads. We dug up some old beaded beads and accented this gold bead pen with it’s hint of blues, golds and whites. We added some TierraCast spacers, white lampwork beads and a fancy, shiny silver bead to the middle.
Beaded bead made with MiniDuos, size 10/0 Czech Round Beads, SuperDuos and Beading thread.
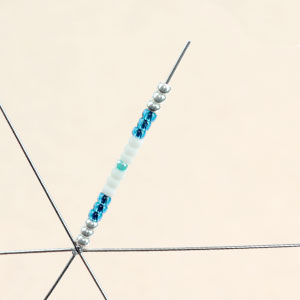
Wire Snowflake Ornament Forms and Tutorial
The holidays are coming up and we’ve got a fun tutorial with tips and tricks to creating snowflake ornaments with wire snowflake ornament forms.
Wire Snowflake Ornament Forms
The Wire Snowflake forms comes in FOUR different sizes. Depending on the amount of beads you want on each peg will determine which ornament form to buy.
Tools are important when completing your ornament. Because the snowflake form has thicker gauge wire, it is best to cut the wire with a Memory Wire Cutter (FTTL0005). You will create a simple loop at the tip of your pegs, for this you can use round nose pliers and roll a loop. However, we love to use the Memory Wire Finishing Pliers (TLZ0207), which creates less stress on looping the pegs. And Serrated Pliers (A001682) to close your loops because it helps grip the peg wires without slipping.
Tutorial
Step One: Slide beads onto a peg. Keep a 1/4″ peg end. Cut with memory wire cutters, if neccessary.
Step Two: Use your round nose pliers or memory wire finishing pliers to roll a simple loop as close as you can.
Step Three: Use a serrated nose pliers and squeeze the loop together.
Step Four: Squeezed loop.
Step Five: Fill the rest of your ornament by skipping one peg and repeat steps 1-3. Skip another peg and repeat until you’ve completed your ornament.
Inspirational Ornaments
Here are some inspiring ornaments you can create with lampwork beads, Swarovski® crystals, Chinese crystals, bead caps and more!
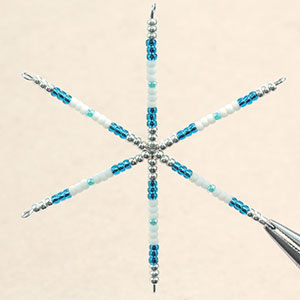
Each peg consists of: seed bead, bicone crystal, bead cap, lampwork, bead cap, bicone crystal and seed bead. Open jump ring, slide through one peg loop, through loop of tassel and close jump ring. Open another jump ring, slide on peg loop opposite of previous peg loop, through an ornament hook and close loop.
This is a different color version like the purple and white snowflake from above. Repeat the same steps for this blue and white ornament.
New GoodyBeads Valentine’s Day Kits – 2017
You’ll soon feel the love in the air because Valentine’s Day is coming. Our GoodyBeads Designers have new Valentine’s Day DIY kits to bling out your lovely look.
These kits include all the beads and findings, along with simple step-by-step instructions. They are also easy to make and give away as gifts.
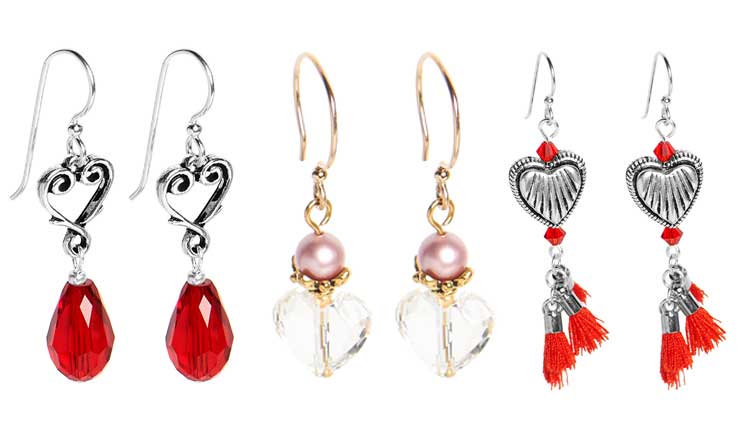
Eat your heart out with a box of chocolates and a beautiful selection of heart earrings.