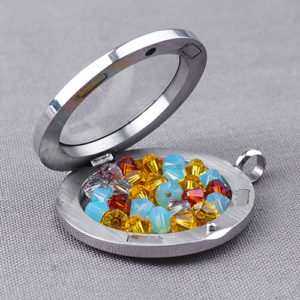
Check out this easy DIY Locket project using 4mm Swarovski crystals and glass locket.
We here at GoodyBeads LOVE a good simple DIY jewelry piece. We believe DIY jewelry can be fun and easy for an advance jeweler and one who aspires to learn. This DIY locket is an easy DIY that anyone can do in mere seconds or minutes.
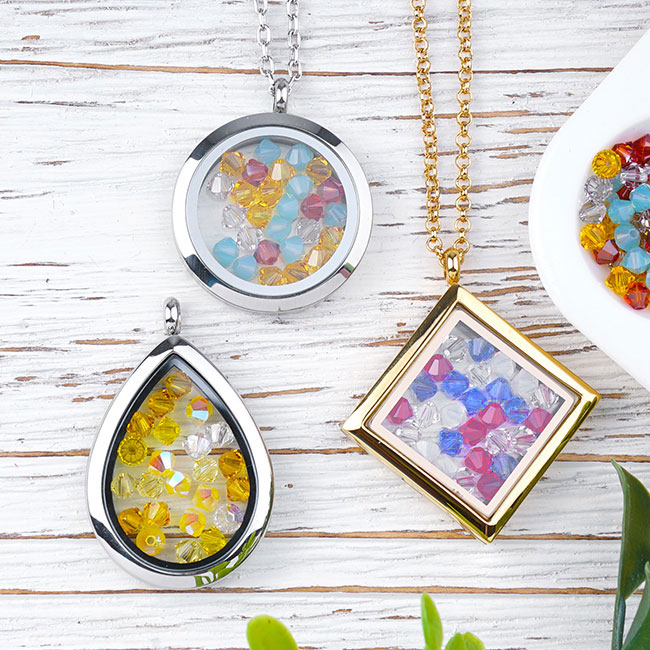
For our projects, we are using GoodyBeads Master Mixes which are predesigned by our Designers with an assortment of colors. You can surely make your own assortment of choose one color of your choice.
DIY Tutorial
Step One: Collect your materials.
Step Two: Open locket and add your crystals in the locket.
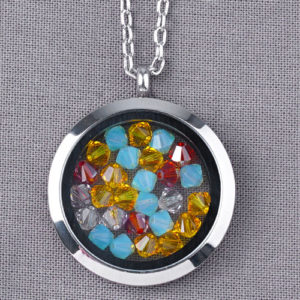
Step Three: Close locket. Open chain clasp and slide chain through bail. Attach clasp and you’re done!
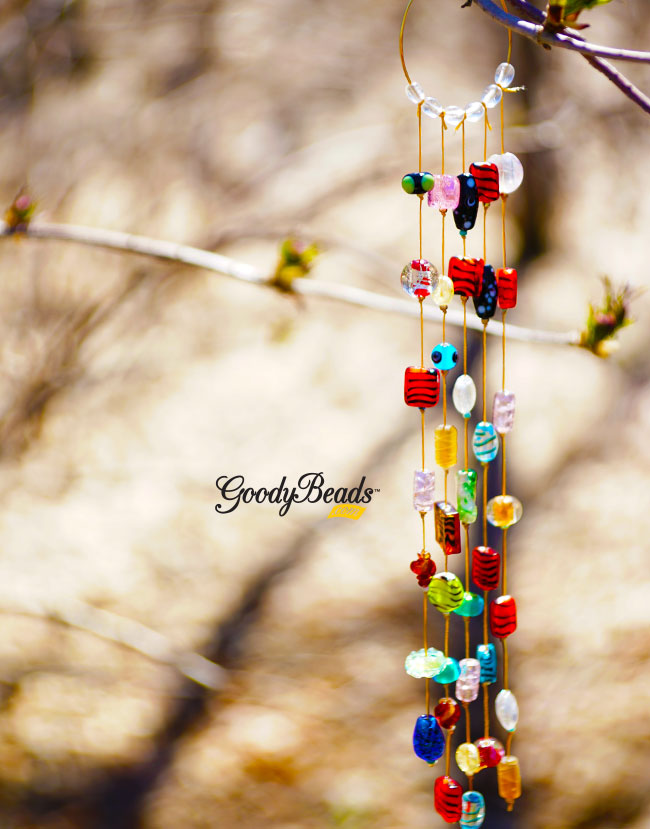
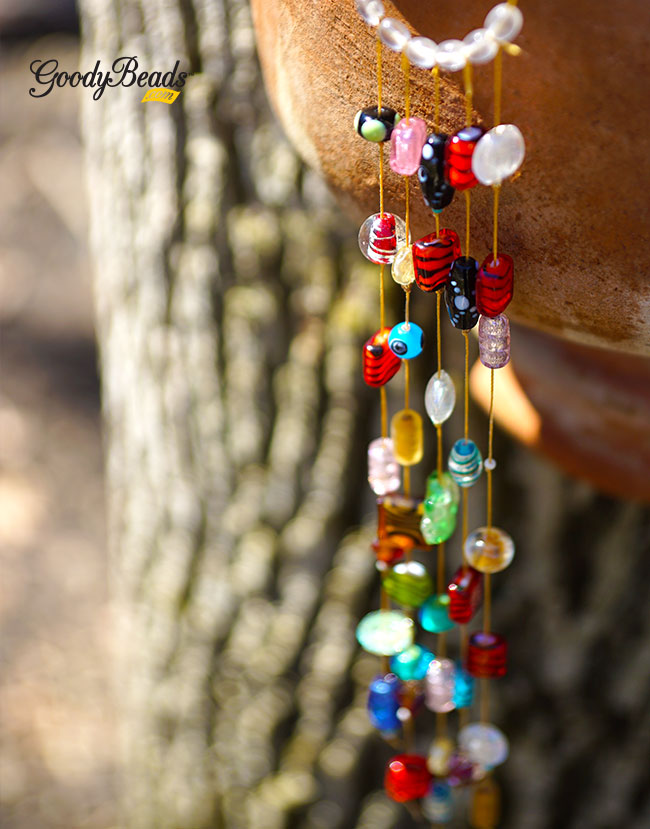
To celebrate Spring, we have a cute Sun Catcher tutorial you can make with glass beads, crystals, metal beads or all your leftover beads.
A fun way to using leftover beads is by making a Sun Catcher. A Sun Catchers is a mobile that you hang by a window. It is said that sun catchers are a good way to deter birds flying into your windows. For our project, we used our glass bead mix: Z010800 but you can feel free to use metal beads, Chinese crystals, Swarovski crystals or other various products you have. I am guilty of stashing beads and having leftover beads, so using them in this project is great!
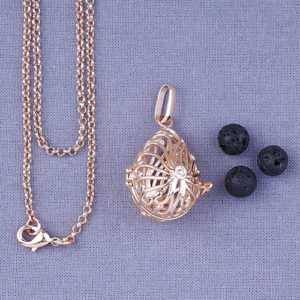
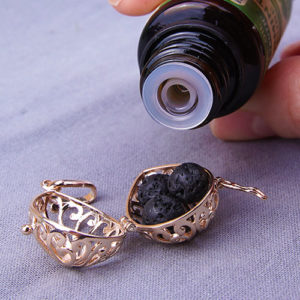
Check out this easy tutorial for making your own DIY Diffuser Necklace with lava beads.
Essential oils are a rapid trend that is used in aromatherapy. “Scientists think they work by sending chemical messages to parts of the brain that affect mood and emotion. Although these scents alone won’t take all your stress away, the aroma may help you relax.” (WebMD) Check out our previous post on some popular essential oil scents and its healing properties.
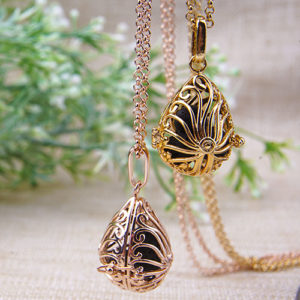
Many users of essential oils just rub it on their skin, but you could design DIY jewelry with lava beads for a fashionable statement. Learn how to make your own diffuser pendant necklace with scented lava beads in this easy DIY tutorial.
What you’ll need for DIY Diffuser Necklace:
Diffuser Pendant Drop Shape (Gold Y003674/ Rose Gold Y003675)
OR Round Shape (Gold Y003673)
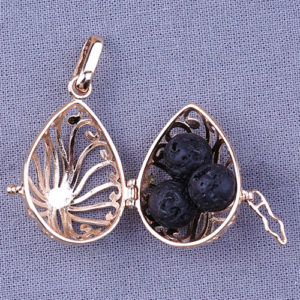
Step Three: Place THREE 8mm lava beads in the pendant. If using the round pendant, add THREE 6mm or TWO 8mm lava beads.
Step Four: Add drops of essential oils. Allow lava beads absorb the oils and let it air-dry.
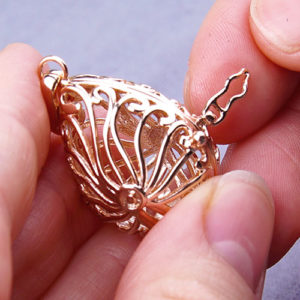
Step Five: Close pendant and snap latch back on. Slide necklace chain through bail of diffuser pendant.
Step Six: Wear with Style!
Sizzix Framelits And Embossing – Video Tutorial
Get your Sizzix Big Shot out and learn how to use Framelits Die and Embossing in this video segment with Candie Cooper and Tory Vezina!
Today’s blog post will feature Sizzix Framelits and Embossing Folders. Use Framelits to cut fun shapes to display your earrings or even use it for your scrapbooking needs. And use Embossing Folders to add a 3D texture to paper, fabric or even thin copper/metal pieces.
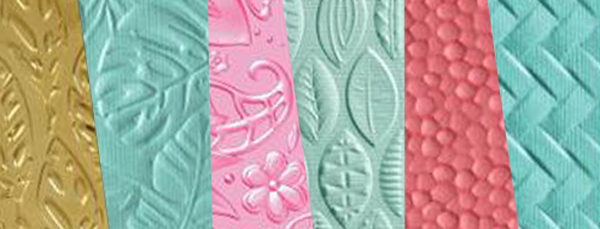
Embossing Folders
The first important rule when using Embossing Folders with the Sizzix Big Shot is the Extended Platform (SZ00053).
You will need the Extended Platform, which is included with Sizzix Big Shot Machine; to place your Embossing folder on to run it through the Sizzix Big Shot, instead of using the Movers and Shaper platform you would usually use to place your Dies on. There will be a visual on the Platform on how to use it with your Big Shot.
The Process to running the Embossing Folder through your Big Shot is to place the Extended Platform down, put your paper or thin piece of metal inside your Embossing Folder, put the Embossing folder on the Extended Platform and place the Cutting Pad on top. Run the whole thing through the machine and you will get a textured piece of paper or thin metal!
Make sure to check out these fun Embossing Folders to creating your own designs:
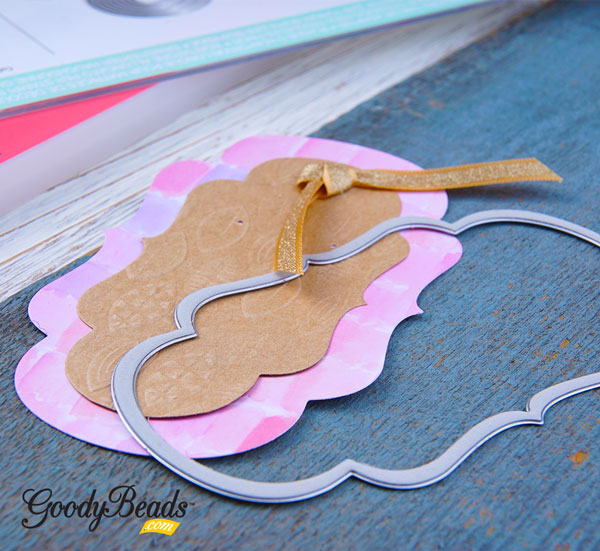
Framelits are dies with intricate and detailed designs best used with paper, fabric or thin pieces of metal or copper. Do not use Framelits with thick pieces of leather.
The process in running the Framelit Dies through the Big Shot is to place the Extended Platform down, then place the Extended Thin Die Adapter on top, followed by a Cutting Pad, Framelit with the form side facing up, your piece of paper and another Cutting Pad. Run all parts through the Big Shot for an intricate cut out piece of paper!
Video Tutorial
Candie and Tory will show you how easy it is using the Framelits Dies and Embossing Folders in this video tutorial!
DIY Lava Bracelets and Essential Oils
Lava bead jewelry is all the rage, whilst combining them with essential oils. Learn about basic essential oil healing properties and create an easy DIY lava bracelets using lava beads from Dakota Stones.
Essential Oils Healing Properties
The aromatic scent of essential oils add extra healing and therapeutic property to calm your mind and your soul. While essential oils are used in aromatherapy, it’s even trending for medicinal uses.
Here are some healing properties of 5 basic essential oils.
Lavender
Healing Properties: calming and relaxing, stress reliever
Peppermint
Healing Properties: uplifting and invigorating, energy booster
One way to use essential oils is adding a drop or two to jewelry made with lava beads. Let lava beads absorb the essential oils for a few minutes before wearing your jewelry!
DIY Lava Bracelets
An easy DIY you can make are stretchy bracelets! Pair lava beads with wood beads for a natural look. And we couldn’t resist these dyed lava beads! What we did to make this bracelet was pre-stretching a 9″ piece of elastic. String on your beads and make a surgeon’s knot. (Check out previous Stretch Bracelet blog for surgeon’s knot).
We made this bracelet using wavy disc and the popular gray lava beads. Cut a 9″ soft flex wire. Slide on 9 lava beads. Slide on 10 wavy discs by sliding one bead concave out and slide another concave in so that the two discs cup together. Repeat for the rest. Then slide on 9 more lava beads. You can add more lava beads to either sides to customize your wrist size. Slide on a crimp tube to one end and loop of your clasp. Loop flex wire back through the crimp tube and crimp your tube. Cut flex wire with a 1/4″ tail. Repeat to other end but adding a jump ring.
ImpressArt Texture Stamper Hammer – Video Tutorial
Add texture to your metal stamping jewelry with this Texture Stamper Hammer from ImpressArt. Watch this vendor video and see how simple you can add dimension to your designs!
A perk to ordering the Texture Stamper Hammer (TL00266) is that it comes with the Sprinkle Design Stamp, so you can start using this tool right away when you get it. Plus, with the twist of the handle knob, you can easily switch out different stamps for different designs! The Texture Stamper Hammer is the perfect tool for all skill levels. So start stamping right away!
Celebrate fathers everywhere with gifts he can proudly wear and still be fashionable! Check out these easy DIY gift ideas to prepare for Father’s Day.
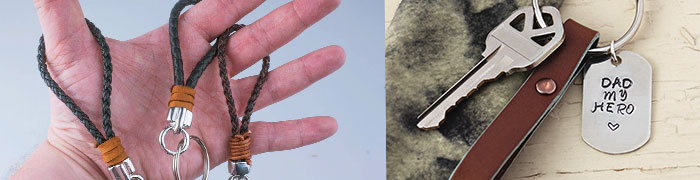
Leather Keychain
Keychains are a smart gift to give Dad! Make it a memorable accessory that he can hang his keys from! From our Facebook Live show, we showed how easy it is to make braided leather keychains. And from a previous Father’s Day post, we did a tutorial on riveting flat leather for a simplistic keychain with a stamped dogtag charm.
Create a modern leather bracelet with round and Regaliz® leather. From our Men’s Bracelet trend, these leather bracelets will never go out of style. Leather bracelets with a touch of silver makes accessorizing with men’s fashion easily from casual denim to a neat blazer.
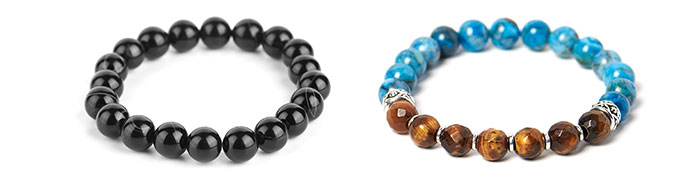
From rock stars to movie stars, you see more men wearing stretch bracelets everywhere. We especially love a bracelet of all Gemstones like these dark Sardonyx or mix it up some gemstones with silver spacers or beads. Check our Easy Elastic Bracelet Tutorial to learn how to make a stretch bracelet with a surgeon’s knot. Or use the Elastic Cord Needle and watch how Beadalon® finishes off their stretch bracelet in this Vendor Video Post.
How easy can beading get! Especially using these Beadalon Instant Pendants. Watch this video and see how easy it is to make a pendant.
Make your way to our Beadable Gifts and snag some of these Instant Pendants. The mandrel of the pendant is 1.5mm thick and 33mm long. They are perfect to dangle a large heavy bead like our array of large porcelain, large-hole gemstones, lampwork, etc. Or layer it with multiple beads and spacers!
There are two styles; one with a ball tip and the other is a cone tip. They come in silver or gold finish. AND you get THREE with each package. So many combinations to think of!
Don’t have a gift for Mother’s Day? We have 4 last-minute gift ideas for the deserving mother and women.
Whether it’s your Mom, sister, Aunt, Grandmother, wife or other beautiful women in your lives, a small gift can show your appreciation. If it’s handmade, that’s extra bonus points! Plan with handmade jewelry made with Swarovski Pearls, customized glass tiles with photos, easy-to-make beadable gifts or select the many DIY kits available.
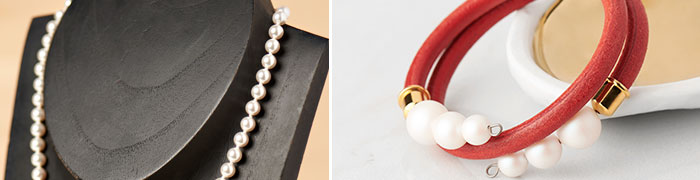
Pearls
It’s been a tradition to gift pearls for mothers, so why not on Mother’s Day. While it embodies purity and love, it’s the kind of jewelry that reflects the elegance of a woman. Here are different ways to use Swarovski Pearls.
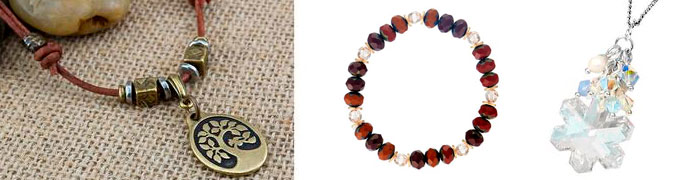
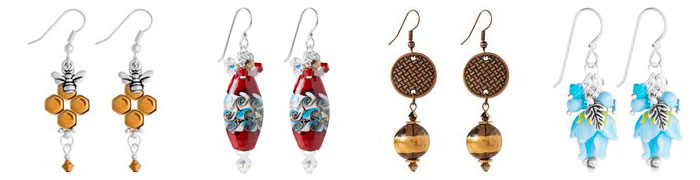
Wire-wrap pearls to make linked earrings or a waterfall necklace (Wire-Wrap Loop and June Birthstone Trend). Or make cascading earrings with Swarovski pearls and crystals in this stunning lampwork glass earrings (Wedding Jewelry Trend).
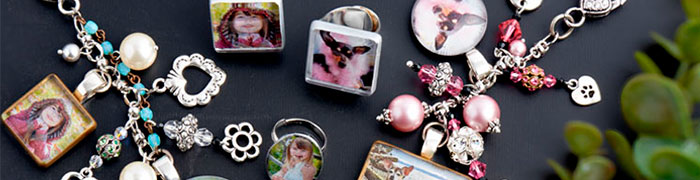
Customized Glass Tiles
One project you can get kids involved in making are customized glass tiles with photos. Check out our previous blog how to make customized glass tile for a fun keychain dangle, ring or add a magnet to stick on the fridge.
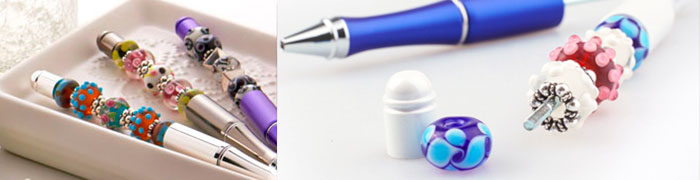
Bead pens are perfect for moms to slip into their handbag or on their work desk. They are sturdy in weight and customizable with beads. Check out Hot Category: Bead Pens for compatible bead pens and large-hole beads to create one today.
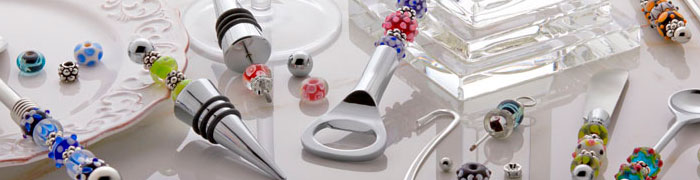
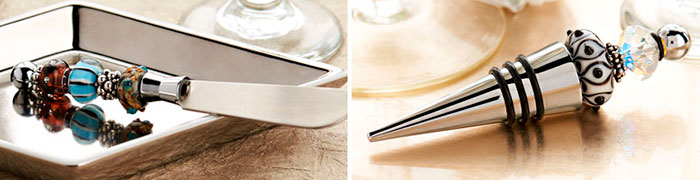
Don’t forget that moms will also love beadable gifts like a letter opener, winestopper or even a beadable keychain. Add large-hole beads and wrap it up for an acceptable gift!
If you can’t decide what to make, pick up a DIY kit. Make jewelry with an easy Earring, Bracelet or Necklace Kit and gift it. These kits are packaged with bead, findings and instructions, so you can even stick on a bow and gift the whole kit for the crafty, beading lady!
Vendor Video: ImpressArt Bracelet & Ring Bending Pliers
Brand New to GoodyBeads are the Ring Bending Pliers from ImpressArt®. Watch this instructional video from ImpressArt and learn how to create your very own DIY rings and bracelets with the Bracelet Bending Pliers and Ring Bending Pliers.
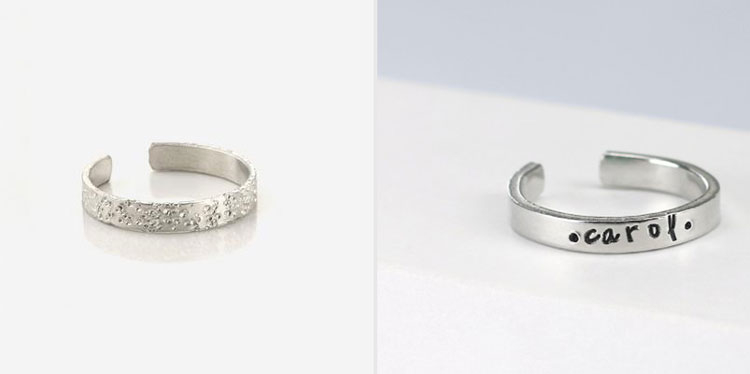
Ring Bending Pliers and Blanks
Custom-make rings by using these new Ring Bending Pliers (TL00282) from ImpressArt. Along with the pliers, all you need to make custom rings are Ring Blank and some metal stamps.
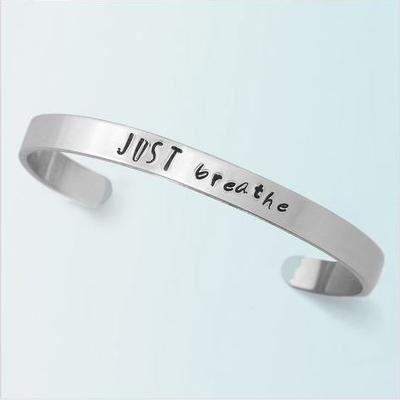
Make sure to get a pair of Nylon Bracelet Bending Pliers (Z005839) to custom-make stamped bracelets. Here are some examples of bracelet blanks and what you can make with them:
Z021577 5/8 x 6 Inches Tapered Bracelet Aluminum Stamping Blank
Z021579 7/8 x 6 Inches Tapered Bracelet Aluminum Stamping Blank
Z018033 Mini 1/4 x 6 Inch Aluminum Stamping Bracelet Blanks
Other Bracelet Blanks:
A021496 3/8×6 Inch Bracelet Strip Soft Strike Aluminum Stamping Blank
A021497 5/8×6 Inch Bracelet Strip Soft Strike Aluminum Stamping Blank
Z005837 1/4×6 Inch Rectangle Copper Stamping Blank
A021460 1/4×6 Inch Rectangle Nickel Silver Stamping Blank
Bead pens are a sentimental and personable gift the gift-receiver will love and use forever. We have a few holiday-inspired bead pens that you can make and gift this holiday season.
Lampwork Tube Bead Pen
We took this gorgeous lampwork tube bead (Z007050) and reamed the hole with a bead reamer (A002370) wide enough to slide onto the mandrel of the bead pen. Then added some beads around to accent this focal lampwork bead.
Another different addition to bead pens are beaded beads. We dug up some old beaded beads and accented this gold bead pen with it’s hint of blues, golds and whites. We added some TierraCast spacers, white lampwork beads and a fancy, shiny silver bead to the middle.
Beaded bead made with MiniDuos, size 10/0 Czech Round Beads, SuperDuos and Beading thread.
Wire Snowflake Ornament Forms and Tutorial
The holidays are coming up and we’ve got a fun tutorial with tips and tricks to creating snowflake ornaments with wire snowflake ornament forms.
Wire Snowflake Ornament Forms
The Wire Snowflake forms comes in FOUR different sizes. Depending on the amount of beads you want on each peg will determine which ornament form to buy.
Tools are important when completing your ornament. Because the snowflake form has thicker gauge wire, it is best to cut the wire with a Memory Wire Cutter (FTTL0005). You will create a simple loop at the tip of your pegs, for this you can use round nose pliers and roll a loop. However, we love to use the Memory Wire Finishing Pliers (TLZ0207), which creates less stress on looping the pegs. And Serrated Pliers (A001682) to close your loops because it helps grip the peg wires without slipping.
Tutorial
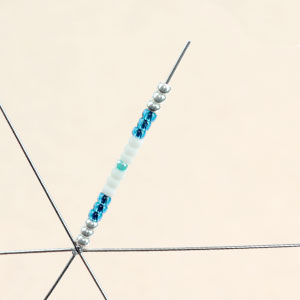
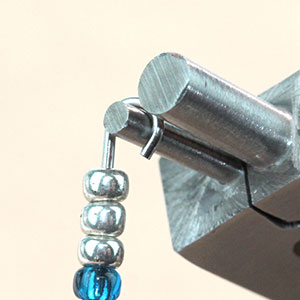
Step One: Slide beads onto a peg. Keep a 1/4″ peg end. Cut with memory wire cutters, if neccessary.
Step Two: Use your round nose pliers or memory wire finishing pliers to roll a simple loop as close as you can.
Step Three: Use a serrated nose pliers and squeeze the loop together.
Step Four: Squeezed loop.
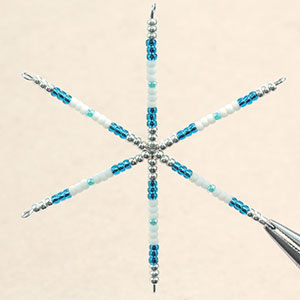
Step Five: Fill the rest of your ornament by skipping one peg and repeat steps 1-3. Skip another peg and repeat until you’ve completed your ornament.
Inspirational Ornaments
Here are some inspiring ornaments you can create with lampwork beads, Swarovski® crystals, Chinese crystals, bead caps and more!
Each peg consists of: seed bead, bicone crystal, bead cap, lampwork, bead cap, bicone crystal and seed bead. Open jump ring, slide through one peg loop, through loop of tassel and close jump ring. Open another jump ring, slide on peg loop opposite of previous peg loop, through an ornament hook and close loop.