How to Make a Leather and Memory Wire Bracelet – Video Tutorial

Learn how make our popular leather and memory wire bracelets in our video tutorial and watch as we teach you how to finish your memory wire bracelet with the nifty Memory Wire Finishing Pliers.

Leather and Memory Wire Components

Here are items you need in order to make your leather and memory wire bracelet.
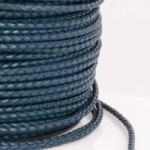
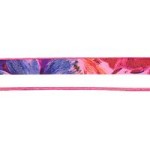
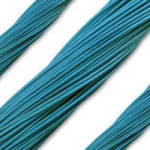
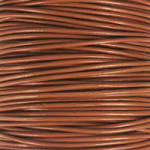
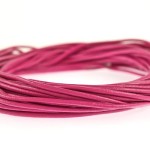
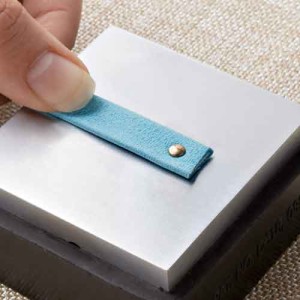
Round Leather

Round Leather is the star of your bracelet. We carry 5mm and 6mm round leather cord, which will need to have a hollow core or hole inside the leather. The hollow core helps the memory wire go through the leather. Make sure when selecting your leather cord to read the descriptions, as not all round leather cords have a hollow core or hole. All leather cord is sold in inches, so order according to the amount of inches you will need for your project.

Another type of cord you can use are Regaliz® Licorice Leather with Hole as seen in our Leather & Swarovski Trend. They are thicker in size with flatten sides.

You can also use Hollow Rubber Cord. These are 3mm in diameter and sold in foot increments. Make sure they say “hollow” in the description for memory wire.
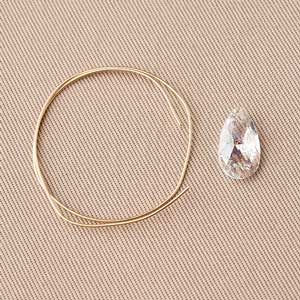
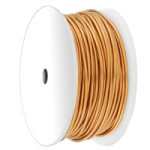
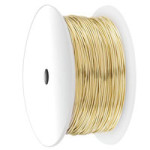
Memory Wire

Memory Wire is the skeleton of your bracelet. Make sure the wire you are selecting is round as we also carry flat memory wire and that “Memory Wire” in the description and/or name.
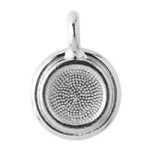
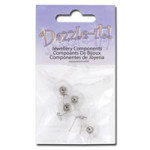
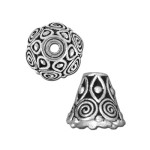
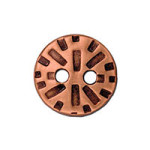
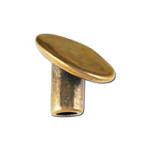
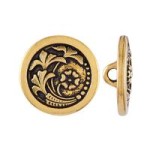
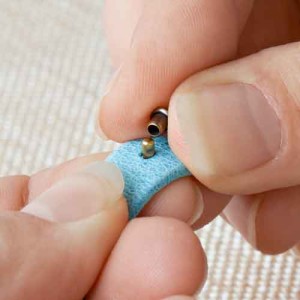
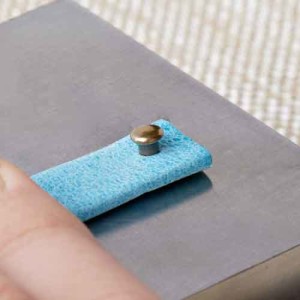
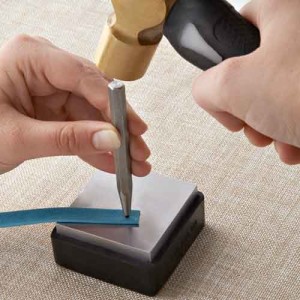
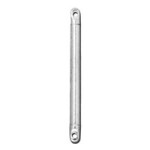
End Caps

End caps will be used to cap the ends of your leather cord. They make your leather ends look cleaner and finished. When looking for end caps, you can find them in Findings: Clasps & End Caps, TierraCast Findings, or search “End Caps.” PLUS, read the descriptions to determine their inside diameter/opening. This will help to accommodate the round leather size you choose to order.
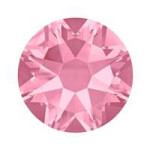
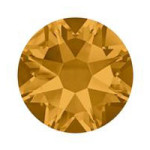
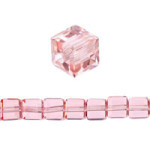
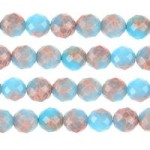
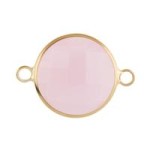
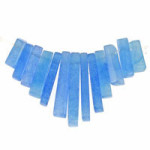
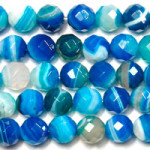
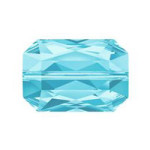
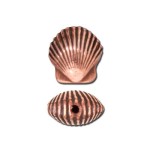
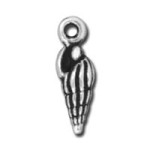
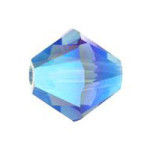
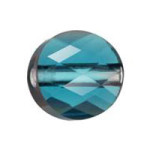
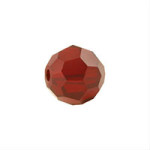
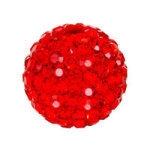
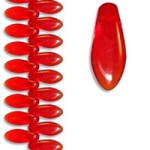
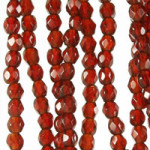
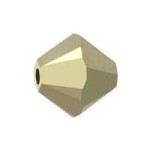
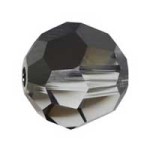
Beads

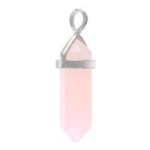
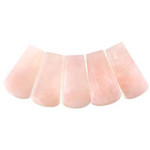
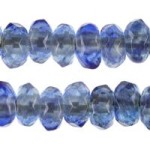
Lastly, add these beads to your bracelet: glass beads, Swarovski crystals, gemstones, wood and any type of beads that will slide easily through the memory wire. Don’t forget some accent beads like bead caps, metal beads and seed beads.

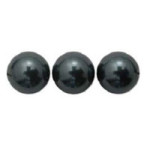
Some beads we would not recommend are large-hole beads like interchangeable large-holes or large-hole gemstones because their holes are large and may wiggle around on the memory wire. Some tubes will not work because their shape will not curve along with the memory wire. Pearl beads can be tricky because some will have holes to small for the memory wire.

Tools

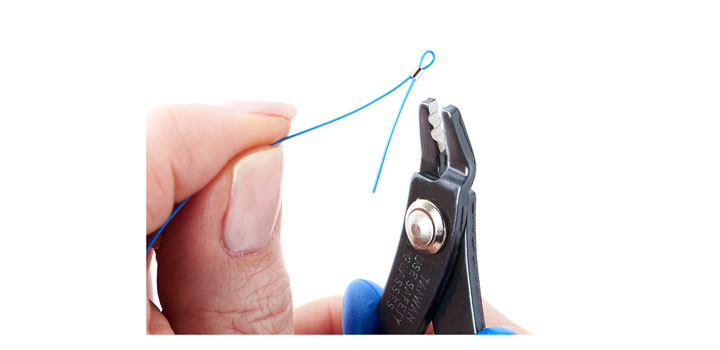
The best tool to cut your memory wire is the Memory Wire Cutter (TL00206). This cutter is meant to cut through heavy-duty wire like memory wire or thicker gauge wires.

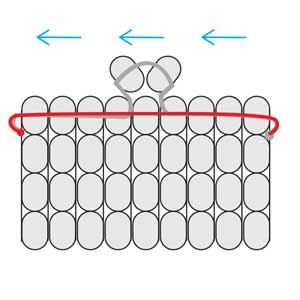
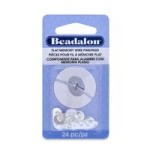
One of your best friends in making your bracelet is the Memory Wire Finishing Pliers (TLZ0207). It’s a sturdy round plier used to loop your wires. It has two mandrel sides to create a consistent 2mm or 4mm loop. This tool will make it easier for your hands to making a loop compared to your round-nose pliers.
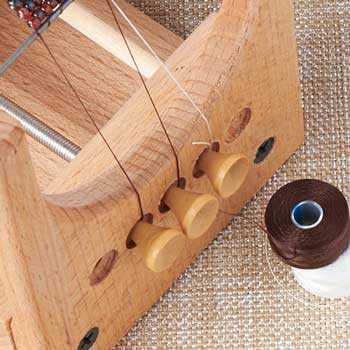
Video Tutorial

Watch our facebook live spin-off video below to learn how to add leather cord and end caps to memory wire and how to loop with the Memory Wire Finishing Pliers.

Items used: WR00121, CH00924 (3″), TC01854, SW00171, SW00180, SW00182, A022201, A022205

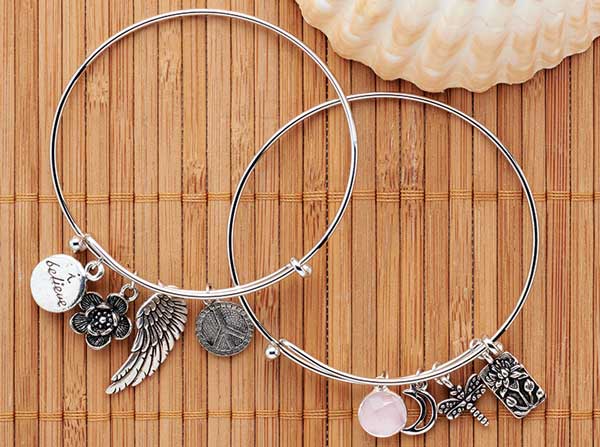
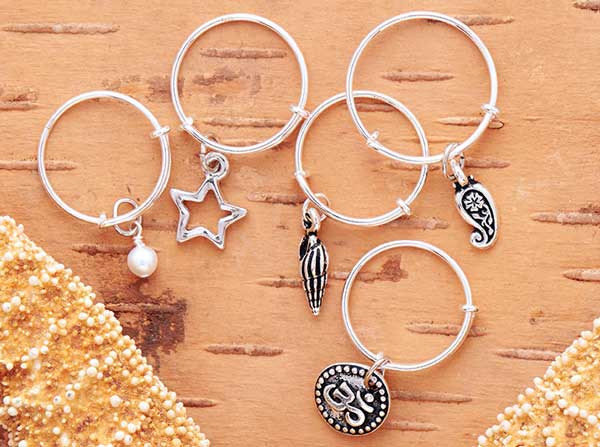
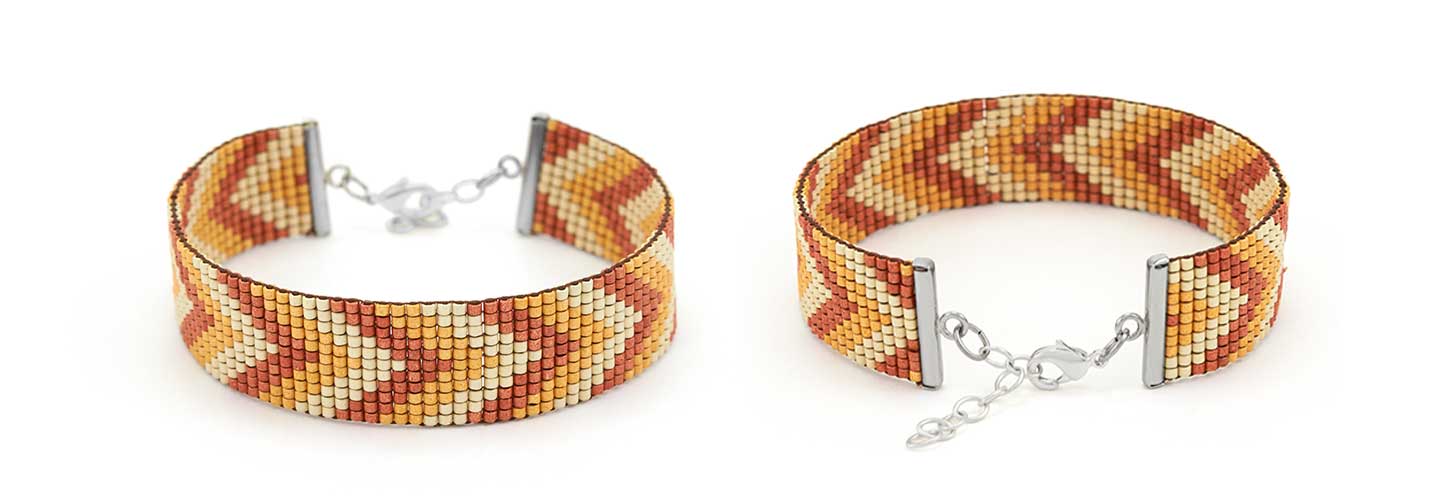
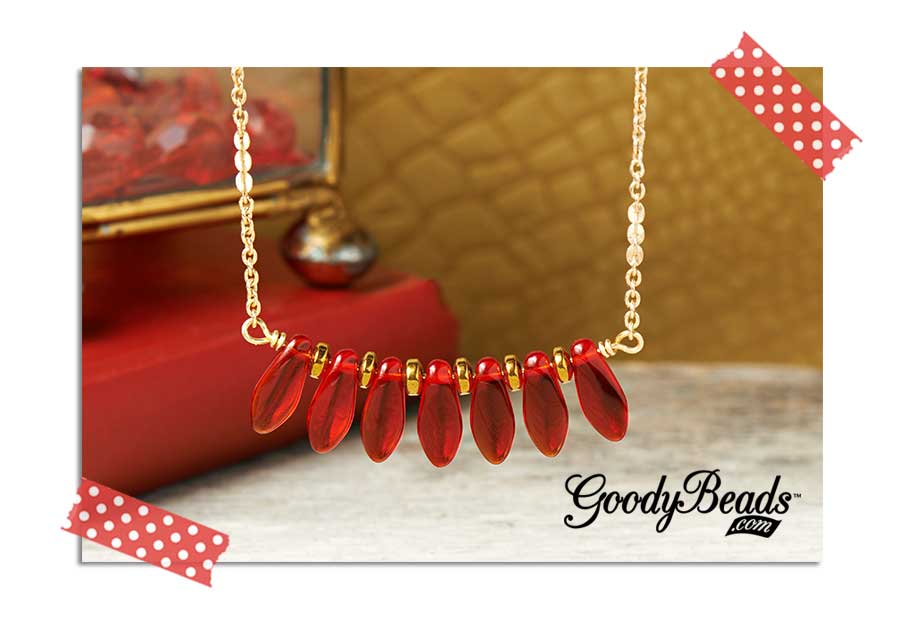
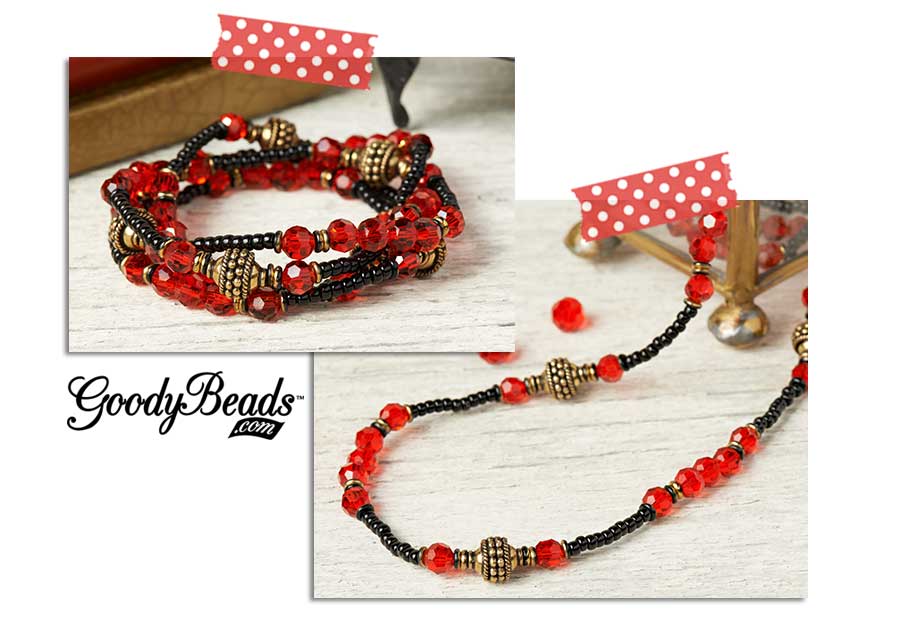
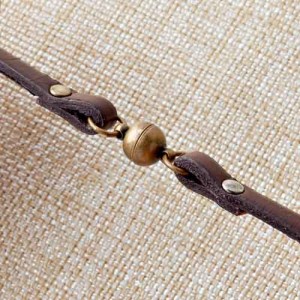
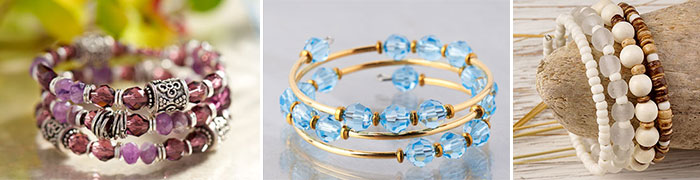
Memory Wire Bracelet Examples

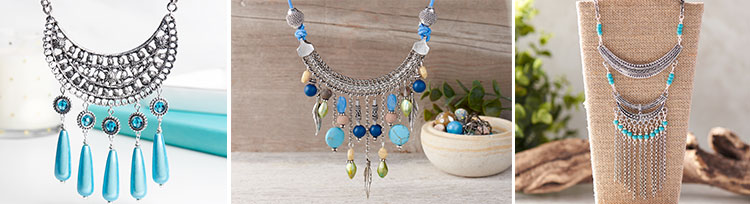
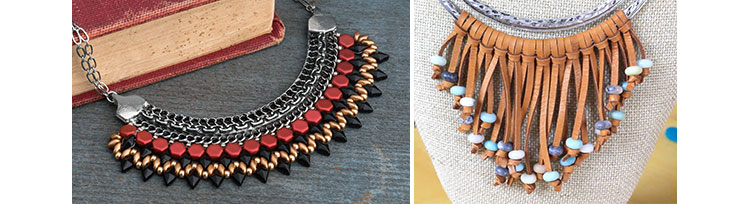
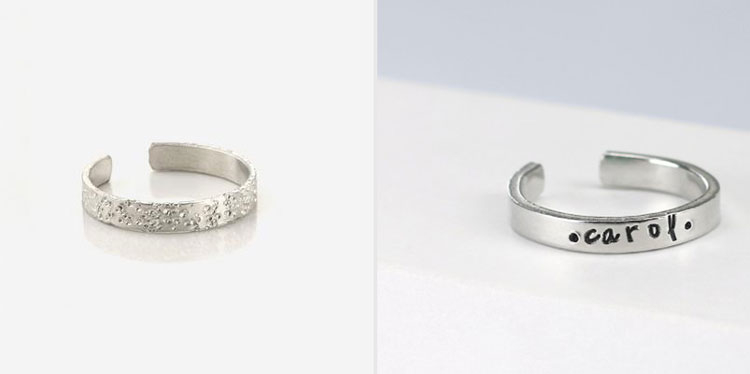
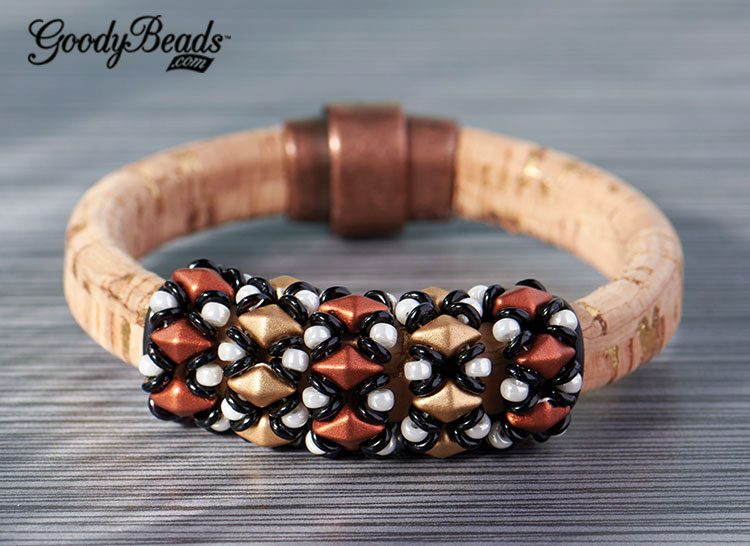
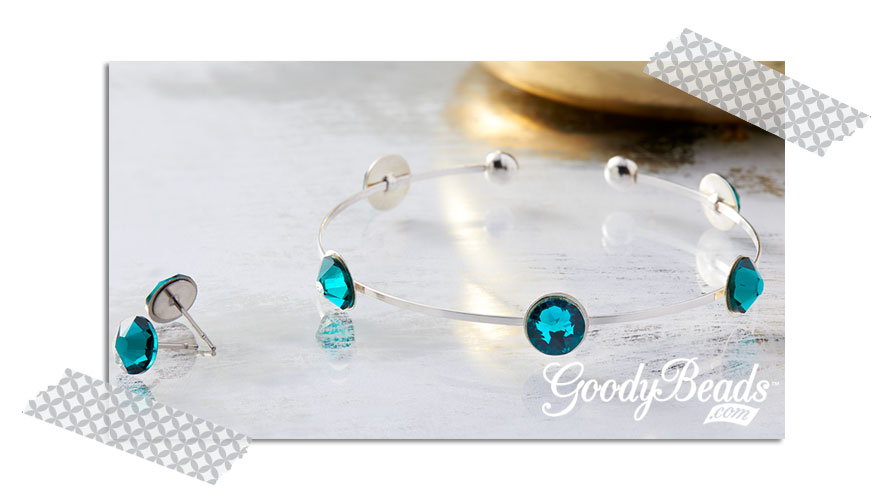
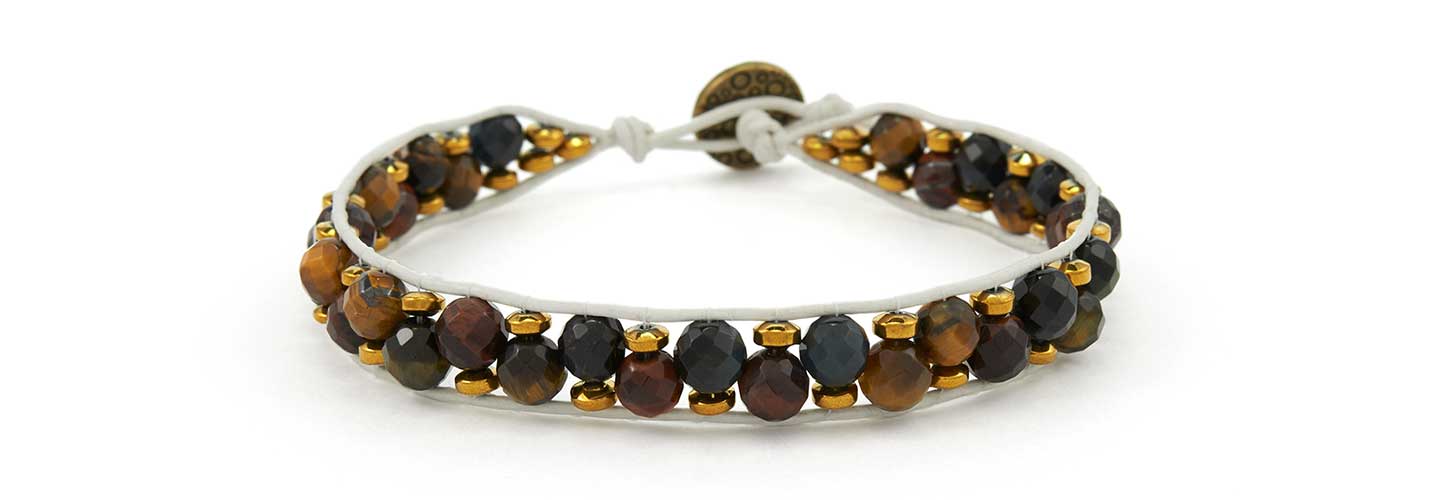
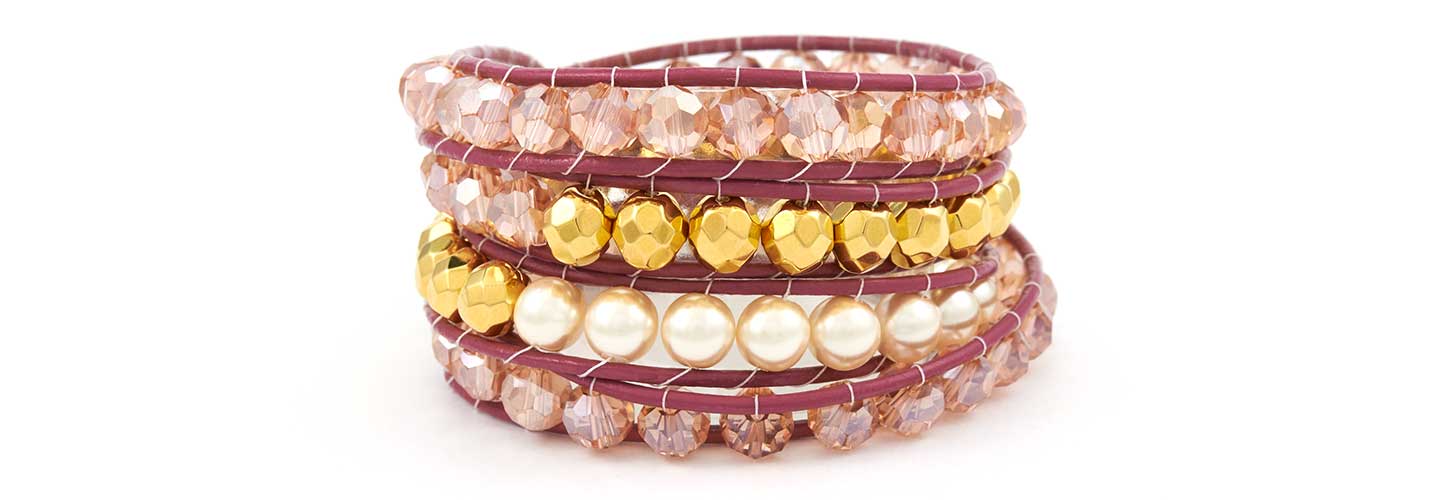
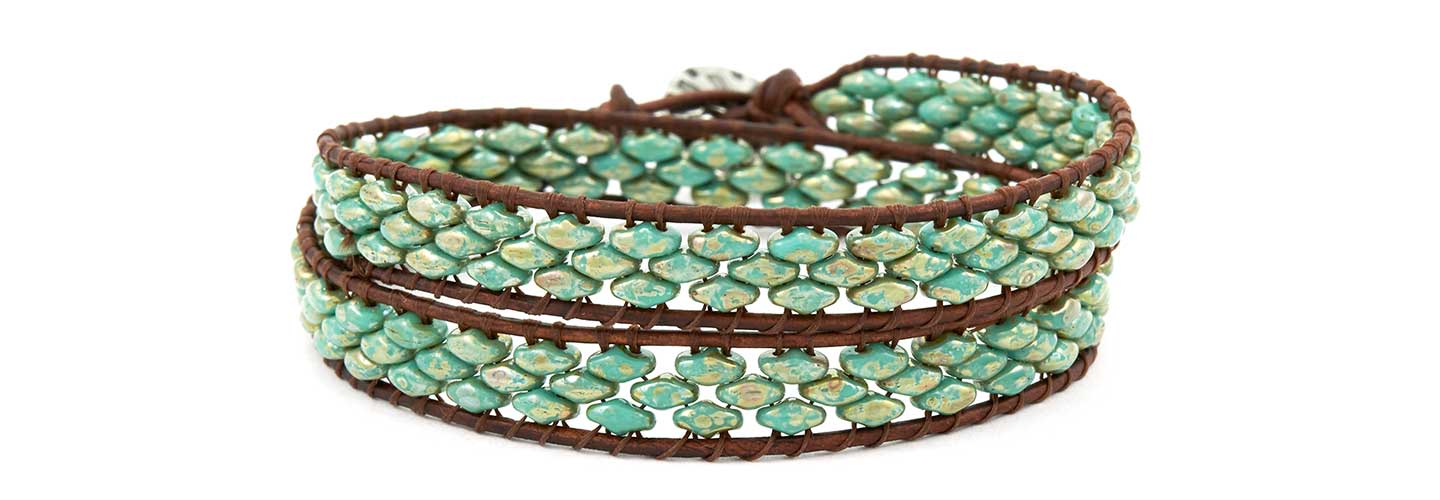
You don’t have to only use leather cords. Here are some fun examples we used with leather and/or beads.

MemoryWire_1

(Leather & Swarovski Wrap Bracelets, Cork Cord and Wood Beads, Round Leather and Wire Bracelets)

MemoryWire_2

(Flamingo and Palm Tree Blog, Summer Wrap Bracelets, Memory Wire Leather Wrap Blog)

MemoryWire_3

(Fall Gemstone Trend, Turquoise Czech Glass Beads)

MemoryWire_4

(February Birthstone, March Birthstone, Naturally Coastal)


Bib Connectors with Candie Cooper

We’re in love with bib connectors at GoodyBeads. So is Candie Cooper! Watch our product video where Tory and Candie will show you bib connectors available at GoodyBeads and how easy it is to add beads, charms, tassels and more for a fun and easy necklace.


Our bib connectors are lightweight with detailed designs. They have holes to easily add charms or tassels to with a jump ring. Watch the video below where Candie and Tory will show you the many kinds of bib connectors you can find on GoodyBeads, sample necklaces using bib connectors and they demonstrate how easy it is to add embellishments to them.

bib_Connectors

Bib Connector Video


Other Examples

Here are other examples using bib connectors.

bib_samples02

(1. December Birthstone Trend 2. Jesse James Trend 3. Boho-Inspired Bib)

bib_samples01

(1. Tribal-Inspired Bib 2. Deerskin Leather Trend)


Vendor Video: ImpressArt Bracelet & Ring Bending Pliers

Brand New to GoodyBeads are the Ring Bending Pliers from ImpressArt®. Watch this instructional video from ImpressArt and learn how to create your very own DIY rings and bracelets with the Bracelet Bending Pliers and Ring Bending Pliers.


Ring Bending Pliers and Blanks

Custom-make rings by using these new Ring Bending Pliers (TL00282) from ImpressArt. Along with the pliers, all you need to make custom rings are Ring Blank and some metal stamps.


Ring Blanks you can get are the following:

thinring_01


Z021562_1


Z021573_1


Bracelet Bending Pliers and Blanks

Make sure to get a pair of Nylon Bracelet Bending Pliers (Z005839) to custom-make stamped bracelets. Here are some examples of bracelet blanks and what you can make with them:

  • Z021577 5/8 x 6 Inches Tapered Bracelet Aluminum Stamping Blank

Z021577_1


  • Z021579 7/8 x 6 Inches Tapered Bracelet Aluminum Stamping Blank

Z021579_1


  • Z018033 Mini 1/4 x 6 Inch Aluminum Stamping Bracelet BlanksZ018033_1

Other Bracelet Blanks:

  • A021496 3/8×6 Inch Bracelet Strip Soft Strike Aluminum Stamping Blank
  • A021497 5/8×6 Inch Bracelet Strip Soft Strike Aluminum Stamping Blank
  • Z005837 1/4×6 Inch Rectangle Copper Stamping Blank
  • A021460 1/4×6 Inch Rectangle Nickel Silver Stamping Blank
  • A020459 1/4×6 Inch Rectangle Brass Stamping Blank
  • A020461 1×6 Inch Rectangle Brass Stamping Blank
  • A020462 1×6 Inch Rectangle Copper Stamping Blank


Ring Bending Pliers Video Tutorial


Video and images by ImpressArt.


New Year’s Statement Necklaces

Glam up your New Year’s Eve party with your favorite dress, dancing shoes and statement necklace. We have a few fashion trend necklaces sure to turn heads before the ball drops!


GoodyBeads | Blog: Statement Necklace - Turquoise Isle Bib Necklace made with Miyuki Seed Beads, Czech Daggers and bib connectors.
Designed by So Vang

Make this iconic bib necklace from our Sept ’16 trend. Create this stunning necklace with our free tutorial, a bold bib connector, seed beads and Czech dagger beads.


GoodyBeads | Blog: statement necklace with suede tassel, end caps and silver-plated chain.
Designed by Heidi Urlaub

From our May ’16 Boho Fringe and Tassel Jewelry trend, these statement necklaces are made with various lengths of microfiber suede cords inserted into end caps, then attached to chain. Rock this statement piece with a sassy dress or pair of your favorite jeans


GoodyBeads | Blog: Statement Necklace with Jesse James bead collection at GoodyBeads and bib connectors, chain, feather charms and leather cord.
Designed by Tory Vezina

Tease your fun side with a statement necklace donned with Jesse James beads from our Dec ’16 trend. Create this statement necklace with the Cabin by the Lake Mix, chain, bib connectors and feather charms. Finish it up with leather cord and you can get on with the partying!


GoodyBeads | Blog: Statement Necklace with wire wrapping Swarovski Pearls strung on gold-plated chain.
Designed by So Vang

Check out this waterfall necklace from our June ‘16 Birthstone Trend. This statement necklace has Swarovski® pearls linked together by wire wrapping each dangle and attaching each dangle to the gold-plated necklace with jump rings.


GoodyBeads | Blog: Gold and Czech Fire Polished Emerald on Chain Maille Statement Necklace
Designed by So Vang

Make statement necklaces simple by draping Czech fire polish glass bead dangles across some elegant chain maille (CH00736/CH00737), like this necklace from our May ’16 Birthstone Trend.


GoodyBeads | Blog: Siam Czech glass beads and Chinese crystal makes this brass statement necklace.
Designed by So Vang

From our July ’16 Birthstone Trend, this statement necklace has the perfect hues for the festive holidays. Headpins are strung with Czech fire polish beads, through Textured Large Oval Links (CH00738/CH00739) and teardrop Chinese crystals.


GoodyBeads | Blog: Dakota Gemstone Pendants Statement Necklace
Designed by So Vang

Let these Dakota Stone Gemstone Pendants (Nov ’16 Trend) create the ultimate focal statement necklace. Simply string one of these pendants with small round beads to separate the stunning sets and add your favorite chain to complete a necklace you can wear year ‘round!


GoodyBeads | Blog: Seed beads and bugle beads makes this stunning statement necklace
Designed by Heidi Urlaub

Seed beads and bugle beads makes this stunning statement necklace from our Dec ’15 Fringe Trend. Find the tutorial to this necklace here.

–Click HERE for more DIY projects from GoodyBeads–


Beaded DiamonDuo Licorice Leather Bracelet with Tutorial

Featured in GoodyBeads July 2016 Trends, we are still loving the versatility of DiamonDuos especially when we pair them with licorice leather. Along with a FREE beaded loop tutorial, we will show you how to create DiamonDuo beaded loops and incorporate them in your licorice leather bracelets.

DiamonDuo Beaded Loop Tutorial

GoodyBeads | Diamond Duo Beaded Loops

Download our DiamonDuo Beaded Loops pattern tutorial to get started. Create different color combinations with DiamonDuos, Czech O-beads and size 8/0 Miyuki round beads. Here are some examples of how we used these DiamonDuo Beaded Loops.

Copper Lights

GoodyBeads | Blog: DiamonDuo beaded loops on Licorice Leather. FREE tutorial. Copper Lights Licorice Leather Bracelet
Designed by So Vang

Items used in bracelet: SB03334, SB03333, SB01916, SB00098, A015841 (2), A015859, Z010806, A006588, A011455, A015210

From our July 2016 trend, we featured this stunning bracelet with cork licorice leather. We made three loops with Matte Copper DiamonDuos and 2 with Matte Gold DiamonDuos. After cutting the cork licorice leather to your wrist size, slide on your beaded loops in alternating colors towards the center. We added a black rubber o-ring on both sides of the five loops to keep them in place. Glue on a clasp and let it dry for 24 hours before you wear. Crazy-neat, eh?

Golden Brights

GoodyBeads | Blog: DiamonDuo beaded loops on Licorice Leather. FREE tutorial. Golden Brights Licorice Leather Bracelet
Designed by So Vang

Items used in bracelet:SB03319, SB02035, SB00002, A012987, A016424 (2), A015606, A015314, A006587, A011455 & A015210.

Using different colors can create a different look to your licorice leather. We created our DiamonDuo beaded loops using hues of metallic golds and white.

GoodyBeads | Licorice Leather Tutorial with Super lon.

After we made five beaded loops, we cut our licorice leather to size. With some Super-lon Bead Cord (A012987), we wrapped the center section of our licorice leather with gold cord. Glue as needed on back side. Slide on a rubber ring, the 5 beaded loops and another rubber ring. ALL centered on the wrapped gold cord.  Glue on a clasp and you have this flashy bracelet.


Expandable Bracelets and Rings

What kind of summer will you have? Whether it’s on the beach, surfing, roaming an outdoor mall or lounging on your back patio, be ready with our easy project using expandable wire bracelets and adjustable rings.

Stack multiple adjustable bracelets together. Or make a cluster of rings and wear them scattered around the base of your fingers or as knuckle rings. However you style it, remember to make it about you by personalizing and customizing them with simple charms and dangles with a quick open of a jump ring.

Expandable Bracelets

GoodyBeads.com | Blog: Customize our selection of expandable bracelets with charms and dangles.
Designed by So Vang

What makes these bracelets expandable is the way you can slip them on and off any wrist size without altering the shape. You can get an antique silver finish or gold finish bracelet and complement them with gold or antique silver charms. Or mix up the colors. Create a theme or select your favorite charms. Attach charms with a jump ring and you are ready for summer fun!

Adjustable Rings

GoodyBeads.com | Blog: Customize adjustable rings with charms and dangles. Wear them at the base of your finger or wear them as knuckle rings.
Designed by So Vang

We are loving the versatility of these rings. They come in three different sizes to give you options to place them on your knuckles, thumbs or simply at the base of your fingers. We’ve added simple charms to our rings, as well as a cute pearl dangle to tie in a beachside look.

  • (2) Z003520 – Sterling Silver Adjustable Ring – Size 5-7
  • (2) Z003521 – Sterling Silver Adjustable Ring – Size 6-8
  • (1) Z003522 – Sterling Silver Adjustable Ring – Size 8-10

Boho Ring-Chain Bracelet

GoodyBeads.com | Blog: Make this boho-inspired ring-chain bracelet with our adjustable rings. Stack or layer them up for a fun-filled summer accessory.
Designed by So Vang

Of course you can use these rings to help achieve a popular ring-chain bracelet. First, we made a simple chain bracelet with a lobster clasp. Then we put the ring on and measured a loose length of our chevron chain across the back of the hand­­. To finish, we connected the chevron chain to the ring and to the middle of the chain bracelet with two linked jump rings. It’s perfect for wearing with other selections of expandable bracelets and adjustable rings for a groovy summer!

Gold Adjustable Rings

GoodyBeads | Blog: 14k Gold filled adjustable rings!

Adjustable rings now in 14k gold filled! Z005593, Z005594, Z005595.


Version 1 Expandable Bracelet:

  • (1) A021132 – Silver Plated Expandable Wire Charm Bracelet
  • (1) CHPW0020 – 17mm Believe Charm
  • (1) A005613 – 12mm Floral Pewter Charm
  • (1) TC00843 – 11mm Wing Charm
  • (1) A002209 – 12mm Peace Sign Pewter Charm
  • (4) A008799 – 5mm Silver Plated Oval Jump Ring

Version 2 Bracelet:

  • (1) A021132 – Silver Plated Expandable Wire Charm Bracelet
  • (1) TC00464 – 17mm Lotus Flower Pewter Charm
  • (1) TC00056 – 13mm Crescent Charm
  • (1) A021738 – 10mm Round Pink Faceted Glass Charm with Silver Plating
  • (1) TC00098 – 15mm Small Dragonfly Charm
  • (4) A008799 – 5mm Silver Plated Oval Jump Ring

Rings:

  • (2) Z003520 – Sterling Silver Adjustable Ring – Size 5-7
  • (2) Z003521 – Sterling Silver Adjustable Ring – Size 6-8
  • (1) Z003522 – Sterling Silver Adjustable Ring – Size 8-10
  • (1) A019636 – 1 Inch Silver Plated 24 Gauge Headpins
  • (1) SW00664 – 4mm White Swarovski Pearl
  • (1) TC00076 – 13mm Paisley Charm
  • (1) TC00093 – 10mm Aum Charm
  • (1) TC00113 – 14mm Small Spindle Shell Charm
  • (1) TC00055 – 13mm Open Star Charm
  • (5) A008799 – 5mm Silver Plated Oval Jump Ring

Boho Ring-Chain Bracelet:

  • (1) CH00800 – 6.5mm Bright Silver Chevron Chain
  • (1) A012846 – 4mm Matte Silver Cable Chain
  • (1) Z003522 – Sterling Silver Adjustable Ring – Size 8-10
  • (2) Z007856 – 3mm Silver Plated Jump Rings
  • (3) A008799 – 5mm Silver Plated Oval Jump Ring
  • (1) A011534 – 10mm Silver-Plated Lobster Clasp


How to Use Ricks Bead Loom, PLUS Two Ways to Clasp Loom Bracelets

From traditional Native American Indian-loomed wampum belts to popular and modern Julie Rofman wrap bracelets, bead looming has transcended through changes in time, culture and fashion.  A bead loom can help you make elaborate, beautiful necklaces to simplistic bracelets.

If you are new to using the bead loom or have been wanting to use a bead loom, believe us when we say that using the Ricks Bead Loom is super easy and simple. Here are some tips and tricks to using Ricks Bead Loom, as well as some inspirational loom bracelets to get you started. We also provide two different ways to clasp loom bracelets.

Ricks Bead Loom

When you purchase a Ricks Bead Loom, you receive the bead loom and its components, as well as a detailed, visual instructions of how to set up and use the bead loom. You can also check out Ricks video tutorial on his webpage on how to use his bead loom.

The basic method of bead looming is weaving a thread back and forth through rows of seed beads that are sandwiched in between vertical strands or “warp strands”. The difference between a traditional bead loom and Ricks Bead Loom is the amount of warp strands you are using. A traditional loom will have multiple warp strands going up and down along the loom, while a Ricks Bead Loom will have only one strand that wraps back and forth, up and around between the two rods. This continuous wrapping of the strands between rods will leave you with two threads at the end.

Like the instructions you will receive, first you insert your metals rods. These rods are where your vertical warp strands will lay. Adjust the wood piece/tailstock to your preferred bracelet length and start making your warp strands. The amount of warps you have is according to the amount of beads you have in a row, PLUS ONE. If you see the image below, you will see that we have eight seed beads per row and thus we need nine warp strands.

GoodyBeads.com | Blog: How to Use Rick's Bead Loom. Adding rows of seed beads to your loom.

Next, lay your card separator in between the warp strands. It is optional to use the card separator. You can use the warp separator card that comes with the kit. Here, we cut a ½ inch piece of cardstock paper to get us started.

Hook your thread end to your peg and insert it into one of the holes in the front.

GoodyBeads.com | Blog: How to Use Rick's Bead Loom.

You are ready to start your rows. The basic motion of weaving each row is by weaving behind the warp strands with your beads and string. You will then weave back into the same row of beads, but when you feed your needle through, you are gracing the top side of the warp strands.

TIP: When bringing your needle back, use the backside of your needle. Using the backside of the needle will give you a smoother glide through the beads. Be careful not to prick yourself with the sharp end when using this method. Makes you wish you had a thimble on hand, huh? I did.

The first two rows will be tricky but after that you get those two on, it will be easier.

GoodyBeads.com | Blog: How to Use Rick's Bead Loom. First 2 rows of your Bead Loom complete.

After your two rows are done, slide off the separator and pull your two rows down so it is flushed against the metal rod. Twist the peg that attaches to your thread to keep loose thread tight.

GoodyBeads.com | Blog: How to Use Rick's Bead Loom. Slide off separator card and pull your two rows down so it is flushed against the metal rod. Twist the peg that attaches to your thread to keep loose thread tight.

And you are ready to continue with your rows until you’ve reached the end.

TIP: When bringing your needle back through the row of beads, press up on the beads so that they protrude upward. Then, when you sew back through the beads, you will go over the vertical warp strands.

When you have finished your piece, unhook your threads from the pegs and sew the end threads through the rows and knot them. Cut excess thread. Slide your loomed piece off the metal bars and spread out your bead rows evenly outwards towards the ends to hide the loops of the warp strands. Then you are ready to add your clasp ends. Here are two types of loomed bracelets with instructions for adding a Miyuki Tube Finding and sewing on a bead loop to add your clasp.

Miyuki Tube Findings

GoodyBeads.com | Blog: How to Use Rick's Bead Loom. Using Miyuki Tube Finding on your loom Bracelet.

Items used in Miyuki Tube Finding Loom Bracelet: A015624 (2), SB01824, SB01826, SB01822, Z004093, A012847, A006597, A014106

For this bracelet, we used Miyuki Tube Findings, which are used particularly with Miyuki Delica Size 11 seed beads. GoodyBeads has four available sizes at 15mm, 20mm, 35mm, and 60mm, which will accommodate a certain amount of seed bead per row.

Bead Loop Clasp

GoodyBeads.com | Blog: How to Use Rick's Bead Loom. Finish your loom bracelets by making a beaded loop to add your jump ring and choice of clasp.

Items in Bead Loop Clasp Loom Bracelet: A001528, TC00452, A006599, SB01077

You can make a design like our Delica seed bead bracelet or you can use a Miyuki seed bead mix like our bracelet here. For our clasp for this bracelet, we made a loop using seed beads.


Using Swarovski® Flat Back Crystals

We just got some NEW Swarovski® flat backs crystals to play with. We love the subtle sparkle they brings to trending minimalist jewelry. Here are a few projects that use flat back crystals.

To get started, we recommend these tools to help you start BLINGING your jewelry with Swarovski flat back crystals:

  1. Adhesive: Check our Adhesive page for options. Fast-drying glue are ideal for quick placements of flat backs. When you are covering a larger area, we recommend using E-6000 as you still have time to adjust the flat backs when it has been placed. Please keep in mind when using adhesives, to make sure you are in a well-ventilated area.
  2. Pick Tools/Tweezers: Because Swarovski crystals are small, pick tools will help to accurately place your flat backs. We recommended handling them by using a BeadSmith® Magic Pick or a Crystal Kanata. Tweezers will also help with adjusting your crystals once they have been placed.

Emerald Bangle and Earring StudsGoodyBeads.com Blog | Using Swarovski Flat Back - Emerald Bangle and Studs


For this simple bangle, it consists of flat memory wire with Round Silver Flat Memory Wire Finding (A021628) with 7mm flat back crystal studs. First, cut one round of the flat memory wire with a memory wire cutter. Slide on the flat findings and hold it in place while you add your adhesive and flat back crystals. When you have finished gluing all your flat back crystals and it has dried, glue on a Flat Memory Wire End Cap to both ends of the memory wire.

For these stud earrings, we also used 7mm Swarovski crystals. Glue crystals onto Flat Post Earrings and you have simple, crystal studs to glam up your ears!


Tierra Cast® Bezel Earrings

GoodyBeads.com Blog | Using Swarovski Flat Back - Capri Earrings

TierraCast® has bezel charms that accommodate the 7mm Swarovski flat back crystals. These bezel charms are available in a selection of finishes and are perfect for showcasing the color of crystals you want to use. We used the bright rhodium bezel with a vibrant Capri Blue crystal in this pair of earrings.


Gold and Red Earrings

GoodyBeads.com Blog | Using Swarovski Flat Back - Red Gold Earrings


Flat backs are a versatile jewelry embellishment because you can adhere them to charms and even jewelry findings. For these earrings, we used 3mm flat back crystals to embellish the top two rows of these Chandelier Earrings. Adding an inch of gold chain to the bottom rows with a jump ring and you have yourself a boho-style earring.

There are endless possibilities for flat backs. Flat back are easy to use as an embellishment to charms, jewelry, and even everyday items around the house, such as your tape dispenser or thumbtacks. Add Swarovski flat back crystals to your phone case, wallet, or couture clothing! Even nail artists, uses flat backs for a 3D design. How will you use it?


Emerald Bangle

  • WR00119 – Large Silver Flat Bracelet Memory Wire
  • A021628 – Round Silver Flat Memory Wire Finding
  • SW01249 – 7mm Swarovski Emerald Flat Back

Emerald Stud

  • A015178 – Silver Plated Flat Post Earrings
  • SW01249 – 7mm Swarovski Emerald Flat Back

TierraCast Bezel Earrings

  • TC02098 – 16mm Bright Rhodium Beaded Bezel Charm
  • SW01217 – 7mm Swarovski Capri Flat Back
  • A002413 – 4mm Jump Ring

Gold and Red Earrings

  • A010238 – 35mm Cold Chandelier Earring
  • SW01266 – 3mm Swarovski Light Siam Flat Back
  • A014109 – Gold Plated French Wire Earrings
  • A011517 – 4mm Gold Plated Jump Ring
  • A008191 – 4mm Gold Plated Cable Chain Link


2016 Color of the Year Inspired Jewelry

Rose Quartz and Serenity are Pantone’s color of the year winners. And for the first time they debuted a duo-color that blurs the line of femininity and masculinity.

We will show how we used these colors to inspire our Color of the Year Jewelry.


Link Earrings

GoodyBeads.com | Blog: Color of the Year Inspired Jewelry - Link Earrings
Designed by So Vang

Made with blue foil tint beads and a hint of pink, these earrings pairs the two colors harmoniously.

Necklace

GoodyBeads.com | Blog: Color of the Year Inspired Jewelry - Rose Quartz and Serenity Necklaces
Pink Quartz Necklace Designed by Heidi Urlaub. Blue Serenity Neckalce Designed by Tory Vezina.

Rose Quartz
Draped with a shiny tassel and beaded chain, this Rose Quartz necklace is the perfect statement piece to wear this spring. Can you imagine wearing it with your sweet summer dress and suede floppy hat?

Serenity
This dream catcher necklace has the right Serenity hues for 2016. Made with handmade silk ribbon, Czech glass chip beads and feather charms, you can pair this with your trending flannel outfit and skinny jeans.


Bracelets

GoodyBeads.com | Blog: Color of the Year Inspired Jewelry - Bracelets
Designed by So Vang

Wire Wrap
This wire wrap bracelet combines a darker shade of Serenity and square pink crystals. Accented with silver bali beads, string these colors onto memory wire for a three-loop bracelet with a simple loop on each end. This fun and easy Color of the Year-inspired memory wire bracelet is ready to flaunt.

Leather cord
When it comes to transcending gender barriers, leather is best to use to create an accessory that both men and women can casually wear. Using the same darker Serenity color as in the bracelet above, we used red aventurine beads on 1mm leather cords. We cut the 1mm cords into three equal strands. Taking the three strands, crimp one end with a revolving crimp tubes. Insert a bead on your top two strands and then the next bead will be on your bottom two strands. Repeat until desired length. Cut the three strand ends straight and crimp them with another revolving crimp tube. Add your choice of clasp and it is ready to wear.

How will you wear this year’s colors of the year?


Link Earrings

  • (2) Z007149 – 30mm Antique Silver Hammered Round Pewter Link
  • (1) A008998 – Silver Base Metal French Wire Earrings
  • (2) A002413 – 4mm Silver Plated Jump Ring
  • (2) A001493 – 2 Inch Silver Plated Headpins
  • (2) A003564 – 6mm Bali Spacer
  • (2) Z014750 – 17mm Light Blue and Silver Foil Rectangle
  • (2) GS00215 – 4mm Round Rose Quartz

Rose Quartz Necklace

  • (1) GS00221 – Oval Rose Quartz
  • (1) Z007727 – 2.5 Inch Rhodium Plated Tassel
  • (1) A001529 – 6mm Silver Plated Jump Ring
  • (2) CH00004 – 4mm Silver-Plated Link Fire Polished Pink Bead Chain
  • (1) A019633 – 3 Inch Eyepin

Serenity Necklace

  • (1) A017782 – Moody Blues Hand Dyed Silk Ribbon
  • (1) Z006771 – 26mm Antique Silver Filigree Washer Pewter Link
  • (3) A019629 – 1 Inch Silver Plated Eyepin
  • (3) A020394 – Matte Blue Mix Czech Glass Chip
  • (1) TC00040 – 29mm Feather Charm
  • (2) TC00041 – 23mm Feather Charm

Wire Wrap Bracelet

  • WR00120 – Large Silver Memory Wire
  • A016464 – 6mm Faceted Cube Pink Glass
  • GS00517 – 8mm Blueberry Quartz Gemstone
  • A003563 – 6mm Bali Spacer
  • A021452 – 18mm Silver Plated Bali Ornate Oval Tube
  • A021434 – 12mm Silver Plated Bali Deep Fluted Round

Leather Bracelet

  • (1) A020113 – 1mm Red Brown Leather
  • (1) A003578 – 8mm Simple Round Toggle Clasp
  • (2) A014995 – 4mm Antique Revolving Crimp tubes
  • (2) A002413 – 4mm Jump Rings
  • (2) A021435 – 8mm Bali Fancy Fluted Rondelle
  • (6) GS00505 – 8mm Red Aventurine Gemstone Round Large Hole
  • (6) GS00517 – 8mm Blueberry Quartz Gemstone


Make a Multi-Strand Necklace with Swarovski® Tahitian Pearls

by Kristal Wick

One of the easiest “go-to” designs I have found is a multi-strand necklace or bracelet. WHAT? You say these look soooooooo difficult? Not true! Once you master the multi-strand, you’ll be hooked! I like to start by making piles of my fave components; for example, sitting in my studio on a chilly (16 degrees below zero) January day in Minnesota, I CRAVED a splash of beach so I grabbed some TierraCast® dolphins and seashells, beautiful blue Swarovski Tahitian pearls and crystals and frosted seed beads to give the piece a sea glass effect. Use three different colors of beading wire with one exposed to add an additional dimension to the necklace. It’s trendy these days to mix metals so I threw in copper components to reflect the shades of glistening sand and a bit of silver to represent the crest of the waves breaking up on shore. Whether you’re physically on a beach or visiting one in your mind, I hope this seashore delight will help you get through this long winter! Use three colors of beading wire – one color exposed – to add an additional dimension to the necklace.

Multi-Strand Blue Necklace

(1) A005473 – Soft Flex TRIOS Beading Wire – Tranquility

(10) FTCT0001 – 2mm Sterling Silver Crimp Tube Beads

(10) Z008729 – 4mm Antique Copper Plate Crimp Bead Covers

(1) TC00690 – 22mm Antique Copper Vine Hook & Eye Clasp Set by TierraCast

(1) CH00018 – 3.4mm Antique Silver Plated Double Cable Chain (Sample shown uses 2 pieces of 2’ chain)

(2) TC01253 – 2 Inch Silver 21 Gauge Eyepin by TierraCast

(2) TC00001 – 6mm Copper Oval Jump Ring by TierraCast

(2) TC00545 – 4mm Antique Copper Beaded Bead Cap by TierraCast

(2) SW00839 – Swarovski® 6mm Indicolite Round Mini Bead Style #5052

(2) TC00304 – 9mm Antique Silver Spiral Cone Bead Cap by TierraCast

Strand 1

(1) SB00367 11-9263 – Lined Light Seafoam AB Miyuki Seed Beads Tube

(1) SB01996 LDP-1F – Matte Transparent Silver Lined Crystal Long Drop Miyuki Seed Beads Tube

(6) TC00314 – 11mm Antique Silver Diamond Bead Frame by TierraCast

(6) SW00839 – Swarovski® 6mm Indicolite Round Mini Bead Style #5052

Strand 2

(10) FTCT0001 – 2mm Sterling Silver Crimp Tube Beads

(10) Z008729 – 4mm Antique Copper Plate Crimp Bead Covers

(10) TC01116 – 4mm Antique Silver Beaded Heishi Spacer by TierraCast

(10) TC00018 – 3mm Antique Silver Beaded Heishi Spacer by TierraCast

(5) SW00680 – 12mm Tahitian Swarovski Pearl

Strand 3

(1) SB00486 6-9149S – Silver Lined Capri Blue Miyuki Seed Beads Tube

(8) TC01150 – 9mm Antique Copper Small Shell Bead by TierraCast

(32) TC00632 – 4mm Antique Copper Scalloped Bead Cap by TierraCast

(16) SW00512 – Swarovski® 6mm Bicone Crystal Denim Blue AB2X Style #5328

(4) TC00001 – 6mm Copper Oval Jump Ring by TierraCast

(4) TC00066 – 16mm Antique Silver Dolphin Charm by TierraCast

(4) TC00113 – 14mm Antique Silver Small Spindle Shell Charm by TierraCast

Strand 4

(1) SB01832 DB1847F – 11/0 Matte Dark Seafoam Delica Duracoat Galvanized Seed Beads Tube

(26) SW00779 – 3mm Crystal Jade Swarovski Pearl

(1) SB00483 6-9148FR – Matte Transparent Light Blue Miyuki Seed Beads Tube

(10) TC00545 – 4mm Antique Copper Beaded Bead Cap by TierraCast

(5) SW01150 – Swarovski® Crystal 14mm Aquamarine Emerald Cut Bead – Style 5515

Strand 5

(1) SB00485 6-9148 – Transparent Aqua Miyuki Seed Beads Tube

(1) SB00041 8-9234 – Sparkle Metallic Gold Lined Crystal Miyuki Seed Beads Tube

(1) A018807 – 8mm Baby Blue Czech Faceted Rondelle Glass Beads

Multi-Strand Blue Necklace Steps

  1. Cut five 16 inch pieces of beading wire (various colors).
  2. Crimp one end of the wire leaving a small loop.
    GoodyBeads.com Blog | Follow these steps to make this Beachykeen Multi Strand Necklace designed by Kristal Wick.
  3. String the following onto strand #1:
    Three Lined Light Seafoam AB Miyuki Seed Beads
    Seven Matte Transparent Silver Lined Crystal Long Drop Miyuki Seed Beads
    Antique Silver Diamond Bead Frame
    Indicolite Round Mini Bead
    Series: 20 Matte Transparent Silver Lined Crystal Long Drop Miyuki Seed Beads
    Antique Silver Diamond Bead Frame
    Indicolite Round Mini Bead
    Repeat the series four more times and add the following:
    Seven Matte Transparent Silver Lined Crystal Long Drop Miyuki Seed Beads
    Three Lined Light Seafoam AB Miyuki Seed Beads
  4. Crimp beading wire end leaving a small loop.
  5. Add Copper Oval Jump Rings to the four dolphin charms
  6. Crimp one end of the wire leaving a small loop and string the following onto strand #2:
  7. Slide the following series onto the beading wire:
    Series: Crimp tube
    3mm Antique Silver Beaded Heishi Spacer
    4mm Antique Silver Beaded Heishi Spacer
    12mm Tahitian Swarovski Pearl
    4mm Antique Silver Beaded Heishi Spacer
    3mm Antique Silver Beaded Heishi Spacer
    Crimp tube
  8. Lay this strand down next to Strand # 1 and space the pearl series in the center of the first 20 Matte Transparent Silver Lined Crystal Long Drop Miyuki Seed Bead series and crimp on either side of the pearl series.
  9. Gently squeeze the crimp covers over the crimps.GoodyBeads.com Blog | Follow these steps to make this Beachykeen Multi Strand Necklace designed by Kristal Wick.
  10. Add the series again and crimp about an inch down the beading wire. Repeat steps 8–10 for the remaining three pearl series.
    NOTE: Before doing the final crimp on each strand, make sure they all end up the same length. Adjust the number of beads on each strand to ensure this.
  11. Crimp beading wire end leaving a small loop.
  12. Crimp one end of the wire leaving a small loop and string the following onto strand #3:
    Three Silver Lined Capri Blue Miyuki Seed Beads
    Series: Antique Copper Scalloped Bead Cap
    Bicone Crystal Denim Blue AB2X
    Antique Copper Scalloped Bead Cap
    Silver Lined Capri Blue Miyuki Seed Bead
    Antique Silver Small Spindle Shell Charm
    Silver Lined Capri Blue Miyuki Seed Bead
    Antique Copper Scalloped Bead Cap
    Bicone Crystal Denim Blue AB2X
    Antique Copper Scalloped Bead Cap
    Silver Lined Capri Blue Miyuki Seed Bead
    Antique Copper Small Shell Bead
    Silver Lined Capri Blue Miyuki Seed Bead
    Repeat the series seven more times alternating the Dolphin charms and Spindle Shell charms, then add two Silver Lined Capri Blue Miyuki Seed Beads.
  13. Crimp beading wire end leaving a small loop.
  14. Crimp one end of the wire leaving a small loop and string the following onto strand #4:
    Two Matte Transparent Light Blue Miyuki Seed Beads
    3mm Crystal Jade Swarovski Pearl
    Series: Five Matte Dark Seafoam Delica Duracoat Galvanized Seed Beads
    3mm Crystal Jade Swarovski Pearl
    Matte Transparent Light Blue Miyuki Seed Bead
    3mm Crystal Jade Swarovski Pearl
    Five Matte Dark Seafoam Delica Duracoat Galvanized Seed Beads
    3mm Crystal Jade Swarovski Pearl
    Matte Transparent Light Blue Miyuki Seed Bead
    3mm Crystal Jade Swarovski Pearl
    Five Matte Dark Seafoam Delica Duracoat Galvanized Seed Beads
    4mm Antique Copper Beaded Bead Cap by TierraCast
    Swarovski® Crystal 14mm Aquamarine Emerald Cut Bead
    4mm Antique Copper Beaded Bead Cap by TierraCast
  15. Repeat the series four more times then add the following:
    Five Matte Dark Seafoam Delica Duracoat Galvanized Seed Beads
    3mm Crystal Jade Swarovski Pearl
    Matte Transparent Light Blue Miyuki Seed Bead
    3mm Crystal Jade Swarovski Pearl
    Five Matte Dark Seafoam Delica Duracoat Galvanized Seed Beads
    3mm Crystal Jade Swarovski Pearl
    Matte Transparent Light Blue Miyuki Seed Bead
    3mm Crystal Jade Swarovski Pearl
    Five Matte Dark Seafoam Delica Duracoat Galvanized Seed Beads
    3mm Crystal Jade Swarovski Pearl
    Two Matte Transparent Light Blue Miyuki Seed Beads
  16. Crimp beading wire end leaving a small loop as in Step #2.
  17. Crimp one end of the wire leaving a small loop and string the following onto strand #5:
    Transparent Aqua Miyuki Seed Bead
    Series: 8mm Baby Blue Czech Faceted Rondelle Glass Bead
    Transparent Aqua Miyuki Seed Bead
    Sparkle Metallic Gold Lined Crystal Miyuki Seed Bead
    Transparent Aqua Miyuki Seed Bead
    Sparkle Metallic Gold Lined Crystal Miyuki Seed Bead
    Transparent Aqua Miyuki Seed Bead
  18. Repeat this series 17 more times. Add a Transparent Aqua Miyuki Seed Bead and then crimp beading wire end leaving a small loop.
  19. Open eyepin, insert one end loop of all five strands and close the eye pin. Repeat for the other necklace end.GoodyBeads.com Blog | Follow these steps to make this Beachykeen Multi Strand Necklace designed by Kristal Wick.
  20. Slide on Antique Silver Spiral Cone Bead Cap, Swarovski® 6mm Indicolite Round Mini Bead, Antique Copper Beaded Bead Cap and make a simple loop on the end. Repeat for the other necklace end.
    GoodyBeads.com Blog | Follow these steps to make this Beachykeen Multi Strand Necklace designed by Kristal Wick.
  21. Add desired chain length (the sample shown uses 2-¼”) to simple loop.
  22. Using a jump ring, add the toggle to the other end of the chain. Repeat steps 20-21 for the other necklace end.BeachykeenNecklace_04


How to Make Leather Wrap Bracelets with Illustrated Tutorial

Leather wrap bracelets is a trending favorite to spice up a boho outfit or rock out to a head-banging concert or add to a casual outing with your girlfriends. Wrap bracelets are a must-have for 2016. We will show you how to make wrap bracelets with illustrated tutorial that you can download.

They may look difficult to make, but after a few attempts, they are honestly easy to make. We will show you a tutorial on how to make these bracelets using one-hole beads and super duo beads, as well as a few tips and tricks to help you make these wrap bracelets.


The basic components you need for these bracelets are:

  1. Button findings: which will act as your clasp. Button Ends will work well, also.
  2. Leather or cotton round cord: these could range from 1mm to 2mm or larger, depending your preference and on the size of beads you are going to use. The length of cord needed for your bracelet will be determined below.
  3. Thread: you can match the thread to your leather cord to hide the look or to add color. Check out some Beading Thread options but keep in mind that you will need a thin enough thread to go through the hole of your beads twice.
  4. Beading Needle: size will be according to your thread and bead’s hole size.
  5. Adhesive: Hypo-Cement with precision tip, is a good choice to glue thread ends or any fast-drying glue will do.
  6. Beads: use your preference of beads or seed beads. Have enough if you plan to have a multi-wrap bracelet.


Determine leather length needed for a wrap bracelet

Use this method to determine the leather cord length you may need for a multi-wrap bracelet.

Take your wrist length and double the length. Multiply that by the number of wraps you want and then add 12”. That will give you an approximate cord length you will need to start your bracelet. (The extra 12” factors in the button knot, end knot(s) and bead size.)

Example:

2 wraps for an 8.5” bracelet: (8.5” x2) x 2 wraps = 34 + 12 = 46” needed.

Or

4 wraps for a 7.5” bracelet: (7.5” x2) x 4 wraps = 60 + 12 = 72” needed.

Keep in mind, these total numbers are approximate. You will want to test the wrap length while you’re making your bracelet. Having extra length is better than being short on your wrapped length goal.


Basic Leather Wrap Bracelet Tutorial

The basic weaving of the thread will be going under the leather cords and then coming over leather cords.

GoodyBeads.com | Blog: How to make a Wrap Bracelet w/ illustrated tutorial- wrap bracelet threading tutorial steps


Click HERE to View and Download an illustrated PDF tutorial on how to make these Wrap Bracelets. You can also save/download this pdf file.


Czech SuperDuo Leather Wrap Bracelet Tutorial

GoodyBeads.com | Blog: How to make a Super Duo Seed Bead and Leather Wrap Bracelet
Designed by So Vang


With Czech SuperDuo seed beads, you will be layering the bead holes to create a layer sequence. Below is a tutorial on how to make this SuperDuo wrap around bracelet.

Click HERE to View and Download the SuperDuo bead wrap bracelet PDF tutorial and to download illustrated pdf tutorial.


Example Wrap Bracelets

Here are some of our inspired wrap bracelets.

GoodyBeads.com | Blog: How to make Wrap Bracelets with Illustrated Tutorials - Single Wrap Bracelet

This is a simple one-wrap bracelet. Think about using a different thread color than your leather cord color for a mix of colors.

GoodyBeads.com | Blog: How to make Wrap Bracelets with Illustrated Tutorials - Faceted And Gold Nugget Wrap Bracelet

Use more than one bead on each layer for more embellishment options.

GoodyBeads.com | Blog: How to make Wrap Bracelets with Illustrated Tutorials - Pink and Pearl Wrap Bracelet

Make a bracelet with multiple combinations of beads to create a fun layered look.

GoodyBeads.com | Blog: How to make Wrap Bracelets with Illustrated Tutorials - Super Duo Wrap Bracelet

These SuperDuo beads look like tiny stone pebbles, don’t you think? Try a SuperDuo mix set for a colorful bracelet or create a zigzag pattern. What will you try?


Other Tips

How to add on additional thread: Tie thread to closest leather cord and glue with Hypo Cement or fast-drying glue. Cut off excess. Tie new thread to leather cord, glue knot and continue.

How to hold leather strands: An alternative to holding the leather strands, for stability when adding beads, is to clamp the button to a clipboard.

How to straighten leather cords: While you are stringing on beads, adjust previous beads with fingers to straighten out leather cords. Or when you have reached your desired bracelet length, lay the bracelet down and run your hand across your bracelet. This will help to smoothen and straighten your leather cords.

How to tighten threads/bead layers: If you find that your thread does not keep your bead(s) sandwiched in place or the bead sits loosely, sew up and under the cords and through the bead again. Over and down through the bead. Sewing through the bead twice on the leather cords will give your beads a tighter hold.

Tighten leather knots: If your leather cord knots are loosening, add a small dab of fast-drying glue or Hypo-Cement to knot(s) for tighter holds.

How to make an adjustable bracelet: Make additional knotted ends for an adjustable bracelet.

GoodyBeads.com | Blog: How to Make Wrap Bracelets - Make additional knots for an adjustable wrap bracelet.


Single Wrap Bracelet

  • (1) Z005069 – 2mm Emerald Green Leather Cord
  • TCZ0194 – 17mm Flower Button
  • A006596 – Brown Beading Thread
  • GS00490 –6mm Blue Dyed Impression Jasper
  • A018854 – Gold Eye Beading Needles


Faceted and Gold Nugget wrap bracelet

  • (1) A020532 – 1mm White Leather Cord
  • BT00038 – 12.5mm Gold Circles Button
  • A020510 – 4mm Gold Hematite Rondelle Bead
  • GS00414 – 6mm Faceted Blue, Red & Brown Tiger Eye Gemstone
  • A006587 – 6lb Crystal Fireline Thread
  • A018854 – Gold Eye Beading Needles


Pink and Pearl Wrap Bracelet

  • TC01262 – 15mm Brass Round Radiant Button
  • A016808 – 8mm Pink AB Round Chinese Crystal Glass
  • PR00284 – 8mm Preciosa Round Cream Rose Pearl
  • Z001553 – 8mm Czech Fire Polish Shiny Gold Beads
  • A019038 – 2mm Dark Pink Economy Leather Cord
  • A006587 – 6lb Crystal Fireline Thread
  • A018854 – Gold Eye Beading Needles


Arianna Caribe SuperDuo Wrap Bracelet

  • (1) A020113 – 1mm Natural Red Brown Leather Cord
  • TC01263 – 15mm Antique Pewter Round Radiant Button
  • SB02239 – Turquoise Blue Picasso Super Duo
  • A006596 – Brown Beading Thread
  • A018854 – Gold Eye Beading Needles


January Birthstone – Garnet/Siam

Happy January Birthdays! Being the first birthstone of the year, January’s garnet, also know as the “Gem of Faith,” derived its name from the Latin word Granatum or pomegranate, because it resembles a dark red fruit. While garnet is a rich red hue, it “signifies power, victory, truth, purity, faith, and protection,” (BirthstoneZodiac) as well as life, happiness and strength.

Jan Garnet Birthstone

Swarovski® defines January birthstones with garnet and siam crystals. We have four simple jewelry projects to start your new year! Wear garnet or siam this year whether it is for showcasing your birthstone color or to showcase this vibrant red color.


January Crystal Earrings

GoodyBeads.com Blog | January Birthstone: Garnet/Siam - January Crystal Earrings
Designed by So Vang

This pair of earrings is made with TierraCast® bezel charm that uses Swarovski® crystals. Simply open up your sterling silver ear wire loop and slip these glimmering charms on. Because these charms are 18mm, they are the perfect statement earrings for January 2016!


January Bangle Bracelet

GoodyBeads.com Blog | January Birthstone: Garnet/Siam - January Bangle Bracelet
Designed by So Vang

The fun thing about these expandable bracelets is that you can add any of your favorite charms. Add your garnet crystal charm and your favorite charms for this easy to do and wear popular expandable bracelet.


Red Golden Dagger Necklace

GoodyBeads.com Blog | January Birthstone: Garnet/Siam - RedGold Dagger Necklace
Designed by So Vang

For this necklace, we paired sharp red dagger Czech beads with copper/gold-tone beads. Take some 22 gauge artistic wire and make a full loop. Before you finish it with a coiled wrap, insert your gold chain. Finish your loop with a wrapped coil. Insert your beads alternating between the dagger beads and copper/gold beads. Make another wrap loop at the other end while adding another piece of your gold chain. Bend your beaded wire piece to create a slight curve. Add your lobster clasp to one end of your chain and a jump ring to the other.


2-in-1 Necklace and Bracelet

2in1-Jan-Braclet-Necklace
Designed by So Vang

We used Chinese crystal beads, brass bali beads, seed beads and Czech O beads to create this simple elastic-strung jewelry piece that doubles as a wrap around bracelet or necklace. Create this fun sequential design as long as you want for an everlasting jewelry piece you can wear year round.

Sources: Birthstone Zodiac: January Birthstone – Garnet. http://www.birthstonezodiac.com/birthstones/january-birthstone/


January Crystal Earrings

  • (2) TC02118 – 18mm Siam Crystal Charm
  • (1 pair) FTEA0003 – Sterling Silver Earrings

January Bangle Bracelet

  • (1) TC02103 – 16mm Siam Crystal Charm
  • (1) A021132 – Silver Plated expandable Bracelet
  • (1) TC01969 – 16.6mm Letter M Alphabet Charm
  • (1) TC00141 – 22mm Key Charm
  • (1) A011729 – Small Anchor Charm
  • (5) A002413 – 4mm Jump Ring

Red/Golden Dagger Necklace

  • AW00028 – 22 Gauge Natural Artistic Wire
  • (2) CH00721 – 2mm Petite Cable Chain with Soldered Links
  • (2) A011517 – 5mm Gold Plated Jump Ring
  • (1) A011537 – 10mm Gold Lobster Clasp
  • (7) A010294 – 12mm Siam Glass Dagger Bead
  • (6) A020510 – 4mm Gold Hematite Rondelle

2-in-1 Necklace and Bracelet

  • (1) A002290 – .7mm Stretch Magic Elastic Cord
  • (49) A016781 – Light Siam Chinese Crystal Glass
  • (7) A004246 – Silver Brass Plated Bali Style
  • (84) SB02042 – Czech O Beads
  • (140+) SB00066 – Size 8/0 Black Miyuki Seed Bead


Using Cold Connection in Jewelry: How to Rivet Leather

Cold connection is a unique metal technique that connects metal components without the use of heat. While you can connect metal pieces by glue or other adhesive, we will demonstrate some basic steps on how to use rivets with leather.

You will find many cold connection and riveting techniques in steampunk jewelry and metalworking. Once you have the basic tools and components for metal working and rivets, you will find how easy this versatile skill can be used for jewelry making.

GoodyBeads.com | Blog: How to Rivet - Leather Bracelet Rivet
Designed by So Vang

Rivet Leather (Part One)

For this project, we are using TierraCast® Rivets to show how to rivet on leather. When riveting on leather, use a two-part compression rivet, which will have a bottom and cap piece. Two-part compression rivets are best for leather, as they will create a tighter hold if you are adding embellishments with the rivets.

TwoPartRivet01

Tools Needed for Leather Riveting:
Steel Hammer, Bench Block, Leather Hole Punch Pliers, and TierraCast® Rivet Setter.

Rivet Leather (Part Two)

GoodyBeads.com | Blog: How to Rivet - Watch Rivet
Designed by So Vang

Make leather loop for jump rings, clasps, or joining components together. Create this wrap-around leather watch by using these two part compression rivets. Cut two 12” 5mm flat leather. Make leather loops on all four ends. Attach your clasps and watch face for a fun wrap-around leather watch.


Leather Bracelet

Wrap-Around Leather Watch

  • (1) Z001647 – Gold Watch Face
  • (4) TC01450 – 4mm Brass Rivet
  • (1) A019947 – Antique Brass Magnetic Clasp
  • (2) Z011513 – 5mm Brass Jump Ring
  • (24) CH00043 – 5mm Tan/Black Flat Leather


Resolution Bracelet – Metal Stamping

As the clock starts ticking down the hours, minutes and seconds to finish off 2015 and chime into 2016, did you make any last minute New Year’s resolution? Making New Year’s resolutions are easy but the hardest part is the commitment. Resolution bracelets are the perfect accessory companions to help you stick to your 2016 plans. Here are some inspiring resolution bracelets that we’ve made showcasing metal stamping. Check out our previous blog post on how to get started with metal stamping, to learn how to make this popular personalized jewelry.


Quoted Stamped Bangle

GoodyBeads.com Blog | Resolution Braceletes - Metal Stamping: Quoted Stamped Bangle
Designed by So Vang

Quotes are words of encouragement. We have quoted Ghandi on this bangle with, “The future depends on what you do today.” What is your favorite quote?

To make this bangle, start out with a Z005837 copper stamping blank. Take some Sanding Sponges like TL00154 and sand down the edges and corners of the stamping blank. Once you have smoothed them down, lightly pencil your quote on the stamping blank, keep in mind the size of the letter stamps you intend to use. Space words evenly to fit the whole quote. Stamp your quote. Use a black permanent market or Stamp Enamel to fill in your letters. Wipe and shine your stamping blank with a polishing cloth. This will also help rub off the light pencil marks. Use a Bending Bar to curve your bangle and Bending Pliers to help shape the bangle.

Items Used:

  • (1) Z005837 – 1/4×6 Inch Rectangle Copper Stamping Blank
  • A010615 – Lower Case Jeanie Metal Letters Stamping Set

Picture Jasper Charm Bracelet

GoodyBeads.com Blog | Resolution Braceletes - Metal Stamping: Picture Jasper Charm Bracelet
Designed by So Vang

Picture Jasper is about peace and relaxation. It’s why we included some Picture Jasper dangle charms in this bracelet to help calm your mind and soul for 2016. We’ve also added a few Chinese crystal dangle charms for added sparkle. We’ve used metal blanks and stamped words to help encourage the mind and soul to “take chances” and “be patient,” as wells as to just “breathe,” “heal” and to “laugh more” in the New Year.

Items used:

  • (1) Z001016 – 10mm Silver Cable Chain
  • (5) A008547 – 8mm Black Diamond Rondelle Chinese Crystal
  • (7) GS00406 – 4mm Round Picture Jasper
  • (12) A001493 – 2 Inch Silver Headpins
  • (5) A019452 – ¾ Inch Pewter Stamping Blank
  • (6) A001529 – 6mm Silver Jump Ring
  • (1) Z005822 – 16mm Swivel Lobster Clasp
  • TL00191 – 3mm Upper Case Bridgette Metal Letters


Focus Wrapped Bracelet

GoodyBeads.com Blog | Resolution Braceletes - Metal Stamping: Focus Wrapped Bracelet
Designed by So Vang

We love the versatility of this wrapped bracelet. We cut a piece of our Lycra cord in half and pulled/stretched it until it curled sideways, providing a soft yet strong, stretchy bracelet base. Thread the lycra cord through both sides of the metal blank we have stamped “Focus” on. Tie it according to the example we have below and wrap around your bracelet three times for a versatile look.

GoodyBeads.com Blog | Resolution Braceletes - Metal Stamping: How to tie Lycra cord for wrap around bracelet.

This bracelet is perfect to wrap around your wrist for a morning jog to “focus” on a healthy goal. Or wear this bracelet while studying your next school exam, so you can “focus” on getting that A+! Focus on the goal and you shall succeed!

Items Used:

  • (1) A021495 – 1.375 Inch Oval Pewter Stamping Blank
  • (1) A017779 – 30mm Yellowish Paisley Italian Lycra Cord
  • TL00191 – 3mm Upper Case Bridgette Metal Letters


New Year’s Eve Swarovski® Earrings, PLUS How to Wire Wrap Briolette Beads

Who doesn’t love ringing in the New Year? You may find yourself at a rooftop party, celebrating New Year’s Eve with cheerful faces, sparkling fireworks, glittering streamers, plastic party hats, bubbly beverages, and midnight kisses! Whether you are dancing the night away or making a toast, we have the perfect earrings, made with Swarovski® crystals, to help ring in the New Year! PLUS, learn how to wire wrap Briolette Beads!


Pendulum Posh

GoodyBeads.com Blog |New Years Eve Swarovski® Earrings: Pendulum Earrings
Designed by Tory Vezina

Make these fun statement earrings with GoodyBeads.com NEW stock of Swarovski® pendulum beads. Take an eyepin and thread on the 10mm and 8mm crystal beads and make a simple loop. Attach the TierraCast® bar link to each loop. Connect the two bar links with the 6mm jump ring. Add your favorite choice of ear wires. Can’t you see yourself at a FABULOUS party wearing these FABULOUS earrings?!


Swarovski® and Rhinestone Earrings

You can’t have enough sparkle when it comes to dressing up for New Year’s. You have to sparkle as much as the flashy New Year’s ball!

GoodyBeads.com Blog |New Years Eve Swarovski® Earrings: Swarovski® Rhinestone Earrings
Designed by So Vang

We’ve given these Swarovski® an extra boost of bling with rhinestone rondelles. We made these earrings with an eyepin, 8mm round Swarovski® bead, 6mm rhinestone rondelle bead and a 4mm bicone Swarovski® crystal. Thread on beads and make a simple loop. Open the eyepin loop closest to the 4mm crystal and attach 1 inch of CH00412 – 5mm Filigree Leaves Chain. Open the other loop and attach 1 inch of CH00533 – 2.5mm Soldered Cable Chain. Attach the other end of CH00533 chain to your choice of ear wire. You are ready to rock the night away when the ball drops for 2016!


Wrapped Crystal Drop Earrings

GoodyBeads.com Blog |New Years Eve Swarovski® Earrings: Crystal Drop Earrings
Designed by So Vang

We love these pear-shaped Swarovski® earrings with patina sparkle that add a glittery shine. Paired with gold earring hooks and gold artistic wire, heads will turn to ask, “Where’d you get those?” Check out our tutorial below on how to wire wrap a briolette or top-drilled bead.


Jewelry Components List

Pendulum Posh

  • (1 pair) A012827 – Sterling Silver Filled French Wire Earrings
  • (4) TC01295 – Rhodium Bar Link
  • (1) A001529 – 6mm Jump Ring
  • (2) A019612 – 2 Inch Eyepins
  • (2) SW01205 – 10x7mm Silver Night Pendulum Bead
  • (4) SW01204 – 8×5.5mm Silver Night Pendulum Bead

Swarovski® and Rhinestone Earrings

  • (1 pair) A012827 – Sterling Silver Filled French Wire Earrings
  • (2) A019612 – 2 Inch Eyepins
  • (2) SW00039 – 8mm Round Light Colorado Topaz
  • (2) SW00204 – 4mm Bicone Light Colorado Topaz
  • (2) A004469 – 6mm Clear Rhinestone Rondelle
  • (1) CH00412 – 5mm Filigree Leaves Chain
  • (1) CH00533 – 2.5mm Cable Chain

Crystal Drop Earrings

  • (2) SW01029 – 16mm White Patina Pear Shaped Pendant
  • (1 pair) Z001082 – Gold Filled Ear Wire
  • AW00028 – 22 Gauge Natural Artistic Wire