February: DIY Project A Day

We’re kicking off the new year with another month of DIY Project a day. For the entire month of February, every day we will give you a DIY project. We will have everything from simple hoop earrings to fun bead-stitching designs. We’ll incorporate a lot of our favorites like gemstones, crystals, tassels, leather and more! Plus, as a bonus for this month, we have special guest designers to help inspire your month!

Each blog post and project will include a high quality image with a full components list and a simple, easy-to-follow directions.

Here is a calendar and list of our daily DIY projects to get you inspired!

List of Daily Projects:

  1. Garnet Gemstone Wire Wrapped Cuff
  2. Golden Goddess Earrings with Lapis Gemstones
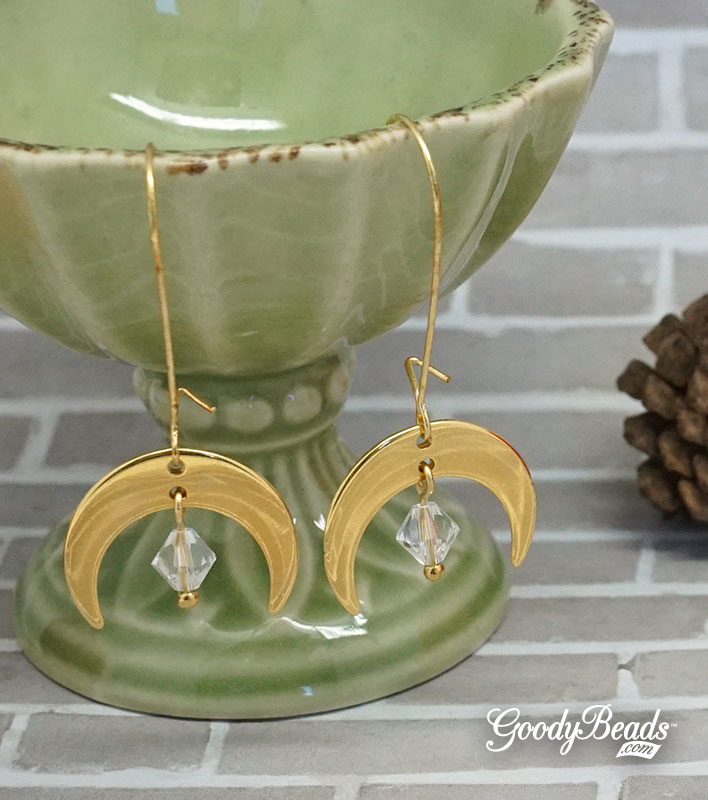
  3. Boho Babe Earrings
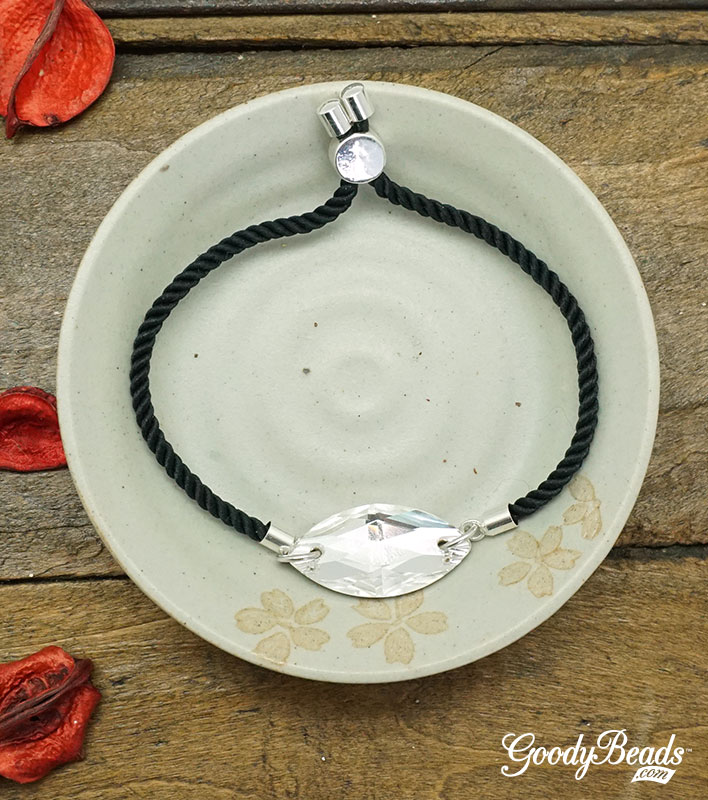
  4. White Heart-Day Leather Bracelet
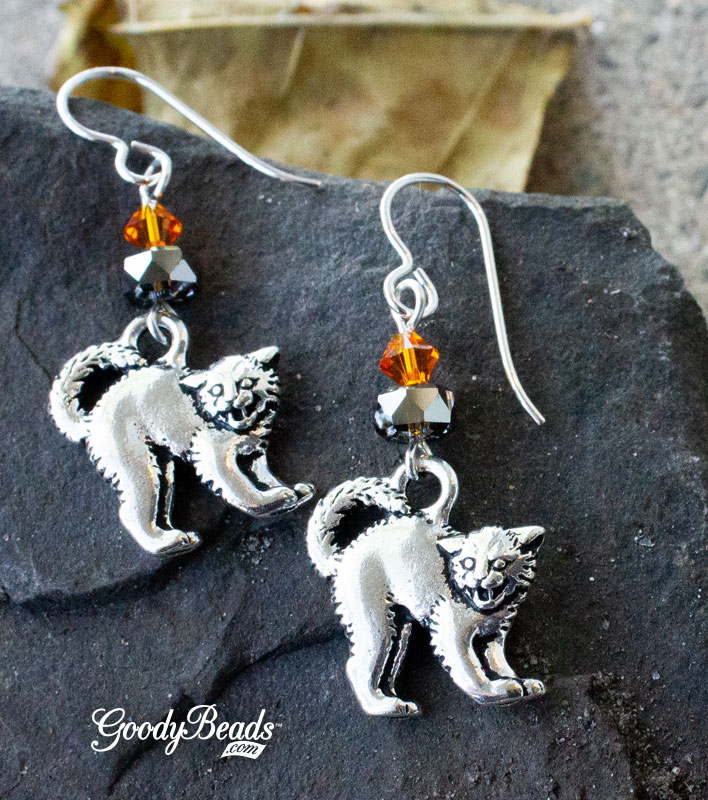
  5. FLASHBACK Friday: Skipping Heartbeat Earrings
  6. Easy Threader Earrings with Pearls
  7. Leaf Drop and Straw Necklace with Beadable Accessories
  8. Fan Tassel Hoop Earrings
  9. Purple Garnet Hoop Earrings with Mircofacet Gemstones
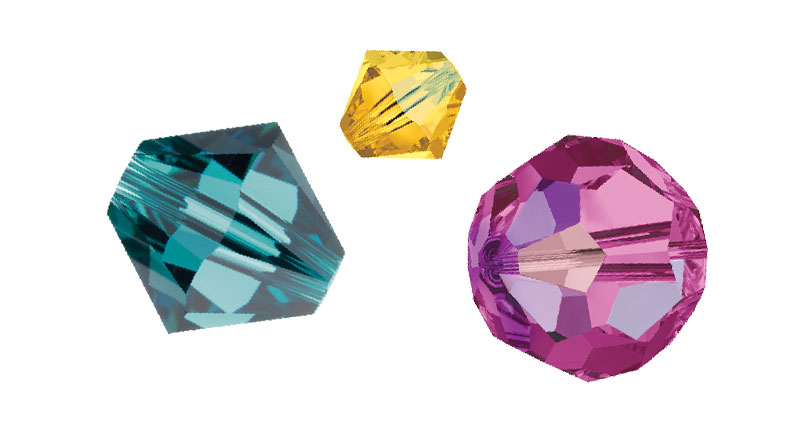
  10. Paradise Beading Necklace with Swarovski Crystals
  11. Chunky Paperclip Chain Bracelet
  12. FLASHBACK Friday: Statement Bib Necklace with Chinese Crystals
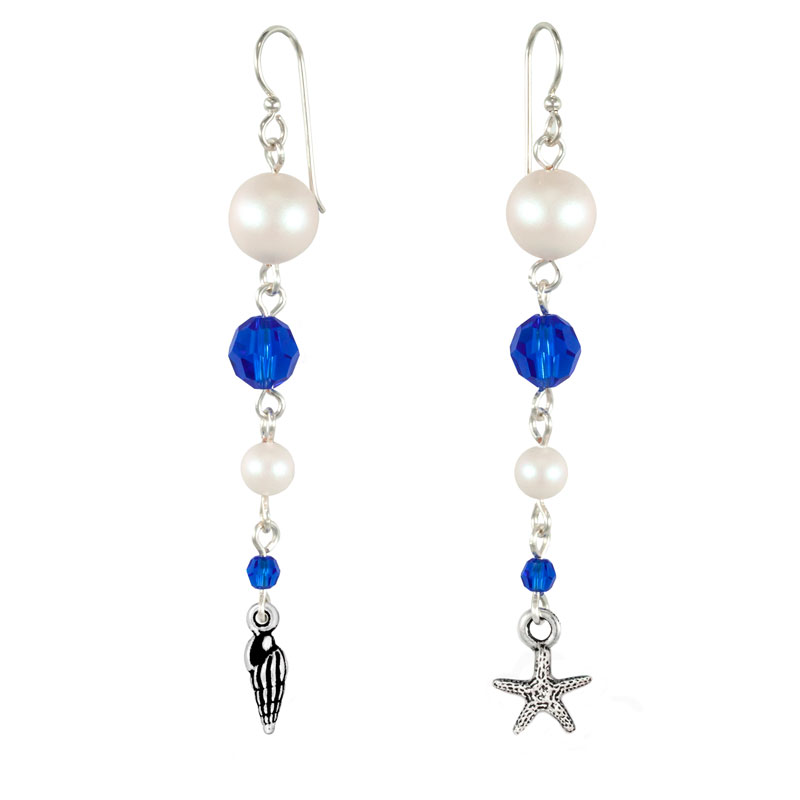
  13. Cowrie Shell Earrings
  14. Carabiner Wrap Bracelet or Necklace
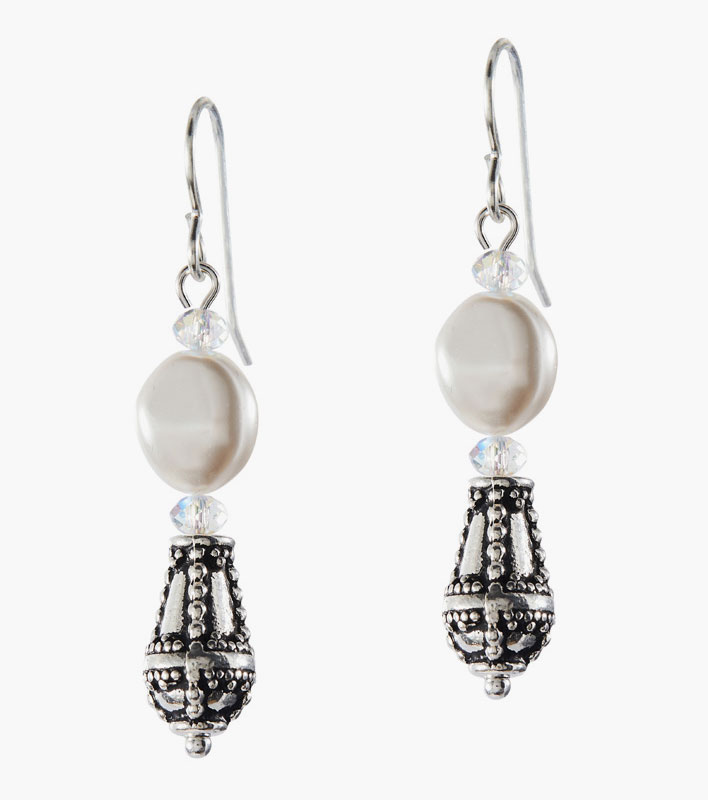
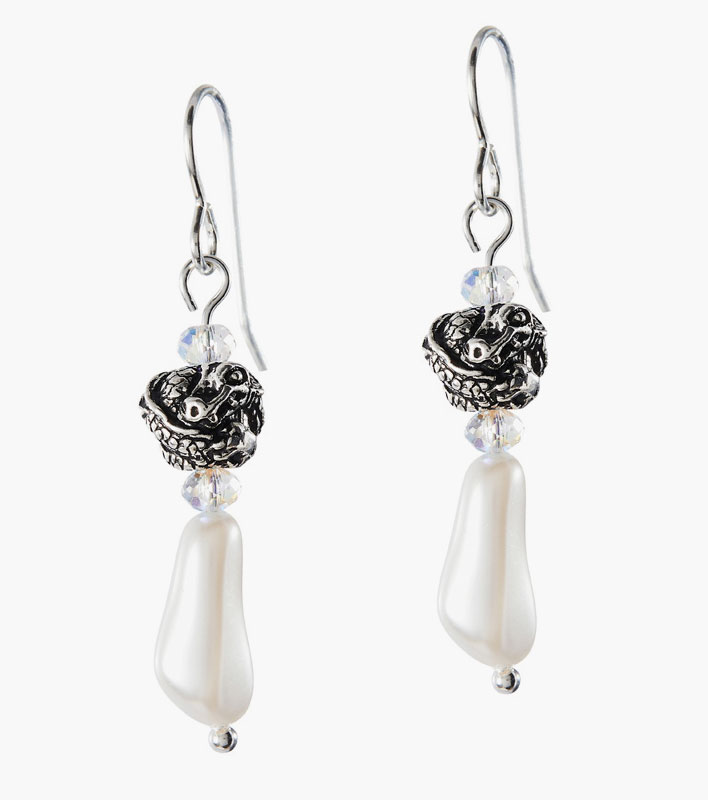
  15. Baroque Pearl Tiered Earrings
  16. Hanging Earrings with Purple Lace Agates
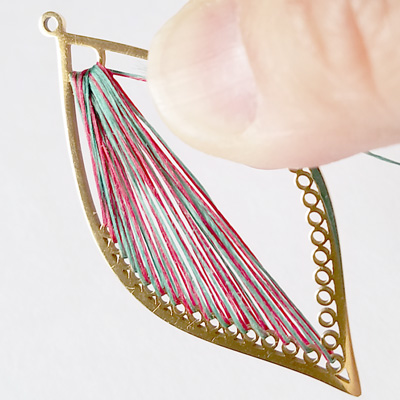
  17. Beadable Fan Earrings with Diamond Drop
  18. Large Snowflake Earrings (Winter’s not over yet…)
  19. FLASHBACK Friday: Easy Leather Hook Bracelet
  20. Half Circle Chain Earrings with Turquoise Seed Beads
  21. Hook Wrap Bracelet with Vegan Bolo Leather Cord
  22. Starburst Post Earrings with Beadable Pendant
  23. Arrow Leather Bracelet
  24. Macrame Wheel Earrings
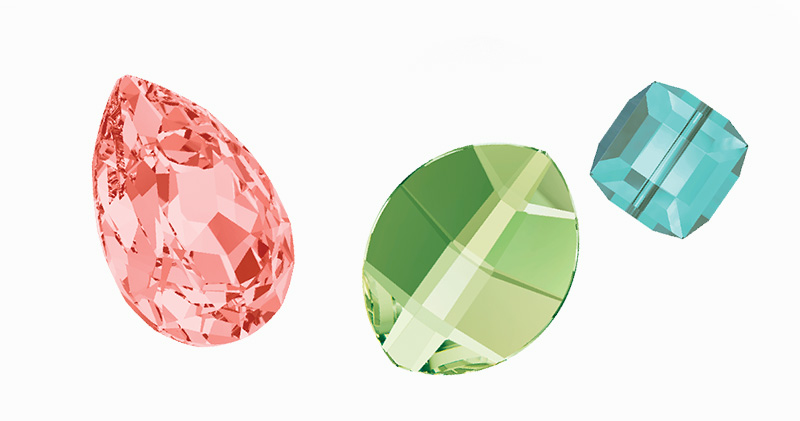
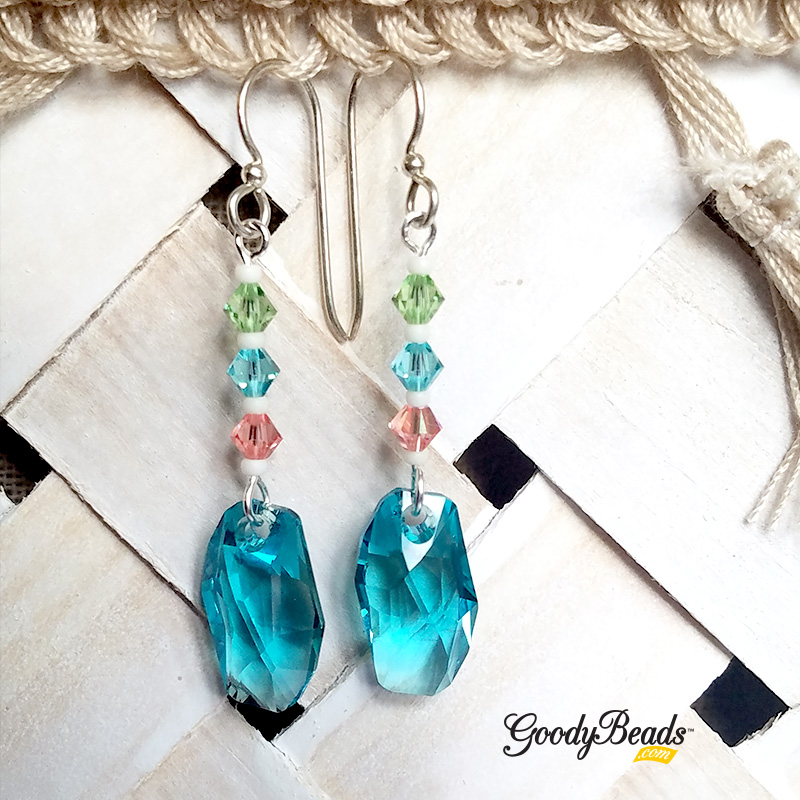
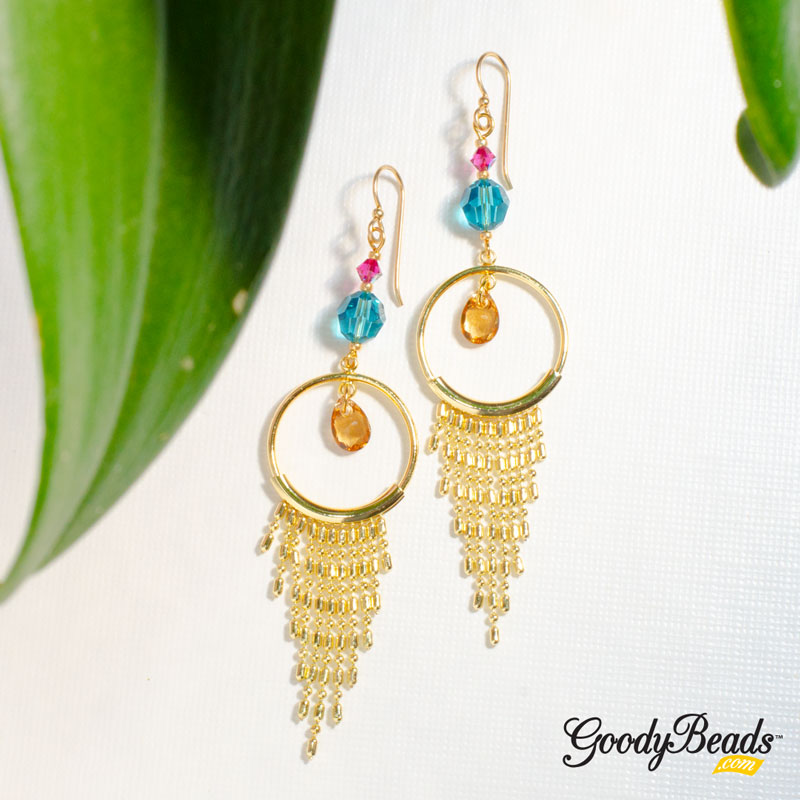
  25. Tropical Statement Earrings
  26. FLASHBACK Friday: Stone Ripple Leather Bracelet
  27. Jacque Tassel Earrings
  28. Fringe Earrings with Triangle Link


DIY Midnight Silver Memory Wire Bracelet with Swarovski Fine Rocks Tube

Feel glamorous in the DIY Midnight Silver Memory Wire Bracelet handmade and designed with Swarovski Fine Rocks Tube, Swarovski® crystals and metal beads on Memory Wire.

Items used in Bracelet:

GoodyBeads.com Blog: DIY Midnight Silver Memory Wire Bracelet with Swarovski Fine Rocks Tube FREE Tutorial

Directions:

  1. Cut 3 ½ rings of memory wire.
  2. Make a simple loop at one end using a memory wire finishing pliers and add the following bead sequence:
    A. Square bead, fire polish, tube, fire polish, square beads, bicone, square bead, fire polish, tube, fire polish, square bead, end cap, 4 inches of leather, end cap, rondelle, disc, fine rocks, disc, rondelle, end cap, 4 inches of leather and end cap.
    B. 3 fire polish, square bead, bicone and square bead. Repeat 4 times and finish with 3 more fire polish beads.
  3. Trim excess memory wire with Memory Wire Cutters leaving about a half an inch and make a simple loop. Tighten each side till beads no longer have extra space to move.


Spend the Holidays with Swarovski® – New Year

We’re celebrating the festive spirit with our friends at Swarovski: Create Your Style and celebrating with New Years Eve colors! Plus, we have a fun DIY project to get you hyped up for the new year.

Here are our selection of Swarovski crystals to embrace the festive and classic colors of New Years:

  • White/Clear – Crystal Clear, Crystal AB, Crystal 2XAB & Iridescent Dove Grey Pearl.
  • Gold/Bronze – Metallic Sunshine, Golden Shadow, Light Gold, Bright Gold, Crystal Light Silk, Metallic Light Gold, Light Topaz & Light Colorado Topaz
  • Silver/Grey – Light Grey, Dark Grey, Silver Night, Silver Shade, Greige, Light Grey Opal

Captivating Crystal Cuff

GoodyBeads.com Blog | Spend the Holidays with Swarovski® – New Year with FREE DIY and tutorial

GoodyBeads.com Blog | Spend the Holidays with Swarovski® – New Year with FREE DIY and tutorial

Items used in cuff: WR00127, SW02445, SW02444 (2), SW002442 (2), SW02437, SW02436 (2), SW02435 (2), Z008287 & SB00106.

Directions:

  1. Set the crystal in its setting and gently bend the prongs down to secure the crystal. (Check out Light Topaz blog post on how to press down the prongs.) Repeat to all 5 crystals and settings.
  2. Cut two pieces of memory wire at a coil and a quarter.
  3. Roll and make a simple loop to each end of the memory wire with memory wire finishing pliers.
  4. Slide on a seed bead on each memory wire. Slide each square bead hole through each memory wire. Repeat this process 7 more times. End this portion with a seed bead to each memory wire.
  5. Slide on small setting you made in Step 1, slide each memory wire through the two-hole setting. Slide on a seed bead to each memory. Repeat adding a medium setting, seed bead, large setting, seed bead, medium setting, seed bead and small setting.
  6. Repeat Step 4.
  7. Cut excess wire with memory wire cutters, leaving about a 3/4 inch end and make a simple loop.


DIY Hanging Crescent Earrings with Swarovski® crystals

Today’s DIY hanging crescent earrings are gorgeous because they contain fun kidney shaped earring findings and popular crescent charms, topped off with Swarovski crystals. You can also make this in a silver version too.

What you’ll need for crescent earrings:

  • Z016772 (2) – 22.4mm Gold Hanging Crescent Connector Charm (Silver Z016773)
  • Z003274 – Gold Plated Kidney Shaped Ear Wire (Silver Z003942)
  • SW00103 (2) – Swarovski 6mm Bicone Crystal Clear Beads
  • A019690 – 1 Inch Gold Plated 21 Gauge Headpins with Ball Top (Silver A019694)

GoodyBeads.com Blog | DIY Hanging Crescent Earrings with Swarovski crystal FREE Tutorial

Directions:

  1. Slide a crystal on a headpin and make a simple loop.
  2. Open crystal dangle loop and slide on inner hole of crescent connector. Close loop.
  3. Open earwire loop, slide on other hole of crescent connector and close loop.
  4. Repeat all steps for other earring.

Designed by Tory


DIY Navette Adjustable Bracelet with Swarovski® Sew-On

Our easy project today will be using beautiful Swarovski crystals and satin Adjustable bracelet.

Items used in bracelet:

  • SW01976 – Swarovski® 29mm Crystal Navette Sew-On Stone
  • TC02347 (2) – 8mm Oval Jump Ring by TierraCast
  • Z014807 – Black Twisted Satin Adjustable Bracelet Sliding Clasp

GoodyBeads Blog | DIY Navette Adjustable Bracelet with Swarovski® Sew-On FREE Tutorial

Directions:

  1. Open a jump ring, slide on one side of the crystal link and through one ring on sliding clasp. Close jump ring.
  2. Repeat with other jump ring and ring of sliding clasp.


Spend the Holidays with Swarovski® – Fall/Halloween

We’re going to dive into fall weather with our friends at Swarovski: Create Your Style and celebrating with Fall & Halloween colors. Because we live here in the Midwest, we’ve started to see trees bursting with fall colors like dark greens, bright yellows and oranges, flaming reds and popping purples! Plus, we have a fun DIY project to get your spooky Halloween going.

Here are our selection of Swarovski crystals to embrace the fall and Halloween colors:

  • Black Colors – Jet Black, Silver Shade
  • Browns – Topaz, Light Topaz, Light Colorado Topaz, Golden Shadow
  • Oranges – Tangerine, Fire Opal, Sunflower
  • Even try our Halloween Master MixesMX0028

Scaredy Cat Earrings

GoodyBeads.com Blog | pend the Holidays with Swarovski® - Fall/Halloween FREE Scaredy Cat Earrings Tutorial.

Items used in earrings: TC02297, SW01187 (2), SW00969 (2), A007659 & TC01590 (2).

Directions:

  1. Open eyepin loop, slide on cat charm and close loop.
  2. ON the eyepin slide on the following and make a simple loop (make sure loops are facing opposite directions):
    rondelle crystal and bicone crystal.
  3. Open earwire loop, slide on dangle and close loop.
  4. Repeat all steps for other earring.


Light Rose Shimmer Circle Post Earrings

Our earring project today is quick and easy! Using one of our newer post earrings with 2 loops, we are linking some beautiful Swarovski® light rose shimmer crystals with chain for this sweet pair of earrings!

What you’ll need for earrings:

  • SW02619 (4) – Swarovski 4mm Light Rose Shimmer Bicone Beads
  • SW02620 (4) – Swarovski 5mm Light Rose Shimmer Bicone Beads
  • SW02621 (4) – Swarovski 6mm Light Rose Shimmer Bicone Beads
  • A007659 – 1 Inch Silver Plated Eyepins
  • Z005958 – 20mm Silver Plated Half Circle Post Earrings with 2 Loops
  • A008182 – 2.5mm Silver Plated Steel Rollo Chain

Directions:

  1. Cut two pieces of chain at 1.25 inches.
  2. Slide a crystal on an eyepin and make a simple loop. Make sure both loops are facing the same direction. Repeat for all crystals.
  3. Link the crystals and chain starting at one end of the post earring loops in the following sequence:
    4mm, 5mm, 6mm, chain, 6mm, 5mm and 4mm
  4. Link the last 4mm to the other loop of the post earrings.
  5. Repeat steps 3 and 4 for the other earring.

Check out more Post Earring DIYs.

Designed by Tory.


Swarovski® Create Your Own Style: Trio of Opulent Earrings

Our blog post today consists of three projects in one, using some of Swarovski’s newest pearl shapes! We are really loving these new shapes because they look organic with fun depths to them. Here are three pair of earrings pair the new pearls with some fitting TierraCast components.

Opulent Earrings #1

Items used in earrings: SW02568 (2), SW01454 (4), TC02572 (2), TC02568 & A019612.

Directions:

  1. Open eyepin loop, slide on TierraCast charm and close loop.
  2. Slide the following on the eyepin and make a simple loop:
    crystal, pearl and crystal.
  3. Open dangle loop and slide on earwire loop and close loop.
  4. Repeat all steps for other earring.

Opulent Earrings #2

Items used in earrings: SW02579 (2), SW01454 (4), TC02576 (2), TC02297 & A019697.

Directions:

  1. Slide the following on to the headpin and make a simple loop:
    Opulent bead, crystal, pearl and crystal.
  2. Open ear wire loop, slide on pearl dangle and close loop.
  3. Repeat all steps for other earring.

Opulent Earrings #3

Items used in earrings: SW02604 (2), SW01454 (4), TC02562 (2), TC02297 & A019697.

Directions:

  1. Slide the following on the headpin and make a simple loop:
    Pearl, crystal, dragon bead and crystal.
  2. Open ear wire loop, slide on pearl dangle and close loop.
  3. Repeat all steps for other earring.


DIY Jewelry with Swarovski® Around the World: Costa Rica

This month’s trip is Costa Rica. Find out how tranquil this destination is from its tropical vibe to its endless blue skies. Plus, check out the hues Swarovski suggests to inspire your Costa Rica trip along with a DIY jewelry project for you to try.

Costa Rica

Starting as underwater volcanoes which then surfaced over thousands and thousands of years, Costa Rica has evolved into one of the largest, lush ecosystems in the world. Imagine yourself rappelling down a waterfall, relaxing in hot springs, hiking along the rolling fog of the cloud forest or exploring the pink sandy beaches of the Guanacaste coastline. Theses adventures paired with rich tropical flora and fauna and soft sunsets over crystal blue water were the incredible inspiration for these pieces – and my version of ‘paradise’.

Costa Rica – Swarovski Crystal Colors

  • Peridot
  • Light Turquoise
  • Rose Peach

Costa Rica Inspired DIY Jewelry

GoodyBeads Blog | DIY Jewelry with Swarovski® Around the World: Costa Rica FREE tutorial.

GoodyBeads Blog | DIY Jewelry with Swarovski® Around the World: Costa Rica FREE tutorial.

Our pair of earrings is cool and bright! It has the simplicity for a warm beach stroll and an elegance for a beach-side patio dinner!

What you’ll need for earrings:

  • SW02553 (2) – Swarovski crystal 18mm Light Turquoise Meteor Pendant
  • SW00157 (2) – Swarovski crystal 4mm Peridot Bicone
  • SW02213 (2) – Swarovski crystal 4mm Rose Peach Shimmer Bicone
  • SW02552 (2) – Swarovski crystal 4mm Light Turquoise Bicone
  • SB00444 – 11/0 Matte Opaque Cream Seed Bead
    You can sub seed bead for 2mm Pearlescent Pearls SW01920 (8)
  • A001494 – 2 Inch Silver Plated Eyepin
  • TCZ0077 – Sterling Silver Earring Wire by TierraCast®

Directions:

  1. On eyepin, slide on the following:
    seed bead, peridot crystal, seed bead, light turquoise crystal, seed bead, rose peach crystal and seed bead.
  2. Make a simple loop about 4mm or large enough to slide on crystal pendant.
  3. Open the loop you made in step 2 and slide on crystal pendant. Close loop.
  4. Open earring wire loop and slide on on other eyepin loop. Close loop.
  5. Repeat all steps for other earring.


DIY Red and Green Holiday Earrings with NEW Thread Bobbin Colors & Swarovski® Rouge Pearls

We’re getting ready for Christmas season with this Red and Green Holiday Earrings. Designed with our NEW Swarovski Rouge Pearls and Thread Bobbin colors, we’re using two colors to wrap with our Beadable Oval Pendants (Z011345 or Z011351) for a festive pair of earrings!

What you’ll need for these Holiday Earrings:

  • (2) Z011345 – Beadable Oval Pendant
  • (2) SW02560 – 8mm Swarovski Rouge Crystal Pearl
  • Z008003 – Seafoam Green Superlon Beading Thread Bobbin
  • Z008298 – Scarlet Superlon Beading Thread Bobbin
  • A019626 – 1.5 Inch Eyepin
  • TCZ0078 – Coil Earring Wire by TierraCast®
  • Needle

Directions:

1. Cut both threads to a length of about 8 feet. Feed both threads to your needle.

2. With your thread ends, anchor it to the inner loop of the beadable pendant with two knots. Cut tail to about 1/4 inch. Optional: You can use a small dot of glue to secure knot.

3. Sew down through middle hole and loop back through top loop. You will start from the inside towards the outside to one side. (You can refer to our previous blog post on sewing through this oval pendant, but these Red & Green Earrings will work from the middle outwards.)

4. Then sew other side starting from the middle and going outwards.

5. Sew through middle strands back and forth and cut off excess (Refer to video tutorial in previous beadable blog post). (Optional, you can use a small dot of glue for security, but not necessary. I’d suggest using a translucent glue that will not discolor the thread. Test out glue before use.)

6. Open eyepin loop, slide on top loop of pendant and close loop.

7. Slide on pearl and make a simple loop. Open earwire loop and slide on dangle.

8. Repeat all steps for other earring.


DIY Jewelry with Swarovski® Around the World: Africa

This month’s trip is Africa. Find out how beautifully wild this continent is from its earthy tones and bright bold colors. Plus, check out the hues Swarovski suggests to inspire your Africa trip along with a DIY jewelry project for you to try.

Africa

The canvas upon which this continent’s epic story is written is not only beautiful but astonishing. Whether heading out at dawn on a safari game drive following millions of wildebeest on their Great Migration or soaring high in a hot-air balloon to embrace the Serengeti, Africa creates the wildlife encounter of a lifetime. Wherever you find yourself on this big, beautiful continent, you will be touched by the wild lands, rich traditions, artisan craftsmanship and natural beauty – all of which these pieces pay tribute to.

Africa – Swarovski Crystal Colors

  • Tangerine
  • Fern Green
  • Light Siam

African Inspired DIY Jewelry

Our pair of earrings embraces the vibrant colors! It also incorporates Black Kamagong Wood Beads, which breaks up the rich colors and gives it a more organic design, as well as an earthy aspect.

What you’ll need for earrings:

  • (2) SW00969 – 4mm Tangerine Bicone Crystal
  • (2) SW00968 – 8mm Tangerine Round Crystal
  • (2) SW02092 – 4mm Light Siam Shimmer Bicone Crystal
  • (2) SW02497 – 9mm Light Siam Pear Cut Pendant
  • (2) SW00134 – 6mm Light Siam Bicone Crystal
  • (4) SW00370 – 4mm Fern Green Bicone Crystal
  • (2) TC02452 – 15x19mm Antique Gold Ethnic Fan Link by TierraCast
  • (2) TC02816 – 15mm Bright Gold Hammertone Dagger Bead
  • WD-BKG4RD – 4mm Black Kamagong Wood Round Beads\
  • Z013671 – 10mm White Fabric Tassel with Gold Cap
  • A019617 – 2 Inch Gold plated Eyepins
  • A008801 – 5mm Gold Plated Oval Jump Rings
  • A011517 – 4mm Gold Plated Round Jump Ring
  • A014108 – Gold Plated French Wire Earrings
  • SB00423 – 11/0 Galvanized Gold Seed Bead
    OR SB00269 – 11/0 Galvanized Gold Delica Seed Bead

Directions:

  1. Open oval jump ring, slide on light siam pendant and eyepin loop. Close jump ring.
  2. On eyepin from step 1, slide on the following and make a simple loop:
    seed bead, 4mm fern green bicone, seed bead, wood bead, seed bead, wood bead, seed bead, 4mm tangerine bicone and seed bead.
  3. Open another eyepin loop and slide through loop you made in step 2. Close loop.
  4. On eyepin, slide on a seed bead, 4mm light siam bicone and seed bead. Make a simple loop. Open loop and slide through first hole of ethnic link and close loop.
  5. On another eyepin, slide on the following:
    seed bead, wood bead, seed bead, 8mm tangerine round bead, seed bead, wood bead, seed bead.
  6. Make a simple loop about 4-5 in diameter, or large enough to slide on TierraCast dagger bead. Open loop and slide on TierraCast dagger bead.
  7. Open another eyepin loop, slide on eyepin loop of previous dangle and close loop. On this eyepin, slide on a seed bead, wood bead, seed bead, 4mm fern green bicone and seed bead. Make a simple loop. Open loop and slide through middle hole of ethnic link and close loop.
  8. Open 4mm round jump ring, slide on tassel and loop of another eyepin. Close jump ring.
  9. On eyepin, slide on the following and make a simple loop:
    seed bead, wood bead, seed bead, 6mm light siam bicone, seed bead, wood bead and seed bead.
  10. Open another eyepin loop and slide on loop you made in step 9. Close loop. Slide the eyepin a seed bead, wood bead and seed bead, and make a simple loop. Open loop and slide last hole of ethnic link. Close loop.
  11. Open earwire loop and slide through top of ethnic link and close loop.
  12. Repeat all steps for other


DIY By The Sea Earrings with Swarovski crystals & pearls

You can hear crashing waves when you wear these By the Sea Earrings. Ok, you might not hear them, but you will definitely want to wear these earrings to your next seaside adventure. It features the brilliant hue of Swarovski® Majestic Blue crystals and the luminescent sheen from the crystal pearls.

What you’ll need to make earrings:

  • TC00113 – 14mm Small Spindle Shell Charm by TierraCast
  • TC02680 – 13mm Tiny Seastar Charm by TierraCast
  • (2) SW01448 – 10mm Crystal Pearlescent White Swarovski Pearl
  • (2) SW01446 – 6mm Crystal Pearlescent White Swarovski Pearl
  • (2) SW01723 – Swarovski® 4mm Majestic Blue Round Crystal
  • (2) SW01725 – Swarovski® 8mm Majestic Blue Round Crystal
  • TCZ0077 – Sterling Silver Earring Wire by Tierracast
  • A019629 – 1 Inch Silver Plated 20 Gauge Eyepin

GoodyBeads Blog | By the Sea DIY Earrings FREE Tutorial

Directions:

  1. Open eyepin loop, slide on a charm and close loop. Slide a 4mm Majestic Blue crystal on the eyepin and make a simple loop.
  2. Open another eyepin loop, slide on loop you made in step 1 and close loop. Slide a 6mm Crystal Pearlescent on eyepin and make a simple loop.
  3. Open another eyepin loop, slide on loop you made in step 2 and close loop. Slide an 8mm Majestic Blue crystal on the eyepin and make simple loop.
  4. Open another eyepin loop slide on loop you made in step 3 and close loop. Slide a 10mm Crystal Pearlescent on eyepin and make a simple loop.
  5. Open earwire loop and slide on loop you made in step 4. Close loop.
  6. Repeat all steps for other earring.


DIY Bubbly Earrings with Thread Beads and Gold Findings

Embrace summer boho jewelry with handmade thread beads. Today’s DIY would pair perfectly with a beachside cocktail!

What you’ll need for earrings:

  • Ivory Thread Beads – Z017904
  • 2 Inch Headpin with Ball – A019696
  • Matte Gold Circles Connectors – Z014013 (2)
  • TierraCast® Gold Earring Wire – TCZ0139
  • 4mm Bicone Crystal Luminous Green – SW00574 (4)

GoodyBeads Blog | DIY Thread Bead and Bubbly Earrings - FREE tutorial

Directions:

  1. Slide the following onto a headpin: bicone crystal, thread bead and bicone crystal.
  2. Make a wrapped loop, making sure to attach to a connector hole before completing wrapped loop. (You can also make a simple loop and attach to connector).
  3. Open earwire loop, slide through other connector hole and close loop.
  4. Repeat all steps for other earring.


DIY Jewelry with Swarovski® Around the World: India

This month’s trip is India. Find out how culturally rich and vibrant this country is from its colorful clothing to its exotic cuisine. Plus, bathe in the hues Swarovski suggests to inspire your India trip along with a DIY jewelry project for you to try.

India

One of the oldest civilizations in the world, India is a mosaic of multicultural experiences and rich heritage. Extending from the snow-covered Himalayan mountains to the tropical rain forests of the south, it is impossible to ignore India’s mesmeric conflation of the old and the new. Walking through the bustling city streets you are greeted by a diverse variety of cuisines, arts, crafts, faiths, and nature. Experiencing different textures, sounds and smells triggered the emotion that prompted these designs.

India – Swarovski Colors

  • Indicolite
  • Light Topaz (Note, we are using Light Colorado Topaz in DIY jewelry)
  • Fuchsia

India Inspired DIY Jewelry

GoodyBeads Blog | DIY Jewelry with Swarovski crystals. India Inspired DIY Jewelry.

GoodyBeads Blog | DIY Jewelry with Swarovski crystals. India Inspired DIY Jewelry.

What you’ll need for earrings:

  • 65mm Gold Plated Round Connector With Dot N Dash Tassel – Z017930
  • 9mm Light Colorado Topaz Pear Cut Pendant – SW02491 (2)
  • 8mm Indicolite Round Beads – SW02538 (2)
  • 4mm Bicone Crystal Fuchsia – SW00126 (2)
  • 11/0 Gold Seed Bead – SB00423
  • 2 Inch Gold Eyepin – A019611
  • Oval Jump Ring – A008801

Directions:

  1. Open jump ring, slide on crystal pendant and through inner loop of connector. Close jump ring.
  2. Open eyepin loop, slide through top loop of connector and close loop.
  3. Slide on the eyepin a seed bead, 8mm round crystal, seed bead, 4mm bicone crystal and seed bead.
  4. Open loop you made step 3, slide through earwire loop and close loop.
  5. Repeat all steps for other earring.


DIY Swarovski® Amethyst & Pearl Hoop Earrings

A fun new and old favorite, are these pair of summer-loving hoop earrings with Swarovski crystals and pearls.

What you’ll need:

  • 6mm Round White Swarovski Pearl – SW00665 (4)
  • 4mm Bicone Crystals, Light Amethyst – SW00195 (6)
  • 6mm Bicone Crystals, Light Amethyst – SW00196 (2)
  • 11/0 Silver Lined Amethyst Seed Bead – SB00339
  • 3mm Gold Round Beads – Z001310
  • Gold Plated Hoop – A013205
  • Earwires – TCZ0148
  • Gold Headpin – A019651
    Note: Directions are for making wrapped loops. If you prefer to make simple loops, we suggest using a harder gauge wire like A019658.

Directions:

  1. Slide on a headpin; 4mm bicone and seed bead. Make a simple or wrapped loop. Make a total of 4 dangles.
  2. Slide on a headpin; seed bead, 3mm round bead, pearl and seed bead. Make a simple or wrapped loop. Make a total of 4 dangles.
  3. Slide on a headpin; seed bead, 3mm round bead, 6mm bicone, 3mm round, seed bead, 3mm round, 4mm bicone and seed bead. Make a simple or wrapped loop. Make a total of 2 dangles.
  4. Cut the tab part of a hoop finding off.
  5. Make a simple loop to one end of your hoop perpendicular to the loop of the hoop. Refer to previous Memory Wire Hoop Tutorial blog post.
  6. Slide on the following to the hoop: 3mm round, step 1 dangle, 3mm round, step 2 dangle, 3mm round, step 3 dangle, 3mm round, step 2 dangle, 3mm round, step 1 dangle and 3mm round.
  7. Slide other hoop end through loop you make in step 5 and roll back a simple loop. (Again, refer to the Memory Wire Hoop Tutorial blog post.)
  8. Open ear wire loop and slide on hoop dangle. Close loop.
  9. Repeat Steps 4-8 for other earring.