

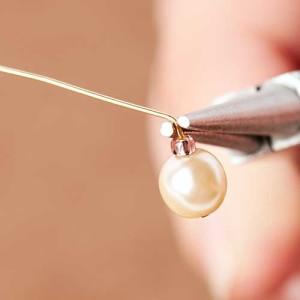
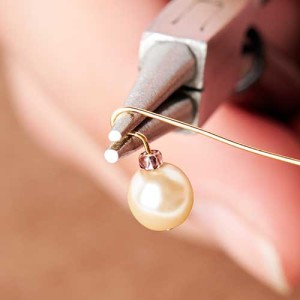
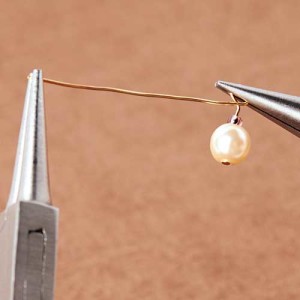
A simple embellishment you can add to your head pins and wire, is making a wire wrap loop. A wrapped loop adds a decorative and elegant look to your jewelry piece. Here, we’ll explain how to make a wrapped loop, how to connect two wrapped loops together and show you previous projects using wrapped loops.
While we covered the basic of a simple loop in a previous blog post, you can take that knowledge of simple loops and amp it up a notch with wire-wrapped loops. Like, our previous advice; practice, practice, practice.
First, let’s talk about wire gauge. While we recommend your head pins, eyepins or wire to be a 21 – 24 gauge, you can surely use other thickness. Do keep in mind that when wire wrapping a thick gauge, like 20 or lower; it will be more difficult to create a tighter coil. While a thinner gauge above 26 will be more delicate. But when it comes down to beading and jewelry, it’s personal preference.
Wire Wrap Loop Tutorial
Tools you will need:
- Round Nose Pliers
- Flat Nose Pliers
- Serrated Pliers
- Side Cutter


Linking Wire Wrapped Loops
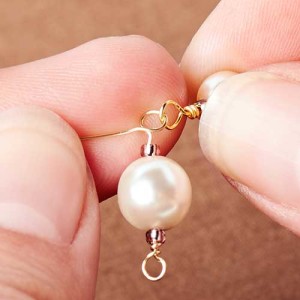
Unlike simple loops, with wire wrap loops you are unable to open the loops up and link them. You will need to add the two parts in the middle of the wrapping process, while using Artistic Wire to make a double wrapped, loop links.
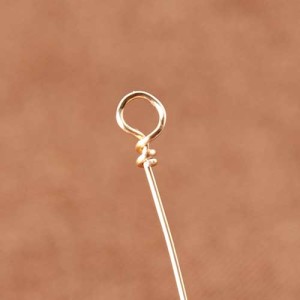

There are many variations of how to form a wrapped loop. Many jewelry-makers create coils while holding the wire end with their fingers. Or others wire wrap an irregular coil. Whichever the look you are achieving, one way to make a wrapped loop.
Sample Jewelry with Wire-Wrapped Loops
Here, we will explore inspirational jewelry from past trends and blog postings that have used wrapped loops.

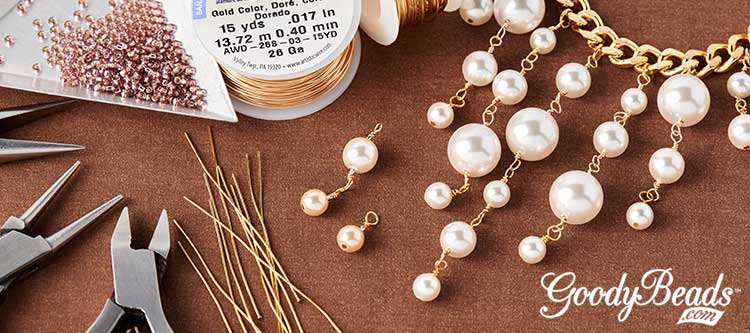
We linked up wire-wrapped loops to make this waterfall-inspired pearl necklace.

Even these beaded tassel incorporates a wrapped wire loop to romanticize this necklace. Get this tutorial in the Beaded Tassel Tutorial blog post.
Thank you!