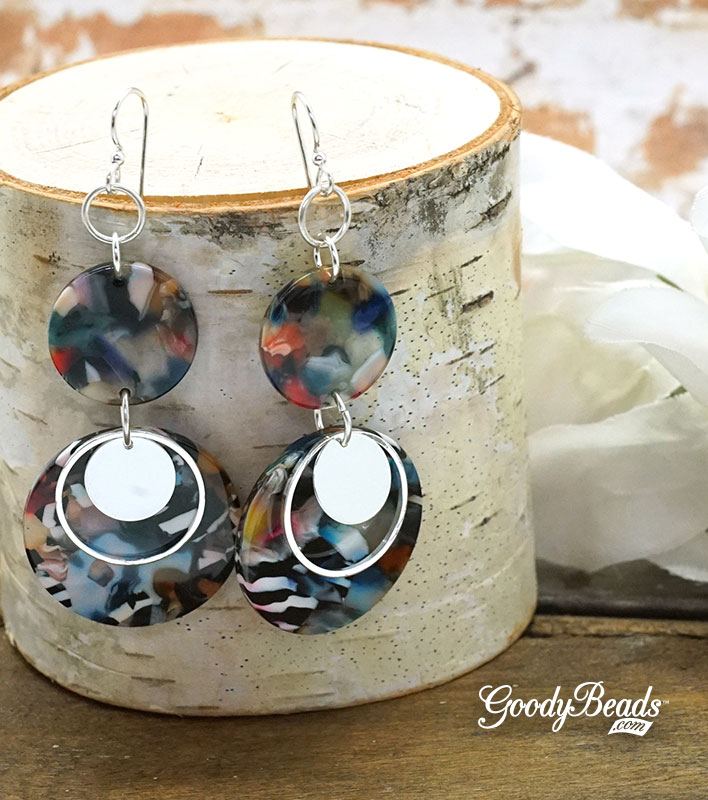
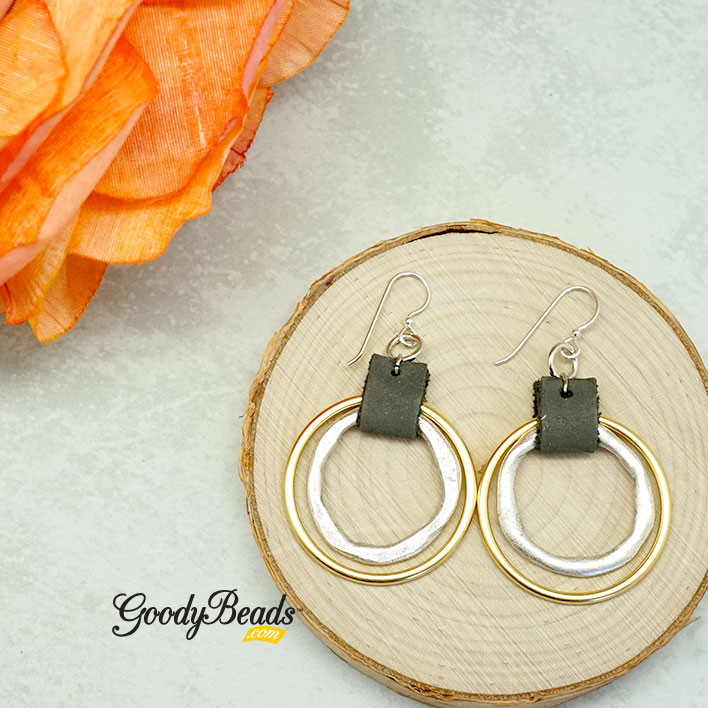
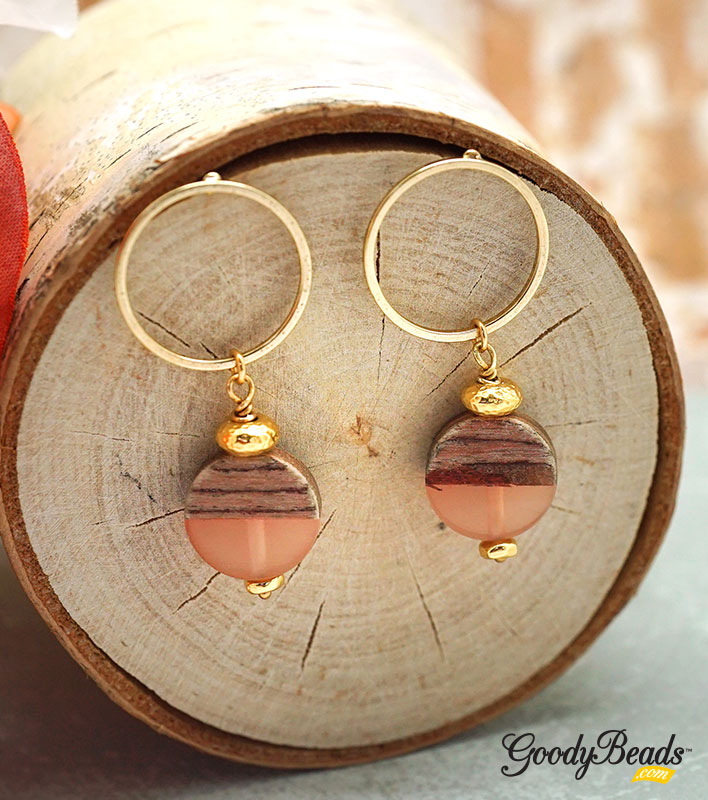
DIY Hoop Post Earrings with Wood Resin Bead

We love our selection of wood & resin charms that we’ve made some super cute beads out of them. And we’ve used them in our project today!

Items used in earrings:

  • Y003022 – 21mm Gold Hoop Post Earrings
  • Z015234 – 15mm Wood & Pale Pink Resin Disc Bead
  • TC02820 (2) – 7mm Bright Gold Hammertone Rondelle Bead by TierraCast
  • TC00567 (2) – 5mm Gold Nugget Spacer by TierraCast
  • A019696 – 2 Inch Gold Plated 21 Gauge Headpins with Ball Top
  • A011517 – 4mm Gold Plated 20 Gauge Round Jump Ring

Get all the components for this project here

GoodyBeads.com Blog | DIY Wood Resin Bead Hoop Post Earrings FREE Tutorial

Directions:

  1. Slide the following on a headpin and make a simple or wrapped loop:
    5mm nugget bead, wood/resin bead & 7mm hammertone bead.
  2. Open jump ring, slide on wood/resin dangle and hoop of earring. Close jump ring.
  3. Repeat all steps for other earring.

Check out more DIY Projects with Wood & Resin.


DIY Bling Leather Bracelet

Don’t you love sweater weather? The DIY Bling Leather Bracelet is flashy and subtle with fun metallic and bling flat leather. It’s the perfect leather bracelet to pair with your fall & winter style.

Items used in bracelet:

  • Z003873 – Shiny Gold Long Leather Setting Slider for 10mm Flat Leather
  • CH01110 (2″) – 10mm Flat Black Leather
  • CH00813 – (7″ or 8″) 10mm Bronze Pearl Metallic Flat Leather
  • Z018344 – 10mm Gold Rounded Magnetic Clasp
  • A015821 – Super New Glue

GoodyBeads.com Blog | DIY Bling Leather Bracelet FREE Tutorial

Directions:

  1. Put glue in the bezel part of the Setting Slider. Put the bling leather in the glued bezel, trim excess.
  2. Glue one end of the flat leather piece into one end of magnetic clasp.
  3. Slide Setting Slider onto the flat leather, making sure the slide is on the correct side of the flat leather.
  4. Glue the other end of the flat leather piece into the other end of the magnetic clasp.
  5. Let the bracelet dry for a few hours or overnight before wearing.

Here are MORE Flat Leather DIYs to try out!


DIY Jewelry Statement Earrings with Acetate Components

We’re layering and combining some of our favorites in this pair of DIY Jewelry Statement Earrings. It includes acetate components, links, charms and jump rings. These earrings are a bit funky with their multi-color acetate designs. Make them today for funky fall style!

Items used in DIY Jewelry Statement Earrings:

Goodybeads.com Blog | DIY Statement Acetate Earrings FREE Tutorial

Directions:

  1. Open 8mm jump ring, slide on 30mm acetate charm, a quick link, disc drop and through a hole of the 15mm acetate link. Close jump ring.
  2. Open a 6mm jump ring, slide through other hole of 15mm acetate link and close jump ring.
  3. Open another 8mm jump ring, slide through 6mm jump ring in step 2 and through ear wire loop. Close jump ring.
  4. Repeat all steps for other earring.


DIY Bracelet Key Chains with Leather and Memory Wire

We have the perfect idea for your holiday gifts; DIY Bracelet Key Chains made with Heavy Duty Memory Wire. They are a fun DIY for every family member, friend and neighbor!

What you’ll need:

GoodyBeads Blog | DIY Bracelet Key Chains with Leather and Memory Wire FREE Tutorial

Directions:

  1. Cut a coil and a half of memory wire with Memory Wire Cutters.
  2. Make a simple, rolled loop to one end of your memory wire, with Memory Wire Finishing Pliers.
  3. Slide on the End Cap, Leather piece and End cap onto the memory wire.
  4. Cut memory wire end to about 3/4″ and make another rolled loop. Roll both ends to tighten up your bracelet keychain.
  5. Open jump ring, slide on tassel and one looped end of bracelet keychain. Close jump ring.
  6. Slide keyring through that end loop also.

More Examples in Video Tutorial

Make sure to swing over to our previous Facebook LIVE where we made some different keychain examples with leather and even LeatherCord USA channel bangles.

CLICK HERE to see Facebook LIVE episode.


DIY Navette Adjustable Bracelet with Swarovski® Sew-On

Our easy project today will be using beautiful Swarovski crystals and satin Adjustable bracelet.

Items used in bracelet:

  • SW01976 – Swarovski® 29mm Crystal Navette Sew-On Stone
  • TC02347 (2) – 8mm Oval Jump Ring by TierraCast
  • Z014807 – Black Twisted Satin Adjustable Bracelet Sliding Clasp

GoodyBeads Blog | DIY Navette Adjustable Bracelet with Swarovski® Sew-On FREE Tutorial

Directions:

  1. Open a jump ring, slide on one side of the crystal link and through one ring on sliding clasp. Close jump ring.
  2. Repeat with other jump ring and ring of sliding clasp.


DIY Double Ring Mixed Media Earrings

We’ve compiled some of our favorites in today’s project! We have TierraCast findings with Leather Cord USA Nubuck leather lace and mixing metals with Nunn Designs hoops. Try these DIY earrings out today!

Items used in earrings:

  • TCZ0077 – Sterling Silver Earring Wire by Tierracast®
  • Z004551 (2) – 30mm Ant. Silver Grande Organic Hoop by Nunn Design
  • Z008273 (2) – 35mm 24k Gold Plated Frame Hoop by Nunn Designs
  • Z016427 – 10mm Black Nubuck Lace
  • A008807 – 7mm Silver Plated 16 Gauge Round Jump Rings
  • A008799 – 5mm Oval Silver Plated 21 Gauge Jump ROpings
  • Tools: TL00043 – Leather Hole Punch Pliers

GoodyBeads.com Blog | DIY Double Ring Mixed Media Earrings FREE Tutorial

Directions:

  1. Cut two pieces of leather at 1.5″ long.
  2. Punch a hole 1/8″ from the edge of your piece of leather. Punch a hole on each leather end. Repeat on the other leather piece.
  3. Open oval jump ring, slide on a hole of a leather piece, slide on a gold and silver ring and slide through other hole of that leather piece. Close jump ring.
  4. Open 7mm jump ring, slide on oval jump ring from step 3 and through ear wire loop. Close jump ring.
  5. Repeat Steps 3 and 4 for other earring.


DIY Golden Resin Foil Earrings

Nothing says fall better than some wood and gold jewelry! Our pair of earring today uses gold-plated findings with our every-popular wood & resin pendant charms.

Items used in earrings:

  • Z004331 – 13mm Satin Gold Rectangle Textured Post Earrings
  • Z010290 – 28mm Wood & Clear Resin with Gold Foil Disc Pendant Charm
  • Z011522 – 6mm Gold Plated 20 Gauge Round Jump Ring
  • TC01208 (2) – Clear Comfort Earring Back by TierraCast®

GoodyBeads Blog | DIY Golden Resin Foil Earrings

Directions:

  1. Open jump ring, slide on wood/resin charm and loop of earring. Close jump ring.
  2. Repeat for other earring.
  3. Don’t forget the earring backs!


Spend the Holidays with Swarovski® – Fall/Halloween

We’re going to dive into fall weather with our friends at Swarovski: Create Your Style and celebrating with Fall & Halloween colors. Because we live here in the Midwest, we’ve started to see trees bursting with fall colors like dark greens, bright yellows and oranges, flaming reds and popping purples! Plus, we have a fun DIY project to get your spooky Halloween going.

Here are our selection of Swarovski crystals to embrace the fall and Halloween colors:

  • Black Colors – Jet Black, Silver Shade
  • Browns – Topaz, Light Topaz, Light Colorado Topaz, Golden Shadow
  • Oranges – Tangerine, Fire Opal, Sunflower
  • Even try our Halloween Master MixesMX0028

Scaredy Cat Earrings

GoodyBeads.com Blog | pend the Holidays with Swarovski® - Fall/Halloween FREE Scaredy Cat Earrings Tutorial.

Items used in earrings: TC02297, SW01187 (2), SW00969 (2), A007659 & TC01590 (2).

Directions:

  1. Open eyepin loop, slide on cat charm and close loop.
  2. ON the eyepin slide on the following and make a simple loop (make sure loops are facing opposite directions):
    rondelle crystal and bicone crystal.
  3. Open earwire loop, slide on dangle and close loop.
  4. Repeat all steps for other earring.


DIY Golden Fine Rocks Bracelet

Are you getting your New Year’s jewelry ready? Why not make this fun bracelet to ring in the new year.

Items used in bracelet:

  • WR00120 – Large Silver Heavy Duty Memory Wire
  • CH00926 (6) – 5mm Braided Metallic Gold Round Leather Cord
  • SW02313 – Swarovski® Light Colorado Topaz Dorado Fine Rocks
  • Z006380 (4) – 5mm Gold Brass Cord End Cap
  • SW00398 (2) – Swarovski® 6mm bicone crystal beads silver night

GoodyBeads Blog | DIY Golden Fine Rocks Bracelet FREE Tutorial

GoodyBeads Blog | DIY Golden Fine Rocks Bracelet FREE Tutorial

Directions:

  1. Cut 2 coils of memory wire.
  2. Make a simple loop at one end of the memory wire with memory wire finishing pliers.
  3. Cut leather piece in half or two pieces at 3 inches.
  4. Slide on the following components on the wire:
    End cap, leather, end cap, bicone crystal, fine rocks tube, bicone crystal, end cap, leather and end cap.
  5. Cut wire end with 3/4″ wire left with memory wire cutters and make a simple loop with memory finishing pliers.


DIY Post Earrings with Turquoise Gemstone Hexagon Points

Stun them on your next zoom meeting with this pair of Turquoise Hexagon Point Earrings! They are quick and easy and only take a few minutes to make.

Items use in earrings:

GoodyBead Blog | DIY Turquoise Hexagon Point Earrings FREE Tutorial

Directions:

  1. Remove small bail from the turquoise pendant. Repeat on other pendant.
  2. Slide hoop of post earring into the bail and put the prongs of the bail into the loop on the pendant and pinch them together.
  3. Repeat Step 2 for other earring.


DIY Miyuki Delica Colorblock Necklace with Griffin Cord

Let’s take out some Delica seed beads and make this fun colorblock necklace with Griffin silk cord.

What you’ll need for necklace:

  • 11/0 Delica Seed Beads – Use a variety of colors!
    Items used in necklace: SB00141, SB02339, SB00229, SB00259
  • Size 4 Silk Cord – Make sure it is a No. 4 size
    Item used in necklace: A006574

Get all the components for this project here

GoodyBeads Blog | DIY Delica Colorblock Necklace FREE tutorial with Miyuki Delica Seed Beads

Directions:

  1. Unravel silk cord from its card and straighten out the cord with water. (Check out Blog as an example HERE)
  2. Make a knot at the end of the silk cord.
  3. Slide on 4 delicas and make another knot, close to the last delica.
  4. Slide on a delica bead. (This will act as your slider piece at the end).
  5. Slide on 1.5 – 2 inches of 1st delica beads.
  6. Alternate the 1st and 2nd delicas 5-6 times.
  7. Slide on 1.5 – 2 inches of 2nd delica beads.
  8. Alternate the 2nd and 3rd delicas 5-6 times.
  9. Slide on 1.5 – 2 inches of 3rd delica beads.
  10. Alternate the 3rd and 4th delicas 5-6 times.
  11. Slide on 1.5 – 2 inches of 4th delica beads.
  12. Alternate the 3rd and 4th delicas 5-6 times.
  13. Slide on 1.5 – 2 inches of 3rd delica beads.
  14. Alternate the 2nd and 3rd delicas 5-6 times.
  15. Slide on 1.5 – 2 inches of 2nd delica beads.
  16. Alternate the 1st and 2nd delicas 5-6 times.
  17. Slide on 1.5 – 2 inches of 1st delica beads.
  18. slide needle through delica you added in step 4. You’re going to make a loop, so feed needle through the side that has the silk cord end.
  19. Put necklace on to determine the length you would like your necklace. Necklace in sample is 38″ long. It can be adjusted to be shorter too.
  20. Make a knot at the other cord end. Slide on 4 delicas and make another knot close to the last delica. Cut off excess silk cord.


DIY Heidi’s Large Crescent Earrings

We’ve have an easy pair of earrings for your fun fall fashion with these DIY Large Crescent Earrings.

Items used in earrings:

GoodyBeads Blog | DIY Heidi's Large Crescent Earrings FREE Tutorial

Directions:

  1. Cut FOUR chain pieces to approximately 1 inch.
  2. Open jump ring, slide on one chain end, through one crescent end loop and close jump ring.
  3. Open another jump ring, slide on another chain end, through other crescent end loop and close jump ring.
  4. Open another jump ring, slide both ends of the chain ends and through earwire loop. Close jump ring.
  5. Repeat all steps for other earring.


DIY Glam Cuff with Flat Leather and Glue-in Cuff

Let’s get to rocking out to beautiful fall weather with this DIY Glam Cuff. It will be your fun go-to jewelry accessory for your cool, fall fashion.

What you’ll need:

  • Z020292 – Rose Gold Glue-in-Cuff
  • CH01080 (7) – 10mm Multi-Colored Shimmer Flat Leather
  • CH00821 (15) – 5mm Matte Gold Pearl Metallic Flat Leather
  • A015821 – Super New Glue

Directions:

  1. Cut 5mm leather in half.
  2. Add glue to bezel part of Glue-in-Cuff .
  3. Starting at one end, line up all three strand ends to that end.
  4. Keeping the leather straight, lay it inside the bezel part of the cuff. Press leather firmly to adhere.
  5. Cut excess leather.
  6. Let it dry for a full 24 hours before wearing.

Try these other DIYs using Flat Leather.