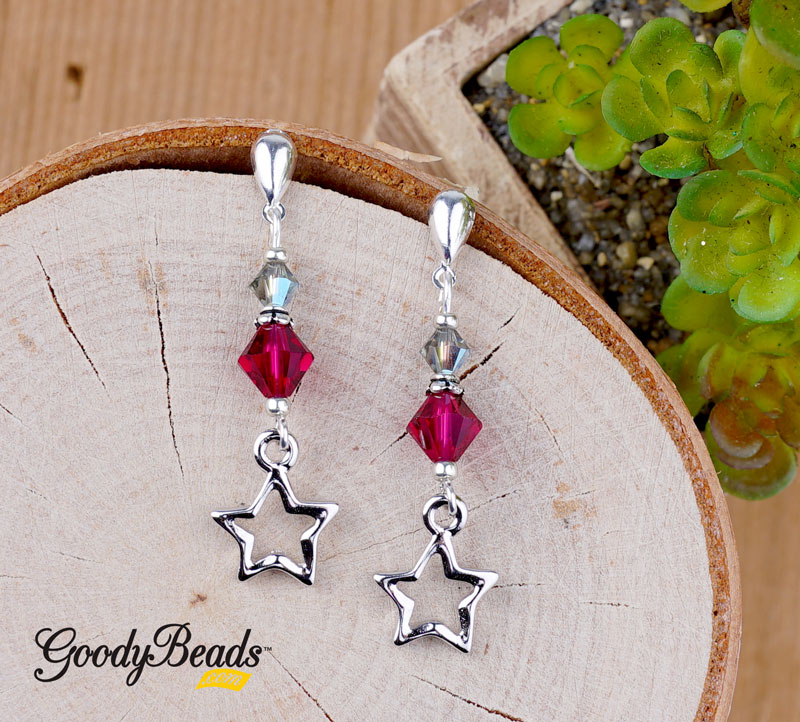
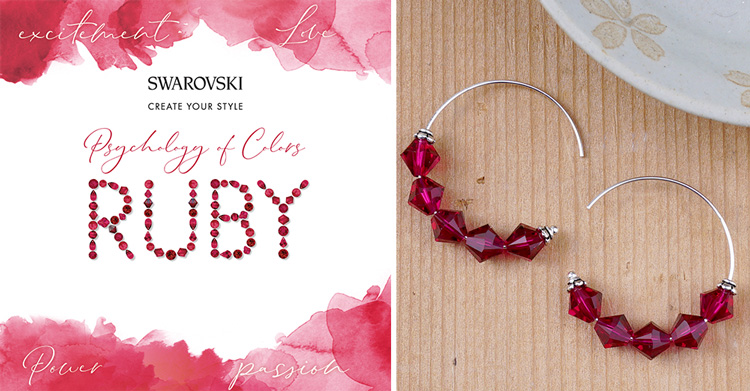
DIY Statement Earrings with Swarovski Scarlet Crystals
Design a pair of DIY Statement Earrings with one our newest color addition in our Swarovski crystals: Scarlet. Scarlet is a cross between a Siam and Ruby color. It has a hint of a deep purple and the vibrance of red. Pair the hue with gold findings for a rich pair of earrings!
On a headpin, slide on a 4mm crystal and make a simple loop. Open loop and slide on one hole of brush gold disc. Close loop.
Open an eyepin loop and other hole of brush gold disn. Close loop.
On the eyepin, slide on 6mm crystal and through teardrop hoop from the inside and up. Make a simple loop. Open loop and slide on hole of half circle connector (curved side). Close loop.
Open another eyepin loop and slide through other hole of half circle connector. Close loop.
On eyepin, slide on 8mm crystal and make a simple loop.
Open earwire loop, slide on loop you make in step 5 and close loop.
Repeat all steps for other earring.
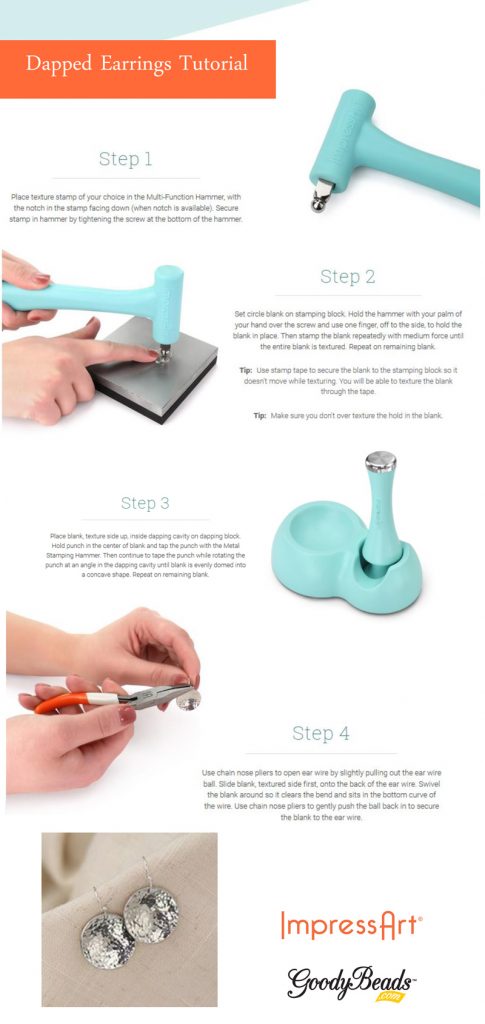
ImpressArt®: How to Use the Dapping Tool
This week’s tutorial from ImpressArt is a simple tutorial on dapping. Turn flat ImpressArt stamping blanks into beautifully domed pieces of jewelry!
Here is what you’ll need to start dapping:
Dapping Block Set (TL00351): This tool is what you will need to create the curved/domed shape.
Tutorial also uses the texturing skill used in last week’s ImpressArt Tutorial.
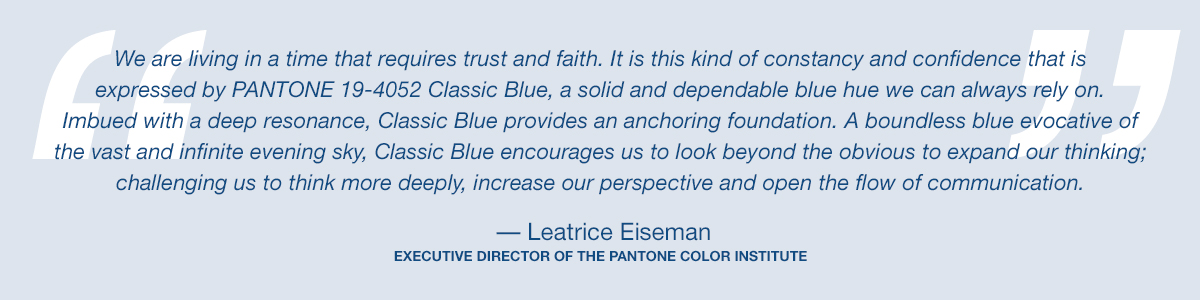
Pantone 2020 Color of the Year: Classic Blue
Pantone has chosen the spotlight color for 2020. Classic Blue. It is a ‘solid and dependable blue hue we can always rely on.’ Here is how Classic Blue is characterized:
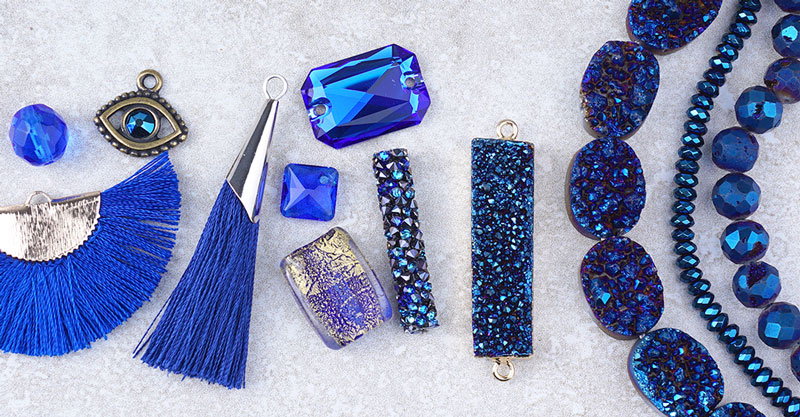
Because Pantone has continuously given us variations of blue hues in the past, it can be safe to say that blue is a reliable and dependable color that we all find ourselves designing with and wearing through the years. And it is definitely a bold color. Here are some items to get you inspired with the classic blue:
Here are some easy DIY earrings to get your 2020 started.
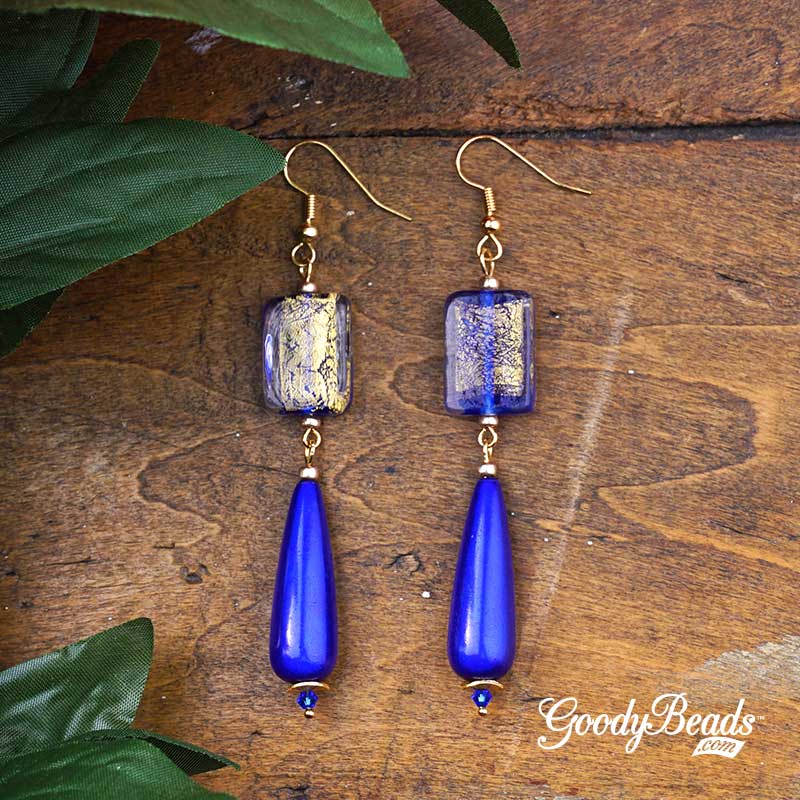
Blue Glass Glowing Earrings
We combined some of favorite beads like glass, miracle and Swarovski, tied together with some gold findings! Plus, we just love the gold flakes in the glass bead.
On a headpin, slide the following beads and make a simple loop: 3mm Swarovski bicone bead, wavy disc, miracle bead and seed bead.
Open eyepin loop and slide on bead dangle from step 1. Close loop.
On the eyepin slide on the following and make a simple loop: Seed bead, glass bead and seed bead.
Open earwire, and slide on your dangle and close loop.
Repeat all steps for other earring.
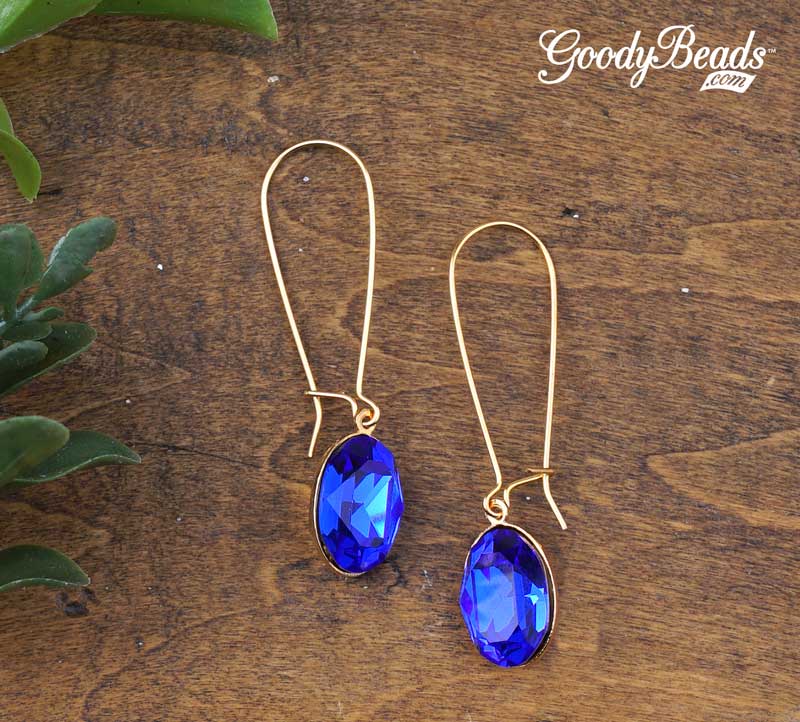
Majestic Blue Drop Earrings
We don’t use much of the kidney earrings, but love them all the same. They work great with a simple drop crystal or charm, as the kidney drapes and elongates the earring itself.
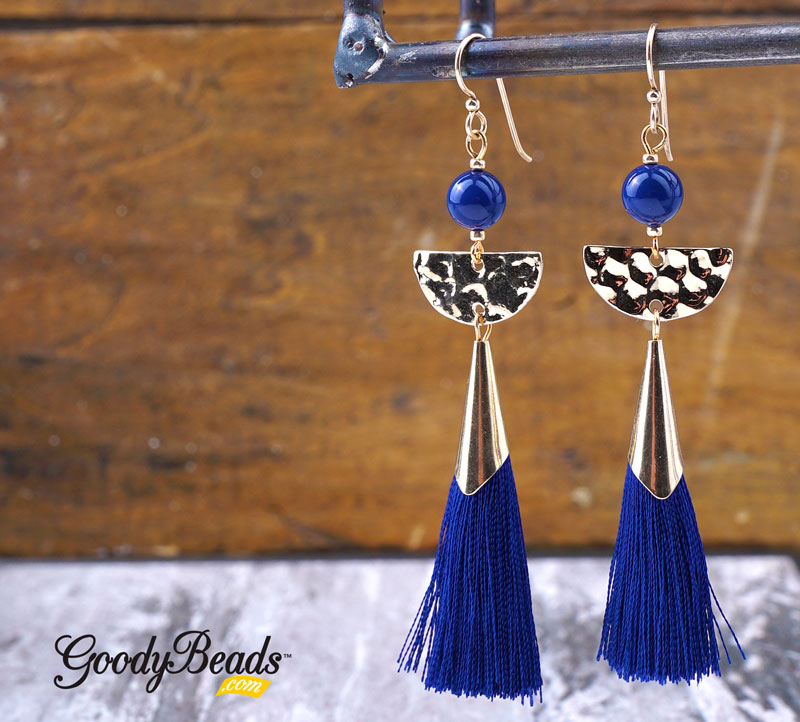
Twist the loop on the tassel 90 degrees so that loop run across the other way.
Open tassel loop, slide through hole of half circle connector (curved side). Close loop.
Open eyepin and slide through other hole of half circle connector. Close loop.
On the eyepin slide on a seed bead, pearl and see bead. Make a simple loop.
Open earwire loop and slide on your pearl/tassel dangle. Close loop.
Repeat all steps for other earring.
ImpressArt®: How to Use the Texture Stamping Hammer
This week’s tutorial from ImpressArt is all about metal stamp texturing. Texturing adds an extra dimension of design to your metal blanks. It also adds an organic look for your metal stamping needs. Here are some product you may need to get you started on texturing:
Texture Stamper Hammer (TL00266): This innovative tool creates unique, one of a kind textures using your metal stamps as texture heads. You can also interchange the stamping head with this hammer.
Ball Pen Texture Stamper Head (TL00313): This hammer head creates an organic, hammered texture look to your metal blanks. It is to be used with the Stamper Hammer.
Texture Bracelet Tutorial
Using last week’s tutorial on Bracelet Bending, texturize the bracelet blank first before bending the blanks to create a bracelet.
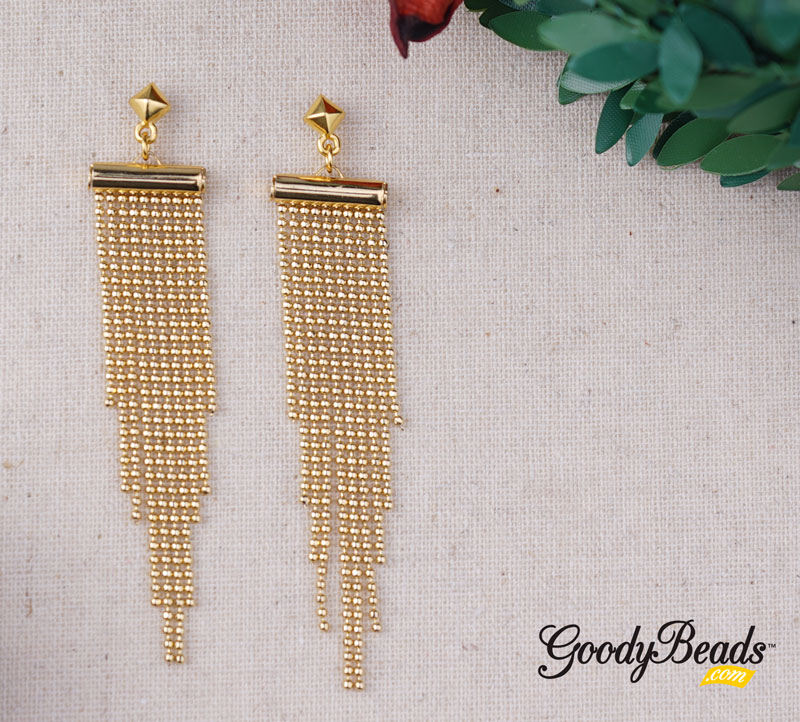
DIY Golden Fringe Earrings with Ball Chain
Let’s celebrate and toast to 2019 and welcome 2020! We have the perfect pair of earrings to celebrate the glam with this DIY Golden Fringe Earrings. Designed with ball chain and end tubes, you can whip up this pair of easy earrings before the ball drops!
Cut chain with the following ball counts: 17, 23, 25, 31, and 35. Cut a quantity fo two each.
Slide the following chain into the tube by hooking one ball inside the tube: 17, 23, 25, 31, 35, 35, 31, 25, 23, 17.
Close the other side of the end tube with a flat nose.
Open jump ring and slide on loop of earwire and loop of end tube. Close jump ring.
Repeat all steps for other earring.
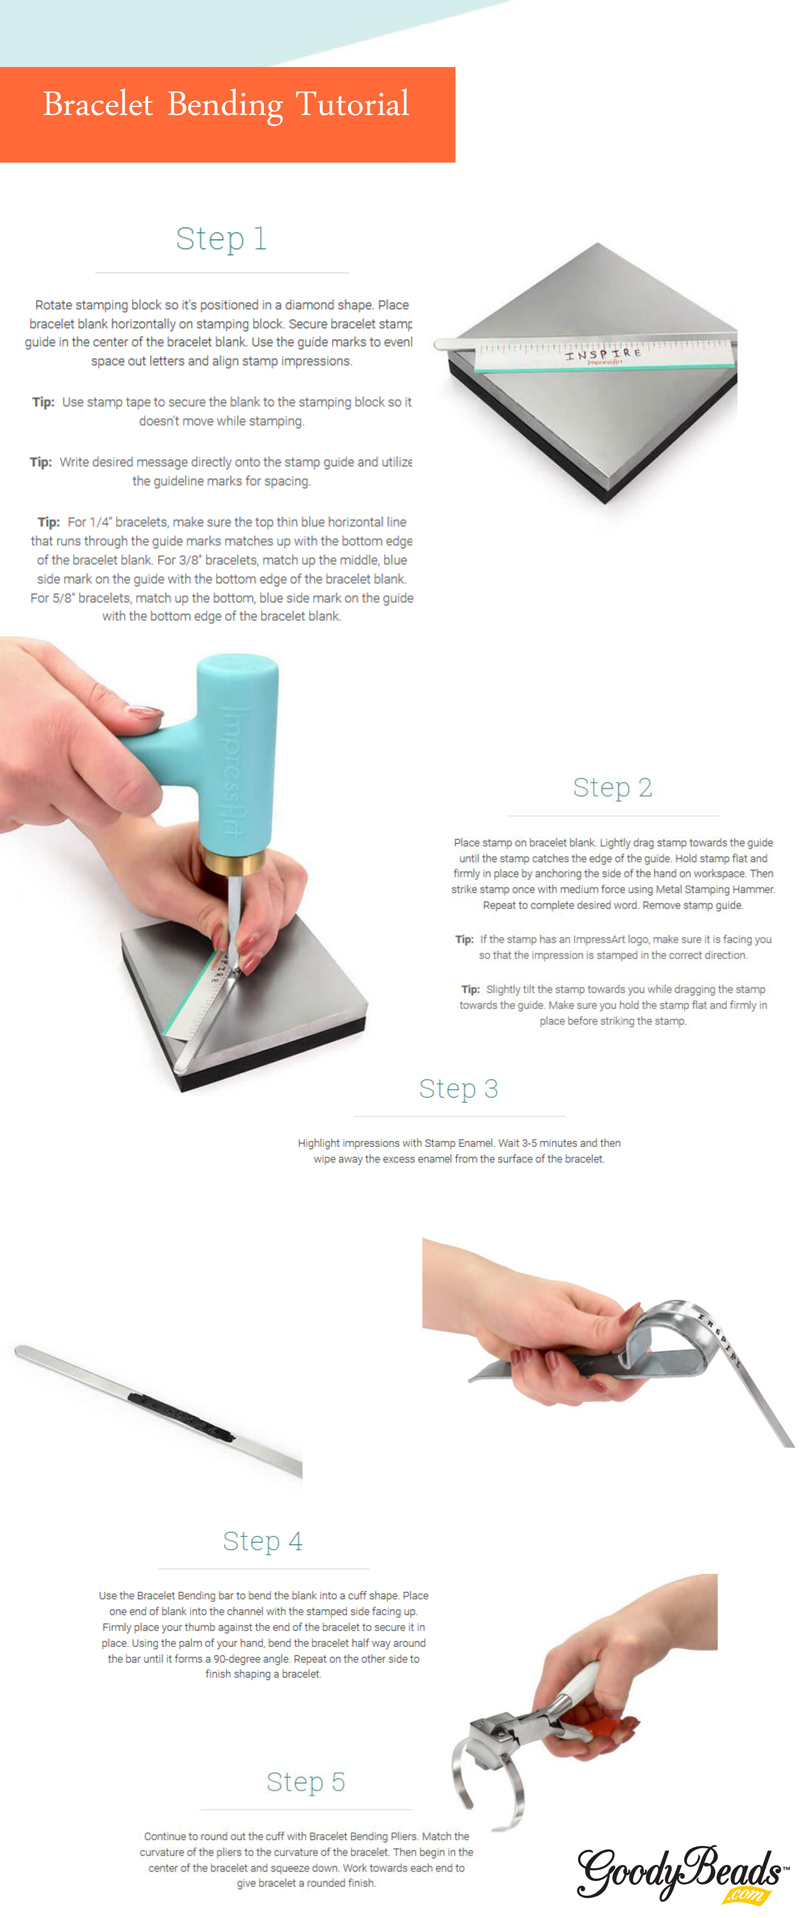
Impress Art®: How Make a Metal Bracelet with the Bracelet Bending Bar Kit
This week’s tutorial from ImpressArt is a simple tutorial on bracelet bending. See how easy it is to make a bracelet by using the bracelet bending tool.
Here are some tool you’ll need:
Bracelet Guides (Z021583) – This will help to keep your lettering straight when writing names or a simple phrase.
Bracelet Bending Pliers (TL00350) – This tool will give you the curve your bracelet will need to obtain a curved shape.
Bracelet Bending Bar Kit (TL00352) – This tool is very useful in bending the ends of your bar. Plus, this kit includes (4) 1/4 inch and (4) 38 inch Aluminum Bracelet Blanks.
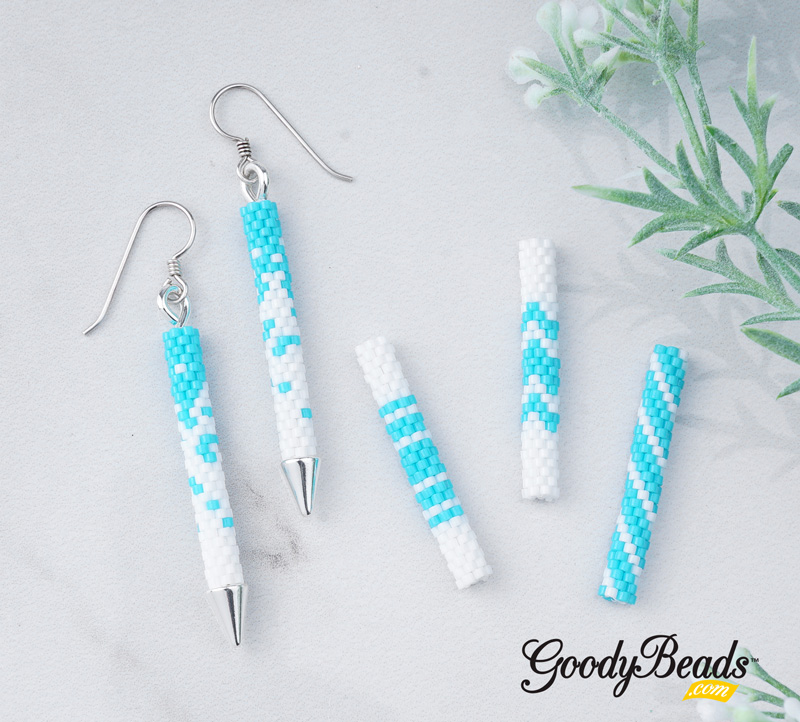
Beadalon instant pendants are easy to use! You simply unscrew the bottom cap and slide your beads one the mandrel and screw back on your cap. Another way to vamp up your instant pendant design is with a peyote stitched tube. Here is a simple even count peyote tube you can add to these nifty instant pendants. What you’ll need:
Make multiple tubes with fun designs using Miyuki Delica beads. Plus, the Instant Pendants makes it easy to slide on each tube or even swap them out for a versatile design option!
Make a stopper bead at the end of your beading thread, leaving a 4-5 inch tail. (I like using a different color Delica to differentiate the beads.)
Sew on 28 delica beads.
Pick up a delica bead and sew back through the second to last delica, going the opposite way. Pick up another delica bead, skip a bead and sew through the next delica bead. Repeat going all the way back towards to stopper
Once you’ve sewn through the first delica bead, you’ve finished your second row of your peyote stitch pattern. Pick up another delica bead and sew back the other way skipping the first bead and sewing through the second. Repeat again down the row.
Repeat your peyote stitch going back and forth until you’ve added 12 rows.
Wrap the sides together to create a tube and peyote stitch the first row to zip up the peyote tube. Gently pull your thread tight to even out thread and loop through a few beads and cut off excess thread. Pull off stopper bead and sew thread end through a few beads and cut off excess.
Repeat all steps to make another tube. Add tube to instant pendant and attach pendants to earwires for easy DIY earrings!
This PDF also has a blank template so you can create your own designs!
Impress Art®: Stamping Essentials
Our friends at ImpressArt have given us a 5 week roll-out of educational tool knowledge, tips and tutorials. ImpressArt has a whole inventory of tools, guides and metal blanks for metal stamping. Metal stamping is a great tool and skill to use to customize and personalize jewelry and crafts with impressed words and designs. (Note: Though, many of these metal stamping tools are great for imprinting on metal, you can use them for stamping leather too.)
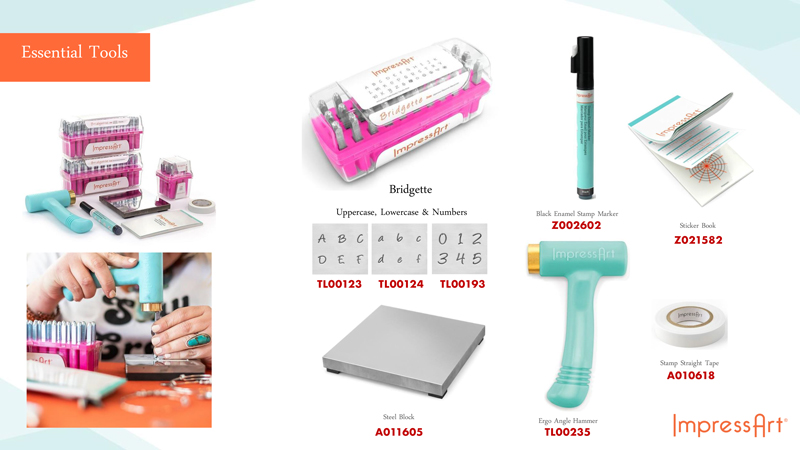
Essential Tools
To get started on customizing with metal stamping, we are starting with stamping essential this week.
These tools are what you will need to help you start metal stamping:
Metal Letter Stamping Sets – Great for personalizing jewelry and craft components. Many of these sets will have an Uppercase and Lowercase set, as well as a number set. Plus, there are different font styles you can get. (Item in image is Bridgette Set: TL00123, TL00124, TL00193) (An example of the stamps you will get with your letter set.)
Steel Block (A011605/A014415) : This a hard, stable block that you’ll need to place your stamping blanks to stamp on. This will assist you in giving you a solid impression when you stamp.
Ergo Angle Hammer (TL00235): ImpressArt’s Ergo-Angle handle provides ideal positioning for clean, even impressions and it’s one pound head provides optimal weight for deep crisp impressions. It’s short handle design features multiple holding options for maximum control and comfort.
Stamping Tape (A010618): A straight guide that allows precise accuracy when stamping letters on metal.
Sticker Guide (Z021582): Stamp Guides makes it easy to space out letters, stamp in a straight line or curve, and stamp Mandalas and other intricate patterns.
Enamel Stamp Marker (Z002602): Stamp Enamel Marker is an acrylic ink used to darken stamped impressions so your design will be clearly seen. Convenient applicator marker makes highlighting impressions quicker, easier and cleaner.
OptionalPolishing Cloth (A002371) : Use the polishing cloth to help wipe off excess enamel.
DIY Key Chain Tutorial
Here is a simple DIY Key Chain Tutorial using these essential tools and guides.
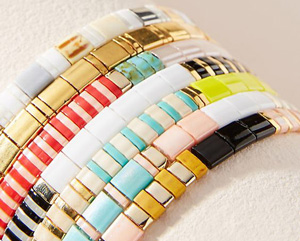
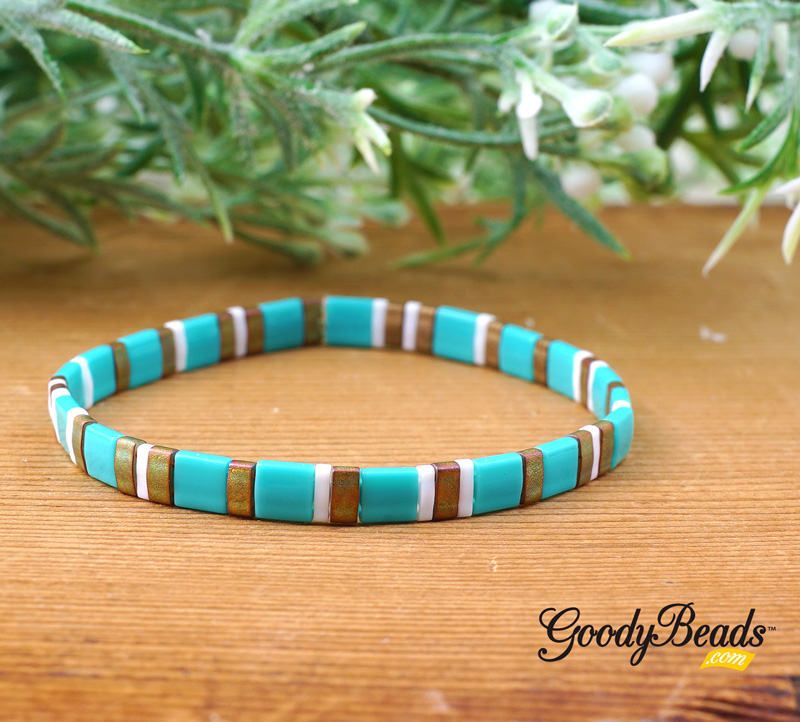
We are seeing these Tila stretch bracelets circulating online and cannot fathom how cute and easy they are! Check out these bracelets from Anthropologie we adore:
(image from Anthropologie)
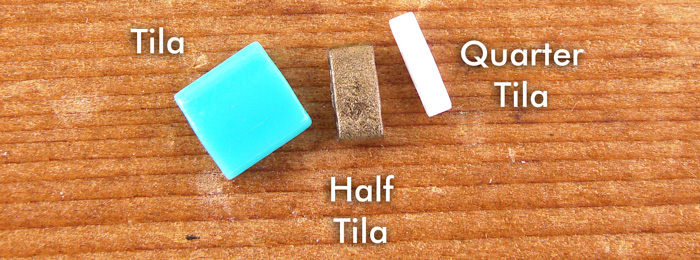
Made with Miyuki Tila two-hole beads, you can make some of your own. Plus, with our usual Tila and Half Tilas, we have newly added Quarter Tilas to our store. The variation in sizes makes for combining and mixing up different colors fun!
Here’s what you’ll need to make your own Tila Stretch Bracelets:
Tory had designed a cute wreath on our Facebook Live episode, using memory wire and jingle bell charm/beads (SBBM0005). This lightweight jingle bell wreath dangle would be cute as a present topper, Christmas tree ornament or even make a pair of earrings with them! Here is the video tutorial where Tory teaches how to quickly make and assemble a wreath of your own. It will be helpful to know how to make a hoop with memory wire.
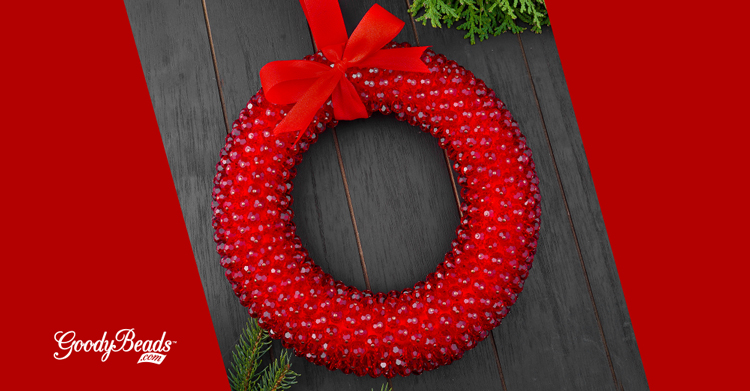
Inspired with Tory’s cute wreaths, So Vang designed this larger wreath with gorgeous satin beads strung on Extra Heady Duty Necklace Memory Wire.
On a headpin slide on a seed bead and a satin bead. Make a rolled loop, coiling more than once is fine. Make a total of 22 of the 14mm Satin beads and 110 of the 10mm Satin Beads.
Cut a coil of the necklace memory wire with Memory Wire cutters.
Using Memory Wire Finishing Pliers, make a perpendicular loop at one end.
Slide on the following sequence:
14mm Satin dangle & FIVE 10mm Satin dangle.
Repeat this sequence 21 more times.
Slide the other end of the memory wire through the loop you made in step 3 and curl a loop (It’s alright to loop it a couple of times.)
Your wreath is complete. Add ribbons and a bow!
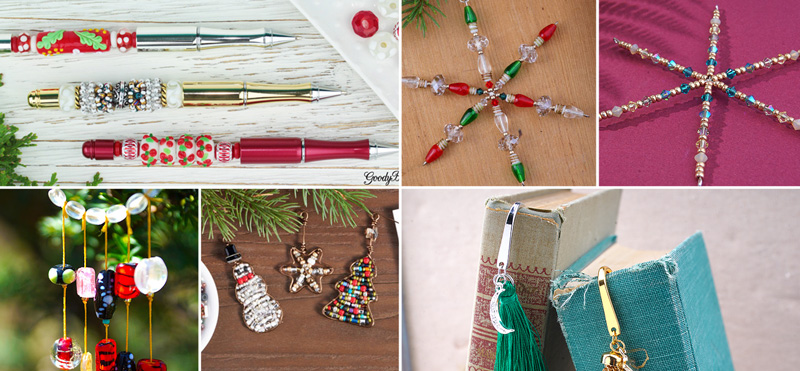
Holiday Gift Ideas: DIY Crafts
Here are some fun DIY Crafts for the holidays. Turning from our traditional DIY jewelry, we want to offer some fun DIY Craft options for your friend who loves to accessorize with bookmarks, ornaments and more!
Need some DIY gift ideas for your naturalist friend? He/She most likely love neutral colors, leather and gemstones. Here are some gorgeous DIY jewelry for the naturalist friend this holiday season!