
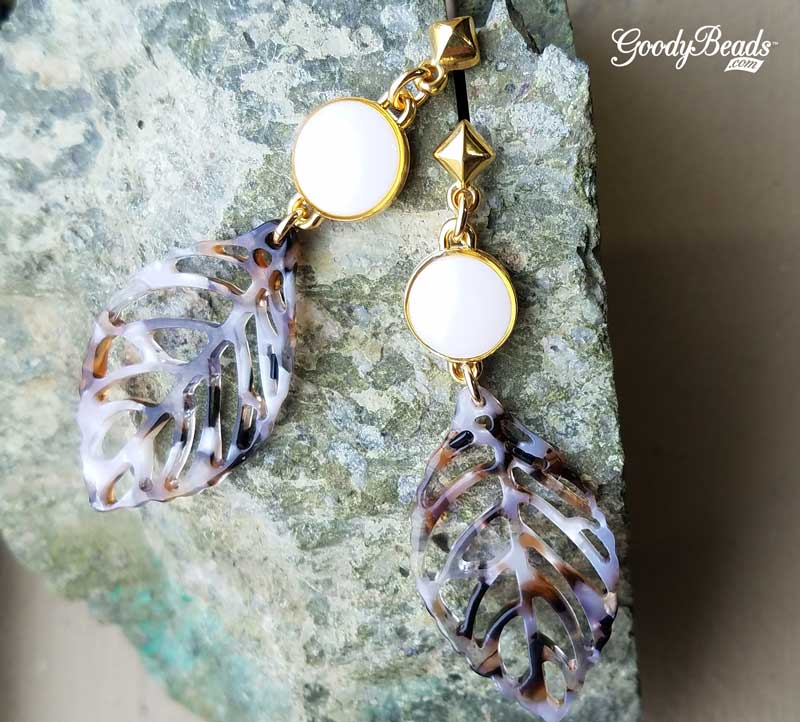
Fall-Inspired Acetate Leaf Earrings
Don’t you just LOVE fall weather? These pair of post earrings would look great with a comfy sweater, jeans and boots.
What you’ll need:
- Brown & Cream Acetate Leaf – Z019918
- 2 – White Enamel Connector Charm – Z016095
- Dismond Post Earrings – Z016754
- 5mm Jump Ring – Z011514
- Rubber Earring Backs (Suggestions A014133, A002817, TC001208 (2) OR TC01250 (2).)
Directions:
- Open jump ring, slide on leaf acetate and enamel connector. Close jump ring.
- Open another jump ring, slide through other hole of connector and through post earring loop. Close jump ring.
- Add your earring backs and you are ready to rock our fall!
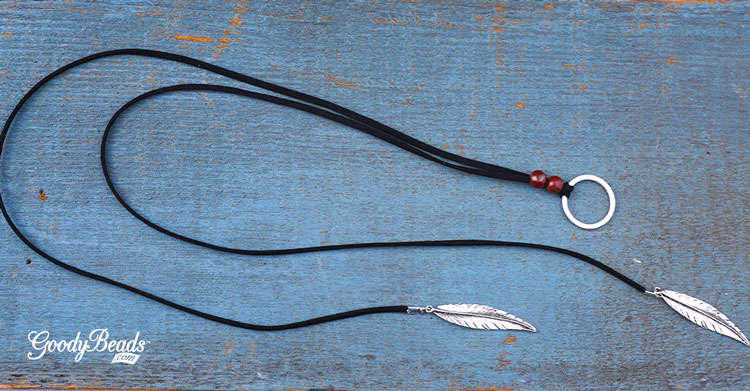
3 Ways to Wear DIY Suede and Gemstone Lariat Necklace
Today’s tutorial features the DIY Suede and Gemstone Necklace. This necklace is easy to make and can be worn three different ways. First, let’s get to designing this necklace!
What you’ll need:
- 3mm Micro-Fiber Ultra Suede Cord (Item used in example Z007132)
- 2 – Feather Charm (Z015963)
- 25mm TierraCast Hammertone Ring (TC00886)
- Crimp Cover End (Z009926)
- 4mm Jump Rings (A002413)
- Large-hole Gemstones (Item used in example APL8RDLH-8)
Directions:
- Cut 50-60″ of suede.
- Fold suede in half and make a lark’s head knot with the suede on the Hammertone ring.
- Slide two large-hole beads on to both suede cords. (Cut ends at and angle to help get both ends through large-hole bead.)
- At each suede end, fold over the Crimp Cover Ends.
- Open a jump ring, slide on feather charm and loop end of Crimp Cover Ends. Repeat to other end.
3 Ways to Wear the Necklace
Here are three ways that you can chnage up your suede and gemstone necklace.
 1. With the Hammertone ring at the front of your necklace, wrap the suede around your neck and slide both ends through the ring. This creates an illusion of two necklaces!

2. Wrap both suede ends around your neck in the same direction and loop both ends into the Hammertone ring!
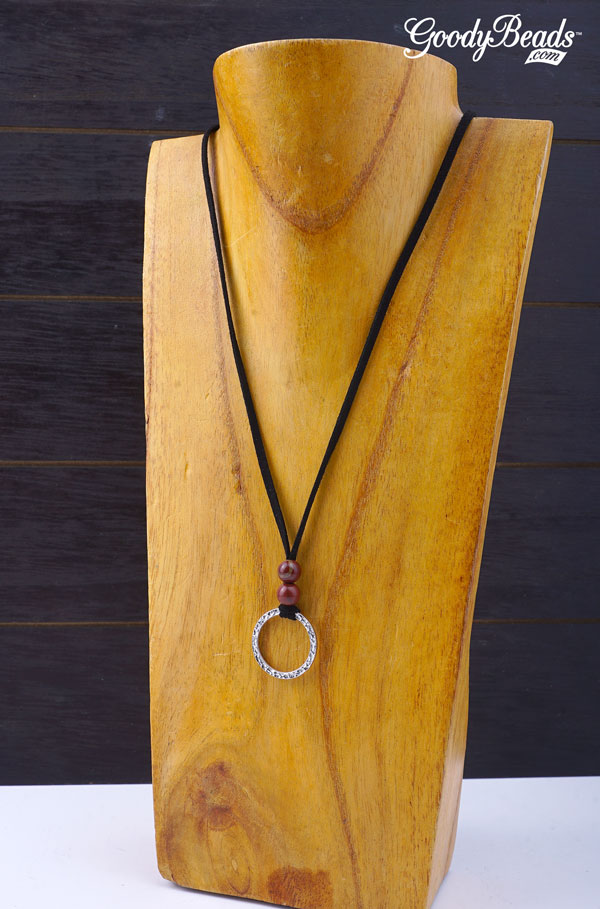
With the Hammertone ring at the front, tie your suede ends at the back of your neck. Adjust length as needed.
DIY Acorn Pearl Earrings
Acorns are a symbolism of fall weather, so these pair of earrings are fitting for the season.
What you’ll need for earrings:
- 2 – 12mm Swarovski Pearl (SW000816)
- 2 – Brass Acorn End Cap (A001086)
- 2 – 2mm Brass Headpin (TC01258)
- Brass Ball Chain (A015357)
- Brass Clamshell (Z008788)
- Brass Earring Finding (Z002858)

Directions:
- Cut ball chain with 10 ball links. Cut two pieces.
- Cup each end of the ball chain with clam shell end caps.
- On a headpin, slide on a pearl, an end cap and make a simple loop.
- Open pearl dangle loop and slide on loop of clam shell. Close loop.
- Open earwire loop and slide on other end of ball chain loop. Close loop.
- Repeat steps 3 – 5 to other ball chain link.
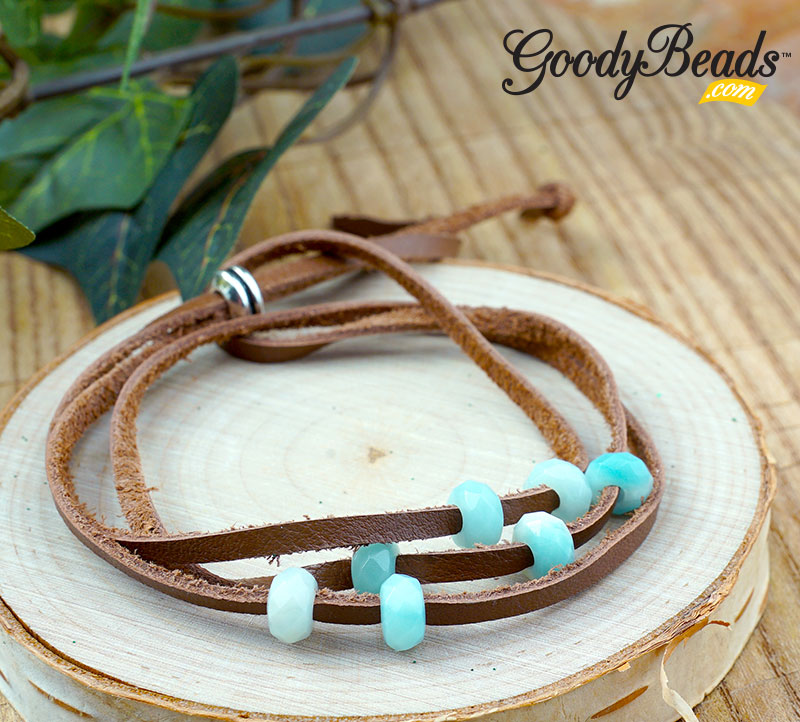
Amazonite and Leather Wrap
Design this wrap bracelet with Amazonite large-hole faceted gemstones and Deertan Lace leather. It’s also adjustable with a sliding clasp and easy to make!
What you’ll need:
- Amazonite Large-Hole Gemstones – AMZ8RLLH-8
Or You can use other Large-Hole Gemstones - 3mm Saddle Deertan Lace – Z015557
Or other colors of ‘Deertan Lace’ - Grooved Large Hole Bead – TC00210
Directions:
- Cut a 36′ piece of deertan lace.
- Slide 7 gemstones onto the leather. (Cut ends at and angle to help push leather through.)
- Take both of your leather ends and slide through TierraCast bead.
- Make a knot at each leather end.
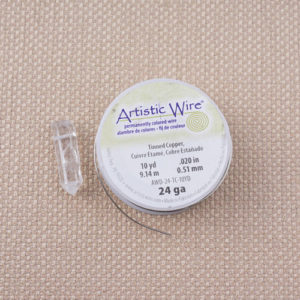
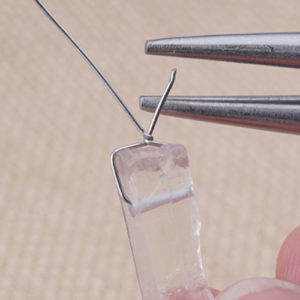
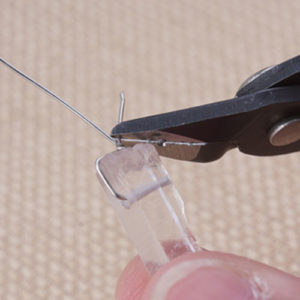
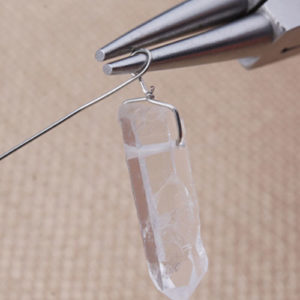
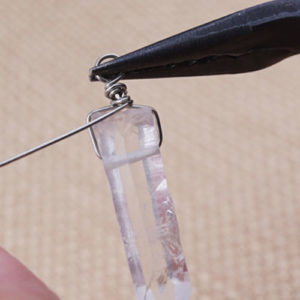
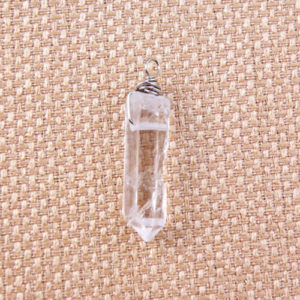
Crystal Quartz Drop Earrings with Tutorial
Today’s FREE tutorial is wire wrapping Crystal Quartz points and making simple pair of earrings with them! All you need are a few tools and wire to get your started!
What you’ll need for tutorial:
- Crystal Quartz points
- 22 – Gauge Wire
OR - 24 – Gauge Wire
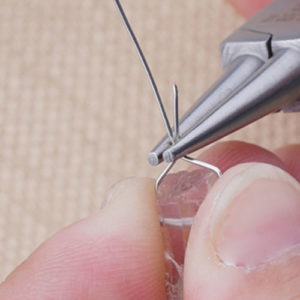
- Tools: Round Nose Pliers, Chain Nose Pliers and Side Cutter
Crystal Point Tutorial
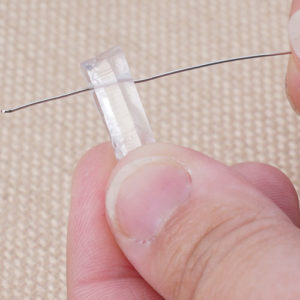
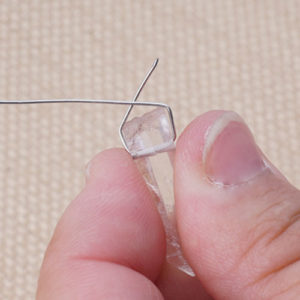
Here are some earring examples to using your crystal points!
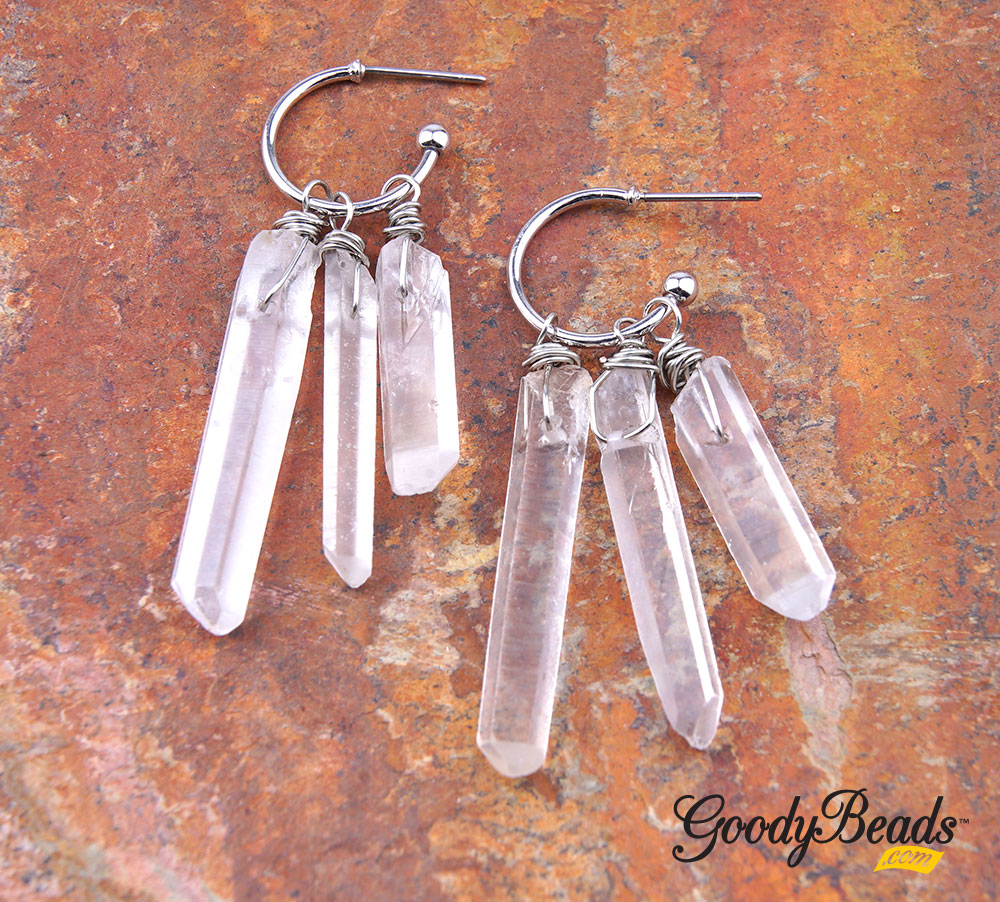
Crystal Hoop Earrings
We took three different graduated points and slid them over the hoop earrings for an easy pair of earrings!
Items used in earrings: CRY3-36PT, AW00055, Z011592
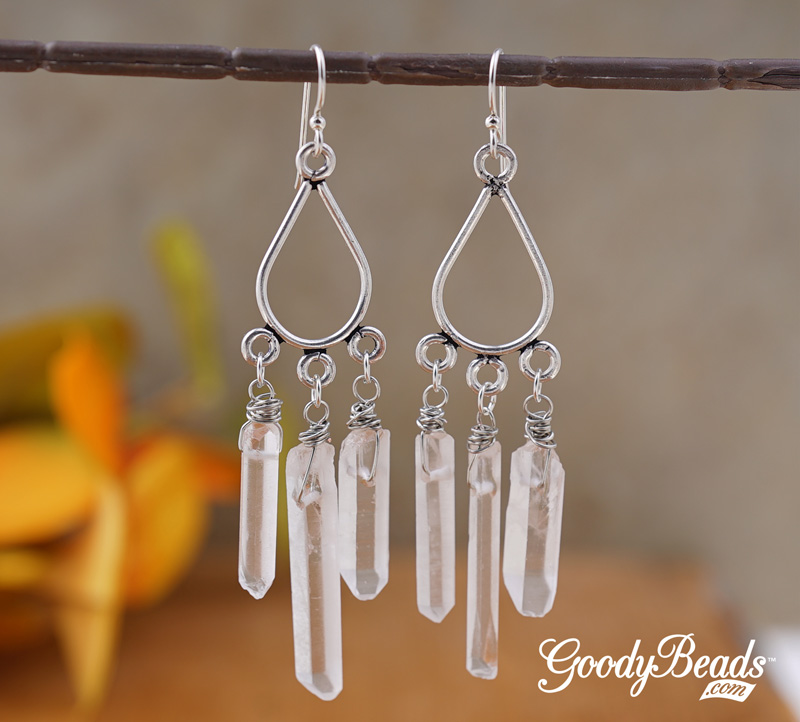
Crystal Point Drop Earrings
In this example, we chose two points of the same length and dangled one point on either sides of the drop link. And a third point at a longer length at the middle.
Items used in example: CRY3-36PT, AW00055, Y013693, TCZ0077, A002413
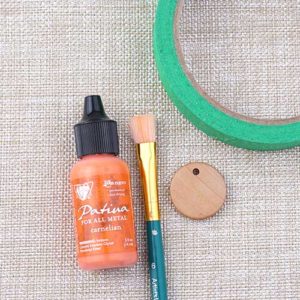
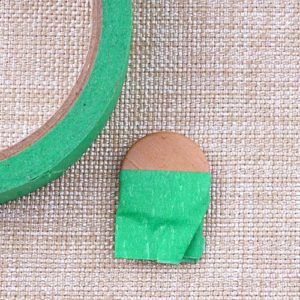
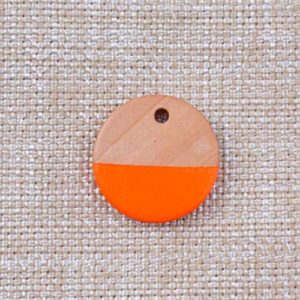
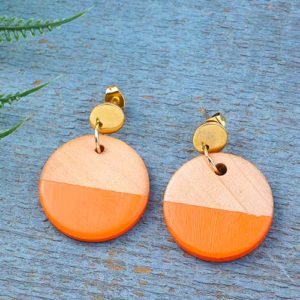
DIY Wood Earrings with Vintaj Patina Paints
Wood jewelry is everywhere and it is a trend that will probably stick for a while. We took our favorite wood pendants and painted them with Vintaj Patinas. Patinas are great for painting on wood because it gives you an even and full coat of paint. Plus, they dry fast enough that if you need a second layer, you only need to wait a minute of two to add your next coat.
What you’ll need:
- 2 – Natural Wood Pendant (A021783)
These pendants come in two other colors: Dark Brown and Black. - Vintaj Patina Paints (Item used in example TL00300)
- Gold Post Earrings (Z001831)
- 8mm Gold Jump Ring (A011523)
- Other tools: Paint brush, Painter’s Tape & Flat Nose Pliers

Step-by-Step Tutorial

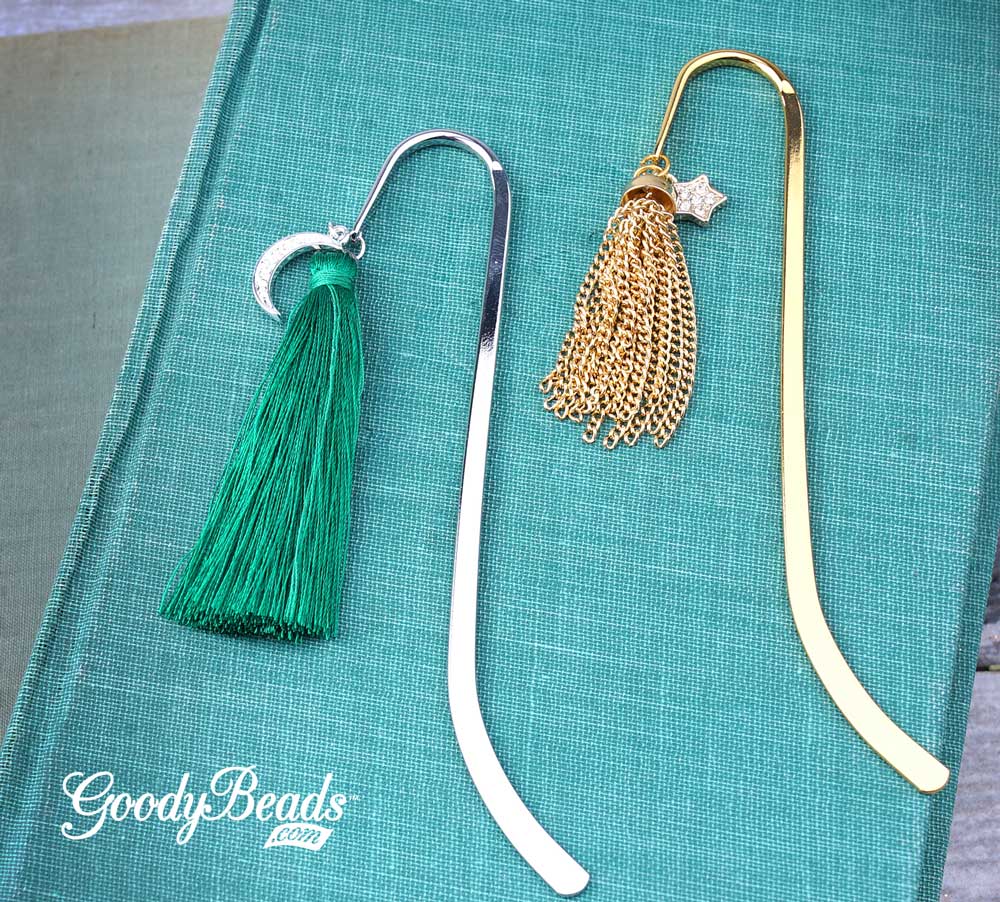
DIY Bookmarks with Tassels
Fall is the perfect time to wind down, cozy up in a nice warm blanket and page through a good read! Why not make a DIY bookmark while you’re at it. And with tassels of course! Here is a quick and easy tutorial on making these bookmarks. Plus, as a bonus we have some book recommendations from our designers to you.
What you’ll need for bookmarks:
- Bookmarks (A002528/A003998/A005286/A005293)
- 5mm or 6mm jump ring
- 60mm Long Fabric Tassels
or 1.75 Inch Chain Tassel (Gold/Silver) - Moon Charm (Gold/Silver)
OR Star Charm (Gold/Silver)
Directions:
- Open jump ring and slide on charm. Close jump ring.
- Open another jump ring, slide on tassel, charm jump ring and through bookmark loop. Close jump ring.
- Repeat all steps for MORE Bookmarks!
Book Recommendation
Make sure to add these books to your Must-Read books, recommended by our Designers:
- Heidi: I recently read Stephen King’s “Sleeping Beauties” and loved it. One of my other favorite books from him is “The Girl Who Loved Tom Gordon”. I also recently read “The Woman in Cabin 10” by Ruth Ware. And currently reading “No Exit” by Taylor Adams.
- John: I’m a Stephen King fan. The Dark Tower Series is great as well as The Stand and Under the Dome and the Mr. Mercedes series.
- So: For a short fun read, One More Thing: Stories and Other Stories by B.J.Novak. For my graphic novel and comic style readers, read This Was Our Pact by Ryan Andrews. The artwork is spectacular!
- Shanna: Butterflies by Martha Goldhirsh
- Tory: Mythos by Stephen Fry
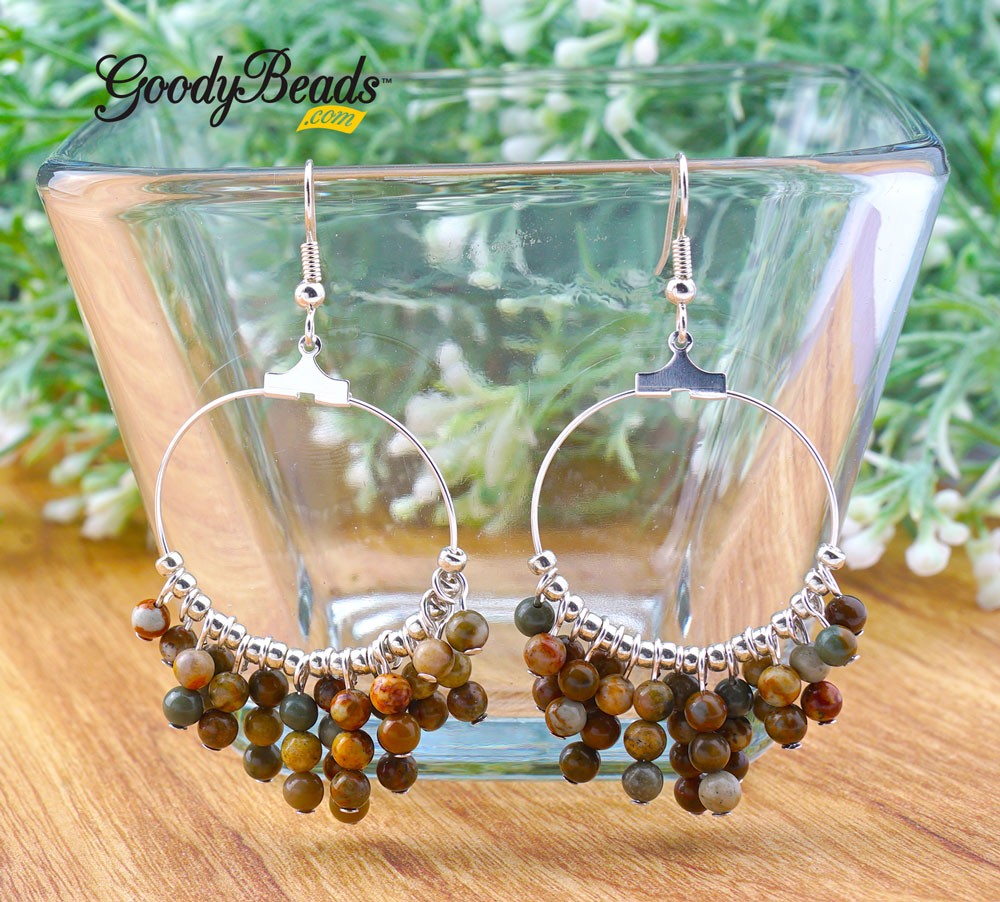
Rocky Butte Gemstone Hoop Earrings
Rocky Butte, from our friends at DakotaStones, “is mined in Oregon and may have either dendritic or landscape qualities. It may also be called Rocky Butte Picture Jasper. The combination of color and pattern variation are reminiscent of Red Creek Jasper, although the colors are much more muted. Rocky Butte Jasper strands are predominantly shades of gray, brown and tan with some beads or inclusions of rust and rose.” (DakotaStones.com)
If you love gemstones as much as we do, you’ll love this pair of hoop earrings with North American Rocky Butte gemstone beads. It’s a perfect pair of earrings for fall!
What you’ll need for earrings:
- 4mm Round Gemstones (Item used in example: RBP4RD)
- 30mm Hoop Frame (Z017105)
- Silver Seed Bead (SB00106)
- Headpins (A019647)
- Earring Finding (Item used in example: A008998)
Directions:
- On a headpin slide on the following amount of gemstones and make a simple loop:
A. 1 gemstone, make a total of 8.
B. 2 gemstones, make a total of 12.
C. 3 gemstones, make a total of 8.
D. 4 gemstones, make a total of 2. - On open hoop on hoop frame and slide on the following seed bead and gemstone dangle:
Seed bead, A, seed bead, A, seed bead, B, seed bead, B, seed bead, B, seed bead, C, seed bead, C, seed bead, D, seed bead, C, seed bead, C, seed bead, B, seed bead, B, seed bead, B, seed bead, A, seed bead, A and seed bead. - Close hoop frame. Open earwire loop and slide on hoop frame loop. Close earwire loop.
- Repeat Step 2 and 3 for other earring.
Swarovski® Sapphire Jewelry Tutorials
We’ve got THREE easy projects using October’s Swarovski Psychology of Color: Sapphire. Design bold and confident jewelry with this hue!
Sapphire Ombré Bracelet
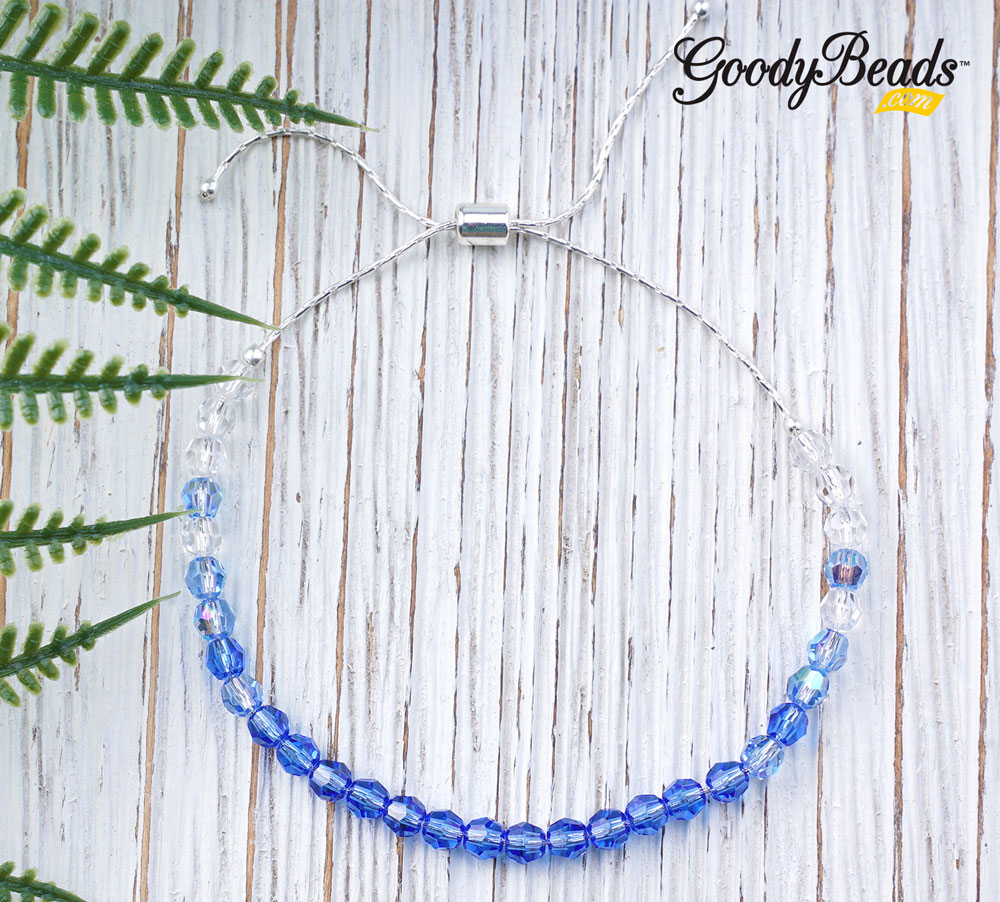

Items used in bracelet: CH00724 (10″), TC01897 (4), Z008576, SW00072 (15), SW02049 (8) and SW00001 (8). Tool: Magical Crimping Pliers
This bracelet is designed using our popular beading chain, 2mm crimps and slide on clasp. We’ve also used Magical Crimping Pliers to finish the crimps! Check out how to use this tool in our BeadSmith Magical Crimping Pliers blog post.
- Slide beading chain through slide on clasp.
- On the beading chain, slide on the following:
Crimp tube, 3 clear crystal, 1 light sapphire, one clear, 2 light sapphire, 1 sapphire, 1 light sapphire, 11 sapphire, 1 light sapphire, 1 sapphire, 2 light sapphire, 1 clear, 1 light sapphire, 3 clear crystal and crimp tube. - Slide chain through slide on clasp in the same direction you did in step one.
- Center beads and make a crimp on both ends of your crystals with magical crimping pliers. Make sure to leave a gap so that the crystals lay nicely and not too rigid on the chain.
- Slide bracelet over the larges width of your hand and cut excess chain ends if needed.
- Add a crimp to both ends of the beading chain and make a crimp with the magical crimping pliers.
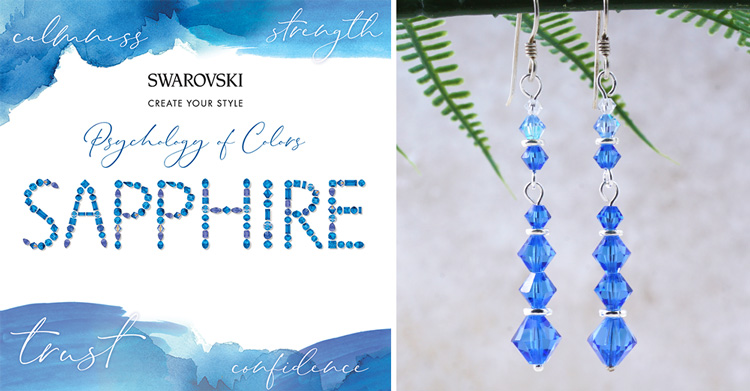
Sapphire Icicle Earrings

Items used in earrings: SW00183 (2), SW00182 (4), SW00181 (2), SW02088 (2), SW00634 (2), TCZ0078, A001495, A019697, TC00006 (4) and TC00032 (2).
- On headpin, slide on the following and make a simple loop:
8mm bicone, 5mm spacer, 2 6mm bicone, 4mm spacer and 4mm sapphire bicone. - Open eyepin loop, slide on crystal dangle from Step 1 and close loop.
- On the eyepin, slide on the following and make a simple loop:
4mm sapphire, 4mm spacer, 4mm light sapphire and 3mm crystal. - Open earwire loop, slide one crystal dangle and close loop.
- Repeat all steps for other earring.
Swarovski Sapphire Bracelet

Our friends at Swarovski: Create Your Style has this stunning bracelet made with classic cut crystal pendants!
What you’ll need for bracelet:
- Z009912 (4)
- 23mm Heavy Hammered Ring Sterling Silver Plated – Vintaj® PT198-040 (4)
- A013159 ( This bracelet substitutes the chain and clasp)
- A008807
- X003062
- SW001762 (8)
- SW01779 (8)
- SW01796 (4)
Directions:
- Using 7mm jump rings attach one 8mm Sapphire pendant to one Heavy Hammered Ring. Then attach one 10mm Sapphire pendant, one 14mm pendant, one 10mm pendant and one 8mm pendant onto the hammered ring. Make sure all pendants face forward. Repeat this step 3 more times and set aside.
- Now using the large charms made in Step 1 attach them evenly along the bracelet. Do this with a 7mm jump ring and attach the Heavy Hammered Ring and Dotted Dap Circles together.
Swarovski Psychology of Color: Sapphire
For October, Swarovski’s Psychology of Colors pick is Sapphire. Check out how bold and confident this hue is!

Cool down with this perfect color for fall/winter! Sapphire is a color loved by many and quite popular in jewelry. Here are some Swarovski colors to match this rich hue:
- Sapphire
- Light Sapphire
- Light Sapphire Shimmer
- Metallic Blue
- Blue Shade
- Denim Blue
Sapphire Jewelry
Check out our other blog post with designs using Swarovski Sapphire!
Purple Persian Tassel Earrings
People will want to PURR with envy when they see you flaunting these tassels earrings made with Czech beads.
What you’ll need for earrings:
- Czech Cat Beads
- 27x47mm Flat Half Circle Fan Tassels
- 19x29mm Fan Tassels
- Eyepin
- 5mm and 6mm Jump Ring
- Earring Finding
Purple Persian Tassel Earrings

Items used in earrings: A019617, Z011514, Z011522, Z007650, Z019427 & Z003693.
- Open large jump ring, slide on both tassels and close jump ring.
- Open small jump ring, slide through large jump ring in Step 1, and through eyepin loop. Close jump ring.
- On the eyepin, slide on a Czech cat bead and make a simple loop.
- Open loop you just made in Step 3, slide on earring loop and close loop.
- Repeat all steps for other earring.
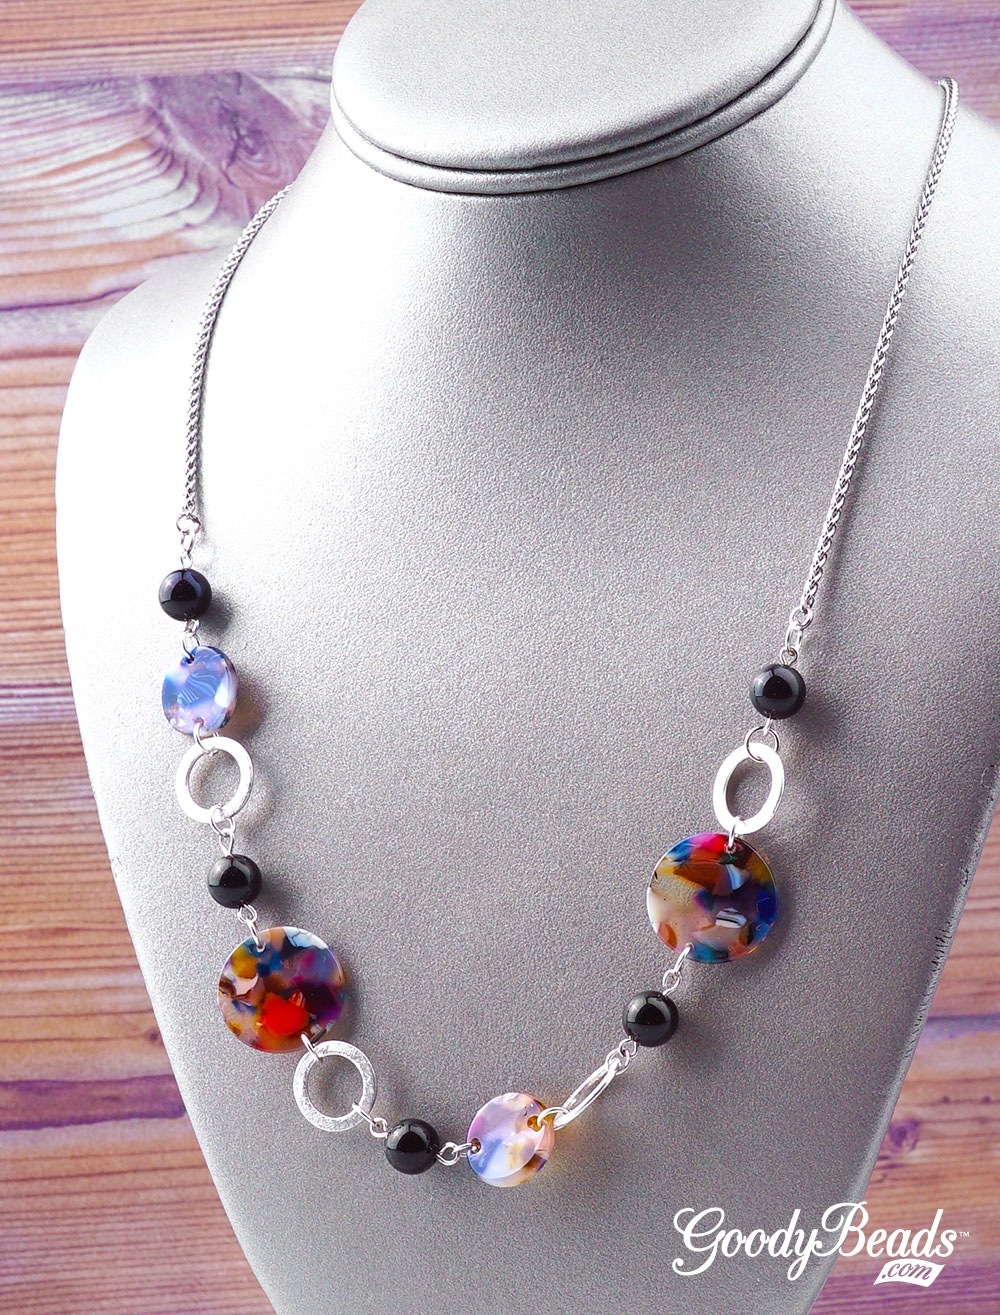
Onyx and Acetate Link Necklace
Combining some of our favorite components, we have gemstones, acetate and an adjustable necklace sliding clasp in this simple link necklace!
What you’ll need:
- 8mm round gemstone (item used in necklace ONX8RD-8)
- 15mm Acetate Two Hole Coin Connector (Item used in necklace Z015018)
- 20mm Acetate Two Hole Coin Connector (Item used in necklace Z015028)
- 14mm Brush Silver Ring Connector/Link (Y018889)
- Silver Plated Adjustable Wheat Chain Necklace Sliding Clasp (Z011945)
- 1.5 Inch Silver Eyepin (A019606)
- 5mm Silver Jump Ring (A001528)
Directions:
- Slide a gemstone on an eye pin and make a simple loop.
- Open a jump ring and slide through necklace loop end and a gemstone link. Close jump ring.
- Using jump ring in between each link, connect each link in the following order starting from gemstone link in Step 1:
15mm acetate, brushed silver ring, gemstone link, 20mm acetate, brushed silver ring, gemstone link, 15mm acetate, brushed silver ring, gemstone link, 20mm acetate, brushed silver ring, and gemstone link. - Open another jump ring, slide on other end of gemstone link and through other necklace loop end. Close jump ring.
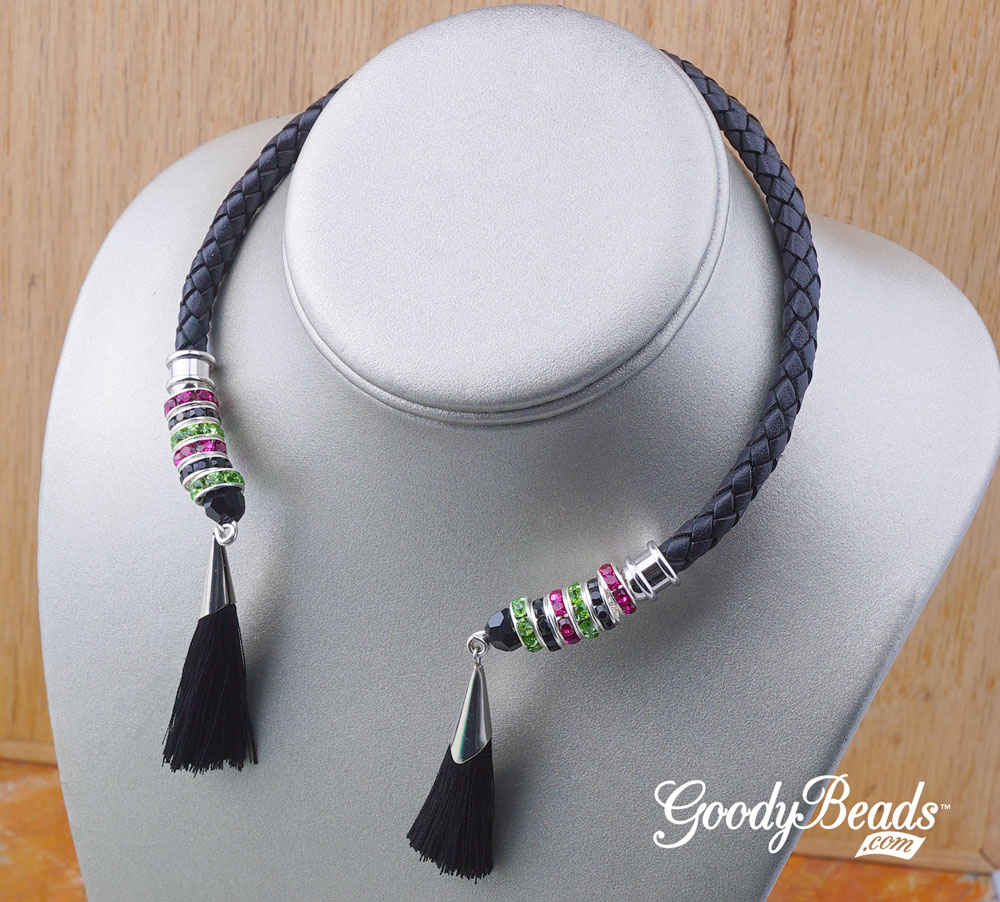
Memory Wire Necklace with Tassels
Our love for memory wire extends beyond just bracelets. We have Beadalon memory wire that has a large diameter for necklace jewelry! Here is a dazzling way to making a collar/choker necklace with memory wire, TierraCast cord ends, rhinestone rondelles, LEATHER and tassels!
What you’ll need:
- Necklace Memory Wire (Silver/Gold/Rose Gold)
- 10mm Rhinestone Rondelles (items used in example: A009131/ A009134/ A004482)
- 2 pieces – 6mm TierraCast Cord End (TC02149)
- 10 Inches – 6mm Braid Leather Cord (Item used in example: CH01088)
- 2 pieces – 8mm Swarovski Round Crystal (Item used in example: SW00101)
- 52mm Tassel with Cap (Item used in example: Z004944)
Directions
- Cut a full circle of memory wire using Memory Wire Cutters.
- At one end, make a loop using Memory Wire Finishing Pliers.
- On the memory wire slide on the following pieces:
Black crystal, green rondelle, black rondelle, fuchsia rondelle, green rondelle, black rondelle, fuchsia rondelle, cord end, leather, cord end, fuchsia rondelle, black rondelle, green rondelle, fushcia rondelle, black rondelle and green rondelle. - Cut memory wire with with about 1/2 to 3/4 inch left. Use your finishing pliers to making a loop at their end. Tighten your loop ends if needed.
- Open loop of tassel and slide on one end of your memory wire loops. Close tassel loop. Repeat to other memory wire end.
Stackable Stretch Czech Bead Bracelets
We’re designing stretch bracelets with 50mm curve tubes beads and 3mm melon beads. Easy to make, stack and wear!
These bracelets are easy to make! Each bracelet is strung on and tied into one bracelet for fun stackable, arm candy fun.
What you’ll need:
- .5mm Clear Elasticity (A021633)
- 3mm Czech Melon Beads
- 50mm Curve Tubes Beads (A014097)
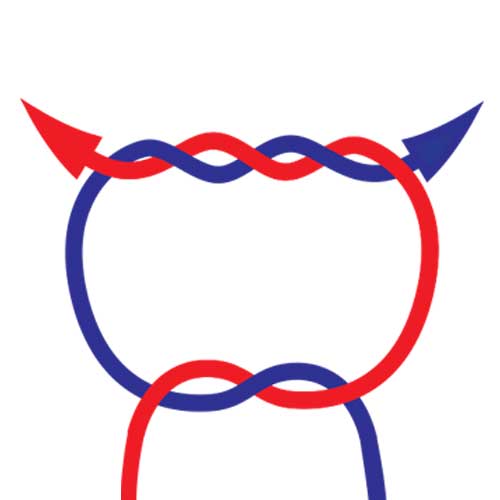
- TUTORIAL on tying Surgeon’s Knot

Items used in bracelets: A014097, A021634, A021914, A021930, A021929
Directions:
- Cut a 10″ piece of elastic. Stretch elastic to loosen the elasticity.
- Slide on the elastic the curve tube and 40 melon beads. (40 beads will loosely fit a 6.5″ wrist size. So add more melon beads to adjust to your sizing.)
- Make a Surgeon’s Knot to your elastic ends. Gently stretch elastic to tighten the knot.
- Cut off excess elastic and slide knot inside curve tube if you can.
Optional: You can add a small spot of Super New Glue or Hypo Cement to the knot. - Repeat for MORE bracelets!