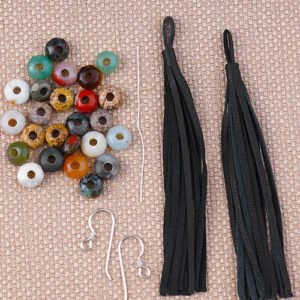
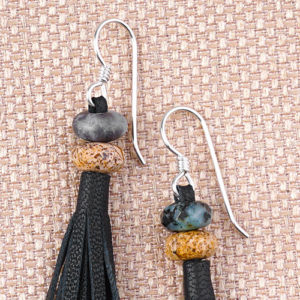
We love a good tassel, and these leather tassels from LeatherCord USA are no exception! Here is a fun and easy DIY gemstone tassel earrings you can make in seconds!
We adore these leather tassels from LeatherCord USA, because they have a long enough loop at the top, which will hold these large-hole gemstone bead from DakotaStones and then topped off with a TierraCast ear wire. With high-quality materials from well-known brands, you’re sure to make a fabulous pair of earrings!
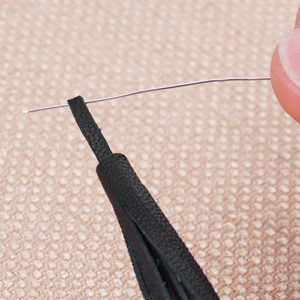
Step 2: Cut an inch of wire and slide it through the tassel loop halfway.
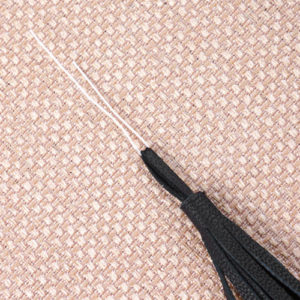
Step 3: Fold the wire in half to create a makeshift needle.
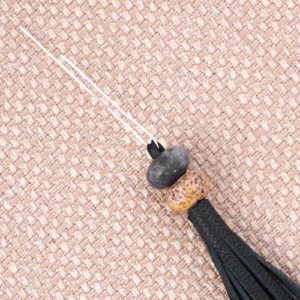
Step 4: Slide on two faceted rondelle gemstone beads.
Step 5: Carefully slide off the makeshift needle. Open earwire loop and slide through tassel loop and close loop. Repeat all steps for other earring.
Sizzix Framelits And Embossing – Video Tutorial
Get your Sizzix Big Shot out and learn how to use Framelits Die and Embossing in this video segment with Candie Cooper and Tory Vezina!
Today’s blog post will feature Sizzix Framelits and Embossing Folders. Use Framelits to cut fun shapes to display your earrings or even use it for your scrapbooking needs. And use Embossing Folders to add a 3D texture to paper, fabric or even thin copper/metal pieces.
Embossing Folders
The first important rule when using Embossing Folders with the Sizzix Big Shot is the Extended Platform (SZ00053).
You will need the Extended Platform, which is included with Sizzix Big Shot Machine; to place your Embossing folder on to run it through the Sizzix Big Shot, instead of using the Movers and Shaper platform you would usually use to place your Dies on. There will be a visual on the Platform on how to use it with your Big Shot.
The Process to running the Embossing Folder through your Big Shot is to place the Extended Platform down, put your paper or thin piece of metal inside your Embossing Folder, put the Embossing folder on the Extended Platform and place the Cutting Pad on top. Run the whole thing through the machine and you will get a textured piece of paper or thin metal!
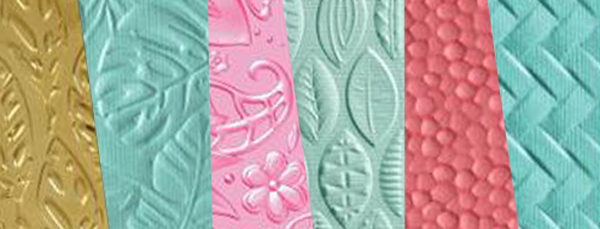
Make sure to check out these fun Embossing Folders to creating your own designs:
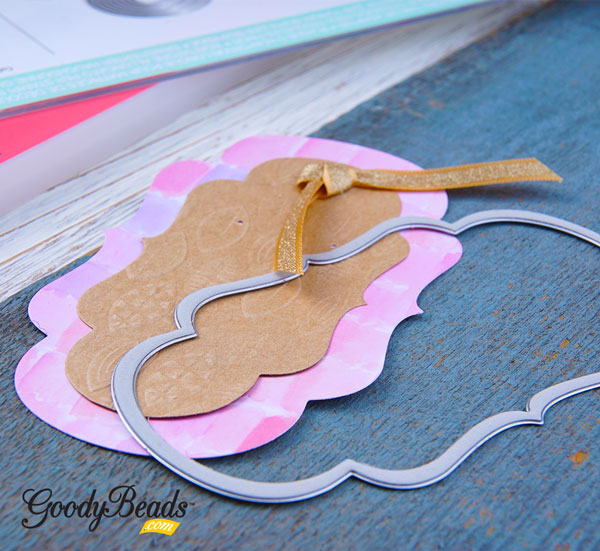
Framelits are dies with intricate and detailed designs best used with paper, fabric or thin pieces of metal or copper. Do not use Framelits with thick pieces of leather.
The process in running the Framelit Dies through the Big Shot is to place the Extended Platform down, then place the Extended Thin Die Adapter on top, followed by a Cutting Pad, Framelit with the form side facing up, your piece of paper and another Cutting Pad. Run all parts through the Big Shot for an intricate cut out piece of paper!
Video Tutorial
Candie and Tory will show you how easy it is using the Framelits Dies and Embossing Folders in this video tutorial!
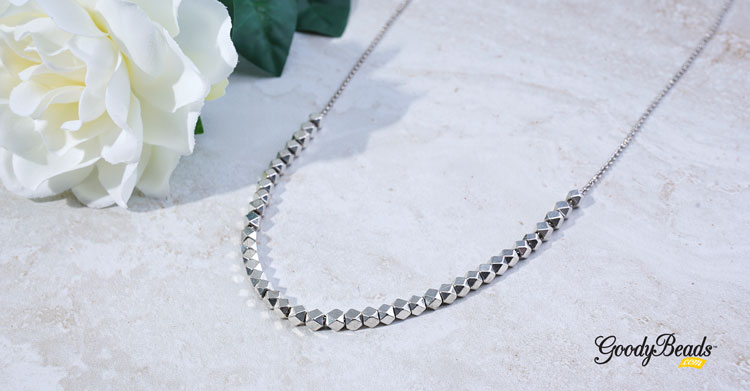
Lariat Beading Chain Necklace – Tutorial
Tory and Heidi popped onto Facebook LIVE this week to create this stunning piece, inspired by window shopping at Nordstroms. Check out how easy it is to make this necklace using our popular rollo chain and adjustable sliding clasp.
A fun pastime we love doing is shopping! Who doesn’t like shopping? Tory came across a lariat necklace window shopping on Nordstrom.com and figured she can make her own! See how easy it is to make and how versatile it is.
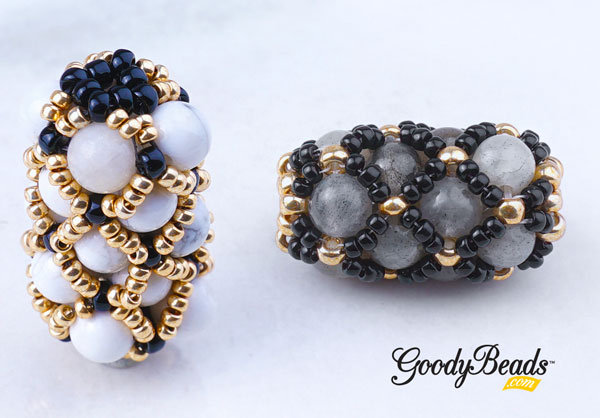
We’ve got a fun lattice beaded bead pattern tutorial for you using 6mm round gemstones. Can’t you image the possibilities!
As a request from our viewers, So Vang is sharing her pattern to making a lattice beaded bead using 6mm round gemstones. You don’t have to use 6mm gemstones. You can use 6mm bicone beads or 6mm round Chinese Crystals or Pearls. You can decide on the colors, that’s the fun of taking a tutorial and making it your own!
This pattern is also an altered version to the 2mm Pearl blog.
Sometimes, when designing your lattice beaded bead, you will find that the tutorial pattern won’t work as well and you’ll need to adjust the pattern. In this example, we have the 6mm Labradorite round beads. These beads are a slight smaller than the white Howlite, so in Step 6 I had adjusted to using THREE 11/0 seed beads instead of FOUR. This way, the lacing of the seed beads will hug the round gemstones.
What will you design today! We would love to see them. Make sure to tag us on Social Media so we can see your lovely creations!
Painted Leather Wrap Bracelet
Check out this bracelet Tory and Candie taught at the Spring 2019 Twin Cities Bead Bazaar, using Vintaj Patinas painted on leather.
If you were able to join us at the Twin Cities Bead Bazaar on March 2 & 3, you’ll know how much fun it was! We are sharing this super easy bracelet Candie Cooper and Tory taught at one of the hourly Make & Takes. It’s made with leather cord and TierraCast end caps on NEW Extra Heavy Duty Memory Wire. And then painted with Vintaj Patinas.
Instructions:
Using Finishing Pliers, make a loop at one end of the memory wire.
Slide on memory wire a bead cap, leather and a bead cap.
Cut excess memory wire leaving about 1/2 inche to 3/4 inch end.
These pendant sets are a composite made by fusing stone fragments using heat, pressure and a stabilizing agent or resin. The stone fragments remain clearly visible, creating fascinating patterns. Composite beads may also be called “mosaic beads” because of the visible fragments. The stone used to create composite beads is usually the remnants from cutting, making them a great way to incorporate upcycled elements in designs with a vibrant pop of color!
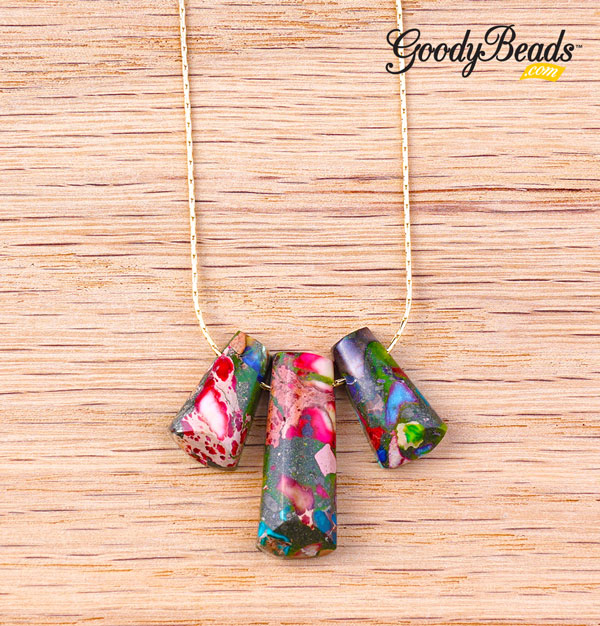
These 11 piece gemstone ladder pendant sets are versatile for your jewelry designs! They make a great statement piece when using all 11 pieces or just use a few pendants in multiple designs. The size ranges from 15mm-38mm. Here are 3 ways to using these gemstone pendant sets.
The most basic way to using these pendant set is making a collar necklace. We used the entire set and strung the pendants on Soft Flex wire with a seed bead in between each pendant. At each end we slid on a clamshell bead tip and crimped a 1.5mm crimp tube to sit inside the clamshell tip. Because we LOVE our adjustable necklace slide clasp, we slid on its jump ring end to the loop of the clamshell bead tip and closed the loop. Instant necklace to wear!
Crimp a 1.5mm crimp tube on Soft Flex wire, inside the clamshell bead tip.
Make a pendant drop with one or a few pendants from your set. One way is to simple slide a pendant on an eyepin for an easy drop. Or slide on three pendants with a seed bead on either side (optional) on an eyepin or wrapped wire loop. Then add your adjustable necklace chain to each loop of your drop pendant for a super easy necklace.
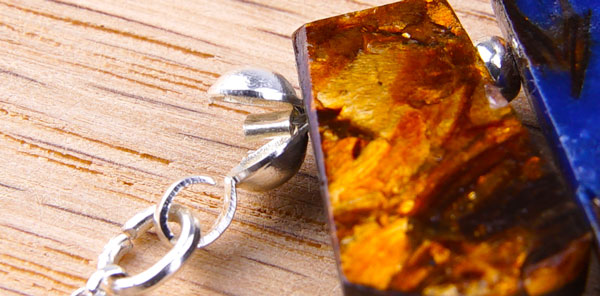
A fun third option is to slide your pendants on a beading chain. Cut your beading chain to your preferred necklace length. Slide pendants onto the beading chain. End your beading chain using the Loop Crimp Lobster Clasp Set (Z012741/Z012743). Slide end cap on beading chain and crimp the end to your beading chain. Repeat to other beading chain end. Open jump ring and slide on lobster clasp and through end cap loop. Repeat to other end cap without a clasp.
Easy SuperDuo Bracelet – Tutorial
Czech SuperDuos are a versatile two-hole bead that can be easily made into a simple stitched bracelet. Check out this super simple tutorial using only Czech SuperDuos, size 11/0 Miyuki seed beads and beading thread.
If you know So Vang, you know that SuperDuos are her favorite two-hole bead to use when bead stitching. It creates fun angles and combines easily with her other favorites like Czech Honeycomb beads and DiamonDuos. But a simple basic way to make a bracelet using SuperDuos is combining it with size 11/0 and warping the strands around for this easy DIY bracelet.
You can make a one wrap bracelet with this tutorial or make a multi-wrap. To make this bracelet, start out with your bracelet length (in this case we did 7 inches), multiply that by the amount of wraps we wanted and add another foot. This length will be the amount of beading thread you will need. In this case, we used about 4 feet. We strung 4 sections of 4 different color ways to make this bracelet. Each section measures 7 inches in length.
A quick tip, when you are finished sewing all the necessary beads, lay your piece straight and smooth out the piece so that everything lays flat before you tie off your ends.
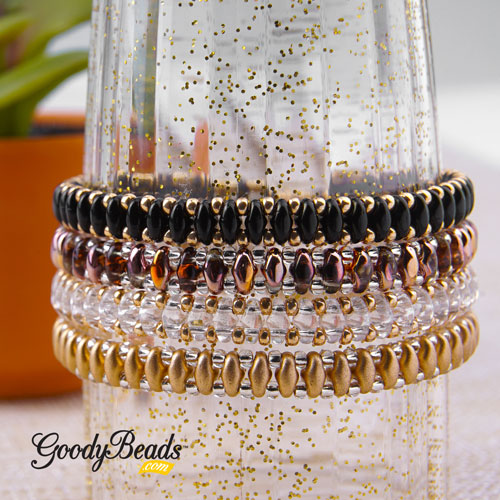
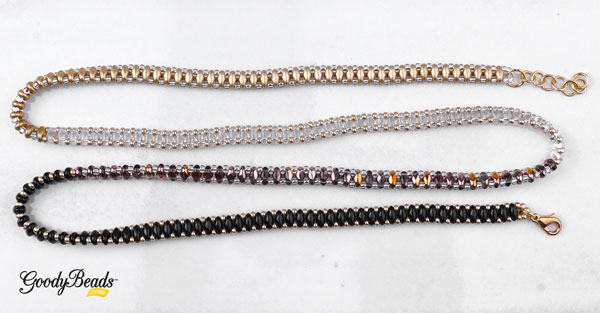
Sample Color ways
Test out different colors to play with. Here we have four samples of various color ways you can make your bracelet.