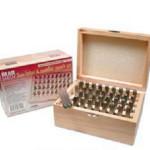
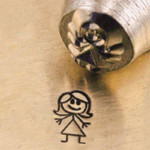
A great addition to any jewelry or crafting project is metal stamping. Personalize a piece by stamping a specific name, inspirational quote, special date, sentiment, etc. There are a variety of fun, decorative designs for stamping, too, such as hearts, animals and flowers. The options are endless!
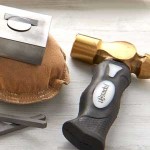
Take a look at our recommended metal stamping essentials to get you started with this exciting jewelry-making trend.
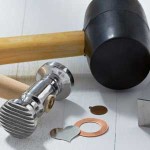
Our friend, Adrienne, from Happy Hour Projects, wrote an introduction to metal stamping and a tutorial on stamping for beginners. Her advice and instructions are easy to follow, so you can start stamping pieces right away. Check out her metal stamping tips.
Don’t feel intimidated by the thought of metal stamping. Once you learn the skill and develop your own technique, you’ll add it to all of your everyday jewelry making ideas. Make your next project meaningful and memorable with metal stamping.
Watercolor Flat Leather Bracelets
Goody Beads has a fun collection of watercolor flat leather. With a touch of soft and vibrant hues and strokes of whimsical patterns, watercolor flat leather projects can be perfect for bright summer days ahead. Here are some inspiring bracelet designs you can do with watercolor flat leather.
Watercolor Double Rainbow Bracelet Have you seen a double rainbow before? I almost lost my head the first time I saw one; which would have literally been a bad idea since I was driving in traffic. To make this bracelet, I chose 5mm squares watercolor flat leather, because it reminds me of rainbows. A double wrap-around style would be prefect for my double rainbow-themed design.
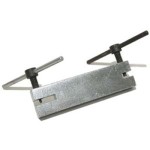
Because I wanted to show a different way to clasp a flat leather bracelet, use this alternative on your next flat leather project: first, cut the 5mm watercolor flat leather at twice the length of your wrist, and add 2-3 inches. Fold over each leather end about 1” and loop through a jump ring. Flatten the each jump ring using a serrated pliers, squeezing the leather together gently. Add another jump ring to each of the leather loops you’ve created. Add fun charms, or create a bead dangle to decorate your bracelet. Finish it off with a lobster claw and you are ready to wrap yourself in a watercolor double rainbow bracelet.
Crisscrossed Watercolor Bracelet Here’s an interesting take on combining flat leathers.
Take two same-length 5mm watercolor flat leather, glue both ends side by side into one side of the clasp. For this project we used a solid color flat leather to enhance the colors of the watercolor flat leather. Keeping the strands straight side by side, thread through the bar slider. Now, cross the watercolor leather over the solid color flat leather. Thread through the second bar slider and glue the ends to the other side of the clasp. Neat, huh?
Golden Watercolor Bracelet This Golden Watercolor Bracelet is simple yet packs a golden glow!
What you will need:
(6) CH00579 – 10mm Brushed Water Color Flat Leather
After measuring your 10mm watercolor flat leather to your preferred wrist length, slide on the gold double bar and then glue the ends to its golden clasp. You can make this simple bracelet in less than a minute and it is sure to brighten your sunny outfit!
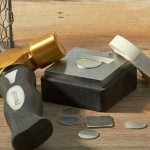
Feature: Dakota Stones and the Process of Matte Finish Gemstones
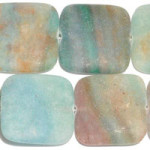
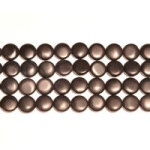
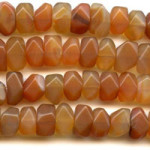
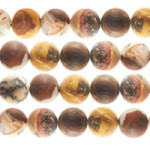
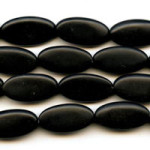
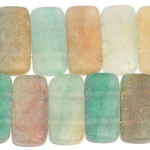
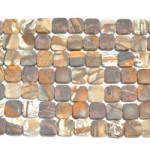
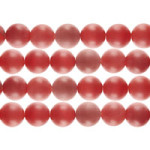
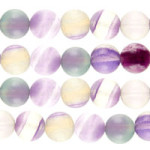
Our friends at Dakota Stones have been generous to supply us with semi-precious and gemstones beads in a variety of natural stones, shapes, sizes, and finishes. We’re especially fond of the matte-finished gemstones. They are stunning with unique, nature-made cracks, lines, and spots.
Dakota Stones shares with us more about matte finishes and their matte-finish production process:
“Matte-finished or frosted gemstones have become a popular design choice in jewelry. They complement many of the newer design materials such as ribbon, leather, chain, rusted auto parts or whatever designers dream up. Matte finished beads work with many of the alternative metals and the variety of finishes now available such as gun metal, copper, antiqued, etc. Matte-finish offers a subtle accent or an understated elegance to designs and is a great choice when designing men’s jewelry.
The process to matte-finish a bead is counter intuitive and actually requires more steps than the traditional polished stone. The stone bead is put through all the normal steps of a polished bead; cut, drilled polished, then it goes back into the tumbler with a fine grit powder, water and additional tiny stones and tumbled to the desired look. Each stone type requires a different amount of time in the tumbler depending on the material’s hardness and characteristics. Harder materials can require up to 2 hours in the tumbler and occasionally it takes multiple tumbles with different various-sized grit powder.”
So, the next time you pick up some matte-finish gemstones and awe over their texture and smoothness, take a second to appreciate the time and care that went into creating these natural-looking gemstones. These types of stones will make a great addition to your next design project.
(image source Dakota Stones and original Post HERE.)
Hello Spring: Tulip Necklace and Earrings
Here in the Midwest, you know that spring is approaching when people are wearing shorts in 45-degree weather. If you think like me, spring reminds me to clean the winter-long mess inside and outside of the house, a thought that makes me groan. Since I LOVE distractions, let’s do some spring beading projects to ready ourselves for lovely spring days, instead.
Nothing says good morning like budding and blooming tulips in early spring. So of course, the theme for our first spring beading project is tulips. I personally enjoy the freshness of pink tulips. Pairing the subtle color with a gold-accent finding, you get a bold jewelry piece sure to get a conversation brewing.
Click to enlarge.
Tulip Earrings
Here’s how to make a pair of gorgeous tulip earrings with pink Swarovski crystals dangling from tulip end caps. First, take three headpins and add a crystal to each, then make a simple wire loop, keeping in mind to stagger the lengths (this adds more movement to the earring). Attach the looped headpins to an eyepin and thread it through the 5mm tulip end cap. Then, top it off with a dainty TierraCast bead cap, another crystal and a seed bead. Lastly, make another loop and hang it on a French wire earring. Repeat for a complete, easy-to-create pair of tulip earrings.
To coordinate with the tulip earrings, a complementary tulip necklace is best! We will basically use the same concept design as for the earrings, but for the necklace we’ll use a 10mm tulip-plated end cap for a more prominent look, along with 5 dangles of 4mm and 6mm pink Swarovski crystals for a variation of dangle size. Because our tulip should shine, we have selected a finer gold chain. Size it according to length, add the clasp of your choice, and violà—you are ready to enjoy your spring tulip necklace and earrings!
The great thing about any beading project is that you can personalize it and alter it to your liking. Perhaps you prefer more colors than the pink or want to use some Czech crystals, pearls, iridescent cat’s eye or charms. Maybe you fancy silver over gold. Choose what excites and inspires you.
What comes to mind when you think of spring? Do you have any favorite pastimes? Please drop us a line or share your project stories on our Facebook page or in the Comments below. Until next time, stay inspired!